I am back in the saddle.
If you’ve forgotten, here is a view of the central control station.
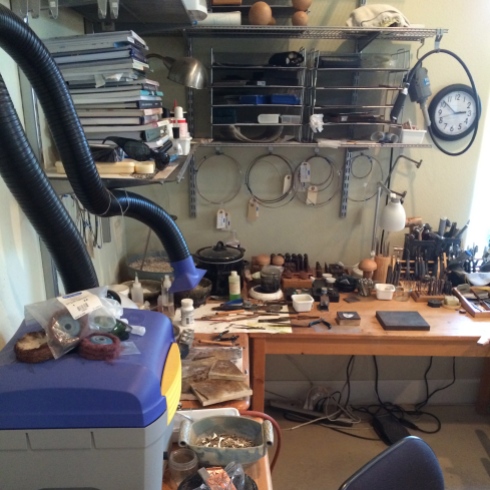
Where all of the good stuff happens.

And some of the bad.
All nice and tidy and ready and waiting.

I keep thinking I would like to get myself a proper jewelry bench.
I like the idea of getting a benchmate system, and having my work right there in front of me with an area to catch all of the droppings.
But, I like my table, and I don’t think I necessarily want to do everything at shoulder height.
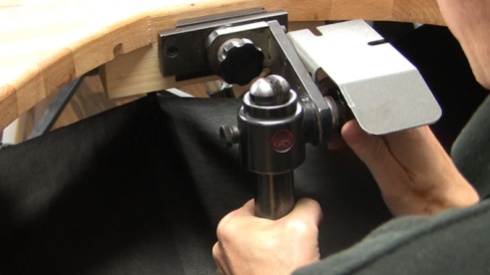
When I do want to do things more at eye level I have my super eye level descending chair to fall back on.

With its cunningly clever descender lever which can instantly take me from this

to this
in the blink of an eye.
A much cheaper solution.
However I might soon have to invest in a more expensive super eye level descending chair as the one I purchased from target for $25 is beginning to adjust itself whenever it chooses to, and I find that unbeknown to me I’ve gradually been lowered at an imperceptible rate until I’m at a, hang on what’s happening here, height to the floor.
Which always surprises me that I haven’t noticed until either P comes in to bring me a cup of tea or, more likely, ask me when the h*@# I’m coming in for the night, or suddenly something just doesn’t feel right.
It’s at this point that I feel either supremely proud of my clever improvisation, or slightly embarrassed as it seems I’ve unwittingly become the height of a small elf…
Here’s the run down on my first day at my table.


If you’re wondering, I’d put too much flux on the piece here.
Veritably flooded it actually.
Oh well… life goes on.


🙂
–
–
You are amazing!
Awww, I bet you say that to all the girls 😉
love it!
Thank you 🙂
Your latest work is just lovely. I can’t believe how much discoloration you could get off of there. Can you “tumble” a complete, finished piece like that? Or how did you do it?
(I wouldn’t even have known what questions to ask or what flux if I hadn’t interviewed a metalsmith here in Colorado last month for “Handmade on the Front Range.” The world of a metalsmith is truly unique, it seems to me.)
I’m sure that there are some stones you can tumble once you’ve set them, but I don’t take the chance. I don’t really use my tumbler as I haven’t got the patience to wait five years for it to do its job.
I put the piece in acid before I set the stone. This gets off the majority of excess mess I’ve made. The rest you can file off, or sand, depending on how bad it is. This wasn’t as bad as it looked.
I see. Thanks.
Well I’m glad I decided to stop by your blog today. In doing so I have discovered that somehow I have become unsubscribed to receiving emails when you publish a new blog post. I have always looked forward to getting those emails with your new posts…..they are always interesting and quite humorous. But the last email I received was for your Nov 15th post I think. So I thought maybe you had gone overseas for the holidays and you just hadn’t posted anything lately. But then I stopped in here today and realized that I have missed quite a few posts.
But now I am all caught up and it was quite an enjoyable read. I cracked up when I read “MIL”! Lol! You are so funny. I hope your holidays were enjoyable. Now I’m going to click the Follow button again so hopefully I will start receiving emails again when you post.
I did have a good holiday, and stopped writing for a while. Hope you did too.
I can see what you’re up to on Facebook. That workshop looks interesting. I could do with a few tips on how to break my negative patterns. I’ll be interested to hear how it goes.
Always inspired when reading your posts. Love the peek inside your studio, too. And your tip on ‘leveling’ the pin when sawing by changing your seat height. Good to know as I’m taking the plunge and working on my stone setting skills in a new metals class. Sawing is definitely intimidating!
Sawing at a lower height definitely makes it easier. Don’t clench the saw, relax and let the blade do the work. If the blade snags stop and let the saw rest easily in your hand and it will find the correct position on its own. I lubricate the blade with beeswax, but the stuff they sell at Rio works. Lubricating the blade extends its life, but also allows it to glide more easily through the metal. Don’t use a blade with large teeth if the sheet is thin. It will just try to rip its way through the metal. I found that after cutting wonky lines and thinking that I’d never be able to cut a straight line in my life, one day I picked up the saw and found it had all come together. So don’t give up… 🙂
Practical advice from experience and I thank you!
P.S. Had my most successful sawing experience this week in class. Not one broken blade! Sitting down lower was a great piece of advice and just remembered to breathe. Thanks!
I’m so sorry my Granddaughter didn’t get to see your stuff when she was here — I went kapluey for a bit from reaction to a transfusion. (Don’t listen to what anyone says — you do NOT necessarily feel better afterwords. I’m now motivated to eat lots more spinach.)
I’m going to send her your url so she can see your stuff for herself. I love how straightforward you are with the process. The fact that it turns into beautiful art is pretty nice, too!! The fact that the proceeds then go to charities which we both admire helps too, but mostly it’s the art, and that we can SEE how the objects are created. (The art aspect itself, of course, is generated in the brain of the artist.)
If you’re ever doing a show or some such in San Antonio, please give a holler!
Hope you are feeling better 🙂
As always, I love reading your posts and really love the photos of your process.
Thank you Stacey 🙂