So, this isn’t for all you seasoned solderers out there, but is instead for anyone who is a relative beginner and who feels that they could do with some practice.
To begin at the end, here’s what you’ll accomplish.

Everything on this bracelet is soldered, but you can choose to not solder the connecting rings if you don’t mind being called a chicken…
‘sall I’m saying.
The reason why this is a good chain to practice on is that the solder doesn’t have to be perfect.
Of course, by the end of the bracelet you should have it down pat, but for this purpose, as long as the solder joins the two ends together, you’re good. The annoying lumps and bumps that a beginner may experience won’t be as obvious in the end result because of the nature of the link and so you can still use them without getting upset that they’re not perfect.
By the end of the project you should have the hang of soldering a link together without using too much, or not enough, solder.
NOTE: I’ve found that when excess solder overflows the joint you are closing you often see a slight discolouration at the area it’s flooded on to, especially as the piece of jewelry tarnishes. This is due to the difference in the composition of the solder to the silver. Pickling the bracelet after soldering may help this, but you can also sand the joints to remove some of the excess once the links are shaped, and before the final finish is applied.
This project really is just a good exercise to help you figure out how much solder to use, how it flows, and how to apply it.
Warning:
Prepare yourselves. It really is a fantabulous bracelet and all your friends will want one.
–
Materials:
For a 7.5″ bracelet.
3 ft of 16 gauge sterling silver wire.
1 ft of 18 gauge sterling silver wire.
1″ x 14 gauge sterling silver wire.
1 x 3mm jump ring.
Note: Ideally you will need both medium and easy solder for this project. You will solder the large links with the medium, and the small links with the easy.
By using the easy solder on the small links there is less risk of the medium solder on the large links melting again as medium solder has a higher melting temperature than the easy.
I only used the easy solder, but just wanted you to know that I tend to wing it.
–
Tools:
Jump ring making mandrels – 9mm, 4.5mm and 3mm.
Jewelry saw or flush cutting pliers
Tape
Hammer – I used various head sizes
(The links above are just some of the tools I use. There are many other choices out there).
–
Note:
Depending on the length you want your bracelet to be you can easily add or subtract links to this design, therefore, you may need either more, or less, of the materials above.
–
To make the links.
I used my Pepe jump ring maker, but you can easily improvise by using any type of rod that is close to the sizes needed and that you can wrap your silver around tightly.

The mandrel I used for the larger link is 9mm. (This refers to the inside diameter).
You will need enough coil to make 26 jump rings.
Cut the coil off the mandrel and wrap it with scotch tape. This will prevent the rings moving around as you saw them.
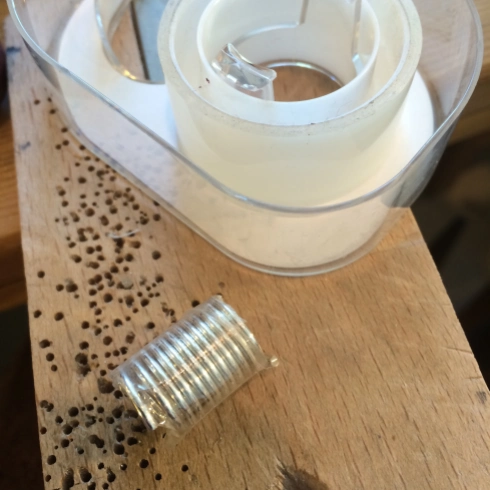
Now cut through the coil either with your jewelry saw.

Or you can use your wire cutters to snip each ring apart. Just be sure to keep turning the wire cutters around so that the flush side of the cutters snip the inside of the jump ring. This provides a flush cut for soldering.
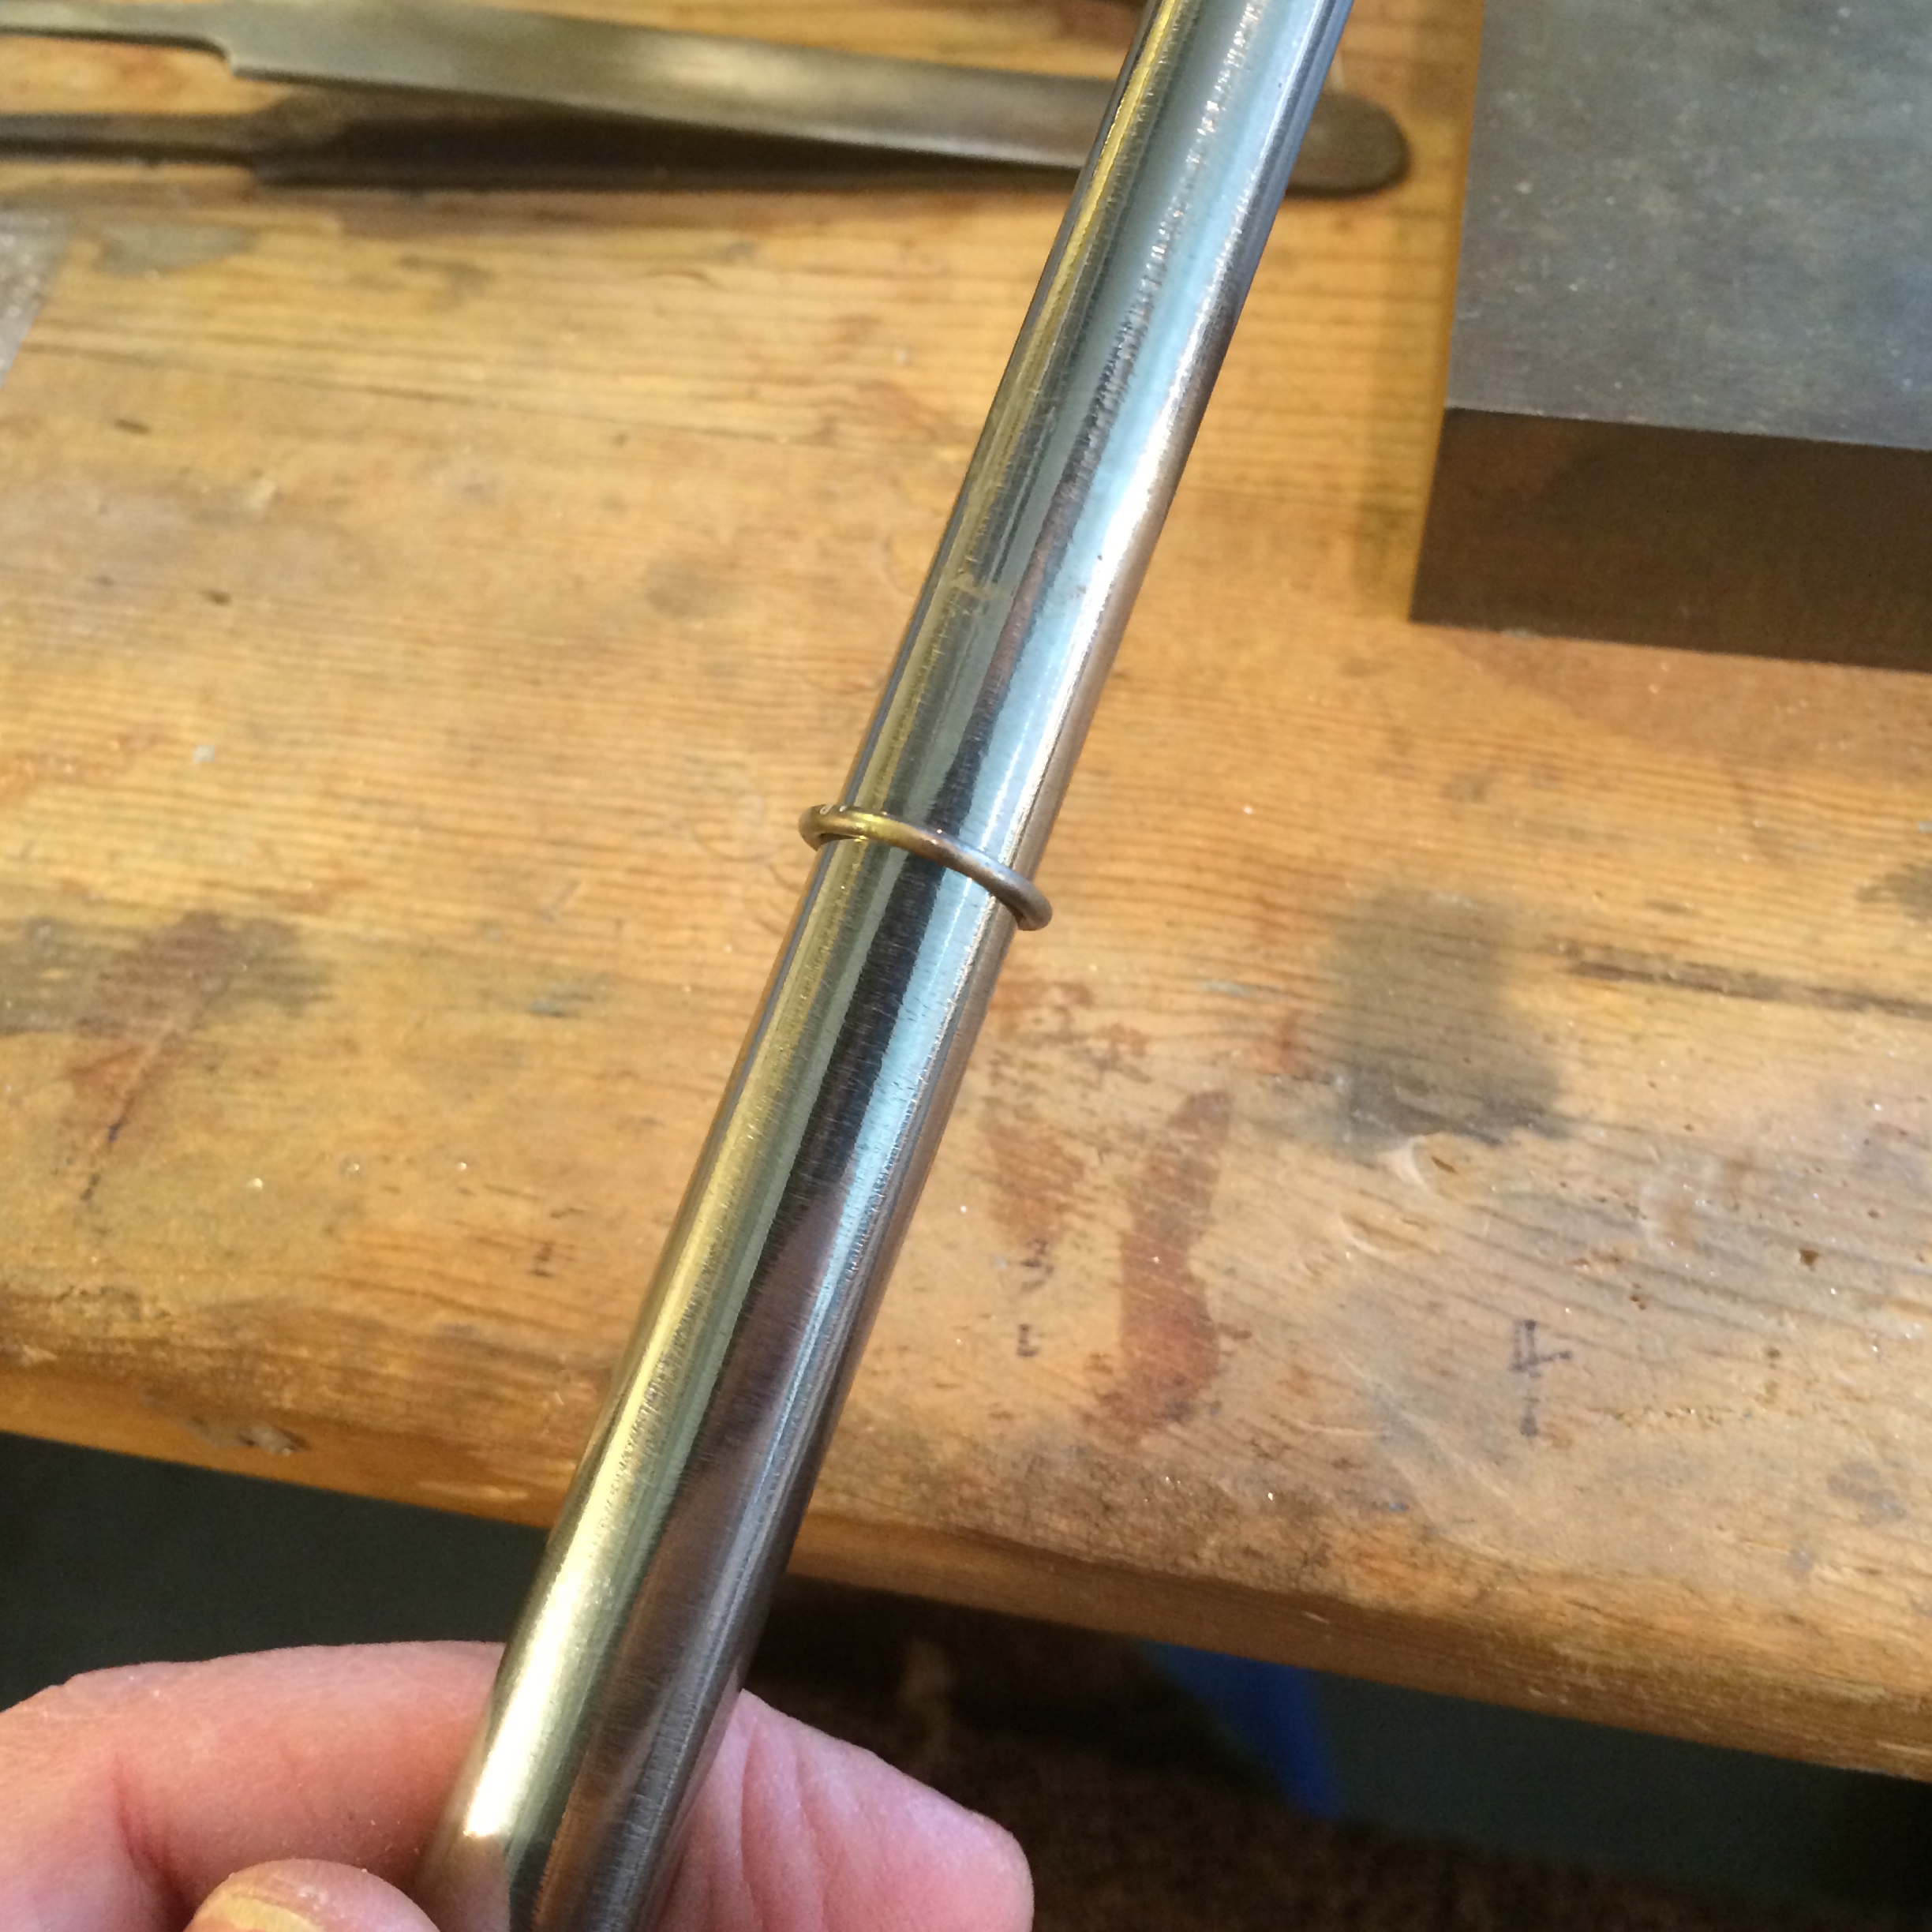
Close the jump rings together making sure that the joins are tight, flush and clean otherwise the solder won’t join them.

(Note: The links are not yet completely closed in the photograph above.)
Now dab a little flux on each join and face the joins in the same direction on your soldering block. This makes it easier for you to find the area you are going to join as the flux will bubble when heated and you may not necessarily be able to see clearly where to apply the solder.

There are many ways to solder jump rings, including sweat soldering, but I like to cut small pieces of solder wire and place them on the soldering block a little apart from the rings. I separate the pieces slightly from each other and they are then ready to heat up as I need them.
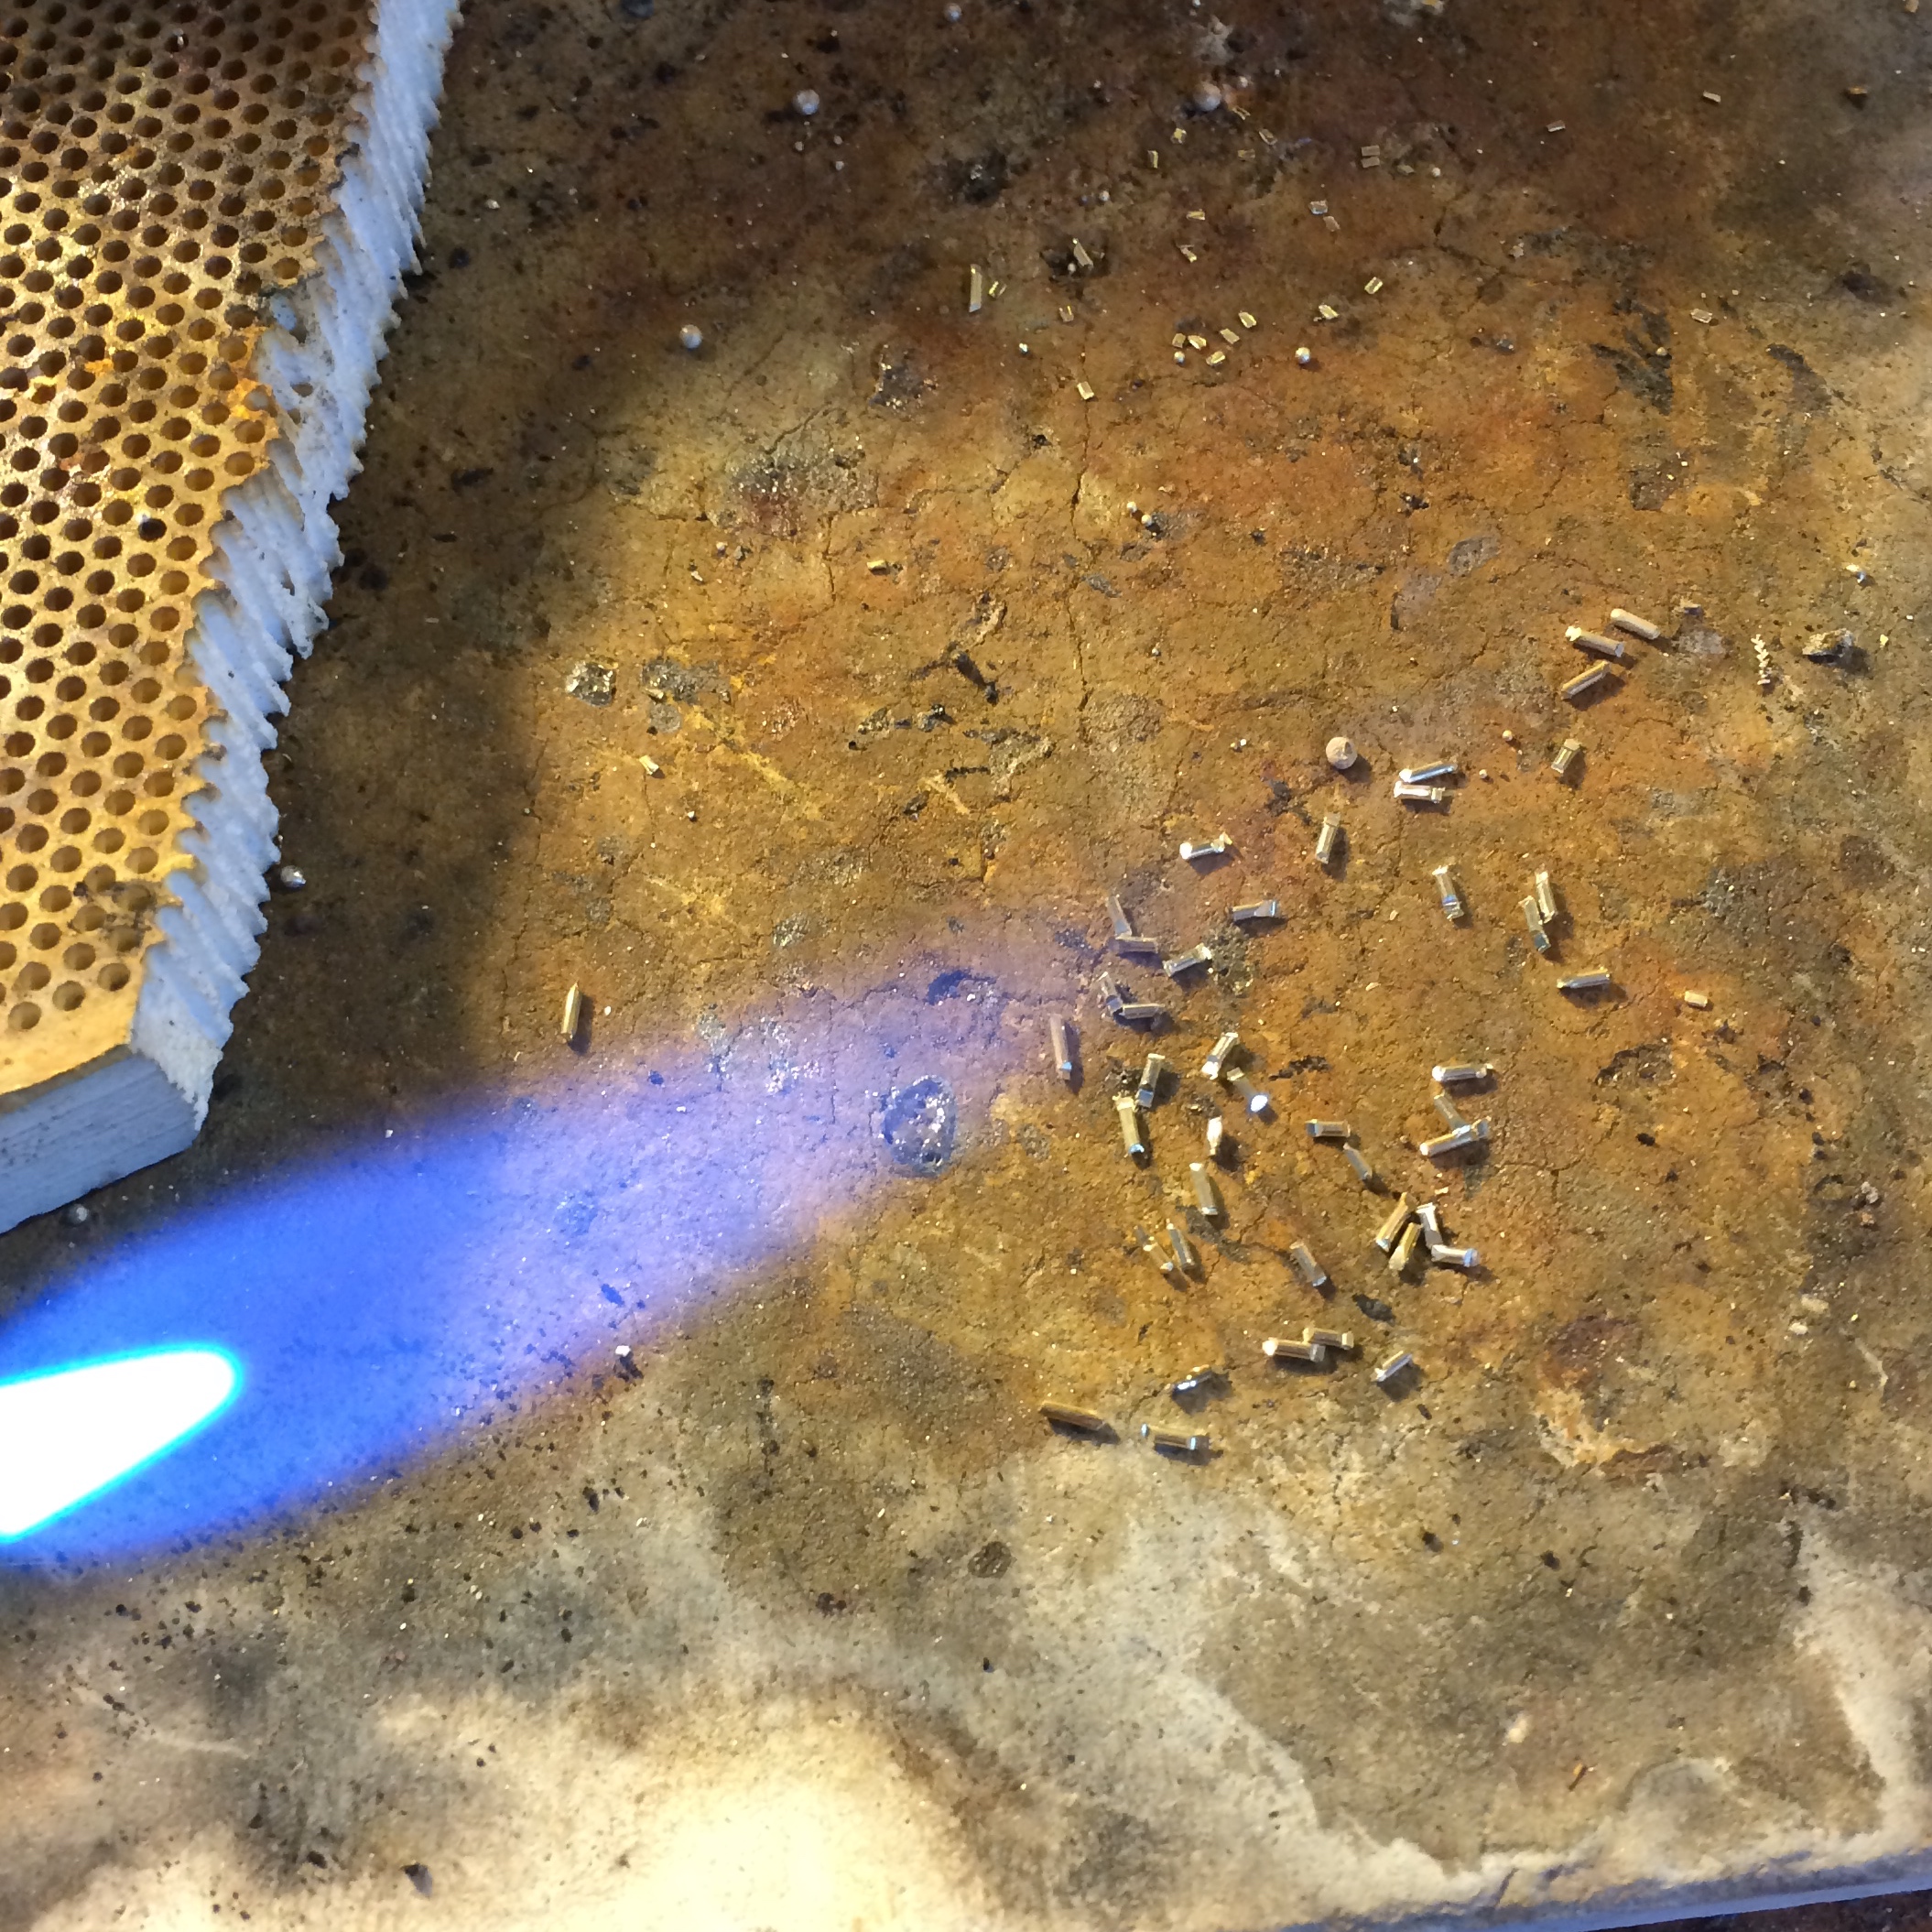
Until you get to know which size a piece of solder needs to be for a particular join you can cut various sizes to experiment with. You’ll find that you really do not need that much solder to join a link. If you were to solder very fine jump rings, for instance, you would find you need barely any solder and that small chips would work best.
Gently heat one of the jump rings by moving the flame around the ring. Now move the flame to the solder pieces and gently heat one into a ball. Heat your pick at the same time. Now you’ll find you can pick up the ball of solder with the end of the pick by simply touching the pick to the ball.

Now take the ball to the jump ring and hover it above the join. As the flame gently reheats both the ring and the solder you can now touch the ball to the join and it should attach itself to the ring. Take the pick away and move the flame around the ring until the solder flows.
Look carefully at the direction of your flame as the solder will want to flow towards the heat. If you are not heating up the silver evenly the solder will move towards the heat and perhaps away from the join. In which case there will be no connection. If this happens just back off with your flame and then slowly re introduce the heat to the other side of the join. Now move the flame evenly around the ring until the solder flows over the join.
You are not heating the solder, but rather bringing the temperature of the silver gently up to the point where the solder will flow over it. The solder has a melting point lower than the silver so it will flow before the silver melts and therefore will, (if the join is clean and flush), fill the join.
Keep an eye of the silver. If it starts to glow, remove the heat as this is a sign that the silver is about to melt. Let the silver cool down slightly and then introduce the heat to try again.
As you come to heat the next jump ring bear in mind that the soldering block is already hot from joining the first jump ring. You’ll find that you don’t need to heat the following rings as much.
By the time you have soldered the 26 jump rings, you will have hopefully become an expert at applying the perfect amount of solder to the join.
If not, you’ll just have to make another one 🙂
Now quench the rings in water.
I don’t clean the rings at this point.
Next I used this small oval mandrel to knock the edges of my rings out of shape. If you don’t have something like this you can keep the links round.
By hammering the link roughly on the mandrel you are creating an irregular shape which will hide any imperfections you may have created with your soldering.

You can skip this part if you don’t have a small mandrel because you are still going to whack the links by holding them flat to your metal block with pliers (to save your fingers) and roughly hammer around the surface.

Do this to each ring and then make the small jump rings, as before, but with your 4.5mm mandrel.
Don’t solder the small jump rings yet.
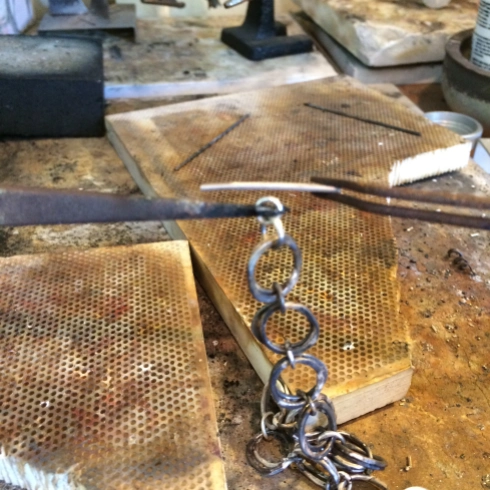
Close four of the larger links into one of the smaller links keeping the soldered areas on the large links as far away from the small link as you can. This helps prevent the solder on the larger links reheating and soldering each other together.
Now place the small link in a third hand.

Try to keep a gap between the third hand and the join of the small link (which should be at the top) and then solder the join of the small link using flux and the ball method.
Try not to use too much flux. You need just enough for the solder to flow, but too much will just bubble and, (I have found), gunk up in a sticky mess.
Carefully move the flame over the small link. Don’t keep the flame in one place for too long. Soldering this small link can be tricky, but with practice you’ll get the hang of it. Keeping the larger links dirty helps prevent them from soldering themselves onto the small link as solder does not want to flow over a dirty surface.
You can skip soldering the small links if you want to, but then you wont have accomplished the fiddly, I can do it, part of the project.
It’s o.k. 🙂
Once you have soldered the small link you can go ahead and make up the bracelet by adding the links two by two until you have the length you desire.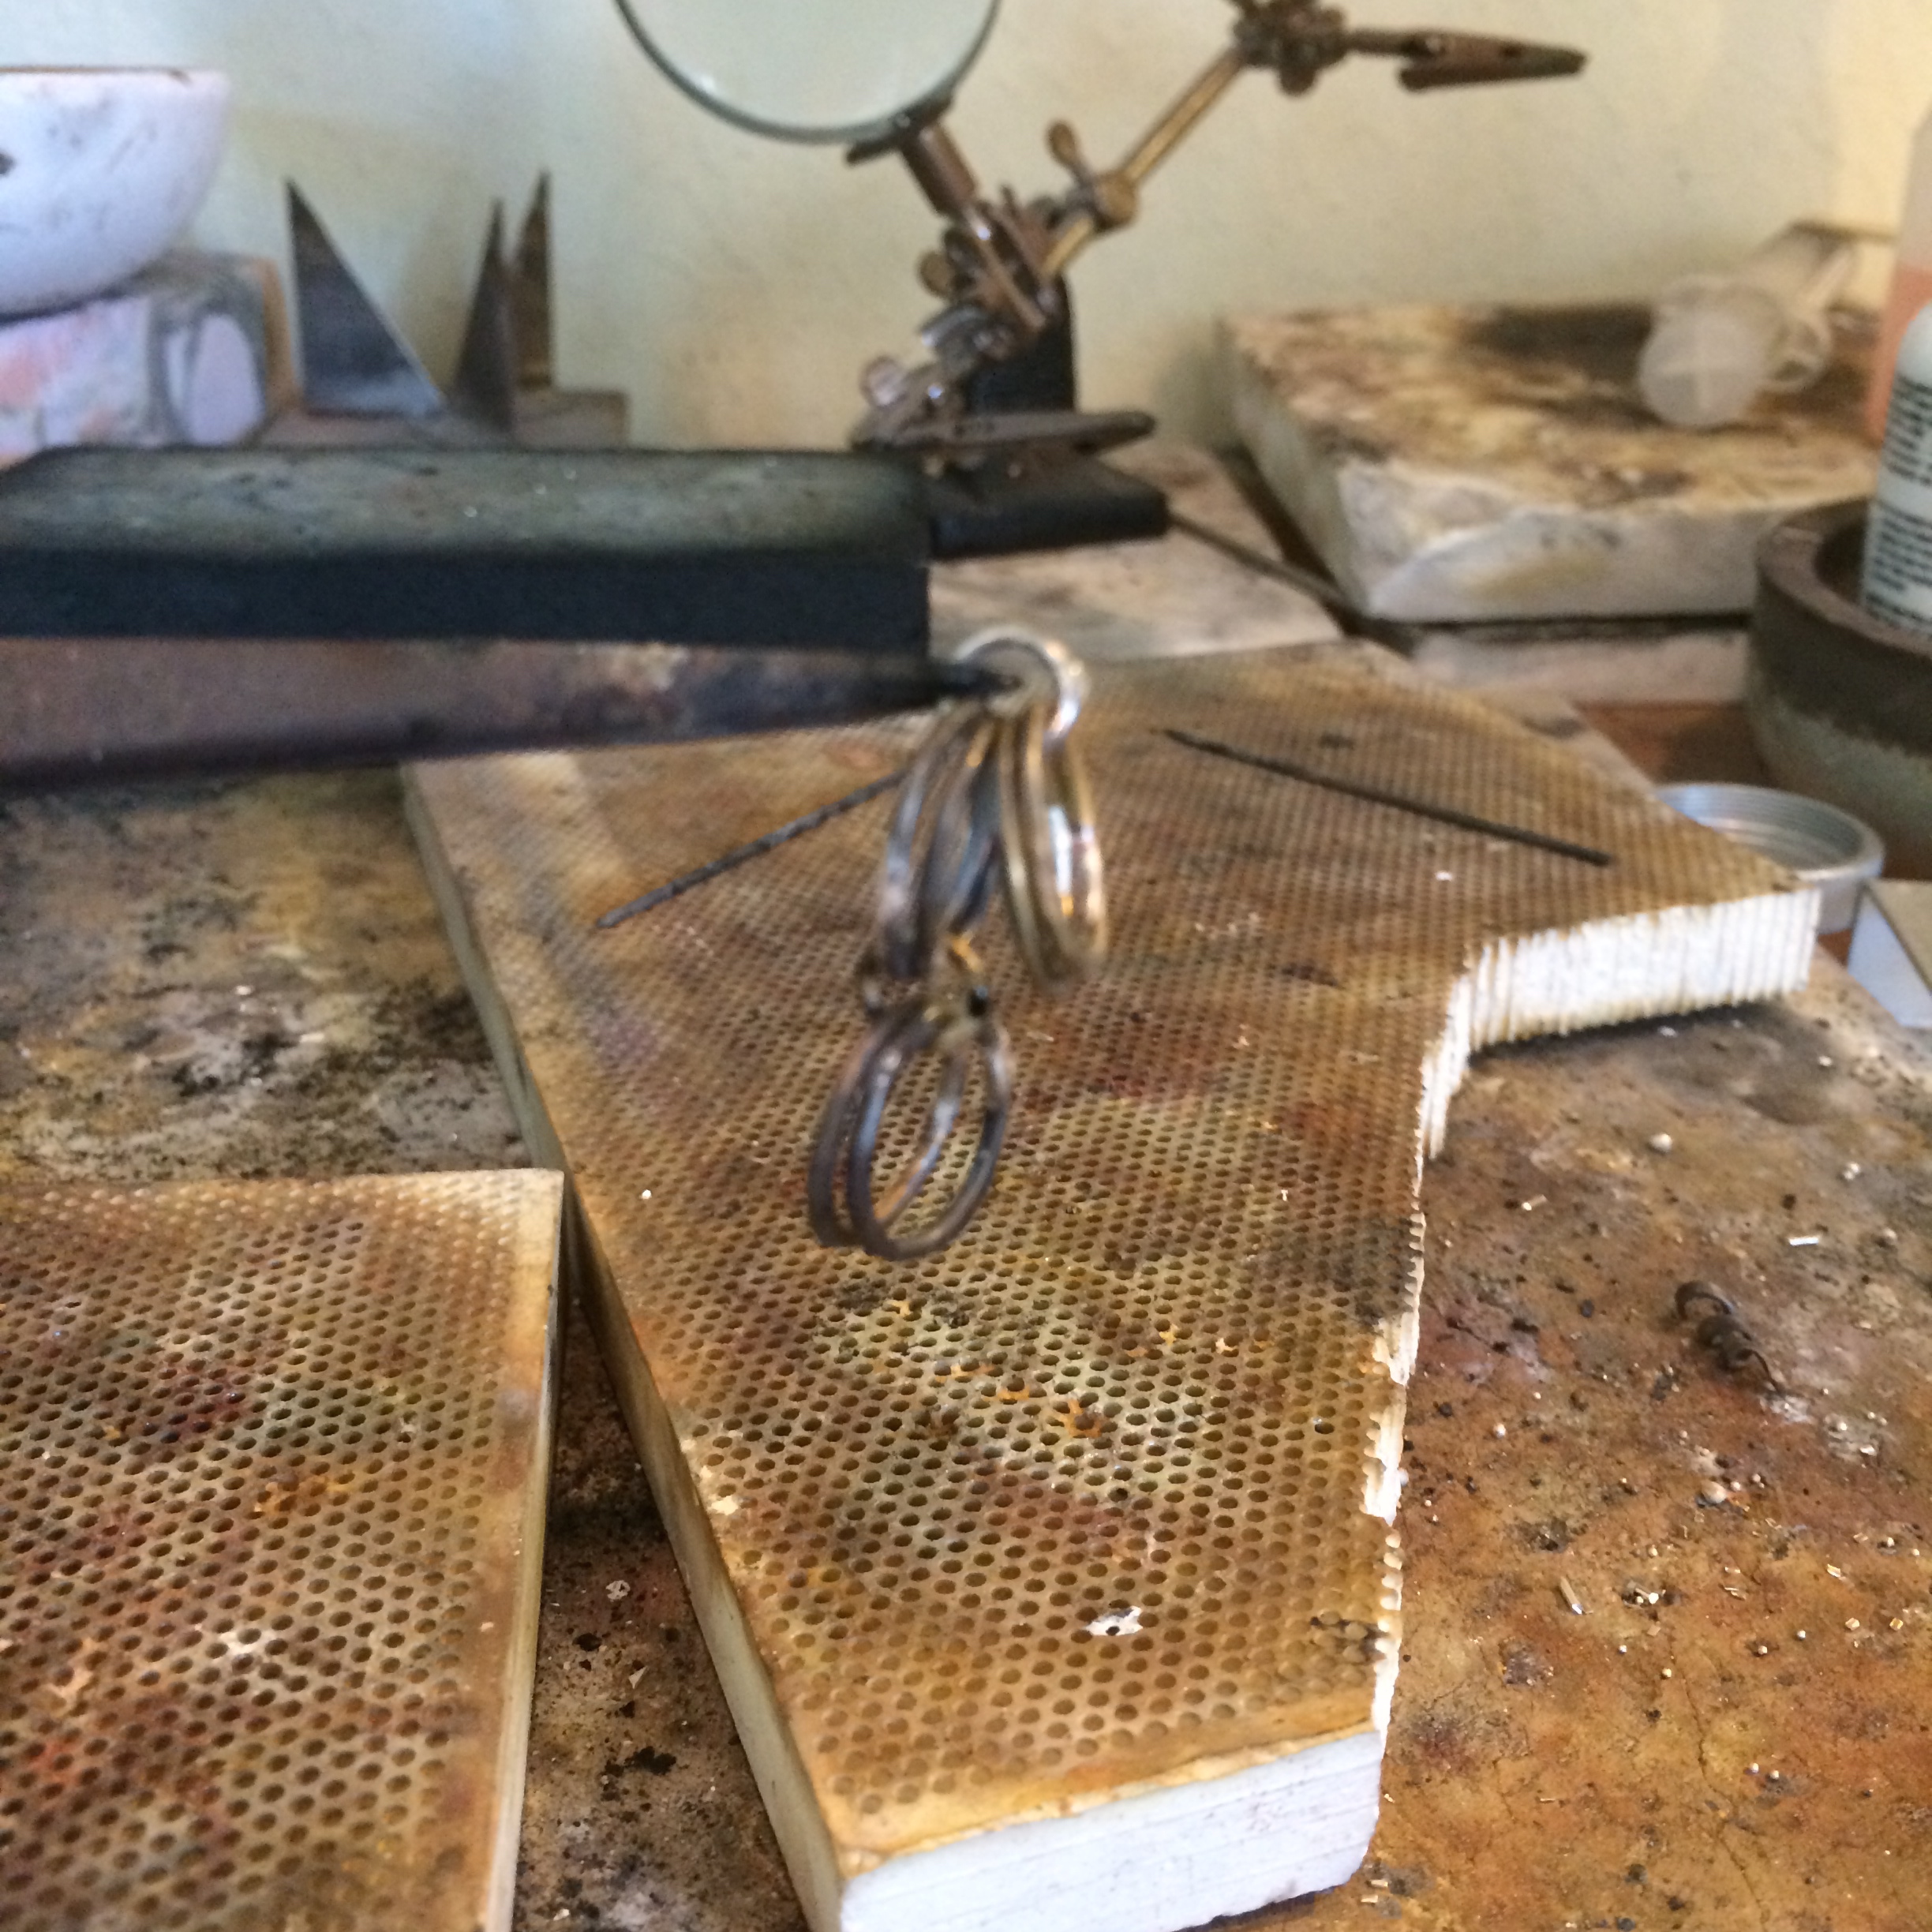
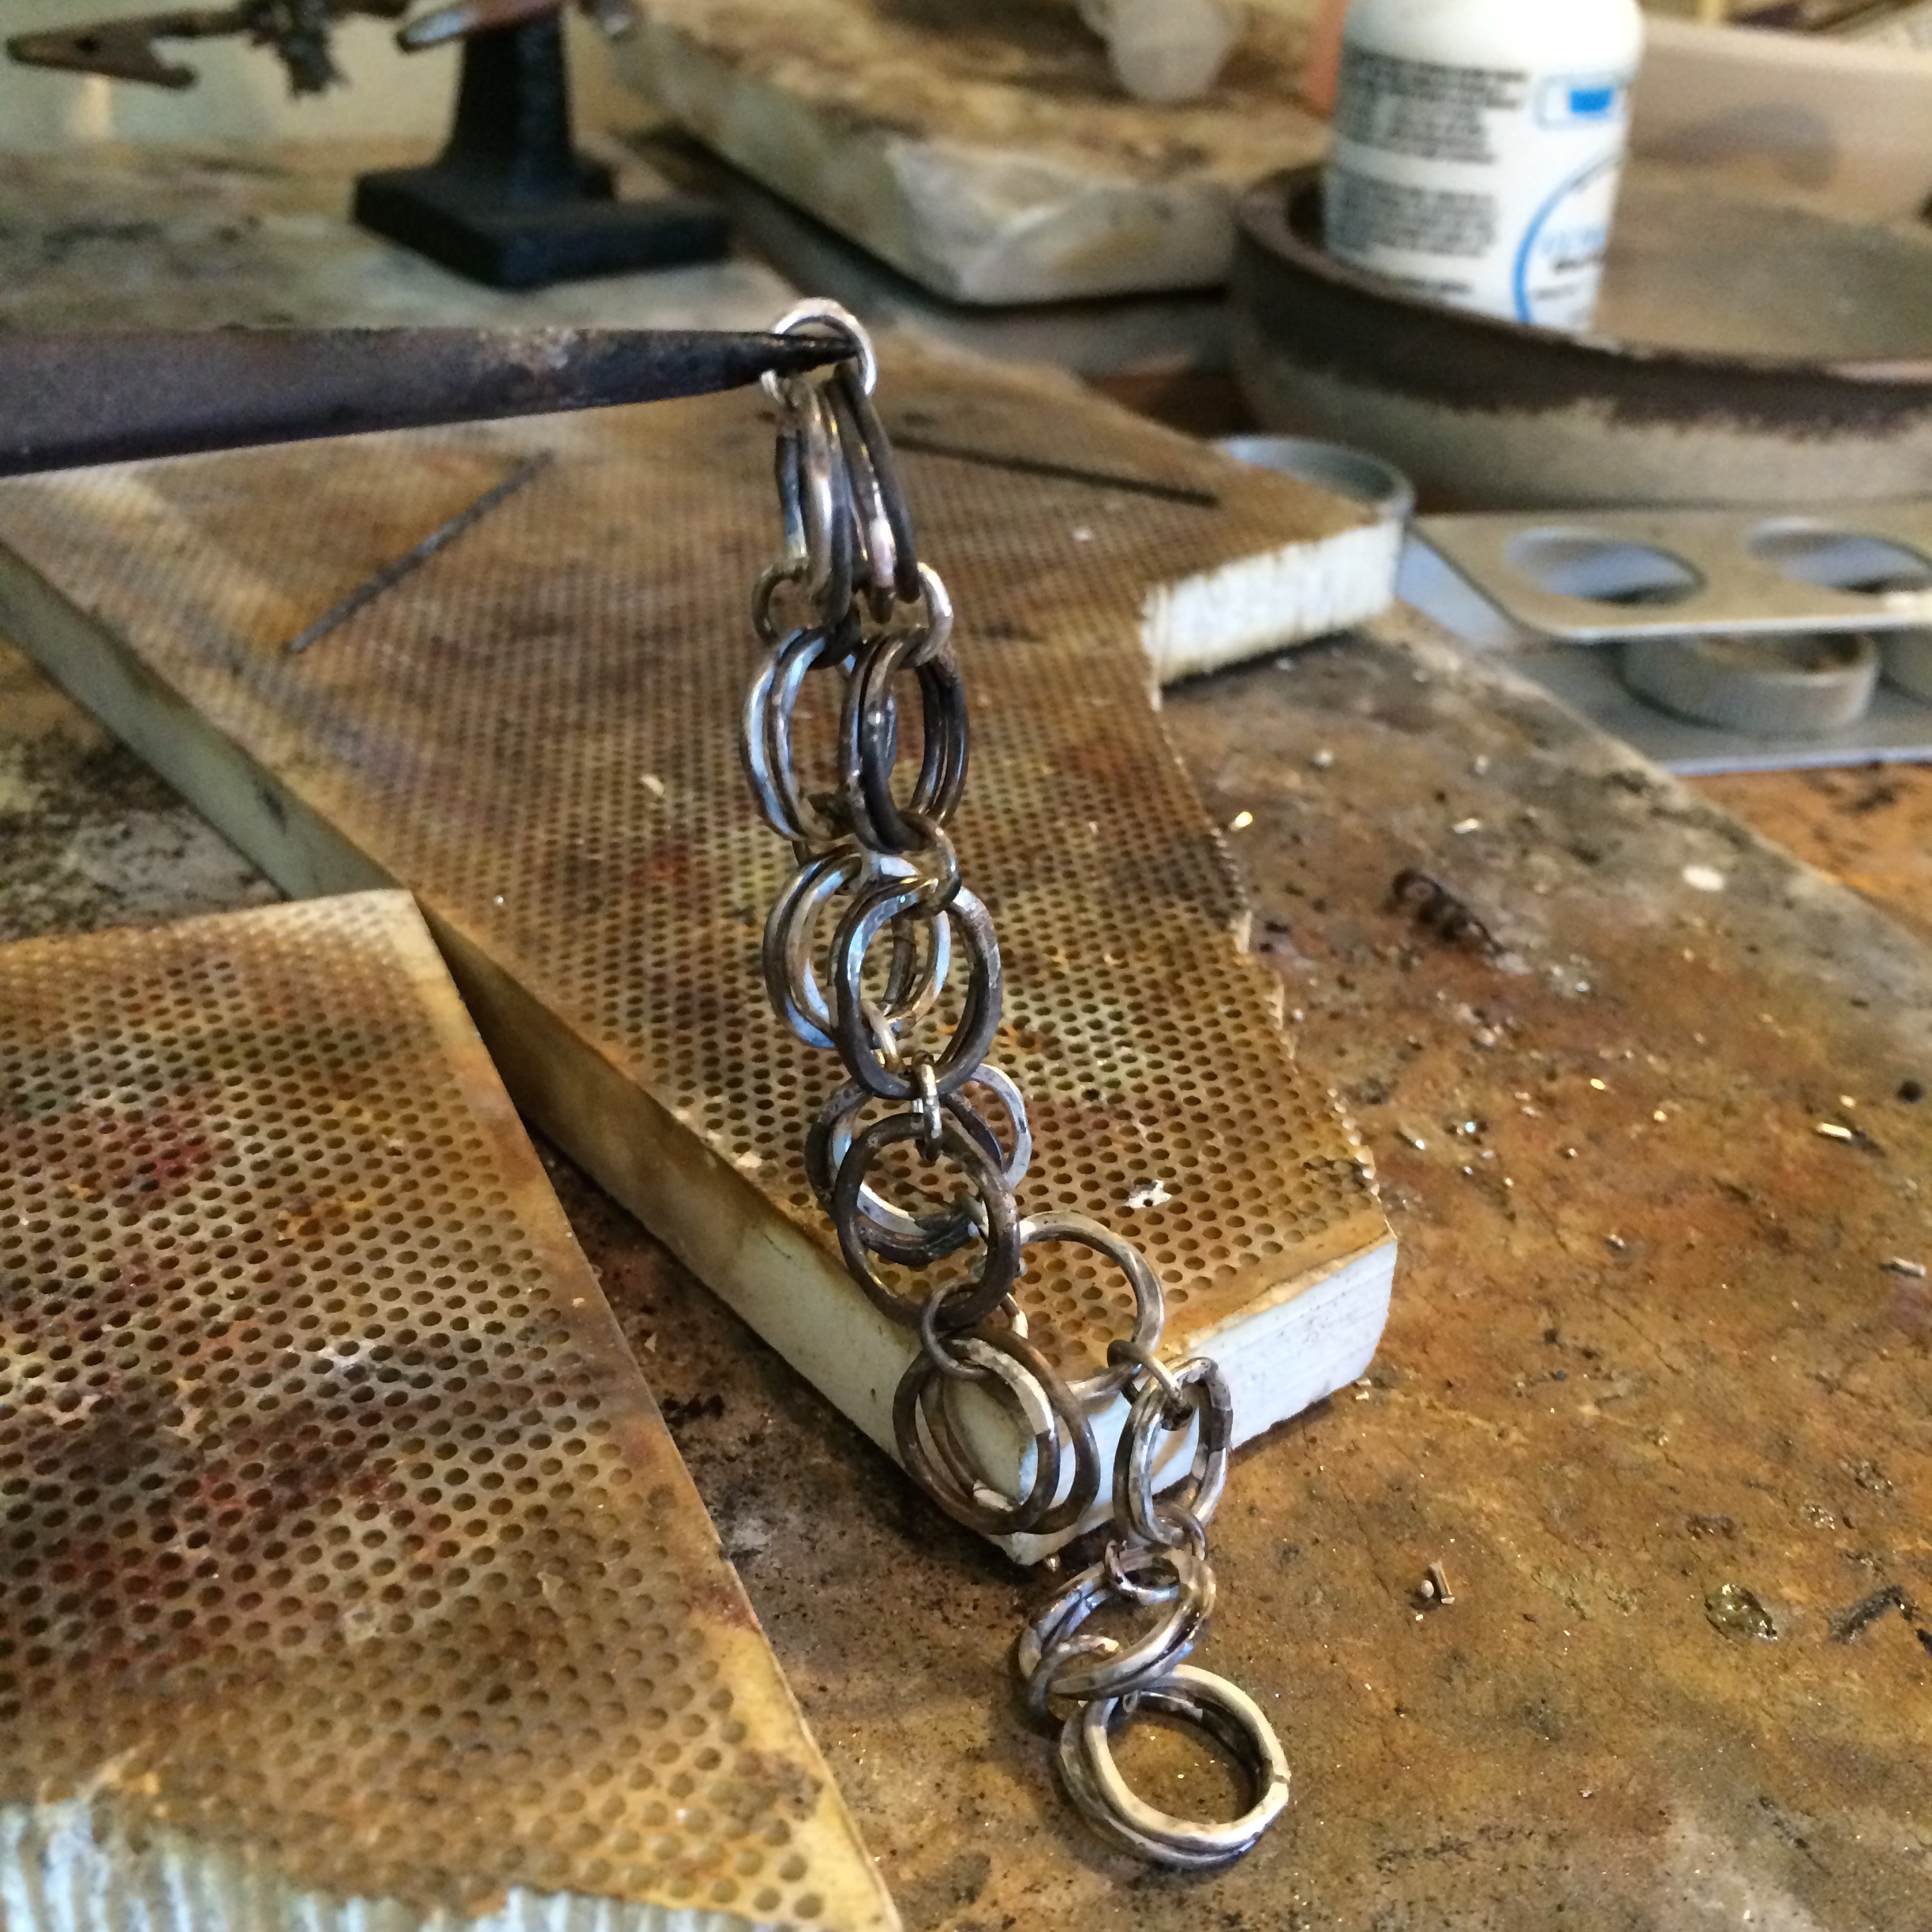
Now you will add two more small jump rings to one end of the chain, and one 3mm jump ring to the last of the small ones. This last smaller link is the one you will add your toggle to.
I forgot to take a photograph of this at the time, but here’s a close up of the finished piece.

Solder each jump ring together.
Hammer your 1″ length of 14 gauge wire to make the toggle end of your clasp.

Then solder this onto the last small link of the chain.
I thought I could get away with one less small link here, but I found that there wasn’t enough leeway for the bar to go through the opposite end link to close the chain.
I deliberately made that mistake so that you wouldn’t have to 😉
Now you can pickle and clean the chain.
For a consistent look you can hammer around the small link with a small headed hammer to match the irregular look of the larger links. Skip this part if you haven’t soldered the small jump rings as the links won’t stay closed nicely once you’ve hammered them.

Now you can finish your chain in the way you prefer, either by tumbling, using liver of sulphur, or just by buffing it as I have done here – and enjoy 🙂

At this point you may never want to solder another jump ring again, but hey, the possibilities are endless…

–
–

–
Yay! This will be the perfect project for me to learn on this weekend! I really like the doubled rings – I’m thinking I’m going to put a silver one in each link, and then alternate copper and brass for the second ring in each link… if I make it to the other side with a completed bracelet, I’ll let you know!
After my torch lesson the other day (I dragged it all to a friends house), I stopped at the hardware store and bought 6 new fire extinguishers! We needed some for other parts of the house, but two are in the basement with me! The funny thing is, my husband ALSO stopped and bought several of them, minutes before me! We laughed but I think we’re still pretty scared that I’m going to set the house on fire!
Can I ask – do you use some sort of ventilation above your soldering area?
I use this http://www.riogrande.com/Product/HAKKO-Fume-Extraction-System-with-Duct-Kit/500102?Pos=15 but quite frankly not as much as I should. I have a large studio, however, I’m not sure how large your basement is, but if it’s cosy, or doesn’t have much air flow, I would consider getting something, or having your husband (sorry husband) fix something up for you from the hardware store. I got Peter to fix something up for me, but the hose wasn’t tight to the vent and so did nothing to extract the fumes away. I think it was one of his attempts to knock me off. Btw, I’m not saying that we, as females, can’t fix something up for ourselves, but I’m all for delegating 😉
I’m not really sure where the one I have actually takes the fumes. I imagine them all trapped in their little box scrambling to get out, so I’m not completely convinced it’s the right one to have, but oh well…
As a note, you will probably see the solder on the copper and brass. Although they do have copper solder, I haven’t yet found one that I really like. You could stamp the join afterwards perhaps, with some kind of texture, that might hide some of it. I did price out the silver and it comes to about $15 all told (I think) so it’s not too bad.
Oh, and I forgot. Be sure to bleed your hose when you’ve finished for the day, and turn the pressure down. If you google torch safety you’ll find a lot of information on it. There really is nothing to worry about. I think ten or so fire extinguishers should cover it, and don’t forget the drop and roll.
You crack me up! I’m with ya on the delegating, and I THINK he likes to do stuff for me… as long as it’s a one day project and nothing more.
I’m going to create a “cheat sheet” and am going to tape it to my tanks, just to make sure I’m not forgetting to shut down properly. 🙂 I do love a good check list!
I’ve tried the copper solder and don’t like it – it’s very brittle. The silver solder lines won’t bother me – this one will be for me!
Thanks again!
oh thank you so much for this wonderful tutorial! i am reteaching myself soldering (did it in college) i am getting more confident and hate using store bought findings!
I hate them too. Once you get the hang of it it really is great making everything yourself, and probably cheaper in the long run – after the expense of the mandrels I suppose.
I can’t believe the amount of work you put into that tutorial. Well done. On a scale of 1 to 10 in soldering skill, I would give myself a 7.5. Although, I didn’t the tutorial (thank your for the heads up at the beginning of your post), I enjoyed the photos and reading about your process.
It was probably completely long winded lol
I’m by no means an expert, but when I was first starting I would have given anything for someone to just give it to me straight. Everyone seemed to know what they were doing, and even though they told me, there were just some thing that I think they thought were too simple to mention. Perhaps it was just me.
Soldering is one of the hardest skills to learn for sure! I can’t tell you how many pieces I melted, and I still struggle with fire scale.
I am looking forward to your future posts. Be well.
Eron
I think I’ll cheat and just fuse fine silver….. If I get to sawing the jump rings, I’ll be happy with my great leap forward!
🙂
Thanks for this tutorial! I found it the perfect project for my first attempt at a chain. It’s here, if you want to see it: https://jensworksinprogress.wordpress.com/2015/05/22/chain-chain-chain-chain-of-fools/
Jen, that is so great! Thanks for sharing it with me.