I think something more to do with the actual making of jewelry rather than just the showing and telling bit, although I never did get to do that at school and am just beginning to see what I missed out on.
I know, poor baby, that was a huge chunk of my childhood down the drain right there.
It happens.
I got over it.
Actually I didn’t because I didn’t know there was anything I had to get over, but I will tell you that I have learned a lot sharing with you here and I recommend putting yourself out there to everyone.
O.K. I’m rambling. You didn’t know I did that did you?
–
Stone Setting…
Ticks me off.
I’m not talking about the cabochon settings I do as I seem to have those down now, but rather the shiny, let’s put one of those in a ring settings.
This is how it usually goes when I want to try something new.
I think about it, think about it, and then I think about it some more. Sometimes for months. The cabs, perhaps a year. And then suddenly, before I even know what hit me, I start making them all of the time and voilà, I’m in the cab club.
Well the other shiny kind of stone setting has been roaming around in the back of my head now for quite some time.
I’ve dabbled, and generally get by, but I cannot tell you that I can wake up in the morning and say, right then, time to set a shiny stone into one of those ring settings, and then go into the studio and set that darn stone with the confidence that it will work.
So this is my mission chaps and chapesses. (Are there really any chaps reading this drivel?). The mysterious world of stone setting.
–
I’ve got a few books on the subject. Well, I’ve got quite a lot really as I love looking at the pictures.
But this time it might actually be time to read them.
Although honestly I’m a visual learner, so I might have to change my mind about this later when all the words start running together and I get brain fog.
I learn by seeing, trying, messing up, figuring out where I went wrong and trying again.
Probably could save a lot of time and energy just by reading the darn books, but where’s the fun and frustration in that?
Here’s one of my books.

Some of you probably have it.
Now, the setting I want to tackle first is the flush setting.
I think that’s what they call it.
Hang on, let me have a look.
Nope, it’s tube setting. Similar I think, but not quite the same.
O.K. I was going to show you a pic in the book, but then I realized that was probably illegal.
I’ll just have to draw my own for you, bear with me a mo…

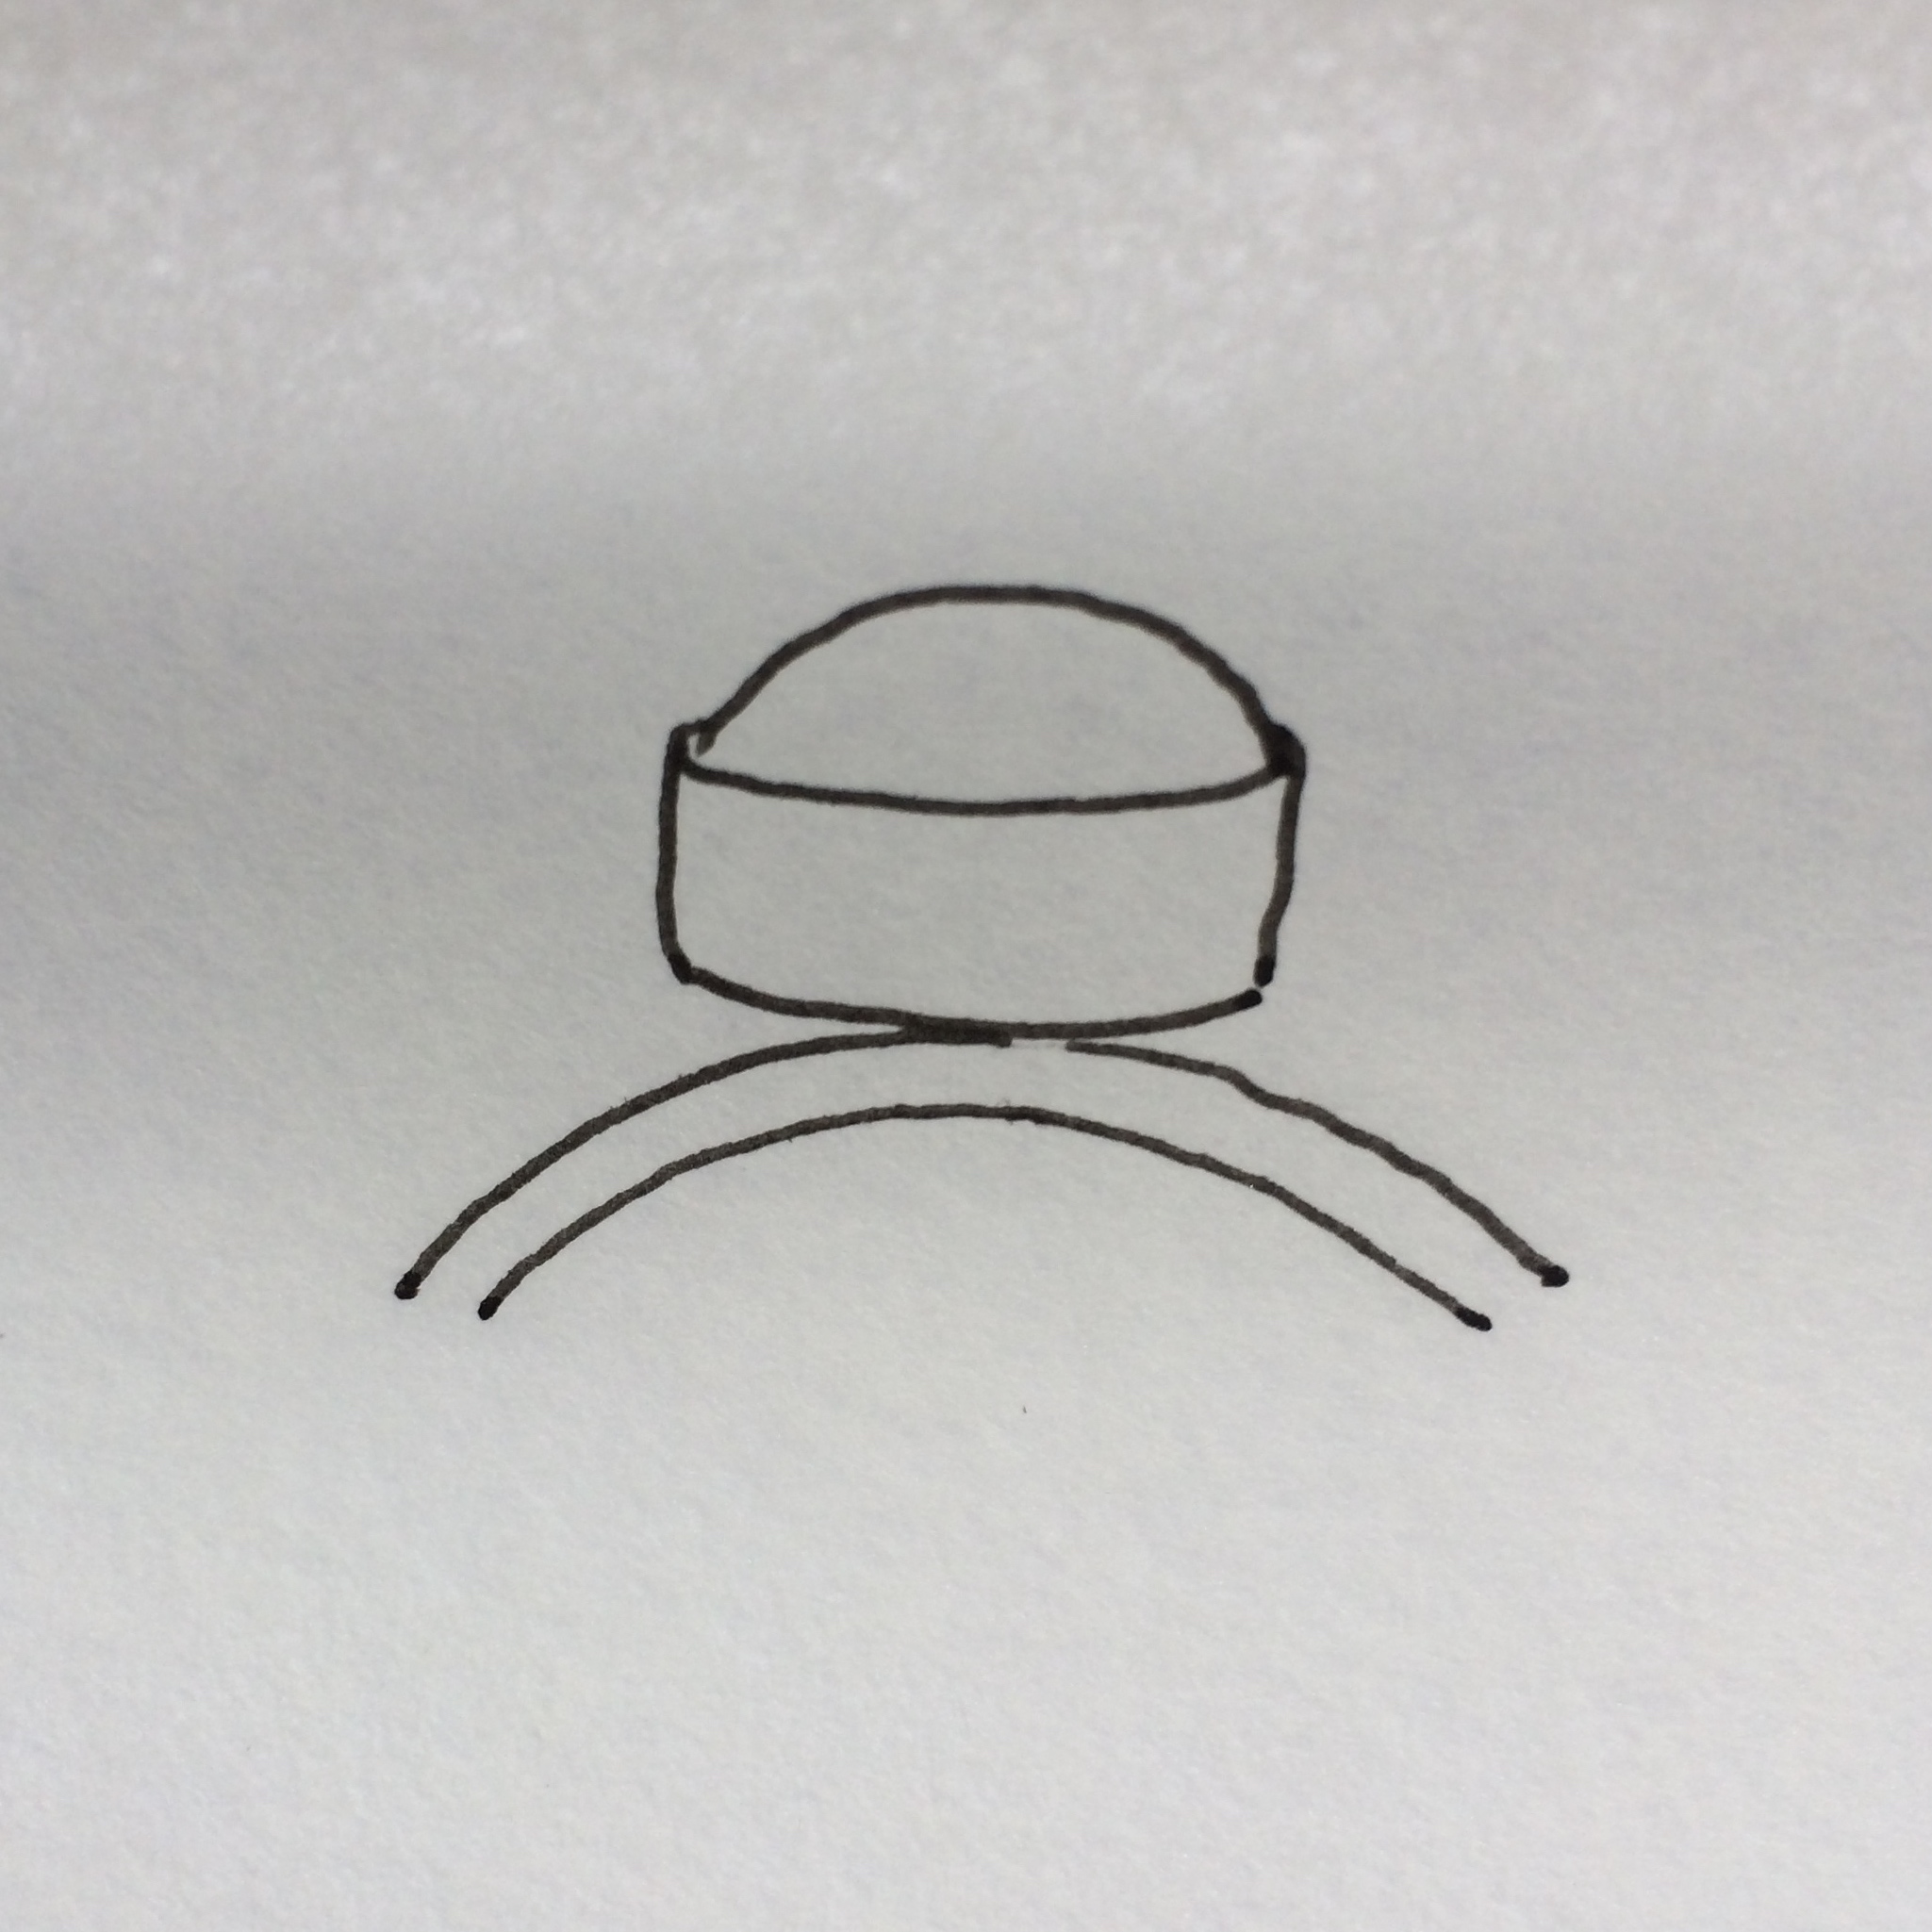
So here’s the plan.
I’ve got some stones which I bought from Rio back when I first starting thinking about it.
I was a little annoyed by this as I was still in the throes of perfecting my cab setting skills, but I went ahead and bought them anyway as I just had to have them.
No hope for me really.
As I said, I have had a few successes, but I really want to get to the place where I have alllllll successes.
I’m needy that way.
I’ll try to walk you through my trials and errors, but sometimes holding the camera while soldering, bezel pushing, filing, etc., can get a bit tricky, but I’m all about overcoming challenges 😉
So watch this space…
–
In other news.
You remember those snipings from the bridesmaid earrings.

There was a lot of them.
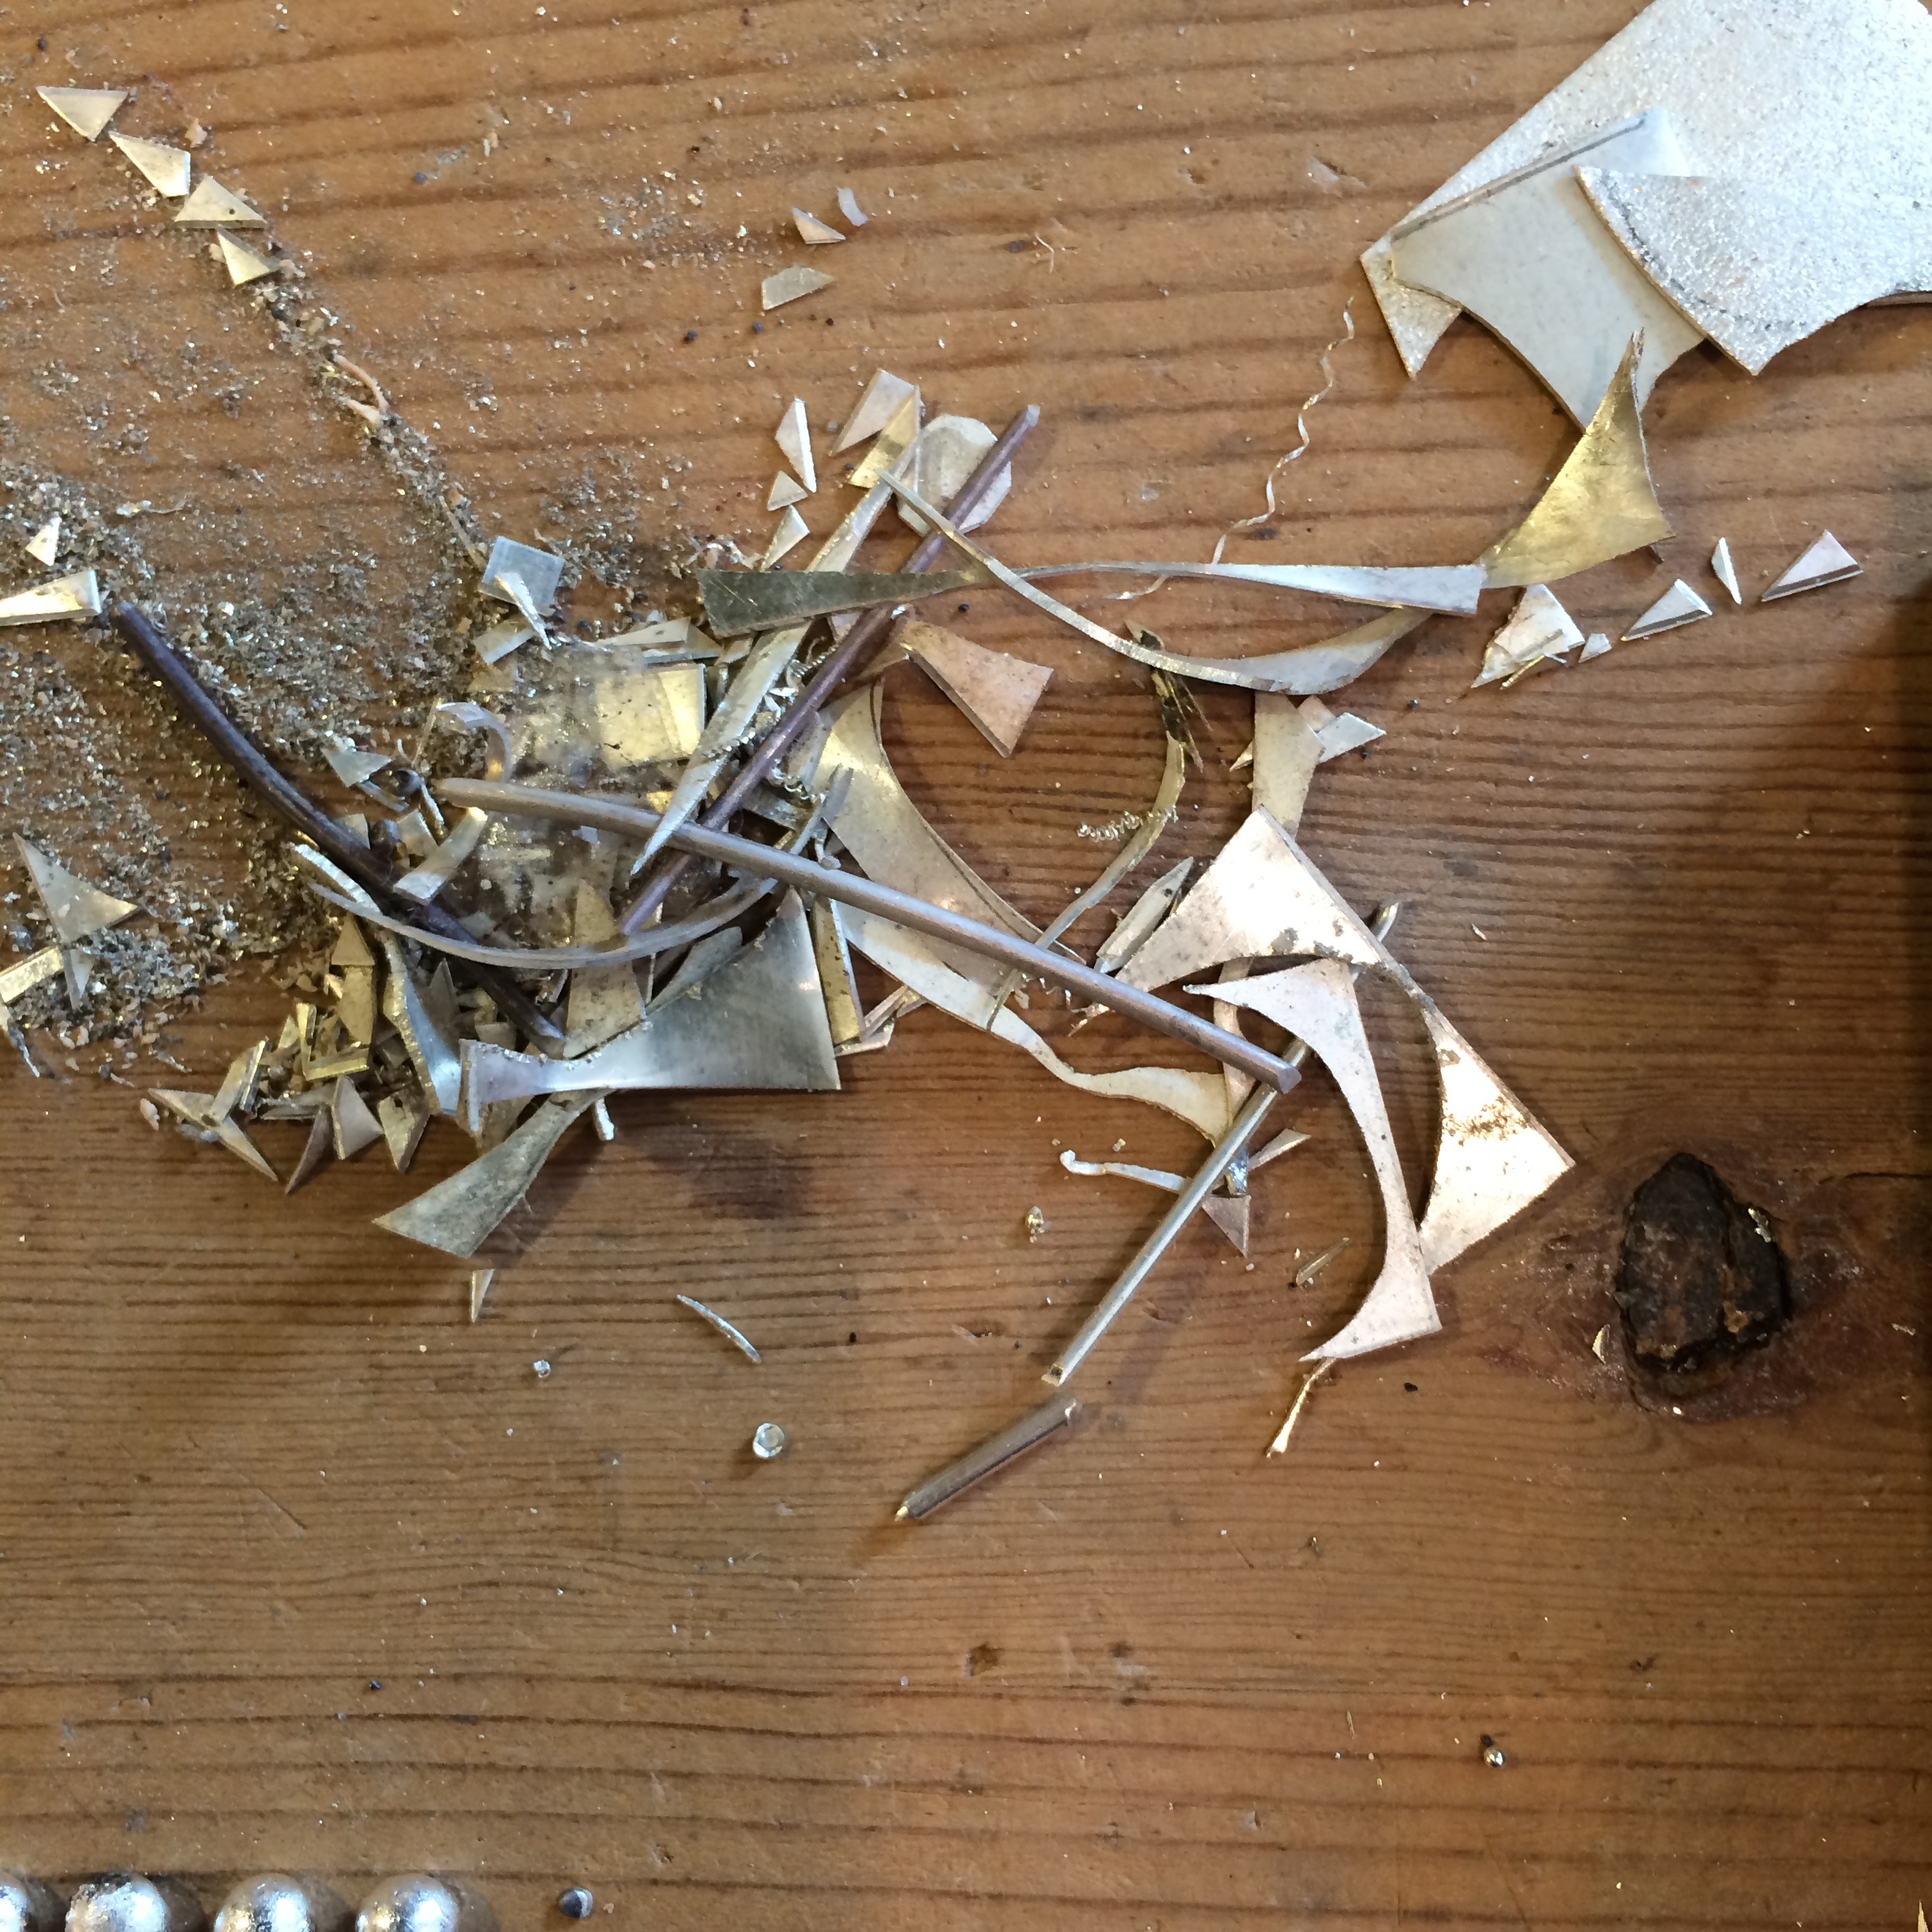
Well they took a holiday at the charcoal block spa and salon.

And now they’re sorted and ready to go party.

Shame I’m doing stone setting now.
And here’s a photo of The Rodent for Angie.

Yes, I know he looks all cute and stuff, but

He’s still a rodent.
Actually there’s a debate as to whether guinea pigs are in fact rodents.
Frankly I don’t care.
He might be cute, but he hounded his poor little black friend to death, literally, by using Thor, RIP, as his sex slave, but that’s another story…
It’s always the good looking ones you’ve got to watch out for isn’t it.
And finally, the show and tell.


–
And for your continual enjoyment.
(O.K. so maybe the show and tell wasn’t last)
Soldering jump rings.
Exciting, right?
Here’s how I like to do it.
Place all of the jump rings facing the same direction as sometimes, once you start heating them, you can’t find the area you want to join.
This way you have a heads up.

Use a little flux.

Cut loads of pallions of solder wire, or use chips, whichever you prefer.
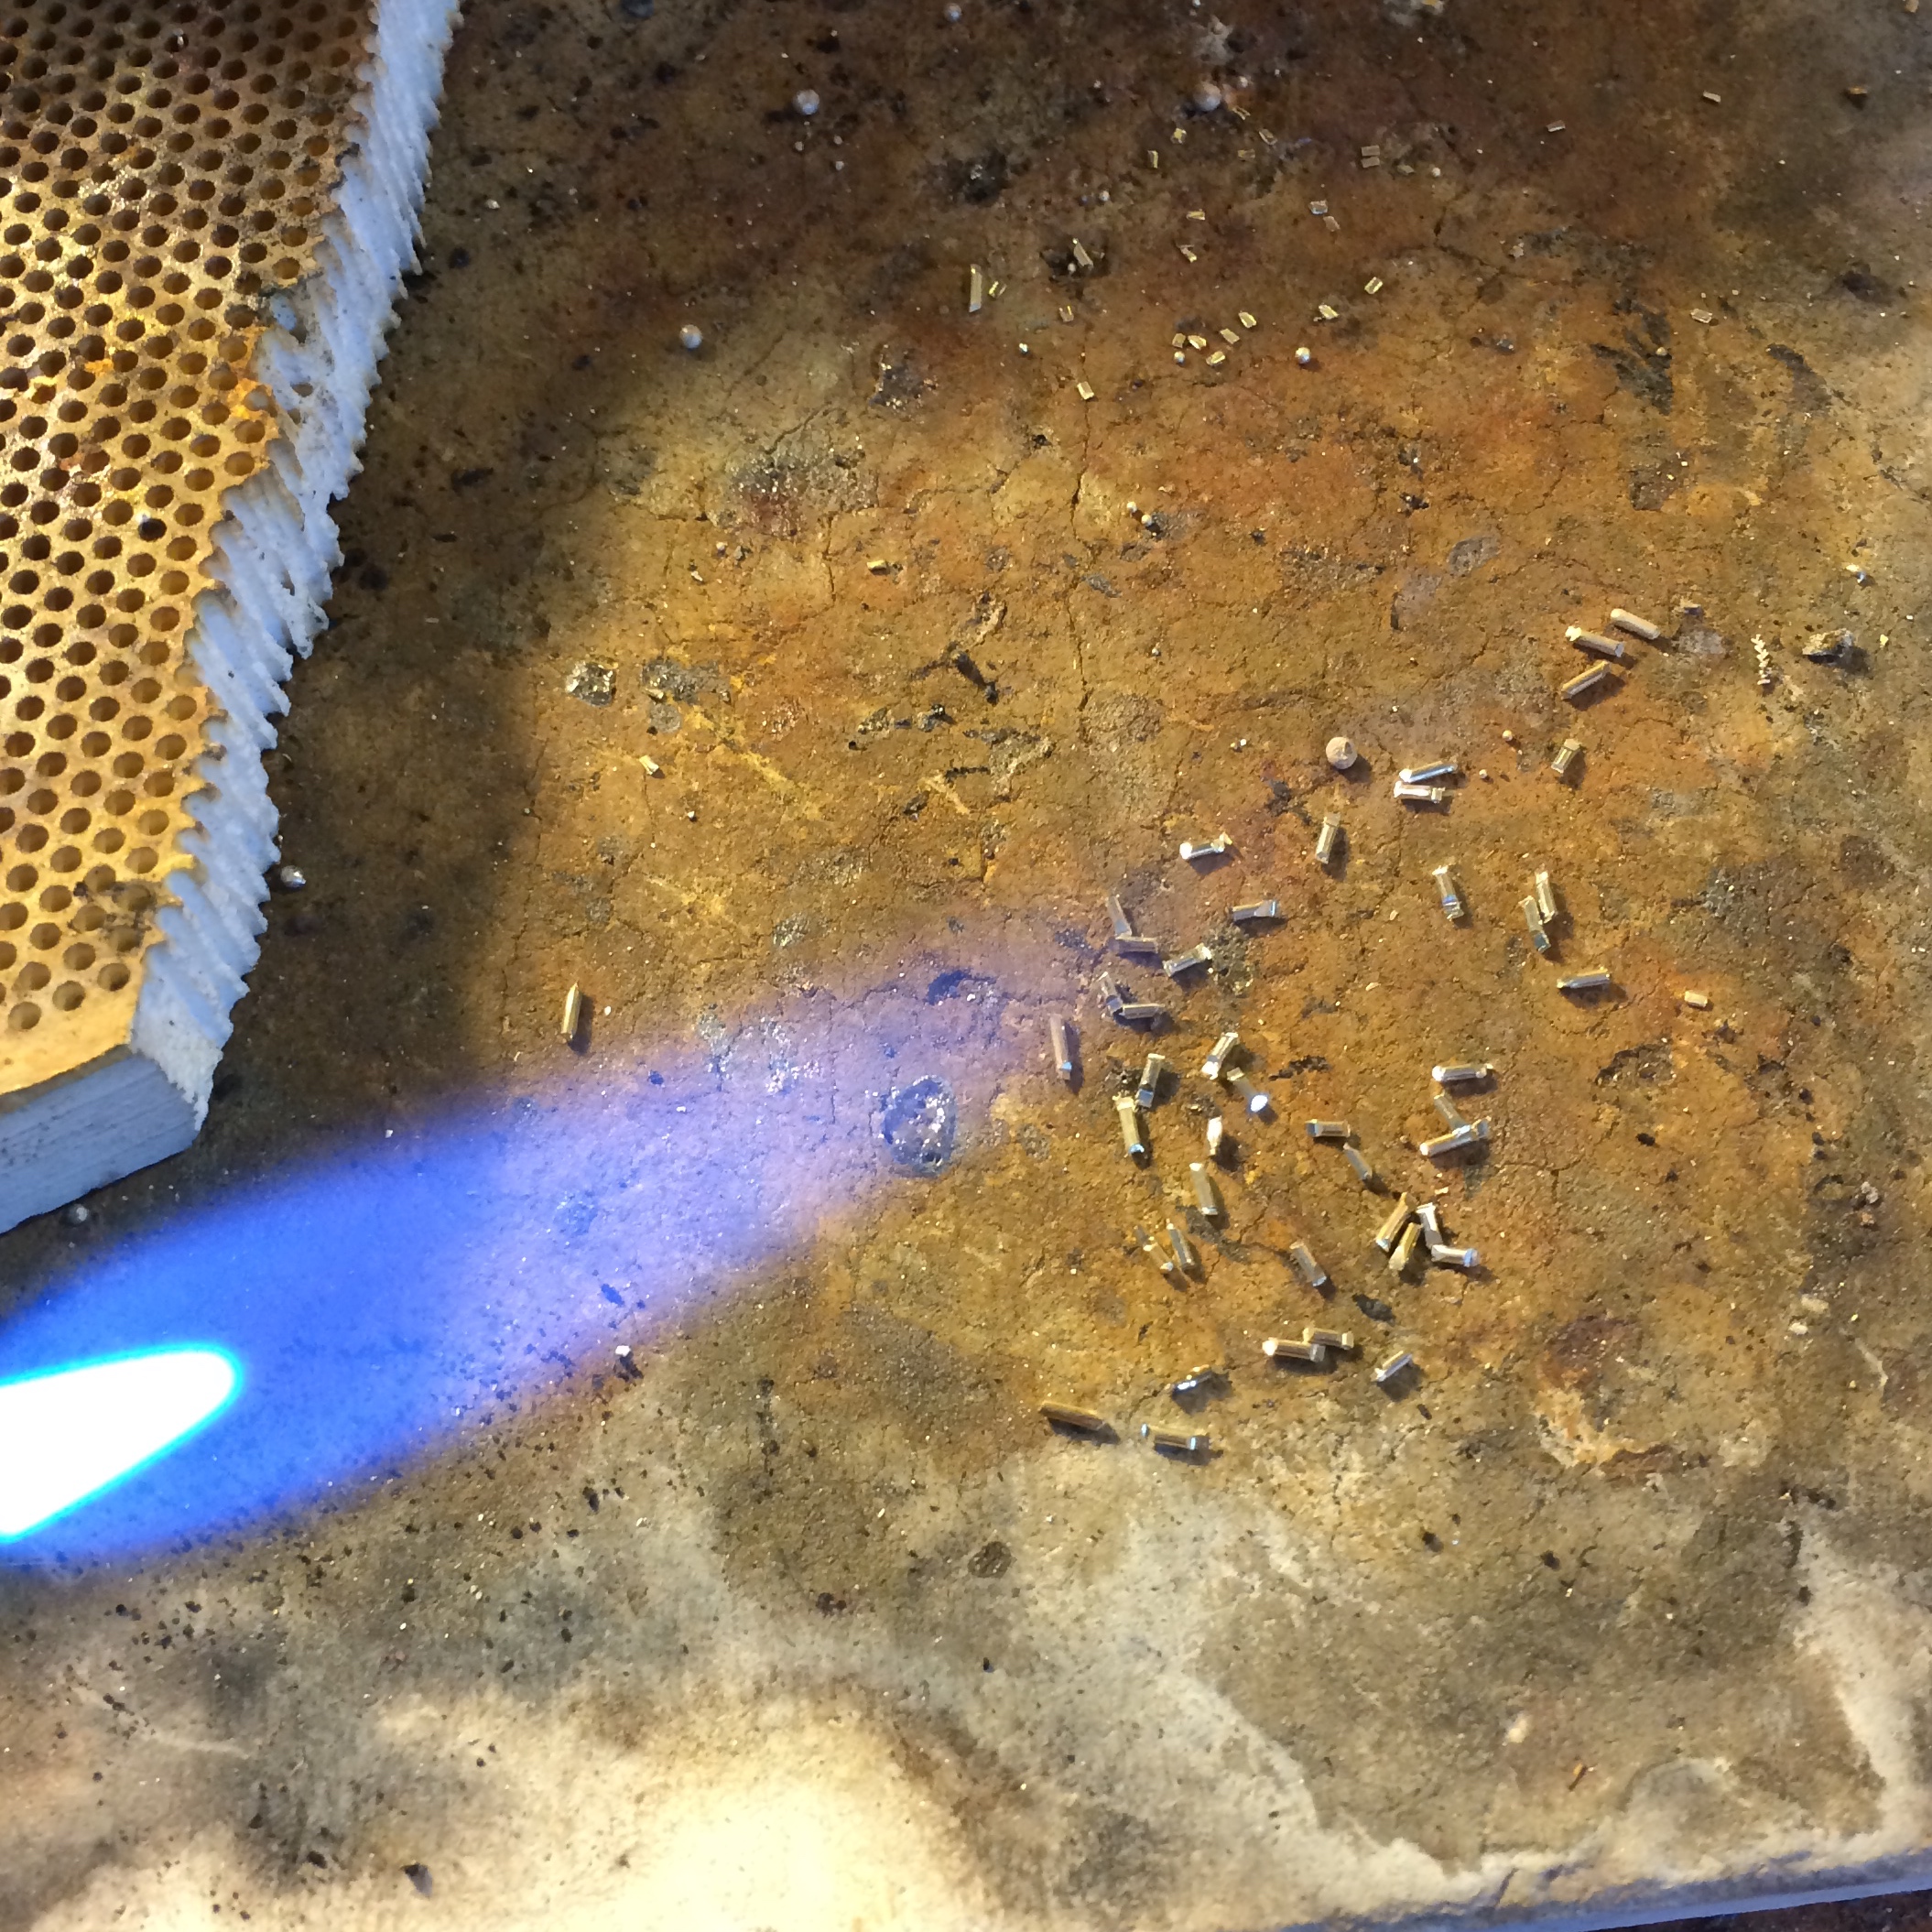
And heat them gently until they form little balls.
You can then pick them up with your pick (see what I did there), and place them easily on the join to be soldered.

The balls have to be hot, as does the pick, to be able to do this.
I leave you now with your very first look at the top of my head.
Oh, and sorry about the sniff. Got a bit of a cold.
Go on. You thought I had long golden locks didn’t you…
–
–
–
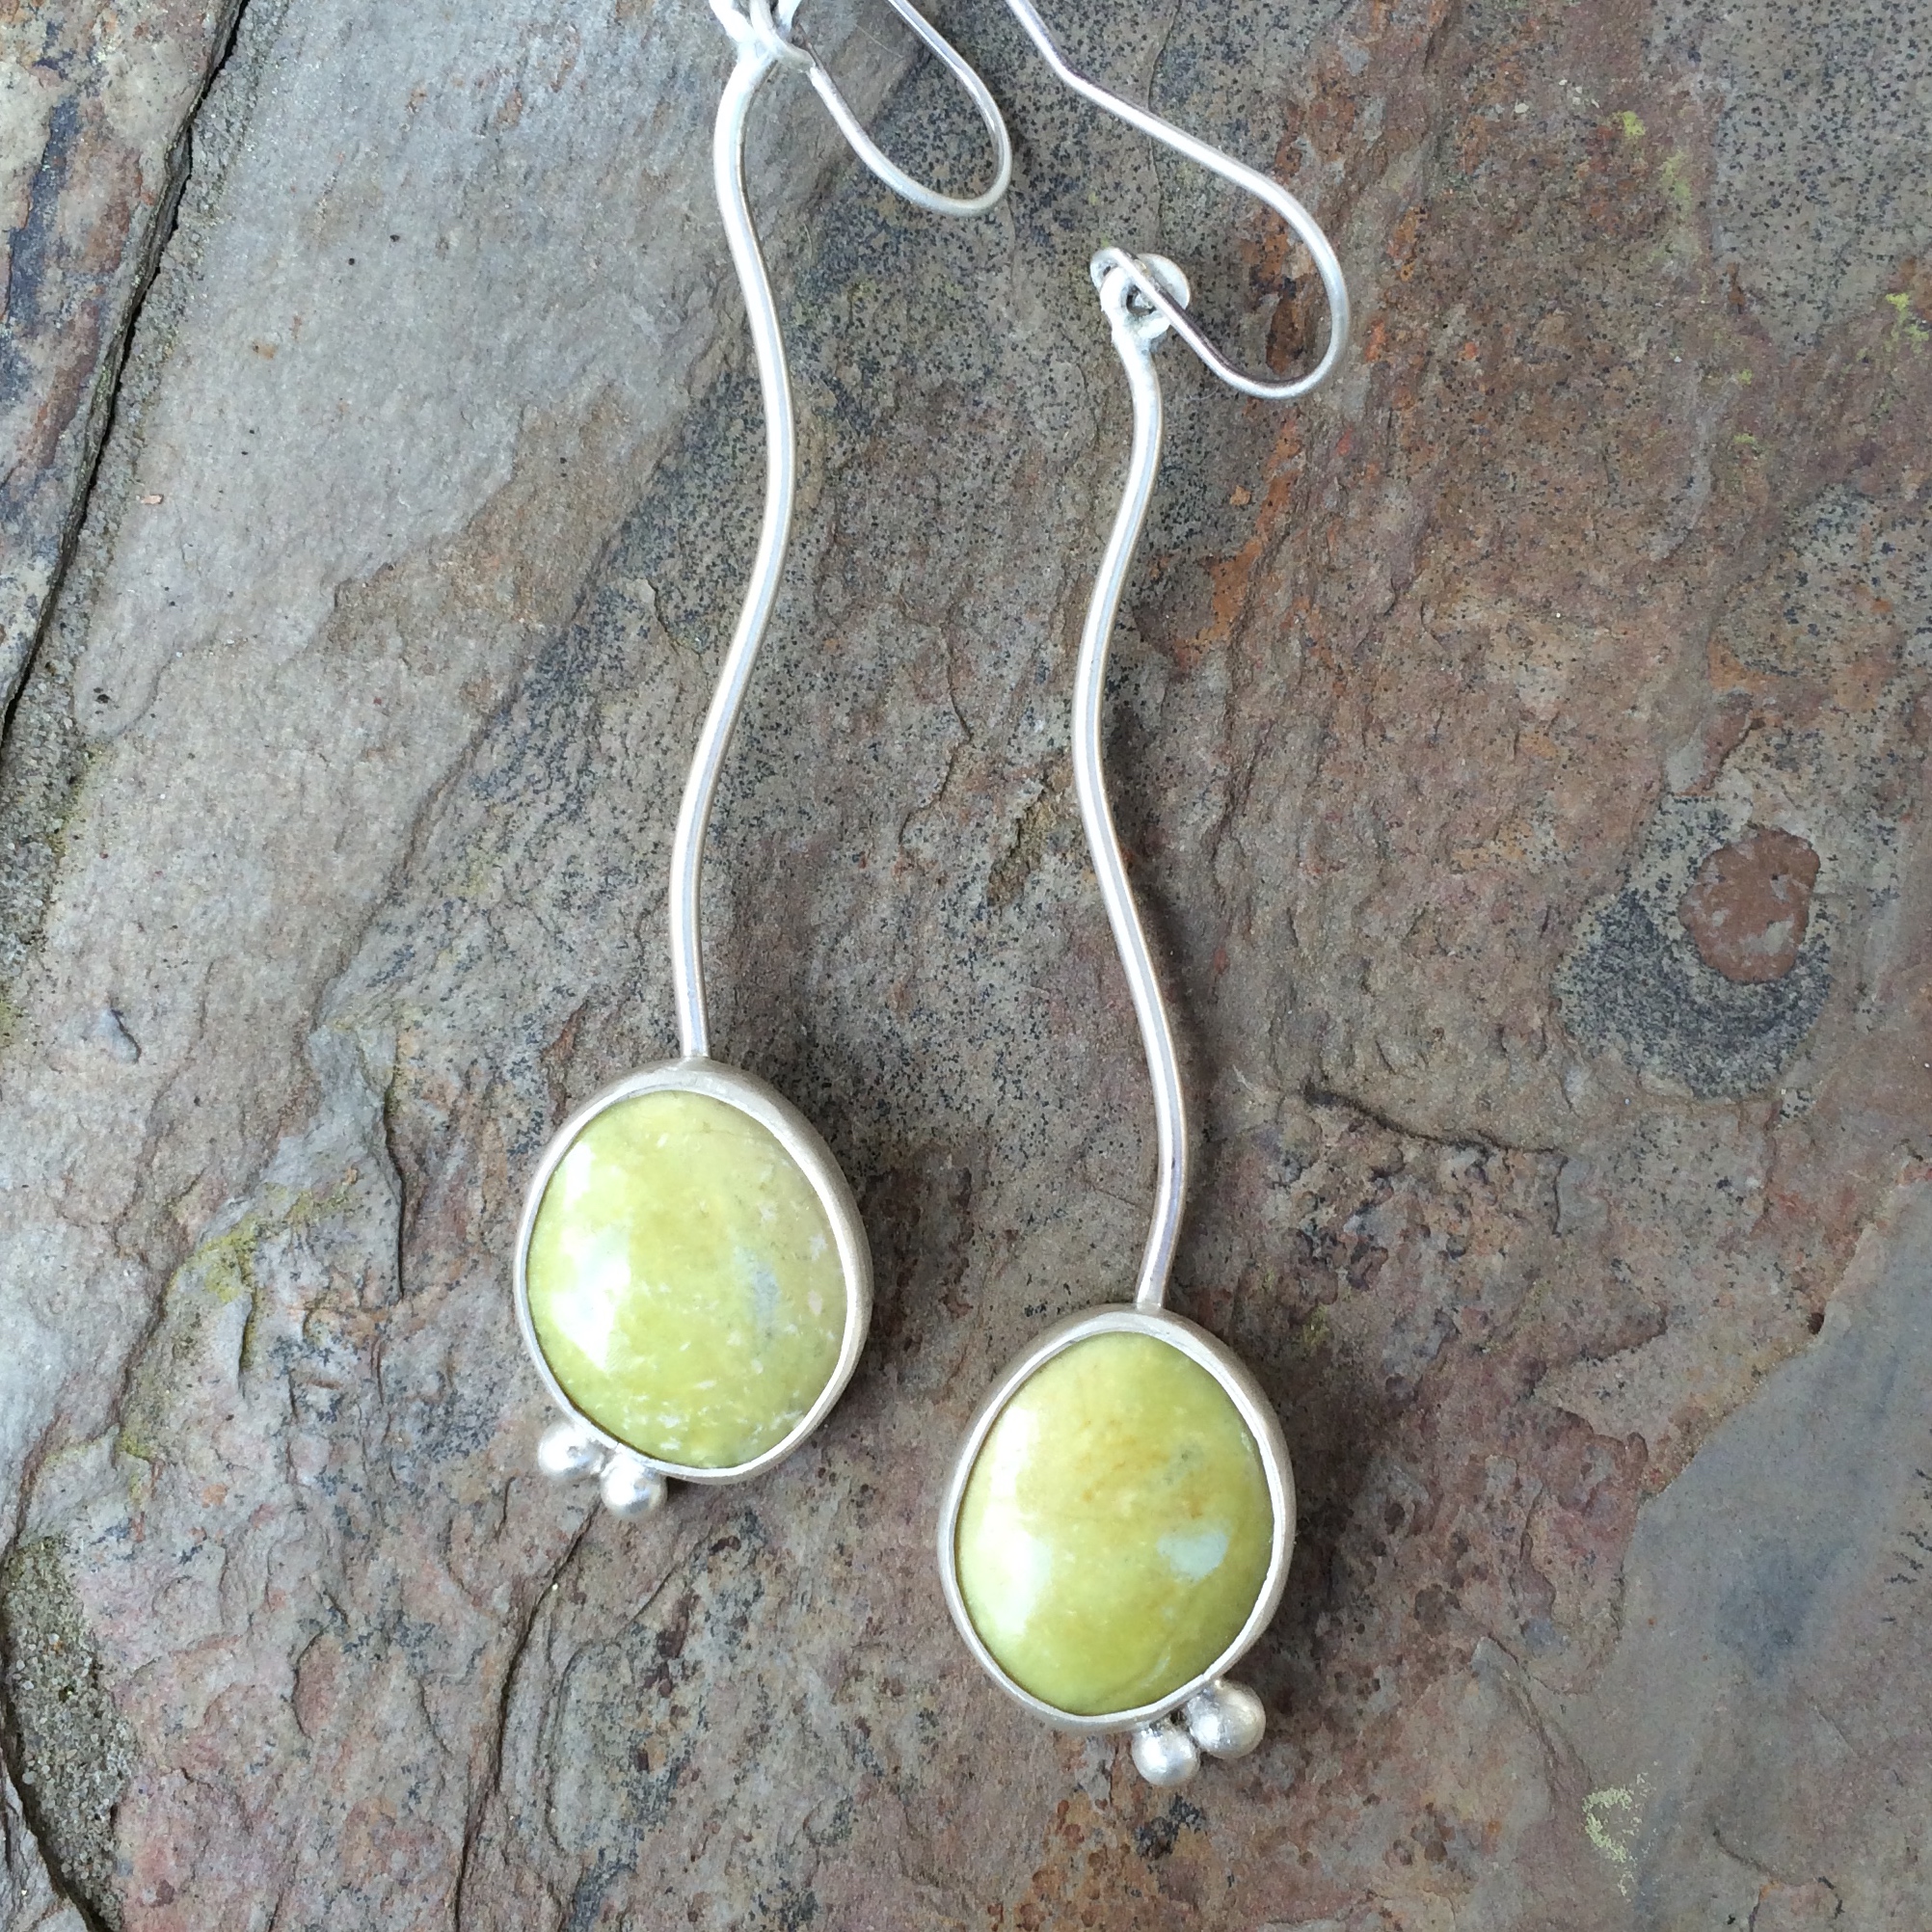
Love those earrings! And thanks for the mini lesson on soldering jump rings. You have encouraged me no end! I bought my own bezel rocker today to set stones at home, instead of just in class. Eep!
Silly really, everyone knows how to solder jump rings :/
yeah, he looks like a horny quasi-rodent for sure! Just look at that fur, sticking straight up like that! 🙂 Poor Thor. Thanks for the pic though!
Looking forward to seeing your fun and frustrating work with the flush (I’ve also heard it called “gypsy set”) and tube settings!
Seeing someone else in action is fascinating… please do that again!
I’m getting help this Wednesday setting up the Little Smith torch I received for Christmas. It was just the torch/tips/hose assembly – he didn’t realize I would need all of the other gear – so it’s been a journey, shall we say. SO EXCITED!
I just have my chunky old acetylene torch. Nothing small about it! Do I need to be jealous?
Ps don’t ask what Gale does with guinea pigs …
You do wonderful things with your chunky torch! Hopefully I’ll be so inspired and no longer afraid of burning the house down, that I won’t emerge from the basement until next week!
I know. Creativity can be fraught with anxiety. The first time I used my pottery kiln I thought I’d blown out the neighbourhood’s power supply. Turned out to be a coincidental power cut. That was a close one. Still, every time I put it on I expect to come home with the house burned to the ground. Don’t get me started on the torch…
Can’t say I’ve ever considered what sort of locks you might have, but right now I’m too busy laughing to thank you for your demo (“easy,” she implies) or compliment you on any of your work there. (Or–you may be happy to learn–to tell you what we do with those rodents in Peru.)
Lol. Are they tasty?
Delectable, if a bit bony.
I have that book as well. I must say I found it completely daunting. Luckily I was able to find a course locally (Sydney, Australia) that taught bezel, tube, tension and flush settings. I think tube settings are the easiest as long as you have a nice, thick-walled tube and a burr to cut the seat. Easy-peasy Japanesy, as they say. The other book I do like is The Rings Book by Jinks McGrath – it has a lot of different settings with good pics in it.
BTW, love your work.
Corinne
Oh, I think I have that one also… I’ll have to go find it.
I’ve done a few tube settings and they worked out fine, but I’d just like to feel more confident with them. After the tubes I think I’ll move on to the flush set. Good to have a project going 🙂
So that’s how make all those neat little balls :-O
Yes. Just heat your scraps up on a charcoal block and bob’s your uncle 😉
Looking forward to your tube and flush setting, pls make your mission happens soonest…. (*:*)
Soo. Is that you from Singapore? I went there once when I lived in Malaysia for a year.
Hi, yes I am from Singapore, I chanced upon your blog one day and found it interesting, so begin to follow you. You should visit us more often, especially Asia, there’s so much to see.!
btw , love what you are doing, blogging, quilting, painting , jewelry making ! How did you get so much energy ?
Ha. I really don’t have as much as you think.
I am going to try soldering like that now. I usually have all my cut bits of (hard) solder on a piece of paper, line up my jump rings, then apply flux (borax) to 3, add a bit of solder, apply flux to the next 3, add the solder, repeat til all have their sprinkles and then heat. your way looks far faster, and sometimes speed is good.
Nice touch with the protective towel. I had my honeycomb board with pegs out last week…one peg pinged right out just as I finished. Missed my bare toes (I know. Really) by about 1/2 a centimetre. Just as well I have a fireproof slate floor in the kitchen, eh?!