I’ve got some things done.
It’s been like pulling teeth.
Every day I go into the studio just to find some excuse to take a break.
Even after just fifteen minutes.
When I can’t find a reason to leave the studio I just decide that I’m so thirsty I’ll die if I don’t get a drink stat!
What’s all that about?
Remember this.
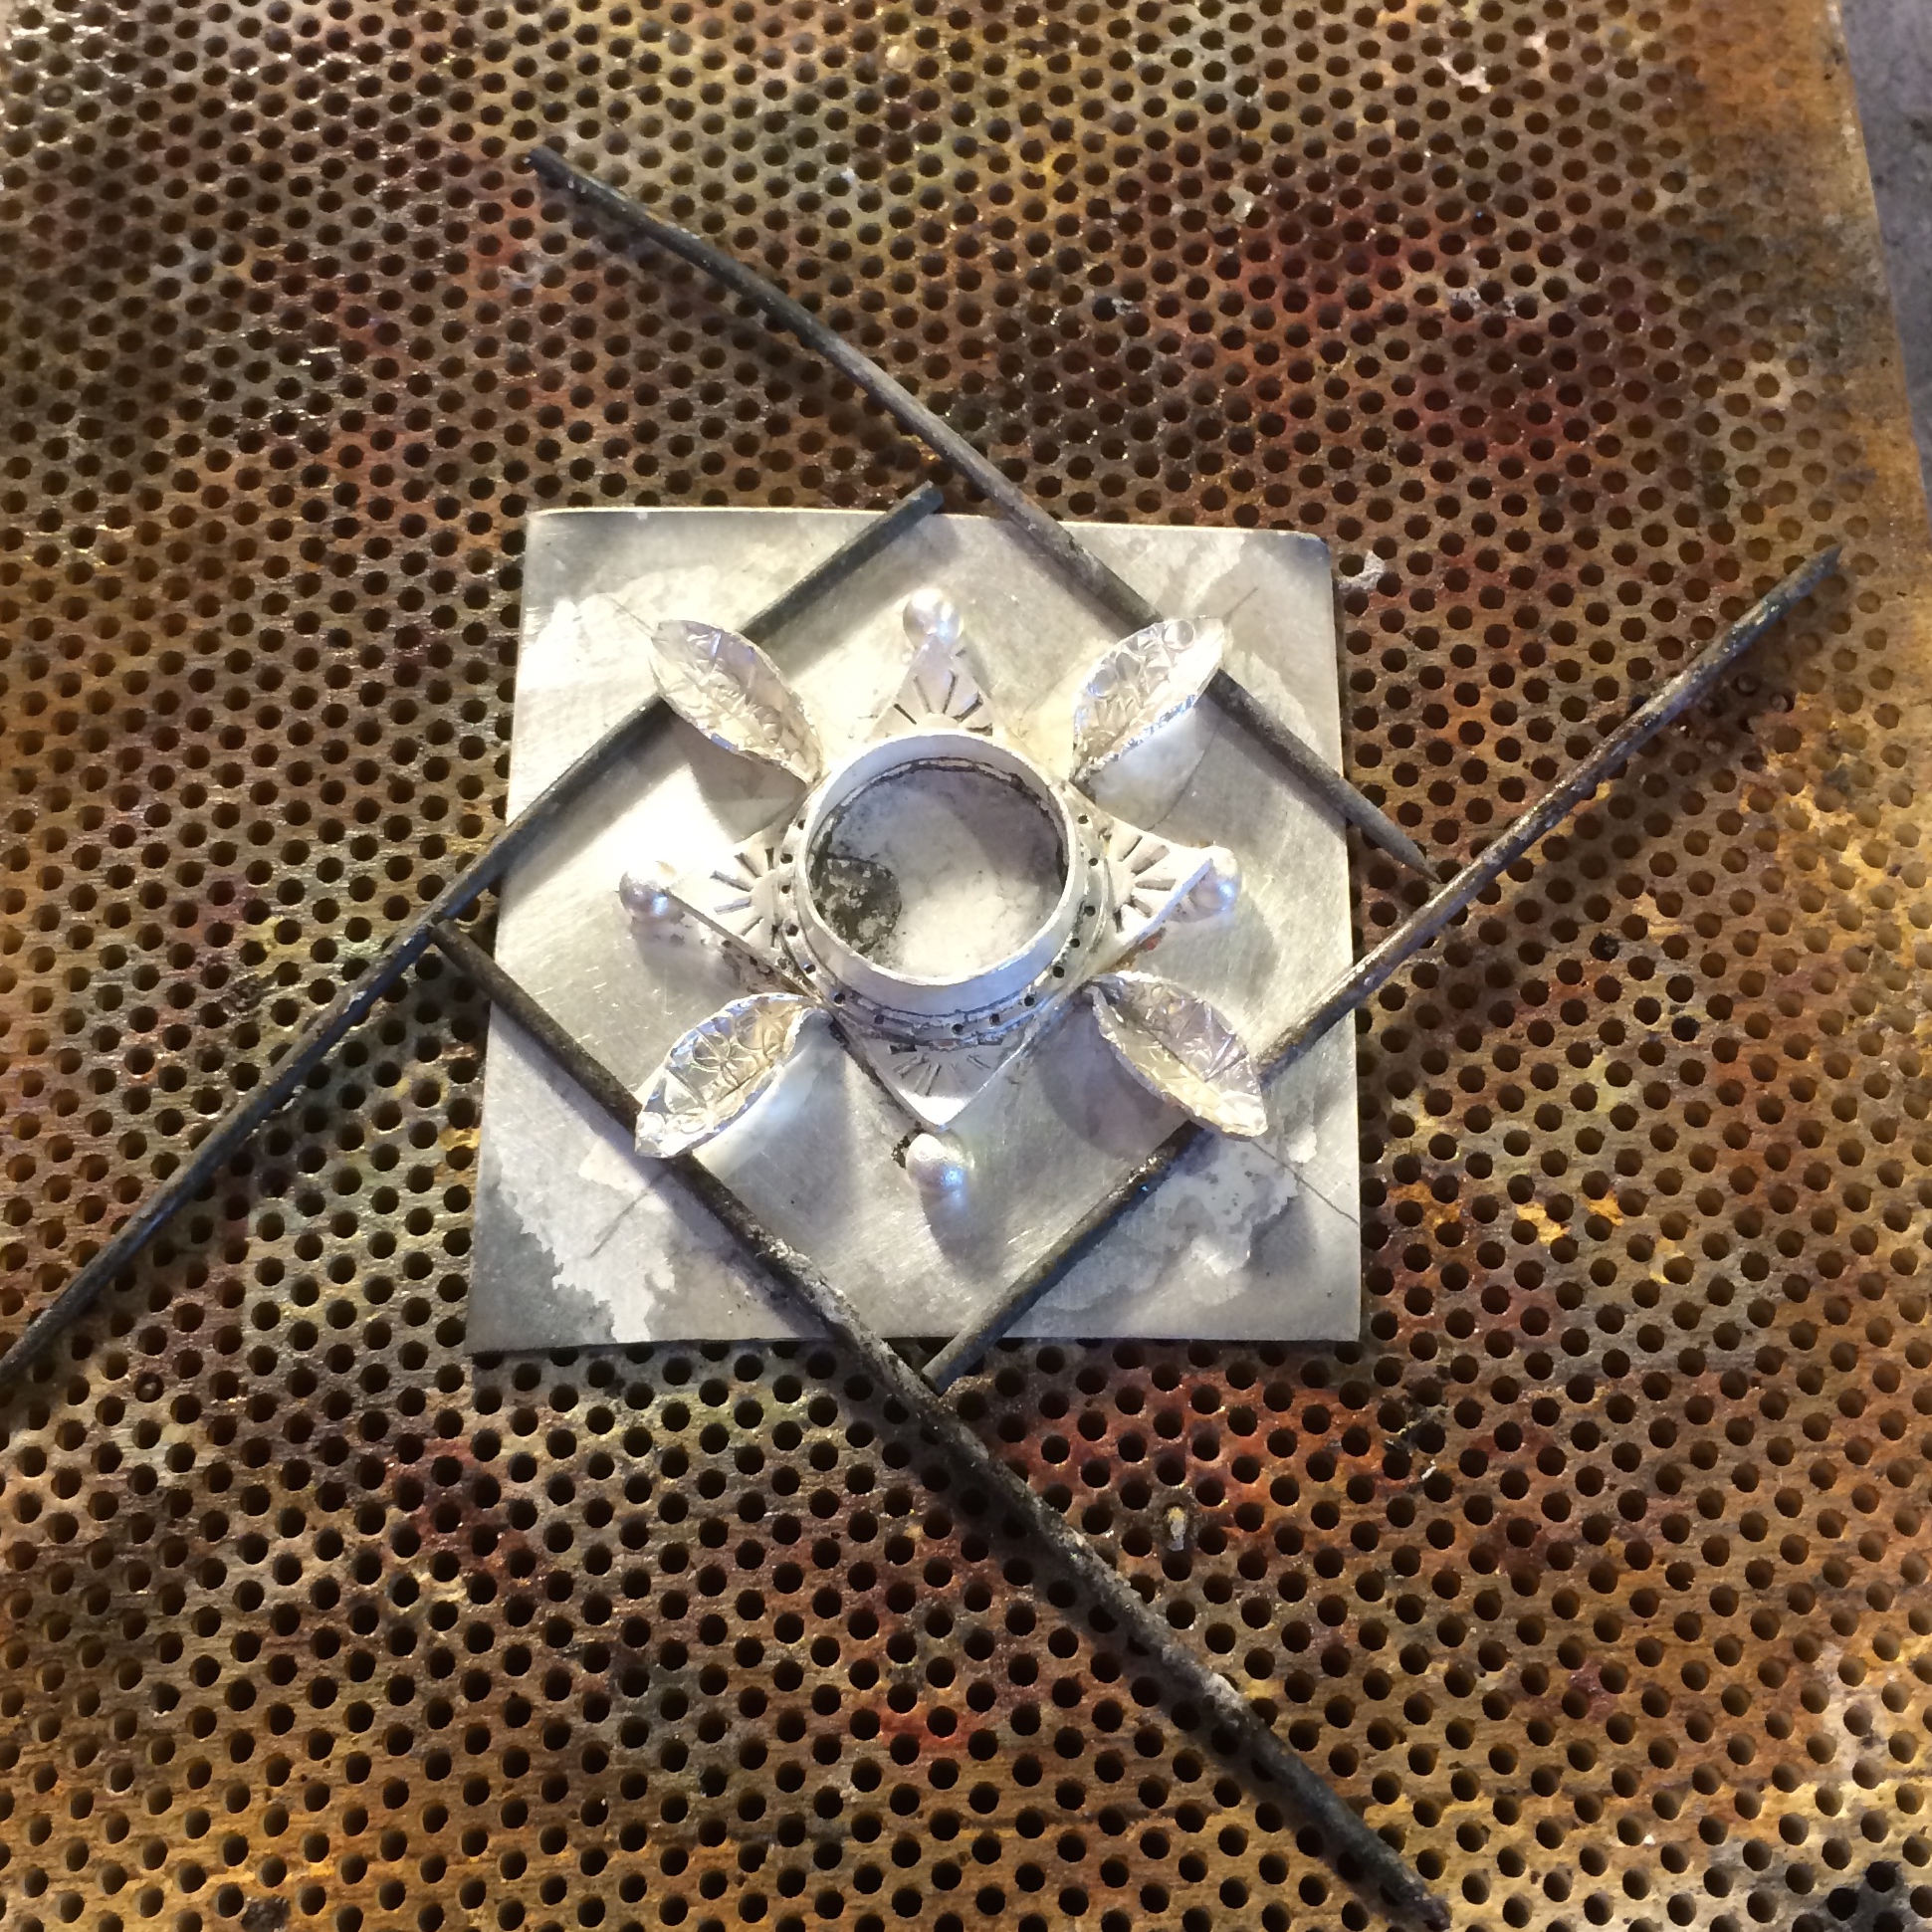
That wouldn’t cooperate and decided that it just didn’t want to be made even though it deigned to pose to show you what you can do with all your broken pick sticks.
Well it took me three days by Jove, but eventually I was able to finish it in-between all the drink breaks and consequent rest room trips.
Not completely sure about the beads though.

And I ordered an I.D. stamp.
Ain’t it cool 🙂
From Infinity Stamps.
They’re very expensive, but I’ve had one before and I really like the quality.
You just design your logo and send them the pic.

It also took me five years to make these.


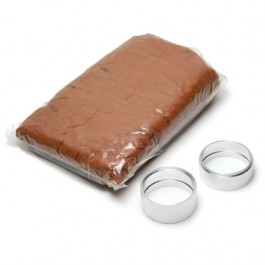
In the meantime, while I was procrastinating going into the studio by ordering more stuff, I bought a sand casting kit.

The wrong one as it turns out.
It all looked so easy on the videos, but man, that sand went everywhere. I even got some in my mouth.
It was like I was a child again.
O.K. still…
I couldn’t keep my space clean to save my life, yet the man on the video didn’t get a grain out of place.
It was very depressing.
My first casting came out so horribly that I just packed all the stuff back into the box in disgust and put the whole thing down as a waste of money.
But I really, really wanted to do it 🙁 and if that man could do it, so could I damn it!
I’d bought it on Amazon and decided to go back there to buy some different sand and try again.
The same sand that the annoyingly good at it man used.
And, while cursing myself that I always get things wrong, I decided to read the reviews on the kit I’d bought.
Now I always read the reviews before I buy anything.
Always… except for this time.
Should’ve read the darn reviews.
Everyone complained about the sand, and when I came to think about it, I couldn’t quite remember why I had bought the brand I’d gone for in the first place when it was more expensive than the brand I’d originally gone onto Amazon to compare pricing on.
The funk’s messing with my brain man!
Then I got a bit ticked off because it was 120 odd dollars and it didn’t work even though it said, new and improved sand, in big letters on the tub.
That should’ve been my first clue.
So in a fit of determination I sent the whole package back even though I’d used the sand and the casting flask had burn marks around the funnel area where I’d poured the silver in.
I told them on the little return box that I’d used it, but that it was horrible, but Amazon refunded me straight away, even before the company had received my parcel back.
I was quite impressed.
Don’t know if the sand casting people are going to be though.
Now I’ve ordered the one I wanted in the first place.
Stay tuned…
Emboldened I next contacted a nice lady on FB who reps for JoolTool.
I’d decided that I’d had enough of defective tools and products.
If you remember some of the discs that came with my JoolTool (seven of them!) kept spinning off the spindle when I was using them because their threads had worn or something.
These things are expensive and so are the adhesive pads and papers that you stick to them.
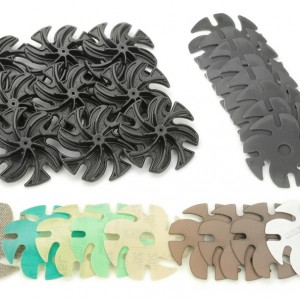
I mean this bunch right here cost over $400!
(I shouldn’t have looked at the price…)
I’d already contacted the shop a couple of months ago and no one had answered me, so I was feeling pretty taken.
BUT this rep was great and Anie, the product designer and owner, phoned me and walked me through fixing them and now they are perfect and ready to go!
Great result.
Great customer service.
Very happy camper right here.
To celebrate I have a little pair of earrings you can make.

All for you 🙂
First take 18 gauge sterling silver wire and wrap it around a mandrel six times.

I’ve used the largest ring on this pair of pliers.
It always irritates me when I get this particular pair of pliers out because I can’t remember why there is a number 1 and an asterisk on them.
I don’t think I put it on them, but why would I buy a pair that were marked?
Just another of life’s mysteries to mess with my mind…
Now snip and solder them.

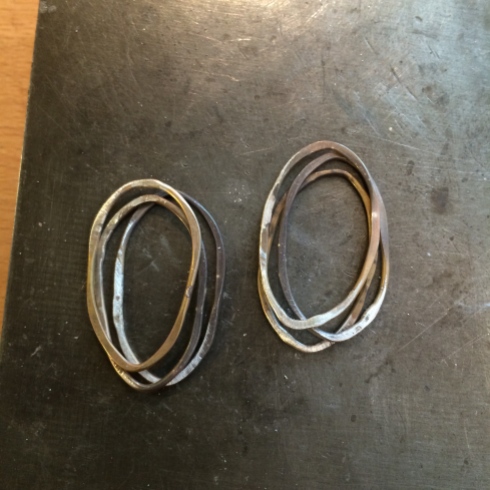
Shape them into rough ovals and haphazardly hammer them.
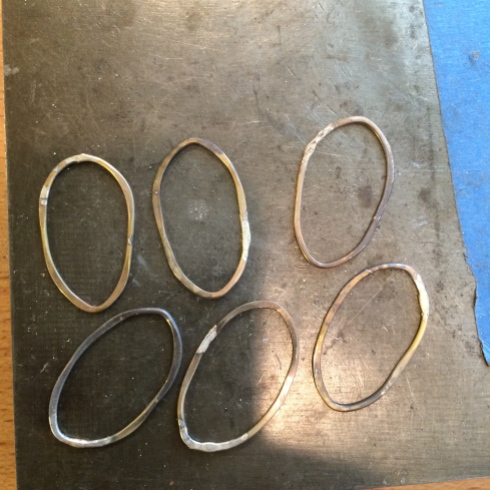
And group them into threes.
As always I’ve forgotten the next photo which would have been of making a loop out of a thicker piece of wire.
I used 8 gauge half round wire.
Now loop the three wires through it and solder the top of the loop together.

Because the half round wire is thick I left the top of it shaped as a teardrop instead of trying to get it perfectly round.
Now find two large silver balls that you have in your silver ball scrap box and solder one onto the rounded part of the thick tear drop ring.
The next photo’s are fuzzy, sorry. I tried hard to get good ones, but, as good as I am, I couldn’t hold everything at once.
Hold the tear drop point facing down in your third hand tweezers.
If you haven’t already got third hand tweeter, get some.
They’re invaluable.
Saves a lot of hospital visits.
Now make sure that all of the soldered areas of the thin large rings are facing down away from the tear drop and place one of those old pick sticks through the tear drop to separate the three rings from the soldered part of the tear drop.
This will help prevent the tear drop solder flowing onto the three rings while you’re soldering the ball onto the round part of the tear drop.
Capisce!

Put some flux on top of the round end of the tear drop and on the bottom of the ball.
Heat the bottom of the ball and pick up a melted ball of solder with it.

Now heat up the round end of the tear drop and solder the ball onto it.
Turn the tear drop over and clasp it in the third hand, again putting the broken pick stick between the bottom of the three rings and the inside of the round end of the tear drop as before.

Get a little jump ring and place it in your third hand with the join facing downward and put some flux on the bottom of the jump ring and on the tear drop end of the large ring.
Gently heat the jump ring and pick up a small piece of solder as you did with the ball.
Now heat the tear drop end keeping the jump ring away from the flame, but close enough to stay heated and when the solder is ready touch the jump ring to the tear drop end.

Pickle the earrings.
Make some ear wires.
And polish the way you desire.
And voilà!
Your earrings are ready.
Now you can knock yourself out and make as many variations as you want.

I tried a different way to connect the ear wire here, but don’t like it as much as the other way.
Always good to experiment though
😉
I leave you with the progress of the painting.

And,
you might want to look away…
a poor me sawing injury
because when you’re in a funk normal activities take on a life of their own and like to do things to make you swear.

A lot.
–
–
–
I love your postings. I am such a klux so I feel better. When making my glass beads I have stuck my fingers straight through the flame. Ouch ouch! Don’t do that. I have picked up my just heated metal. NO don’t do that either. I like the piece you just created (top). I have thought about that Jool tool. Very expensive when you get all the parts. Do you believe that it has saved you time in your finish work? And I think you had tried it for finishing some cabs a while back. That could be good. BUT I also want a Potter Hydraulic press. hummmm. what to do, what to do.
I find soldering the small jump rings when joining the larger rings can be very tricky and difficult. I just melted one of the big rings as I was trying to solder the small rings. For the time I have put it on the side.
Love the earrings.
I like the JoolTool, it just irritated me that I couldn’t use some of the discs. It is expensive though, and will continue to be because you have to buy new sanding paper, especially if you’re cab making. I have made cabs from beginning to end on it quite successfully, I also like to be able to trim cabs that I’ve bought which aren’t quite the shape I need, or if I’ve made the bezel too tight. I would choose it over a hydraulic press because I don’t make multiples, but, of course, I have got my eye on one lol
I love these earrings!! I am looking for some quick ones to make for next week’s show and I may try these. Great look!!
So now that you’ve conquered lapidary, you are going to do casting?? YOu remind me of someone, um, I’m not sure who?? Oh, yes, ME!! HAHA!!! And I got my finger cut by the saw last week. Sheesh. I was rushing and being careless. What else is new?
I just revised the gauge on the earrings. I realized that I put 20 gauge instead of 18. Hope this didn’t mess you up :/
Deborah, you love the fiddly!! I spent the last hour and a half on these, and I have a coppery, soldery mess!!! I’m going to try them with 16 gauge now, because the 20 gauge got all coppery.
LOL!!
I’m so sorry 🙁 I guess you got to make them before you read my reply. I got the gauge wrong, it was 18 gauge not 20 🙁 🙁
I did go on to make some 20 gauge ones though.
I am making the 16 gauge ones, and the wire part came out really nice, but I have melted 8 jump rings trying it to attach to the 8 gauge ring!! My husband asked what all that cursing was about this afternoon!! I put it away for now, will conquer it tomorrow. (I’m supposed to be getting ready for a show next weekend and the one after!! Nice diversion!)
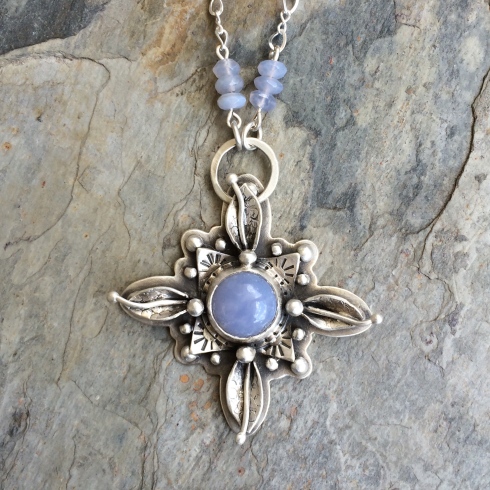
And BTW, I especially love that blue necklace. I LOVE the way you did the bail – very creative!!
O.K. so I’m inside now. When you solder the small jump ring onto the larger ring the key is to bring the thicker piece of silver up to the temperature of the smaller piece. This means keeping the small jump ring out of the flame until you’re absolutely ready. Even then I tend to flicker my flame in and out of the area I’m soldering always keeping an eye on the jump ring. With practice you can see when it’s going to melt and whip the flame away. I know you probably know all this, but just in case. I always found soldering really annoying, but suddenly it all seemed to click into place. Being discouraged is not allowed, but swearing is o.k. 😉
Wow, love those earrings, but no, you won’t see me fiddling around picking up solder and placing pieces together, my hands shake too much! Might figure out another way tho. My pick is crooked, but has a metal handle, so it has stayed on.
Going further up: definitely staying tuned, because me too had an idea about casting, a long time ago, but then I learned more about shaping metal in other ways, and forgot why I wanted to do it. But I’d bought the sand, looks exactly like that bag of yours, interested to see how it turns out!
And further… thanks for that link to the ID stamp — that’s something I’ve been looking into more recently, and that link might just be one solution. Tried to get one locally, but maybe we just were unable to communicate, or they didn’t do that kind of stamps. They would have liked me to buy a trademark stamp or whatever they are called. But then I’d first have to register for a couple of hundred €, and to be able to do that, I’d first have to found a company… which I have contemplated, but since I found neither time nor money, I didn’t get any further on that so far… But really I might have to do that in the end anyway, since I found out that according to European law I’m not really allowed to sell silver pieces over 10 g without a trade mark. Well, at least they abandoned the guild system from medieval times…
That chain on the necklace is just wonderful!
…well the rest of the necklace too is just as fabulous as all your stuff always is, but I especially noted the chain! 🙂
I know, I think the stamping is the same in England. I find it a little confusing so just as well I’m not living there at the moment really.
I’ve been wanting to cast for a while, but am not interested (yet) in the big investment so sand casting is a neat way to get my feet wet.
I see in a photo you use Ultra Flux. Is that a product you have used for awhile and have you found it to be superior to others you have used? Is so, where do you get it? Thank you for posting the earring tutorial. Your completed pendants are wonderful!
Yes I’ve used it for a long while. I like it a lot and I usually get it from here
http://www.amazon.com/Wolverine-Ultra-Flux-Silver-Brazing/dp/B0071N1G98 although I’m sure you can find it in other places.
Thank you!
Thanks for sharing your beauties and the awesome tutorial! I know that I don’t have any 8g wire so I’ll have to improvise! I’m going in!!! We shall see…
If I don’t hear from you again, I’ll send help…
You had me until the saw injury. 😀
The chalcedony piece is absolutely lovely.
😉
Hi from sunny South Africa! Thank you so much for your tutorial on the earrings, I made them today and they turned out beautifully! I find your tutorials very helpful, as even though I have watched hundreds of them, there is always something new to be learnt. I never thought to heat the jumpring or silver ball and to pick up the tiny ball of solder with that! Sooo clever! I have been following your ups and downs during the last couple of months, and I know that being creative is the best medicine for feeling down, so I know you are going to be okay! Doing more tutorials will also be good for you………….
Great! Glad to hear that you made them and that they came out well. Missed you hanging around here. Think of you time to time in your beautiful country making art 🙂
you inspired me to make a couple f pairs of these…I made them whilst in a strop on the 24/06/16 when the other 52% of the nation voted to leave the EU. I made them differently, and they don’t look as interesting, but I like them, so thank you. Once I have taken some photos I will send them to you. Thank you for the genius idea of the scrap balls. I think I may make many now!