I have struggled with making my own jump rings ever since I’ve been, well… making them. The only thing, in my opinion, more annoying than making jump rings is wire wrapping.
Fortunately I don’t care to make wire wrapped jewelry, but on the odd occasion that I need to make something requiring even the simplest wrapping technique you can believe me when I tell you it involves a lot of swearing and oftentimes the throwing of pliers.
I’ve tried lots of different methods and bought different contraptions to make jump rings, all of which make me want to pull my hair out.
I have this.
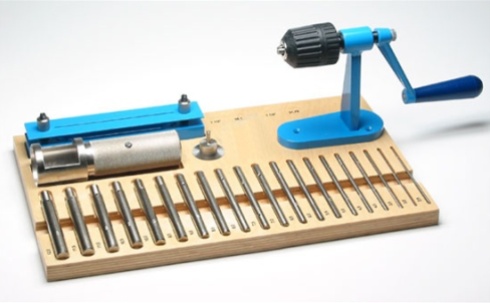
Which is great at making coils, but I’m darned if I can get that special little cutting device to work as well as it’s apparently supposed to.
When I put the coil inside the doohickey thing and run the blade through it, all of the rings smoodge down, bend out of shape and down right refuse to co-operate.
I’ve even tried taping them to keep them all lined up tightly.
But no.
I did watch a lady on Youtube yesterday thread the rings over a length of dowel, which I’ve thought of doing myself, but have never bothered with as it would mean going out and buying every different dowel size that I need.
Which is most all of them.
Still, I might give it a go as I do like to let my pent up anger out at least once a week and I’m sure this will help with that.
Until then that sweet little cutting vise thing just sits there on my table taunting me.
I think I hate it.
I also have one of these.
 Which looks as though its only existence in life should be to do something wonderful.
Turns out, however, I was using it wrong.
I was supposed to be using it like this.
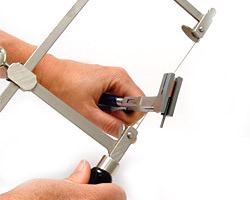
Should have read the instructions first I suppose.
Even so I still find it fiddly, awkward and annoying.
Aside from using these fine tools I’ve tried taping the coils and sawing them using all manner of painful hand positions.
I’ve cut them on the outside.
I’ve cut them on the inside.
I’ve used the saw by placing my hand in-between the blade and the saw frame.
I’ve even filed a groove in my trusty bench pin to lock them in place.
It has been a war people.
A war I am still determined to win!
So a word of warning:
DON’T
even think of telling me that you’ve been using this simple way of cutting jump rings all of this time as it might well be the end of our good relationship.
Yes it’s simple.
And yes I’m annoyed with myself.
But this duh moment has definitely brought a little more sunshine into my life.
So without further ado…
–
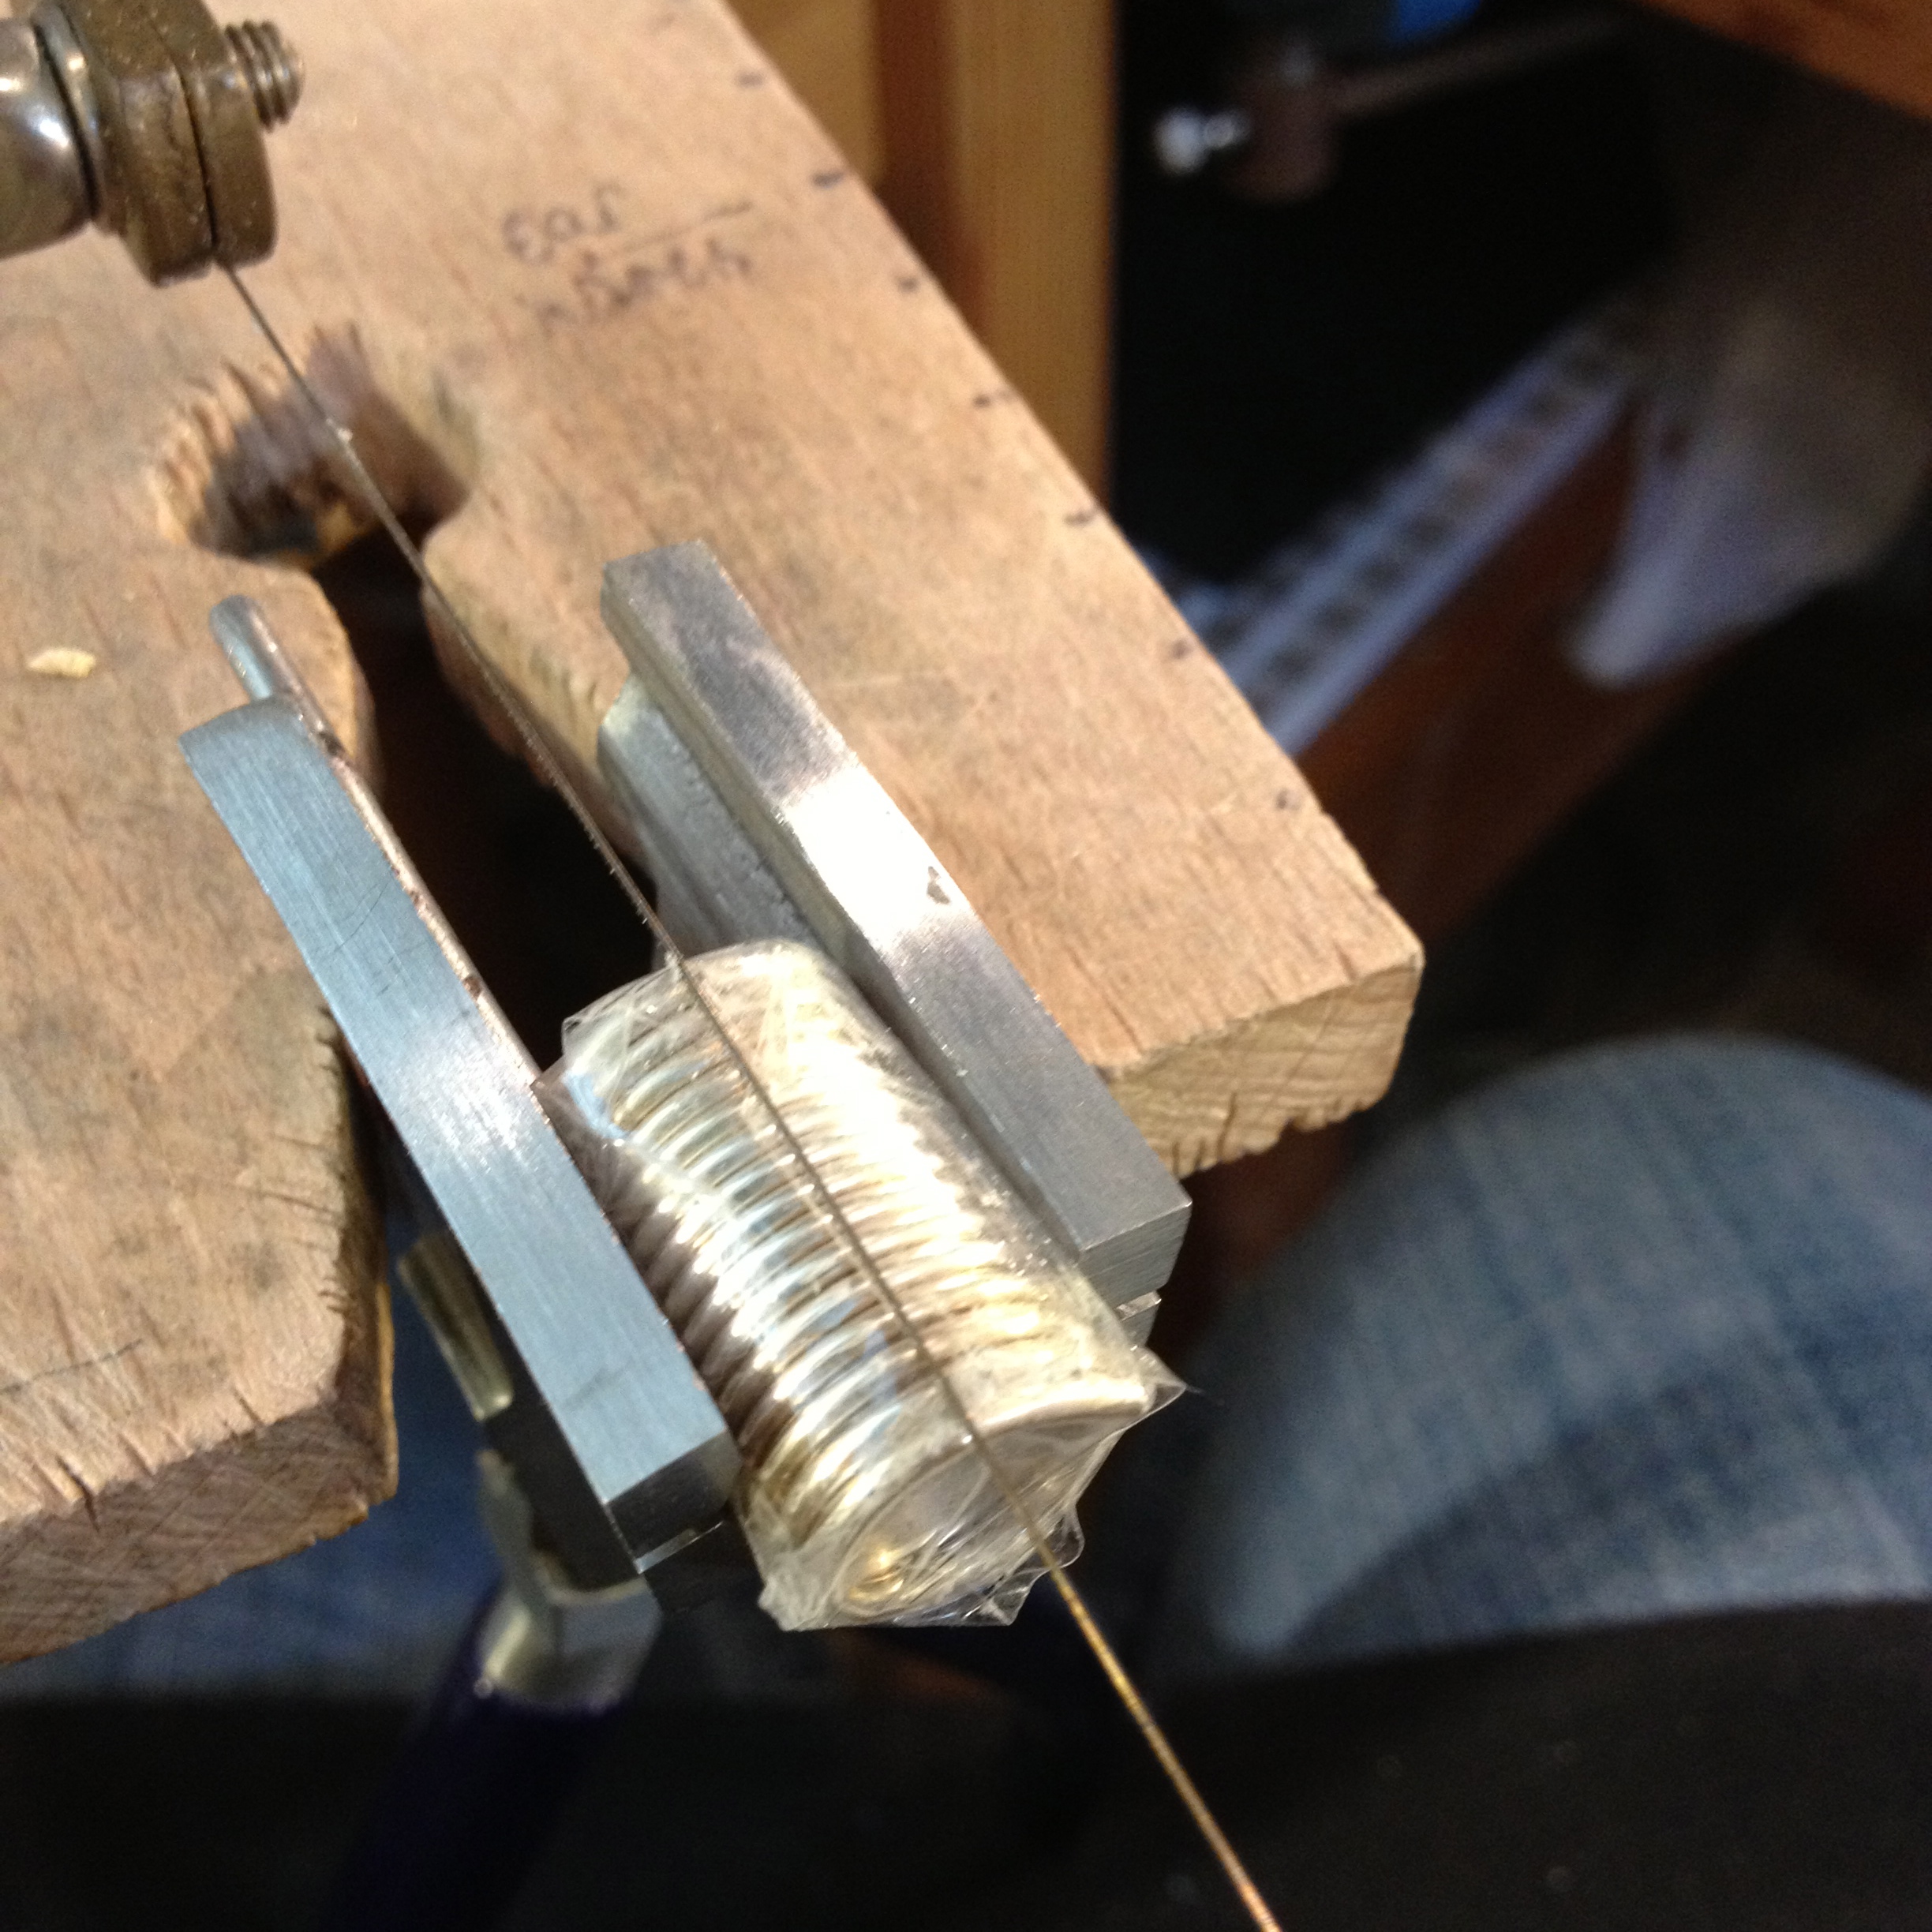
Make the coils and tape them.
Place them on the edge of a wooden block or table.
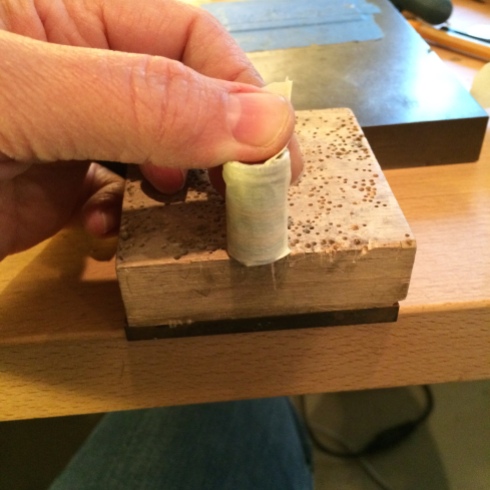
And saw them.
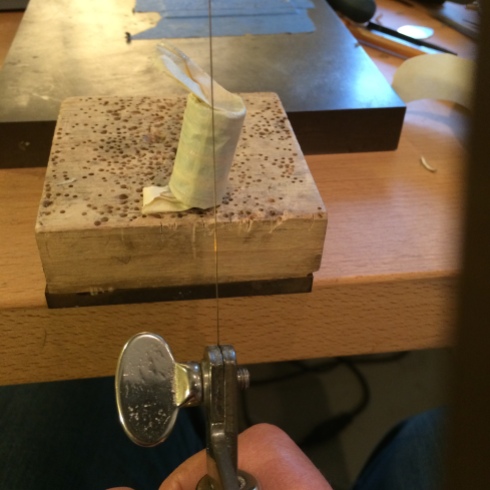
O.K. so I couldn’t hold the camera and the coil, so…
Now don’t laugh because however simple this seems to you I just didn’t ever think about putting the coil over the edge of a wooden block. I did it every other way imaginable, but…
O.K. so you can laugh.
It’s not actually as awkward as I make it look in the video because here I’m using a very large diameter coil which has made it a little wobbly.
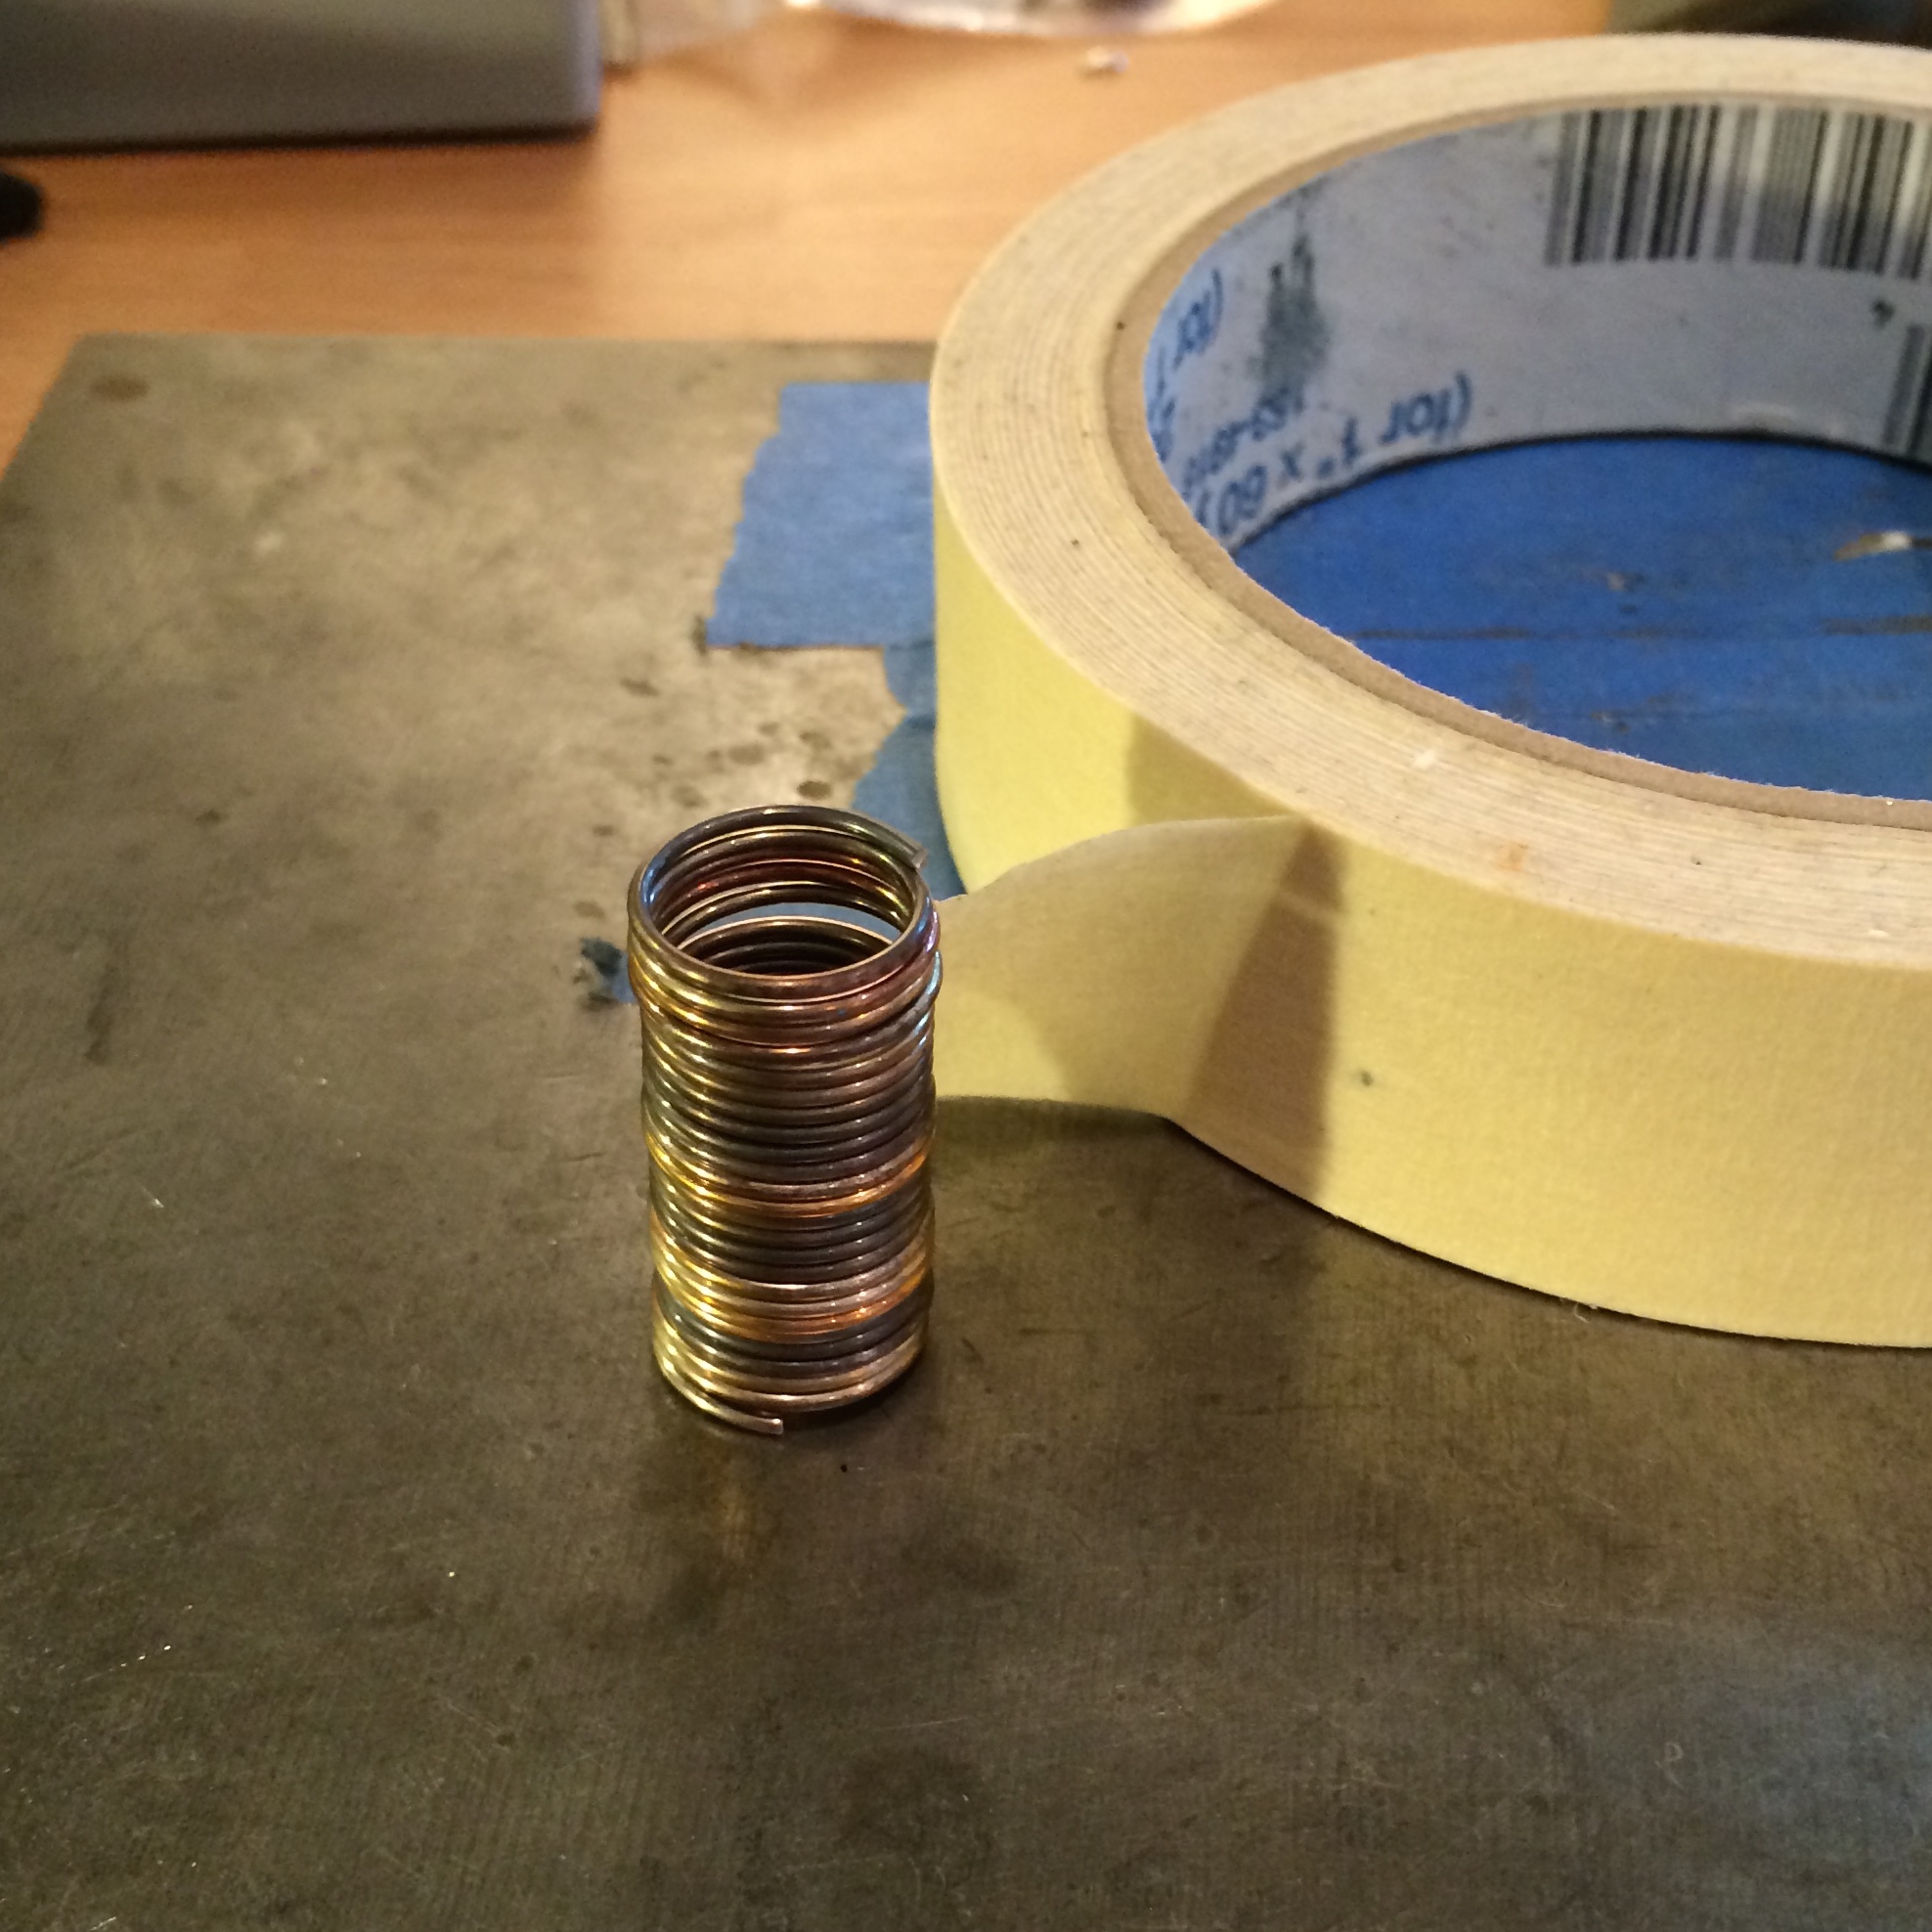
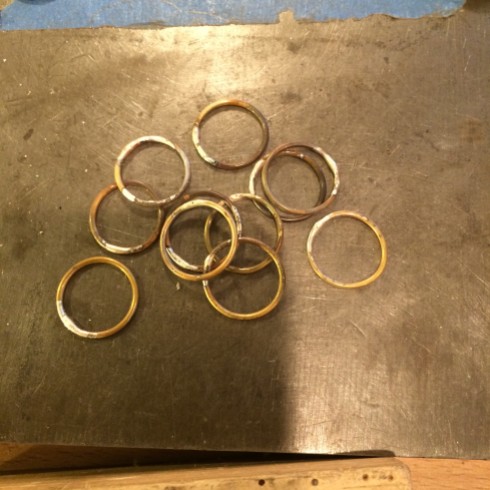
Smaller coils cut like butter.

(These coils are brown because I annealed the wire first.)

Here’s what I did with mine…

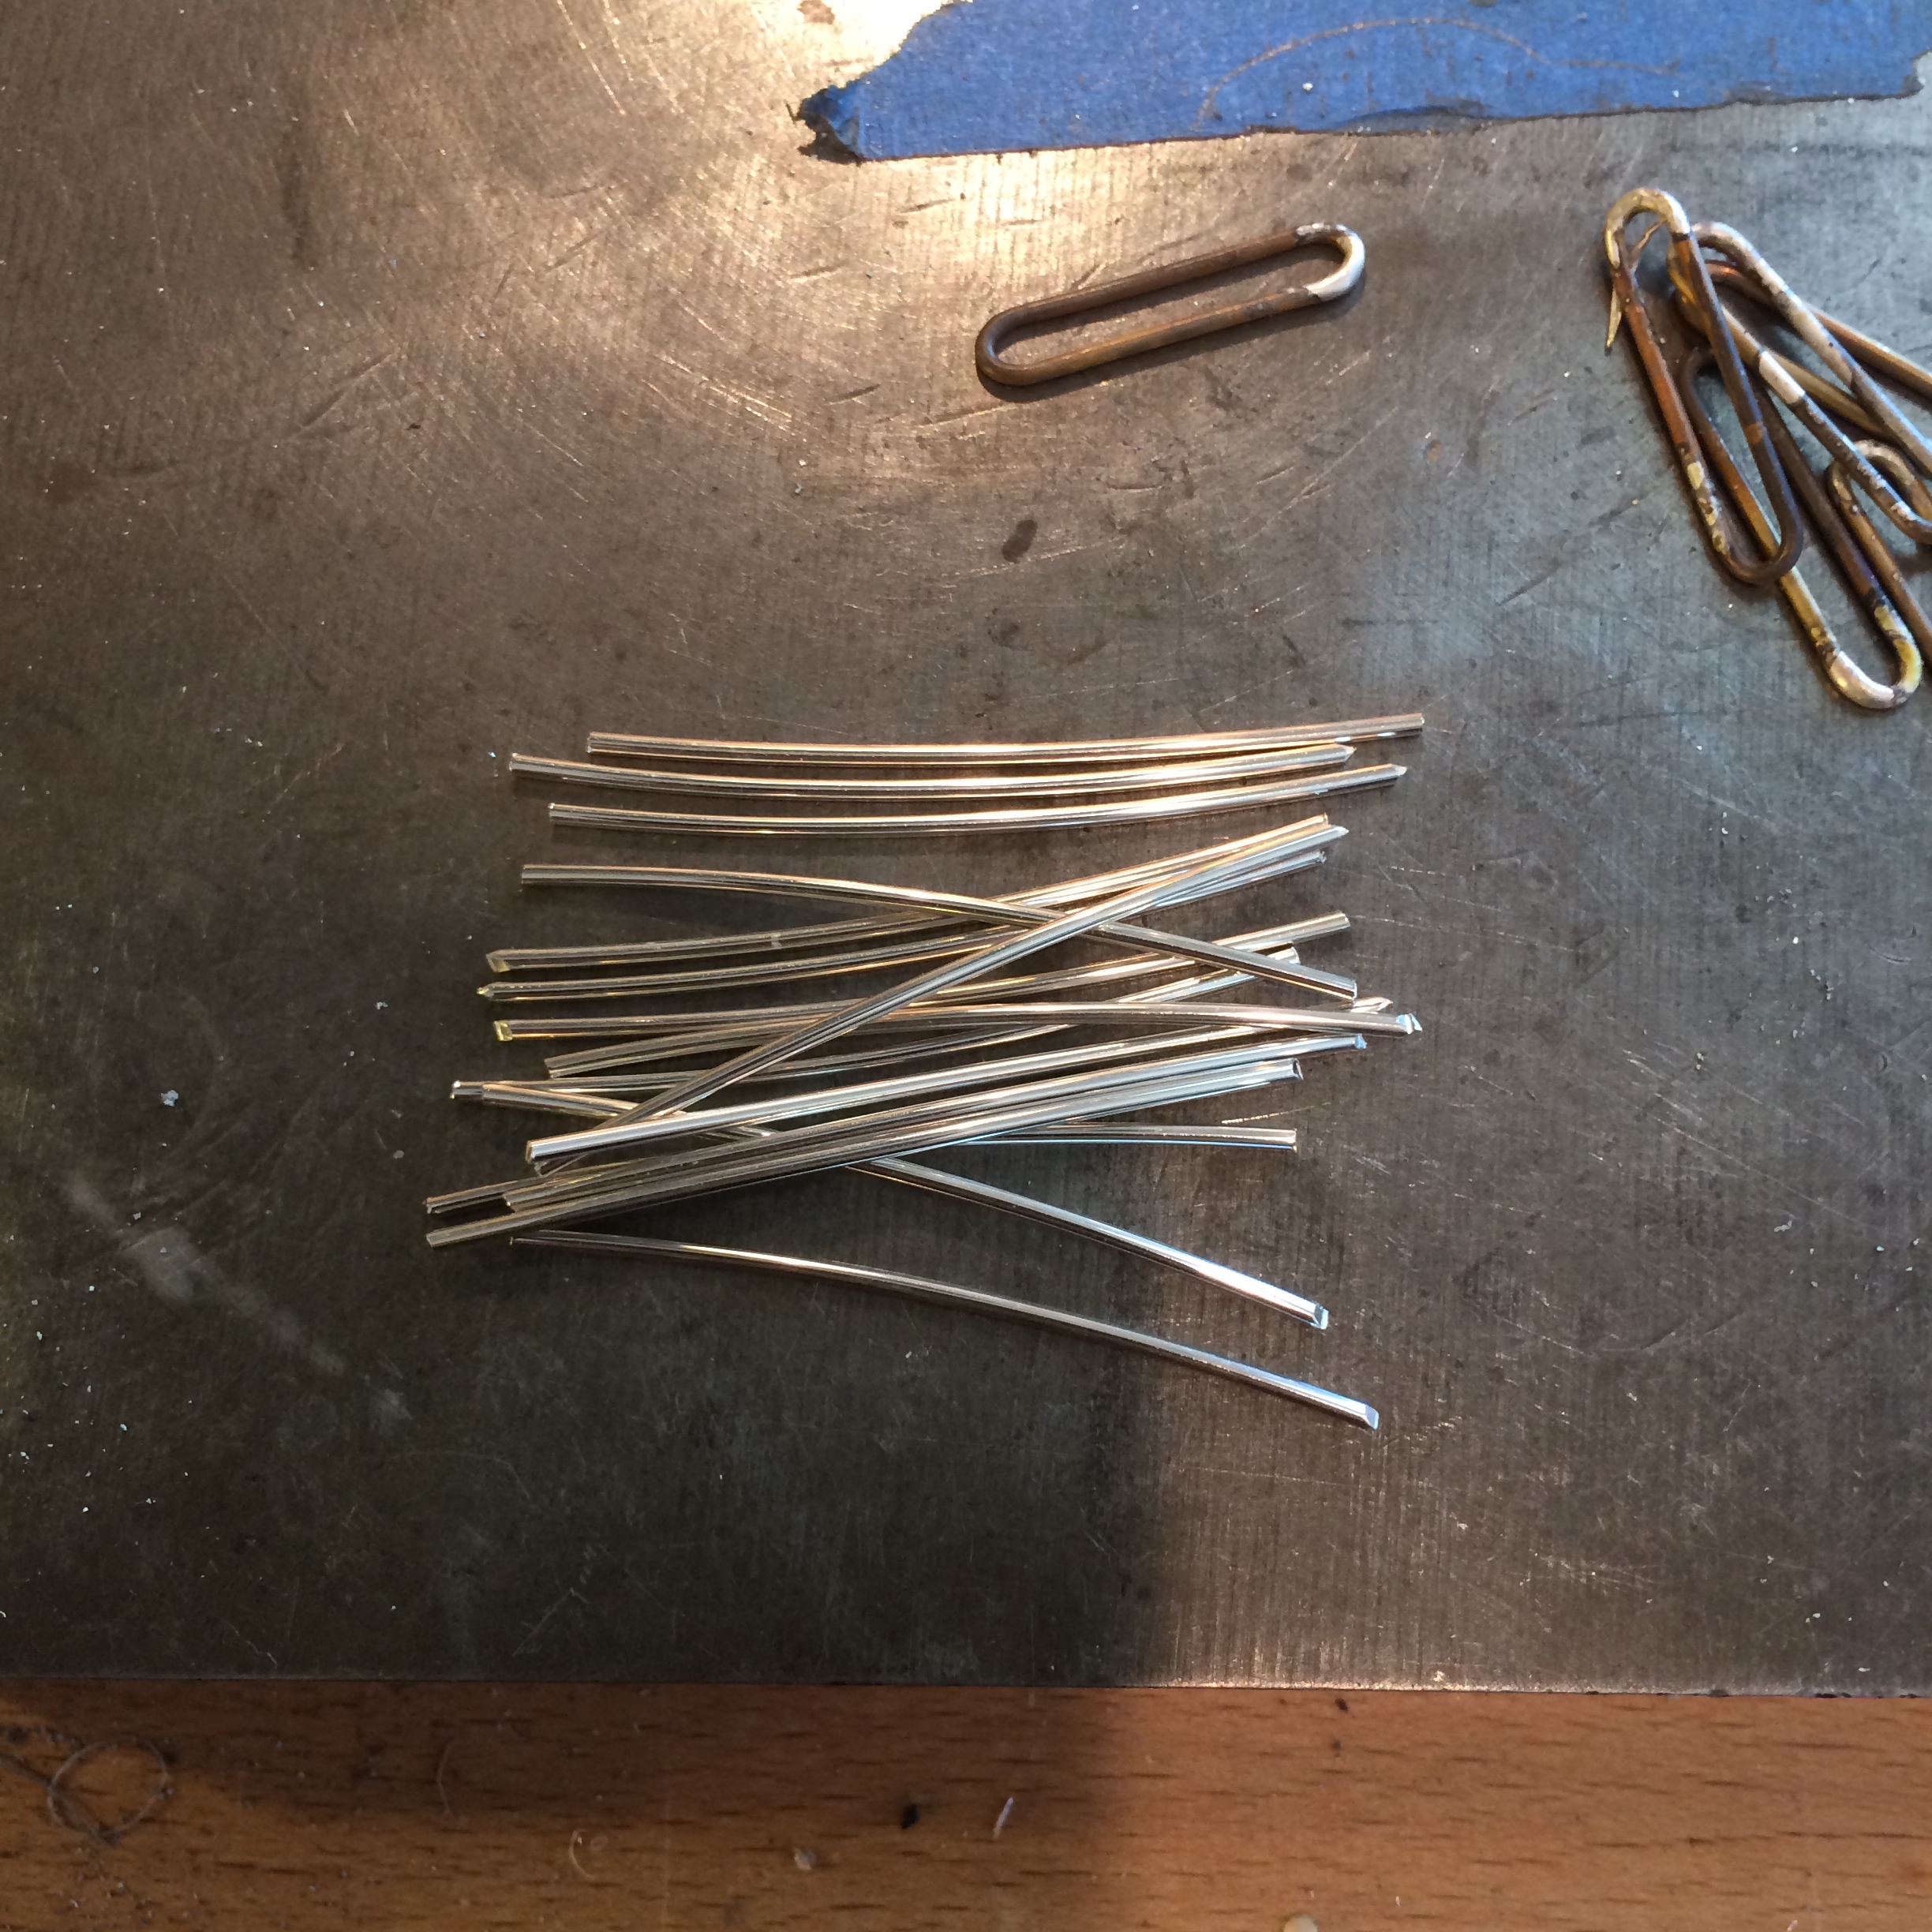
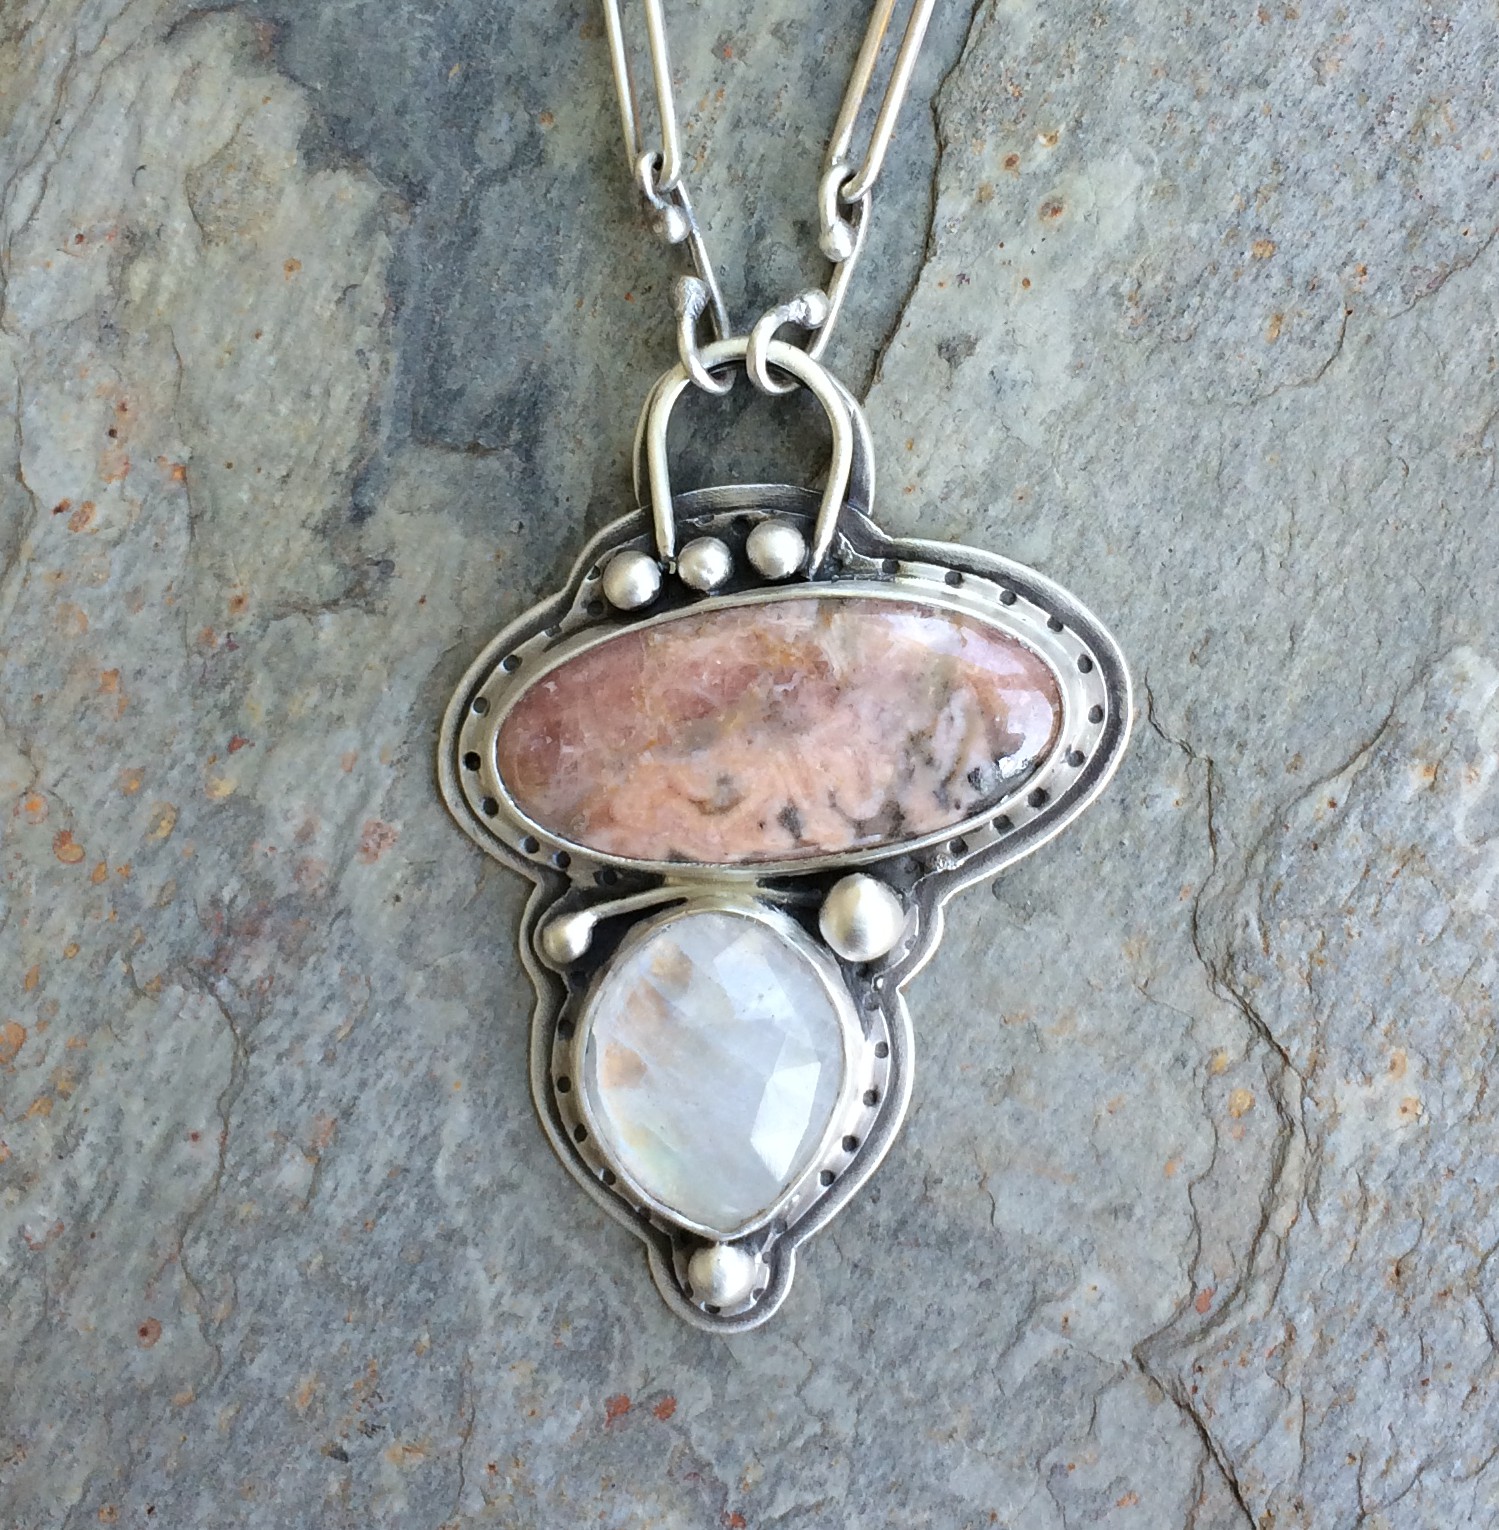
16 x 10.5 mm 18 gauge ss wire jump rings.
Soldered.
Then stretched on round nose pliers.
Trying as best as possible to keep them uniform in shape.

16 x 1.5″ lengths of 18 gauge ss wire.
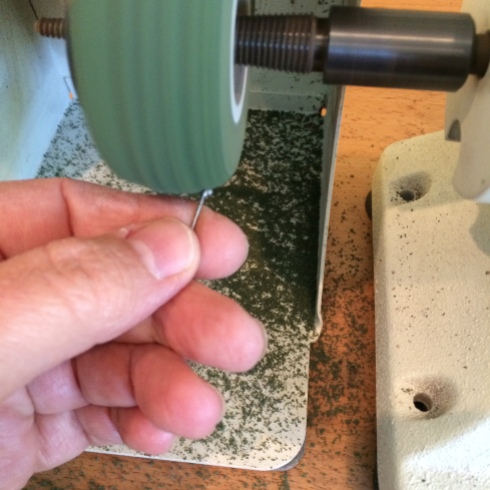
Ball up the ends trying to maintain a uniform length.

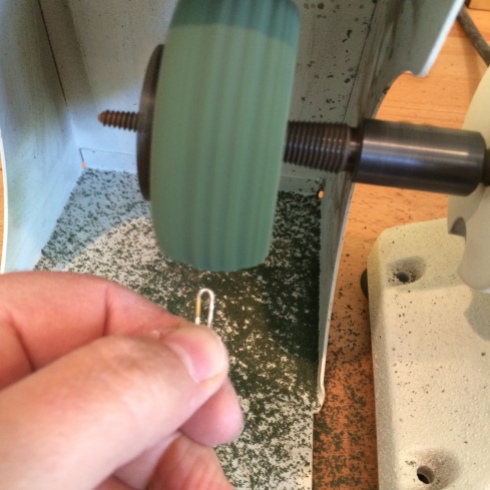
Buff off the roughness of the ball.
Buff down the soldered area of the links.
ALWAYS use safety goggles and a mask.
Bend the balled up lengths.

And attach one of the links to either side.

You might need to pry open the center of the link to get the ball through. If you do, make sure you re-form the link.
Close the ball completely so that the link doesn’t move out of position.

Now you can complete the chain.

Until you have the length you desire.
To make a clasp cut a 1.75″ length of wire and ball both ends as before.
This time just bend one end the same as the others and shape the other end into the clasp end.
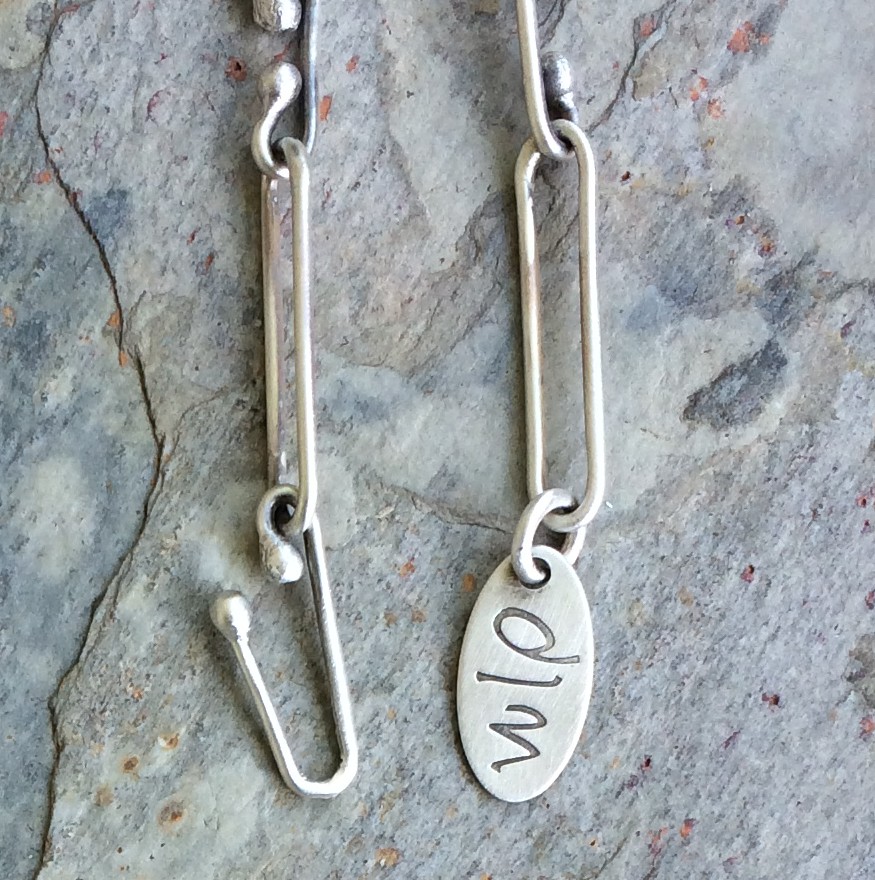
Rhodochrosite and Moonstone.
🙂

–
–
–
Your chain (in that magazine, you know) was what first led me to your blog, and now I’d be happy to look at your chains all day. But I will keep on reading because you are funny, inventive, and certainly helpful. Thank you.
As for me, I could wire-wrap all day (but don’t usually). However, you know that jump rings give me the heebie-jeebies. Long ago and luckily, I was warned that the Pepe would only lead to grief. I suspected that I wouldn’t ever be able to get the right grip on that vise thingamabob, so again I saved myself that expense. I could afford a giant pack of wooden dowels, so I did try sawing rings that way– and frankly, it’s a royal PITA (and a waste of wood). Since I already have the blue tape, though, I’ll quit worrying about sawing off a finger and give your back-to-basics technique a go. I really do need to solder some giant jump rings, and they won’t hold if they aren’t saw-cut. Thanks again.
And now I know how to keep my silver ballpins from looking lumpy, too! (Will just have to finagle the cheapskate’s version of another tool.)
Ohhh…so many memories. I got the Pepe Jump Ring Maker a few years ago. After about a week of no success, I set it on a shelf and didn’t want to touch it anymore. Then my DH decided he knew how to do it except he even had a hard time (go figure). Now I just use the mandrels and cut the rings with my flush cutters. After watching your video, I will try that now. Wish I had a buffing machine:-( Thanks for the tutorials. You are the greatest!
I’m so pleased to hear that your husband had a hard time with it also, although I’m sure it did nothing for his pride 😉 Sometimes we need all the validation we can get that we’re not the only ones gadget challenged. A dremel with some polishing bits will do just as well as the buffer. I was thinking of showing all of my favourite tools in one of my next posts.
Yes! Favorite tools, please.
I, too own the jump ring maker and it does come in handy – at times. But most of the time I use good ole knitting needles as mandrels and warp them by hand. They come in metric sizes, which makes them awesome. Most of my coils I don’t bother taping them, except the silver ones, they can be a bit feisty. I just clamp the coils in my little vise, gently, but firmly and cut them with my jewelers saw. Works very well, although bigger sizes are tricky in thinner gauges with that method. That hand-held gadget sounds nice on paper, but has a distinct pain in the rump look to it, so I never even bothered with that.
Since my cheap little vise flakes paint, I line the inside of it with several layers of masking tape for some cushioning. Hope that helps!
Man! I’ve done the vise thing also. More than once as I was determined to make it work. Never had the luck, or the skills, you have. If I hadn’t bought the Pepe I would be using knitting needles also as they have one of everything, and then some.
Nice to hear from you again 🙂
Yes, I was also elated when it wasn’t working for him either:-) He was a design engineer mostly with all kinds of construction vehicle engines. He’s been retired for about 7 years now. I like the idea of seeing all your favorite tools.
There’s a saying in Swedish that goes something like “all ways are good but/except for the bad”, and somehow it comes to mind always when making jump rings is discussed… I’m happy with the combo of wooden dowels and soft-grip vise (with some tape added if necessary). Wooden dowels come in the shape of flower supports, several sizes — or any wooden stick that is even! I drill a hole in one end and start the coiling from that, then I snip off the end stuck in that hole and slide the coils to the other end, where I saw a slit in the wood (and this can be re-used). This I clamp — coil and dowel, or just dowel — to my soft-grip (but inexpensive) vise, and then I can saw with the coil supported by the wood, and I only have to keep the coil fairly steady on the immobilized dowel. Fairly pain-free, as long as I stick to silver or copper, but the 1.5 mm bronze wire has me all sweating and reaching for cutters… And it took me a lot of time and research to get there — everyone has their favorite method — I was sure the “from the inside” one was amazing until I’d tried…
Another contraption I found to be useful all by myself is an one-hand soft-grip screw clamp — not for jump rings, but for sawing. At least for a bit longer stretches, but it depends. You don’t have to grip the metal so frantically with your other hand, and can relax and saw (I have a jigsaw pin, not an ordinary jeweler’s bench pin). I went shopping to the hardware store this summer…
That chain looks so great with your pendant!
One of my favourite things is to see all of the different ways people do the same task. That’s why I always check out things even if I know how to do them, because often it’s the small things that help the most. Otentimes it involves a lot of smacking the head that I hadn’t thought of it myself 😉
I know it’s better late than sorry, but this is super late. 😀
I use heat-shrink polymer tubes to hold the coiled wire together while I cut it from inside. The shrunk plastic holds the pack very well, and there is no sticky residue like what you get with any tape. Do try that out!
That sounds interesting. Thank you!