Here’s a little ‘how to fix it’ for when something decides to fall off your almost completely finished piece of jewelry so that you don’t need to pull your hair out.
The subject of this video series.
NOTE
You can watch these videos on YouTube, but will have to come back to this page to find the next in the series. I do this as often I forget to mention things in the videos and will write notes to accompany them. Because of this they are not stand alone videos.
Optivisor – riogrande.com – #113214 – This one comes with four lenses. You can chose to buy the optivisor and buy just one sense.
Sticky wax – riogrande.com – #700187 – NOTE: There’s lots of sticky wax out there, this is just the one I have. Fair warning – there’s loads of it in the box and it will probably last you a life time…
You can find a selection of flat headed diamond burs – HERE
–
NOTE: Some stones are more delicate than others and you may be more likely to scratch the surface of them if you’re not careful. I’ve found that, for whatever reason, the dendritic agates are fantastically forgiving…
–
If the stone you’re trying to remove is exceptionally thin (as the one I’m using is), or is delicate any way, you have to be really careful when you press on it with the wax stick so not to crack it.
This video series is really for anyone who wants to see my thought process and particularly the soldering bit in its entirety.
So, you’re duly warned and might want to skip it if the tedium of it all will get to you…
The stone I use for this show and tell is Turquoise and is also round so the piece turns out slightly differently from the one above. You’ll get the gist however.
–
MATERIALS
A 12 millimeter-ish round-ish piece of Turquoise or other stone.
A smaller 5 millimeter-ish complimentary stone.
22 gauge fine silver sheet for the base.
23 gauge fine silver sheet for the leaves.
Some 18 and 16 gauge fine silver wire.
–
TOOLS
You’ll find a list of the tools I use and their links under each video.
I don’t endorse any particular tool, nor recommend that you use them. They are just the tools I used.
–
NOTE
I keep all of the videos here on my blog. If you click to watch one on you tube you’ll have to come back here to find the next one. I do this as sometimes I feel a little more explanation may be needed and so I write notes to accompany them. As such they aren’t really stand alone videos.
–
1
This video has a small glitch in it around the 3 min mark when somebody texted me or something. Sorry ;(
Note: It’s best to anneal any silver you intend to form first.
–
2
Now that the leaves are annealed I can actually squeeze the ends together and snip at the same time.
You don’t have to use fine silver. I prefer it as it doesn’t tarnish as sterling silver does. Bear in mind, however, that fine silver is softer that sterling so anything you want to hold its shape, like cuffs etc., will distort more easily.
I am a very visual person so I find that I’m constantly using my tweezers to move pieces around etc. Even if I’ve made a drawing I like to get an idea of how everything will look together. Sometimes you can’t get this from a drawing alone – unless you’re one of those super accurate fine jewelry making drawers, in which case you shouldn’t be watching these videos…
Here is a photo of the necklace I refer to in the video which uses the leaf stems as prongs and has the 50 plus pieces.
–
3
When I make a bezel collar I find that the combined thickness of the overlapping bezel wire gives enough extra length to ensure that the cabochon fits just right. I cut the wire a millimeter or two longer than where I mark it with the pencil just as an added precaution. Often times, however, I end up snipping it back down to the pencil line. If you are using a very thick bezel wire this will still work for you, but you will have more wire to snip away. It’s just trial and error with the type of wire you prefer to work with, but the principle is the same. It just gives you a good starting guide of where to snip and if you wrap the wire around the stone correctly you should have perfectly matching edges to solder together.
You have to make sure that the bottom of the bezel wire is flat to the block and that the sides are perpendicular and not bent inward, or outward, at any point along its circumference for your bezel join to work properly.
Although there are other companies that will recycle your scrap silver I send mine to riogrande.com
You can find their scrap programme at the bottom of their page under Rio Grande Services & Brands
–
–
5
This is a long one so if you want to watch it go get yourself a cup of coffee or a stiff drink of some sort and settle in for the ride as I will now attempt, before your very eyes, to solder all of the fiddly bits on. Sometimes it works, sometimes it doesn’t, but with practice and patience you too will be able to do this and probably better than I do…
Some notes:
Don’t tell anyone, but I rarely use a proper file.
It looks bright enough in the video, but it was pretty dark from my angle and I couldn’t see properly.
I had two sizes of balls. Small ones for the oval pieces and slightly larger ones for the leaves to give it more interest.
I have several pairs of tweezers handy so I can swap them out as they get hot.
Often the pieces won’t stand up on their own as the small piece of solder I’ve placed on the bottom form a slight ball. This is why I put them on individually instead of soldering them all at once. If I can get them to stand up on their own I would do it all at once. As it is I tack them into place first and then give them a good once over at the end.
You have to keep your eye on everything at once so that you can see if something is going to melt. By moving my torch in and out I can generally avoid the other pieces, but this is also why you have to make sure you give everything a good going over at the end. I generally do this by changing up my torch head to a larger one because it can cover more area at once. If I’m careful I can get all of the pieces to settle at once and not have to keep working one area at a time. Seriously, it’s just practice and knowing where the heat is.
You can do it 😉 It’s like one day you can’t do it, you can’t do it, you can’t do it and everything melts and you’re going to give up and take up crochet, then suddenly voila a shift in the fabric of time and you won’t look back.
It’s difficult to see anything doing anything in this one, but it is short and sweet – thankfully 🙂
–
8
It wasn’t worth it to keep re-heating and moving the pieces around to fit the stone in as it was such a small slither of silver to take off, but I think that first cut off disc was blunt and wasn’t doing anything.
The stems did fit into the leaves more easily than in my previous necklace, but it turned out that I still found it easier to tack the tip of the stem onto the leaf and then push it in to get a better fit before continuing to solder it in place. By cutting the end of the stem first rather than before soldering it I could make sure that it was be the right length to travel up along the leaf and be long enough to continue up as a prong. If I hadn’t cut it first I couldn’t be sure that each prong would be the same length.
Cut Off Disc – Rio Grande #346080
–
9
I just sand the tips of my tweezers with the sanding disc in my Foredom. Use a mask if you do this.
I know I seem to be fussy about that small piece being out of place, but I think it’s good practice to try to make things as best you can.
This video shows you just how fiddly it can all be. It was even annoying me. If you haven’t got the patience or really don’t want to make things like this you might still pick up one or two things from seeing me struggle – if it’s only to not do it this way.
The piece wasn’t entirely clean which is why the flux went a funny colour.
–
Cup Burs set of 12 – Rio Grande #344397
–
12
Here I use the rubber end of the hammer so that I don’t mark the silver leaves.
–
13
This video stops short as someone phones me, but it’s at the end anyway. The only thing I had left to do was to go over it all again to make sure everything was completely soldered.
–
–
15
I propped up the leaf at the end because if the solder melts again the leaf is still in place and won’t just drop off.
–
16
Generally annealed wire is easier to wrap, but this was still a little awkward.
Warning – the sticky wax in my link comes in a huge packet which will last you for the rest of your life if you’re just using it for this purpose. You can probably find similar products elsewhere. It won’t always get out cabochons which are really stuck in a setting so don’t rely on it unless you’re pretty confident it will work.
Sticky wax – Rio Grande #700187 – Warning. This is a lot of sticky wax. You won’t need to buy any ever again.
–
Black Max – Rio Grande #331053
Yellow 3m wheels – Rio Grande #332581
Very Fine Buffing Wheels – Rio Grande #330541
Bench Lathe – Rio Grande #334016
–
18
Finished!
–
Here it is
I know it was a long one, but I hope you got something out of it – even if it’s only that you never want to make one.
Not my fault really as I don’t know anybody called Keirsten and so don’t have much opportunity to say it.
As always this is just a show and tell. I’m not even sure if I wanted to show this one as I think it’s really boring. You can definitely see how I go about making my jewelry though. I was being completely serious when I told you that I wing it. Sometimes I follow a drawing, but more often than not I just place things here and there deciding as I go along if I like it or not.
And yes I mumble and um and ahh to myself also.
It can be a little lonely in my studio at times so if I’m not talking to the radio man I’m talking to myself…
:/
So that’s the design aspect of it. The technical aspect is to simply work on the fly using whatever tools I have hanging around that I think might give me the result I’m looking for. One day perhaps I’ll go to jewelry tool school and figure out what they’re really made for.
I’ve always hated going to sites like Rio or Otto Frei and seeing fantastic looking tools and not really knowing what the hell you do with them. Sometimes they give you a little video how to on them, and Youtube is pretty good for finding things out, but I hate knowing there’s just the tool out there that will make my life easier and not knowing about it.
My world can be a dark, mysterious place sometimes.
Moving on.
I’m going to try to make another of these…
…for Keirsten.
–
Please remember.
I am just a somebody muddling through. This is the way I do things. I am a wing it, try it, do it wrong, try again, sort of person. I do not maintain that I know what I am doing, only that I am trying to do it. Please feel free to enjoy my discoveries but follow your own research for professional advice and to perfect your skills. Above all, enjoy. Life is short.
Also.
The links to the tools and materials used are only examples of the ones I use. There are many different types available of the same tools, some better than others and some less expensive. If you are beginning your jewelry adventure, please don’t just buy the ones in the links here. Research until you feel comfortable that you are purchasing the right tool for you.
–
I got these little pieces of turquoise from turquoisesusa on Instagram. I have bought some in the past from aztrading.madison on Instagram also.
–
Warning: This video is just like watching silver melting 😉
–
I felt in this one that I didn’t really explain the silver stretching part properly. You’ll find that just stamping on one side of the silver lengthens and distorts the strip. You have to balance it up by stamping or hammering out the opposite side. If you want the melted part to stay as it is and not stamp it as I did, do all of the texturing before you melt the edge.
I keep checking the back of the strip as I form it because I don’t want to completely mess up the texture. You’d have to be a whole lot more careful if you want to have a good smooth finish 😉
–
–
I was trying really hard not to use up my acetylene, but I was going nowhere fast by not having enough heat on the piece to solder it. The idea of taking that bottle back to the shop really kills me…
–
Just so you know I was joking when I said why do it the proper way 😉 that’s just not as much fun as making things as difficult as you can…
You have to be really careful when you bend the tube as I’m doing here as the silver can easily split. I try to do it really slowly and gently.
–
–
When I say I’m going to buff the ends to smooth them out I mean I’m going to use the coarse scrubby bits that I used before – HERE.
–
–
Brown (thicker) cutting disc – Rio Grande 337217
Thin dangerous diamond disc – Rio Grande 346080 There are a lot of different ones of these so you might look around.
Cylinder bur – Rio Grande 343029
Grinding wheel – Rio Grande 332189
Smaller knife edge cutting bur – Rio Grande 348520
–
–
–
Dawn Gill you’ll be pleased to know that I just bought myself a new honeycomb soldering block as mine’s now in five pieces 🙂
Always wear a mask when buffing even if you’re not using a patina as the small fibers from the buffing wheel get everywhere.
–
And voila!
A turquoise cuff.
So all said and done it’s nothing like the original, but the way I made it is the same – somewhat. I prefer the originals myself although I think that’s because I was surprised by this one’s size.
Here is another series of videos showing how I made this silver cuff with Amber.
They come in bursts so that no one is ever that long, except for one I think, but maybe you’ll forgive me for that one.
Sometimes the rambling gets away with me…
They’re just work in progress videos and not really intended as tutorials, but if you glean any snippets, even if they’re what not to do, I think my work here is done 😉
–
Disclaimer
I am just a somebody muddling through. This is the way I do things. I am a wing it, try it, do it wrong, try again, sort of person. I do not maintain that I know what I am doing, only that I am trying to do it. Please feel free to enjoy my discoveries but follow your own research for professional advice and to perfect your skills. Above all, enjoy. Life is short.
Also.
The links to the tools and materials used are only examples of the ones I use. There are many different types available of the same tools, some better than others and some less expensive. If you are beginning your jewelry adventure, please don’t just buy the ones in the links here. Research until you feel comfortable that you are purchasing the right tool for you.
–
Notes:
In this first video I call the necklace a bracelet so you can see that we’re off to a good start…
And please excuse my clothes! I don’t know about you, but I just use my old tee shirts and jeans, etc. to work in the grime of the studio and apparently this morning I was also playing with the cat…
Cabochon from New Stone Age Cabochons on Instagram – HERE
Note: I use fine silver bezel wire so this is not for you if you need sterling.
I didn’t show making the components in this video as you can find out how I do this in the Cheetah Jasper Necklace show and tell – HERE
I typically use a #0 head on my acetylene/air torch. I change up to a #1 head when I want a little more overall heat and to not concentrate on smaller areas.
Wire doesn’t crack or snap! It seems that sometimes I get a little bored with using the correct terms. It can however break off when you push on it if the heat from the flame has weakened it.
I mostly pick solder when I’m soldering small pieces. When I solder balls onto a piece, however, I use the ball as my ‘pick’. At the end of this video you can see that I take the balls to the pieces of solder and heat a small blob onto its bottom. I then take that back to the piece I’m working on.
A phone call interrupts this video and cuts it short.
–
Notes:
This is the long one…
I find lifting the piece up off the soldering block allows the heat to flow more evenly around and under the piece. These titanium strips do the job nicely as I read once that they are not a heat sink. You can find them – HERE
I heat around the piece until the flux turns a sort of powdery white. This is the point where the water has mostly evaporated from the flux and you can then move your flame closer to the piece as the pallions of solder won’t bounce around. You can see that the flux then starts to get a little gunky and then glosses over slightly. This stage happens just before the solder will flow and is where I lift the piece up with my pick. I do this because it just seems to give the solder that little extra nudge that it needs to get going.
I use Wolverine flux. You can google it as the price seems to change from site to site. I take a small amount of it out of the main jar and mix it with distilled water in a smaller jar. I’ve used a few different fluxes, but for some reason I really like this flux. The solder stays in place and doesn’t bubble around even though I dilute it more with water. I also spread it over all of the silver, even those places I’m not directly soldering on. I think this is mainly a superstitious act as a prayer to the solder gods. Don’t judge me…!
I bend the tips of my tweezers so that they pick up the small pieces more easily. It appears that haven’t done this yet with my new pair.
I concentrate on soldering, or tacking, one piece at a time. Because they’re not fully soldered I can move the pieces around more easily if I want to at this point. Once I get them all into place I change up the torch head for a larger flame as now I want to make sure the solder flows. I hold down each piece with my tweezers, or pick, and you can feel it ‘relax’ into place as the solder flows then I take the heat off it and after a fraction of a second I tap it to make sure it’s secured. You have to wait just that tiny bit as if the solder is still hot the piece will move even though the join is good. I’ve been tricked into thinking I haven’t soldered something more than once because I’ve nudged the piece before the solder has hardened. Once I think that everything is fixed in place I move the heat around the whole area this time to make doubly sure that everything is evenly soldered. You have to keep a good eye on it at this point as the larger flame will bring everything up to the same temperature more easily and this is when the silver can melt and give the pieces more opportunity to move out of place. Note: I only solder this way if I’m soldering a lot of tiny pieces at one time. If you’re just doing a simple solder you don’t have to go around tapping the piece as you can see it flow 🙂
Usually the solder from the bezel join takes care of attaching the ends of the stems. If not I will at some point come back in and place just a tiny dot of solder to secure them.
–
Notes:
Yes. Sometimes it still amazes me that I’ve managed to do it!
To make sure all the pieces are absolutely secure I scrub them with a toothbrush and take the opportunity as I do so to clean it up more with Penny Brite – HERE
–
Notes:
I have a few of those stainless steel condiment cups that I like to use for holding small items and it was handy for mixing the No-Flo.
I get a little sidetracked here with the whole plaster mixing thing. These are just the sort of questions that take up room in my brain and distract me from the real issues at hand… sorry.
I placed the top piece on the back plate a little too soon. The top half had melted, but I should have given the bottom half a little longer this is why it took longer for the solder to flow on one half. I also use too much in the center. Usually I would have soldered both sides and then turned the torch off to place the pallions in the center, but was trying to do it all at once for the video. Well that’s my excuse anyway 😉
–
–
Now, don’t hold your breath on these next videos making any sense whatsoever. I’ve only made maybe four or five cuffs before and it’s like reinventing the wheel each time. Maybe I should start taking notes…
I also tend to jump right in when perhaps I should pay more attention to what I want the end result to be before I actually begin cutting up stuff.
–
Where you can literally hear the painful process of my brain whirling. It’s really not that hard Deborah…
Contact paper – HERE – this stuff will last you for five hundred years or more.
–
Notes:
They’re not pieces of wire. They are silver sheet.
You have to experiment with which torch head works best. The key is to heat it to the point of melting and not leaving the flame in one spot. It doesn’t really look as though I’m doing anything to it here, but it improved on the first effort.
–
Notes:
Warning. Skip this one if you get annoyed easily. It’s short, but painful.
This is where I had actually figured out how I was going to make the cuff, but then completely forgot when I came to videoing it.
There’s a hole in the end of the strips as I’m going to rivet the two pieces together.
In case I’m not clear (hard to believe I know) the sterling silver may over time tarnish and so the nail polish is a barrier to that.
It is Lexi Erickson’s tip. I watched a couple of her videos years ago which were really helpful when I first started and I always remember the nail polish over everything 🙂 I worry a little bit about the polish discolouring and always mean to research it. Perhaps it’s high time I do that now.
Check out her videos. I can assure you they are a lot more comprehensible than mine 😉
If I find that a sanding disc won’t fit I use a flat bur to clean out the bottom of the bezel.
–
And so that’s it.
Again it’s not really a tutorial, but more of a show and tell because you can’t really teach if you’ re making it up half the time.
This past week I gave myself a Pulling Teeth Challenge because that’s just what making jewelry, or anything else really, felt like.
I think I’ve been a bit down for a good while just recently and then, all of a sudden, the sister of one of my good friends died. Just like that. She was one year older than me. I thought I was o.k., but going to the funeral did me in completely, you know the whole death and family stuff, and I still can’t comprehend how my friend or her family feels especially losing someone so young.
I mean they’re just there, and then they’re not.
It was a bit touch and go for a while there and, let me tell you, I was almost on the brink, but you’ll be pleased to know that I think I’ve finally pulled myself out of it.
Hearing about everyone else’s ‘dry’ spells on fb and Instagram, due to depression or anything else really, helped out a lot also.
Put things into perspective.
I knew I was in trouble when I was sitting at my bench and it was all I could do not to just lay my head down on my steel block. Giving myself the challenge of going into the studio every day and making myself start and finish something and then post it on Instagram even though I didn’t feel that I even had the energy to close a jump ring together let alone solder it, started to bring me out of it and on the day after Thanksgiving I thought I’d have another go at making a video.
Just for jollies.
Well for jollies and for the fact that the act of committing to something seems to have been the key to snapping myself out of it. Although it must seem as though I’m always vague and slightly confused I was definitely dragging at the beginning, but by the end I simply couldn’t take myself that seriously especially when I listened back to how awkward I am.
And my god the words! Why can’t I remember the words.
I think when my brain is on the go the words just aren’t always that relevant.
Sorry words. And sorry to those of you watching that might have liked some words that could have actually shed light on what I was trying to explain.
So that said, this new ‘How To’ video series is a bit rough and ready although you can thank your lucky stars there aren’t near as many to get through.
See. Bonus right there.
I do want to say that I will be the first to agree with any jewelry maker who’s been properly trained and who gets upset with someone, like me, who tries to ‘teach’ other people how to make jewelry.
I haven’t been trained. I just get through.
Think of this blog as just a thinking out loud platform for me to share with you how I do things. Not for me to tell you how you should do things. Some things I do quite well, some things not so well, but all of it is meant well and in good faith and for you just to have a go yourselves.
That said here’s my disclaimer.
Please remember that I am just a somebody muddling through. This is the way I do things. I am a wing it, try it, do it wrong, try again, sort of person. I do not maintain that I know what I am doing, only that I am trying to do it. Please feel free to enjoy my discoveries but follow your own research for professional advice and to perfect your skills. Above all, enjoy. Life is short.
Also.
The links to the tools used are only examples of the ones I use. There are many different types available of the same tools, some better than others. If you are beginning your jewelry adventure, please don’t just buy the ones in the links here. Research until you feel comfortable that you are purchasing the right tool for you.
-.
And so without further ado…
For the Chrysoprase Necklace you will need.
–
Materials:
A stone
🙂
(I used a 23 mm x 16 mm chrysoprase)
Silver sheet.
(I used 23 gauge fine silver)
A 3 to 4 “ piece of silver wire.
(I used 18 gauge fine silver wire)
black max or liver of sulfur etc.
–
Tools:
pliers
saw
torch and solder
contact paper or rubber cement etc.
buffing tools
straight line chasing or stamping tool to make the leaves.
sanding tools or file
–
Video 1
Where I think I’m just going to show you the necklace I’m going to make, but then decide to explain how I’m going to make it differently than I normally do even though that’s not what I intended to do in the first place and so it’s not really very clear what’s going on until you get further into the videos.
And even then it’s touch and go…
SPECIAL NOTE: It’s ChrysoPRase, not ChrysoPHRase as I’ve pronounced it here. The word was very long. Forgive me.
How I cut my leaves to give them a more 3 dimensional look.
I haven’t shown how I make the basic leaves because I covered that – HERE – and thought it best not to keep going over things you’d already seen.
NOTE: Seriously, I did not lie to the nice snipper guy. I do not use my good snippers to cut off the ends of leaves I use them just for wire. I couldn’t find my old ones. Promise.
–
Video 4
A quickie on making silver balls. Skip if you already make them.
–
Video 5
In this one I’m figuring out the best way to make the necklace the new way and also deciding if I want to make it into a bracelet/cuff instead.
–
Video 6
The contact paper bit.
NOTE: For sawing out fine detail on a piece of silver sticking an image onto it using rubber cement is probably a better choice. I’m not sure if you can print a design directly onto the contact paper because I haven’t tried. I know some people use sticky back labels to get the same effect.
NOTE: As each piece is individual and so not exactly the same shape as each other remember to keep the pieces in their specific order as you go along. I kept forgetting to do this.
–
Video 8
Continued belabouring of the design
NOTE: When I make pieces that have a few different layers I pay attention to what I imagine the end weight will be. Sometimes the stone is heavy also. Had I used a slightly heavier stone here and just one layer of silver work I would perhaps have used the 20 gauge sheet, but because there were essentially three layers (including the leaves) and then the stone I used 23 gauge as it all adds up.
Finding my grown up words and moving on to the next stage.
NOTE: I usually run a Sharpie around the edge of the top layer of silver if I want to contour it. This gives me a good guide line for sawing. Pencil rubs off too easily and the thicker Sharpie has a good width for a starting point and I can sand more away later if I want it to be narrower.
–
Video 11
Soldering all the little pieces on.
At the beginning of this video you will hear what it sounds like when someone tries to get more than one word to come out of their mouth at the same time.
Doesn’t really work…
NOTE: When I’m attaching smaller pieces to the base I hold the attachments, leaves, balls, etc., close to the flame as I’m heating the base. This means that they’re not coming to the piece cold. Typically they don’t need as much heating as the base so you can control their temperature more by easing them in this way otherwise they may overheat and melt more easily.
MORE IMPORTANT NOTE: DO NOT BREATH FLUX IN. Quench your piece first before putting more flux on it. The heat from the silver sends flux fumes into the air. Heating the flux with your torch also sends fumes into the air, it’s just not as obvious as it looks here. Use an extractor fan if you have one or at least solder in an open, well ventilated area. I have a fume extractor which I didn’t put on here as it would have been too noisy, but even so putting flux on a hot surface as I did in this video is not a good thing.
Muddling through the next soldering part as I demonstrate to you why your piece of silver should be clean.
–
Video 13
Fitting the stone in the bezel.
NOTE: Another reason why something doesn’t solder easily could be because your flux isn’t clean also. Just clean everything. Teeth, hair, clothes, etc.. then you should be covered.
Links – cut off wheel – Rio Grande #346085
–
Video 14
Using the Black Max and the first buffing.
NOTE: Really you should wear gloves when you’re using the Black Max or any other chemicals. I have those latex free ones. I would take them off, however, when using the buffing wheel. It probably wouldn’t happen, but I just have visions of a piece of loose glove getting caught up in that wheel and taking your hand off. This is probably my tendency toward dramatic thinking here, but you never know.
You don’t need a buffing wheel, or whatever that machine is called, for finishing your piece. You can get smaller wheels for your hand piece which will do the job. Just maybe not as fast. Links below.
Small hand piece buffing wheel – Rio Grande #338130
I was trying to explain here that although the bezel wire fits to the bottom circumference of the stone, because the stone I’m using has a very shallow dome there is a lot more wire to push over to hold it in place. In this instance if you push too much of the wire over the sides of the stone too quickly the silver will likely stretch unevenly thereby distorting the fit. The stone I used in the bracelet video had straight sides and so this wasn’t as critical, but you should always rotate the piece as you push the wire over the stone so that you’re not concentrating on one part for too long..
Also I don’t know if I explained it clearly, but by pushing the stone toward the bezel pusher as you push the wire over, you are always pushing the stone away from its opposite side. You will never get a good tight fit if you do it this way. You don’t have to actually pull the stone away from the bezel pusher very much, just make sure you’re not pushing it toward the pusher. See, not confusing at all…
In case you missed it, or need to go through the torture again, here’s the link showing how I set the stone in the previous bracelet video – HERE
–
Video 16
Ceaning up and final buff.
I know it didn’t look as though I was sanding the sides of the bezel gently, but I was 😉
–
And so that’s another one done.
🙂
I went ahead and made the bracelet using the method I said I would at the end of the last video and I think it’s definitely quicker and more precise than the way I demonstrated for the necklace. Next time I make something similar I’ll experiment some more and report back, but I think you get the drift.
And here is…
Day 1 of the Pulling Teeth Challenge
Day 2
And day 3
Thank you for letting me waffle my way out of my funk.
But I thought I’d just pop out of hiding for a few minutes or so to let you all know that I’m still alive and to tell you a little bit about my mental state when I come to the realization that I’m going to have to step it up a notch.
Because I’m thinking it’s time again.
😉
I liken my jewelry making to potty training.
Bear with me now…
You know when you put your kid on the potty every darn day for a month and they still pee in their pants so you throw your hands in the air and give up on it completely. Then a week later realize that every other kid in preschool has mastered the big toilet so you try again, not expecting much, but whoa, it’s like they’ve had these alien beings invade their little bodies since you last tried and they’re poohing like champions on the potty all the time now and laughing in your face like what’s been your problem anyways…
Yeah my jewelry making is like that.
Although not quite as messy.
It comes in stages, like one day I’m really struggling and then voila! the next it’s like I’ve crossed a bridge into I can do this with my eyes closed land.
O.K. So not quite with my eye’s closed, because that would be dangerous and I could lose digits or burn the studio down, but you get my drift.
And it’s so satisfying.
You feel like champion of the world for a day until you realize that there are so many skills left to master that from here on out you’ll always need to keep your spare pair of pull ups close by in case of emergencies.
It excites me when I see something that I haven’t done before and I just know that I’ll be thinking of it for a while until suddenly, that’s it, I’m going to have to have a go even though it looks really, really tricky and my old friend, You’ll never be able to do it, turns up uninvited and leaves me struggling with, I’ll never be any good at this, dammit!, until I finally decide to give up on jewelry making altogether even though I have all those tools and gadgets and stones.
Because I’ve completely forgotten about all the stuff I can do and have done and how far I’ve come since that one day when I thought, hey, that looks like a fun thing to do.
It’s a rollercoaster I tell you.
That said, when I look at all the great jewelry out there, and see all the things that I can’t do yet, I know there are challenges coming that I can’t avoid.
So right now I’m trying to think of one of the many skills that I shy away from because I think it’s beyond me.
And I’m thinking it’s going to have to be stone setting.
Not cabochon setting as I think I have that down now, but those fiddly little, how on earth don’t you just pop out, stones.
I might well have no hair left after accepting this challenge, but it’s been on my mind now for some time, and every time I see a video of someone setting those little boogers I can’t help the stubborn in me whisper, If they can do it, so can you.
So we’ll see what happens.
If, of course, I can get past the, Nah! Why would you want to bother with that anyway, voice.
I used 23 gauge fine silver sheet, 18 gauge sterling silver wire, and 10 gauge fine silver wire.
Remember that you’ll have to accommodate for the silver around the cabochon you choose to determine the final size of the ring.
–
First up this is just the way that I make my jewelry. I’m self-taught and make loads of mistakes and don’t always do things the best way.
I’m a bit of a muddler really and so the way I do things and the tools I use are not meant to be set in stone.
The best way to view this How To is to take a looksee and see if it’s something you’d like to experiment with.
I won’t be answering the door to any subpoena’s for incorrect information.
Just saying…
😉
–
I start all of my pieces with a quick drawing to get a feel for what I’d like to start with.
Sometimes these are brilliant pieces of art work.
Sometimes not.
Here you can see that I’ve already made the collar for the cabochon, but you don’t have to do that first.
I just happened to have this one hanging around for a while because I started off with an idea for it, then couldn’t make up my mind.
I’ve got a lot of indecision on my table.
Then I stamp and cut out little pieces of silver.
Lots of little pieces of silver.
Which I then play around with on the sketch I’ve made adding some silver balls that I have laying around.
Every time I turn off my torch for the day I take out a charcoal block and use up the excess gas in the line to make balls out of the scraps I have laying around.
This way I feel as though I’m not wasting anything and the bonus is I have loads of little balls just waiting for a home.
Of course, however many balls I have hanging around I never seem to have the exact size I’m looking for.
Life can be complicated like that sometimes.
Once I’ve come up with a plan I then take a piece of 18 gauge wire and wrap it around the stone.
I try to do this loosely to give it a little personality.
Here I’ve used sterling silver because that’s what I had hanging around and so I annealed it first to make it more pliable.
If I were using fine silver I wouldn’t have to anneal it first as it’s much softer.
Once I think it’s interesting enough and balances out the stone nicely, I place the little pieces of silver on it to get another feel for it.
And then cut out a piece of the 23 gauge fine silver sheet to solder it on to.
I usually cut out the shape of the pencil line I’ve made around the piece so that I don’t waste so much silver, but for today I’ve just measured out a rough piece to work with.
I did have lots left over to make new leaves though so it’s all good.
🙂
Now I clean it up with my handy sanding pad.
And place the collar and wire on it to solder.
NOTE: I cover all of the plate with flux.
Some old gentleman at one of the shows I did a couple of years ago told me that this helps prevent fire scale, so I decided to believe him and that’s what I’ve done ever since.
Seems to work.
(See more info on this at the bottom of the post)
Also you can see above that I haven’t cleaned the wire for soldering.
I know you’re supposed to, but I’ve found that it’s really the correct heat and the area you heat around the piece you want to solder that is the key. I do, however, always clean the back plate.
I’m not recommending it, just explaining what you see in the photo.
Next I sand around the area to clean it up.
Sometimes this is enough, but sometimes you will need to pickle it.
I then check that the stone still fits using either dental floss to ease it out again, the sticky wax on a stick thing, or, if it’s willing, by just tapping it out.
And now you add the bits.
🙂
I have attempted to make a little youtube video showing how I do this.
It’s quite boring so I’ve sped it up a bit, but if you want to take a look at it I’ll put it at the end of this post.
You’ll see that I place each piece of stamped silver individually around the collar. Sometimes heating a little blob of solder on the bottom of a leaf etc.,and then taking it over to the piece works well enough, but this time I found that I needed to place the solder on the wire around the collar first and then place the leaves, etc., on it for it to stay put.
I use tiny chips of solder from Contenti to do this.
I heat the wire a little then I gently heat a stamped leaf piece as I take it over to the solder. I melt a tiny piece of solder onto it’s underside and then I bring it back to it to the piece to fix it in place.
If you watch your flame and control where your heat is you won’t undo the pieces you’ve already soldered.
Continually watch the silver. You will see when a piece of solder is going to re-flow. Just take your flame away and come in gently again to the piece you want to solder.
This will work most every time once you get the hang of it..
NOTE: You can place all of the pieces on the piece at once and heat it up evenly until they’re all soldered, but I find that not all the pieces will stay put and I also like to make it up as I go along. You’ll see in the video that I sometime try different sizes of balls, for instance, or I might like to add or take away something.
Now I pickle it and cut it out.
You don’t have to use a sharpie to out-line it, but I find it helps me to keep the back plate just a little proud of the top which is the look I’m going for as, for me, it adds to the depth of the piece.
And now this stage is done.
Next up is the ring shank.
You can make this anyway you prefer, but for the purpose of this How To I’ll show you how I made mine.
I took two pieces of 10 gauge wire which I rolled slightly through the rolling mill.
You can leave them round if you wish, or gently hammer them if you prefer.
Once I flattened them slightly I then bent them so that their middles met to be soldered.
That’s when I found out that I’d used one piece of fine silver, and the other piece, which I’d found lying on my table, was sterling.
Told you I mess up a lot.
My life, I tell you.
:/
But we’re not going to talk about that anymore.
Needless to say, when you have joined two pieces of the correct wire together you will bend them around your ring mandrel.
Depending on whether you measured out you wire before hand, which I didn’t, you may have some excess which you can then mark off at the size you want the shank to be.
And cut down accordingly.
You will then need to take your rubber/rawhide hammer to shape the ends around the mandrel.
Next you will need to angle off the cuts so that they will sit flush to the base of the ring top.
You can do this a couple of ways.
By holding it in you fingers to file down.
Or your thumb.
Or you can sand it.
I stick a piece of that sticky backed sanding paper on my table next to my bench block.
Once the ends sit flush you are ready to solder it onto the ring top.
Here I’ve already stamped the bottom with my mark and silver content. You can do this as I’ve done or you can stamp them on the ring shank itself.
I usually stamp my pieces after I’ve made them and before I’ve set the stone.
I balance the piece on one of my disc cutting punches and stamp it that way.
Don’t question me. It’s just a thing I do…
And now you’re ready to finish up.
I cleaned up the bottom with my new favourite abrasive wheel.
You can choose the best way for you.
Then I cut down the collar.
I ran a pencil around the inside of the collar keeping it flush to the top of the stone.
You might want to cut off the collar differently depending on the cut of the cabochon. This one had a distinctive curve that stopped without transitioning smoothly to the flat top of the stone and as I didn’t want the collar to sit short of the top I decided to roll it over the sides of the cabochon to meet the flat top.
I don’t know if that makes sense, but a long story short I felt that the collar would look wrong curved just half way up the edge of the stone.
I next brushed it with Black Max and buffed it down as much as I could at that point.
After which I set the stone and covered it with masking tape to protect it and finished off buffing it until I got the finish I was looking for.
I prefer this brushed look, but you can finish yours using the method you prefer.
And there you have it.
Your new ring.
Hope that all made sense.
I’d love to see what you make.
Happy Mother’s Day.
🙂
As I didn’t want you to watch sugar dissolving I sped this video up a bit, but I think you’ll get the gist. Here I’m soldering the bezel collar and the 18 gauge wire to the back plate using a larger #1 Smith nozzle on my torch which helps to heat the whole area evenly. The solder pieces are already placed inside the bezel collar and the whole piece is raised up from the honeycomb block on one of those titanium strips which I’ve bent into a triangle shape to support it. Once the solder pieces (pallions) begin to shine slightly you might just be able to see that I lift the corner of the silver plate up from the titanium prop with my pick. This allows the heat to get underneath the piece and helps the solder flow.
This lifting of the corner is a great tip and my solder flows every time I do it. I use less solder because of it and it really flows evenly around the whole area leaving no pits on the inside or outside.
Depending on how much you use some of the outside wire will be caught up in the solder flow, but generally only those areas that are closest to the collar. You’ll see that after the bezel collar is soldered I use my pick to pick up small chips of solder to attach the outer edges of the wire to the back plate. In this instance I didn’t need the wire to be completed soldered down as I wanted it to lay in a more natural flow around the piece. I just needed it to be secure, but you can use this technique to fix it all down if you need to.
If you use this technique, at times, if the pieces to solder aren’t evenly heated, you might find that as you bring the solder on your pick to the piece it will flow up over the wire and not underneath it to join it to the back plate. If this happens take another small chip of solder and hold it down with your pick as you heat it so that it doesn’t have the chance to go where you don’t want it to.
This second video, which isn’t 7 minutes long by the way, but is thankfully only as long as the first video, shows how I attach the small leaves and balls.
I flux everything and then heat it up. As I mentioned above at first you can see me taking each stamped piece to the small chips on my board, heating them slightly so that the solder sticks to their undersides and then taking them back to the place I want to attach them to. Usually this works fine, but for some reason today, (probably because I was being watched) they wouldn’t stick. To remedy this I then took the small chips and placed them on the wire where the attachment was to go and soldered them that way.
Let me know if I’ve missed anything out, or something doesn’t make sense.
😉
–
–
UPDATED INFORMATION – QUESTIONS AND ANSWERS FROM FRIENDS ON FACEBOOK.
If you have anything to add that may be of relevance just let me know and I’ll update it here.
First commenter: Only one issue: that particular flux is not a prevention flux for firescale. It’s a flow flux, to facilitate solder flow. No need to put it all over the piece; just use a little where you want your solder to flow.
From another commenter: I thought all flux covered firescale & flow. No?
Original commenter: No. There are flow fluxes and barrier fluxes. Neither does both jobs.
Another commenter: Sooooo cupronil says it’s both a flux and a fire coat preventative … is that not the case?
Cupronil contains some boric acid and some do use it like Prips as both, but I have not found it to be as good as using 2 separate fluxing preps- all in what you get used to and how you were trained. My training was to fire coat thoroughly, then use flow flux only where you would solder.
I’ve been enjoying making the cuffs and up to now have used the strips that Rio sent me that one time when I messed up my order and ended up with six, 6″ x 1″ strips instead of a 6″ x 6″ square.
Always check the order form before you click submit.
I was a little bummed at the time and they hung out in the draw for a while as they seemed a little too special to use, like they had some heavenly purpose for being there, but then I decided I wasn’t going to beat myself up about it.
And so my cuffs were born.
🙂
Except that the 1″ width frustrated me at times.
Sometimes I wanted a little over and sometimes I had to saw them thinner which was fine if I was going to use the crinkle edge on them, but annoying when I couldn’t get 6″ of a perfect saw line.
I used my Jedi mind powers, I did, but there was always that one time about 3″ in when just as I was thinking how well I was doing I’d end up messing up.
Over confidence can be a killer.
So new tool number one!
The table shears…
I didn’t want to pay a tremendous amount for the times that I would be using it.
If I was a mass producing beast of a cuff maker – maybe.
I’ve since noticed that you can get it cheaper at Contenti, and Otto Frei has one although the cheapest one is for a 4″ cut, but I’ve got so many good girl spending points at Amazon that I ended up getting it for nothing.
Can’t beat nothing.
It cuts like butter through the gauges I need it for even though it’s much cheaper than some of them.
😉
And to further aid in my recent cuff making frenzy I also bought one of these from – HERE
Because although I already have a mandrel I find it hard to hold and couldn’t find a bench attachment for it.
Also this one swivels.
And that’s always fun.
So, there you have it.
My new tools.
I feel spoiled when I think about being able to get these things for myself, and I am grateful, but I have been good, promise, and just think of the damage I can do with that shear….
I had the old end of the world earthquake dream this morning.
It wasn’t all bad.
As we waited for the pre-quake green black apocalyptic storm clouds to totally cover the sky a small van pulled up down our road handing out supplies to the residents.
Did we need any survival supplies?
I chose a couple of dust masks.
You know, those simple ones with the little vents in the front.
Seemed as though they’d come in handy.
A large high rise was due to fall onto us once the quake started. Instead of moving away from the object of our imminent death, we instead contemplated the chances that the gaping hole torn into the side of the building would fall exactly over where we waited thereby saving us from being crushed to death.
I tried to calculate the exact trajectory of the high rise’s collapse, but ultimately knew that the life saving cavity would miss us by a few inches.
Bummer.
Still didn’t get out of the way though.
–
In other, less violent, news I just managed to send off another $7,000 to charity.
To celebrate.
A chain.
🙂
–
This is a very simple chain which you may have already seen on my Instagram page, and I promise this post is not as long as my last one.
😉
I used 16 gauge sterling silver wire.
I haven’t calculated how much though, so sorry about that.
First up you will need a torch to ball up the end of the wire.
After which I like to use a large cup bur on it to round it out.
You won’t need the bur if you use fine silver as it will make a perfect ball when you heat it, but I tend to use sterling for most of my chains.
If you have never balled the end of a piece of wire before simply hold the wire vertically in a pair of tweezers and move the flame up and down the bottom of it until a ball forms. If you keep the flame on the ball for too long after it has formed it may fall off, so be sure to remove the flame when you have the size you need.
Now make a loop as shown.
Solder the ball end at the spot it crosses over the other end of the loop and then make another smaller loop and cut off the extra length of wire.
This loop is turned and soldered just under the first soldered join.
Take the remainder of the wire and ball up the end again.
Make another loop.
This time you will thread the larger loop into the smaller loop of the first link before soldering the loop together.
After soldering it make and solder the smaller link as before.
And continue until you have the length of chain you desire.
I made sure that the balls were all sitting the same way and that all the links matched.
No rules though.
You can mix it up if you want to.
😉
Here are some more photographs of the process.
Now put a catch on it.
And you have a new bracelet.
🙂
Now I’m going to get my survivors guide to the end of the world out and see if there’s anything else I might need to start collecting other than dust masks.
I thought I’d show you how I made one of my cuffs. So if you want to make one yourself, and if you’ve the patience to get through this post, here are step by step instructions.
Before we start you should know that a lot of times I tend to make things up as I go along and only afterward realize that, had I a plan in the first place, things could have been done more efficiently. So if some of the steps here seem just plain wrong it’s just the way my brain works.
Not my fault…
Also there’s going to be a lot in here that seasoned jewelry makers already know and so many of you, who I know can recreate a piece just by looking at it, might want to skip this post entirely unless you’ve been having trouble sleeping.
–
Here’s what I’m working with, you can pick any cabochon that you think is worth the amount of silver in this cuff.
It’s a lot.
As always links are in the photographs and dotted around the text for the suppliers and tools I’ve used.
These are just what I use and are not necessarily what you need to create this bracelet.
Dendritic Landscape Opals from HELGASHOP
First off choose your stone and make the bezel collar.
Here I’m making a collar for the earrings, not the cuff, but the process is the same.
Find the right height bezel wire. You’ll want it to be at least a couple of millimeters, if not more, proud of the stone.
Overlap the bezel wire as you fit it snug around the stone and then mark off with a pen or pencil where the join is going to be.
Be careful when you wrap the wire around the stone, especially if the stone has a domed edge, that you don’t push the top of the wire over the stone as this will distort your line.
Cut the bezel wire a millimeter or so away from the line so that the collar will be slightly larger than needed.
It’s better to keep snipping away thin slithers until the size is right than cutting off too much to begin with.
Once you have snipped away enough for the collar to fit perfectly around the cabochon, (ideally so that the stone will slip easily in and out of it without it being too loose), push the two ends into and beyond each other so they overlap slightly then you can pull them gently apart until they meet under a slight tension.
The two ends should be flush together as should the top and bottom of the collar.
Once they are in place I like to squeeze the edges together with a pair of pliers. This takes care of any distortions on the flat sides of the collar.
You can just about see the join here at about 2:10 o’clock.
Or is that 2:11?
😉
This is how I solder my collars.
I like to hold them in a Third Hand – HERE – and solder them with hard solder on the inside of the collar.
You can’t see them clearly here, but the joins are on the bottom waiting to be soldered.
I also like to use their chips for soldering links and small parts – HERE.
And I use Wolverine Flux which you can find on Amazon.
Because someone recommended it to me and I believed him.
Don’t judge me.
As with everything here, you can use whichever products you prefer.
–
Now they’ve all got their collars on.
🙂
Hopefully, if they behave they will become a pair of earrings, two rings and a cuff.
–
Next I cut a piece of silver sheet leaving about a centimeter around the stone.
Here I’m using 23 gauge because I didn’t have any 22 left.
You can then saw or cut it out.
If you use snippers, as I do, it can distort the sheet. In this case take a raw hide hammer, I prefer one of those rubber hammers – HERE – and tap the sheet gently as you pull the hammer out away from the center rotating the sheet as you go.
This will flatten the sheet.
Alternatively you can place it in-between two bench blocks and hammer the top.
Whichever way is good for you.
I then take the sheet and hold it in-between a pair of long tweezers – HERE – and begin to run the heat slowly along the edges of the sheet until it begins to melt.
This can be a little frustrating.
I use an acetylene/air torch so I’m not sure how this will work with the smaller hand-held torches, but the key here is to use a torch head that will heat the edges sufficiently to keep the molten silver moving.
I’ve found that on smaller pieces a #0 torch head is sufficient, but on longer or larger pieces you may need to use a #1 torch head.
Ideally I needed a torch head in-between these two numbers for this piece as the #0 wouldn’t touch it and the #1 took itself way too seriously and wanted to control the whole show.
But, if you’re careful you should be able to melt the edges into a nice crinkly blob effect.
Note, however, that if you haven’t done this before and decide to practice with the torch you have that different metals will melt at different temperatures. So using copper, for instance, which would be great to practice on, may give you a different feel for what you’ll experience with silver.
One thing I’ve found is that it seems to work best if you keep the flame moving at a slight angle along the edge of the silver and then once it starts to melt you can ‘push’ the melting silver along.
(That’s not strictly true as you’re not actually ‘pushing’ the melting silver, but rather new bits are melting as you move along the edge.
Just wanted a visual is all.)
Anyway, watch it carefully as one lapse in concentration can result in the whole thing going to pot and you’ll have to swear mightily and roll around in a tantrum across the room.
Which actually might not be a bad thing as could be you’ll find all sorts of goodies that you thought were lost forever on the floor.
Not that I’ve done that.
So, all blabbing aside, this is what you should end up with.
Which I then clean up with one of these special things – HERE – that I bought a while back and didn’t know what to do with.
The melted edges can be very sharp and this bristle brush takes care of it almost immediately.
Love it when I finally figure out what to do with things.
Now solder the bezel collar to the melted sheet.
If you have trouble soldering the collar because of the rippled edges of the back plate and you find you are left with some gaps that you can’t fill, solder what you can and then quench the piece. Put the piece on your bench block and gently tap the collar with your rubber hammer to close any gaps. If you do this gently enough you won’t distort the collar too much as the silver will already be softened due to annealing during the first solder and it won’t take much to close it.
If it does distort you can place the stone back into the setting and re-form those parts affected. I use wax – HERE – which I have blobbed onto the end of a stick to lift my stone in and out of a setting if I haven’t drilled a hole in the bottom from which to poke the stone out.
Doing this isn’t ideal as you should try to get your bezel collar and back plate to sit as flush as possible, but in a pinch this works for me.
Now you can put a little more flux on the piece and heat it up again so that the solder flows nicely around the edges.
Next I put the stone back in the setting and textured the area in-between the wavy line of the melted silver and the bezel collar. I also textured slightly up the collar.
I then used a pair of pliers to turn up the edges.
You can’t use normal metal pliers as I have here if there is no texture on the back plate as they will mar the silver, but you can carefully use the pliers with the nylon tips, or I have also used my burnisher to push the sides up from underneath.
Again this step can distort the bezel collar so you have to take care not to trap the stone.
Once this is done I cut the inside silver away.
As a note, I have turned the sides of the setting up both with the back still in and with it cut out. Although it seems more logical to turn up the edges with the back already cut out so that the stone doesn’t get trapped I found that, for me, it distorted the setting more and it was harder to get the shape back so that the bottom lay flat.
You could try either.
You don’t have to cut out the inside of the setting, but I like my stone to sit further down into the design as it gives it a little more dimension. It also takes away some of the weight from the larger settings.
Use your pliers to reshape any distortions.
Try to saw away the inside as close to the edge as you can otherwise you’re going to have to do a lot of filing.
😉
I rest the collar on the edge of my bench block and either use my file,
or an old, worn down grinding wheel – HERE – that is able to fit inside the setting.
This can be a bit vicious however so use with caution.
You want to end up with your stone being able to slip right through the setting.
Now cut out another piece of silver sheet just a fraction larger than the piece you’ve just finished.
Sand the silver sheet with a piece of rough sandpaper.
I like these foam backed pads from the local hardware store – HERE.
And use that special buffing thing on the bottom of the setting.
Or whatever you normally do to clean things up for soldering.
I like to lift the larger pieces I need to solder up off the block a little as it really helps to move the heat around.
I use one of those titanium strips – HERE – that I don’t know what else to do with.
I never can seem to bend them into the shape I want, but for this it’s perfect.
When I solder larger pieces I not only raise it up off the block a little, but once the flux has begun to gloss over I lift the whole of one side of the piece I’m soldering up with my pick. This really gets the heat moving around and the solder flowing.
For those new to soldering sometimes you will notice that the solder flows up onto the bezel collar. This is because the bezel wire is thinner and therefore heats up faster than the rest of the setting. The heat draws up the solder. Be patient. Keep an eye out not to melt the collar, but the solder will eventually begin to flow and you will have won the game.
It’s all about where you place the tip of the flame and getting it to heat all of the silver to the same temperature at the same time.
You don’t want to concentrate your flame on one spot, but rather move the flame continuously over the whole area you want to solder.
The very tip of the blue part of the flame is the coolest, so that can be a little closer to the top edge of the collar. The hotter part is about a centimeter out from the blue tip. This is the part that will melt things, so if you bring the blue tip down closer to the top edge of the collar the hotter part of the flame will go down beyond that to the area where you want the solder to flow and not melt the collar itself.
You still have to be careful, but it works.
😉
I then saw away the base to mirror the top layer of the setting and sand it smooth.
And voila.
A little grubby but I’m not complaining.
Now I put it in the pickle and work on the cuff.
–
Here I have a 6″ x 1″, 20 gauge piece of fine silver.
I tend to use fine silver for all my pieces and only use sterling for some wire.
Anneal the silver.
Charles Lewton-Brain says that you know when the silver is annealed when the flame turns orange.
I always looked at the colour of the silver, but now I look at the flame.
It’s good to mix it up once in a while.
😉
Once annealed I start to hammer it over the edge of my bench block to fold it in half.
Bit fiddly.
Eventually I decided it was easier to wedge the silver in-between the block and my bench, push down on the block and whack the thing upward.
Once it folded over as much as it wanted to, I annealed it again.
I then hammered along the very edge on the fold.
Which opened the ends up slightly.
Enabling me to get one of my jump ring mandrels inside and pry it apart by tapping gently on the mandrel with my rubber hammer.
I put the hammered part of the fold, about 5mm or so, into my bench vise and then hammered one side down to make it a 90 degree angle.
After which I was able to fold it back over itself.
And flatten it down.
It doesn’t look tremendously great at this point.
Going to have to work on my folding skills.
Remember to keep on annealing during this process. As soon as the silver seems harder to work with put it back under the flame.
Now you’re ready to stamp.
I hate stamping, and I hate wire wrapping.
Fortunately I only had to deal with one evil here.
You are going to have to level up the underside of the cuff with a piece of metal so that the stamp will mark evenly on the top.
Here I’m using another piece of silver because I was too impatient to find something else.
Not really one of my better ideas although it didn’t spoil the smaller piece as much as I thought it might.
You can use card or something else to pad it with.
Here is the front of the piece ready to continue stamping.
You can gently hammer on the edges of the strip if you find it has distorted during stamping, but the reason it’s distorted here is because I have stamped more on one side than the other which has, in essence, stretched the silver out unevenly.
You can correct this by stamping more on the other side to compensate for this.
Here I have leveled it up and snipped away part of the ends to help with shaping.
And now it’s ready for the edge melting process.
At this point I shape it on a bracelet mandrel.
And take the setting out of the pickle to cut down the collar to the correct height for the stone.
I run a pencil around the inside, snip as much as I can away with some snippers, and then file the rest down.
For this setting I wasn’t as precise as I usually am as I wanted a more uneven look to go with the setting.
I propped up the cuff and used far too much solder on it to join the two together.
But that setting ain’t going nowhere…
I forgot to mention that at some point I also added some balls and whatnots to the setting.
Sorry.
I pickled it once again then painted it with Black Max – HERE – which is not the least toxic of products out there, but is my favourite patina.
Just be very careful with it and always wear a dust mask when buffing it.
Always wear a dust mask anyway.
I give it an initial buff which I forgot to show you, with both a radial wheel – HERE – I like to use these 1″ yellow ones for the tight places and then with my dinky buffing machine – HERE – with this very fine buffing wheel – HERE.
After I’ve got it almost finished with the first buff I set the stone and place masking tape over the top.
Which I then cut away leaving enough to protect the stone.
And then I buff it again.
Until I’m satisfied with the end result…
So I hope you made it through without my boring you to death.
I come to you today with my new, ‘stepped up’ pieces of jewelry which now I actually think of as being more ‘stepped out’.
They kind of happened when I wasn’t paying attention.
Which I highly recommend.
–
I’m a very anal creative.
With the pottery, with the quilt making, and with the jewelry making, I like to cross all the t’s and dot all the i’s, and will often go back, even when something’s finished to fix something that, in my opinion, is just not quite right.
Can be annoying.
Also, I don’t think it’s necessarily always a good thing.
Sometimes you’ve just got to let yourself go.
It all started with a ring that a lady had asked me to make for her, but which we could never really decide on.
She liked this, but I couldn’t find a similar stone.
I also thought that perhaps all the little leaf things would catch on other non-leaf things when she wore it.
Looking at it now I’m not so sure.
So I cut quite a lot of stones and made up a few settings, which I consequently made into necklaces.
India Black SkinLarsonite
I didn’t mind doing this as I’ve been needing some help getting into the studio.
I really like this setting. It’s clean with a little interest and it highlights the stone nicely.
India Black Skin and Larsonite are now two of my favourite stones.
India Black Skin from NataliesRockCraftLarsonite from NataliesRockCraft
I next cut a nice piece of dendritic opal.
Dendritic Opal Opalite from OCDhobbiest
And this is where it all went wrong.
And right.
I admit I was at a loss for making the ring and when I feel that I’m not able to do something I tend to self sabotage.
It’s not going to work anyway, right? So why pay attention.
This happened while I wasn’t paying attention.
I had made a cuff the day before, but I didn’t like it. I did like the melted edges, however, so I decided to make my favourite setting with the same edges.
And as I’m a slow learner I soldered the bezel collar to the sheet first.
Not smart.
I managed to melt the edges of the sheet o.k.
Along with the collar.
Frustrated I just decided to leave it and make the most of it.
I was kind of liking the rough and ready, Capt’n Jack Sparrow look to it anyway.
Don’t ask.
It just reminds me of him.
Pirates in general really.
So I improvised around the collar, in the back of my mind thinking that it might turn out o.k. after all, but at the same time not holding my breath.
I knew it wasn’t going to be a ring as it was just too big, so a brainwave later, I decided to put the whole darn thing on the ugly cuff.
–
Still on a bit of a downer after dad.
Everything’s ugly.
Or dark.
In-between nice shiny bits of lovely.
It’s a work in progress.
–
Bottom line is that I kind of liked it.
It’s funky and statementy and more out there than what I’m used to, but it may just be exactly what I need right now.
Not that anal isn’t necessary at times, but I need a change.
So I made it a friend.
And then decided to make it some cousins.
Here’s a ring.
Luna Agate from NataliesRockCraft
And another ring.
Purple Salvia Chalcedony from CatalinaCabochons
Seen here at their group photo op.
Pretty darn big rings really.
And here’s their second cousin once removed.
Which isn’t as deep, dark and seductive as it is in this photo.
See.
For some reason certain stones just want to mess up the whole show.
So in a sense I think I have stepped it up.
In that out of the box way.
Although I do tend to suspect that my inside self is more big, bold and colourful than my outside self gives up.
And so I’ll leave you here to go out to make more.
Mostly it’s because I’m impatient which, of course, often times means that I end up needing to work on something for longer anyway because I didn’t pay enough attention in the first place.
So I’m going to step it up.
Again.
I know I stepped it up once before, and that was a good thing, but now I want to work on always being able to know, with confidence, that what I’m doing is definitely going to work the first time and that when it goes out the door I’m completely satisfied that it’s the best I can do.
I know it can be done.
I know there are people out there who are so bang on their game that they’re just brilliant at it.
Don’t get me wrong I’ve enjoyed my new pieces.
Mexican AmberFlamingo Rose AgateSapphire Berry, Ocean Jasper, Larsonite
But I always get worried when one of them goes out the door.
No, not worried.
Agonized.
It’s worse when I see that I have a review on Etsy.
I can literally feel my heart stop a beat because I know they are just so disappointed with it and I have to cross my fingers to see if it’s going to be o.k.
Crossing my fingers, by the way, happens to be my go to safe place.
Nothing bad will happen if my fingers are crossed.
Well that’s what I tell myself anyway…
It’s amazing to look back at pieces I made when I first started out and didn’t know what I was doing.
The amount of solder I used for instance.
Way too much
😉
But you don’t know these things unless you keep on doing them wrong until they whack you over the head.
And that’s o.k. as we all have to start somewhere.
But for a while now I just would really like to not do it wrong.
And for me that means slowing down, paying attention, and finally being able to let go of a piece knowing that it’s everything it should be.
For years I just put all the jewelry I made into little bags and popped them in a drawer until I sold them.
This worked well until I started to drown in finished jewelry pieces and found myself becoming more and more fraught with anxiety each time I sold something and couldn’t immediately put my hands on it.
It didn’t help that I wasn’t always good at following the drawer rule either.
Sometimes I’d find the pieces in other places.
Just laying around.
Mocking me.
I’ve always worked, (and lived really), in a chaotic mess which has never really bothered me except that sometimes the idea of running a business just really brings out the nerd in me.
I mean I love Office Depot for instance.
All those organizing things under one roof.
It’s just unfortunate that Ms Chaos runs rings around Order every time I decide to sort myself out..
But now I have the perfect system.
For me anyway.
Prepare to get your nerd on…
… and your baggies out.
And the sticky labels…
NOTE:
This is only for those of us who don’t know what the hell they’re doing.
For all you other people who already know what you’re doing this will probably have you either in stitches or you’ll lose your eyeballs in the back of your head.
You have been warned…
–
I break down all of my items into codes as such.
Necklaces with Cabochons = NC
Necklace without Cabochons = NS because they’re typically just made with silver.
And so on.
Earrings = EC and ES
Bracelets = BC and BS
Rings = RC and RS
Then I add their numbers after this code and stick it onto individual appropriate sized bags.
Like so.
NC1
NC2
NC3
etc..
I then use a larger bag to hold up to ten pieces of jewelry.
This bag gets its own label.
NC1 – 10
NC11 – 20
NC21 – 30
Into which I put the corresponding items.
The good thing about this is that I can then store them in bag order in the drawer and so when I sell item NC26, for instance, I can put my hands on it straight away.
To encourage me to remember to do all of this I have a set of numbered bags ready and waiting in a little box on my work table.
When I finish a piece I put it straight in its pre-labeled bag, then I just take the box inside and list the pieces that are in it.
It may sound simple.
You may already do this.
You may have a better system.
But to me, this is heaven on a sticky label.
Here are the cabochons waiting for their turn.
I then have a simple spread sheet that I made on my computer which has this code number on it, where I have it listed, i.e., Etsy or my Website, the item name, how much it is, and finally a box in which I can mark off when and also where I sold it.
i.e. √E = Etsy
√F = Facebook
√I = Instagram
etc.
This one is for the earrings.
Don’t ask me what the P is for…
Just goes to show. You can take a horse to water….
Maybe it’s a private sale?
We may never know…
So there you have it.
Of course you have to follow through with all the putting things in baggies and remembering to put the code in the item’s title when you list it on Etsy, etc., although I noticed that now Etsy has a new box for putting in your SKU number when you list something so that should make life easier.
O.K. so don’t laugh that it’s taken me this long to figure things out.
I didn’t know I was going to make so much stuff.
Not my fault…
Of course I don’t have any system whatsoever for keeping track of materials etc.
I suppose I’ll be saving that little project for another decade.
As those of you that read my blog know, I’ve kind of lost my way since my dad died, but I don’t want to give up just yet.
My trip home was good.
I only had a cry three times, including one where my sister lovingly tossed me a used tissue.
Bless her.
Probably why I’ve got the lurgy now.
I’ve come home with a sore throat, cough and achy parts.
Thank you K.
I ate all of the food on my list except for the pie and mash, fish and chips, and the pint of bitter.
So much food, not enough time.
The flights were awful. The most uncomfortable I’ve flown for a long while and took for ever. We did make it there and back in one piece, however, so I’m grateful for that.
I wasn’t as cold there as I expected, which is unusual for someone who usually curls up in a corner with a blanket and doesn’t come out again until all the heaters are turned up high.
In fact, at times it was just as cold here in Houston as it was in England.
We stayed at my brother-in-law’s house which is an old converted barn.
Actually I think it was the pig sty as the large barn is to one side.
I started a painting of their house before we left, but I just can’t get those pesky oil pastels to dry.
They’ll probably get it two years from now.
Our bedroom was behind the larger window in the roof, above the kitchen door.
The house has the original brick floors and some brick walls, but I really only had to curl up once.
Probably the red wine helped.
I’m thinking of painting the barn opposite also.
But not the big black barn.
It’s just all barn and windows.
Nice, but a bit boring.
This is the entrance coming into the old farm.
Before Christmas I made quite a few pieces which I shared on Instagram, but only got into the studio for the first time yesterday.
A friend wanted a piece with topaz and amethyst, but it was hard for me to find anything that I liked.
In the end I found these.
And this is where K and her used tissue comes in.
Usually I’m pretty good at replicating one of my drawings. In fact it always surprises me, but this time.
Well…
Don’t even talk to me about it.
So today I’m off out to get my hair cut, which always makes me feel better, and then I’m boycotting the studio until I feel better.
I’m going to sit on the sofa and switch off BBC and put on some old film.
An old black and white Barbara Stanwyck movie is my preferred choice, but I doubt I’ll be able to find one.
I persevered through the Houston heat and that one bizarre time when at the same time of year I nearly froze to death it was that cold.
Honest I did.
But yesterday even the good ol’ Texan boys were complaining.
Grown men moaning about the heat.
And I was with them.
I’ve never been so overheated in my life.
I wasn’t just sweating, it was coming off me in planes.
Sheets of wet sliding off my face.
My face looked like a wet rhubarb and I gave up on trying to keep what little make up I wear on my face.
Just wern’t ‘apning.
I had to go au natural, which actually wasn’t natural at all because no one looks the way I did yesterday.
Ever.
Oh I checked it out alright.
I looked at every last vendor there and no one looked as much like a wet fish as I did.
And I bet you no one had to change their clothes three times!
It was bad enough at the beginning after setting up, but then it rained. Not a lot, but just enough to make the humidity virtually unbearable in the hour or two afterward.
We can’t have a good old cool down after a sprinkle can we.
No, Houston has to turn into the hothouse of hell.
It did let up later in the afternoon until the thunderclouds decided to roll on in.
Fortunately, (or not), they did seem to pass either side of us. I say not because at that point I was actually praying for a catastrophic storm, or even a small earthquake really, that would mean we’d have to go home.
Not one to abandon ship at an art fair, because that’s just not cricket is it, I was at one point seriously considering emailing the show organizer and telling her that my leg had just fallen off and that I had to leave. Sorry.
I trooped on though and have now vowed that it was my last.
I had four sales including the one from the friend who helped me with the booth.
This morning I still can hardly walk.
I’m telling you.
I almost died out there.
As I was in the shower later that night I tried to turn my misery around and thought about all the people in Syria and Yemen and how they must feel just living day to day in awful conditions with oftentimes no water or food to boot.
It made me feel a little ashamed that I couldn’t make one day without completely falling apart and so I determined to continue to make my jewelry for them as it’s the least I can do.
Although not at art fairs unless I can find a good one in Houston that’s indoors for heaven’s sake.
For the love of god, are the people who live here even aware that it’s completely abnormal to even consider outside activities in 90 degree heat with 90% humidity!
And I was one of them, but I’ve come to my senses at last and not a minute too soon.
Before yesterday I was even considering applying to the three day Bayou Festival they hold here twice a year.
As I write to you on this fine morning I admit to having just deleted the FOUR new games I gave in to midway through this week.
Shame on me.
But it did bring home to me more than ever the fact that this addiction to wasting my precious time is wasting my precious time.
I was reading again.
I was like almost finished with the book I’ve been reading for over a year now.
And then – nothing.
A black hole of word games sucked my life into a mindless funnel toward zombie land and I was gone again.
But now I’m back.
Until the next slip.
Not going to happen.
Maybe.
Despite the relapse I’ve had a fairly productive week and I sold quite a few things.
I’m now over $60,000 for charity which although amazing seems to have had no impact whatsoever on saving the world.
Man.
Can you say disappointed or what!
But, kidding aside, I do want to thank everyone who has bought a piece of jewelry from me.
🙂
The new lovelies this week are.
A pair of earrings with beautiful purple Luna Agate stones.
This shop is expensive, but I just can’t resist the stones there. It’s sometimes hard to use them as they make the jewelry so much more expensive.
This Ocean Jasper was from there also.
And here’s its back.
Then I made another one of these for someone using one of my new favourite stones.
Rare Purple Chalcedony.
And this one with a piece of Carnelian that I cut myself
😉
Next up I’d always wanted to make something with one of these dentritic stones.
It came all the way from India. I prefer not to buy from outside the US, but look at it
🙂
And then I fiddled once more with this piece which has been giving me some trouble with its stone choice.
I think finally I’m happy with it.
I also made a couple of chains, some simple silver earrings, and cleaned up my work table to the point where I’m shocked whenever I go into the studio and see it again.
Simple joys.
🙂
I’m still having trouble avoiding purchasing stones, but look at this
And this.
Seriously.
I had to have them.
No hope for the wicked as my old mum used to say….
Just as a side note those are not my fingers. He seems to have cut the top off of one of them, something to look out for when cutting my own stones perhaps…
And on a completely different topic.
Just look at our orange tree!
We bought it last year and I forgot what it was. I picked one thinking it was a lime and cut it open. Wow. The combination of the gorgeous green outside colour to the vivid orange inside was incredible.
It seems that I will talk with anyone, and actually I do, but really I’m a scaredy cat who frets until I’m there and doing it.
Then I’m like.
Who are you? And what did you do with Deborah?
But not in that, Be gone from me Satan way.
In a good way.
I almost left the page, then I thought Do It! And so I did it.
It still makes my heart skip a little, but I’m sure there are worse things I’ll encounter.
Like my next trip to the dentist.
I also thought that as I’m pretty good at watching a video and picking things up through trial and error that perhaps I should save my money, but I think I really want to go mingle with like-minded people and see what happens.
Can’t be a hermit forever.
In other news.
The tank is back baby!
This is the old one going home to his empty friends
Doesn’t help calm the nerves that they put that bright red sticker on it.
And here is it’s replacement.
Looking a little lost with his clown nose.
Anyway he soon got right to it and we made a couple more necklaces.
Turquoise
Turquoise
Ocean Jasper
It’s like my old nan used to say.
The back should be as good as the front.
Could do with a little more work under that second leaf on the right though…
Yesterday I ruined my painting.
This is it started.
I haven’t got a photo of it ruined as my darn phone keeps telling me that I have no storage.
It never used to have this problem so I think it’s all just a dastardly plan to get me to buy a new one.
They think I don’t know about their dirty tricks.
It’ll probably work though…
And now I’m off to Austin to visit B, my eldest.
We are going to have a weekend of watching movies, doing some stitching,
I’ve still not finished this.
Or this.
And just hanging out.
And so I leave you with a Rumi quote.
Not really into all that touchy feely stuff, but this one kind of makes me feel very centered.
When the gauge gets down to around 4 on the regulator thingy I start to get anxious.
The inevitability of having to drive that bottle down to the shop one more time and bring back a full one starts to weigh on my mind and every time I light the thing up I know I’m just a little bit closer to the end of the world.
D day awaits me tomorrow.
I’d have it delivered if it wasn’t for the fact that I live in the Stepford Wive’s neighborhood.
They’d probably have a committee meeting to throw me out if they knew the goings on in the studio.
I think I’m safe though as I’m pretty sure they think I’m the house cleaner.
So today I could paint. I could make some non soldered pieces – I’d like to brush up on the old cold connections and work on some riveting.
I could clean the house.
I think, however, it’s going to have to be the cinema.
Bourne has been waiting for me and I hate to disappoint him.
Yesterday we went to the Summer Chills here in Houston to see Agatha Christie’s, The Spider’s Web.
I love going to the theatre, and I especially love it now as we make a point to go see these summer murder mysteries with all the family.
It’s become a tradition.
Except S hasn’t been around for a while.
He sayyys he’s working in his namesake town, Stephensville, but how likely is that.
I personally think he’s been kidnapped into slavery again.
Or he’s working undercover to throw down some huge drug ring in the middle of Texas.
Negotiations have obviously been thwarted if it is abduction, however, as first he was to come home the end of July, now he’s to stay there through September.
They let him answer his phone occasionally so that’s kind of them. Most of the time though we don’t hear a peep out of him.
Kidnappers can be so inconsiderate like that.
Here’s his picture so if you see him would you alert the authorities.
Although he’s grown a bit since then.
Like 20 odd years, but I’m sure you be able to pick him out in a crowd…
I haven’t done much since we last met. I made the simple things a simple bracelet.
I’m quite pleased with the simple things except they take me ages to make as I’ve to cut each piece out individually.
I started on another oil pastel painting.
I’ve decided to call these paintings Happy Art, because they’re not really real art, but make me happy.
I should have known something was up when it took me five years yesterday to solder two caps onto the ends of some wire.
I should have walked away then.
But no.
I had to persevere didn’t I.
I had to finally, after hours of fiddling around and trying again and again, finish the piece and decide to buff it.
Didn’t I.
One rotation, that’s all it took, one rotation of the buff and the same mood that had obviously been lurking around during the whole time I was making the darn thing, and that was it.
The wire wrapped at least twice around my hand, if not more, so tightly that it’s a wonder it didn’t rip my finger off. Fortunately for me, (well more than fortunate really), the wire snapped. All three strands of 18 gauge half-hard silver wire. Otherwise I don’t know what would have happened.
That’s how much it had twisted around my hand.
Twice around my hand and then spiraling off when it couldn’t go around anymore into a mass of twisted wire before snapping.
It hurt.
Please.
Please!
Always use the buffing machine with care and your full attention, and don’t use it on things that it’s not meant for. Like chain or wire.
The dent in my fore finger was so deep I didn’t think it would ever go back to normal, and with a bruise on my pinky and a gouge out of the underside of my forefinger, I consider myself to be extremely lucky.
For a minute I didn’t think I was going to be able to cut it off with the snippers in my left hand and all I could think about was tiny baby toes getting wrapped up with a thread from their blankets, rotting, and falling off.
I know.
Don’t ask.
But it was fine. I had a little cry, because right now it’s all just piling up, and turned the buffer off and shut down the studio for the day.
Should have done that right at the beginning.
Today’s not much better. I don’t seem to be able to get myself moving and it’s taking me ages to do anything.
I know why. My sister sold dad’s car and we made the decision to sell his house also. I was doing o.k., but then smacked into emotions about the house that I didn’t know were there.
And then P had a birthday and dad’s was always the first card to arrive.
It had to happen, and will happen again. This year will be a first for everything.
Just putting it out there.
But I was happy with the pieces I’ve made, which most of you have probably seen on Instagram or Facebook.
It’s like I have no surprises any more 😉
First up the Carnelian.
I broke the stone I made it for so had to cut another.
Looks like a jelly bean doesn’t it.
Then there was the chrysoprase.
A bit blurry.
Sorry.
Then I used up some more of my scraps using the blob of silver I’d heated and rolled and heated and rolled till my arm almost fell off.
I quite like these and am making a bracelet to go with them now, but due to The Mood it’ll probably take another five years before it’s finished.
Next I made a little something for somebody.
I quite like the rustic look of this one and might try it again.
Then I bought some lovely East Java Purple Chalcedony off of Shirl and Bruce and made this little one.
Designs by Shirl is one of my go to cab shops. They’ve always got some interesting things going on.
Then there was the quartz.
The piece for which I almost lost my finger.
And its friend.
Who was much more well behaved.
I like this one as the back of the stone is a pyramid (I’m sure there’s a term for that) and so it juts out slightly from the hole I cut in the back.
Anyhow, those are all the newbies.
My next challenge is taking the acetylene tank down the road to get a new one.
I’m putting that little treat off until I don’t feel so accident prone.
Hasn’t stopped me from buying up all the cabochon’s on Etsy though.
Or a new saw.
I didn’t want to buy it.
Really I didn’t.
Just look at it in all its funky self.
I didn’t want to encourage it.
I’m not that fancy gadget tool kind of girl.
But, although my trusty German beginners saw has done me well over the past years, I decided to bite the bullet.
And I’m glad I did.
It’s a beaut.
What I love most about it is the tension lever. I do find it a little more awkward to change the blade or open it up for piercing, but only because I haven’t found a comfortable way to hold it yet. The old saw just sat nicely in-between my chest and the bench, but because you don’t need the tension of your body for this one it seems to wobble around more and it’s just a little more fiddly, but aside from how to hold it as you put the blade in it really is easy to load and it saws like a dream. It almost seems to do half the work for you.
I love it. and recommend it.
I perhaps wouldn’t have got the 5″ one, however, as it hits me in the Optivisor if I’m wearing one. I thought it was a good idea, but as I buy my sheets in 6″ squares, it doesn’t accommodate the width anyway and I feel that the regular 3″ would have been fine.
Because of the asthma I’m also going to have to invest in a dust collector.
I’ve seen a few that will work for me and just have to make up my mind.
I need a hose that goes to two places on my bench. One where I buff and one where I use the Foredom to sand, etc.. I already have a fume extractor which I’ve started to put over the pickle pot as well as over the soldering area as, as the fine doc says, you can’t fix stupid. Actually he said fume damage, but I knew what he meant.
So I may go for this one.
Or this one.
I’m thinking the Dura-Bull as it looks easier to change the filters. Depends on it fitting under the table with the hoses sticking upward however.
So, maybe it looks like I’m not giving up jewelry again after all.
Maybe just taking a break.
Here are the newbies.
Petrified Fossil Wood
I broke this one so I’m going to have to re-do it.
Perhaps this was the beginning of the funk.
You know. When everything goes so well.
And then not.
So my heart really wasn’t in this one below.
Plume Agate
Although it turned out well.
Or this one really.
Australian Crazy Lace
I have enjoyed making the torc collar, or whatever they’re called, for the pendants.
I looked everywhere for them as I knew that my work would be better suited for them, but couldn’t find them anywhere. In the end I asked a jeweler whom I’d noticed used one. She told me she’d made her own which I had thought about doing myself, but for some reason thought that they wouldn’t hold up well. So this gave me the confidence to go ahead and make one.
I used three strands of 18 gauge sterling silver wire which I capped off and soldered a lobster claw clasp to.
This is the jeweler I asked.
Laura Jane Bouton
I really like her jewelry.
You should go check her out if you haven’t already.
So that’s it really.
Spud’s all jewelry’d out.
And I’m off out to do some painting, which I’m sure I’ll really, really enjoy until I decide to give that up also.
After Dracula I had decided on either Rebecca or Anna Karenina, but when I listened to the preview readings of the audiobooks I didn’t fancy either of their voices so I search around aimlessly until I came upon South of Broad by Pat Conroy.
Bit of a difference I know, but work with me here.
I think everyone must have seen The Prince of Tides with Nick Nolte and Barbara Streisand, but I hadn’t ever thought about anything else he’d written until I listened to an interview he gave on the Diane Rehm Show on NPR. He was talking about his book The Death of Santini and I was fascinated, until I forgot about him again.
Sorry Mr Conroy.
As I listened to the preview of South of Broad I was hooked.
What a warm, relaxed feeling that Southern accent gives. I could listen to it all day. I don’t know if Mark Deakins who narrates it is from South Carolina, but who cares…
And the words, in the sentences, that make up the paragraphs.
What can I say.
Pure bliss.
I’ve nearly finished it so I’m sure now I’ll have to go through and listen to them all.
You may never hear from me again…
I’ll be on my veranda drinking cold lemonade with my audiobooks.
If only I had a veranda.
And some lemons.
Not a lot going on in other news except that I have just found out that I have asthma. Turns out that instead of keeping me for two days in hospital and signing me up for five thousand heart tests when I went to the doctor with the heavy chest and shortness of breath feelings, they should have just looked more carefully at the chest x-ray they took when I first got there.
But at least now I know my heart’s O.K. and that, as P points out, they actually found one.
At first I laughed when the pulmonologist told me as asthma was the last thing I expected to hear, but of course then I thought that he had also got it wrong and in fact I have silicosis which he had overlooked in favour of the lesser deadly disease because I don’t look like the silicosis sort.
I started preparing myself for the inevitable lung transplant.
So when I went back to the doctor after having the ‘breath tests’ which the man kept referring to as ‘breast tests’ (was it just a lisp I asked myself or had the v-neck of my t-shirt got stuck around my waist again?) we had the, ‘ So, how do you know exactly that it’s not silicosis because you know I work with clay and other fraught with danger chemicals in my studio’, chat.
He said that I didn’t have silicosis.
I questioned him again, just to make sure.
He said no (again).
I didn’t have it – yet.
He could have left that last bit off because of course that means there’s still a chance that I could contract it in what’s left of my lifetime (I’m opting for the 40 more years version) and so my hypochondriacal self will obviously be having a field day with the possibility of contracting silicosis from now on out.
Girly you really need to get a grip.
So now I have two inhalers and some other medicine. I sometimes wonder that they don’t just give out this stuff like candy. I’m going to have to tell him that I can’t be inhaling that stuff everyday forever when I go back in six weeks.
No-one got time for that…
But I’ve definitely been more diligent with putting on the old fume extractor since.
And so here’s a new lovely.
Ocean Jasper
And some new drawings for some Willow Creek Jasper.
Although I must admit I’m having a bit of trouble getting excited about them.
Don’t know why, but perhaps I just need a break.
A painting break?
Not a pottery break. I’m too silicosis’d out for that right now.
I know for sure that I need a break from going to the darn doctors every day since the beginning of eternity.
And I thought you might like to play along with me.
By the way, Dracula is great. I much prefer it to Frankenstein except that it’s spoiled somewhat by the fact that the Gary Oldman/Keanu Reeves movie is so true to the book that I can see it all playing out in front of me again. I really wanted to imagine it differently this time.
Oh well. Rebecca next…
Or Anna Karenina.
Don’t know.
So onto the project.
I bought a lovely piece of Sage Amethyst and thought I’d make another of my boxy pieces.
So if you fancy making one here’s how I did it.
I drew a rough design around the stone.
Then I took a length of bezel wire that is the same width as the depth of the stone and shaped it into the top three sides of the box.
You can just about see it below.
See.
I sniped it to sit perfectly on top of the stone.
Then I bent another piece of the bezel wire across the top of the stone.
And soldered it to the bottom part of the box.
(Prepare for fuzzy photo)
I turned it over and soldered what will be the top of the box onto a piece of silver leaving enough overhang on the bottom edge to create a lip that will cover the top of the stone slightly
Then I cut around the sides of the box.
(Another fuzzy photo)
and checked out how it fit to the stone.
I actually thought of leaving it right here as the plain silver looked so good on its own. But you know me and my fiddly ways…
Here’s the lip.
You can see above that the area where the sides of the box and the stone meet doesn’t lie flat on the block. Annoyingly I had forgotten my own instructions and chosen the wrong bezel depth so I had to adjust the lip slightly so that it didn’t lay quite as far over the stone as I would have liked. This allowed the two pieces to sit flush.
Had the sides of the box been deep enough I wouldn’t have had to kick myself and swear (just a little – I’ve had bigger problems) but as I’m all about problem solving I manned up and moved on.
So much for paying attention.
Then I forgot all about it when noticed a half set little Tiger’s Eye just laying around on the table doing nothing much in particular and thought it might look good with the amethyst.
The colour actually looks a lot better with it than this photo gives it justice and, as Snow White would sing anytime she had chores to do – Someday my Prince will come – It was as if it knew its soul mate would eventually come.
Somehow thinking of P when I’m doing the washing up doesn’t quite have the same effect on me..
As the sides of the tiger eye bezel wasn’t as deep as I wanted it I decided to make it another.
Now I don’t know if you remember, but I had an awful time fiddling around trying to get this vice thing to work for me.
But now I can tell you it’s my new best friend.
I just wasn’t being stern enough with the screws on the top.
Now I’ve figured out that I just have to be firm with it the thing holds the tubes, and whatever else you want it to hold, like a champ.
So I cut another length of tubing to fit the tiger eye.
And placed the cut off bit back in the vise and made sure to sand the ends completely flat.
You can file right down the vise and not damage the file, or so the Internet says, and you know the Internet is always right…
Once you’ve done that you can use your nifty bur to drill down into the tube to cut a seat for the cabochon to rest on.
As you probably know you can purchase cabochons, tubing and bur sizes in various millimeters so that they all correspond to make setting a stone a breeze. Once you get the hang of the annoying vise…
See here how it sits so pretty.
Took me over a year to figure out the easy way to do this.
Man I’m slow…
Next I cut out a matching hole on the top of the box.
You can just about see below that the tube has been soldered to just stand proud of the top of the box. You want the tube to fit snug into the hole you’ve made so that the solder joins the two completely and you want just enough of the bezel showing above the box to be able to push the sides over to hold the bezel.
Next I filed the bottom flush.
And cut out a backing sheet of 22 gauge fine silver to fit both the top box and the stone.
Before soldering the top to the backing plate, however, you have to pierce the back so that air can escape as you don’t really want another explosion in the studio.
Just sayin’
My tube sits all the way down and will be soldered to the back plate so creating a sealed chamber around it inside.
My preferred way to do this is to trace around the pieces to be soldered with a Sharpie pen.
This way I can play around with some ideas and then saw out my design.
After I have done this I can then go ahead and solder the box to the back plate knowing exactly where the design will lay by matching the top to the Sharpie lines.
I then drew in the bottom part of the stone again and drilled some holes for the prong setting.
I like to solder the prongs using a charcoal block. This way I can place each prong into the hole I’ve drilled and gently tap it with a hammer so that it sinks down into the charcoal a little. I place each prong as you would close a bezel up, tapping the next prong on the opposite side, etc., etc., until they are all in. This way seems to keep them more secure.
Then I place a little blob of solder at the base of each prong and place the leaves around the bezel and after soldering
See if I haven’t completely messed up and that the stone fits correctly.
Here is the pierced back.
And my grubby finger. Oh how we suffer for our art…
Here I have cut the excess silver from around the box and stone and have cut the prongs down to their correct height and finished them by shaving some of their thickness off and smoothing out the tips.
Here’s it’s sexy shot.
I fashioned it a simple, yet charming bale and soldered that to the top after I finished up the back design.
At this point we know that it would be an extraordinary thing for me to have managed to photograph every stage of the pendant’s making.
Extraordinary I am not.
I forgot to show you the back.
You’ll have to improvise.
Sorry.
Here is the piece sanded, patina’d and buffed.
Sage Amethyst
Turns out that I’m not completely happy with it because the top left hand of the stone doesn’t sit as snug as I would have liked it to and the prongs are set too far out on the left hand side. I think it happened when I had to fiddle with the lip to fit over the stone.
🙁
But I will bravely continue on with my struggle to produce technically perfect little pieces of lovelies.
I’ll never surrender…
And here’s its back.
Finished while you weren’t looking.
And here’s another piece I had on the back burner.
Not just any old bur, but the sharpest bur in the box bur.
Middle finger – sanding disc cut.
Yep the edge of the disc managed to slice open the side of my finger at full speed ahead – which kind of hurt.
And it had to be the coarse disc didn’t it…
Right forefinger – water bottle cut.
Man!
Who slices their finger open on the cap of a plastic water bottle!
They’re all wrong. Too much water is obviously hazardous to your health.
I haven’t cut so many of my fingers at one time – ever, and all of them are really sore and needed Band-Aid attention.
Previous to that, in this same week, I suffered a scalpel blade cut and yesterday a chain swipe around a thumb as I was happily buffing away.
Don’t do that.
Buffing chains is not cool and can kill you.
I just like to live on the edge.
I blame it on Mary Shelly as listening to Frankenstein had seemingly lured me into a deep hypnotic state from which I obviously couldn’t wake up from in time to prevent these bodily dangers.
Darn you Mary Shelly.
Or was it the narrator?
Probably more likely.
What can I say except that Victor Frankenstein is a complete weeny and is frankly getting on my nerves a little bit. He needs a quick kick up the you know where so that he can just buck up and stop going on and on about how tormented he is all the time.
Such a drama queen.
And that wretch the Monster. Good grief. He learned an awfully excellent vocabulary in the short time he’d been exposed to the German mother tongue and showed an extremely enlightened compassionate side to all fellow creatures for one so primitive.
I almost kind of liked him.
Until, of course, someone ticked him right off and he threw all decency out of the window in one hell of a toddler temper tantrum and decided to kill anyone who he decided had done him wrong.
No hello, no how you doing, no nothing.
Just straight in for the kill.
Talk about bi-polar.
Now don’t get me wrong I am enjoying it, but Dr Frankenstein’s final telling of his story as he searches once again for his offspring, this time hopefully to put an end to it all, is getting just a little mind numbing.
Dracula next.
Dum dum dum…
–
Here are my newbies.
Sonoran DendriteMexican Crazy LaceMorgan Hill Poppy Jasper
For all his woe is me drivel I have to admit that Frankenstein seems to have definitely steered my designs toward a new path. Now, if only I can keep all of my fingers intact I might be on to something…
And yesterday after finding I needed to sleep on the sofa from 2:30 to 4:30, which I guess is another symptom of grief, I finally made it into the studio.
I nearly came straight back to the sofa as I had no energy whatsoever, but then I had a thought.
Hadn’t had one of those for a while so it kind of caught me off guard.
Instead of the radio I plugged my phone into the speakers and blasted music.
What a difference.
I ended up staying until 8 p.m. and have almost finished 5 pairs of earrings.
I’m telling you. If your dad has just died that world news can really bring you down man!
I’ve decided that I might need to lay off it for a while which is a shame as I do like to know what’s going on, but needs do as needs must I suppose.
In other news.
I’ve decided that I really must use up all my silver scraps as I almost have a full bowl of them which I try not to look at as they worry me.
I know that I can send them back to Rio, but I don’t know how much the postage will cost as they’re so heavy and I can’t get my head around it right now.
I think I am going to have to do it at some stage, but for now I’ve decided to just see how much I can reuse.
Kind of like a challenge.
But not.
I did flatten one of my scrap pancakes into a nice flat round of silver so that was a great result, but it took forever to keep annealing and rolling.
I’ve now discovered muscles I didn’t know I had in places I didn’t know existed from working that mill for that long, but it was very satisfying to finally get that nice sheet of silver.
Trouble is that I don’t want to use it now as it’s so lovely and the idea of messing it up and having to start all over kind of stresses me out. So I’ve put it to one side for now so that I can just look at it and be reminded of the little engine that could.
For when the old muscles recover of course.
Here’s a bracelet that I made using scraps.
But that touches hardly a zillionth of what’s in the bowl.
I did take the beads out of the bracelet as it made it too long, but it fits nicely now and I think I’m going to make some more.
I can’t seem to get back into the swing of things.
It’s o.k.
I am in the studio though so that’s good otherwise I might have to start worrying.
Since we last spoke I’ve sparked up the old slab saw and cut my first cabs on the CabKing.
Willow Creek Jasper
The Lapidary machine is a lot faster than the JoolTool and I think I prefer it simply because it has more power and grit. The slab saw is amazing. I thought I would just be using it for cutting the slabs and keep my smaller saw for trimming them into cabochons, but in the flick of a switch the automated slab saw becomes a manual trim saw and it cuts like butter.
It’s magic.
It uses mineral oil which is a little messier, although not that much as to bother me at all really, and bonus point, I’ll definitely have the softest hands in town by the time I’m finished cutting all the rocks I bought 🙂
I am going to have to practice, a lot.
The JoolTool was easier because I could see the stone from above as I trimmed the edges, etc. You come in more at a slant to the wheels on the CabKing and I don’t think I’ve quite got the hang of it yet.
See how that bottom cab’s top right corner isn’t the same as the left hand corner? The oval one is good, that’s just the angle of the camera, but the bottom one may well have to go back to the sander.
Another thing is that I found it was easier to miss small scratches on the top of the cabs. I just couldn’t see properly. Again I’ll just have to watch out for that instead of getting so excited to see the end result.
I’m definitely going to keep the JoolTool. It’s extremely handy for taking just a fraction off the side of a cabochon that you’ve fit a bezel too tightly for and for polishing. The CabKing has a polishing pad on its side, but I like using the JoolTool for finishing and I feel it will be more convenient for using different pads with different compounds on them.
I did have to work through the fear factor of it all when I first started, but actually once I got going it was fine. I still have all my fingers and toes
So I finally got around to starting up the new ol’ slab saw.
You remember.
The one I got after my dad died because I got to thinking why does anything matter anyway so why not.
No?
O.K. so I think maybe you might be getting the new ol’ slab saw a little confused with the other new ol’ thing I got because my dad died.
Namely
The CabKing extraordinaire.
And perhaps I completely forgot to tell you about the new ol’ slab saw thing.
Sorry.
So here it is.
The new ol’ slab saw thing in all its glory
The Barranca Diamond BD-10 power feed trim saw with 1/3 HP motor!
I refuse to feel guilty about it.
Except for just a little bit.
Maybe.
Anyway I’ve had it for a while now and have to admit to having pretty much ignored it as it’s sat there in its corner looking all important like.
Not because I was intimidated by it or anything.
:/
Of course I knew that it was there, and it knew that I knew that it was there, but we both chose to not know… in that not knowing way of knowing.
If you know what I mean…
But yesterday was the day I faced my fears…
Except I had just a little trouble understanding the concept of when a socket is a socket and not a socket trying to protect the world from catching fire.
You know, that old chestnut…
I’d bought my new ol’ slab saw a ground fault circuit interrupter because the instructions said I had to and as I have an inordinate fear of authority of course I did.
I also bought the saw the mineral oil it needed to run on.
So with all the instructions read and everything set up just as it was supposed to be I plugged the interrupter into the wall socket and the little light came on which to me, and call me old fashioned if you feel the need to, indicated that the thing was working and ready to go.
Nope.
Not a thing happened.
After all that anticipation and all.
I had to irritate myself by asking P to come in and tell me what was wrong with the darn thing and who knew (except for P damn him), that apparently the little light in the interrupter box meant danger danger Will Robinson and actually had to be off for the thing to work.
Man!
Since when did a ready steady go light mean everything was dead and wouldn’t work even if you did give it the death stare while shouting swear words at it!
So after P had given me the ol’ sideways, omg really? look which, you’ll be pleased to read, I deliberately ignored, I got out a rock and cut away.
O.K. so only after having to drag P back into the studio two more times to explain some other little tricky bits to me.
All I can say is that I was having a bit of an off day – and I’m sticking to that explanation so don’t question me…
Here it is in action.
AND it does it all by itself…
So you can get on with other things while it does its magic.
It’s a beautiful thing.
So guess what I’ll be doing today.
🙂
As I was preparing myself for this first brave step into slab cutting and toying with just leaving it in the corner for another week, I started another painting to take my mind off it.
But after biting the bullet and cutting two small slabs, which it did very quietly I might add, and rushing inside to show P my new lovelies it became evident to me that my excitement over conquering the fear of death by slab saw wasn’t going to elicit any amazement out of him. Nor Spud come to that.
And Nutmeg couldn’t raise a curious eyebrow to save her life.
It’s all boring me, so I’m not going to bore you with it.
I get out of bed. I shower (big effort). I try to make it past the sofa, and if I do make it, which is touch and go let me tell you… I go into the studio.
I have been making some stuff so it’s not all bad, but nothing else seems to get done.
To take my mind off it all I’ve decided that the jewelry needs a step up.
Every so often I think this is a good thing otherwise I feel I could become a little complacent, so I’ve decided that now nothing goes through the studio doors until it’s perfect.
Or as perfect as I can get it.
So I’ve slowed down.
I’m a very fast maker. I’ve always been that way. Actually, I don’t know if I’m a fast maker or that I just drop everything when I’m making and enter that zone where nothing else exists.
I don’t think this is particularly healthy, but it sure helps with shutting out all that world stuff.
But now I want to relax into it more.
Take my time and try not to get so excited about seeing the finished piece before it’s halfway made.
I always have at least two pieces on the go and this helps with the impatience somewhat, but how can someone be so particular about making all the fiddly bits that make up a piece of jewelry and yet be so impatient to have it be finished.
Anyway here are the latest.
I finished this.
Turquoise
And this, which was its running mate
Turquoise
Then there was this lovely piece of Willow Creek Jasper
Which slowly morphed into this.
Willow Creek Jasper
Then I decided to make it a cousin.
Once removed.
Peruvian Blue Opal
And after a cup of tea.
I thought I’d get the ol’ turquoise out again.
Which after much fiddling.
Became this.
Turquoise
Next I decided to go big or go home.
African Green Opal, Willow Creek Jasper, Dendritic Opal
But wasn’t quite sure what to do with them all.
I thought this might be a bit dark and moody for a flowery pendant.
Like a poisonous midnight bloom.
But wasn’t so sure about this one either.
I kind of liked this one.
But not with the tendrils as it looked a bit insect feelers like and creeped me out a bit.
In the end I chose this.
But must have been sleep making when I discovered that the shape was completely off at the top.
I don’t actually mind it, but it definitely needs something on top to balance it out.
So I’m off now to finish it.
I do have another African Green Opal which I’m going to make the other design with, so actually both drawings win, and that’s always a nice thing…
Now you might say that this is magical thinking at its best, but I know that when you enter the dark world of odd numbers there’s just gonna be trouble in store.
Just take a look.
1 3 5 7 9
Now you can’t tell me that all those odd numbers don’t look dark, angry, and downright depressed compared to their round and jolly even compadre’s.
2 4 6 8 0
O.K. so the 0 is a bit ominous…
Can’t see it? Then I can’t save you from the consequences of ignoring the possibility of imminent every other year danger.
Sorry.
But, I’m beginning to think I was wrong as so far 2016 has sucked, more so even than 2011 when both my mum and father in law died within a month of each other costing us a small fortune to go back and forth to the U.K. for their funerals. Not to mention the waste of time and energy it took to unpack from the first trip just to load it all back up again.
Oh, and let’s not forget the distress and anguish part.
To be honest this mess of a year did start back in December of 2015, as though it was saving up its winning card to throw onto the table right at the last minute – just when you thought you were safe – so perhaps that’s what set 2016 off on the wrong foot. But let me tell you, from now on the even years have got a lot of making up to do…
The story so far…
December – Cervical scare. Hospital procedure involving Victorian leg tights, deli cap, and stylish hospital gown. Waited a month. Nothing wrong…
Also in December – Kidney’s took a 50% function hit involving blood and pee tests – nothing like keeping your pee in the fridge alongside the dairy to keep life interesting. Two weeks of scouting out unsuspecting, healthy looking, kidney donors in the supermarket – only those in the fruit and veg section of course, didn’t want any of those vitamin deprived kidneys hanging out in my body, and the making of an extensive reading list to keep me going through dialysis.
January – Kidney tests came back A Okay for no apparent reason whatsoever except, I suppose, to keep the hypochondria fed and watered. This lead to a small smacking of the doctor to let him know that it sucked to be fooled into false diagnosis’s even though it wasn’t his fault. He should have known better than to pull his chair up that close to an anxiety ridden hypochondriac.
Also in January – Mammogram scare. Another month of terror. Hanging around. Tests, tests, and more test. Turned out to be a cyst… or did it. I can see that little blot on the landscape may well be hanging around in the depths of my overactive imagination for some time to come…
February – Ovary scare. Loads more tests culminating in the making of a, who get’s what, list. The studio was divvied out and preparations for the Viking send off in the pool were arranged. Couldn’t be doing with all the expense and ceremonious inconvenience of a regular funeral, rather a floaty, a large G&T, and then get the ol’ jewelry torch out for me.
March – Dad died. All of a sudden. No warning. No nothing.
April – Well this week really. Apparent heart attack… O.K. so that was jumping ahead a bit.
On Monday I went to the doctors having had chest pressure the whole week before. They wheeled me right down to the E.R. which was kind of embarrassing, and distressing as apparently there was a 6 hour wait! What! I almost decided to go home when my name was called. For some reason they like to check out the high blood pressure, chest pain, quiet, pale people sooner rather than later. So six tests and two days later I came home. Can’t say they weren’t thorough.
Turns out it’s probably anxiety, although I’m pretty sure it esophageal cancer. You know a hypochondriac is nothing if not vigilant…
So, taking into account that, alongside my dad, all those other lovely people have died. Bowie, Prince, Victoria Woods, Ronnie Corbett, to name just a few, 2016 pretty much sucks.
But, I know its number and where it hangs out so 2016 better be darn well careful from now on is all I can say…
So back to life…
Before the trip to the E.R. I finished the sad girl painting.
And this little lovely although I’m not enjoying how it looks like a bunny.
Polychrome Jasper and Turquoise
This, which seems a bit too chunky.
Candelaria Turquoise
And just before all the excitement I began this
Which has a long way to go if it’s going to hang around with the others.
The afternoon they released me from you know where I started these.
And it was wonderful to get back in the studio.
I finished them yesterday 🙂
Kingman Turquoise, China Mountain Turquoise, and something lovely
I call them my little freedom lovelies…
And now I’m putting chains on all of my older pieces in time for the art festival.
To me this is the most boring part.
Condor Agate, Ocean Jasper, Larimar, Ocean Jasper
So friends just to finish. I started this blog as a way to put myself out there. I wanted to show myself that it’s not worth living with a lack of confidence, and to face all of my insecurities. And it’s working. I’m growing as a jewelry maker and I found along the way that I wanted to share all of this, warts and all, so that anyone else who struggles knows that’s it’s o.k. and to just do it. In the long run, none of this matters.
So I share my mistakes, my anxieties, my hypochondria, all be it tongue in cheek. I am o.k. It’s all good. And I want to laugh in the face of it all (except for my dad) and just get on with making the most of it all.
None of this is meant to get you down or elicit sympathy, although chocolate never hurts…
A while back I decided to take the 100 faces painting challenge.
Why!
I know darn well that I never keep up with these sort of commitments.
So I’d only done two up until now.
This one
And this one
But yesterday I fought all day with finishing these
I just started to get really bored with it all even though I know I’ve the art show coming up and need some more jewelry.
So eventually, after a good amount of moping around while eating all the mint humbugs even though they made me feel guilty because they’re really P’s and I stole them, I gave the jewelry up and started another face.
She’s a bit sad.
I might have to change her up a little so she doesn’t look as miserable.
I couldn’t do much with it as even though it hadn’t rained for hours the electricity went out around 5 p.m. and I couldn’t see what colours I was picking up in the dim light.
For a heart stopping moment I almost used a brilliant red for her eyebrows which in my honest opinion just wouldn’t have worked.
Perhaps that’s just me.
–
In other news I have a confession.
I didn’t get out of bed until 12.30 today
🙁
Just couldn’t be bothered.
It’s now 2 p.m. and I still can’t be bothered to do anything.
🙁
Even though the face is waiting, and the jewelry pieces are waiting, and, it seems, everything is waiting.
I decided to give myself a pick me up after, you know what, happened.
Now, whenever I grind a stone, I can imagine my dad did it with me.
We’ll be in it together.
Trouble is when it arrived my immediate thought was to phone him to tell him the exciting news. He would have laughed at the thought that his daughter had bought yet another piece of machinery and perhaps wondered what happened to her and all the girly things.
But of course I couldn’t phone him so instead I took a photo of it and sent it to my sister and told her to show him.
He’s under her stairs.
He was on the porch for a while, then she put him under the stairs until we can decide what to do with him.
She can’t look at him yet. Also she’s had to give up watching soccer as she used to watch it with him every Thursday when he came to her for dinner which is a shame as she loves football.
For reasons only known to him, dad supported Queens Park Rangers. Traitor to those of us who know that West Ham is the team to beat. Well according to P that is.
My nephew called QPR and apparently we can spread dad’s ashes on their football pitch if we want to.
Who knew!
Lords cricket ground won’t have him though as, although he loved the game, he wasn’t actually a member.
I just can’t get over how many dead people all those cricketers and footballers must be playing on.
Do they know?
It’s almost as bad as all those dead people laying underneath the aisles of the churches.
William Shakespeare
Gives a whole new meaning to not stepping on the cracks.
Anyhow, in other news, I was thrilled to break the $50,000 mark and my new goal is $60,000. I did wonder if it should be $55,000, but then threw caution to the wind and decided to dream big.
The tank ran out again. I think I’m averaging just over six months a pop which means that twice a year my life is on the line.
This time I made the boy come with me. He wasn’t too thrilled about holding the tank in-between his legs though.
Can’t imagine why.
So now that little tragedy waiting to happen is once again over and done with and we didn’t blow up and the possibilities of being a grandmother is still viable, I now have a full acetylene bottle all set to go .
In other news, my final trial is over. The bad mammogram is put to rest for another year.
That was a bit worrying to say the least.
A whole month of waiting!
My hypochondria was never so thrilled.
Is this how it’s going to be from now on I wonder quietly to myself. A slow body breakdown from here on out?
Can she cope.
I think not.
I do seem to have finally got back into the swing of things, however, and am enjoying the studio.
I even bought me some new toys to celebrate the left breast news.
The super quick-change hand-piece.
And the intriguing hammer hand-piece.
With all it’s friends and family.
Not sure I really need them, but as I said, I’m celebrating, and it’s my birthday next week.
For bringing out those sweet little chocolate bird eggs again!
Every. Single. Year!
O.k. so now that’s out I’ll move on to the blog post.
Whilst I eat my chocolate eggs.
And put on the pounds as I do so.
I don’t eat a lot of sweets, but for some reason those little eggs are the best.
I think they put drugs in them.
–
I’ve been making rings.
I don’t usually make them because I never know what size will sell. In fact I’ve only ever made two or three of them before.
But.
They’ve been on my mind for a long time now, like a year, and usually when that happens for that long I just know that I’m going to be making not just one ring, but a whole bunch of them when the flood gates open.
It happened before with my first cabochon so I know.
It took me a long while thinking about it before I set my first stone, but when I finally did I think I had already sorted everything out in my head already and it was like I’d been making them for ever.
I couldn’t stop.
Bit obsessive that way.
So, I had these little larimars
O.K. and an amethyst…
and thought I’d make another bracelet like the one before.
But then I didn’t.
I knew I wasn’t going to even though I was going through the bracelet motions.
I tried to fight it, I did.
I thought, O.K., just one ring then.
You’ll enjoy it. It’ll be done. You can move on.
The other two can still make a bracelet.
Or two bracelets…
But nope.
One thing led to another,
And then there were three.
So I will take these to the art show and that way people can try them on rather than me getting the sizes wrong in the descriptions.
I have a gauge, but I’ll see how it goes.
I wasn’t so sure at first, but I’m beginning to really like larimar. Quite a pretty blue.
Next up I made some little lovelies.
Which I seem to have photographed out of focus.
And have decided to make some more of these to take to the art show also.
Right now I’m having a little trouble typing this as Spud has decided that my fingers taste remarkably delicious.
Told you the eggs had drugs in them
Probably cat nip.
In more exciting news I finally worked out how to use the dreaded mitre-cutting vise.
O.K. so I didn’t figure out how to use it as that was pretty simple, but I figured out how to make it work for me.
It’s still touch and go, but it’s progress…
I don’t know if any of you have one of these little beauts, but I’ve always found it irritating.
The top screws would never screw down evenly and it was all just fiddly and annoying.
Eventually I just forced the screws all the way, and lo!, that seemed to do it.
Now I think I was just being too timid with it.
Don’t really know.
I wasn’t ever going to touch it again. I’d put it into a drawer, right at the back so I wouldn’t have to think about it. It just irritated me that much,
Everyone who ever wrote about the thing would say how great it was. Their favourite tool. Couldn’t do without it. etc., etc.. And there I was wondering what planet they were from and if I could get a trip there.
But then someone asked me to make something I’d made once before which had a tube setting and I decided to give it another go.
It’s like I’ve passed some kind of initiation or something.
I’ll leave you with Spud after her chocolate egg overdose.
It’s very simple, and like most things creative, not unique to me, but if you’ve not tried making your own chains yet and fancy having a go, read on…
You will need about 4 ft of 19 gauge wire for this 18″ chain and simple soldering skills.
I used sterling silver because that’s all I had available in 19 gauge.
Of course you can use any gauge and ring diameter, but you will have to adjust for the amount of links, etc., accordingly. You can use copper if you prefer, but note that the solder tends to show more.
TIP
When making calculations for a different chain design or gauge I like to make a 4 or 5 link sample chain. This way I can measure how long that small piece of chain is and then multiply it for the actual amount of links I would need for the chain length I want.
I can also see at this time if I like the chain design and the gauge.
For this reason I’ve started making different sample chains out of copper for quick reference.
To calculate the length of wire needed for each chain I’ve found this handy interactive chart.
Jump ring sizes are measured using the inside diameter. To be sure that I actually have enough silver to complete the chain I measured the jump ring I want to use by the outside diameter.
–
Now for the chain…
Make 24 x 9.5mm jump rings.
Wrap them with tape.
And saw them apart trying not to slice your finger open – because it hurts.
TIP
After much experimenting I find it easiest to use long blade passes through the rings holding the rings just proud of the edge of a wooden block. Start sawing at an angle and once you’ve got a good purchase straighten up the blade so that it runs more or less perpendicular to the outside of the rings.
With practice it becomes easier and that’s actually the first time I’ve cut myself.
Must not have been paying attention.
Always pay attention…
Now make 26 x 3mm jump rings and do the same.
Beware as this is more fiddly and swear worthy.
Now solder the small jump rings together.
Note: I like the whole chain soldered, but you can skip soldering the small jump rings if you wish and just join the completed larger links together at the end.
For a completely soldered chain, however, I find it easiest to solder the small jump rings first.
For joining the jump rings I like to use chips of solder which I buy from Contenti.
I sprinkle a small batch directly onto my soldering board and use my pick to take them one at a time to the links.
NOTE
You do not need flux or solder to join fine silver together.
You really only need one of these tiny chips to solder the 19 gauge jump ring together. The key, as always, is to make sure that the ends of your jump ring fit tight together.
There shouldn’t be much of a gap at all otherwise the solder will not flow across the two ends to join them.
Now they are all soldered you can slip two of them onto a larger jump ring and prepare to solder that closed also.
TIP
Always point the joins you want to solder in the same direction. This way takes the guess-work out of finding the join, especially if you’ve done a good job preparing them and they’re so tight you can’t find the join at all.
Now take two of the soldered links and join them together with a third, large link.
Solder these also.
Now you’ll have groups of three.
Which you’ll join together with another large link.
Although at this point it becomes easier to solder the whole chain together at once.
Continue in this way until you have used up all of your jump rings.
Now you could stop right here and you’d have a nice, large loop chain to clean up and buff.
You could leave the rings round or hammer them slightly to give them more character.
But I took a pair of round-nosed pliers and opened up the links.
If you do every other link in this way you’d once again have a nice, large loop chain to wear.
If you then took the oval links and squeezed them together so that their middles touched, you’d have yet another design of chain.
But I was going for the figure 8, which is achieved by holding a pair of flat nosed pliers at each end of the oval link and twisting it 180 degrees, making sure that you twist each link in the same direction.
So here’s another chain design.
You could also change it up by using a different size joining ring.
Your options are limitless…
If you continue to stretch the rest of the 9.5mm links you can go through the same process, making a different style of chain at each stage.
But, like I said, I was going for the figure 8 all the way…
Here it is after the pickle.
And once it has been dunked into the Black Max, or Liver of Sulphur. and buffed.
All ready and waiting to go.
You can see here that I also hammered the ends of the figure 8’s.
–
Now for the question.
How much would you charge for this chain?
Bear in mind that you have to accommodate for your experience. For example it’s not fair to set a price when it’s taken you all day to make something which, in fact, it should only take you 2 hours.
I’ve made quite a lot of them now and each time this particular chain takes me 1 hour 50 mins from start to finish.
No breaks. No daydreaming. Just exact timing carefully watching the clock.
Right now silver is $15.79 and so this piece has $4 worth of silver in it.
If you have a scale you can easily weigh the finished piece in troy ounces and then calculate the silver content.
You can find the current silver prices at the top of Rio Grande’s site.
I have a scale similar to this one.
So, what is your formula for pricing?
I used to just guesstimate, but as time has gone by I’ve begun to see how important my time is and how, in the past, I was almost giving my jewelry away.
This had always been o.k. with me insofar I was learning my craft as I went along, but if you are serious about making and selling your jewelry there comes a time when you should start to look into the real value of your work, if not you are not only underestimating your worth, but also undercutting the worth of other artists.
I still have a bit of trouble getting in there first thing, but once I finally make it through the door I’m in there for the rest of the day.
I finished this yesterday.
I’ve had these little larimars for a while now and didn’t really know what to do with them.
I kind of like it, but there are a few changes I’m going to make to it today.
When I finish a bracelet I like to wear it for an hour or so to get the feel of how it lays and if there are any improvements I can make on it.
This one is a little different in that the focus is on two sides instead of the three larimars all sitting next to one another.
Look at that poor dried up skin 🙁
I actually like the oddity of the arrangement, however, although I didn’t think I would, but I’m going to change up the chain just a little so that it accommodates more wrist sizes. It fits me great, but I’d like it to have more options.
And, of course, what would a finished piece of jewelry be without the obligatory boo boo. Just when you finally put the thing down from spending forever buffing and cleaning it and exhaling that final sigh of contentment…
A leaf comes unsoldered.
Oh they look all fine and dandy here I know, but as soon as I turned my back on them one of them innocent looking leaves came loose.
The culprit here is the larger top leaf on the far right of the photo.
It’s still attached to the setting by its stem, but the actual leaf is able to bend when caught on something.
Not cool.
So the larimar is coming out, and that leaf is going to be re-soldered whether it likes it or not.
No one messes with the hand that holds the torch!
–
–
–
And now I’m back.
The leaf is soldered anew and the chain is revamped.
It was quite satisfying as I went from not being able to solder a darn thing last week to not being able to put a foot wrong this week.
I’m going to have to commit this one to memory as I tend to go straight to complete despondency when something in the studio goes wrong and take to the sofa vowing never to make jewelry again.
It’s exhausting, let me tell you.
P just rolls his eyes now which kind of bugs me because I totally mean what I’m saying at the time.
I’m just so misunderstood.
All I ever wanted was love, attention, and a good, strong cup of tea.
Here’s a simpler piece waiting to be finished.
Sooooo
I got this macro lens for Christmas.
Because, as this nifty little gadget twists straight onto your iPhone, I thought, Hey! I need to get me one of them things.
Brilliant.
And so Santa got me one.
Bless him.
And because sometimes I have to wait a while to get my head around new things I only opened the box yesterday.
Now I know what the term macro means.
I do.
But for some reason I thought that this lens would do its macro thing magically whilst I wasn’t looking and as I was taking the photographs the way I normally do.
After struggling a bit actually putting the lens on because, heavy-handed and impatient as I can sometimes be, I thought I’d snap some vital piece of it off and have to swear, I was a little disappointed to find that I’d been sent a defective one.
So I swore anyway.
Because the fact that the lens was completely out of focus couldn’t possibly be my fault.
Who knew that you had to actually put the lens right up close to the jewelry.
I mean so close that the cup on the end of it was practically touching the table.
I had to stoop so low that I nearly put my back out.
I wasn’t tremendously impressed at first although I did get to see that I really do need to stop cutting myself and start taking more care of my hands.
Maybe.
(I had to make this really small as it was shockingly real and scared me each time it popped up on the screen… weak heart.)
So here’s one of my jewelry.
The thing I haven’t worked out yet, if indeed it’s possible, is how to take a photograph in focus without the lens having to be right on top of the subject and so not being able to get more of it in the picture.
Also.
Dam’ I’m going to have to be good if I want to use this lens and not see every single mistake on my work.
I mean could it get any more in your face…
Now I’m not sure if I’m can use it that much, which is a shame as I really want to, and it was expensive, so I’ve decided I’m going to have to play with it more to figure it out.
Or just go find some stationary insects to gross me out and, despite my revulsion, become the next David Attenborough of the macro world.
So for two months I had kidney disease and all that implies.
I was already sorting out what books I could read whilst having dialysis and secretly eyeing up unsuspecting, but totally suitable, donors and wondering just how one goes about asking for one.
Could you just bring it up over coffee perhaps?
Like, So hey, you look like you’ve got a couple of healthy kidneys packed away in there. Do you think you’d be up for sharing one?
I mean seriously, how hard could it be.
But then lo, all this became a moot point as, on my next trip to the doctor, as I sat in the bright, sterile, completely unfriendly room wondering if there was a hidden camera checking up that I wasn’t poking around with the ultrasound machine, I didn’t have it any more…
He didn’t know why.
He was sat so close to me as he showed me all the lab results, like I actually knew what it all meant, that when he came out with the good news I actually smacked his arm as I told him that I’d had a really fun couple of months wondering how long I’d got left on the planet.
Not.
Just to keep the anxiety above the extreme level I also had to have the old ovaries looked at.
Let me tell you… I was on the edge.
Not to waste a good ultrasound I had the sweet tech girl have a quick look at my kidneys just to make sure that they were actually in there and, for good measure I had her check out my liver also.
I think she enjoyed it as she doesn’t often get a chance to rummage around looking for all the other stuff when usually her clients are only interested in those tiny baby things growing inside.
Although to be honest my right kidney did actually look like a baby.
It had that hunched over, floating around look that they have – only in the wrong place.
Of course as she’s not allowed to tell me anything and as I didn’t know what the hell I was looking at, it was all a bit of a futile exercise, but at least I got to make sure that I had them and that they were right where they were supposed to be.
How the hell they can see anything, let alone make out what’s going on in there, is beyond me. It’s like when the doctor pushes around on your outsides and tells you that he can actually feel your organs.
Right.
I go home and have a go and they’ve all disappeared.
Crawled back into the murky abyss I suppose.
So what with that on my mind and the trip home I was completely off going into the studio.
It was enough to drag myself out of bed.
But that’s over now and for the past two or three days P has been well out of luck with any dinner being presented to him on his return from the big outdoors.
I mean how hungry can you get sitting behind a desk all day.
I did feel a little guilty yesterday though, but as I sat finishing up one of my new pieces, it didn’t quite stop me from texting him that the chicken just did not want to get into the oven.
Not my fault…
Here’s what I’ve been working on.
And before I could actually bother to even look at the jewelry table here’s what I tried to get back into the mood with.
A little colour.
Now I’m working on this,
Which was the cause of the chicken protest.
And I leave you with one of the reasons my life is so complicated.
A note from P.
I get them sometimes.
He leaves them for me so that I don’t forget that sometimes there are important things that need to be done.
It was the first time we didn’t have it at our house with just immediate family, so that was a bit strange, but still nice.
We got to meet a lot of people we didn’t know. Like at least fifteen of them!
There were twenty odd of us all told, give or take a kid, stuffed into the smallest house possible.
Good job I’m older now and not as shy otherwise it might well have done me in completely.
And so yesterday I took a moment to myself and went into the studio. I don’t think I’d been in there for about a week.
I almost forgot how to get there.
So I did some more to this.
I’m liking the mirror finish on the water.
This time around I used oil paints over the oil pastels.
I don’t know if you can do this, and perhaps the painting will spontaneously combust when I’m not looking, but I decided to chance it non the less.
Living on the edge people…
I did the same to this one and I’m quite liking this one too.
(Yep, I said that)
The one below is on canvas instead of board.
I prefer board as I’m not keen on the texture of canvas and it doesn’t seem to take the paint as well for me.
But I think that’s just me.
Everyone else seems to get good results on it.
The next two were worked on before the Christmas shut down.
This one, was remarkably orange when you last saw it.
And this one is of a field of Triffids in the Rolling Plains of the Lower Kowlandis.
Actually it’s a bit too hilly to be rolling plains, but we’ll go with it for now.
I’m still working on them all, as well as the five thousand and sixty-three others hanging out in the studio, but they’ll all have to wait now as I leave for the mother land tomorrow and have still to organized myself.
I just found out that my green card expires at the end of the month so I’m lucky as I’ll just about make it back into the U.S.
Nothing like checking out these things before you decide to travel is there.
I didn’t even think to check my passport, but fortunately P, being the only executive in the house, had it all under control.
Except I thought executives had peeps to do all that organizing stuff for them.
Most likely no one will work for him…
I’m sure it would have been o.k. though.
You can get all the paper work done on-line now and Spud is always willing to help out.
Except here we see her lying down on the job.
To be fair I think she’s become hypnotized by the psychedelic painting on the screen.
No excuses Spud.
And here are two new jewelry pieces.
I’m thinking of changing up this one because I can’t decided if I like the stone combination.
Isn’t that lavender stone beautiful?
And I think that’s a piece of Royston Turquoise
I can’t remember what the lavender stone is right now.
And I also made this one (below) which I quite like.
This is a nice piece of turquoise also.
And so all that’s left for me to do is leave you with Nutmeg, who doesn’t quite understand why the orange seems to be bigger than her head.
And Wally contemplating the bananas
And Pickles who has definitely eaten all the pies over the holiday.
Save yourself girl. Eat more fruit…
And so I wish you all a Happy New Year – when it comes to you.
Just yesterday my dad and sister were here and it was July.
Why didn’t anyone tell me that it was going to be December already.
I wasn’t ready…
Not that I’m worried about Christmas. I’ve always been a wing it person when it comes to preparations.
In other words I forget all about it until it’s a week or so before, then I get a little worried that I’ve nothing done.
You’d have thought I’d have figured it out by now.
I’m so over worrying about doing things the ‘right’ way. I think it’s one of the best things that comes with getting older.
I could do without the achy joints though.
It’s the knees.
I think they’ve had it.
I remember when I was at art school lying on my bed one afternoon trying to figure out how old I would be when the new century came around.
Math was never one of my strong suits.
Or maybe my confusion was because I couldn’t ever imagine being that old.
41
Man!
And now that’s over and done with what else is there to worry about.
I’ve been thinking a lot recently about me then and now. I’ve felt a shift and it’s kind of sad, but in an exciting kind of way.
It’s like all of a sudden I’ve become different.
Like a layer has been peeled away and I didn’t do it and didn’t want it to go, but now i’s gone and I’m left a little lost.
Like I’ve got to grow into the new me.
I’m a little worried that I’ll waste myself.
I think a new strategy is in order, one that hopefully involves finishing The Goldfinch because I’ve been reading it for five hundred years now and it looks like I still won’t be finishing it any time soon.
One that involves enjoying stuff, finding out the important stuff, not worrying about what people think about me, enjoying who I am, and finishing things that I love to do.
Looking after myself, and the people I love.
Getting out of bed and getting on with things instead of dreaming about doing them.
Being more spontaneous.
Not being afraid.
(I’m afraid of everything and it’s boring)
Using my powers for good.
And just doing it for heaven’s sake.
Do you think it’s too late for me to be an astro physicist?
Would the math part be a problem I wonder.
–
As I ponder these life problems I leave you with a new piece.
A little seed pod, plucked and fashioned into a necklace before it could grow into the fearsome Triffid it was intended to become.
For the time being at least, we can rest safe knowing that one more threat of world domination has been removed from this world and that we can all put our laser guns away.
And maybe get ourselves a good haircut and shave already…
But before I posted it yesterday I took another photograph as I wanted to show you the back of the bracelet.
I love making the backs almost as much as the front.
And I started another painting.
I’ve begun to realize that I’m a starter painter and not a finisher.
I must have about fifty of the darn things hanging around.
I’ll be that crazy old woman who leaves behind so much stuff that her kids have to pull their hair out deciding what to do with it all.
The cats must be attracted to weird start-up people because this is how I wake up most mornings.
On my side with at least two cats balanced on top of me.
Glad they’re comfortable.
So
What to do today?
I always wake up at a bit of a loss really.
On the weekends P watches his football team lose.
This is them running away from the ball.
I used to hate football, but now I love listening to it.
There’s a special football noise that reminds me of home and it’s kind of comforting.
It comes with some danger, however, as I’ll be sitting here in another room, happily dribbling out my thoughts to anyone who cares to read them, and I’ll either hear despondent groans, or loud euphoric yells of victory which make me jump out of my skin.
Fortunately the latter happens rarely.
Good ‘ol West Ham!
You go boys…
So I’m sitting here wondering what to do today when I know full well it will involve the studio.
I’ve been thinking pottery which kind of annoys me as that’s a whole new ball game when it comes to disappointment.
Worse than the painting as at least you can change a painting where as there’s no hope for a pot once it’s fired except to smash it up and make mosaics.
I don’t want to make mosaics so let’s hope that little urge passes soon.
–
So all that’s left to say is a happy Sunday to you all and may your football team always win.
But don’t forget to put the ear plugs out for those of us who don’t care…
I think I shall call it – Blinded by the Light of the Glorious Hills.
I’m determined to persevere with the darn paintings.
Every so often I think I’ll have a go and then spend the day wallowing in and out of disappointment and moaning to P that I can’t do it.
I think he’s kind of over it.
Again.
So today it’s back to the jewelry before the kids come over.
As Thanksgiving has never been that big a holiday for us, especially as we’re English and have no family over here for us all to get together with and make it special, I told the kids that if they wanted to spend the day with their significant others who are American and have deep roots in this wonderful tradition, I would be O.K. with that so long as I get to see them all today.
Friday.
Of course, I forgot all about S who has no significant other and who bemoaned the fact all day that he had no turkey.
And, of course, as soon as the girls said O.K. that’ll be great, I felt completely abandoned.
And I felt bad that I had made this Thanksgiving arrangement without consulting P.
But, hey.
We got to go to see James Bond, which was almost as delicious as eating a turkey leg.
Afterward we thought we’d top off the day and pick up some Indian takeaway, but what d’ya know, even they were closed for the holiday.
Man!
We had to go home to cheese on toast with S giving me the sly, so it doesn’t matter to you that I’m an American, look.
He had beans on toast.
A traditional English feast so I don’t know what he was complaining about anyway.
So our first non traditional Thanksgiving is over with to which I can only tell you that it has made me very grateful that I have family to miss and that next year I will be happy for everyone else to decide what they would like to do instead of trying to make sure not to upset anyone with wanting my grown ups to be with me only.
Here’s my latest piece.
Made with beautiful turquoise that warms the soul.
Thank you for your nice comments Patti, they made me feel good.
🙂
I hope that everyone who celebrates had a wonderful Thanksgiving.
Alongside putting on chains it’s probably my least favourite thing to do, especially as I like to take them on this one particular tile outside my back door and so it means getting down on my knees or sitting on one of those tiny plastic step stools.
Getting up is a nightmare. Sometimes I think I’ll have to be down there forever.
It’s probably due to all the floor scrubbing I did in a previous life come back to haunt me.
Here are the new pieces.
Silver Lace Onyx
Back
Silver Lace Onyx
Back
I cut them from this beautiful slab of Silver Lace Onyx
Which I got from Rt395Minerals on Etsy.
As usual I didn’t really look at the dimensions and this piece turned up huge!
See that first what looks like a crack but isn’t coming down from the top right hand corner?
That part to the right of it is all I used to cut the stone which is 1.5″ x 0.75″ and then I sliced it down the middle because I thought it was too thick and so made the second piece.
If you look at the two pieces you can tell that they are sliced as the markings are similar on each.
Man I’m getting good with the trim saw.
😉
This whole slab cost me $8!
O.K. so almost $14 with shipping, but still, what a find.
And he’s still got some if you’re interested.
The stone took a great shine and I’m really happy with them.
Here they are with two others I’ve got lined up.
Jools and I have still got some practicing to do, but on the whole I think I’m improving.
So back on out to the studio.
I’ve got four more days until we go away for a week and I’m already getting withdrawal symptoms.
I’d like to tell you that everything I make starts good, ends good, and everything in the middle is perfect.
But…
–
So I cut this nice little Willow Creek Jasper cabochon from a big chunk I bought from The Gem Shop.
And thought I’d show you something I made with it.
I decided to go for something like this, but wasn’t sure about the garnets.
I thought they might be a little too pretty, but decided to go ahead anyway.
If you’re new to bezel making here’s how I prepare mine.
I run a length of bezel wire around the stone and cut it off a little larger than it needs to be.
If the stone has corners I define those with a pair of flat nose pliers first.
Then holding it as tightly as I can I tuck one end underneath the other and mark where it overlaps with a pencil.
O.K. so that was a lot more overlap than I needed.
I was obviously feeling generous.
Now I snip the extra off leaving it a slither longer than I measured it.
And I work the two ends by pushing them beyond each other to close up the gap and create some tension when they touch together.
I use my flat nose pliers to slightly flatten the join. This helps to finish up the alignment.
The join has to be perfectly aligned before soldering.
With no gaps.
Now I solder it.
I like to use a third hand and place the solder piece on the outside of the bezel, but there are many ways to do it. Just make sure to heat the silver evenly so that the solder flows over the join. If you heat one side more than the other the solder will pull away from the join toward the hotter end and the solder won’t fill the join.
If this happens take your flame away, start heating the whole thing again so that the silver heats evenly and then help the solder flow across the join with your pick.
The bezel should fit nice and snug.
See.
Look at the shine I got on that cabochon.
I did that.
😉
In fact I was so impressed with myself that I celebrated with a cup of tea.
Here’s the other side.
They’re not so impressed. Especially the last man.
Next up I soldered the bezel wire to the back plate and pickled it.
And because all of a sudden I thought perhaps I should I’ve stared rinsing the piece in a solution of water and baking soda when I first get it out of the pickle.
Then I rinse it in water.
I also hold my breath when I open the pickle crock pot.
The hypochondria’s been creeping back in.
It’s O.K.
I’ll be O.K.
:/
Now I trim away the excess silver from around the bezel wire leaving a couple of millimeters as a border.
And then I cut away all of the silver plate inside of the bezel wire.
You don’t have to do this when making a bezel setting. I just like to sink the stone down into its surround a little more to try to give it more depth.
If you want to try this make sure to saw as close to the inside edge as possible otherwise you’re going to have to do a lot of filing.
And that gets boring real soon.
The end result should see the cabochon passing through this first step of the bezel without it getting caught on the sides.
Just in case you were wondering we’re still on the rise bit of the project so try not to worry too much.
If you haven’t got one of these special little glob on a stick things you’ve got to get one.
Aside from coming in very handy they just make me smile.
I’m sure there are lots of other fun stuff you can do with them aside from picking up small things that don’t want to be picked up and, of course, you could easily make your own out of wax, but even when I’m not using mine I sometimes have to look over at it and give it a wink.
Just sayin’.
I used it in this instance to pick up the garnet and measure it with this gauge tool.
I’ve got to tell you that this is another one of my smiling tools.
It’s just so simple and neat.
And here the two of them are doing their stuff together.
Brings tears to the eyes…
O.K. so I measured the height of the garnet and then marked out the length of the tubing.
Now I use the corresponding bur bits to drill out a seat for the garnet.
This takes a bit of practice and a steady hand as there’s not much room to play with if you chose this method to make the bezel.
The first couple of times I made one I gave up on ever being able to do it properly.
But.
This is still not the fall of the Willow Creek Jasper.
I know you’re getting anxious.
So there’s hope.
Always hope.
Again, there are different ways to do this, but this is the way that I’ve found works for me.
I take an old pair of flat nose pliers and hold the tube against a wooden block and gently drill out the middle, first using the round bur.
Up until now I’ve found that the tube easily slips out from the pliers if you’re not paying attention.
But then.
I had a brain burst and got out an old pair of plastic tipped pliers which I rarely use because they don’t have a spring handle and I don’t like them as much as my other pair.
These grip the tube so much better and I’m not worried about ruining the plastic stuff as I never use them anyway.
Win win.
(Update: The heat from the drill bit melts the plastic stuff so it doesn’t work after all. Man! I was so excited as well. I’m going to see if I can’t drill some tube sizes into an old pair of pliers, or something like that.)
After using the round bur to drill away to the depth you need you go in with the setting bur.
This one creates a little ledge for the stone to sit on.
Check out the fit as you go along using the fun goo stick thing.
I prefer the beeswax as the Bur Life is too crumbly for me.
And voila!
The stone should sit level in the bezel cup and deep enough for the edges to be pushed over the slope of the stone.
With practice this is possible.
My theory is.
If somebody else can do it. So can I.
Be strong.
Now I place all of the components on a sheet of 22 gauge fine silver to outline where I need to saw the sheet to prepare for soldering.
And so begins the downfall of the Willow Creek Jasper…
It all started innocently enough.
A phone call with P.
Another cup of tea.
Some yelling at Willow who has taken to barking all of the time wherever she is and whether she wants to or not.
P thinks it’s because she’s deaf and old and becoming senile.
I think that’s a bit harsh.
Deaf maybe.
You can yell at her all day and she won’t hear you.
But look at her.
🙂
So basically I was distracted and didn’t know it.
And so happily continued on my way
Until everything was nicely soldered.
Except for the little balls which needed a slight adjustment.
Nothing much to worry about.
Except for the fact that I had soldered the bezel collar upside down which might not have been a problem except that the stone really really didn’t look as good this way up as it would the way I had intended it to be.
I could have continued with it, but it would have bugged me every time I looked at it and as I’ve decided to really try to make the best jewelry I can and also didn’t want to begin over, I reheated the piece and took the whole lot off and re soldered it the correct way up.
A little tricky as, if you remember, I had cut the inside of the bezel away and now had to try to solder it back on again with no wiggle room whatsoever.
Here’s a trick to removing already soldered components.
If you just want to remove one item then heating it and picking it off with your tweezers is good enough, but if like me, you want to remove everything, it can be difficult to keep the heat spread evenly enough to loosen everything at once as one side invariably cools just enough for the solder to harden again.
So basically, just as you get one side of whatever it is you’re trying to remove loose the other side becomes soldered again and you can end up going backward and forward in a never ending spiral of desperation until you either melt the stuff accidentally, or more likely on purpose, as you’re so very frustrated and annoyed with it all.
To ward against flinging your torch across the room at this point and setting the room on fire I find that if you turn the whole piece over and heat it from the back it gets everything glowing nicely and evenly and then you can quickly turn it back over and pluck the pieces off easily.
Of course then you have to chance that one of the components will fly off the tweezers and burn a hole in your leg so that you’ll never be able to walk again.
Fortunately this time I was saved by the towel.
Always pluck carefully.
Now, of course, because of the traumatic rescue, the whole bezel setting is a complete mess and solder has flown everywhere including into places that you never knew it could flow into.
And also the little border I cut out at the beginning was a little messy and uneven.
To even up the border I marked the outline with a sharpie which helped me see the areas I needed to file away.
I have to admit that I cheated here by using one of those handy little flat burs.
Even so, it took some time.
A few moments of, Man! Why can’t you get anything right.
And another cup of tea.
But eventually I cleaned it up, and soldered that pesky leaf back on which had decided that with all the fun going on it would take a little field trip.
Next up I cut away the excess silver.
Filed it and added a bale.
Then I cut away the back design.
Just so’s you know, the flower design is upside down here on purpose and has nothing to do with the fiasco above.
The top half of the back of the cabochon isn’t as nice as the bottom and I wanted a nice colour to show through.
Then I cleaned it up some more with the flat bur and trimmed away the collar to the best height for the stone.
And gave it a good scrub with the Penny Brite and a toothbrush.
At this point I wasn’t too sure about how to hang the bottom garnet as, although wire wrapped tear drop beads are nice, I felt it would be a little too unfinished for this piece.
So I made it special home.
Yes, I know.
It looks like a cow bell.
Then, relieved that the struggle was almost over, I blackened it with Black Max, buffed it as much as I could, and set the stone.
After setting the stone I covered it with blue tape and buffed some more.
Once I’d got it to the point I was happy with I got out the setting tools for the smaller garnet.
These are neat little punches that hug the round of the bezel cup and, as you hammer the top gently, push the bezel over the stone.
It’s a bit freaky when you first start using them as you just know you’re going to damage the stone.
But it works well if you take your time.
And so there you have it.
I’m still not sure about the bottom garnet, and might change it up, but on the whole I like it.
Especially as now the stone is the right way up…
Here are a few others that I just finished.
Turquoise
Back
Flamingo Rose Agate
Back
Green Opal
Back
Now I’m off out to yell at Willow again because she’s driving me nuts!
It really only makes me feel better as she can’t hear me at all…
Yep. N’s car got drownded (as the kids used to say).
In lots of water.
And they had to wade home in it up to their knees at 4 a.m. for an hour and half while we slept oblivious to the phone calls and texts.
Good parents we are.
The Mini Cooper is a ferocious beast with eight, yes read that again, eight air bags crammed into that small, but safe, cocoon of a vehicle. B has had five, (don’t talk to me about it), accidents in hers and, aside from the extortionate amount of money they charge to put the thing back together again, she wasn’t hurt once even though two of them were really bad and involved 360 degree spins on Austin freeways.
One might say they’re a bit of a bumper car really.
But it seems they are no match for the elements when it comes to driving through hidden flood patches.
Perhaps they should have triggered all of the bags and floated across.
Guess you’re not thinking straight in stressful situations.
So, not a lot of luck with the cars really.
That’ll teach them for going out on a Friday night enjoying themselves…
–
So it’s Monday again.
And I’m off out to the studio.
I did spend yesterday reading my book and eating dinner with the kids and I think that was all I needed.
A day of nothing.
However today this little lovely is waiting for me.
And I had two sales over the weekend that I’ve to post which is quite nice and cheering.
Especially as this
Found its forever home.
One of my favs.
I’ve been really lucky just recently with selling some pieces and I have a feeling that I’m up to $44,000 now, but haven’t sorted it out yet.
I think I might send it to Heifer International this time as I’m getting a bit depressed about Syria and I’ve had to stop listening to the news for a while.
So I’ll be concentrating on sheep and goats for a while now to shake it off.
Except for the bunnies.
I won’t be thinking of Heifer sending any bunnies to anyone as what do you do with them except use their fur and eat them?
I’ve started putting a small amount of flux in a small lidded jar which helps considerably with the stuff drying out.
I use Wolverine Ultra Flux, but it dries out so quickly and however many times I regurgitate it (yes I know that’s not the right word, but it sounds so good), it just dries out again and again and again.
By putting a small amount of it in a jar it just seems to remain workable a lot longer and is a lot less annoying.
So.
That’s my tip of the day folks.
Unbelievably remarkable, but true.
Also, I’ve just tried out this Firescoff stuff.
I bought the small bottle of it, and you might wish to do the same, but really, I didn’t find it that brilliant.
It was expensive and it didn’t last that long.
Perhaps I’m not worthy of testing its significance, but I honestly didn’t see that much difference in it keeping my work clean.
I have, however, started covering the whole surface of the silver I’m soldering with flux and that does seem to make a big difference.
You see P told me that if I didn’t buy cat litter on the way home that day that I couldn’t live here any more.
Did that mean I would be locked out of my studio, I wondered quietly to myself.
I could break in the window while he was away hunting and gathering perhaps…
I got the cat litter.
I don’t like to go to PetsMart because I have to look at the cats.
I can’t look at the cats.
In fact I’ve been banned from looking at a cat from inside a five hundred feet no go zone.
Once I look at a poor forlorn PetsMart cat I’m on a downward spiral toward becoming the crazy cat lady.
I know this.
P knows this.
I can’t believe he forgot it when he told me, in no uncertain terms, to get the litter.
We can only get the sort we like at PetsMart because I kept buying every bag that was on the shelf in Kroger and I think the man got a bit fed up with having to restock the shelves.
It was just one more hassle in his stressful day.
So he discontinued it.
Darn him.
So now I have to venture into the land of abandoned cats else I become homeless myself when P chucks me out for not getting the litter.
Fortunately I made it out alive and cat free, but I did have to take a sneaky peek in the kitty kennel and found the poor soul above who just happens to look a lot like Charles. A cat relation of ours.
Who does that to a cat?
They’ve spray painted him green and purple.
It’s not even his colour.
He’s more of an Autumn, which would be browns, burnt oranges and suchlike.
See.
Blusher for Autumn Colouring
If your colouring is light you will be best in Linen or Peach.
If your colouring is medium you will be best in Peach or Almond.
If your colouring is medium to dark you will be best in Almond, Warm Blush and Fudge.
Eye Make-up for Autumn Colouring
The best eyeliner and definition colours are going to be Cocoa, Fig, Olive or Forest.
For your base shadow you can choose from Pearl, Sand or Toffee.
It’s been on my mind for a while now to stop with the fiddly things.
I’m not sorry that I made my last piece as I think I’m really getting better at soldering all the little bits together.
What I’m not good at is polishing.
I like the oxidized look, but I’m beginning to get irritated that I can’t get it to look how I want it to.
I like the fact that for it to not be oxidized I’d really have to step it up.
Shiny silver shows up every mistake.
Challenge accepted?
Maybe.
Only because I don’t like shiny as much as oxidized, but I’m thinking this will step it up for me.
We’ll see.
I don’t want to stray too far from my style, even if my style is going a little over the top right now.
Here’s the piece as finished as I could make it.
Without its dangle.
And I hate it.
What I do like is the back.
I’m thinking of making more of these for the front.
I also like the ruffle around the turquoise.
At one point I got so frustrated with the finishing that I made a real hack job of getting the stone out so that I could really get down to business.
I think I have a tendency to give up on a piece when I know I’m never going to like it and so am not as careful with it.
I’m working on that.
I didn’t mind as my intention, after I realized that the bezel wasn’t going to make it, was indeed to ruffle it and then solder a new bezel inside of the old one.
It would mean grinding away some of the width of the turquoise, but me and Jools were up for that.
That’s until I got really fed up with the thing and GLUED the stone in.
Yes.
You read it correctly.
I glued the darn stone into the bezel.
I have never done that before and have vowed never to do it again.
What happens now?
Well the piece never gets to go out into the real world.
That’s for sure.
I might keep it around to experiment more with the finishing, but it will probably find its sad self melted down at some point to become a new model.
Maybe a few of these.
turquoise
I kind of like that. I even kept this one for myself.
I know!
So here’s one of my first pair of shiny earrings.
With a little tiny bit of oxidation, because I couldn’t help myself.
😉
larimar
All Spud can say about it is
When exactly did you say I can get this darn collar off!
I haven’t used the old JoolTool for a while now. Not since I learned how to fix the thing. So I thought it was time to get the old girl out and give her a whirl.
So I threw her a little turquoise.
She worked like a dream.
No showing off and throwing her attachments across the room.
I didn’t have to swear at her once.
So encouraged I got out some old sketches.
And picked one.
(That one on the left looks a bit creepy. Must have been my gothic insect period.)
And here’s the sketch posing with its forever friend.
Then I thought I’d try my luck with another piece, but although I liked it in the sketch it didn’t look as good when I started fiddling around with it.
I tried drawing it another sketch, but didn’t really like that either.
So it’s back to the drawing board with this one.
–
First up I cut out all of the leaves for the new design and soldered them onto a piece of silver sheet.
After my nice chat with the old man at the craft show I’ve started coating all of the silver with flux instead of just the parts that I’m going to solder and it does seem to prevent the fire scale.
It’s cleaned up here, but the back plate was pretty much how you see it now immediately after soldering.
Next time I am going to cover the leaves also and see what happens with them. Perhaps I can eliminate all that lovely gunk in the center.
It will be a shame to see it go as we’ve become such good friends, but…
I have already cut away the inside of the bezel here and the turquoise slips nicely through the bottom.
I like doing this as it seems to give the piece more depth.
Next up I play around with it and gather all the components that I think will work.
After I’ve worked out where the pieces are all going I draw an outline that will support everything visually.
I do this before I take all of the little pieces off, but forgot to take a photo with them all on there.
Sorry.
You’ll just have to be surprised all at the end.
Now I saw the piece out.
And file it until it’s as good as I can get it.
Next I get another sheet of silver (I’ve used 22 gauge for both pieces here) and trace around the top piece and inside the bezel area with a Sharpie.
As you can see from the photograph below, I then draw a precise grid on the silver with pencil.
And decide on a pattern for the back.
At this point it’s extremely important to be precise.
Make sure your grid marks line up as perfectly as mine below.
Now I make a hole in each area I’m going to cut out, except for the center, and saw away.
And then I file the cut out areas until I like what I see.
Next I freshen up the outline.
This helps to place the two pieces together in the exact position for soldering so that the back pattern is centered.
I know I was joking about the grids above, but this part is actually important, otherwise the back will look awful.
Been there. Done that.
Now I solder the two layers together using the special broken pick technique and at the same time I solder all the little components on.
A bit tricky, but doable…
Here’s the back.
I forgot to mention that I stamped the back before I soldered it onto the front.
You can stamp it afterward if you forget by supporting the silver on something solid that will fit into the bezel space.
I typically use one of my disk cutting punches to do this because there are enough sizes to fit into a variety of tight areas.
It can be a bit awkward balancing the piece this way but serves me right for forgetting.
Sometimes I forget to do it on purpose because I don’t know exactly where I want the stamp mark to go. Then I congratulate myself on my tricky balancing trick stamping technique.
It’s all in the perspective.
Sooo,
Next up.
The cutting out of the final shape.
–
I had to take a break here, because when I drew the final shape around the top layer I didn’t like it.
So much for planing ahead.
So I decided that perhaps I would put some more ‘stuff’ on it, but that I needed to sleep on it.
O.K. so I didn’t need to sleep on it at all, but I had to go inside to make dinner.
Hate it when that happens!
Anyone would think that P was out working all day just so I could sit in my studio and play.
The guy wants dinner as well!
Seriously.
Actually it was a good move because as soon as I opened the fridge I realized I was starving.
We had chili so’s you know.
And it was yum.
–
Now it’s the morrow and I decided I needed brain food to start my day. So I made myself my all time favourite breakfast sandwich which I reserve for important thinking days.
The toasted Philadelphia cream cheese and banana sandwich.
(It’s almost too good to share with you.)
After which I was ready to face the studio with brilliant ideas.
Or so I thought.
It started out O.K.
I added some more doohickeys.
I cut out the little drop holder area which looks uncannily like an old mans mouth with a drunken nose.
You can’t un-see that now can you
🙂
And then I added the bale.
The next step was to blacken it.
And polish it.
And therein lies the problem.
Look at it.
This smacks of my pottery making dilemma.
I can make the darn pots, but I’m always disappointed with the glazing.
If I ever go take a jewelry class it will be on polishing.
I swear, if I could make the piece and someone else polish it I would give them my first-born child.
Although that might be a bit hard as she’s 26 now and doesn’t live here anymore.
But I will track her down if it means my pieces could buff up the way I want them to.
So,
tomorrow I have decided to give it a rest and clean the house instead of going into the studio.
I know. Desperate times.
I’ve decided to give the piece a little time to knock itself out and enjoy the joke, then I’ll be back out there working on it until I either figure it out, or chuck it in the scrap box.
It’s up to you new jewelry piece.
It’s up to you…
I leave you with poor Spud.
She could care less about the drama going on in the studio.
Not to be defeated I went on to make a bigger, better, stronger,
Pathetic Lump
So that the first Pathetic Lump would have a friend and not feel so alone in its patheticness.
Little do they know that their friendship cannot last as it’s back to the flames with them.
As soon as I can be bothered to go through the whole process of making yet another mold.
Don’t fret for them my friends as once they stand at the crucible’s edge they will happily sacrifice themselves to the inferno knowing that other forms may come into being.
If the form master can get her act together and figure out how to do the darn thing.
Actually I think I’m close.
It’s just the sprig that needs sorting out is all.
Too much silver is trying to force its way into that little tube and starts to cool before it can fill the mold. I just get too nervous when I’m carving away the sand in case I hit the mold and mess it up.
Obviously I’m nowhere near it and can dig out another centimeter at least.
Onwards and Upwards.
We will never surrender.
In other news.
The painting, or at least one of them, is coming along.
I call it,
‘I can be a little harbour if I want to so leave me alone and get on with your own stuff why don’t you.’
I’m just going to figure out how to make the houses look not so silly and then I do believe I might even say that I have finished it.
I know right!
Also,
I bought me a cup.
Ain’t it cool
🙂
Off to make the new generation of Pathetic Lumps now.
We had a great art fair and the weather was absolutely perfect.
For a minute I thought we must be somewhere other than Houston.
NO humidity what so ever.
Brilliant.
AND I met this really neat little old guy and we chatted forever about jewelry making.
Loved him.
Never had such a good conversation about flux and firescale.
Today I feel shattered.
Everything hurts and I even had to get out of bed early because my legs hurt so much that I thought I needed both hips replaced. Like immediately.
Man!
How do all the other people do it?
Am I the only weenie around?
So today, after I had to take Advil (double weenie) I’m off out to the studio to either try my hand at sand casting again, or to finish up my painting.
I’ve cast two things so far. One with the bad sand which I sent back, and one with the good sand which I’m actually thinking is also bad sand because there’s no way the pathetic lump of silver that emerged from the mold could be my fault.
Bit of a let down really.
Not going to give up though.
I’ve also come up with a better way to cut my jump rings so I’ll be writing about that (Gale) as soon as I get back to jewelry making.
Might be a while with the old hips playing up though.
So, $2,500 is going off to Care.
Thanks for all the good wishes and to the weather god.
Every day I go into the studio just to find some excuse to take a break.
Even after just fifteen minutes.
When I can’t find a reason to leave the studio I just decide that I’m so thirsty I’ll die if I don’t get a drink stat!
What’s all that about?
Remember this.
That wouldn’t cooperate and decided that it just didn’t want to be made even though it deigned to pose to show you what you can do with all your broken pick sticks.
Well it took me three days by Jove, but eventually I was able to finish it in-between all the drink breaks and consequent rest room trips.
They’re very expensive, but I’ve had one before and I really like the quality.
You just design your logo and send them the pic.
It also took me five years to make these.
Ocean JasperOcean Jasper and Chalcedony
In the meantime, while I was procrastinating going into the studio by ordering more stuff, I bought a sand casting kit.
The wrong one as it turns out.
It all looked so easy on the videos, but man, that sand went everywhere. I even got some in my mouth.
It was like I was a child again.
O.K. still…
I couldn’t keep my space clean to save my life, yet the man on the video didn’t get a grain out of place.
It was very depressing.
My first casting came out so horribly that I just packed all the stuff back into the box in disgust and put the whole thing down as a waste of money.
But I really, really wanted to do it 🙁 and if that man could do it, so could I damn it!
I’d bought it on Amazon and decided to go back there to buy some different sand and try again.
The same sand that the annoyingly good at it man used.
And, while cursing myself that I always get things wrong, I decided to read the reviews on the kit I’d bought.
Now I always read the reviews before I buy anything.
Always… except for this time.
Should’ve read the darn reviews.
Everyone complained about the sand, and when I came to think about it, I couldn’t quite remember why I had bought the brand I’d gone for in the first place when it was more expensive than the brand I’d originally gone onto Amazon to compare pricing on.
The funk’s messing with my brain man!
Then I got a bit ticked off because it was 120 odd dollars and it didn’t work even though it said, new and improved sand, in big letters on the tub.
That should’ve been my first clue.
So in a fit of determination I sent the whole package back even though I’d used the sand and the casting flask had burn marks around the funnel area where I’d poured the silver in.
I told them on the little return box that I’d used it, but that it was horrible, but Amazon refunded me straight away, even before the company had received my parcel back.
I was quite impressed.
Don’t know if the sand casting people are going to be though.
Now I’ve ordered the one I wanted in the first place.
Stay tuned…
Emboldened I next contacted a nice lady on FB who reps for JoolTool.
I’d decided that I’d had enough of defective tools and products.
If you remember some of the discs that came with my JoolTool (seven of them!) kept spinning off the spindle when I was using them because their threads had worn or something.
These things are expensive and so are the adhesive pads and papers that you stick to them.
I mean this bunch right here cost over $400!
(I shouldn’t have looked at the price…)
I’d already contacted the shop a couple of months ago and no one had answered me, so I was feeling pretty taken.
BUT this rep was great and Anie, the product designer and owner, phoned me and walked me through fixing them and now they are perfect and ready to go!
Great result.
Great customer service.
Very happy camper right here.
To celebrate I have a little pair of earrings you can make.
All for you 🙂
First take 18 gauge sterling silver wire and wrap it around a mandrel six times.
I’ve used the largest ring on this pair of pliers.
It always irritates me when I get this particular pair of pliers out because I can’t remember why there is a number 1 and an asterisk on them.
I don’t think I put it on them, but why would I buy a pair that were marked?
Just another of life’s mysteries to mess with my mind…
Now snip and solder them.
Shape them into rough ovals and haphazardly hammer them.
And group them into threes.
As always I’ve forgotten the next photo which would have been of making a loop out of a thicker piece of wire.
I used 8 gauge half round wire.
Now loop the three wires through it and solder the top of the loop together.
Because the half round wire is thick I left the top of it shaped as a teardrop instead of trying to get it perfectly round.
Now find two large silver balls that you have in your silver ball scrap box and solder one onto the rounded part of the thick tear drop ring.
The next photo’s are fuzzy, sorry. I tried hard to get good ones, but, as good as I am, I couldn’t hold everything at once.
Hold the tear drop point facing down in your third hand tweezers.
If you haven’t already got third hand tweeter, get some.
They’re invaluable.
Saves a lot of hospital visits.
Now make sure that all of the soldered areas of the thin large rings are facing down away from the tear drop and place one of those old pick sticks through the tear drop to separate the three rings from the soldered part of the tear drop.
This will help prevent the tear drop solder flowing onto the three rings while you’re soldering the ball onto the round part of the tear drop.
Capisce!
Put some flux on top of the round end of the tear drop and on the bottom of the ball.
Heat the bottom of the ball and pick up a melted ball of solder with it.
Now heat up the round end of the tear drop and solder the ball onto it.
Turn the tear drop over and clasp it in the third hand, again putting the broken pick stick between the bottom of the three rings and the inside of the round end of the tear drop as before.
Get a little jump ring and place it in your third hand with the join facing downward and put some flux on the bottom of the jump ring and on the tear drop end of the large ring.
Gently heat the jump ring and pick up a small piece of solder as you did with the ball.
Now heat the tear drop end keeping the jump ring away from the flame, but close enough to stay heated and when the solder is ready touch the jump ring to the tear drop end.
Pickle the earrings.
Make some ear wires.
And polish the way you desire.
And voilà!
Your earrings are ready.
Now you can knock yourself out and make as many variations as you want.
I tried a different way to connect the ear wire here, but don’t like it as much as the other way.
Always good to experiment though
😉
I leave you with the progress of the painting.
And,
you might want to look away…
a poor me sawing injury
because when you’re in a funk normal activities take on a life of their own and like to do things to make you swear.
So I got this far and then decided I was bored with it.
So I moved over to the jewelry area and half heartedly played around with some sketches and stones.
And decided on the spider one.
Even though I knew that it really wasn’t ever going to be the same as the drawing.
Just to step it up a bit I used one of my new stamps on it.
And then soldered it onto a back plate that was way too large for it.
That annoyed me as I usually pay a lot of attention to the amount of silver I waste to the point that I often have zero wiggle room to work with which also annoys me because then it’s touch and go that I’ve enough silver around the piece to do what I want with.
Guess the search for a happy medium continues…
Now I will share with you a tip for what to do with all your old pick sticks.
I don’t know about you, but after a while my picks start to loosen from their wooden handle. Even though I try to ignore it for a while they eventually start to swivel in the handle when I’m doing the picking thing with them.
I still try to ignore it, but then it just begins to get ridiculous and I can’t do a thing with them.
That’s when I get excited because I remember that hey! I can just buy a new one.
I’m a bit slow on the uptake sometimes.
So, not one to be wasteful, (apart from the huge amount of silver waste above), I keep the pick ends and use them to prop up pieces when I’m soldering.
See.
Anyway, long story short, it all looks good here, but the soldering flopped due to the funkness and then I had to go in to make dinner…
Not before I added a bit more to the painting though.
So… that’s it.
In other news, while I was bored with it all and in one of my funks, I bought a new table top to add to the jewelry bench area and now it feels more complete.
I’m telling you, that small Swedish store is a blessing when you need a funk distraction.
Now my jewelry area is fantabulous.
And I feel very fortunate.
And just so the painting side of the studio didn’t feel left out I bought it a new table and drawers also.
That side is still a bit of a mess, but I’m working on it…
But look at all my pastels!
They have a happy home…
🙂
AND last, but not least, I have to tell you that I’ve hit another milestone.
Today I am going to get out of bed and make something with my chunky chain.
Can’t think what yet, but I’ve given up painting again so that will help get me back into jewelry mode.
I’m a little concerned, however, as my alarm went off this morning and I have an awful feeling that I should be going somewhere that I’ve completely forgotten about.
I’m going to miss something I don’t want to go to.
I just know it.
Like a doctor’s appointment, or the evil dentist man.
Because that’s the only reason I ever put my alarm on.
While I feel somewhat relieved that I can’t remember where I should be going today, I now have that pit of doom feeling that I can run, but not hide, from whatever it is I should be doing on this fine Monday morning as they’ll get me in the end.
I always book nasty things on Monday mornings to get them out of the way.
Maybe I should make a Monday morning appointment for a dementia test…
It all started when I stumbled across a series on Youtube called JTV Rock Star Designer because I was too bored to bother going into the studio and needed some inspiration.
I’ve suffered through all six episodes so far, and now have to wait until next week to find out who the two finalists will be. I think the winner gets to design a jewelry line for JTV.
I’m actually very surprised at how horrible the jewelry is and that, in the six hours they’re given to complete a piece, they can’t seem to make something that looks a little more professionally finished, but I suppose they’re under a lot of pressure. Also they’re only given half an hour to come up with an idea. That would be the hardest part for me as I generally make it up as I go along.
They’re also given some pretty gruesome materials to work with.
I’m not particularly impressed with the show, but of course now I have to finish watching it.
Then I discovered the artist videos and I love them.
It makes me want to go back to art school.
I went to Winchester School of Art in the U.K. What I wanted to be was a painter, but somehow I ended up in the sculpture department. I still would like to be a painter, but I’ve never given myself enough time to really get into it and now I just end up making piddly paintings which I enjoy, but which aren’t real paintings in my opinion.
Now these artists are making me a little sad that I never really gave myself to it.
I did love making the sculptures. I especially liked working out how the darn things would actually stand up and not kill someone.
I still think about making a sculpture of a woman sitting with her beautiful legs crossed in her beautiful designer clothes using nothing but used fake finger nails. I mean, what do they do with all of them once they’re done. I imagine that there are bazillions of them, in all shades of lovely, somewhere out there filling land fills and waiting to destroy our world.
Perhaps she could be having drinks with a refugee.
Who knows.
So I got my degree and then, nothing.
Well, there was the marriage part, and then the kids part, so it wasn’t exactly nothing.
Now it’s my part, and I’m really enjoying it.
Problem is that I’d have to get up before yesterday and go to bed after tomorrow, to be able to do all the things I’d like to.
Just pick one laddie!
Anyhow, so while I’ve been away I’ve been dreaming of all the things I started out to be and how I need to start being them.
The time is now people!
We just need to get down and be the people we know we are inside and stop fussing around with all the other stuff.
You can make these plain or textured, wonky or straight, rustic or perfect, but these are the way I made mine for the pieces you’ve seen.
I use fine silver.
I buy all of my sheets in fine silver and most all of my wire in sterling. I like to use fine silver for my bezel settings because it doesn’t tarnish like sterling.
Sterling tarnishes when exposed to air because it has a little more base metal in it than fine silver. Sterling is .925 silver and fine silver is .999 making it purer. PMC is also .999 as is Thai Silver.
Just love the Thai Silver 🙂
Back to the project…
Cut a strip of 24 gauge sterling silver, or fine silver, sheet and texture it with a favourite stamp.
I have a selection of stamps from the Indian Jewelry Supply store – HERE
It’s like christmas every time I look at them.
Cut a manageable length off the strip and wrap it around a mandrel.
You might need to anneal the silver to do this as stamping, hammering, or any work you do to a piece of silver hardens it. Annealing the metal by running a soft flame over it until it changes colour and then quenching it, softens it again making it easy to work with.
Some people don’t quench afterward as they say the silver hardens again, but, as you may know by now, I’m too impatient to wait for it to cool on its own and I’ve found that quenching doesn’t really affect the results I want for this project.
When you’re annealing be careful not to melt the metal. It just takes practice. If it does start to melt no worries as you can then practice your reticulation skills, but that’s for another day… 😉
You want the silver to just begin to turn a dull pinkish color then take your flame away.
Now you can bend it around the mandrel until the two ends meet for soldering.
The mandrel can be anything that is the shape and diameter you want. I often use anything on hand. The shanks of my stamps or dapping tools, wooden dowels, but better still are the mandrel sets that come with a jump ring maker.
Like this
As you then have a selection which will last you forever and you can more easily match the mandrel diameter to the size of bead you’re using.
I’ll be using 8mm beads for these tube ends.
Now solder the seam.
Once soldered you can cut the tube into the lengths you want either by hanging it over the edge of your bench pin.
Or by using some other way to keep the tube secure as you saw.
This is an old paintbrush.
For this method, slowly turn the tube and gradually saw around the circumference for an even cut.
Now you can put the smaller lengths of tube back onto the mandrel so that it just overhangs a couple of mm’s making it easier to file the ends straight.
At this point you can decide whether to keep your tubes straight or make them wonky.
I like wonky.
So I use one of my dapping things to hammer into the tube to flare out the ends slightly.
And then I might even hammer them down even more to wrinkle them.
I haven’t done that here, but just so you know all of my secrets…
The next step is to punch out the silver discs which will be the end caps of the tubes.
I like them to be just a fraction larger than the tube, (including the flared out diameter), as you’re going to dome them and this reduces the diameter of the disc.
Now you can use a hole punch or a drill to make a hole in the center of the discs.
I’ve found the easiest way to use a hole punch is to mark exactly where you want the hole to be with a sharpie and then place the bottom of the punch over the mark.
Then you can see exactly where to punch.
Now you will shape the discs into the caps using a dapping block.
If you don’t have these tools you can perhaps use makeshift ones.
Making shallow holes in blocks of wood, for instance, may make a good substitute for the dapping block. You can also round off a matching dowel piece to use as the punch.
For the discs you will have to either saw them or snip them. You can then file them down when they’re soldered to the tube.
At this point you are going to solder the caps onto the tubes.
You can solder the first cap from the inside.
But will solder the second cap onto the top.
Warning:
You can only do this if there is at least one hole in the silver for the hot air to escape.
If you do not leave a hole the heat will build up inside and the piece will explode!
It will fly away from the soldering board and, if you’re as lucky as me, will probably land on your body.
And it will hurt.
Now clean up the edges of the caps with a file and sanding board.
And they are pretty much done.
These are my ‘rustic’ ones, but you can make these so that the joins don’t show. It will just take more precise measuring and filing, etc.
Of course this doesn’t always go according to plan.
I’m just a little too impatient to read all the books and watch all the YouTube how too’s.
I just like to look at the pictures and wing it.
So I’ve made a few of no go’s over the years, and that’s o.k. as sometimes new ideas come from them.
I tell you this as I just want to remind you that, for most of the time, I don’t really know what I’m doing. I would hate for you to think that I have the best advice out there, even reasonably o.k. advice.
But I just love making stuff and think that if you want to have a go at something you should just do it without thinking you have to be some kind of expert at it who never makes mistakes.
Here’s a mistake.
19 gauge sterling silver wire using an 8mm mandrel.
Oh yes, it looks all fine and dandy I know, but it’s stiff and lifeless.
The gauge of wire is too thick for the diameter of the ring and the chain can’t move freely.
Now, I know that when you’re using rings to make a chain you need to know the ratio between the wire gauge and the diameter of the ring.
Yep. I know that.
But when I want to make something and I get excited I ain’t got no time to go looking for a chart or read the books, so I eyeball it, make a wish, and have a go.
Don’t try this at home folks.
Actually I wasn’t far off. I think half a millimeter may have done it.
Or maybe one.
(See, I’m doing it again.)
Don’t do it people!
Get a chart.
(I haven’t found a chart yet but I’m looking.)
If you have a chart I want one in millimeters, not fractions. I can’t be doing with all of that 5/16 stuff unless you’ve also got a chart for turning 16th’s into millimeters.
Math is NOT fun for me.
Web surfing is, however, so I’m off to find my chart as soon as I finish up here.
So the chain wasn’t a waste of time really, because I also decided that sterling silver hurt my fingers too much. But using sterling silver wasn’t a waste of time either as I soldered each link perfectly, not always a regular occurrence, so that was pure satisfaction right there.
See.
So next up I made another chain, this time using 20 gauge fine silver with the 8mm mandrel.
Much better, but I’m going to make another today using the 8.5 mandrel.
You should have a go if you haven’t yet.
It’s fun.
And the sense of accomplishment having made your own chain is a wonderful thing.
Warning: I may have mentioned that I still haven’t got ‘the chart’ so you might want to wait until you, or I, find one or I actually make a chain that’s perfect.
Don’t hold your breath on that last part.
–
So.
Single Loop Chain.
(This is going to be boring for people who already do this, so stop reading now unless you need a nap)
20 gauge fine silver 8mm mandrel
Make your jump rings and fuse them together.
I use a hard charcoal block for this.
The most important thing to remember when fusing silver is to make sure that you have no gaps in-between the two parts you are fusing together. The join has to be completely touching. If you have any gap at all, however tiny, the ring may fuse, but you can end up with a thin area of the ring which will be weaker than the rest of it.
So preparation is key.
Place the rings on the block with the joins all facing the same way. If you’ve done your job right and the ends are flush against each other it can be really hard to see where the join is so this eliminates that problem.
You want your flame to be a little softer than perhaps you usually use so you can turn down the pressure on your regulator a little to get it to a nice balance that will heat the silver, but isn’t so fierce that it melts it.
Now keep the flame moving around the ring until you see it just start to change, then quickly hover it over the join and take it away immediately the silver flows.
Keep the flame there too long and it will melt into a ball. Then you just continue to melt the ring and add it to your ball collection.
This might grow considerably as you practice.
It’s o.k. 😉
You want to keep the flame moving around the ring as the whole ring should be brought to the same temperature. If you get a gap, or a thin area, where the join is you either had a gap there to begin with or you have heated one side of the ring a little more than the other and the silver has gathered there pulling itself away from the join.
It’s just practice.
You don’t need any solder or flux to fuse these fine silver rings together.
Now you are going to stretch the rings out using a pair of round nose pliers.
Try to keep the rings at the same place on the pliers each time you stretch one as you want your shape to be as consistent as possible. I use the tips about 2mm down. You can mark the pliers with a sharpie or tape if you need to.
It’s at this point in the game that you’ll discover if your joins are fused properly.
It’s good to find this out now rather than later, so either re-fuse the broken ones or add them to your ball collection.
Now squeeze the middle together.
And bend them in the center.
Use a length of wire, (I’ve used copper here), to anchor one end of the link and push the top ends together.
Now you can slide another link into the first.
To do this you may have to squeeze one end of the second link together slightly so that it fits through the hoop in the top of the first link.
sorry about the photo.
Also you can push an awl, or your center punch, through the hoop you wish to thread the next one into to widen it slightly.
Now you just continue to make the chain until you get to the length you need.
Once it’s completed, anneal the chain by gently running the flame backward and forward over it until the surface of the silver just changes slightly, and then quench it.
For the next part you’ll need a draw plate.
I bought mine HERE, but you can find them anywhere, and any kind will do. I just drilled a hole through an old piece of wood before mine arrived.
Once the chain is annealed pull it through the draw plate to even up the links and make it look beautiful.
You just want to even up everything at this point and not stretch it so be careful which hole you pull it through.
The chain will be crunchy afterward so just loosen it up in your fingers and then voilà!
You are done.
Finish it however you prefer, I like to blacken mine, and then make something extraordinary with it.
Go on. You know you want to.
🙂
–
P.S. Remember Ann Cahoon has a great visual tutorial on chain making – HERE
I really liked the lightness of this design, but for some reason, which I can’t remember now, I went a different way with it.
Now it’s heavy and Victorian looking and only people who like heavy Victorian looking things will perhaps buy it – which leaves out most of the population.
Is this self sabotage I wonder.
To make jewelry which is not to the taste of the majority of people.
Or is it a genius scheme to save me from ever parting with my beauties.
We may never know…
So this stone, which is beautiful by the way and now happens to be one of my new favourites, had to be pried from its setting twice because one of the balls kept falling off.
We won’t mention names.
Carrasite Jasper
I hate it when this happens and for it to happen twice, each time after I had cleaned it, blackened it, polished it and smiled with satisfaction at it, just sent me right over the edge.
The best way I’ve found to pry a stone from its setting once you’ve pushed the whole bezel collar over and sat back thinking it’s done by golly, is by using a scalpel.
I used to use one of these double ended pottery tools
Because I’ve got loads of them hanging around.
But even though they look thin, the knife-edge is actually a little too thick and it’s also easy to bend.
So, after much deliberation, like a nano seconds worth, I went to the scalpel.
Which seems more dangerous, and it is, but sometimes we have to blow caution to the wind and just get down to business.
Just gently slide the blade down in-between the bezel collar and the stone and wiggle it slightly until a small opening occurs, then slowly move it around the stone. Sometimes you can’t slide it and have to push it down again to make another opening.
The key is to do this slowly and to not push the collar too far out from the stone all at once. It’s best to do it in little movements as you work your way around the stone.
If you try to move it all at once the collar will get marks and crinkles in it so you want to do the least damage to the collar as possible.
Otherwise you may as well throw it in the bin and start over.
The tip of my scalpel blade snapped off which makes it easier to use. In fact you might want to take a small section of the point off to begin with so that you don’t have it fly into your eye when it decides to do it for itself as that wouldn’t be good.
Needless to say, always use your safety glasses as well as crossing your fingers.
So, there you have it.
I sincerely hope that you won’t ever have to take your stones out because your balls fall off, but if you do, know that there is hope.
It takes me a while to get back to normal after my family leave.
I like to sit around wallowing for a couple of days.
I also like to give up cooking, stop going to the grocery store and stay in bed for a little longer.
O.K. so I always stay in bed for a little longer, but now I have a reason to.
My brain stops thinking about anything much and my head becomes a dull vacuous cave with barely enough sunlight for even the dust motes to play in.
(Too much?)
But I have got a great new studio to get back to.
When K was here we found a small backwoods furniture shop called IKEA and bought me some new stuff 🙂
It was a great opportunity to get this done as my sister was able to lift all the heavy stuff while I directed.
She didn’t complain once about her RA, but I did have a sore finger and couldn’t quite manage.
Actually we found a nice man who put everything into the back of the car before I could turn around to help him.
If only he’d waited.
Now I have drawers.
And super solid work surfaces instead of the jumble of old tables I used to have.
I still have my old table that I do most of the work on because the new ones were too long for the space, but I put a plank on two of my little drawer things and now I have a shelf and even more drawers to keep my bezel wire, silver plate and the small useful things which clutter the table when they’re not being small and useful.
I’ve still got more putting away to do, but to be honest, without K here I’ll probably try hard to ignore it, but ain’t it great 🙂
O.k so it’s not a winner exactly, but I felt that since we had talked about the chain I’m still impressed with myself for making, that it’s something of a big reveal to show you what I did with it.
And so, without further ado,
Open the curtains please…
The Bracelet.
Dah daaah.
Lol
Bit of a let down really.
Made myself chuckle though.
And
Just because I like you, here’s a new link.
–
Take a manageable length of 16 gauge sterling silver wire and hammer it flat and file the end.
Now make a small curve with your round nose pliers at the flattened end.
Still using your round nose pliers shape the wire into a link so that the small curve is on the inside.
As you close up the link push the wire past the end it’s to be soldered to so that when you wiggle it back into place the ends of the wire will be touching.
Annoying I know, but the two ends have to touch to solder.
As you form the link match it to a master link.
This way you’ll always be checking it against the same size and it will be easier to keep them consistent.
Now cut the link from the remaining wire
And make it a couple of friends.
When you have as many as you need pick solder the ends together.
With just the tiniest pieces of solder.
Now trim them and file the ends smooth.
And join them together with a soldered jump ring.
Then you can go to town with making another bracelet.
Because you’re on a roll.
🙂
–
Sorry that a few of the photo’s are bad quality, but you get the drift.
It’s just been a weird month that plugged into my hypochondriacal, so I’m going to die now am I, self, which only stopped yesterday afternoon.
Nope it wasn’t big.
Loads of people go through it.
BUT
I didn’t like it and I felt really really sorry for myself and really really annoyed that I was feeling sorry for myself and everything screeched to a stop as I planned for how I was going to react to my biopsy being positive.
Told you.
Hypochondriac.
Actually my doctor said that she had seen hypochondriacs and that I wasn’t one, but I’m pretty good at hiding my secret life of health anxiety so she didn’t know that I had already planned my funeral and given away all of my jewelry tools.
(Penny, you would have hit the jackpot! Especially as my imminent death didn’t stop me from buying more.)
Sooooo,
That’s about it folks.
I made it.
I’m still here.
And now that’s over I’m going to take my jewelry to the next level.
Again.
–
In other new.
My dad’s here so that has also slowed down my days.
But I did manage to finish a piece for Leslie.
Blue Opal and Ocean JasperBack
I’ve also finished a second piece for Leslie to consider, but I don’t like it and can’t concentrate as much as I would like to at the moment on making something better.
And before dad arrived I made a chain.
My first.
And I was pretty darn pleased with myself.
I started on a double one, but got the gauge wrong and haven’t been able to start another yet.
If you want to make chains this is a really good dvd.
And they’re really not as fiddly as you think they’re going to be.
Of course I haven’t got on to the triple double o.m.g. one yet so I’ll have to get back to you on that.
Throughout my trauma Spud has slept.
Without a care in the world.
Just to rub it in.
But I still love her.
Even though I had to restock on phone charging wires and computer leads.
She doesn’t discriminate. P’s leads are as much in danger as mine.
And she comes onto the bed at all hours of the night when she decides she needs to spend a couple of hours purring next to a human head at decibels exceeding those made by a pneumatic drill.
It’s all good.
–
And finally, to all of my cyber friends who need a boost.
Just a small one concerning those parts of the body that an old grandma might refer to as the ‘unmentionable’ bits.
It was nothing EXCEPT that I had to sign my life away, have HALF the blood drained out of me, have an EKG AND a chest x-ray, AND was asked if I have a living will and, just to make me feel really good, would I like to have the chaplain visit me…
These people obviously didn’t know I’m a hypochondriac.
On top of that I had the added pleasure of paying thousands of dollars for the privilege.
We’re lucky to have care when we need it, but how on earth do people manage if they haven’t got thousands.
All the people in the hospital, except the mean looking desk lady who didn’t know how to smile, were really nice.
Not that I felt like hanging around or anything,
but really nice.
I got to wear the long white victorian tights, the puffy purple gown with the vacuum pipe attachment, and that nice deli counter cap.
Why can’t they just put that thing on you when you’re not looking? I mean, they do everything else while you’re sleeping…
I didn’t want to go and don’t mind telling you that I felt very sorry for myself.
I had to toss up between going in to hospital for a couple of hours with living in one of George Martin’s books or turning myself in for a fifteen month prison sentence – voluntarily.
We’ve just started to watch Orange is the New Black. Not sure that I like it, but it certainly came in handy for weighing up my options.
As for George Martin. What the hell’s going on in The Game of Thrones anyway.
All you get is the boy who can’t walk being dragged around in his little caddie chair and dreaming about crows and doing his eye rolling thing. I don’t know where he thinks he’s going. I don’t think he knows either. The tall soldier lady dragging around her one handed captive. Stark’s ward sniveling like a little boy in the corner and not doing anything to help out anyone. O.K. so I know he was tortured, but get a grip man! The oldest daughter just sulks around in fine dresses. The youngest daughter stabs anyone she can get her hands on with her little sword and looks like she smells bad. And dragon lady just wanders around messing in other people’s affairs and generally not really doing much but looking pretty. John Snow just is, and the poor half crusty girl has to sit in her little dungeon room all day reading books.
I only like the dwarf.
Now we have to wait until we get to watch season 6 and I will have forgotten everything that happened and why it happened so none of this will matter anyway.
But with all these options available to me surgery was the least worrying.
Except it messed with my brain man…
And when my brain gets messed with it thinks that this
amazonite
Is the same size as this.
charoite
But it’s not.
And now you have enough big beautiful blue/green rock to make more cabochons than you can count on two hands, which is roughly about one hand too many.
But, I did get a gift.
rose quartz
Because the nice rock man probably knew my brain was a mess.
Oh well.
Could have been worse.
It has got to the point where I daren’t let P into the studio anymore.
If he knew the extent of my (let’s call it) habit I might end up needing surgery on more than my unmentionables.
In other news:
Spud is a nightmare and likes to use Pickles as a spring board to elevate herself to higher levels. Fortunately Pickles is so fat that she doesn’t even know this is happening.
The 100 day project stopped for a couple of days because of Tuesday and the whole brain short circuiting thing, but should be up and running again soon.
I dropped my laptop (again) and now it likes to do its own thing even though I press all of its buttons.
Probably because I press all of its buttons.
And I’ve made a few pieces of jewelry including this
Pickhandle Turquoise
And these.
Flower Jasper
And I’m just now starting another pendant with one of my new favourite stones.
For anyone out there who would like a comprehensive tutorial on prong setting, bezel setting, and flush setting faceted stones, Ann Cahoon has one of the better demonstrations I’ve watched.
You can download it to watch immediately or purchase the dvd.
And here’s another piece I’ve just finished because I know you were wondering.
Silver Onyx and Charoite.
I’ve decided that my next pieces will concentrate on finishing and polishing.
Jane I know you asked, but I’m really not that good at it.
For the pieces I make with the leaves I simply buff the hell out of them using one of these
These
And these.
The bottom two make it easier to reach into the nooks and crevasses.
You can also use fine sandpaper.
I know steel wool will work also, but I threw mine away because it hurts.
All those tiny slithers of steel get into your skin and even if you wear gloves there are still stragglers on your bench etc..
They really hurt.
I know, I’m a weeny.
I actually find it very hard to finish my pieces.
My journey to correct this starts now…
stay tuned.
When I get frustrated I take it out on a perfectly innocent canvas.
Sorry canvas.
As you all may know by now I start a lot of paintings, but rarely finish any of them.
I’ve decided not to let it bother me and just enjoy the flow.
Perhaps I’ll get to finish this one as I’m pretty sure my acetylene is going to run out at any minute and I won’t be able to replace the tank until later next week.
I’ve spoken about my cabochon habit before, but today I thought I’d fess up.
They do say that admitting it is the first step to recovery.
Ocean JasperAfrican Green Opal, Labradorite, Chalcedony, and some strange pieces at the bottom.A mixture of odd yummiesSome Prudent Man, Ruby things, and other lovelies.This is the chrysoprase, chrysocolla, gaspeite, and shattuckite page with a few odd ones sneaking in.Crazy LaceThings I don’t know what to do withSerpentine, blue opal, petrified wood and larimar.Red Creek Jasper, Sonoran Dendrite, and a few of their friends.The turquoise page, although I think a crysocolla has sneaked in when I wasn’t looking.Fossilized CoralAnd, of course, the brecciated mookite page, with some phoychromed something or others, a couple of willow jaspers?, and two stones that don’t know why I bought them.
Don’t judge me.
They actually are more beautiful that the photo’s give them credit for. The colours didn’t come out well.
I took them so that I could keep an eye on what they’re doing and print them out to design around.
Somehow I’ve got to set them before P sends the van to take me away.
I did make some pieces recently that I didn’t show you.
One of the custom pieces.
Imperial Jasper
Which was followed by his friend who didn’t want to be left out.
The friend
And I started another painting.
In other news.
Spud is causing as much trouble as she possibly can.
Except when she’s so tired she just has to fall asleep wherever she happens to be.
Here she is at the vets
And this is what she thought about it.
I think she’s actually been sent here to cure me of my need for material things as she and Nutmeg continually race back and forth until all my things get broken.
And all my computer and phone wires get chewed through.
I’m going to share with you my latest adventure into jewelry making where I seemed to have fire scaled the living daylights out of an innocent piece of silver…
I have to tell you the truth, up until now I hadn’t given much thought to fire scale.
I’d heard the word bandied around the jewelry channels often enough and yet, as with many things that cross my path, I didn’t think they were talking to me.
Those colourful papers with school activities and happenings would come home from school in the kid’s backpacks and I would just put them aside thinking they were meant for other mums.
Until I missed the event and wondered why no-one told me.
Yep. That’s the world I live in.
I think it’s called dissociative.
I call it happily going on my way and ignoring the stuff I don’t want to deal with.
Like fire scale.
Then, as I was making my latest piece, I was taken by how beautiful a piece of silver was that I had just soldered.
I mean, look at it.
And I was wondering if I could make a piece and somehow protect this finish.
But I believed it was just the flux having a field day with the heat and that it would just come off in the pickle.
Actually, I haven’t pickled that piece yet, so I still don’t really know.
Ah, the wonders of experiment.
Anyhow, somewhere in the back of my head the word ‘fire scale’ started to wake up, and now I think that’s what it might be.
Which might bore some of you because it’s pretty much like all of my latest pieces.
I bought a nice piece of Peruvian Blue Opal from Shirl.
I didn’t like the shape, but I liked the stone.
So I had a few drawings hanging around and decided to make one…
or two…
You know how it is.
First up I re-cut the stone to fit my design and polished it through all of the grits of the Jool Tool.
I do like how I can now adapt stones I’ve already bought, and for that I think the Jool Tool is worth it for me.
So here it is in its sketch.
I’m kind of over the big leaf design, but for some reason here’s another.
I made the opal, and it’s friend, a collar.
But felt that to just solder this onto a sheet of silver wouldn’t look good as it needed some more substance.
So I rolled out one of my silver pancakes that I’d melted down from my scraps.
Because I wanted chunky.
Decided where I wanted the dimension.
Used that sticky film paper
To cut out the shape.
And then decided it needed to be stamped.
I then soldered the collar onto it.
And that’s when that beautiful surface design happened.
The back didn’t look quite as good though.
That must be the copper coming to the surface.
Still kind of interesting though.
Because I wanted the stone to sit down further into the design I then cut the inside out of the bezel.
This also reduced the weight of the piece.
I try to saw as close to the inside edge as I can otherwise I’ll spend a lot of time filing away the excess.
I want the stone to pass easily through to the bottom.
Next I tidy up the edges of the bezel where the stamping may have distorted the shape and see how it looks on the sketch.
Now I solder it onto its new back plate, which is 22 gauge silver sheet, making sure to leave enough room around it to be able to give it a ‘step’.
Here it is trimmed to its final outline.
And now a much needed chip break.
I don’t usually eat them, but S brought me in some.
I think just to make sure I was still on the property.
You can see from the last photo (above the crisps) that I have traced a line around the inside of the bezel where I want the collar to fit against the stone.
I now also decide on the design I would like to put on the back.
I draw it onto the inside of the bezel because it’s easier to saw it out this way. I also always use a sharpie pen because I find that pencil rubs away as I’m sawing and so I lose the shape.
I don’t cut it out before I solder the first part of the bezel onto it because I want to make sure the design is exactly where I want it to be.
I drill the holes.
And cut it out.
And at the same time cut away and file the extra from the height of the bezel collar.
As you can see above I’ve already cut out the leaf shapes.
You can snip them out of scraps, but here I’ve used my saw as I haven’t got any scraps left.
They’re all repurposed pancakes now.
Oh well, live and learn.
Then I put them onto the sticky tape and use my chasing tool from Larry to make a leaf design.
Which I then solder onto lengths of 20 gauge wire.
I cut a length of 16 gauge wire for the main stem and soldered it onto the top of the bezel.
I then filed down the excess back plate to follow the curve of the stem.
And checked it on the sketch.
I wrapped the leaves around the main stem and soldered them onto it.
I do this very gently.
I move my torch in and out of the piece that I want to solder, all the time watching the surrounding area.
With practice you can see when another part is going to melt and so then I will quickly take my torch away, then bring it back in again slowly.
Depending on how many different solder points I have sometimes I will do this in batches in-between pickling the piece.
This is because often, before I can get to a different solder point, the flux has become grubby and the solder won’t flow so I can just manage three or four points at a time.
I just have to be patient (not easy for me) and go into my zen place.
If you are going to try this know that it is possible and just takes practice.
I only use easy solder for all of my joins from the beginning to the end of the whole piece and I am able to do it so keep at it.
🙂
I added some balls then pickled and sanded it, bringing it to its pre-finished state. Trying to get all of the excess solder and my new friend, fire scale, off and then I smothered it in Black Max.
Because I like to live dangerously.
Oh, and I decided on that little ball thing hanging from the bottom.
I buffed it a little bit and then set the stone.
I prefer to use the bezel roller.
I started with the square pusher thing, and did find that easier at first, but I like the smoothness of the roller.
It’s worth practicing with if you can take the pain of constantly pushing it into your fingers when you begin.
And voilà.
Yet another viney, leafy piece.
I really need to get some new designs going.
–
BTW
If you read the Ganoksin article on fire scale (linked above) you will have read this line.
I came across the 100 day project and thought why not.
Trouble is I didn’t know what I’d want to do for a hundred days.
I’m not usually up for challenges as I believe they are set ups for failure, but I thought, hey, I might give this one a go.
So I decided I could either:
1. Make a piece of jewelry every day, but as I pretty much do that already it kind of seemed a bit like cheating.
2. Clean a little part of the house every day… Nah. Don’t think so.
3. Stop drinking wine for a hundred days.
That would definitely be a set up for failure.
4. Take a photograph.
5. paint a picture.
6. Create a doodle.
Etc., etc., etc…
I could do all of these things, but my dad’s coming to visit within the hundred day period, and my sister, and I don’t want to take up my time with them. It would have to be something I can do that doesn’t mean going into the isolation tank for long periods of time.
And, of course, number 2 would just about do me in and that wouldn’t be fair to my visitors, or to me.
So I chose Cornelius.
Remember?
My little botanical book?
Titled.
The Ledgers Ledgendof Cornelius Audenberry III.
Intrepid Explorer and Royal Botanist to HRH Significanta Regina, Queen of Spry.
I started it when I was creating a run of triffid paintings.
Of which, you can be assured, there are many more.
And of course each triffid begged for a story.
Well, o.k. they didn’t actually beg, but rather was given one whether they liked it or not.
And so began Cornelius’ adventures to document the wildly fantastic flora of the Copstan Islands.
Of course his voyage on the Encumbrance had to be postponed due to his narrator taking all of the time she could be writing making jewelry instead, and whining about the house keeping, so to Cornelius the 100 day project seems to be a brilliant idea.
(Or not)
And one that I can easily do when my dad and sister come.
At first I thought I’d give myself a word or page goal for each day then I realized that I really just needed to write anything and not worry about giving myself rules.
So today is day four.
And I’ve already discovered a new member of the crew.
Who knew!
I usually get caught up in grammar and spelling and reorganizing the words, but this time I am simple writing it down.
One day at a time.
–
Other news.
Here’s a picture I’m working on because I was getting a little bored with the jewelry.
It’s got nothing to do with Cornelius as this is an entirely different world which he hasn’t discovered yet.
And when the boy is back in town things happen that you didn’t want to happen.
Like coming home to strange animals.
First there was Guiness.
Imprisoned for his sins.
(If you remember he was found guilty of the sexual abuse and consequent death of Thor. RIP)
Then Nutmet.
The clumsy kitten with diarrhea.
Thankfully that little episode is over now,
but she’s still here…
And then, just when we thought we were safe, we come home to a strange dog standing deathly still and silently staring at us with his eerie eyes.
As though he owned the place.
Zelda
Actually that was kind of freaky and I was glad to find out that the boy had brought him over from a friend’s house because he was scared of the noise from the graduation party going on there and that he was going home that night.
He was just so completely quiet and his eyes, though beautiful, gave me the creeps.
Next up.
Spud!
What can I say.
Ridden with fleas. Just the way we like ’em.
Not.
Here she is preparing for the flea washing ritual.
She wasn’t happy.
It was kind of tragic seeing her cling on for dear life to the enemy.
Yes, the water of death comes from the faucet little one.
She was left utterly exhausted
But very soft and fluffy.
That’ll teach her to turn up without an invite.
Ultimately Pickles (don’t look at her fat) is just baffled as to why these creatures keep turning up
And Wally and Willow are just so over the drama already.
They can’t even be bothered to pretend they’re interested.
Meanwhile…
In the studio I’ve been working on my silver scraps.
I’ve loads of them.
Four years worth I should say, give or take a year.
This is what’s left after my scrap silver melt down extravaganza.
A while back I bought a new torch head because the one I use for soldering didn’t give out enough flame to melt anything and I was just wasting gas.
The one I use for soldering is a number ‘0’ (can there even be a number ‘0’?) and I really like it.
So, not one to mess about, I decided I’d get a number ‘4’ nozzle.
That’d show the scraps.
Well it came and veritably scared the sh@* out of me when I tried to light it.
The bang was a loud explosion of black smoke and I thought I’d have a heart attack right there at my table and no one would find me until it was time for dinner.
After the initial shock, and not one to give in to intimidation, I decided that the thing was obviously new to the game and was just adjusting itself to its new job and so I tried it again.
It scared the sh@# out of me just the same this second time,
and the third
and the fourth…
Don’t tell me I’m anything if not determined.
Eventually I decided that perhaps continuing wasn’t the best idea I’d ever had and that my heart probably couldn’t take a fifth explosion so I packed the torch head back in its box and sulked a bit before giving up on the scraps as a lost cause.
They’d have to go back to Rio.
That was until I had the bright idea of ordering a number ‘2’ head.
This one.
Now it might sound obvious to anyone reading this that a number ‘4’ was just way too large for the job I needed it for, but why the h@#$ would a jewelry store sell a torch head that could take down the Eiffel Tower just by looking at it?
Not my fault.
The number ‘2’ worked like a dream and now I have a huge stack of silver just waiting for something to do with itself.
Look at it!
It’s brilliant.
So here’s to my little scrap necklaces.
This could be the beginning of a wonderful relationship.
I wanted to show you what I do when I’m buffing one of my pieces.
Full disclosure here that I’ve only just started to do this because I’m the SLOWEST learner IN THE WORLD!
You probably do this already so don’t rub it in.
When it’s finished but before I put the stone in I give it its black dunk or liver of sulphur spa treatment and buff it up as much as I can.
Then I set the stone and cover it with masking tape.
I trim the excess tape away with an xacto knife
and then really go to town on it.
I don’t buff it completely before putting the stone in because I don’t want to harden the collar too much, but I’m pretty sure you can do it all before the stone goes in.
I just like to make it harder on myself.
It’s more interesting that way.
I started to use these some time back.
I like to use three of them together for the general buffing, after which I soften the look up a bit with a fine buffer.
Either this.
Or one of these.
And I use one of the yellow wheels on its own to just touch up the top edges of the bezel collar to give it a pop.
You can just use a general burnisher for this also.
As usual I started off with the good intention of photographing everything I do to cut a cabochon, but then forgot.
Sorry Linda.
Sometimes I didn’t forget, but didn’t want to lose a hand.
You understand I’m sure.
Talking of hands I was listening to NPR yesterday and it was actually about how they can do hand transplants now,
but even so I didn’t feel like chancing it…
–
I start out by buying the slabs already cut.
Mainly from Natalie, because she’s got loads of them and her shop is laid out nicely so I don’t have to search around forever and get frustrated because I don’t really know what I want.
Then I take them to my new trim saw which always makes me feel irritated because somewhere in the back of my mind I have a feeling I had one before which I never used and at some time must have thrown away.
This is why you never throw out anything people!
It’s not hoarding. It’s common sense.
Saying that, I did manage to take six boxes of craft books (not that I have a problem with collecting them of course) to the charity shop yesterday.
I had to listen to S moan and groan all the while as he took them to the car. He even showed me his box wounds afterward, but why else would I have had him if not to lug things around for me is what I want to know.
So I got the trim saw from Rio Grande although I’m sure you can get it anywhere.
Armed with a mask, a pair of safety glasses, my old pottery apron and a towel hooked around the front of my neck I proceed to cut the slab into manageable sizes.
Not quite as cute a look as I usually go for, but as the saw spits out water faster than I can put in it it was that or catch pneumonia and I’ve already got a bit of a cough…
Although I’m fairly sure that they can reattach fingers more easily than hands you’ll see I prefer to push the slice through with a slab of wood.
Again a seemingly useless scrap which I was loath to throw away and yet proved itself to be of vital importance.
Australian Crazy Lace
These are the manageable pieces.
Gaspeite aka The Motherlode, Tiger Tail Jasper, The Australian Crazy Lace and a Jasper gift from Natalie as she probably knows that I don’t know what I’m doing and need all the help I can get…Thank you Natalie.
Next I mark out the shapes I want to go for with a sharpie.
I used templates for the first four shapes and winged it for the gaspeite.
You can probably tell.
Then still with the trim saw I try to trim as much rock away as I can because I don’t want to wear out my grinding disc more than I have to.
I think it’s a great little tool, but I think if you want to make cabs for a living and not just the odd one here and there, you’ll probably want a ‘proper’ lapidary machine thingy.
Like this
Oh hell. I just found this.
Save me now.
So back to the Jool Tool Extraordinaire…
This is the diamond grinding disc which I use first.
It screws onto the spindle on top of the Jool Tool.
You can see I cleaned it for you 🙂 It was either that or the bathroom…
no brainer really.
And the idea is that you push the stone onto the disc from underneath.
The neat thing is that the discs are designed so that you can see through them as they are spinning and therefore you have more control over what you’re doing.
The speed of the disc also keeps the stone cool which is nice.
You keep the stone wet as you grind it. You can just see the little water tray underneath the wheel.
Here they are after their first round with the grinder.
Next I like to mark half way down the side of the stone and on the top for guide lines and then I sand off the edges.
Jool Tool + finger nails means never having to get a manicure again.
Priceless.
O.K. so here’s where I forgot to continue photographing.
🙁
Basically you continue to grind the stones in this manner until you get the shape you want. After that it’s just a matter of sanding the stones through all of the grits available until you get a nice finished shine.
For instance after the diamond wheel you go through the coarse, medium, fine, extra fine, 3,000 microns, 5,000 microns, and 50,000 microns sandpaper wheels. Then you use a fine cerium oxide wheel and finally a felt wheel with a polishing compound on it.
It really doesn’t take that long and it can be quite calming.
I’ve found I like to do it when I’m having a, oh my god I can’t go on, moment as it’s mind numbing yet productive.
But that’s just me.
Here’s what I did with the Gaspeite cabs.
I drew the sketch.
Around the cabs.
Set the collars.
Cut the back plate away so that the stone sits deeper into the piece for more dimension.
Soldered this onto a new back plate
Made some balls.
Worked on the bottom vine.
Cut a design out of the back and attached a hoop for the bottom vine to hang from
I finished the custom order and the lady liked it!
Very fuzzy photo, sorry.
It was a nice surprise to hear from her that she wanted it.
The day I finished it I told P that I didn’t think I was up for any more custom orders as it was just too hard for me to get to grips with what someone really wants and then I end up wanting to under charge them because I’m unsure of myself and feel bad for them that they’ll be getting something that they don’t really want.
Etc…
Then yesterday, when I was upstairs cleaning out my ‘clean’ studio, the one where I make my quilts etc., I got an e-mail from another person wanting a custom order.
I didn’t say no.
And so it starts over…
Actually I’m looking forward to it.
(Remind me of that when I start to moan again)
In the short time it took me to give up taking custom orders and then accept another one I tackled my thirty year stash of craft books .
To be honest I didn’t think I would be up for it and P definitely had doubts.
In fact he laughed at me which was not funny and not very encouraging.
But look.
And I haven’t finished yet.
They haven’t actually made it out of the house yet, but I’m working on it.
Of course the upstairs A/C decided to pack up half way through my sorting, but I soldiered on and now I’m feeling quite pleased with myself.
They’re all going to the ministry up the road although I think that they may have to open a new room to accommodate them.
In other news,
the boy’s cat, Nutmeg,
has diarrhea.
Nope. Don’t talk to me about it.
I’m not really that put out by the sofa covers needing to be washed five hundred and sixty-three times daily.
I’ve almost completely had it now with the boredom, the bathroom, and the custom order, but at least I don’t have to worry about the cactus garden for a while now as we had 162 billion gallons of water fall here last week.
162 BILLION GALLONS!
I can’t even count that high.
P still went into work though because he’s very brave.
And stubborn.
It’s hard for me to imagine, but over 20 people lost their lives.
Now I’ve just depressed myself.
Which is all I need as I’m already depressed, and bored, even though it’s Saturday, and I like Saturdays – apart from the cleaning the bathroom part of it.
I should pick a new bathroom day.
I hate the bathroom.
Every day I have to get up and go in there.
I’m so over showering. You’ve got to get wet, get dry, find clothes…
It’s all boring.
Then you have to do it all over again the next day.
and the next…
Probably should have just stood outside with some soap during the thunderstorms instead.
So. On to the custom order.
I’m struggling.
I just can’t seem to get it right. The piece I’m making just feels too thin and blah and I’ve finally figured out that I’m trying so hard to make it just right for her, that I’m forgetting to go with my instincts.
As you know she likes this.
And so I made this
And this
And then I made this
Which, to be honest, I really don’t like that much, although I did cut the stone myself.
Pretty pleased with that 🙂
Anyway she sent me the stone she wants in it and I’m in the process of making another, but as I said, I’m just not feeling it.
So today, I’ve decided that I’m just going to go out there and stop being so precious with it and try to give it back some feeling.
I’m not upset at making the piece at all, but am very interested in how doing things for other people makes me so unsure of myself.
I’m definitely getting better at it, but it’s quite hard for me.
Of course it might not have anything to do with the custom order at all, but that I’m just in the lower part of my circle. The part where everything goes wrong and you begin to wonder whether you should just become a lollypop lady instead of fiddling around trying to make jewelry all day.
But I’m just not sure that the outfit would look as good on me.
Here’s another piece that went so wrong that I had to take it in a completely different direction from the original design.
FrontBack
And so what have I learned from all of this you may be wondering?
Not to try so hard and to loosen up a bit.
Otherwise just order the yellow coat already and stop moaning.
Maybe it’s the weather. It’s done nothing but rain since I woke up two months ago, and although I like it I think it might be making me a bit moody.
The garden is loving it though.
I’ve been thinking about water a lot just recently, and how we use it, and I’m pondering over whether I want to plant a cactus garden in the back instead of my wanna be English garden.
There’s this lady round the corner, Alice, and her native Texan garden is beautiful.
Garden envy.
I have it.
P doesn’t but look.
Of course, you wouldn’t want to be pushing anyone over into the flower beds
Or go around acting like the crazy Medusa lady
But it could be very calming
Especially if you throw in one of those blue doors as well.
Now I’ve just got to get P on board and work up the energy to get myself going.
Could be a while.
Through the boredom of it all I’ve still been making jewelry.
And teaching myself to cut stones
But I really haven’t been in the studio much these past weeks.
I’ve also been fiddling around with the embroidery.
I’m practicing for a big one.
And I really might have to make myself one of these.
Because it’s beautiful.
🙂
Other than that there’s not a lot going on really except I’m reading The Goldfinch by Donna Tartt which has started off beautifully.
I thought I might have to give the murder mysteries a rest for a while as they were all running into one another which wasn’t really helping my powers of deduction. I was getting a little confused as to the best way to knock P off if he doesn’t come around to the cactus garden soon.
The perfect murder just doesn’t work when you get muddled with too many options and I ain’t prepared to get caught over a succulent just yet.
While I’ve been away, recuperating from the trauma of losing one of my most beloved teeth, I’ve been working on a couple of custom orders.
(Actually, there wasn’t much recuperating going on, I was just boring myself silly with all the drivel I’ve been writing lately…)
I’ve never really felt that comfortable trying to make something for someone else and prefer to just stick to whatever comes out of the studio whenever it feel like happening, but I decided to live on the edge for a while.
I only have two custom orders, but wanted to give the buyers a couple of choices as I really can’t cope with the idea that I’ve got it wrong.
I’m sure that will get easier if I do more customized pieces.
Here they are.
For one lady who wanted a piece using Gaspeite.
I made this, which you’ve already seen.
Gaspeite and Turquoise
And this,
Gaspeite and Opal
Which is the piece she went with.
Then, for another lady, I made this
Variscite and Chrysoprase
And this,
Candelaria Turquoise and Garnet
But am still working on something for her as they weren’t quite what she wanted.
She likes this
Variscite
So perhaps I should just go with it instead of trying to make something similar, but different.
I’ve enjoyed making each one of them.
In the meantime I’ve decided that I definitely have a problem with cabochon hoarding.
When I opened one of the little drawers I have which holds them there in all their glory, the whole little chest almost toppled over because of the weight of the stones in it.
It was a bit of a wake up call really.
I’m like that with books.
Finish reading the ones you have before you buy another already!
Now I sound like my mum…
So I might have a little stone setting marathon. Although that will more than likely take me well into next year I’m sure I’ll be able to come up for air at some point along the way.
Maybe to eat perhaps.
I don’t know.
Who of you offer to make custom orders for people with stones you already have which they can choose from?
Is it really that worrying, or am I just a scaredy cat?
Now I feel old and gappy, as though I’ve forgotten to put my dentures in.
It was a horrible experience and I’ve felt shattered the WHOLE week. I can only imagine what I’m going to be like when I have to have the implant. It’ll most likely freak me out completely.
I’ve already warned the dentist, but he says it’ll be o.k. as he’ll have his phone on hand and there’s this guy on youtube who does some great dental demonstrations if he needs to check in on the procedure.
Doesn’t help.
Secondly, much to P’s distress, I’ve been going through the whole Inspector Barbaby series on Netflix and all of a sudden, what do you know, it’s over.
No warning.
No nuffin’
It’s left a void, like a black hole imploding in my chest.
It’s going to take me a while to get over it, I mean, how do you recover from something like that…
Fortunately Netflix only went up to season 15 and so somewhere there’s another three waiting for me in the magical world of t.v. limbo land.
P will be delighted..
On a brilliant note, however, I had a great art fair last Saturday.
You know, I didn’t really feel up for it. I’d been a bit blah, as you all know by now from my recent groanings and moanings, but it was really good.
The weather was perfect. I managed to emerge from my introvert coma for the day, and we talked and laughed all day.
And, as you may know, laughing is my favourite thing to do…
I made $4,000!
I can hardly believe it.
Personally I think people were afraid, paid quickly and ran for their lives.
Whatever it was it worked, and I’m fairly sure Nepal is not going to worry about it.
Studio happenings are as follows.
This
Fell apart.
Don’t talk to me about it.
So I threw it around a bit, gave it a good sanding, and re made it.
The serpentine crumbled in the first setting so I had to re make the middle bezel and use his brother.
I can see I’ve still a little sanding to do in between the top two stones.
I finished the beast by taking out the Serpentine stone after I gouged a great big 5mm wide trough through it from one side to the other and managed to work with it on the Jool Tool (beginning to like this thing) until it was looking better.
I found that Serpentine, at least the ones I have, are very crumbly and I’m not completely sure I like that.
I worked with it as much as I could, but it isn’t one of my better pieces.
I think I set myself up for the fall because in the back of my mind I didn’t think I’d done the best job I could with forming the stones.
You can see from the above that the bottom bezel is too high, and the top bezel is just annoying because the bottom edge of its collar soldered to the top edge of the middle bezel’s collar and I had to saw it apart.
I say I had to. I could have sweated the three bezel collars off and started over, but, as I said, I don’t think I ever thought it was going to be a good piece in the first place and believe I set myself up for sabotage.
Oh the dark inner workings of our minds…
I like the back though 🙂
I’ve been cleaning up my work for the art fair on Saturday and reworking some pieces that I don’t really care for.
I hate cleaning the jewelry, but wouldn’t be seen dead trying to sell it without it being its absolute best. As a consequence I’m probably not taking the beast.
Unless little pixies break into the studio between now and Saturday and work some magic on it.
Could happen.
I finished the second needlework piece.
And started another.
And that’s about it really.
Except I’m fiddling around with a new website as, although I like the Wix one I have, I’ve discovered that Indiemade seems easier to use.
I’m not sure about it yet.
And I’m just about to send off $800 to Care for the Nepal disaster so guess what?
This week I’ve only managed to make horrible things.
Not only are they horrible, but they took years to make.
It was like drowning.
So I’ve decided to knock it on the head for a bit. For the rest of the week I’m just going to just clean up my jewelry for the art festival in May, work on my embroidery thing,
and I’ve an itch to paint, although we all know how that will turn out.
By the end of the week I’ll have not only drowned in the horror of it all, but sunk to a depth I’ll never be able to rise from.
Again.
Even my woes are feeling woeful for themselves at the moment, and I have injuries.
Deceivingly tiny, but very sore, hand injuries.
That Jool Tool, I’m telling you. I might have to start wearing the little green tape on my fingers that came with it.
I simply just can’t go on like this.
I need my skin.
I bought these a while back and, although they’re beautiful, I just wasn’t going anywhere with the shape.
I set one in a bracelet and absolutely hated it.
Every time I looked at it, it made me cringe.
In the end I took it out and the relief was overwhelming.
So I decided to cut them up, along with another stone that I’d put in the, nope, don’t like that either, pile.
And then I polished them along with my fingers.
And I thought I’d done a fairly good job even though I hadn’t exactly matched the sizes
🙁
But that was O.K. because I decided that I’d break them all up anyway and use them in different pieces rather than the earring pairs I was initially going for.
Yes it looks fine here, but I should have taken warning from the earrings I struggled with the previous day, which almost drove me nuts and used up a quarter tank of acetylene to boot.
So now all I’m left with are horrific pieces of, dare I call them, jewelry, and a whack to my confidence.
On the upside, however, it will be all fun and games at the immigration center again when it comes to taking my fingerprints for my green card.
Maybe I should take my Jool Tool along with me and they can scrape some of them off there.
I’ve never embroidered before, just cross stitched, and I must say I’m enjoying this more. I can do it faster and get more detail. I’m half way through another and after I’ve practiced more I think I’ll make a big one.
I also finished this pendant.
I bought the bottom Sonora Dendrite, but formed the other on my super duper Jool Tool. Still can’t quite get a good shine yet, but on the whole it’s very exciting.
If you’ve been reading my blog for any time you’ll know I get them.
I’m a funky kind of person – and not in the good way 😉
Well this one’s just been lingering around trying to make itself more important than it really is, and I’ve been plodding along almost going ‘there’ (yes you know where), but then writing my blog and laughing at it like this,
Hahaha!
It works. I laugh at, and with, myself through this blog, and, for me, that brings everything back to a level I can work with.
So yesterday I was in the studio having one of my, why am I bothering doing this, nothing really matters, I’m just so bored with it all moments.
You know, general wallowing and floundering around, looking at all the stuff on my table and not wanting to do anything.
But, knowing that I just needed to get on with something, anything, to work through the funk, I decided that I was going to make a piece similar to this one.
Because I had another of those nice little coral flint whatever stones just left hanging there with nothing to do.
It was one of a pair that were sold as earring stones, but, thoughtless me, split them up and now they’re lost twins.
O.K. So…
No writing now, I think I’ve managed to get all the melodrama out.
Let’s see how long I go without having to say something.
Mwahahaha.
Too pointy so I changed it slightly.
Now I’m playing around with it as I never really do know what I want to happen next.
Finally decided.
Added the bail.
Cut the prongs.
Added some extra little balls along with the prongs.
Not quite like the one I was going for.
The darn prongs got on my nerves a bit, but I finally remembered I had bought some of that Rio Chil Gel a while back and decided to give that a go.
Bit of an overkill with that ginormous syringe though for those tiny prongs 🙂
It really works well so try that out if you want to stop something melting five hundred times before you finally clue up.
And that was when the determination kicked in.
Up until then I had been making the piece by rote really, not really putting my back into it. But… when those darn prongs kept melting and I finally decided to walk away and give up because I would never be able to do it, I suddenly felt my bloody minded side kicked in.
Where had it been all day?
Probably slinked off somewhere to have it out with the funk is all I can think of because it came back with a vengeance and, before I knew it, those prongs were set and finished.
It was a beautiful thing.
😉
Here’s a little video of me making the leaves. Don’t know if you can really see what I’m doing, but hey, I was in the funk at the time, so it’s all I have.
So I made a few tube settings and, although it goes against every grain in my body, wouldn’t you know it, slow and sure wins the day.
Almost.
I also wanted to start using up the huge bowl of scrap silver I have sitting beside me.
Taunting me always in the corner of my eye.
So I used that in the earrings also.
Except for when I used my favourite grey pearls.
Here’s how I made them.
I started by cutting a silver tube which has a slightly larger diameter than the width of the stone, (half millimeter or so), into the lengths I needed to accommodate the depth of the stones.
with this handy, but annoying tube cutting thing.
I used to hold it in my hand to cut the tubes, but found that you really need to have hands the size of André the Giant to hold it steady and put your thumb over the lever at the same time, so now I place it upright in my table vise which holds it brilliantly as I saw through the tubes.
Look. I found this one for you and it’s only $8! Almost exactly like mine.
I tell you this only to save you from the inevitable agony of carpal tunnel syndrome and the irritation that goes with taking forever to figure these things out…
or is this just me?
So the second annoying thing about the tube cutter thing is that, however hard I try, I cannot get the edges to cut flush and have to spend loads of awkward time fiddling around filing them flat after they’re cut.
See.
So this time, after I cut the tube to the lengths I needed, I put them in this fine little contraption thing.
And, once I got the hang of it and figured out that they didn’t just include that nifty little allan key for amusement’s sake, I found I could put the little cut pieces of tube in it and file the edges flush more easily.
So, I know what you’re thinking.
Why, for the love of god didn’t she put the whole darn tube in the fine little contraption thing to begin with and saw the lengths of tubes she needed in that instead of faffing around with the first stupid tube cutter thing?
WELL DON’T ASK ME!
Don’t talk to me about it. Don’t even think to roll your eyes.
I just didn’t is all – because I can’t use that special, I look as though I can do everything easier, fine little contraption thing either.
It’s just too darn fiddly and I can never get the thing tight enough to keep the tube steady even with the nifty allan key thing which keeps eyeing me in that, you don’t really know what you’re doing way.
Guess I haven’t got the touch.
But practice makes perfect and I’m determined to get it down sometime this century.
O.K. so the tubes are cut, and filed, and a little silver disc has been soldered to their bottoms.
Ready for their next adventure.
And this is the bit that I haven’t quite got down yet.
(Well aside from cutting the tubes…)
(And holding the annoying tube cutting thing…)
(And tightening the nifty contraption…)
I’ve looked at the books and seen the pictures and have a general idea of what I’ve got to do, but I haven’t quite managed to completely figure out how to seat the stone so that it sits absolutely flush when I try to put it in the tube.
I eventually get there, except for the ones above with the pearls hanging from them which annoy me every time I look at them, but I just know that it shouldn’t be as hard as I’m finding it.
I’m determined to figure it out.
One stone setting book said that the method I used above will never work as, however thick the rim of the tube is, it just ain’t gonna happen.
Perhaps I should have believed it.
It says that instead you need a tube for the width of the stone, then another, smaller tube set inside the larger one which will become the seat of the stone.
But I didn’t have a tube small enough in diameter to fit inside the first tube, so I couldn’t do it that way.
I’m going to give it a go as soon as I figure out how I can improvise without having to buy every darn width of tubing that has ever been made.
So up next…
Tube making
Exciting, yes?
O.K. so then I drilled out the tube with my stone setting bur so that the stone could sit in there nicely even though it didn’t really want to.
And then soldered all the earring components onto the tubes.
This one is for the last pair. For the top three pairs of earrings I also soldered the silver drops onto them at this stage.
Next I got out my box of special bezel punch things.
Which I really like to look at even when I’m not using them as they look so neat. And I chose the one that fit over the tube I was setting and tapped down on it to push the silver over the stone.
For the first three pairs of earrings it worked fine, but for the fourth I decided to try the old tried and tested way of pushing the sides over with my bezel pusher.
I think I like this way better because I could actually see the rim moving over the stone which gave me more confidence that the stone wouldn’t fall out afterward.
Its a trust thing.
And that’s it.
I’m still not completely happy with them so I’m going to practice some more. I want to eventually be able to make them without having to fiddle around so much, because, as a friend would say,
This takes a little time and it seems that the silver likes to melt as the edge is being pushed by the flame rather than heating it face on.
Now bend the piece lengthways over the edge of your block.
Either this way.
Or this way, depending on what works best for you.
And finish bending by gently hammering.
Or squishing.
Until you have a folded bar.
Don’t hammer the fold flat, you’re just bending the edges together.
The trick to making this bracelet is in the annealing.
Each time you work silver it hardens. Heating the silver softens it so that you will find it not only easier to manipulate, but also less likely to split as you bend it.
So now you will gently heat up (anneal) the bar of silver until it turns a dull red colour and you can either leave it to cool on its own, or quench it in water.
For this purpose I’ve found that either works o.k.
Now you can take a bracelet mandrel or anything that you can form your bracelet shape around and, with the rough edges facing upward, gently ease the silver around the mandrel.
The metal is so soft at this point that you can do this easily with your fingers.
You don’t want to push the metal too much and you will begin to feel when it has started to become hardened again.
This is when you stop and anneal the metal once more.
Continue doing this until you have formed the bracelet shape you want.
This can take three of four goes.
You may need to use a raw hide hammer toward the end of the forming. Don’t hit the bracelet too hard, but gently tap the ends around the form.
If the silver twists just gently tap it back into shape, and anneal when necessary.
When you have your finished shape anneal the piece once more.
Again the metal will be soft enough for you to now open up the bracelet.
Don’t do this though.
Because it hurts.
Keep about three-quarters of an inch at the two ends closed and snip them into a round which you will sand smooth so that you don’t cut your wrists each time you try it on.
Not that I’ve done that because I’m too impatient or anything.
Now take your raw hide hammer and gently tap the bracelet all over.
This isn’t shaping the bracelet, but hardening it again so that you can put it on and take it off without the silver bending out of shape each time.
You can use liver of sulphur for this but I prefer using the most highly toxic chemicals I can find.
Look at that lovely radioactive green liquid. We used to have curry for school lunches on Fridays with a juice that ran out that neon colour. Looks bad but it was my favourite.
Could explain a lot.
So,
Rinse off the bracelet, buff its outsides, and you’re ready to go
I think something more to do with the actual making of jewelry rather than just the showing and telling bit, although I never did get to do that at school and am just beginning to see what I missed out on.
I know, poor baby, that was a huge chunk of my childhood down the drain right there.
It happens.
I got over it.
Actually I didn’t because I didn’t know there was anything I had to get over, but I will tell you that I have learned a lot sharing with you here and I recommend putting yourself out there to everyone.
O.K. I’m rambling. You didn’t know I did that did you?
–
Stone Setting…
Ticks me off.
I’m not talking about the cabochon settings I do as I seem to have those down now, but rather the shiny, let’s put one of those in a ring settings.
This is how it usually goes when I want to try something new.
I think about it, think about it, and then I think about it some more. Sometimes for months. The cabs, perhaps a year. And then suddenly, before I even know what hit me, I start making them all of the time and voilà, I’m in the cab club.
Well the other shiny kind of stone setting has been roaming around in the back of my head now for quite some time.
I’ve dabbled, and generally get by, but I cannot tell you that I can wake up in the morning and say, right then, time to set a shiny stone into one of those ring settings, and then go into the studio and set that darn stone with the confidence that it will work.
So this is my mission chaps and chapesses. (Are there really any chaps reading this drivel?). The mysterious world of stone setting.
–
I’ve got a few books on the subject. Well, I’ve got quite a lot really as I love looking at the pictures.
But this time it might actually be time to read them.
Although honestly I’m a visual learner, so I might have to change my mind about this later when all the words start running together and I get brain fog.
I learn by seeing, trying, messing up, figuring out where I went wrong and trying again.
Probably could save a lot of time and energy just by reading the darn books, but where’s the fun and frustration in that?
Here’s one of my books.
Some of you probably have it.
Now, the setting I want to tackle first is the flush setting.
I think that’s what they call it.
Hang on, let me have a look.
Nope, it’s tube setting. Similar I think, but not quite the same.
O.K. I was going to show you a pic in the book, but then I realized that was probably illegal.
I’ll just have to draw my own for you, bear with me a mo…
Flush SettingTube Setting.
So here’s the plan.
I’ve got some stones which I bought from Rio back when I first starting thinking about it.
I was a little annoyed by this as I was still in the throes of perfecting my cab setting skills, but I went ahead and bought them anyway as I just had to have them.
No hope for me really.
As I said, I have had a few successes, but I really want to get to the place where I have alllllll successes.
I’m needy that way.
I’ll try to walk you through my trials and errors, but sometimes holding the camera while soldering, bezel pushing, filing, etc., can get a bit tricky, but I’m all about overcoming challenges 😉
So watch this space…
–
In other news.
You remember those snipings from the bridesmaid earrings.
There was a lot of them.
Well they took a holiday at the charcoal block spa and salon.
And now they’re sorted and ready to go party.
Shame I’m doing stone setting now.
And here’s a photo of The Rodent for Angie.
Guinness
Yes, I know he looks all cute and stuff, but
He’s still a rodent.
Actually there’s a debate as to whether guinea pigs are in fact rodents.
Frankly I don’t care.
He might be cute, but he hounded his poor little black friend to death, literally, by using Thor, RIP, as his sex slave, but that’s another story…
It’s always the good looking ones you’ve got to watch out for isn’t it.
And finally, the show and tell.
SerpentineChrysophrasePetrified Wood Opal. (I know, who knew?)
–
And for your continual enjoyment.
(O.K. so maybe the show and tell wasn’t last)
Soldering jump rings.
Exciting, right?
Here’s how I like to do it.
Place all of the jump rings facing the same direction as sometimes, once you start heating them, you can’t find the area you want to join.
This way you have a heads up.
Use a little flux.
Cut loads of pallions of solder wire, or use chips, whichever you prefer.
And heat them gently until they form little balls.
You can then pick them up with your pick (see what I did there), and place them easily on the join to be soldered.
The balls have to be hot, as does the pick, to be able to do this.
I leave you now with your very first look at the top of my head.
Oh, and sorry about the sniff. Got a bit of a cold.
Go on. You thought I had long golden locks didn’t you…
Nutmeg isn’t mine, but she sure acts like it taking the best seat in the house and the cosy blanket.
She’s the Boy’s, who showed up with her a few months back when he came home from university.
Like we wouldn’t notice.
Yes she lives with him, but did he not know that when term’s over and the holidays show up he lives with us!
I love cats I do.
I have the fabulous Wally Walnut.
My constant companion, even if I don’t need his assistance all of the time.
And the rather fat, very heavy, but super cuddly Pickles.
Who would lay at my feet over subjecting me to her bone crushing love any day because she knows she could do with losing a few pounds.
I think I told you that one night I was dreaming I had a railway sleeper on my chest (don’t ask) and woke up to find pickles laying on me.
I was almost crushed to death in my sleep.
So despite the danger of broken bones, bruises, and strained backs when you try to lift obese animals, I love cats. They’re my favourite. So much so that P has told me that if I ever bring another one home it will be the last thing I do.
Like he thinks he can take me out.
I don’t think so!
But, I love P and am getting a little tired of the litter box myself, so I was just a little p.o.’d when the Boy brought Nutmeg home, and especially p.o.’d when on his latest visit this spring break the extremely cute, but incredibly clumsy Nutmeg had obviously been having one hell of a time ripping open her body on fences.
But that’s o.k. It only cost me $350 to put her back together because the Boy is broke.
Go figure.
I should get him the collar of shame to wear also, perhaps he’ll think twice next time when he can’t clean those tricky bits and keeps bumping into walls.
And then there’s the guinea pig…
Doesn’t everyone need one for their front hallway.
Needless to say I’m looking forward to the rodent going back to school also.
And then there’s the shoes.
The ones relegated to the studio because they got a bit too grungy for their own good.
Well they finally gave up the ghost and died.
It was somewhat of a relief really as the water was getting in.
So I had to buy a new pair which proved more complicated that it seems.
I wanted a nice, comfortable pair, but I didn’t want to spend too much on them as they would soon look the same as the old ones.
I’m a bit hard on studio shoes.
So I finally settled on these.
Which are definitely comfortable, but make my feet look stubby and my ankles fat.
🙁
Oh well we can’t have everything.
In other news, the studio looks like a bomb hit it.
Been doing a bit of snipping.
That’s a lot of mess for just five pairs of earrings.
For some bridesmaids, if they’ll have me.
Actually I made this also,
This is the back, which I’m kind of liking, but kind of repulsed by as it looks like the alien face thingy.
And, lastly for Cecilia.
I’m still doodling. I’m thinking of making some cross stitch patterns, but can’t make up my mind.
It seems that I can’t handle too much internet at one time.
Something had to give.
Either that, or I’ve hit my boring stage.
Whichever it is I’ve got nuttin’ except a few pieces of jewelry to share and I’m even beginning to bore myself doing that.
Hang on, let me think…
Nope, still nuttin’.
Oh well, here’s the latest.
Ocean Jasper
More Ocean Jasper
Labradorite and that strange Acai seed thing.
And the ever faithful Turquoise.
Something’s up.
Every day I wake up excited to go into the studio, and then I can’t be bothered
🙁
I think it’s a phase.
Perhaps it’s because I just had a birthday.
Again.
Man they’re coming fast. And don’t get me started on Science Friday. I like listening to NPR as much as the next person, but every time I turn around it’s Sci Fri on the radio and another week has simply poofed into extinction.
I’m beginning to dread it.
It’s like I can’t keep up any more.
On top of that it seems that the Flourish and Thrive course has finally bored me to death, I’ve yet to even look at the last week.
I’m all flourished out.
So, that’s it I’m afraid. I’m off now to plod through today which will soon be tomorrow, and then Ira Flatow will be on – again – telling me about birds drinking deer tears or something equally fascinating but with the terrible finality of life floating away into a sea of intriguing information.
Drowning in ….
Too much?
So. All that’s left to say is that I will see you on the other side of the boring place my friends…
I mean, I like a good downpour as much as the next person, but I want to take some photographs and, although the dark depths of doom sky is pretty cosy in my book, I just can’t operate under these conditions.
I’m telling you now, when I go outside in a minute if it’s cold as well, I’m going to be completely fed up.
I’d have lain down and died already if I was living in the snowy parts right now.
I don’t like to be cold.
I shut down and wither away, in that brittle kind of way you do when you’re freezing, and that might very well mean no dinner for P.
Yes, and I’m not going to be the one to tell him.
In other news…
I made a nice pair of earrings, but they took me THREE hours!
Look at that stone. A beautiful Prudent Man Plume Agate. The beads are Cats Eyes.
Yep, you read that right, THREE hours!
Just when you think you’ve got it down, that you’ve turned a corner, hit a milestone, become invincible…
It all goes to pot and you have to kick yourself in the head.
To be honest I wanted to encase the bottom bead in bezel wire so that you could see it on the front and the back.
Like this.
But with a little thicker wire round it.
You know, like a regular bezel, but not.
And I did manage to make one without too much trouble.
Don’t look at it, it’s annoying me.
But do you think I could make the second one?
Nooooo.
So two hours in I threw it on the floor and settled for just the beads
I hate to settle but I was getting depressed.
I was just as depressed the next day when it took me a whole year to make these two.
polychrome something or other. Front.Back.
Aqua Nueva Agate. Front.
Back.
I think the Flourish and Thrive course is de-thriving me.
I’m dipping into funk time people, and it ain’t gonna be a pretty sight.
To top it ALL I just ate one too many slices of bread for lunch and now I’ll probably blow up.
My life. I’m telling you…
–
P.S. I’m determined to make one of those bezels. It might not be today, it might not be tomorrow, but one day, just when it thinks I’ve forgotten…
I’m not sure if it’s really up and running or if I’ve just imagined it all…
but I’ve done it!
It took me a week because I dithered around waiting to take some better photographs of some items, but it’s been cold, dark and dreary here so I kept putting it off because I like to take my photographs outside and I don’t like to be cold.
In the end I just decided that if I didn’t publish it now it wouldn’t get published at all because, knowing me, I would keep on putting it off until another year had gone.
Then another.
I’ve still got to work on the SEO’s etc., but I’ve decided that I need to take a break from it for a while else my brain will explode. I have yet to figure out what to do about Etsy, etc., but I just can’t think about that right now as seriously I need a cup of tea or five.
Anyhoo, any critique would be welcome, just so long as you’re gentle with me.
I’m feeling a bit protective of my baby right now as she’s so brand new…
First off, I can safely say, without having to dither around second guessing myself, that small lobster claws are definitely off the menu.
They’re fiddly and they just look like little, I can’t be bothered so I’ll just use one of these small things that are awkward to use and hurt when the prong jabs up under your thumbnail because the darn thing keeps slipping in your fingers which makes you have to swear a little, or a lot, depending on where you come from, and so you have to chuck the jewelry on the floor because now you have to wear that other piece of jewelry that you didn’t want to wear and which doesn’t go with today’s choice of clothing and so you have to curse again (but this time with meaning) the maker who thought it would be a good idea to put small little fiddly things on their pieces of jewelry without thought nor care for when you, the user, has to go out in public wearing the inappropriate accessory for your attire just because they, the maker, couldn’t be bothered to really think about what they’re doing.
See how that goes.
Very thoughtless use of the small lobster claw…
O.K. maybe I will have to dither a bit as admittedly they do look good on some of those lovely petite pieces of jewelry with fine chains… especially if they’re gold chains…
Man!
Amendment #1.
I don’t like the small lobster claws on my jewelry pieces because they’re fiddly and they just look like little, I can’t be bothered so I’ll just use one of these small things, etc., etc., and so forth…
I won’t go into the medium lobster claws here because I believe the above goes for them also. Except that, if possible, they hurt even more because the jabby prong thingy is bigger. Granted they are a little more user-friendly than the small ones, but on the whole they should perhaps be included only as a side dish on the menu.
Now for the large ones…
And this is where we come to the, I like them and I don’t like them, section of todays entertainment.
I just don’t know.
I don’t want to use them, but… on the jewelry I’ve recently made, especially the latest bracelets, the hooks are just not working. The bracelets are meant to be worn snuggly so that the stone doesn’t keep turning and I’ve found that the hook is very awkward to close onto the best link for that fit. I certainly prefer the look of the hook, as Cap’n Ahab said to his first mate over morning coffee, but I put a lobster claw on one piece, under duress you understand, and it clasps the correct link so much easier.
I have to say that also they are far more secure, and when the bracelet is expensive, I think I would much rather feel safe knowing that the clasp was less likely to come undone and the bracelet lost.
Hook (I’ve yet to put the little pearl on the end of this one).
Lobster Claw
So, that said, I’ve decided to change the clasps on all of my recent bracelets. No, no. You can’t stop me. But I will be looking into buying some of the lobster clasps that turn, (as Gale mentioned in one of her comments), because I think those will definitely make the bracelets ‘wear’ more comfortably.
–
In other news the website is nearly ready!
After me, you’ll be the first to know when it’s up and running.
😉
–
Oh and the trivia we come across when we follow the rabbit’s path
Every last tee shirt I own is misshapen or has holes in it. Probably due to my dripping pickle on it in the studio.
Got to pay more attention to that.
And this all makes me sad as I do not want to go shop for more.
I hate clothes shopping, almost as much as I hate going to the dentist.
O.K. so that’s a lie.
Dentists are evil and should be avoided at all times.
Unless of course, like me you have a fear of authority and have to do as you’re told even if it does mean facing danger every six months at the hands of the menacingly innocent looking, poky spike thing wielding, hygienist.
Yes, you know who you are…
It’s a good job that I have turned into something of a recluse over the past year and people don’t see my worn out clothes. I’ve even stopped answering the door because I think people will just think I’m the cleaning lady.
And you know how that goes down with the handsome U.P. S. men who’ve got a few minutes on their hands.
Alright, so that was a bit of a day dream right there.
Maybe I really should start getting out more.
So, while my clothes have been sorely neglected (sorry clothes), I’ve been focusing my powers into buying up every last cabochon in the world.
Dr. Evil would be proud of me.
And the madness continues.
Just this morning (thank you Penny) I bought four uncut slabs just because I had to.
I mean, what kind of reason is that!
If someone doesn’t intervene soon I’ll not only be lost beyond help, but naked to boot.
Not a pleasant sight.
In other news.
–
I’m still working on the Flourish and Thrive course.
Unfortunately, every time I listen to the lessons I fall asleep.
My only hope is that I’m learning how to be a brilliant jewelry entrepreneur subliminally.
–
I am working on my website – again.
I started it back in 2012, so I’m thinking I’ve maybe got it down now.
–
I’ve also just finished making a necklace with a wiggly chain.
Plume Agate. I think it’s Graveyard Plume, but there are so many plumes sometimes I have a hard time keeping up…
But, not to worry, I won’t be doing that again.
And I reworked a necklace I made a long while ago by tidying it up a bit and resetting the bezel.
Silver Lace Onyx
Very satisfying.
–
So there you have it my friends.
I might have to check myself into a rehab that specializes in rock habits as soon I’ll be on the streets having spent all my money on cabochons.
Between you guys (sorry been in Texas too long) and the Flourish and Thrive course I’m really beginning to sort myself out… I think.
Either way I’m enjoying myself.
In January I decided to take my jewelry to the next level.
To Infinity and Beyond.
It started out a bit boring and at first I thought it weren’t possible capt’n. Also starting the course put me in a little funk and I kind of lost all my umph, but suddenly I got right back into the groove again and I can see some improvements now.
I’ve really enjoyed making these bracelets, however I worry about how they fit on the wrist.
You have to wear them snuggly otherwise the stone flips or slides around to the other side of your wrist.
It just can’t be simple can it!
I worry too much about the people who buy my jewelry, but I really can’t let it go. I can’t imagine someone spending money on something that isn’t just right.
Oh and I forgot to show you my very first cabochon.
Remember this
Well I took a piece of this
red plumb agate
Actually this isn’t exactly the piece because I forgot to take a photo before I cut it up, but it was very similar.
And I used this,
And made this.
It’s my very first one.
The most difficult part was getting the shape perfectly round, and getting a brilliant shine on it.
Both of which I haven’t quite mastered yet.
I’ve got the compound and the wheels, but used my felt on metal first and think that’s why.
Ani said sometimes tiny metal fragments can bed themselves in the felt wheel when polishing silver and in turn they can scratch the surface of a stone when you come to polishing one.
I knew that, but was too impatient not to try it on both metal and stone.
It was too exciting.
Now I’m going to have to buy myself a separate felt wheel just for the stones.
Still exciting though 🙂
I can see it’s going to take me some time to see the inner beauty of a stone also.
I’m not particularly fond of the off white opaque part of this one.
Anyway, I have a few more slabs to experiment on so I’ll keep you posted.
–
In other news I watched The Quartet again over Christmas.
Do you think it’s too late for me to take up opera singing?
I’ve just finished the first week of the Flourish and Thrive course, which has made me sit down and really think about my jewelry making.
Of course this has brought out all my ambiguity issues.
Do I want to take my jewelry seriously, or do I want to keep it as an expensive hobby?
–
In the Hobby Corner.
If I don’t try harder to get rid of the stuff it’ll just keep on piling up and when I die the people who live with me will find billions of pieces of jewelry stashed away in every nook and cranny.
Could work. They could sell it all and retire to Hawaii.
–
In the Serious Corner.
But I want to see if I can do it. I want to feel successful, and make money, and feel grown up.
But. Do you really want to work that hard?
–
Hobby Corner.
It’s fun, you get to make what ever you want, when ever you want to.
But, you’re always wondering… what it.
–
Serious Corner.
You might end up investing in it and then you’re stuck. What if you can’t do it. What if you have to actually go out and talk to people, and do the sales pitch stuff.
–
Hobby Corner.
You take yourself too seriously. Get over it.
–
Serious Corner.
What if you find out that you’re lazy or if as soon as you decided to make a go of it, you get bored and flunk out?
Am I a flunker?
I hate that I might be a flunker…
–
I tell you this only because my brain will explode otherwise.
Also, I know there are others of you out there who think the same as me and hopefully you’ll find comfort in knowing you’re not alone.
(Please tell me I’m not the only one)
Bottom line is I think that this is all fear and no confidence, and so I’m just going to know it’s there and let it go already.
The good thing about the Flourish and Thrive class is that it has made me think about it and sort out in my mind how I can accommodate my fears.
It really doesn’t have to be that hard.
Of course, I haven’t done all of the homework yet, because it’s too hard.
😉
The hardest thing I’ve come up against so far is discovering who my dream client is. And that’s the first darn question in the course!
Frankly I just don’t know what ‘type’ of person wears my jewelry, and this is important as then you know who to target. If it’s just a hobby I guess this doesn’t matter as much, although it still helps you when you come to selling it.
I can’t believe that I’m still stuck on Monday’s paper.
Not going to worry about it. I’m just gong to let it hang out with me for a while.
Hopefully it will smack me in the face soon so I can move on to question two…
So far I feel that I’ve been working on perfecting my jewelry making skills, but (scary but) perhaps now I’m ready to take another step.
I’m trying to concentrate on the idea that you won’t die just by going up to your comfort line and take one tiny step over it.
A tiny step can’t be that bad can it…
I think that the problem I’ve always had is that I’m never that sure what to do with my jewelry and where it fits, but I can’t be the only one who worries about that… can I?
There are thousands of billions of people out there.
I can’t be unique in my worries… can I?
So it starts today.
At 11 o’clock.
I’ve tried checking around to see if my jewelry holds up to some of the other member’s work.
Still not sure about that, but I’ve paid now so too bad.
However,
I expect over this next six weeks to transform into a wonderfully confident jewelry maker who is ready to take on the world.
I’ll keep you up to date with how that’s going…
:/
Some newbies
TurquoiseNot sure what’s going on here.And some earrings.
When in the space of one swallow I had a sore throat.
Add that to the constant runny nose and it’ll not be long before I need my face mask for more than just keeping the dust out.
Actually I’m wondering if I shouldn’t put my pickle farther away from me as I work. I think I’m going to try that because I think the fumes might be getting a little too intense and perhaps it’s burnt my throat and soon my lungs will drop out.
Just another studio freak out waiting to happen.
I had a great week last week, in spite of the runny nose and burnt lungs.
I made over $1,000 and I’m still wondering if it hasn’t all been a terrible mistake on the part of the people who purchased my things.
Here’s the run down.
I sold this.
And this.
This one.
And this.
This.
This.
And two charms!
See.
That’s a little too good for anyone to not feel worried about.
I am very grateful for all the people who did buy my jewelry. I hope that they like it when it arrives.
Anyway, yesterday I made this.
But I am beginning to wonder if they aren’t all a little too much.
I love making them though.
And I sketched up a design because I’m thinking maybe the quilts are calling me again.
But again.
Even the quilt designs are getting a bit out there…
It’s all making me feel a bit like Willow did yesterday.
To take my mind off it being in the same room as me I bought it some new friends.
The Optivisor…
I got a 2x and it’s brilliant.
I was a bit doubtful at first, but it really is cool. I have to take it off when I’m soldering because it bumps into the fume extractor, and once or twice I pulled it down over my cheapo target magnifying glasses and had a little vertigo moment, but I’m sure I’ll get used to it.
Warning!
Don’t buy one if you don’t want to see every single mistake and botch up you’ve made on your jewelry.
It will send you into a funk.
I’m too excited to get the funk right now, but I’m telling you, at any other time I might well have given up making jewelry forever – again.
I also got a pair of half round pliers.
A special little wax stick thing for picking up stones.
A different kind of ring clamp.
Only it wasn’t the different kind of ring clamp I wanted.
I wanted a different kind of different kind of ring clamp.
One that holds the ring on the inside.
I’ll be checking out where to get this little gem later.
I also got a few different sizes of bezel wire to play around with, and some chain.
So that was my excitement for the day.
Here’s the better photograph I told you I’d take of my latest piece.
All finished and up on Etsy.
And a little something else I’m interested in doing.
Remember those charms I made using some of my left over silver.
Well, the left over silver just won’t stop coming.
I’ve a whole bowl of it just hanging around waiting for something to do.
I knew I could send it back to Rio for their recycling programme, but I wanted to do something special with it and the charms seemed perfect, but I also thought the charms needed their own role in life.
I’m happy to say that they have finally found their purpose.
A little school in Kenya 🙂
So while I’ll continue to send the money I make from selling my jewelry to the larger charities, all I make from the charms will go to the Roko 20 Academy.
I found a welding shop a little closer to me and bit the bullet.
Before I left I did find an online shop which would deliver a tank of acetylene to me the next day. I didn’t use it as I’d lost my wrench (i.e. someone took it) and couldn’t get the regulator off. As it happens the man in the shop had a lot of trouble with it also so I doubt I would have been able to easily exchange my empty tank with the delivery man anyway.
They appear to deliver to most places in the U.S. (sorry back home folk and other not here people) and they don’t charge for shipping, just a $10 handling fee. Which seems a pretty fair price to pay for them to possibly blow up instead of me.
So to all my soldering friends out there who are weenies like me here’s the link.
So, I won’t be doing that again, and perhaps neither should you Penny 🙂
Another thing he said was that after soldering you should turn the tank off and run the gas out of the hose. You should also open the pressure thing completely until the next time you use it.
I usually run the hose empty by lighting it and using the flame to ball up small pieces of silver to use later. I do this until the flame just goes out on its own, but I haven’t heard that you should open the pressure gauge before, and although I listened very carefully I’m still not completely sure why.
Sometimes I don’t even run the gas out of the hose :/
I might have to stop reading all this stuff now as it’s beginning to make me feel nervous.
Things I did know are.
Don’t run the thing with the pressure above the red danger line.
I did for my first tank because I didn’t really think the red line was talking to me.
Sometimes ignorance is bliss, but not any more.
See that big, obviously important, red line there on the left dial. The arm shouldn’t go beyond there. In fact the man said that I shouldn’t need for it to go beyond the 5, but I found that the flame wasn’t doing its job at that pressure so I upped it until it was soldering better.
Not above the red line though.
When the arm is at the bottom as shown in the right dial, it’s empty, and not just pretending to be, so get it back to the shop before you blow up.
Or have the nice delivery man come.
If you do have to take it in your car, keep the tank securely upright and crack your windows slightly as, according to the shop guy, sometimes the gas can escape,
and. you’ll. d.i.e…..
(O.K. so he didn’t say that but I thought I’d add a little more drama as I’m sure we haven’t had enough. Something equally bad will probably happen though, so crack your windows…)
Oh, and don’t flip the car over or smoke while you’re driving home.
I thought that was his best tip.
Thoughtful though.
End result after a fraught day.
Just a little more cleaning up and on to the next thrilling adventure.


 I like to solder the prongs using a charcoal block. This way I can place each prong into the hole I’ve drilled and gently tap it with a hammer so that it sinks down into the charcoal a little. I place each prong as you would close a bezel up, tapping the next prong on the opposite side, etc., etc., until they are all in. This way seems to keep them more secure.


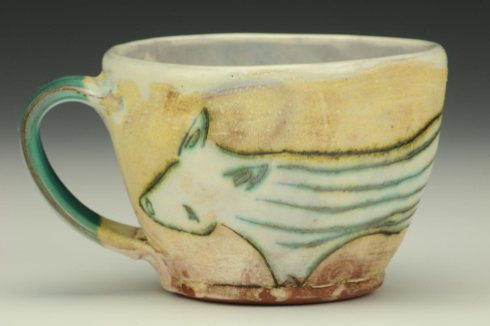
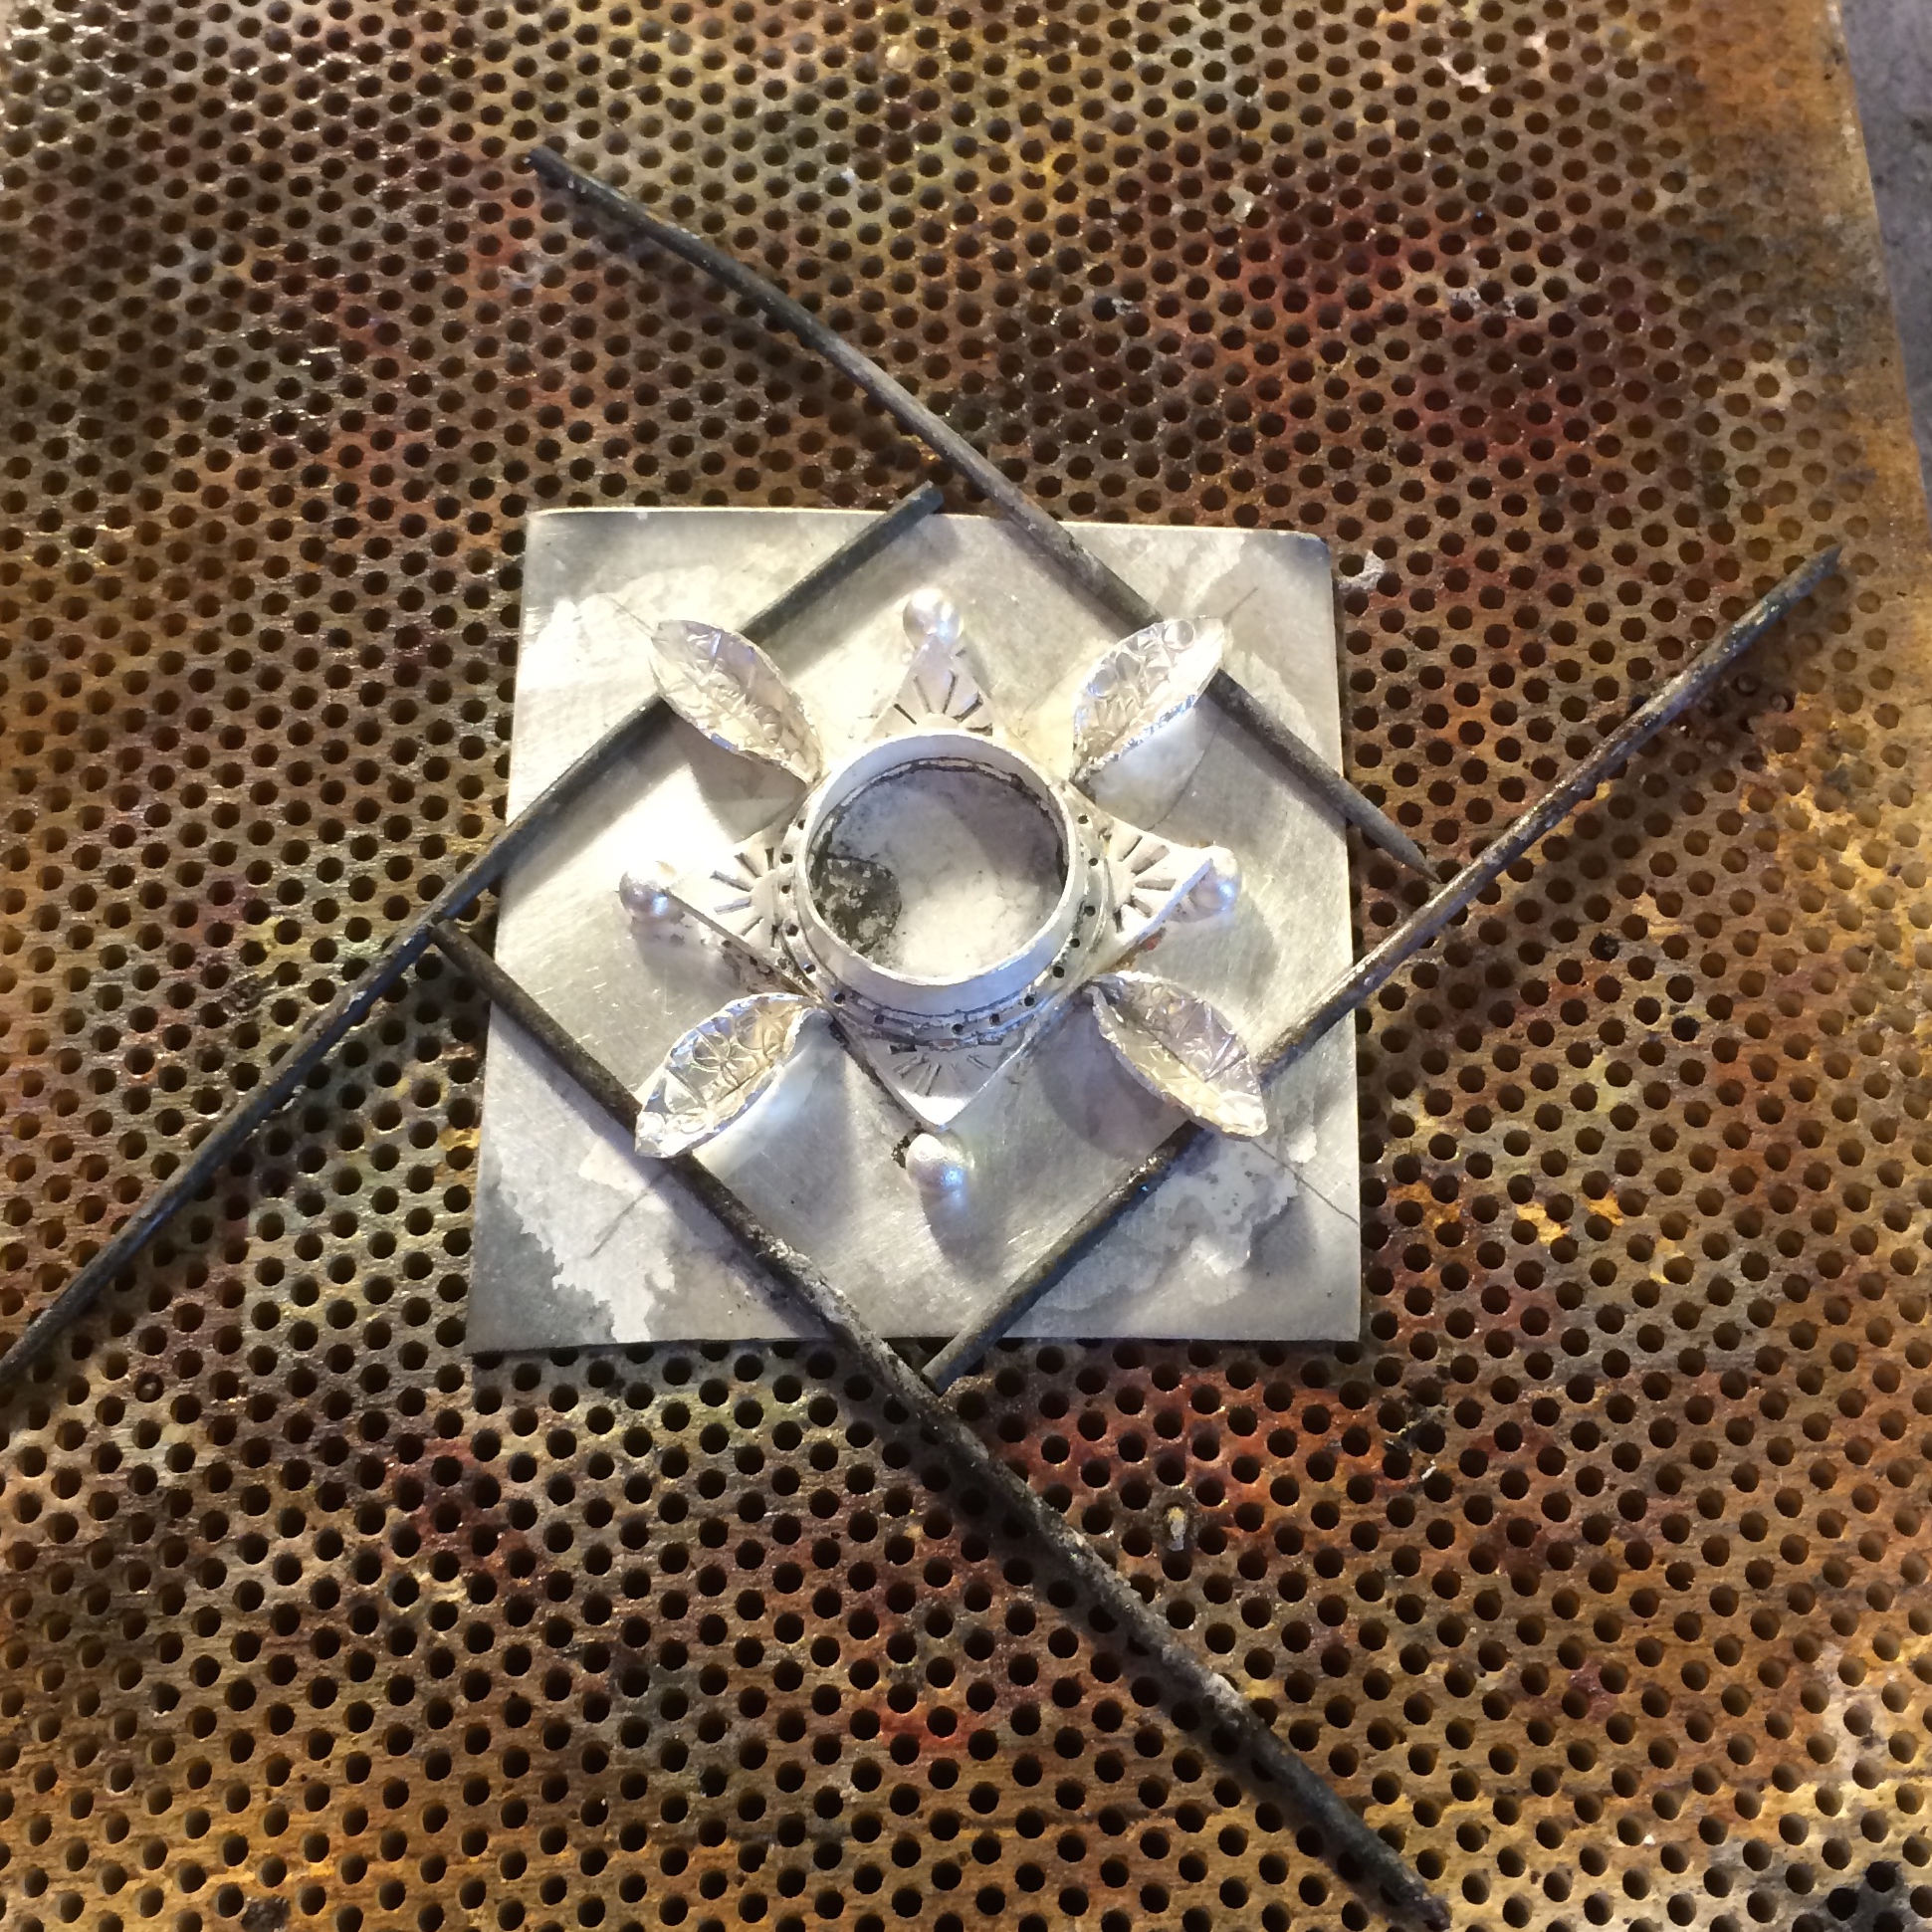
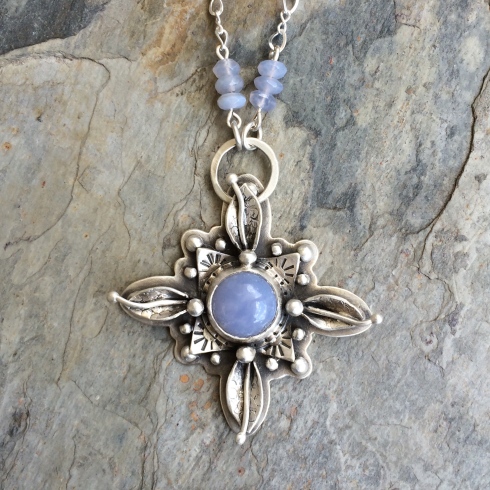


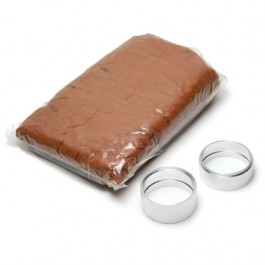
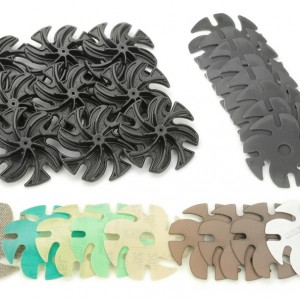


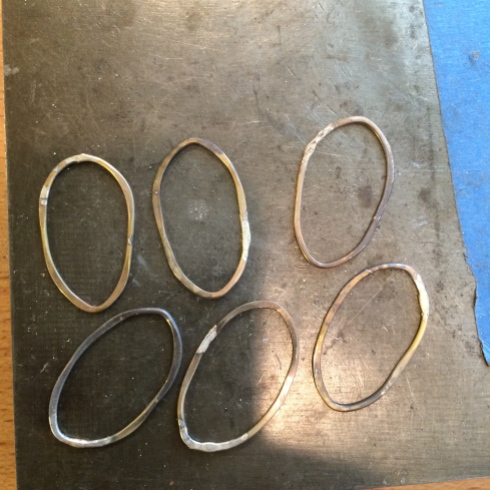
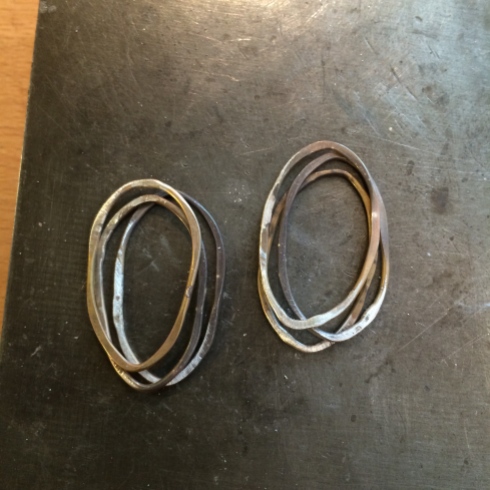


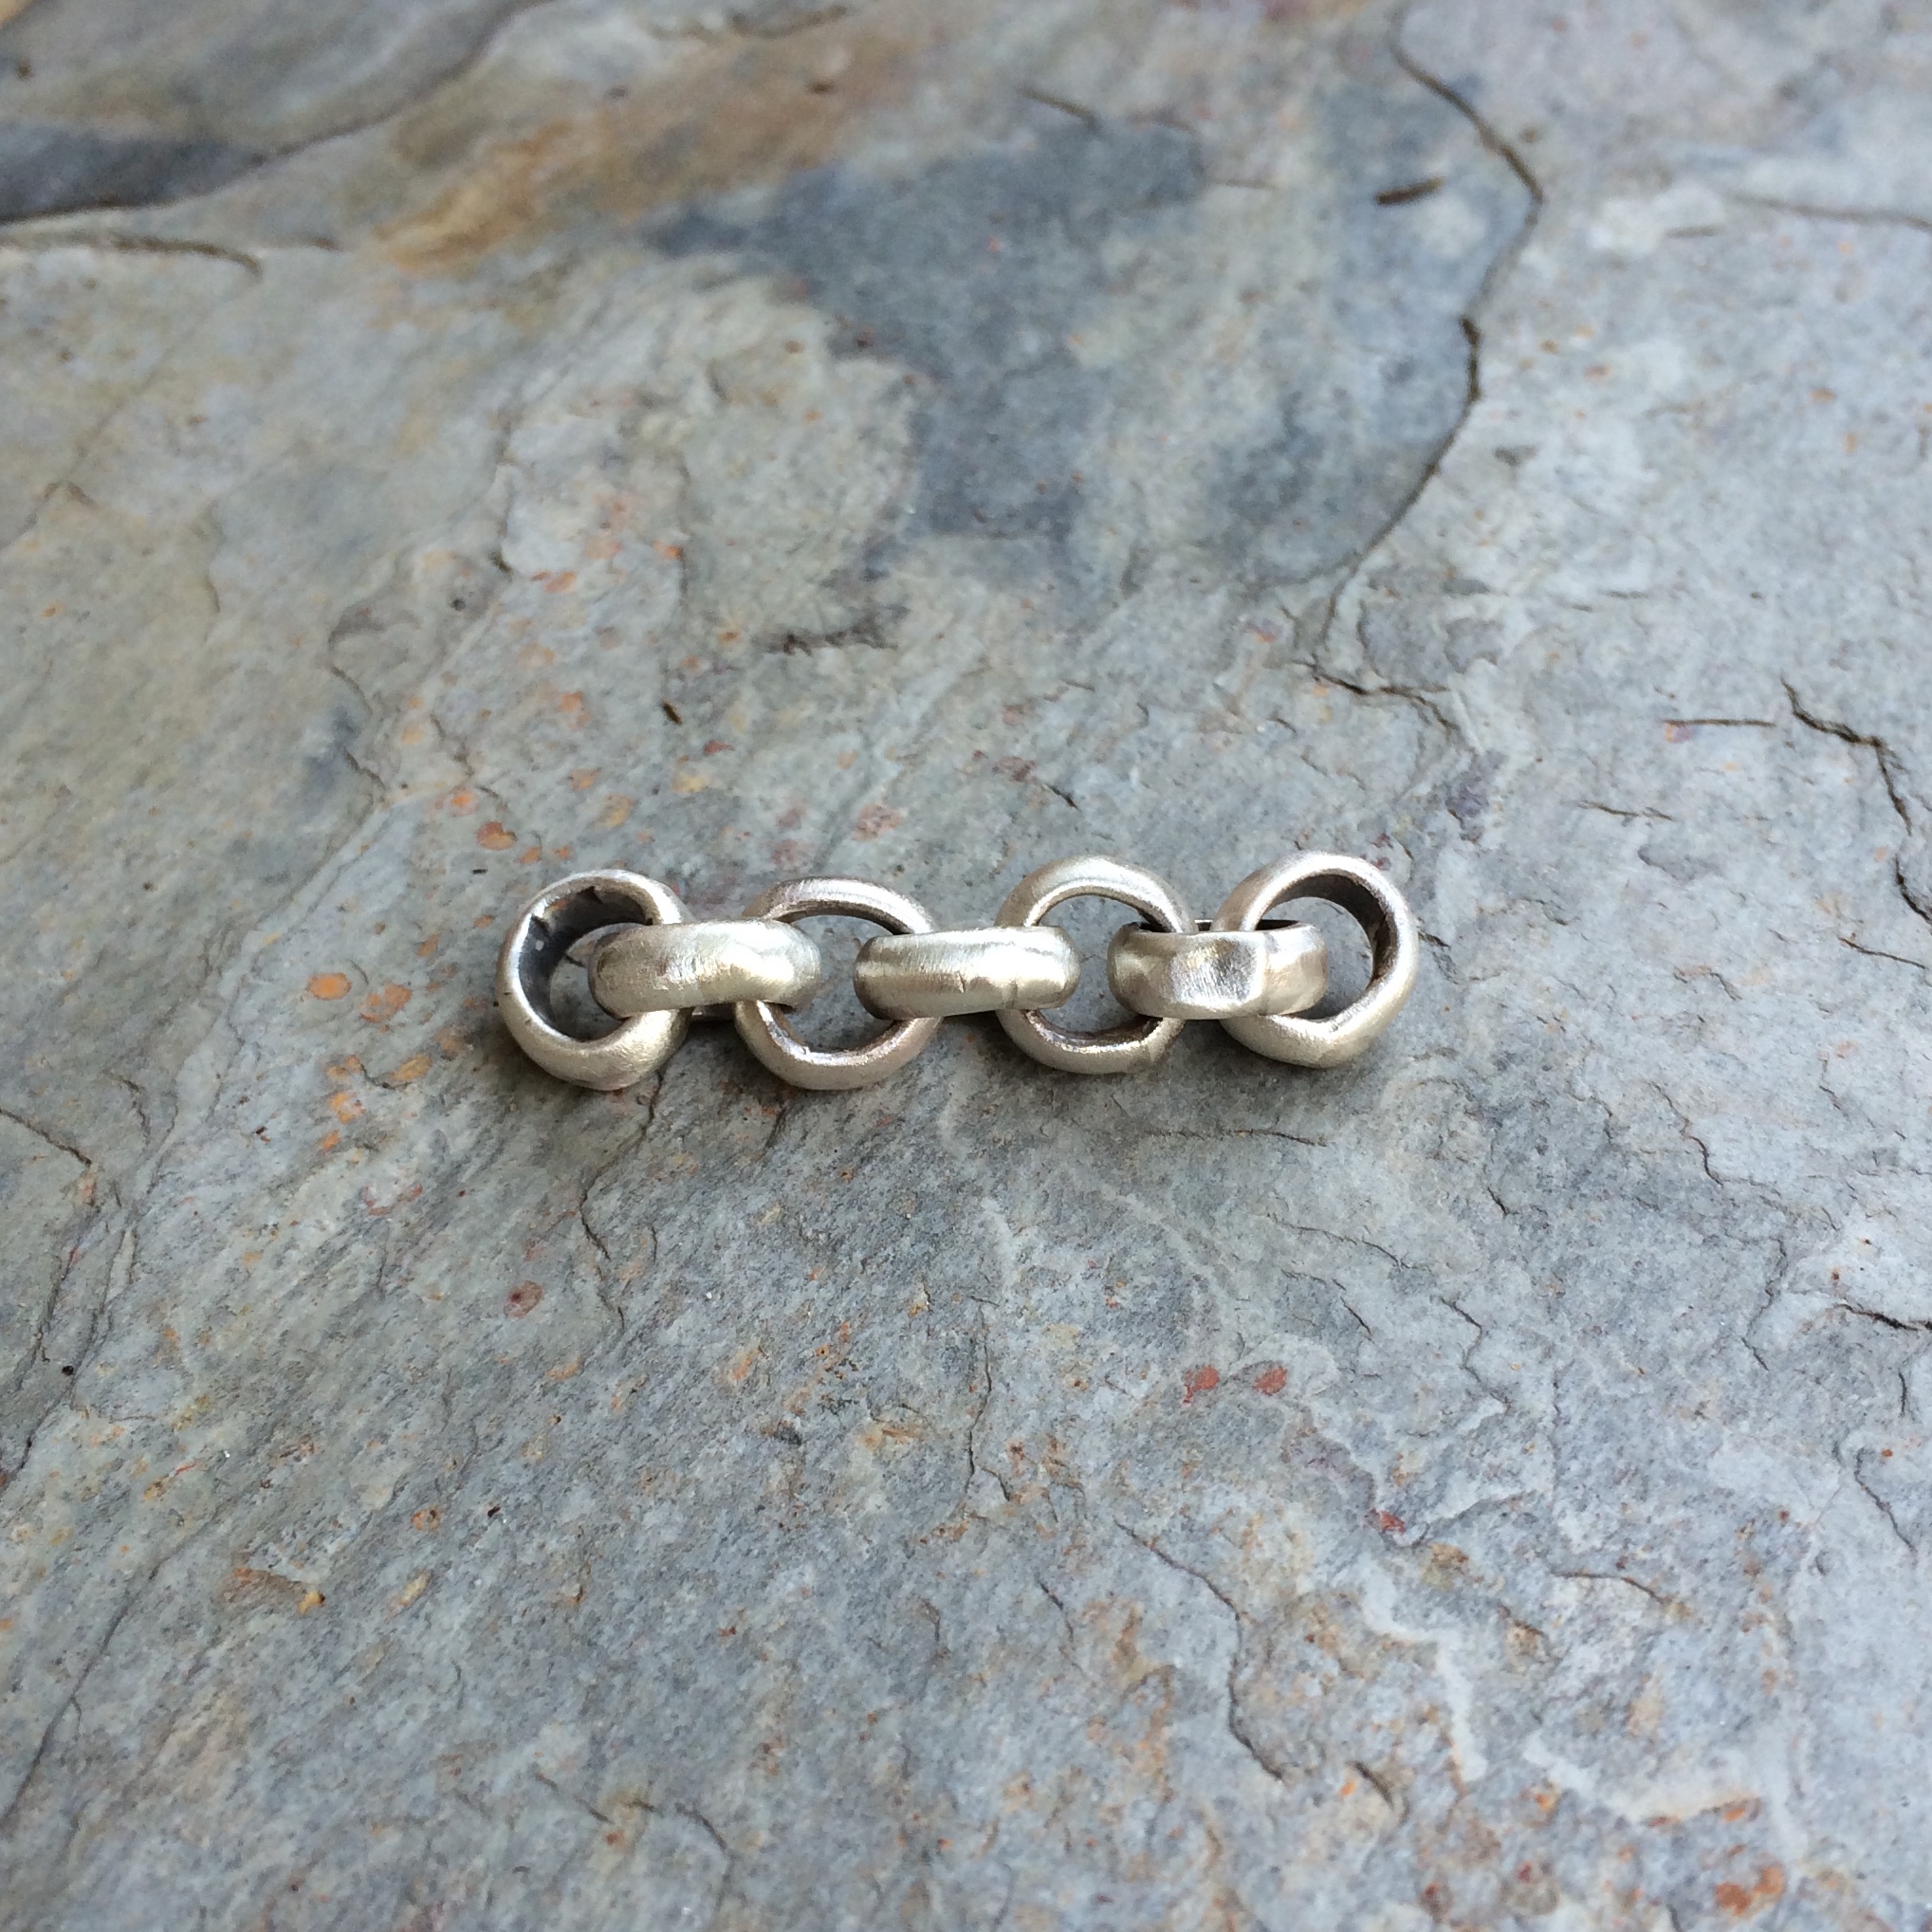
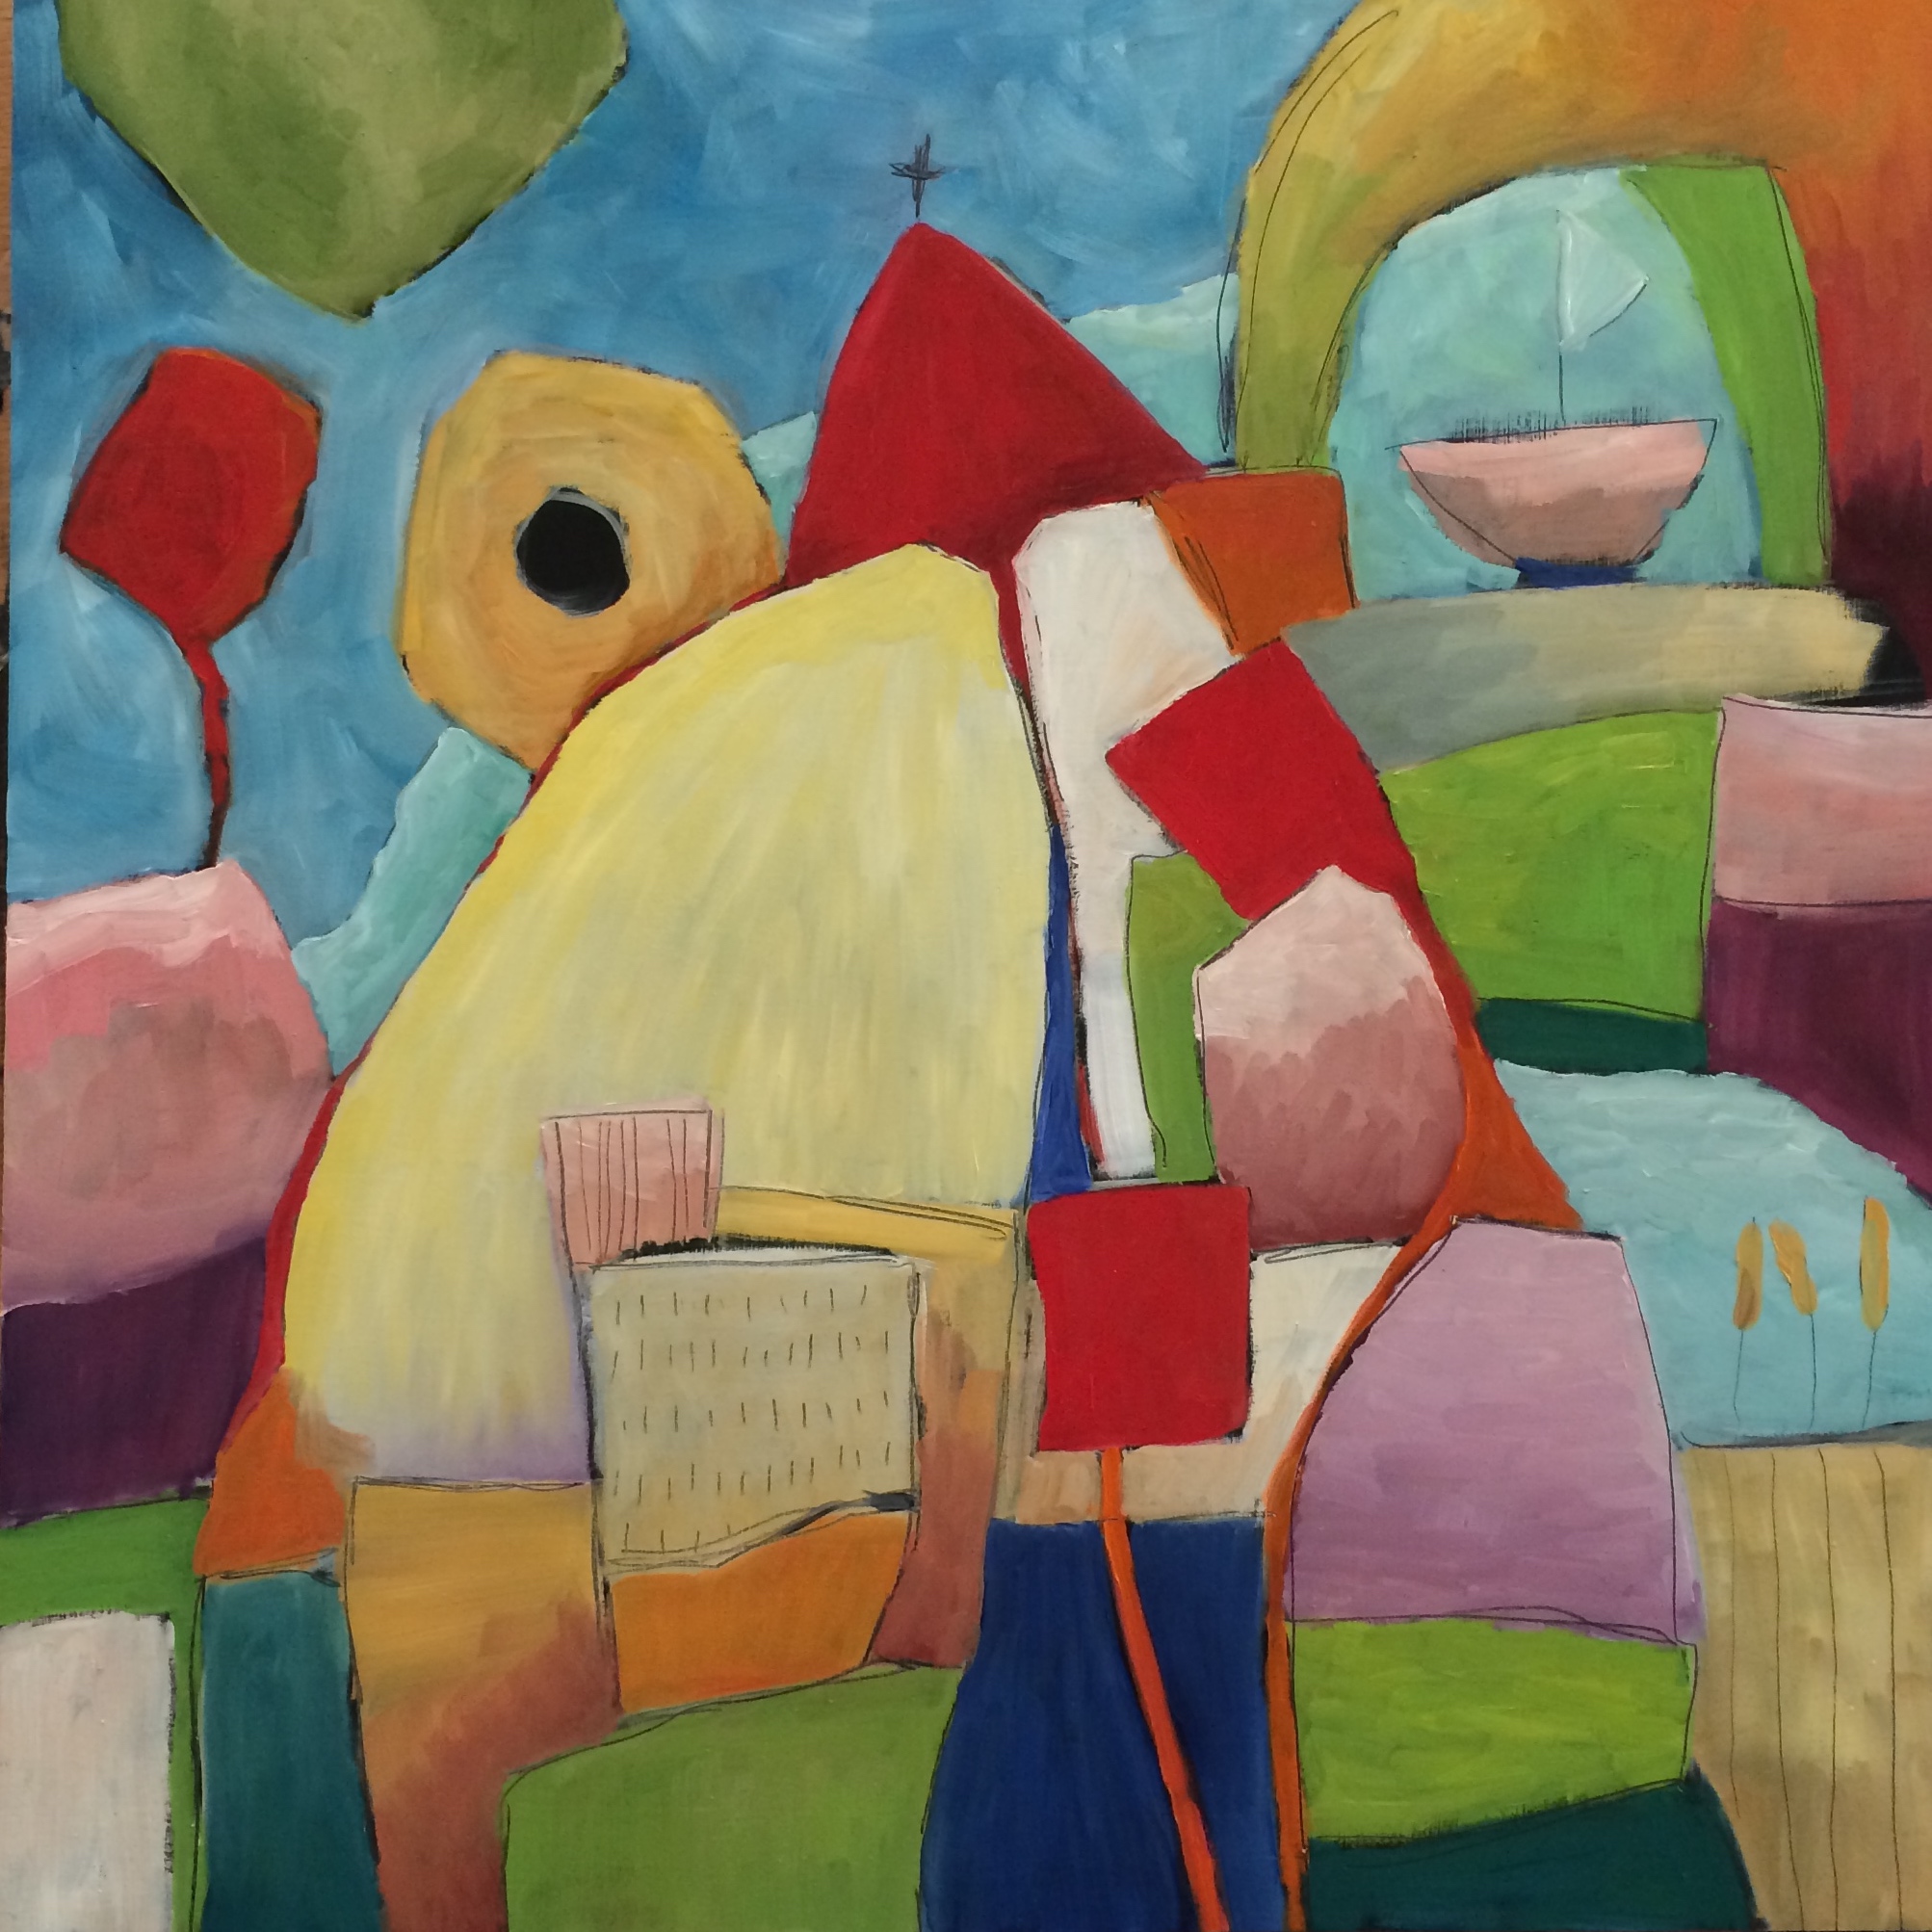


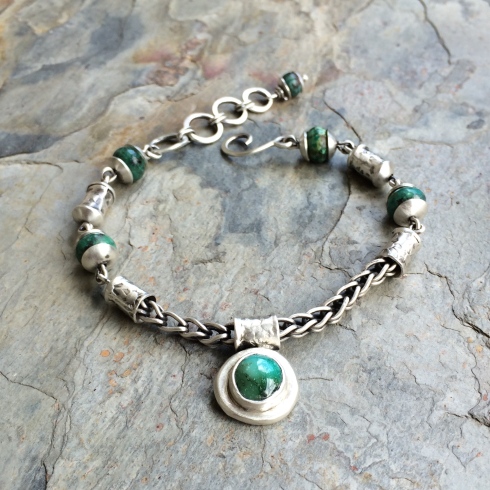
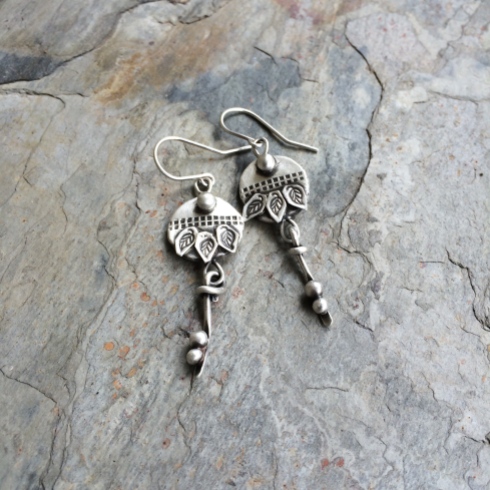


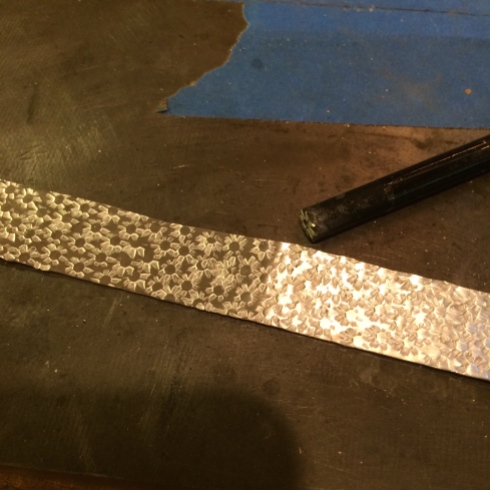

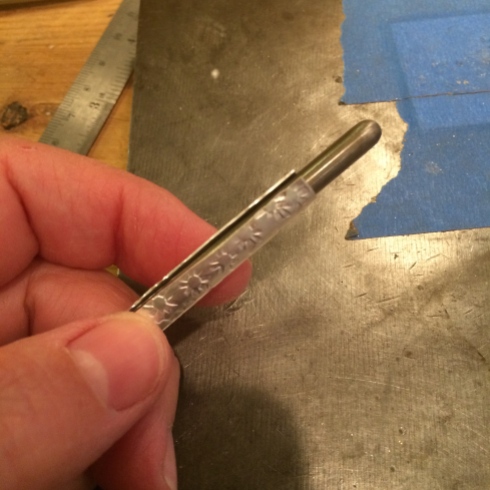
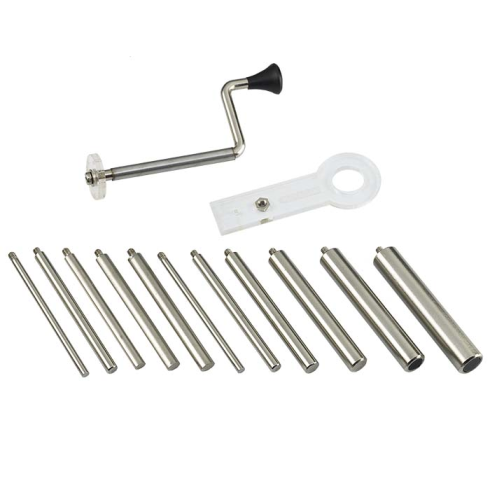


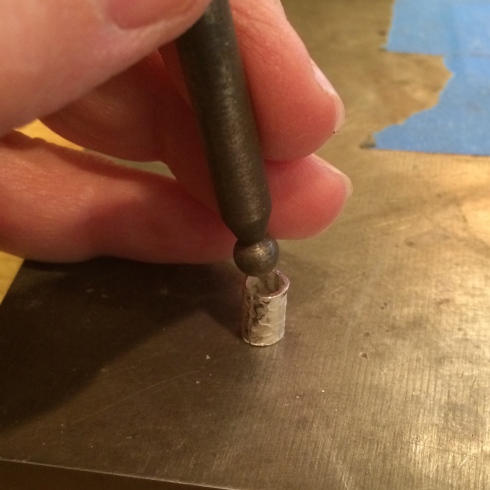


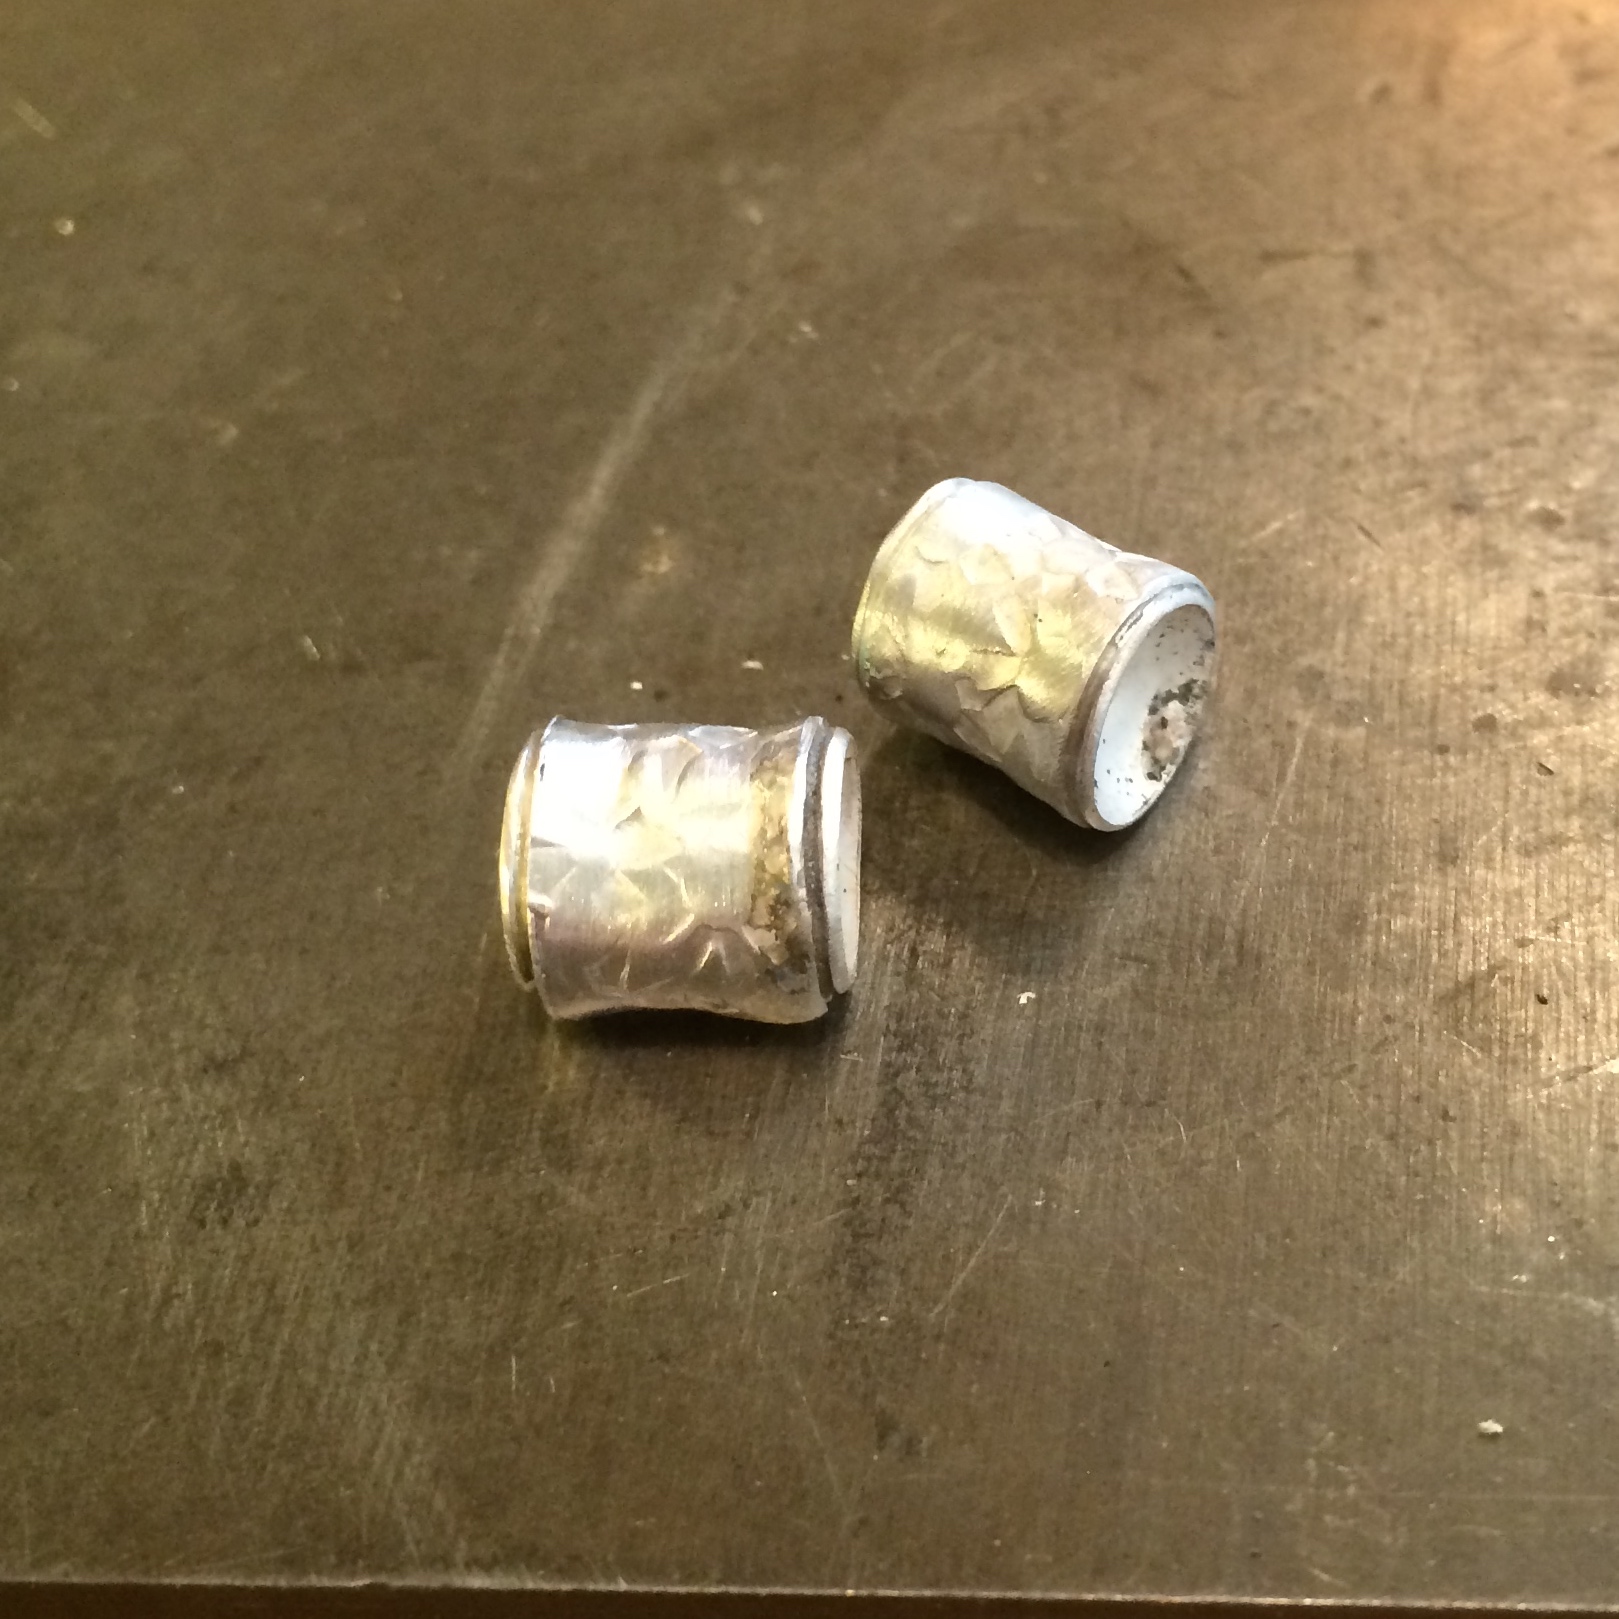
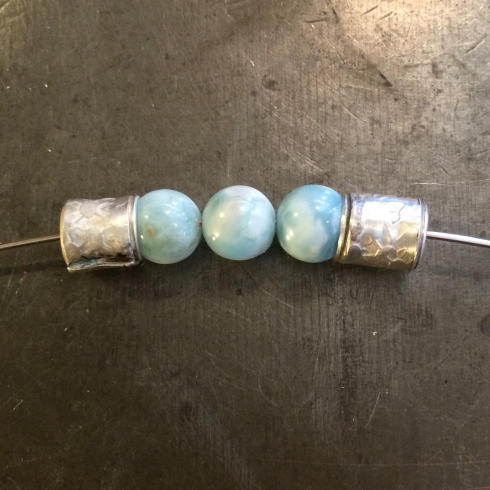


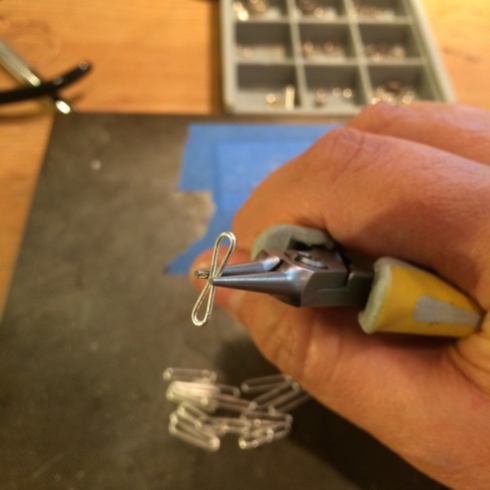
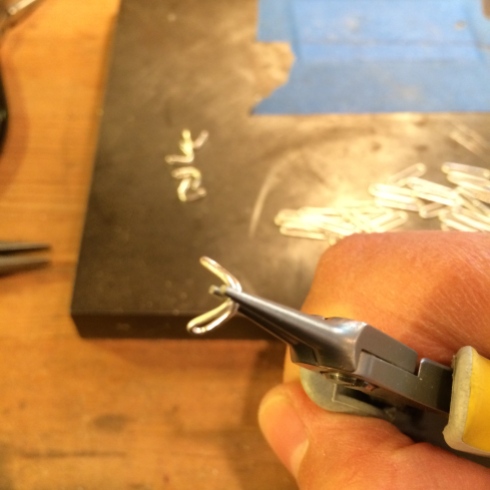


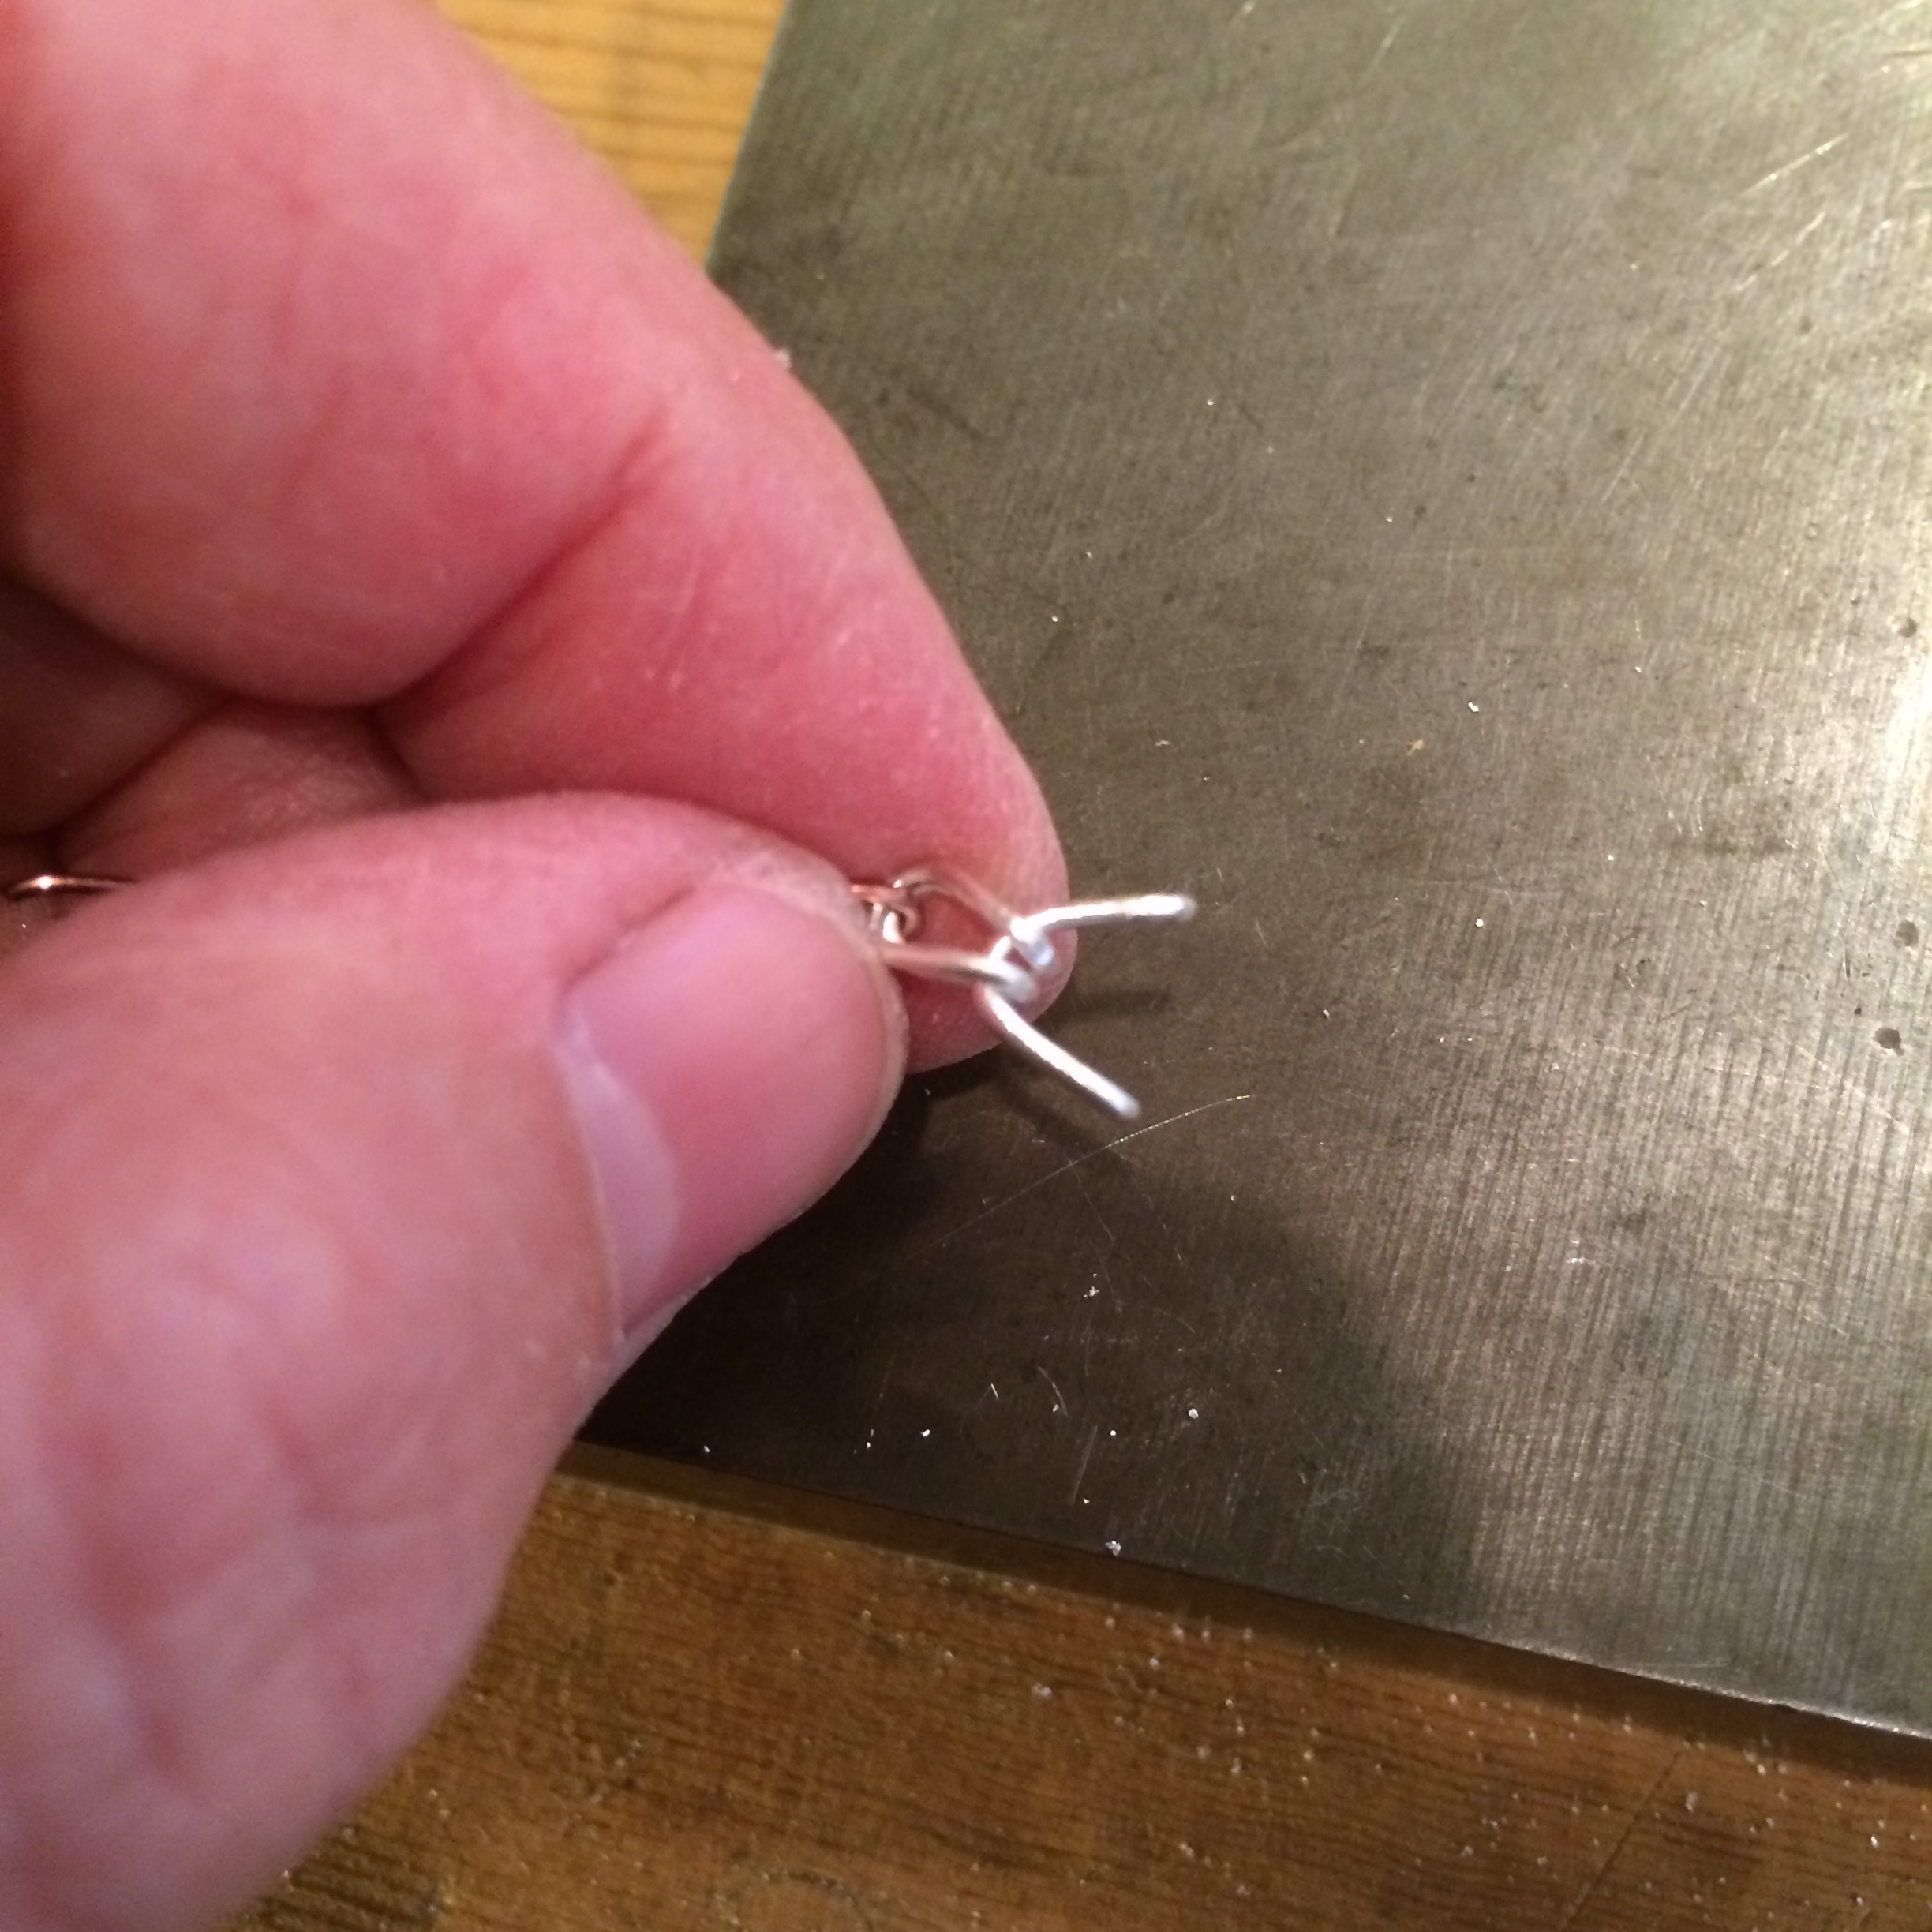

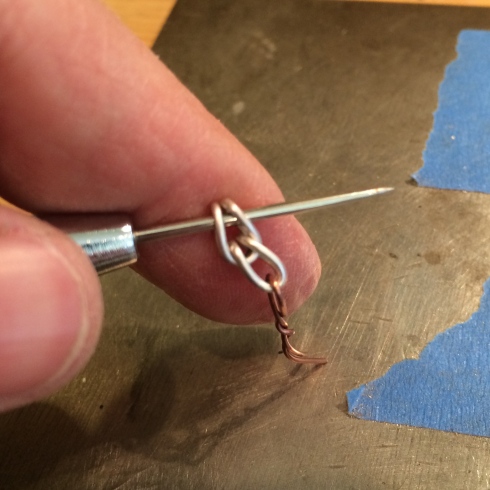
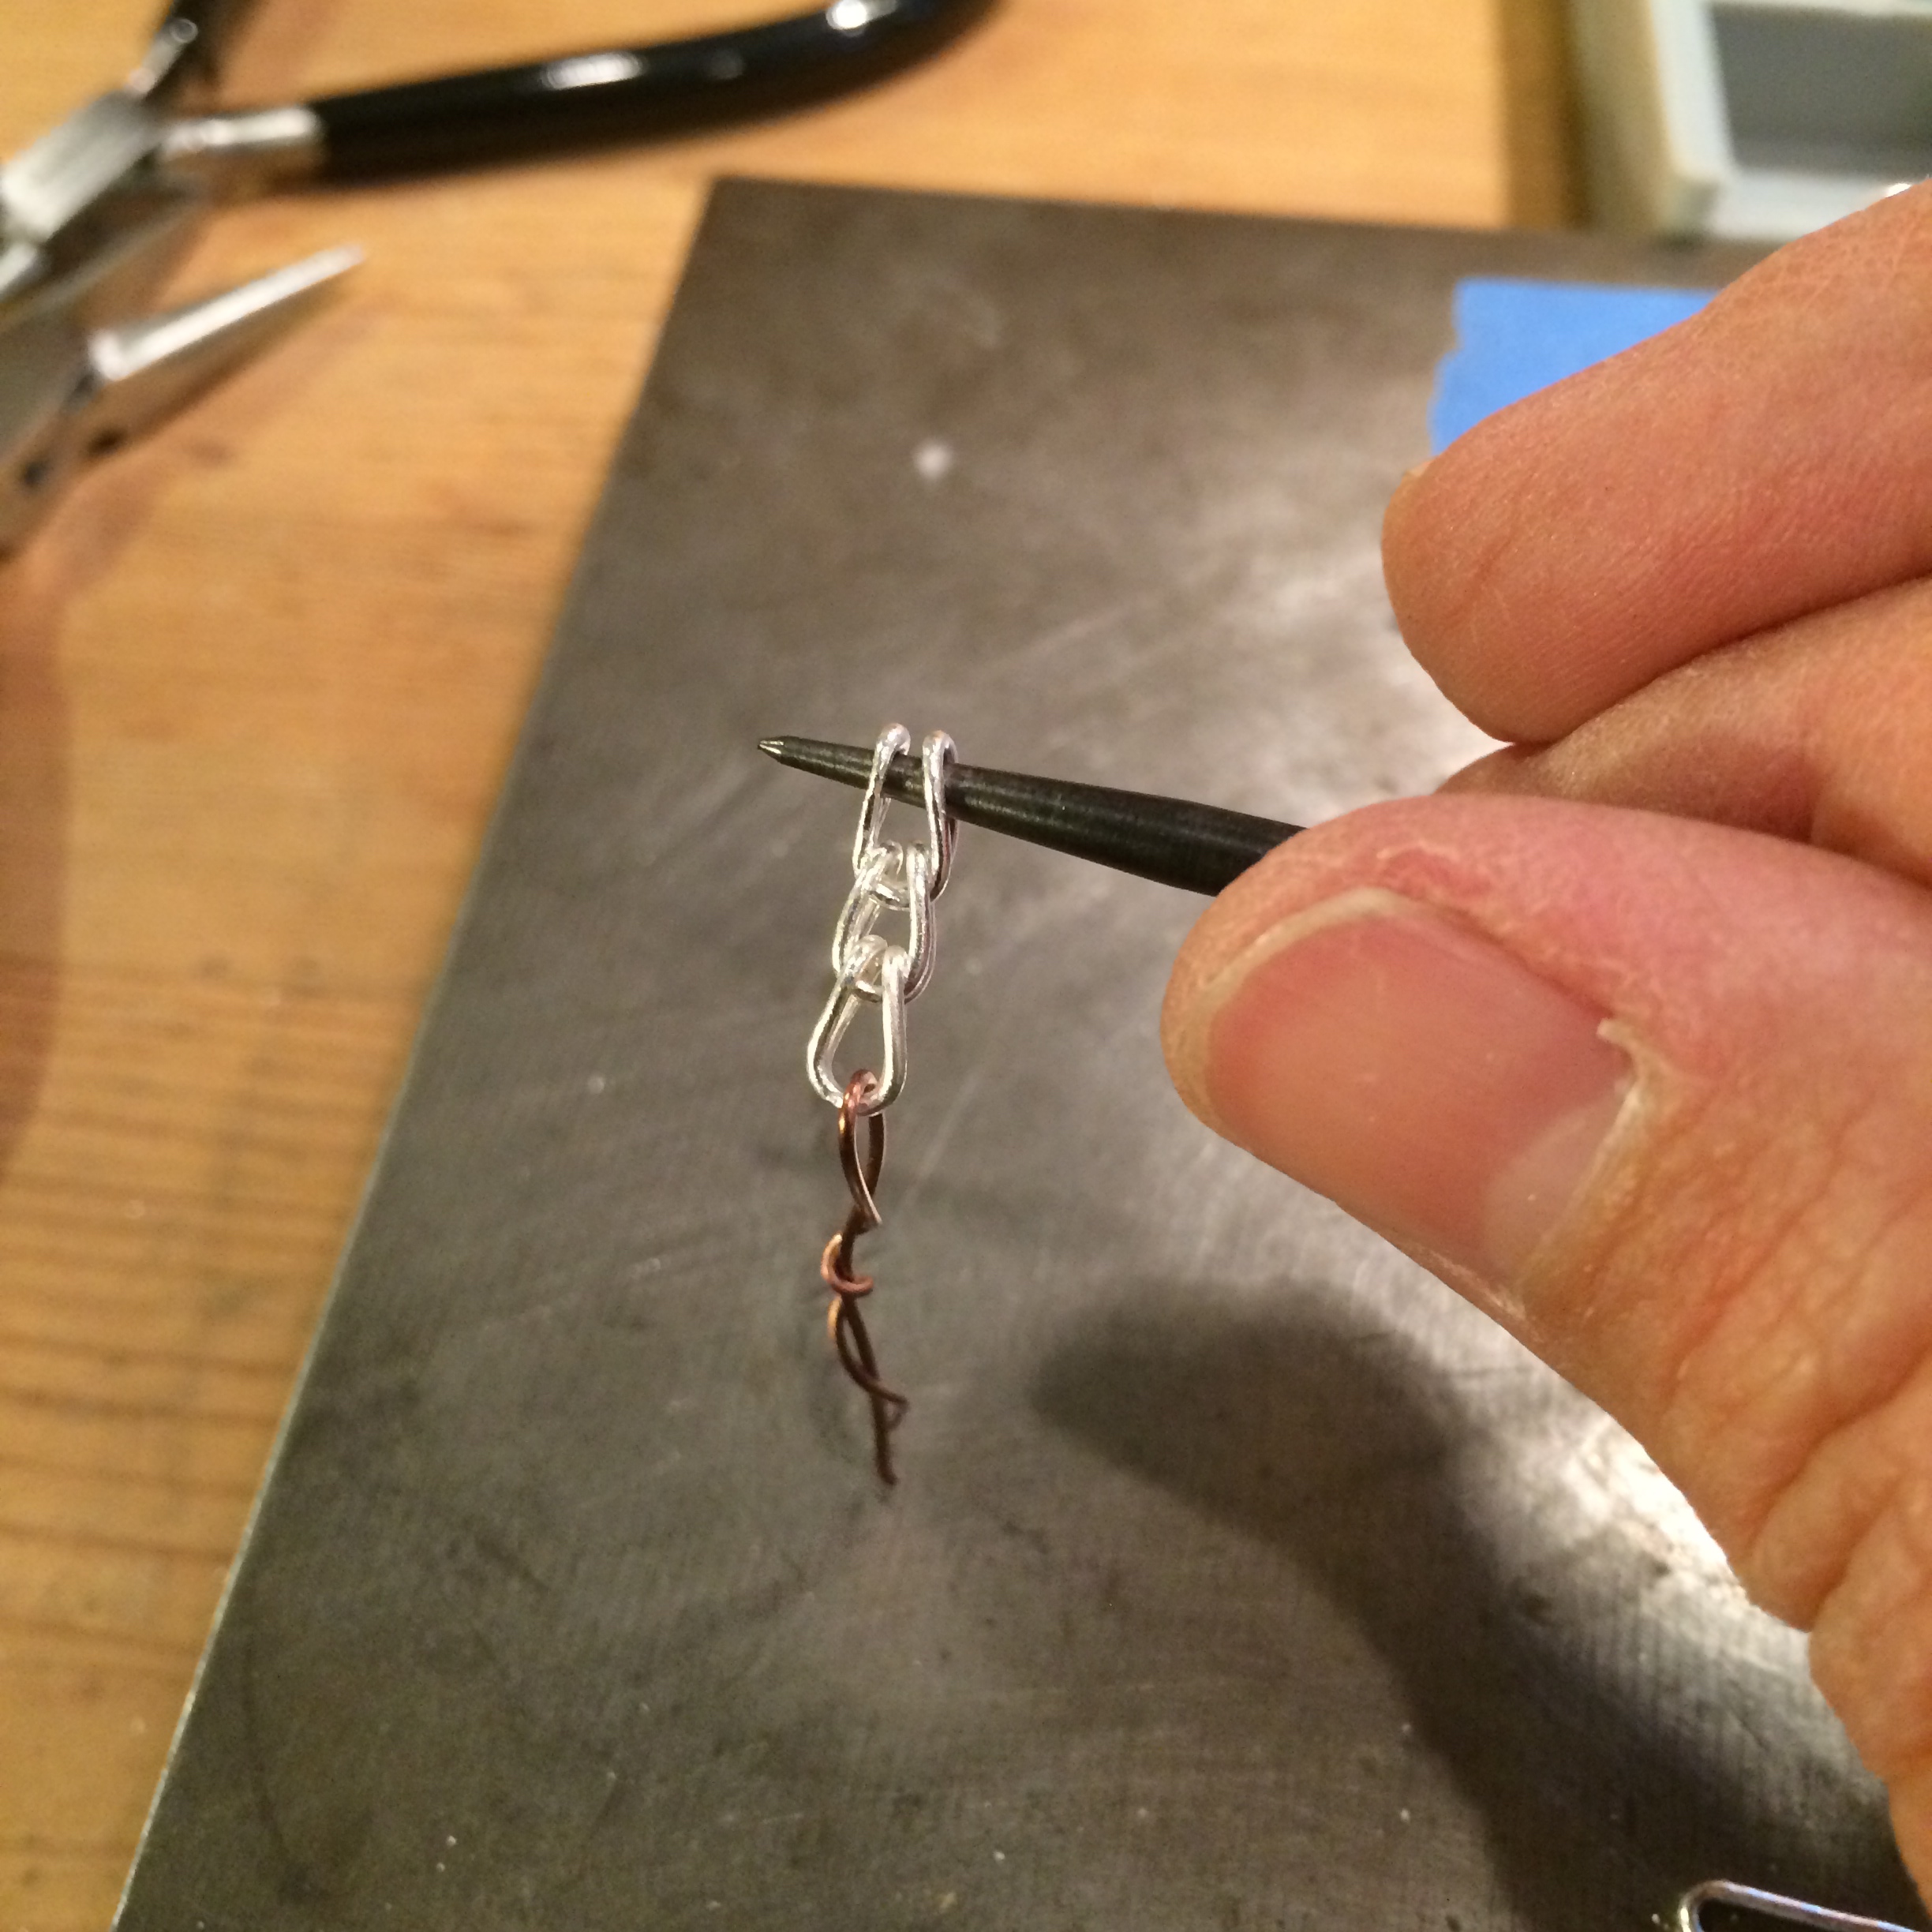


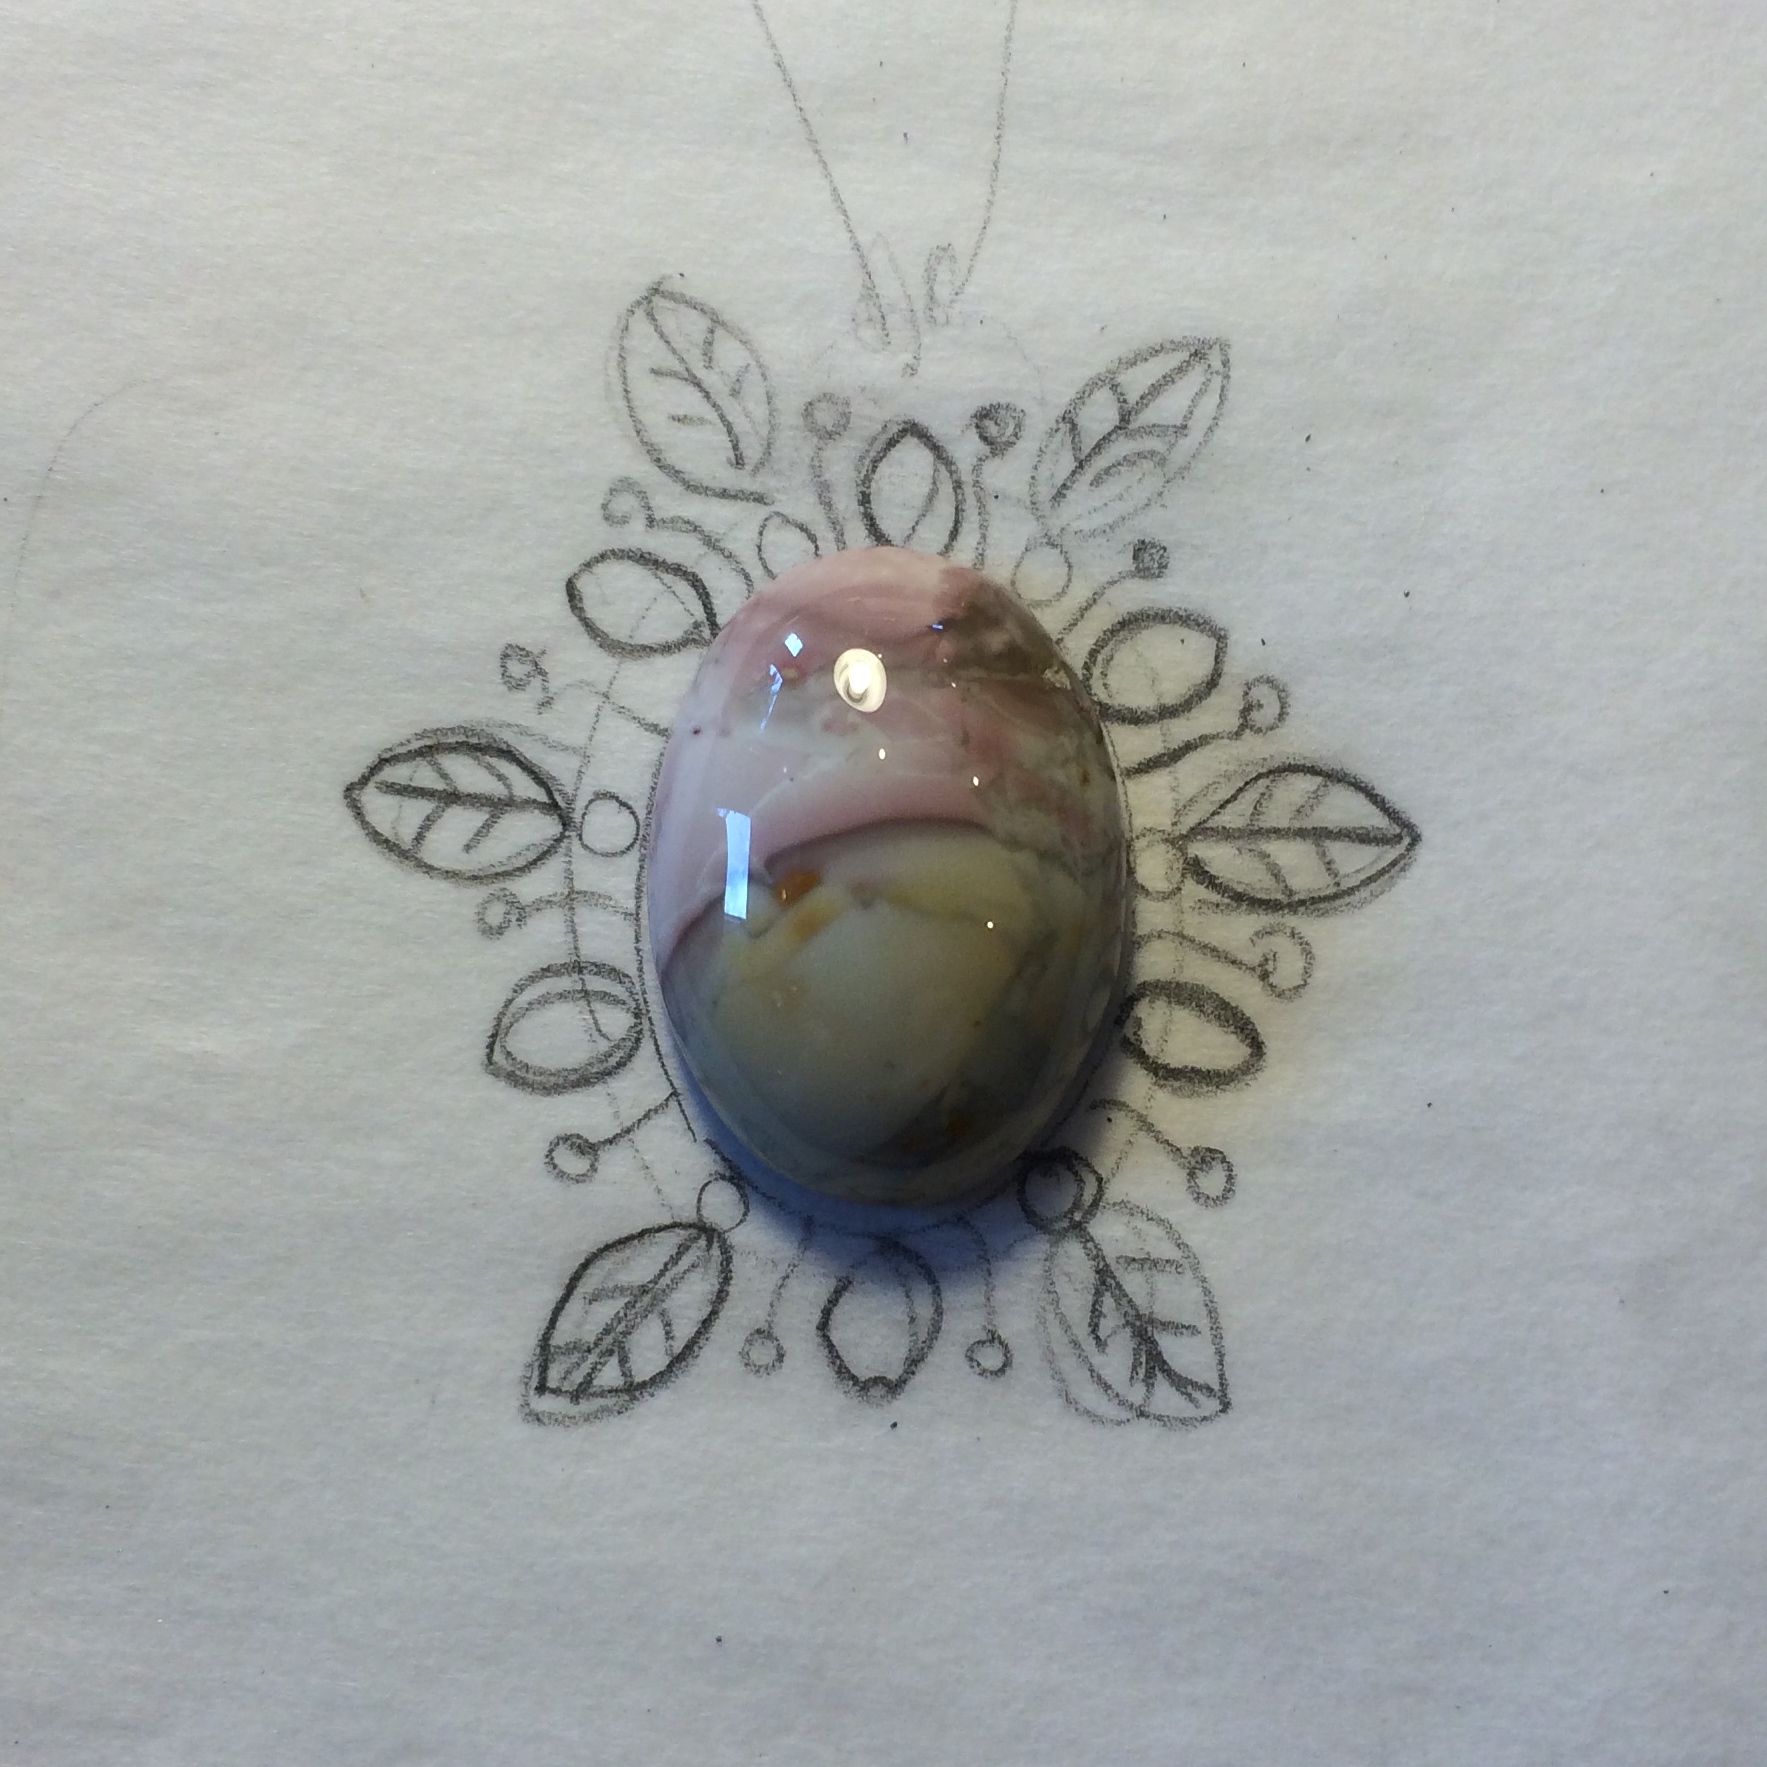

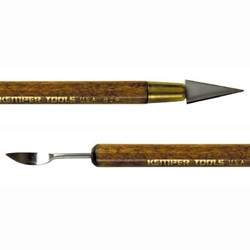


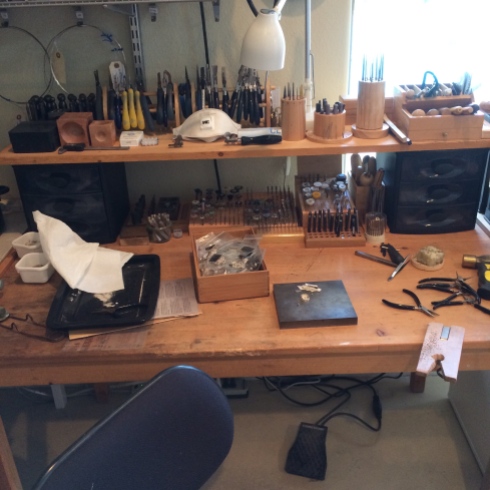


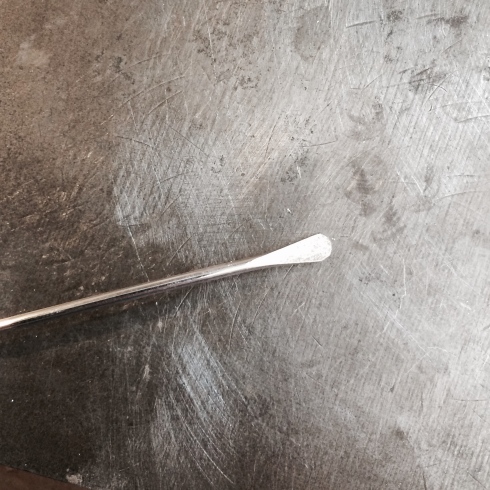
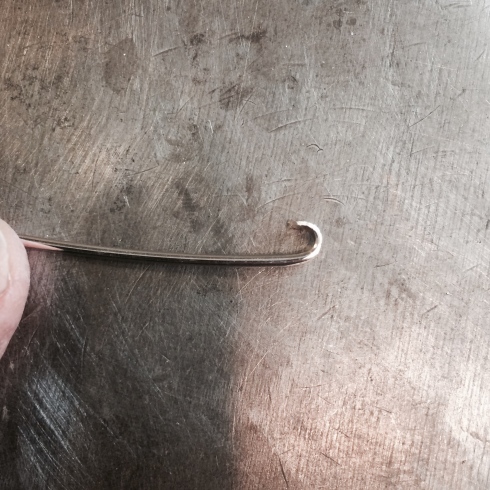


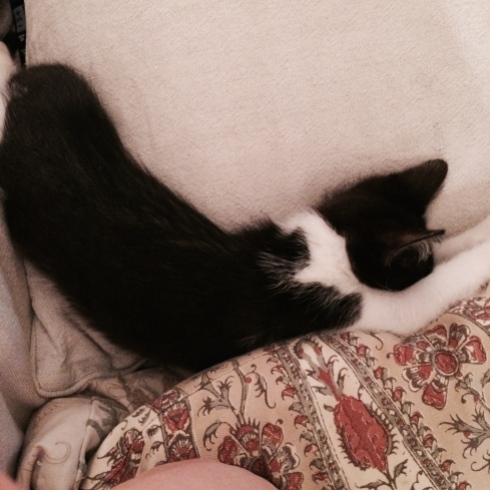


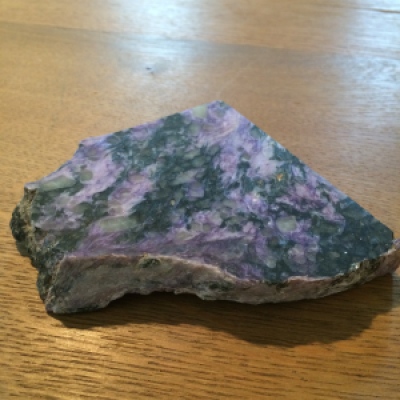
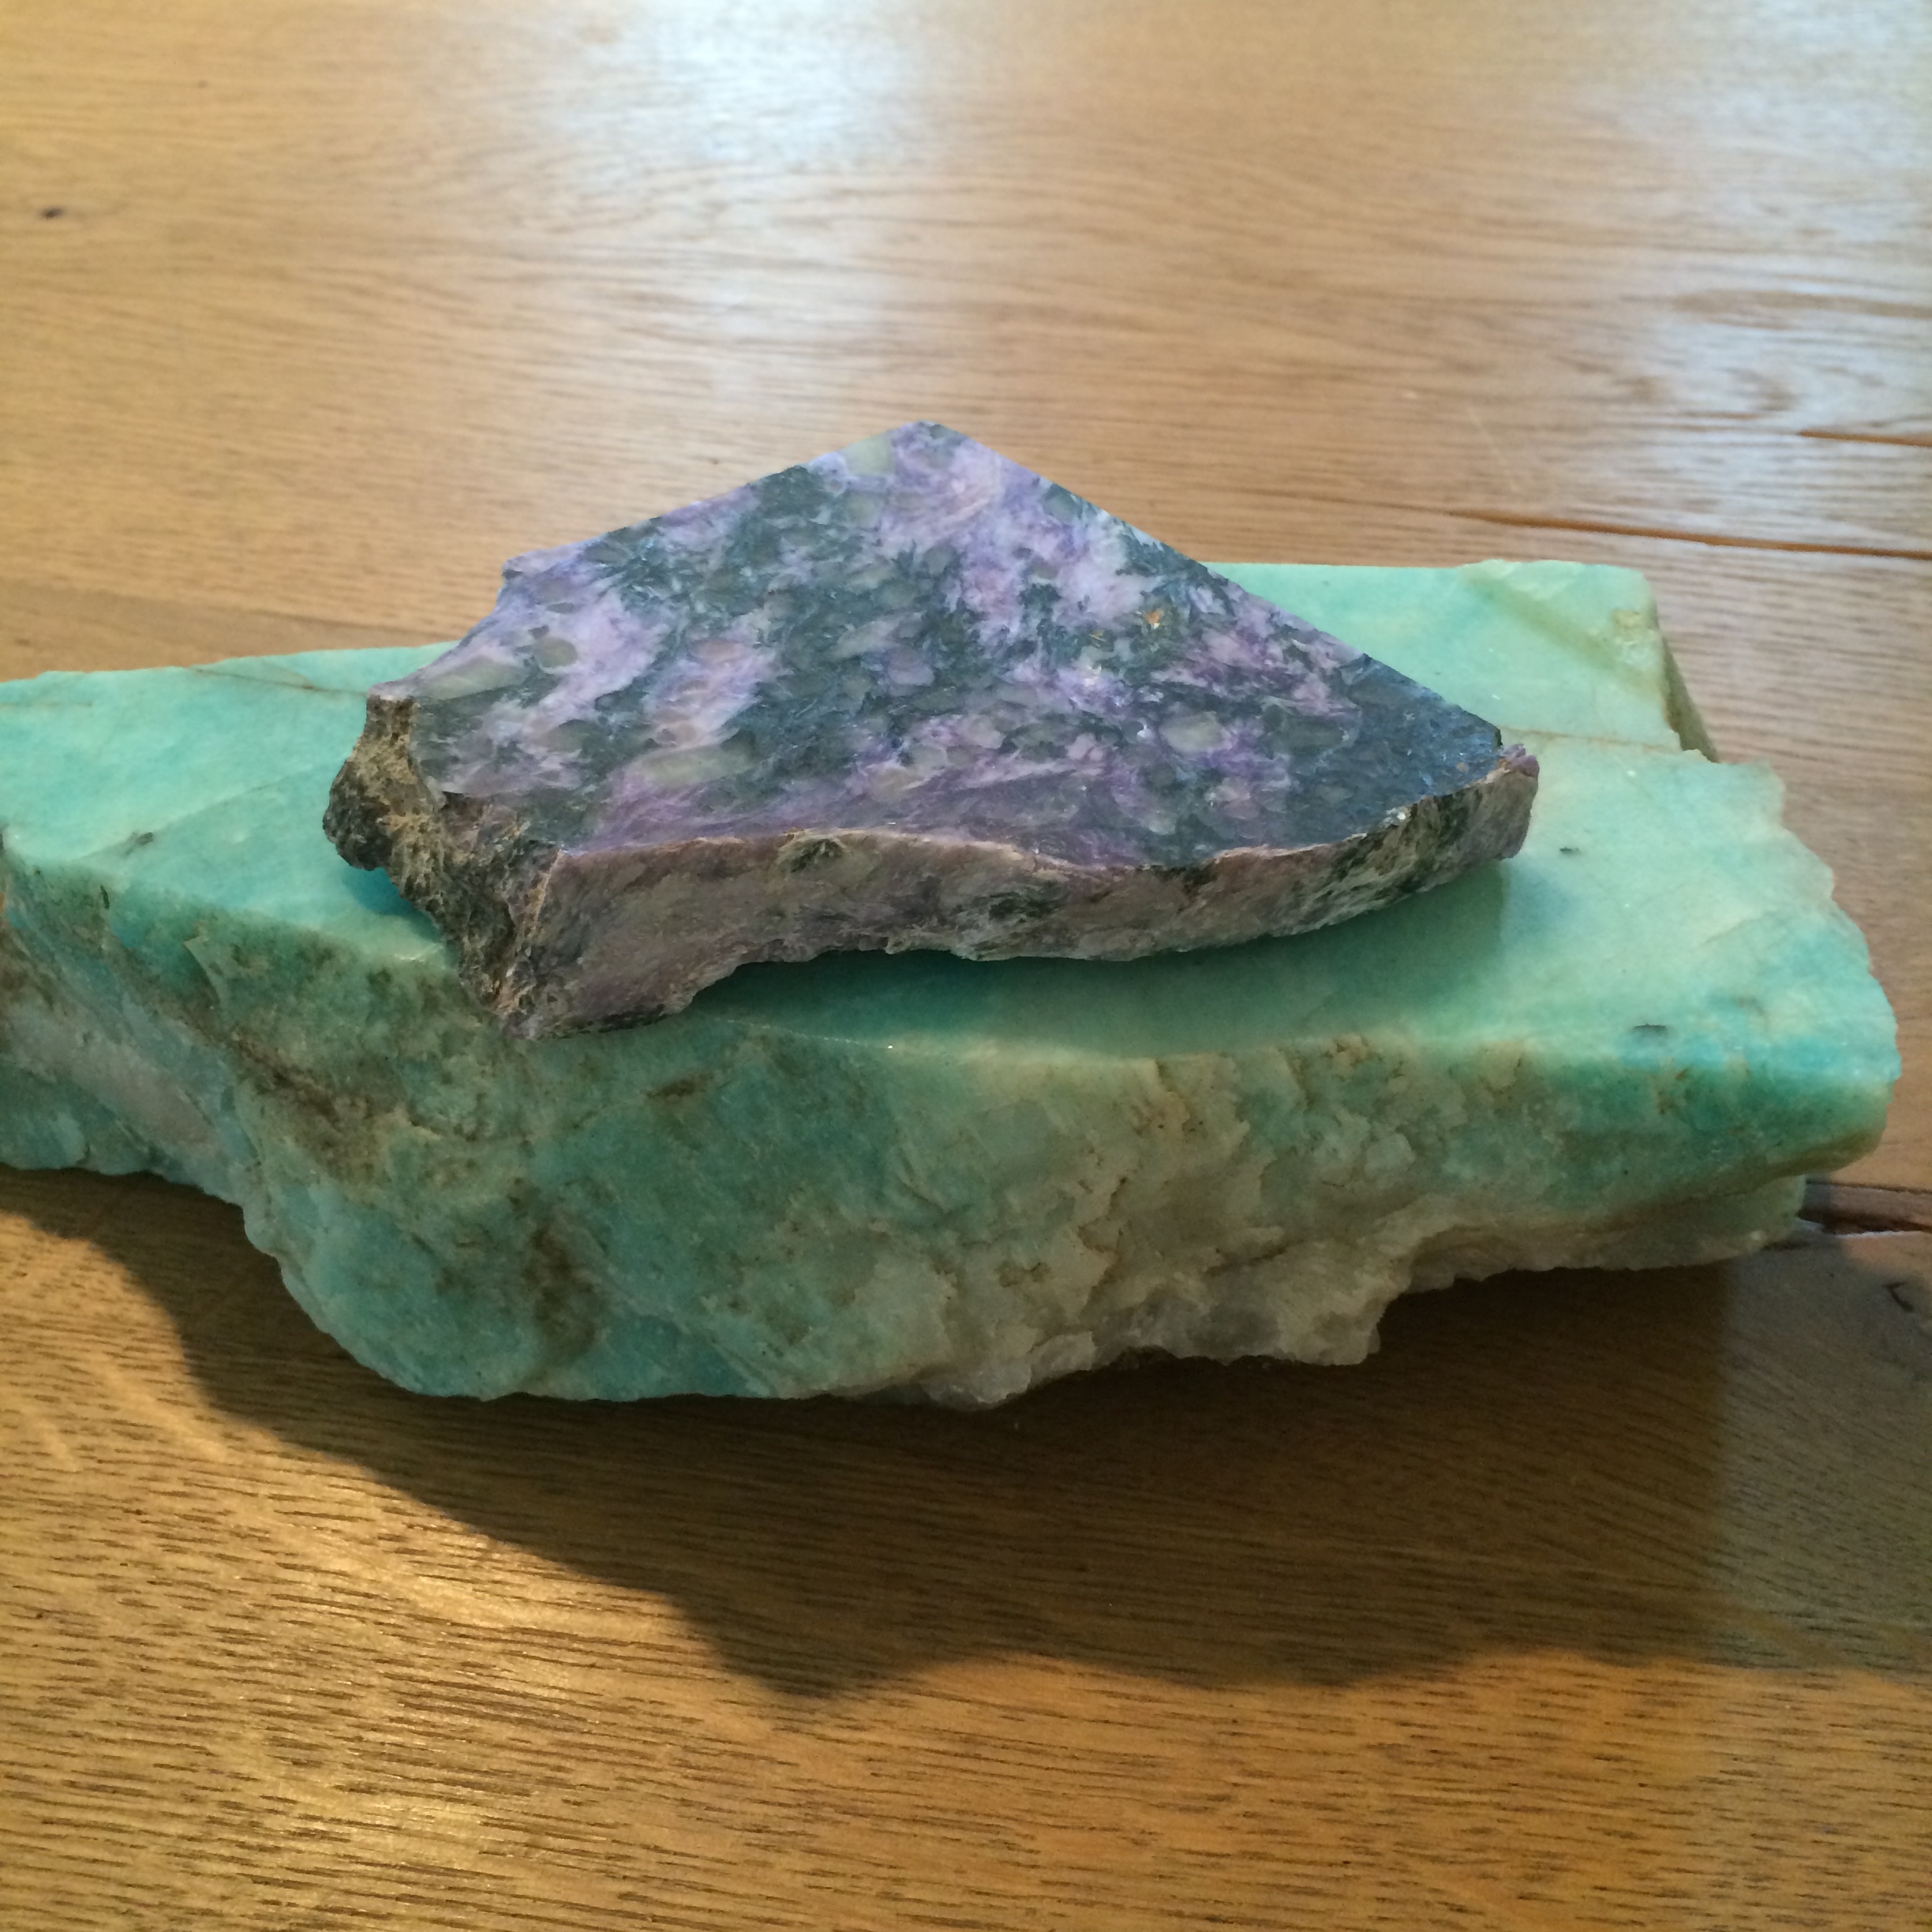
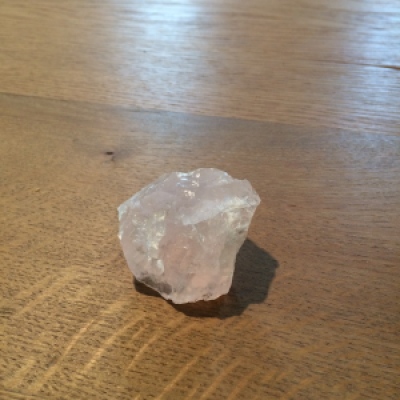
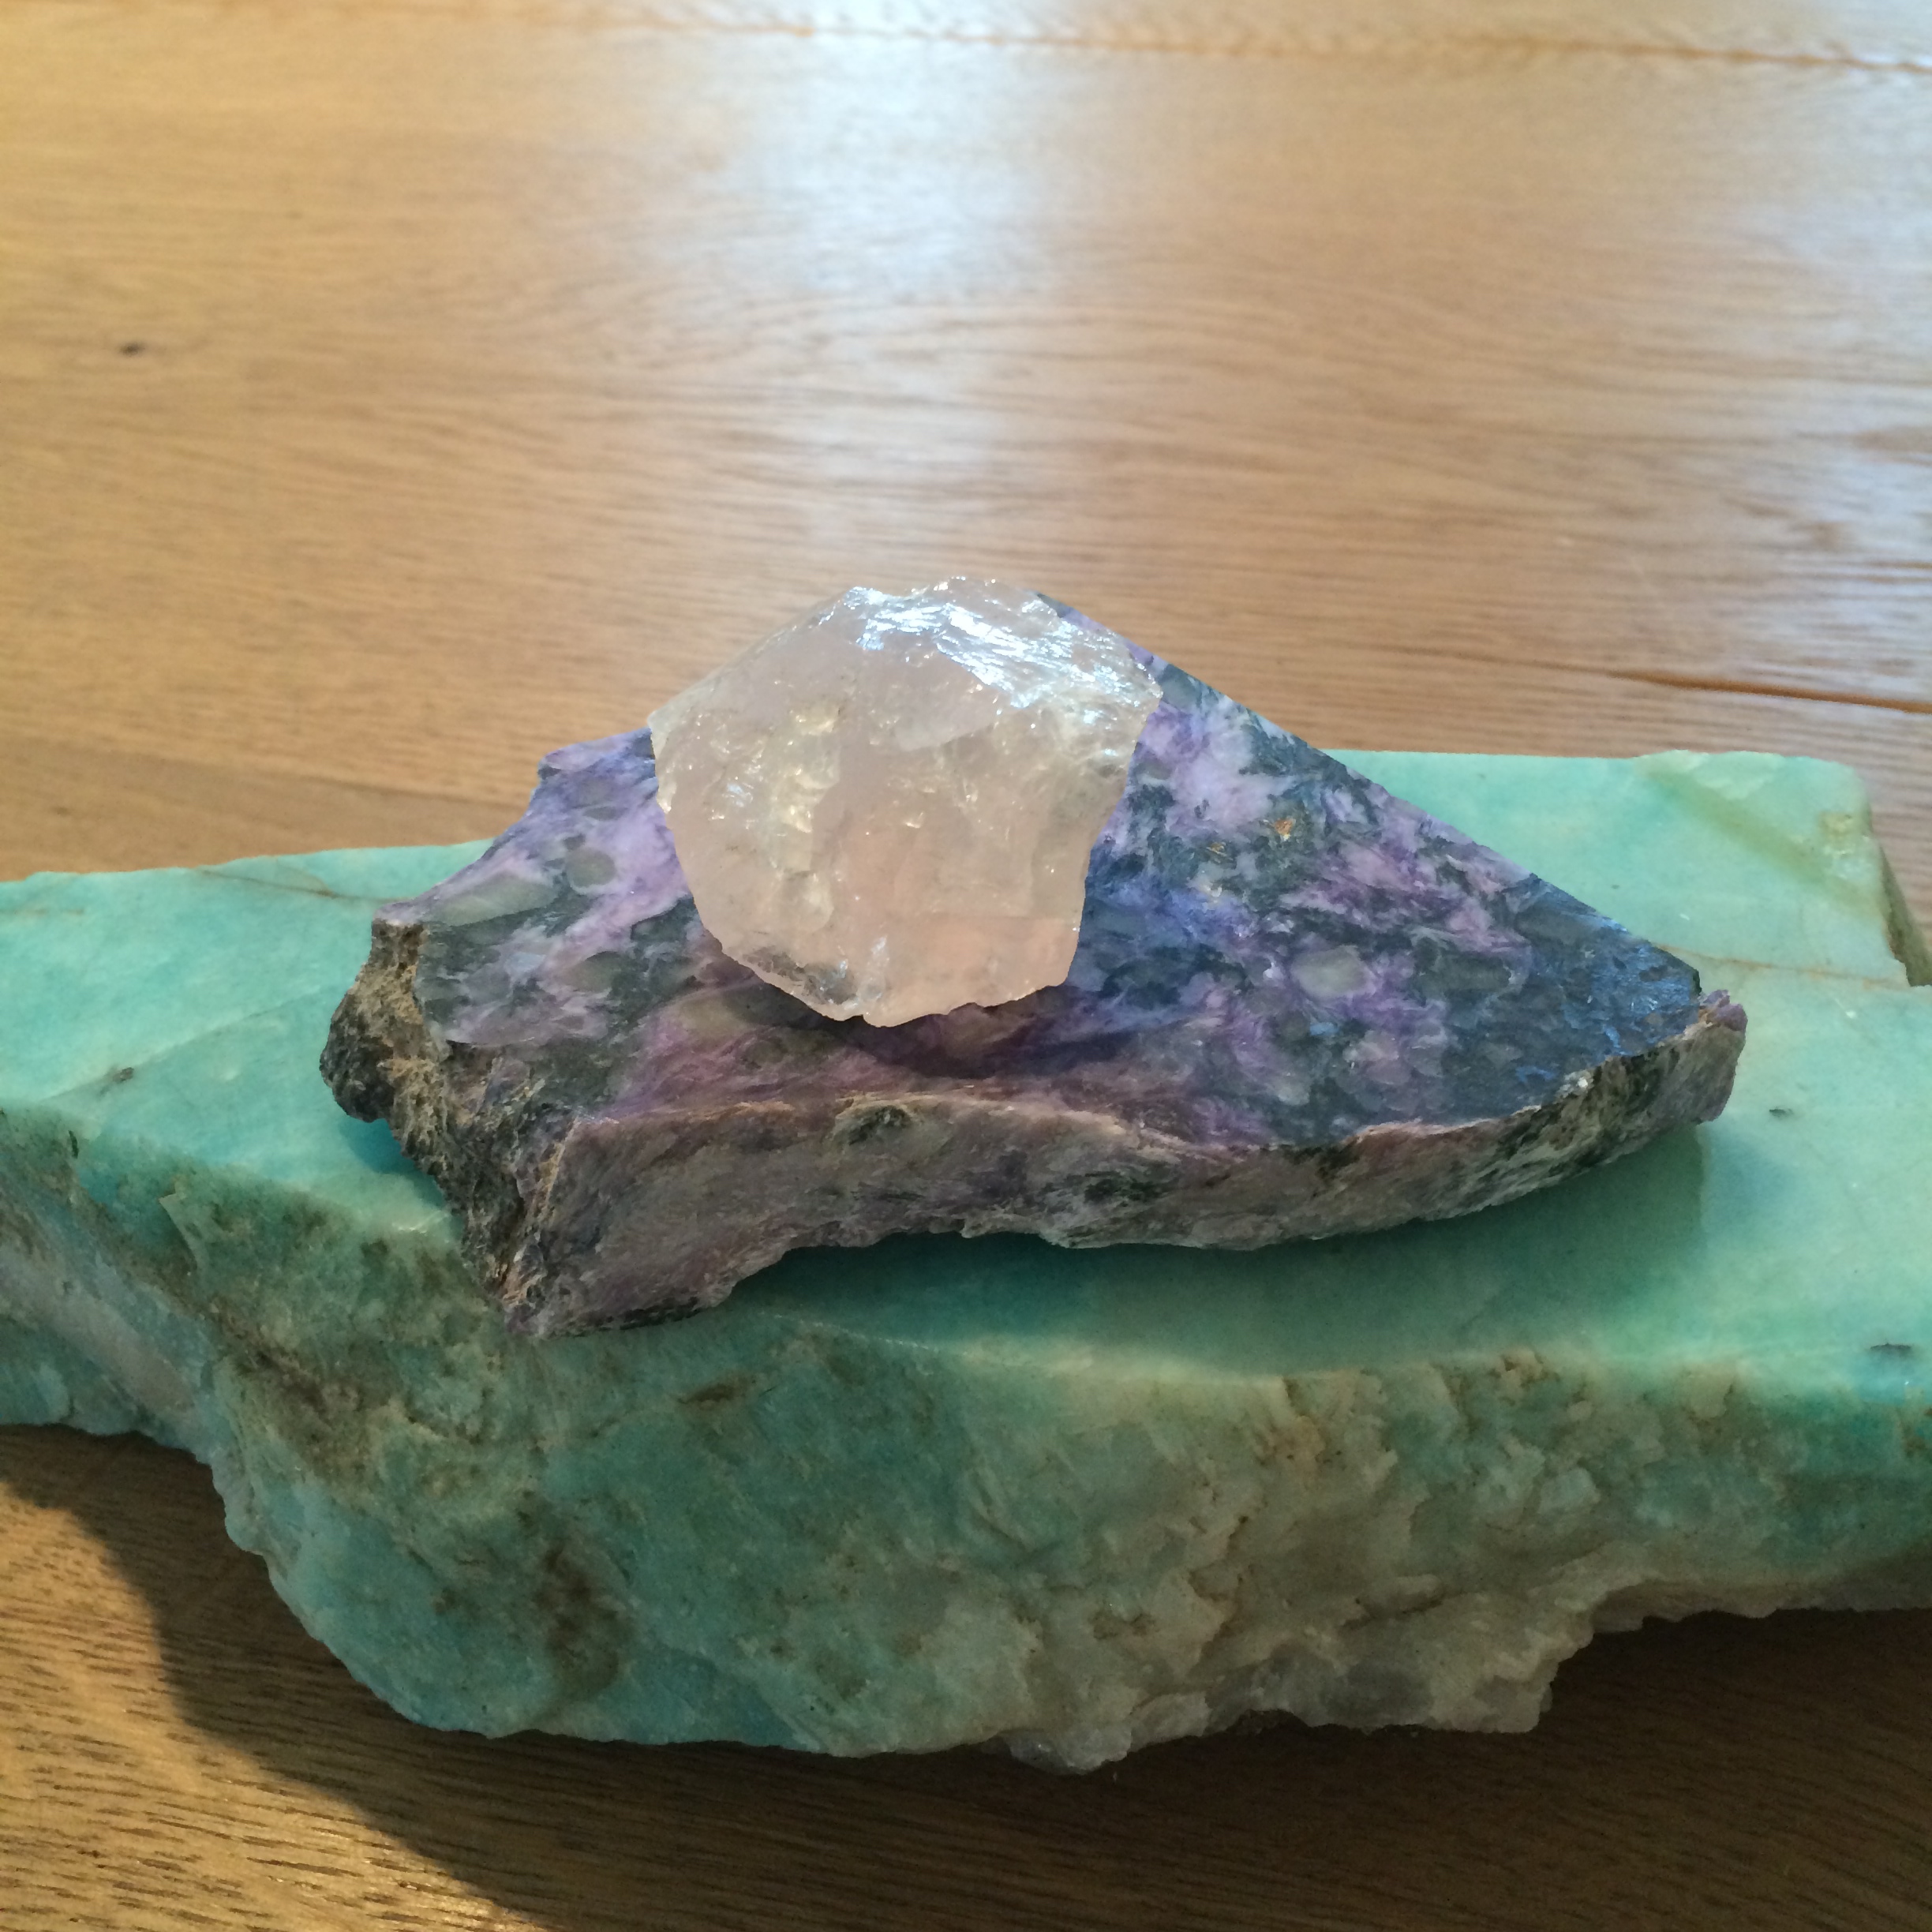

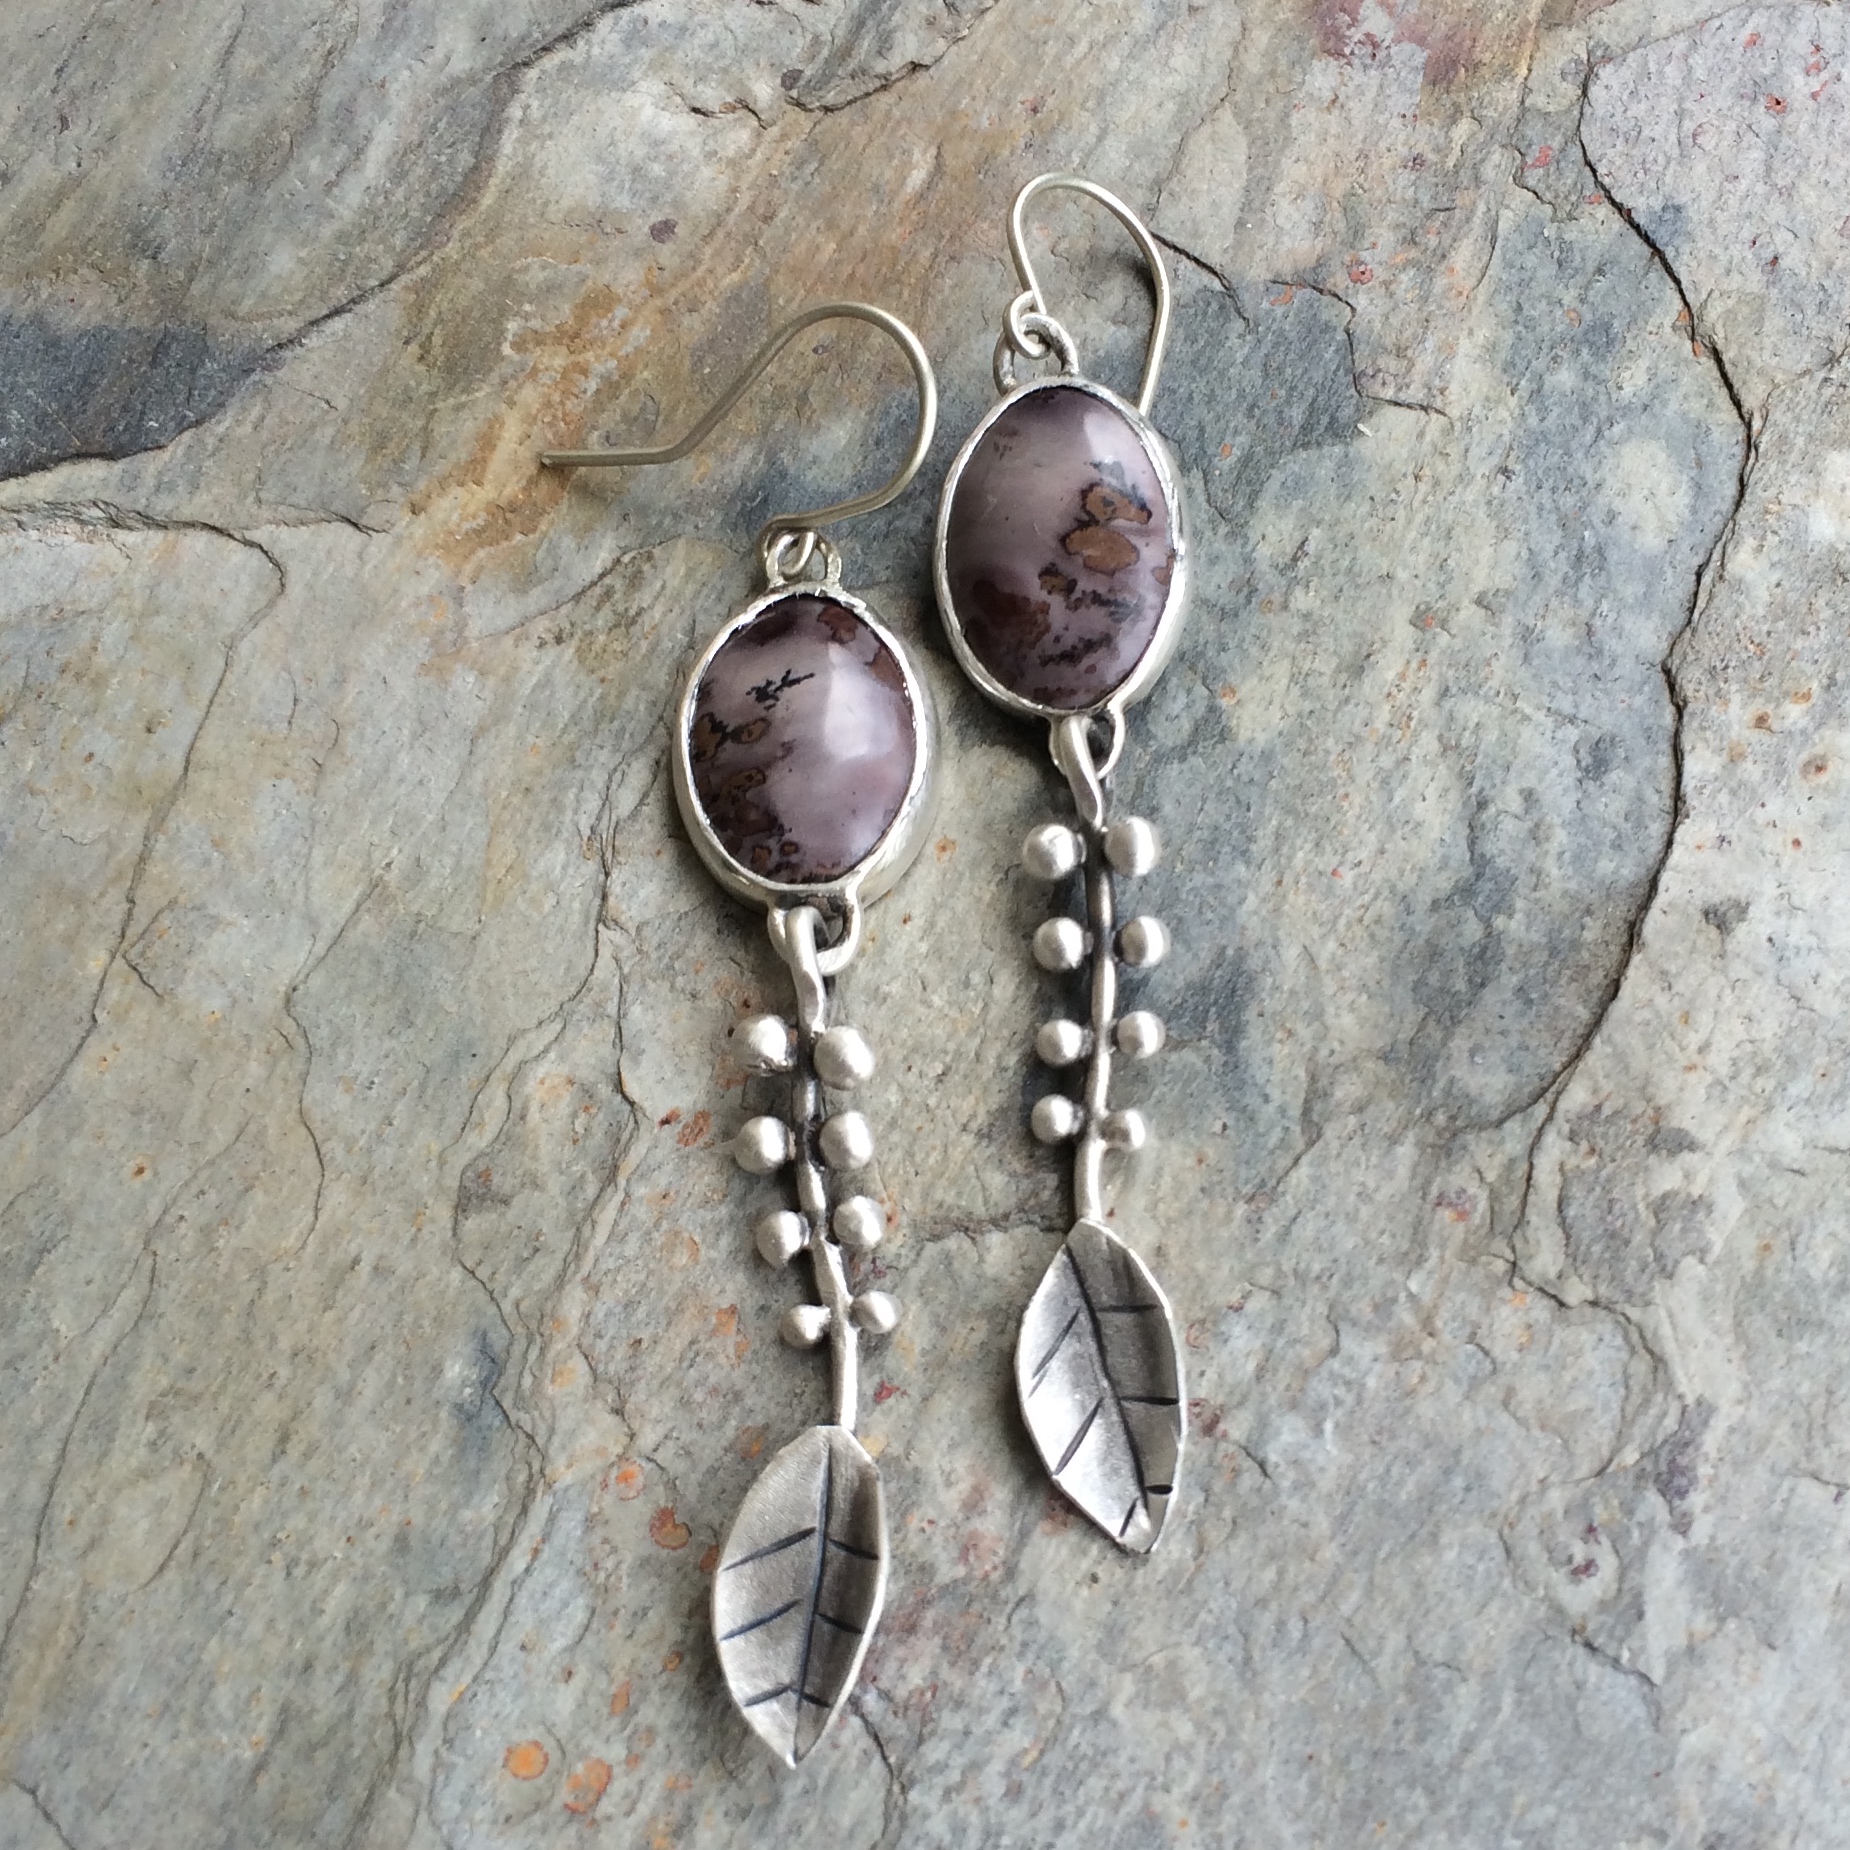
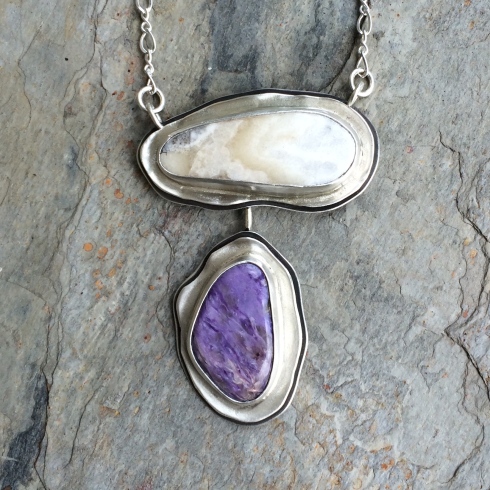
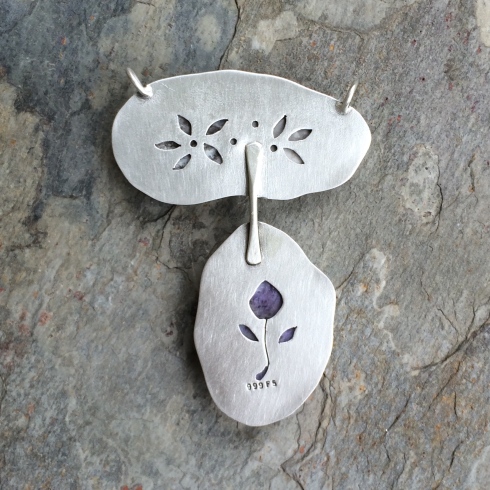

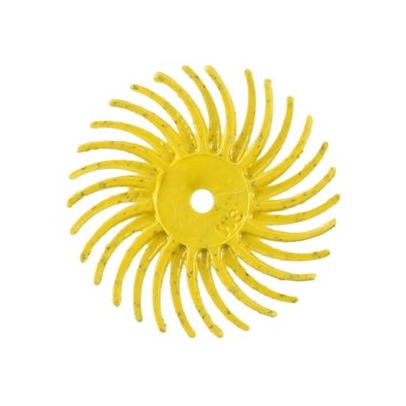
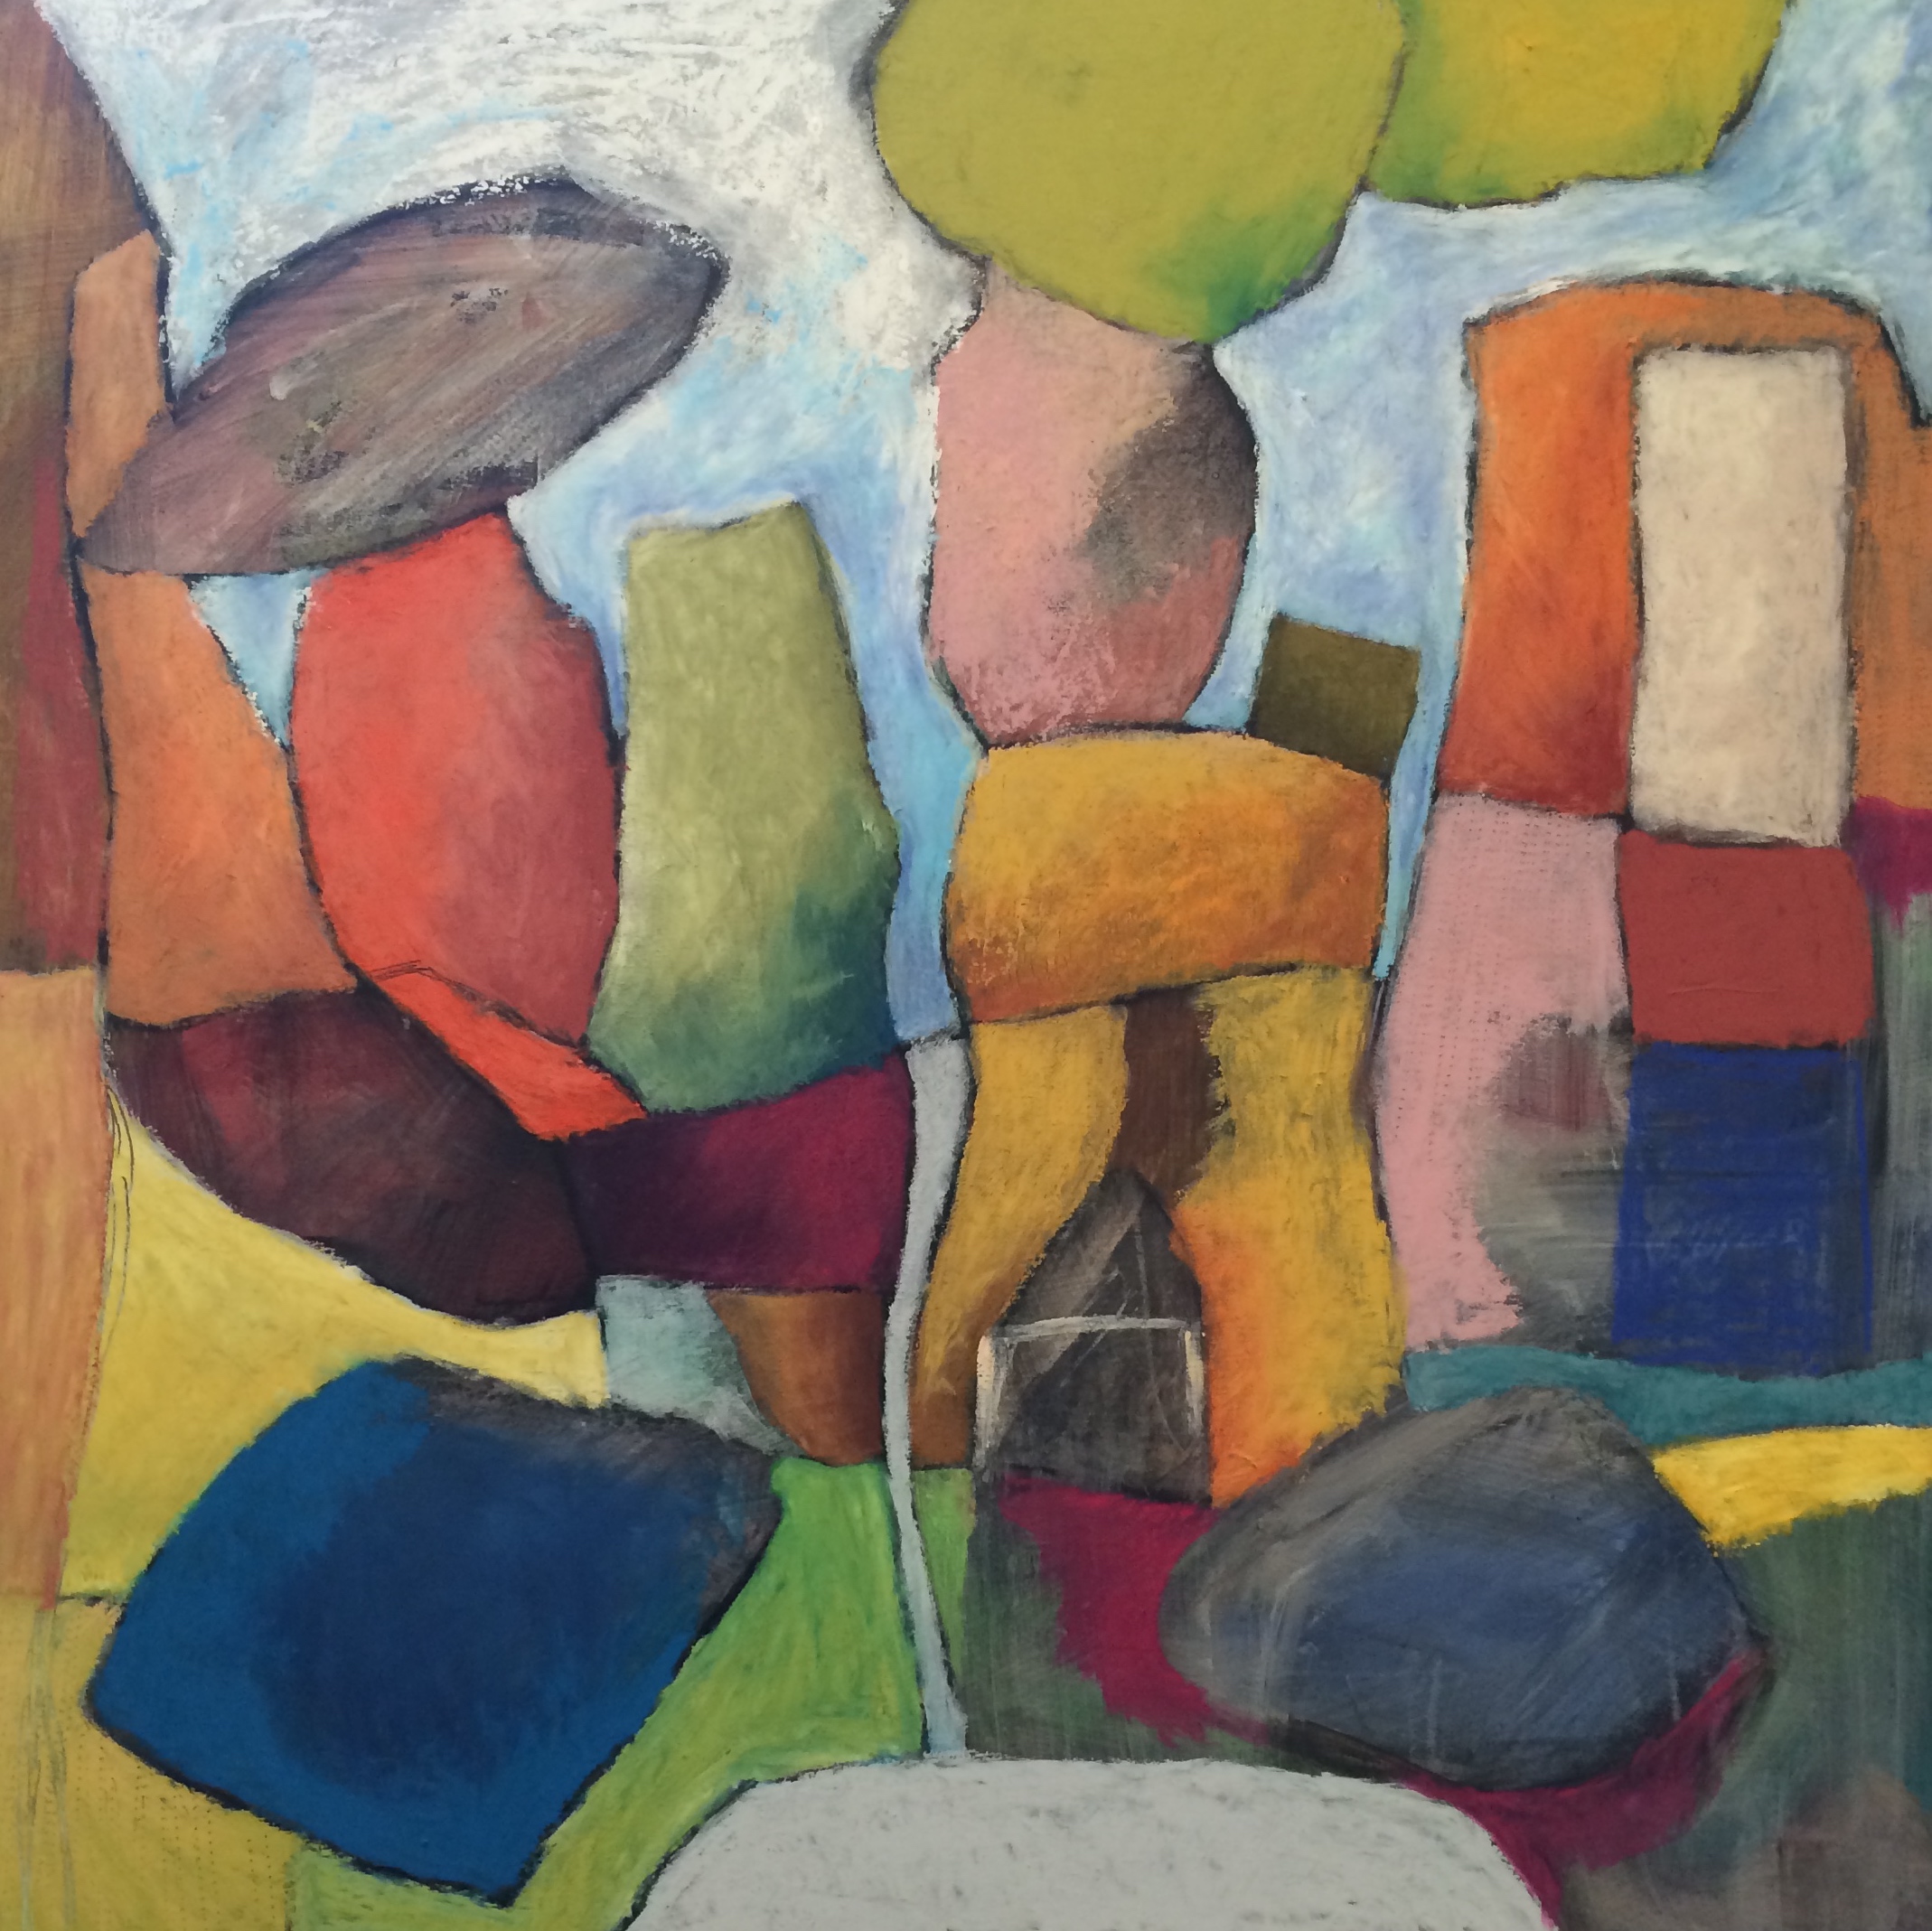


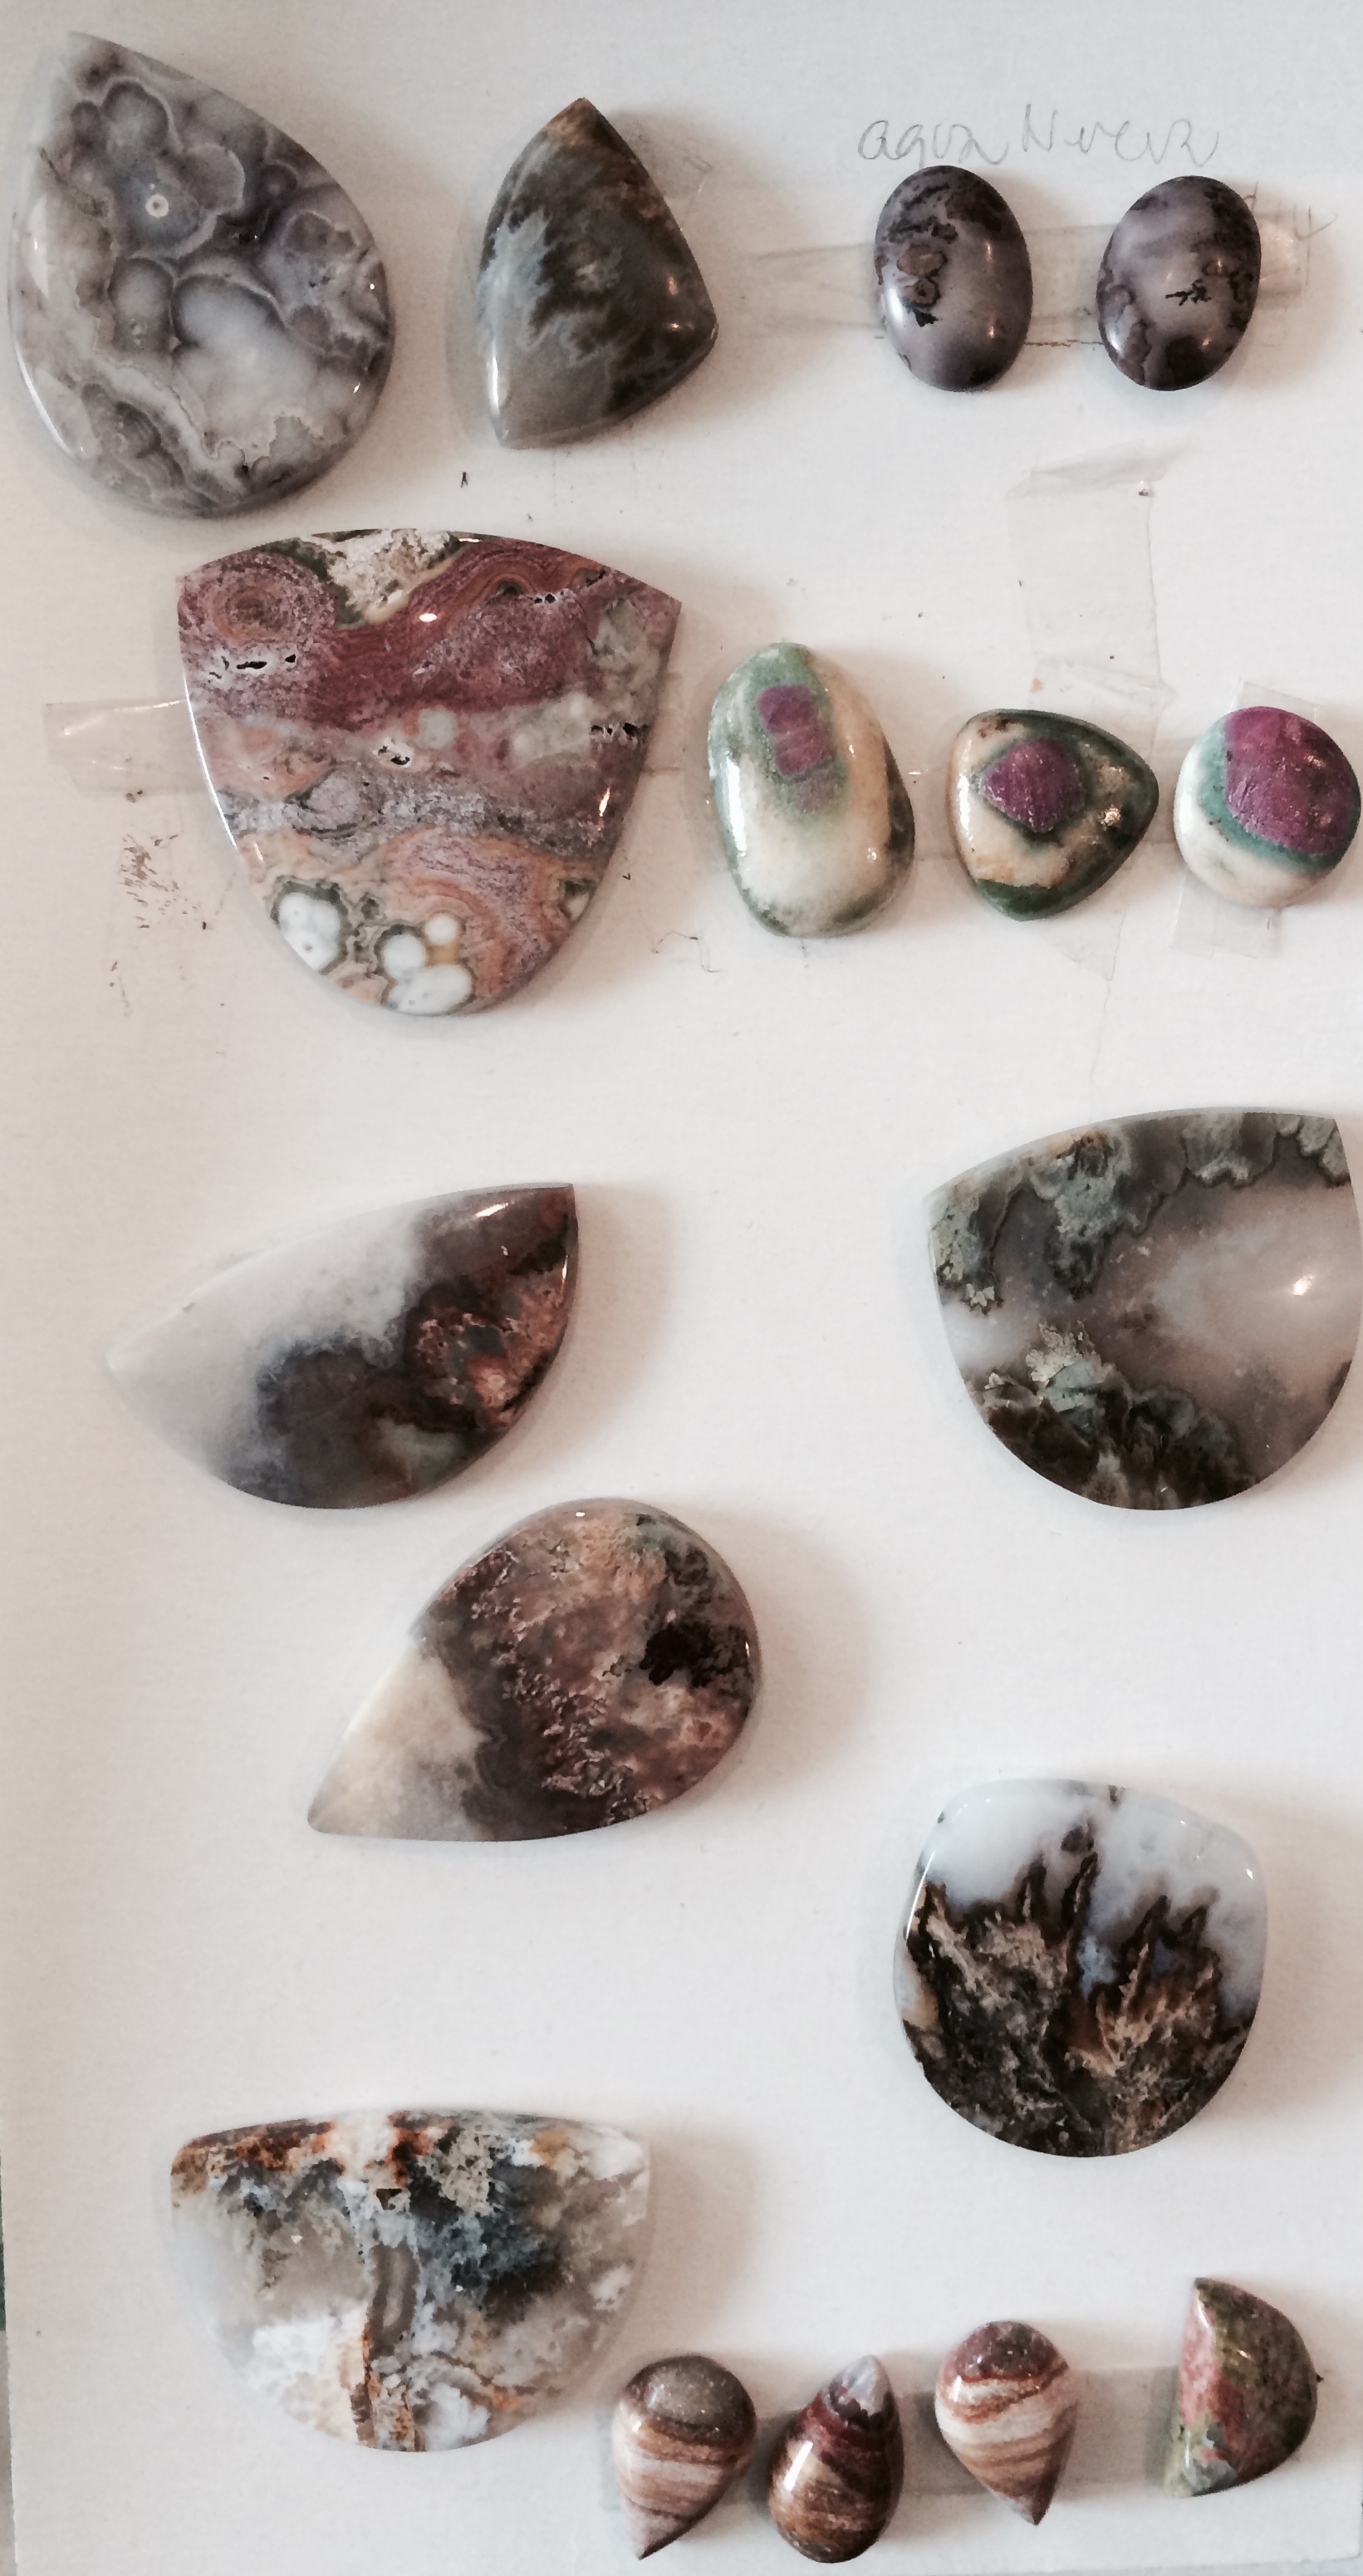

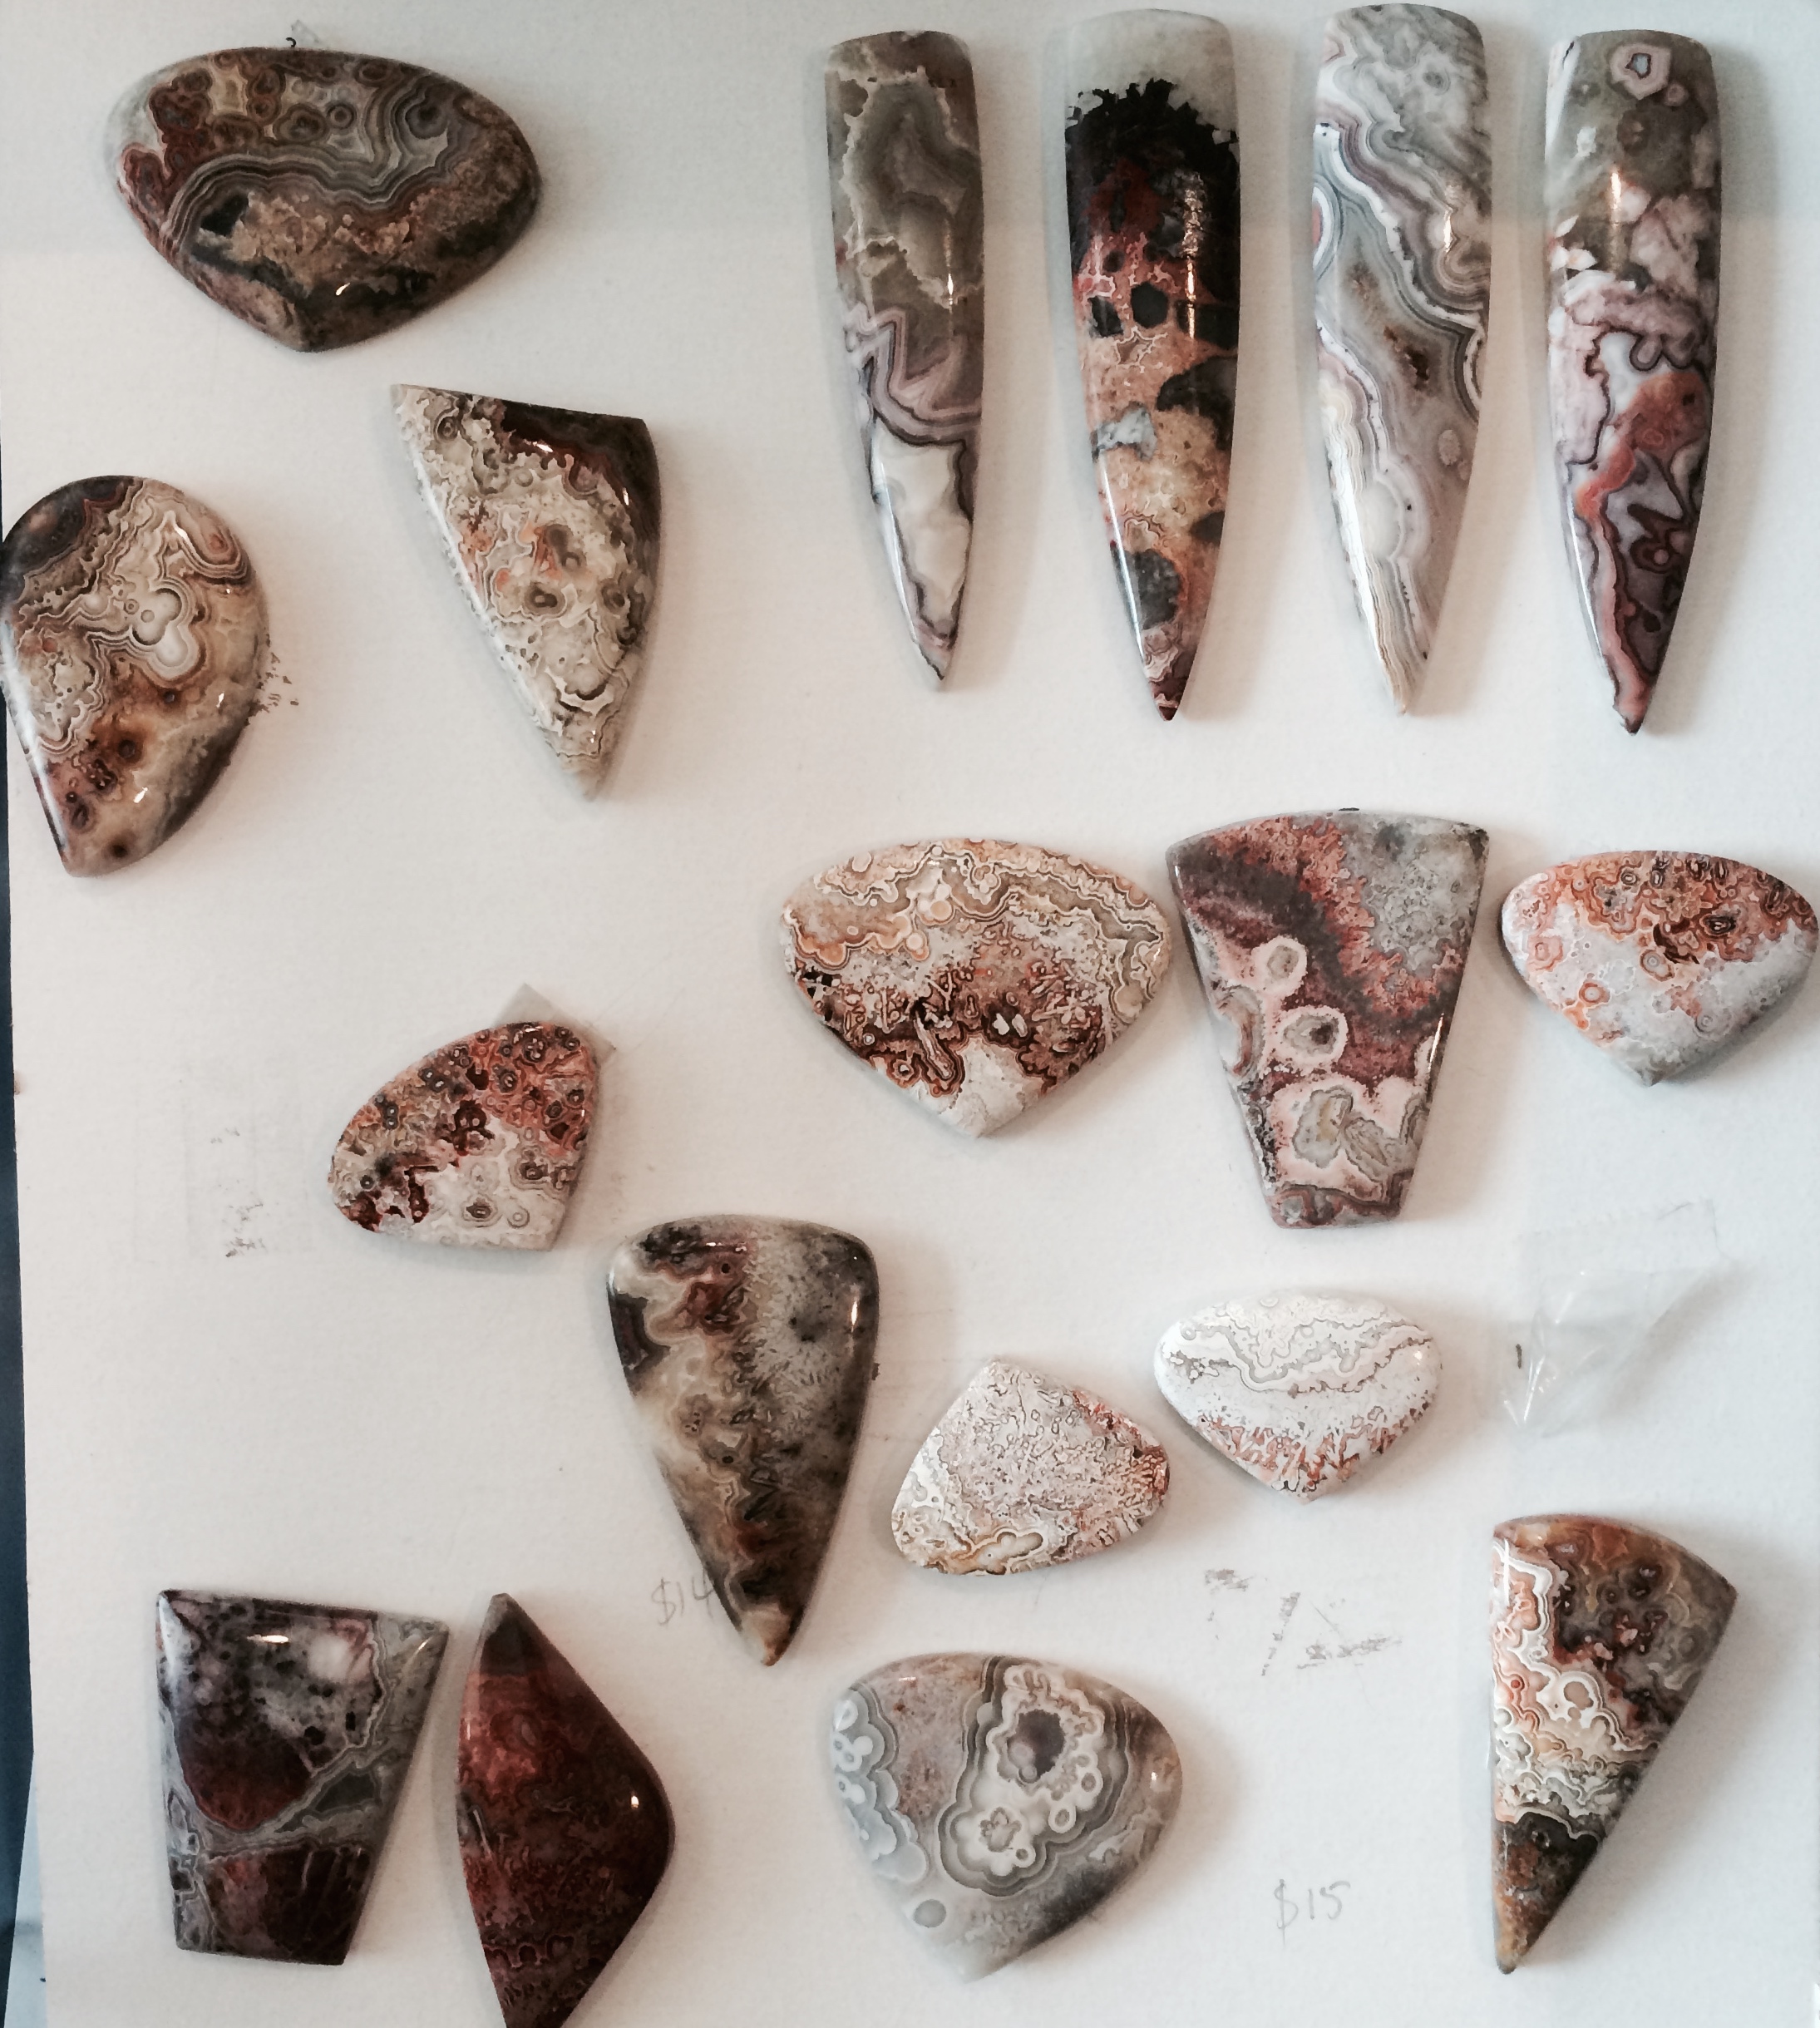


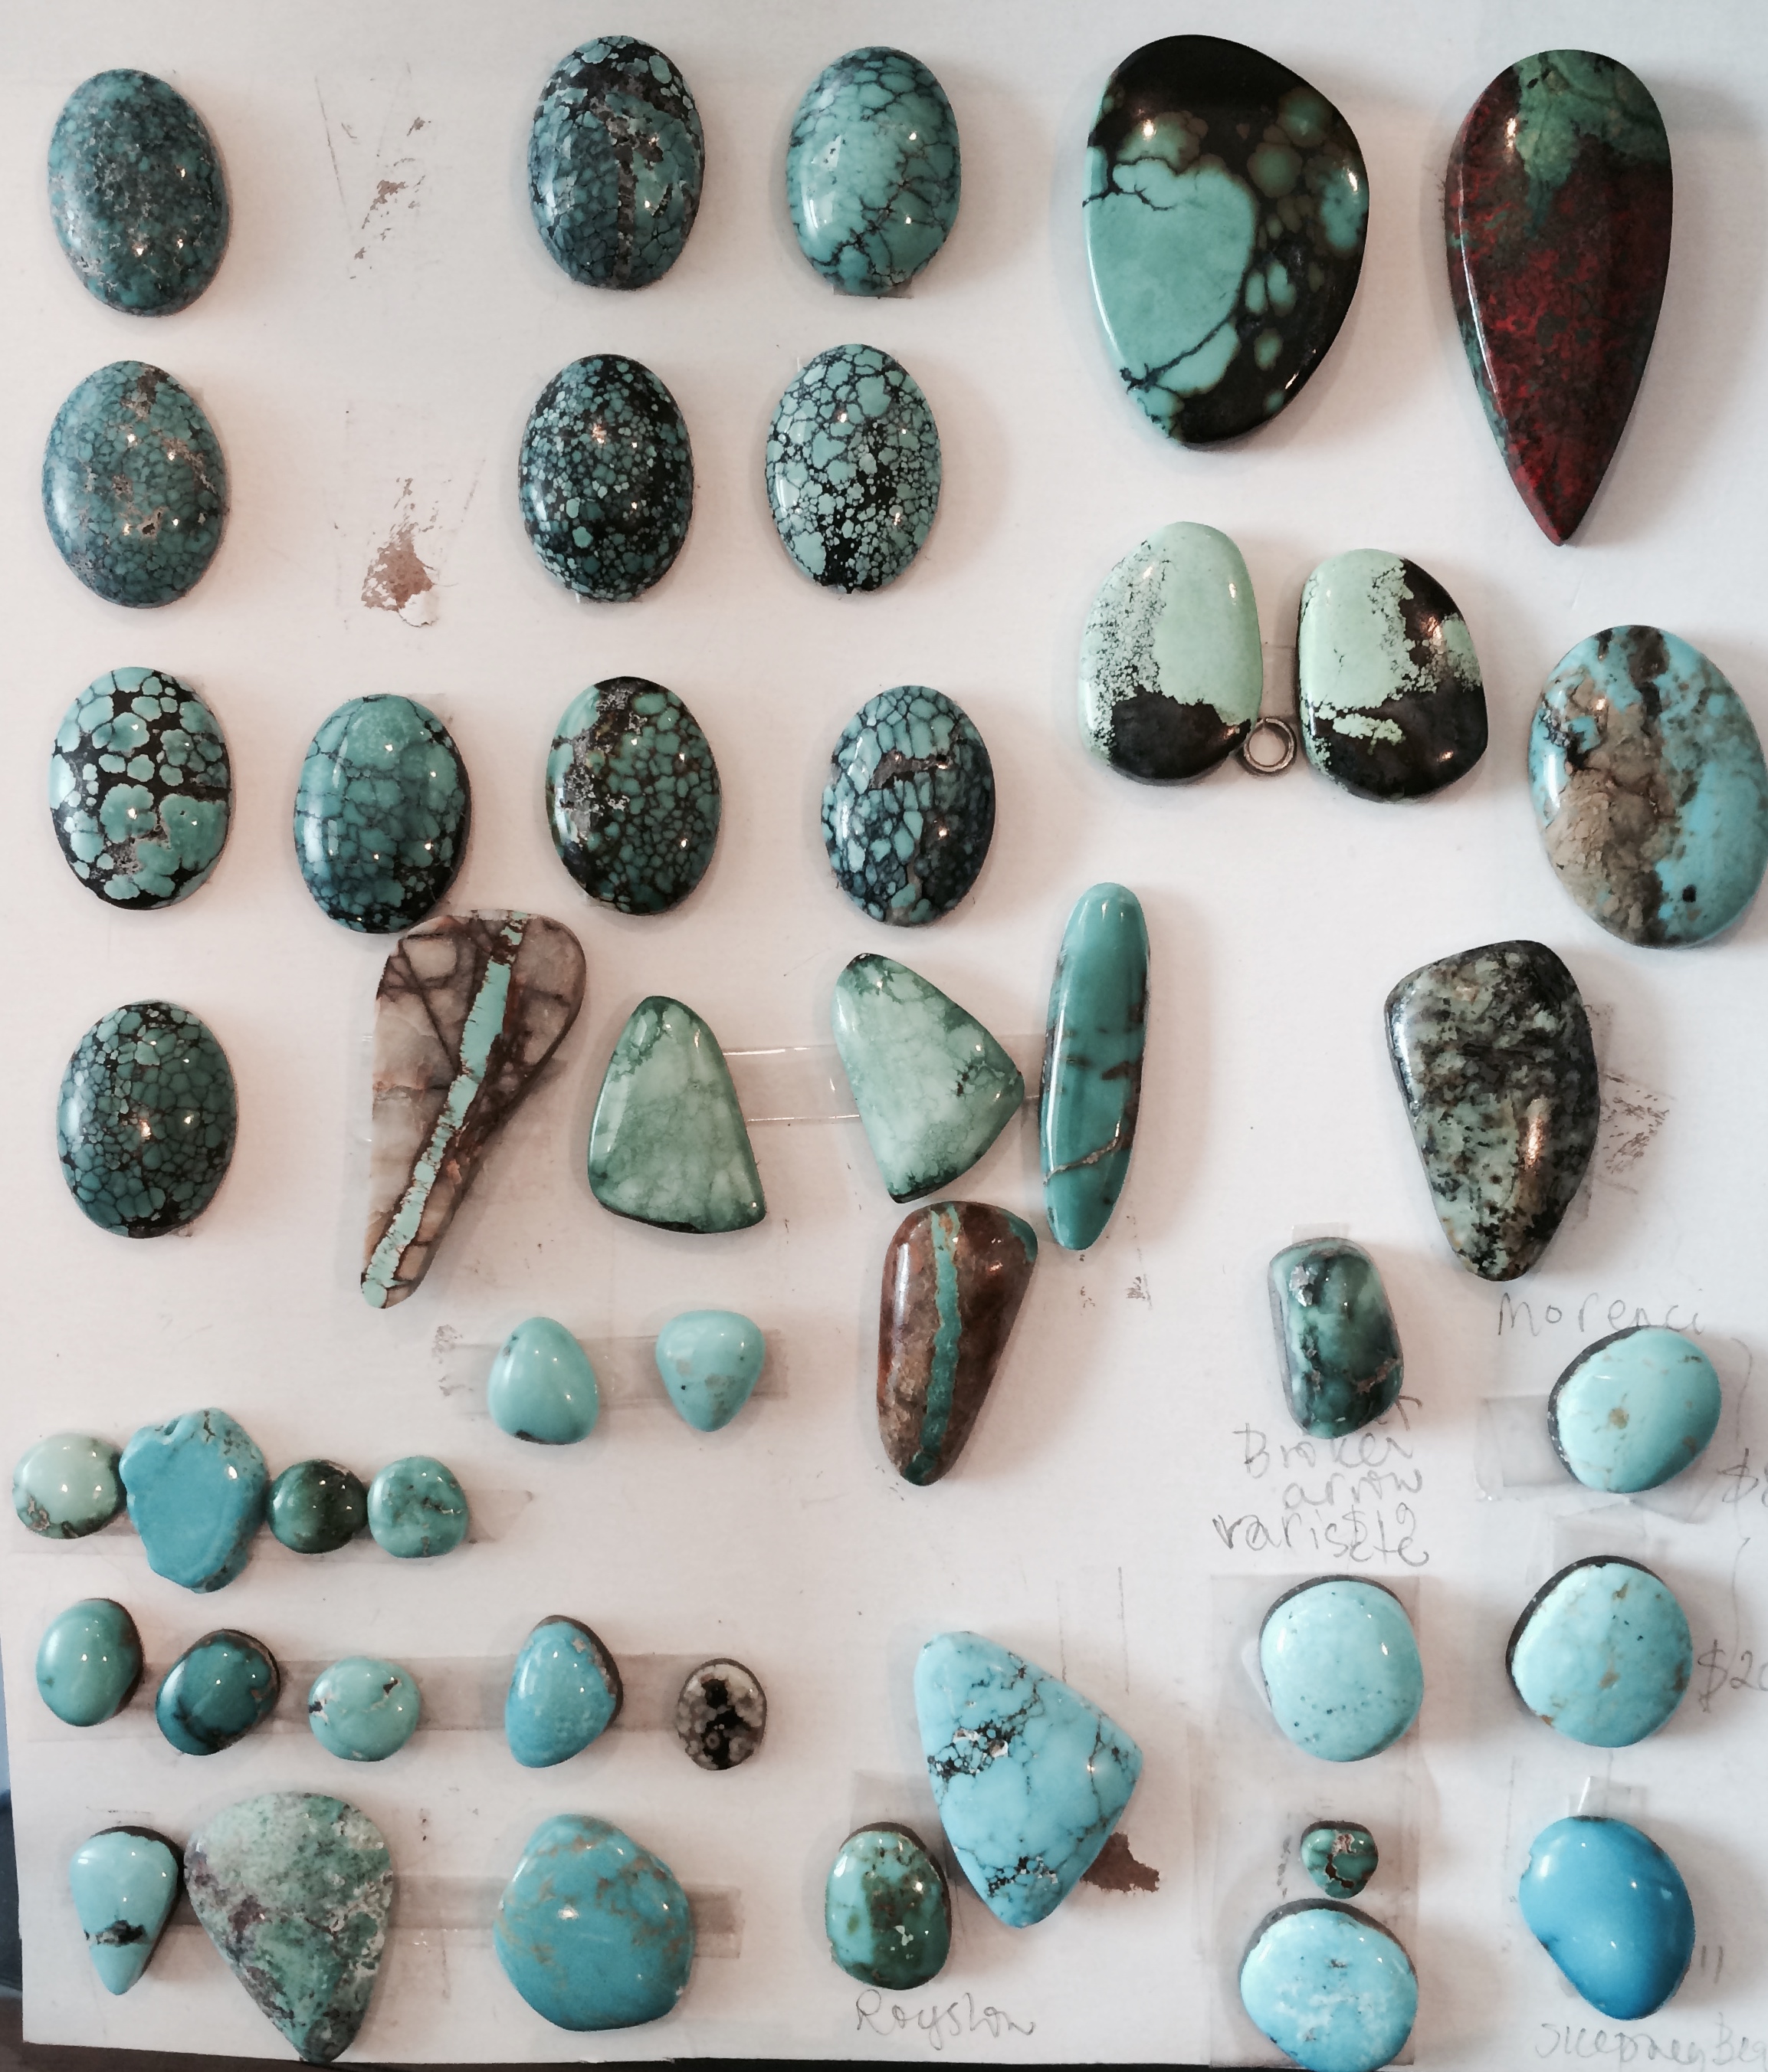
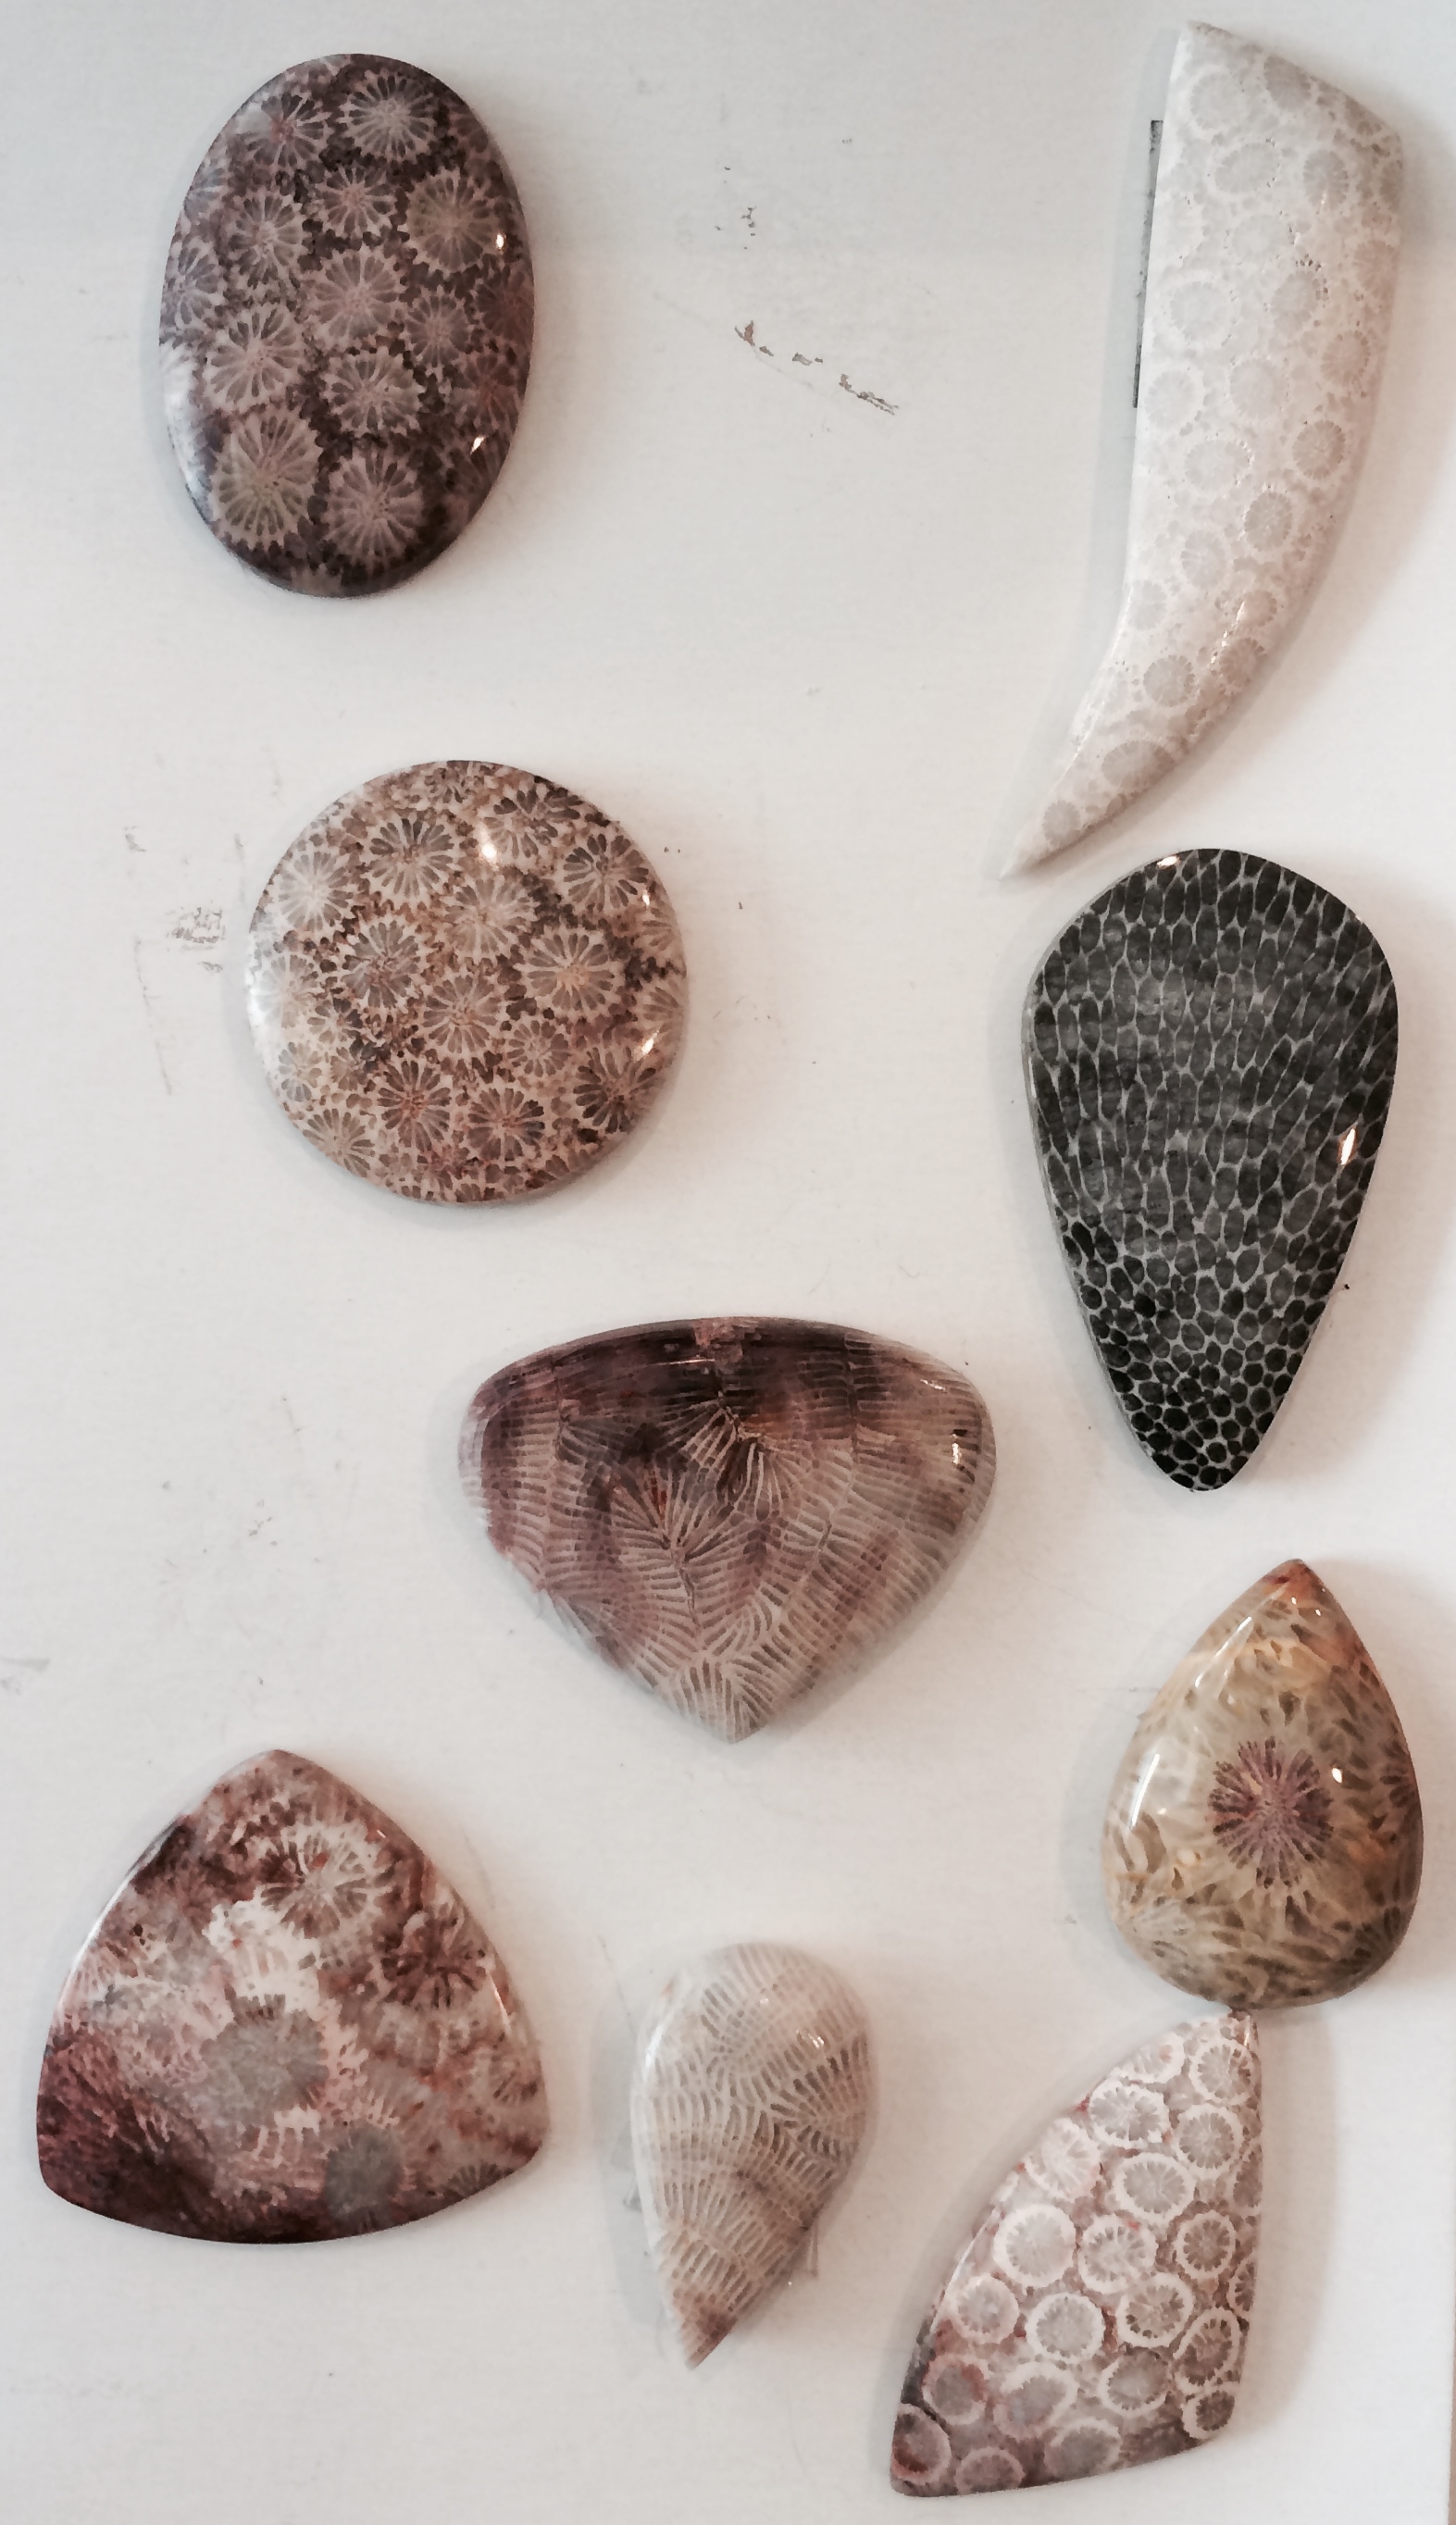


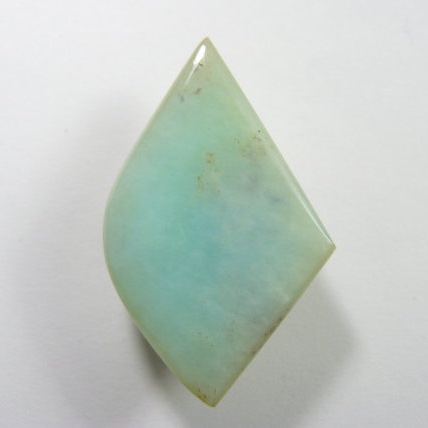

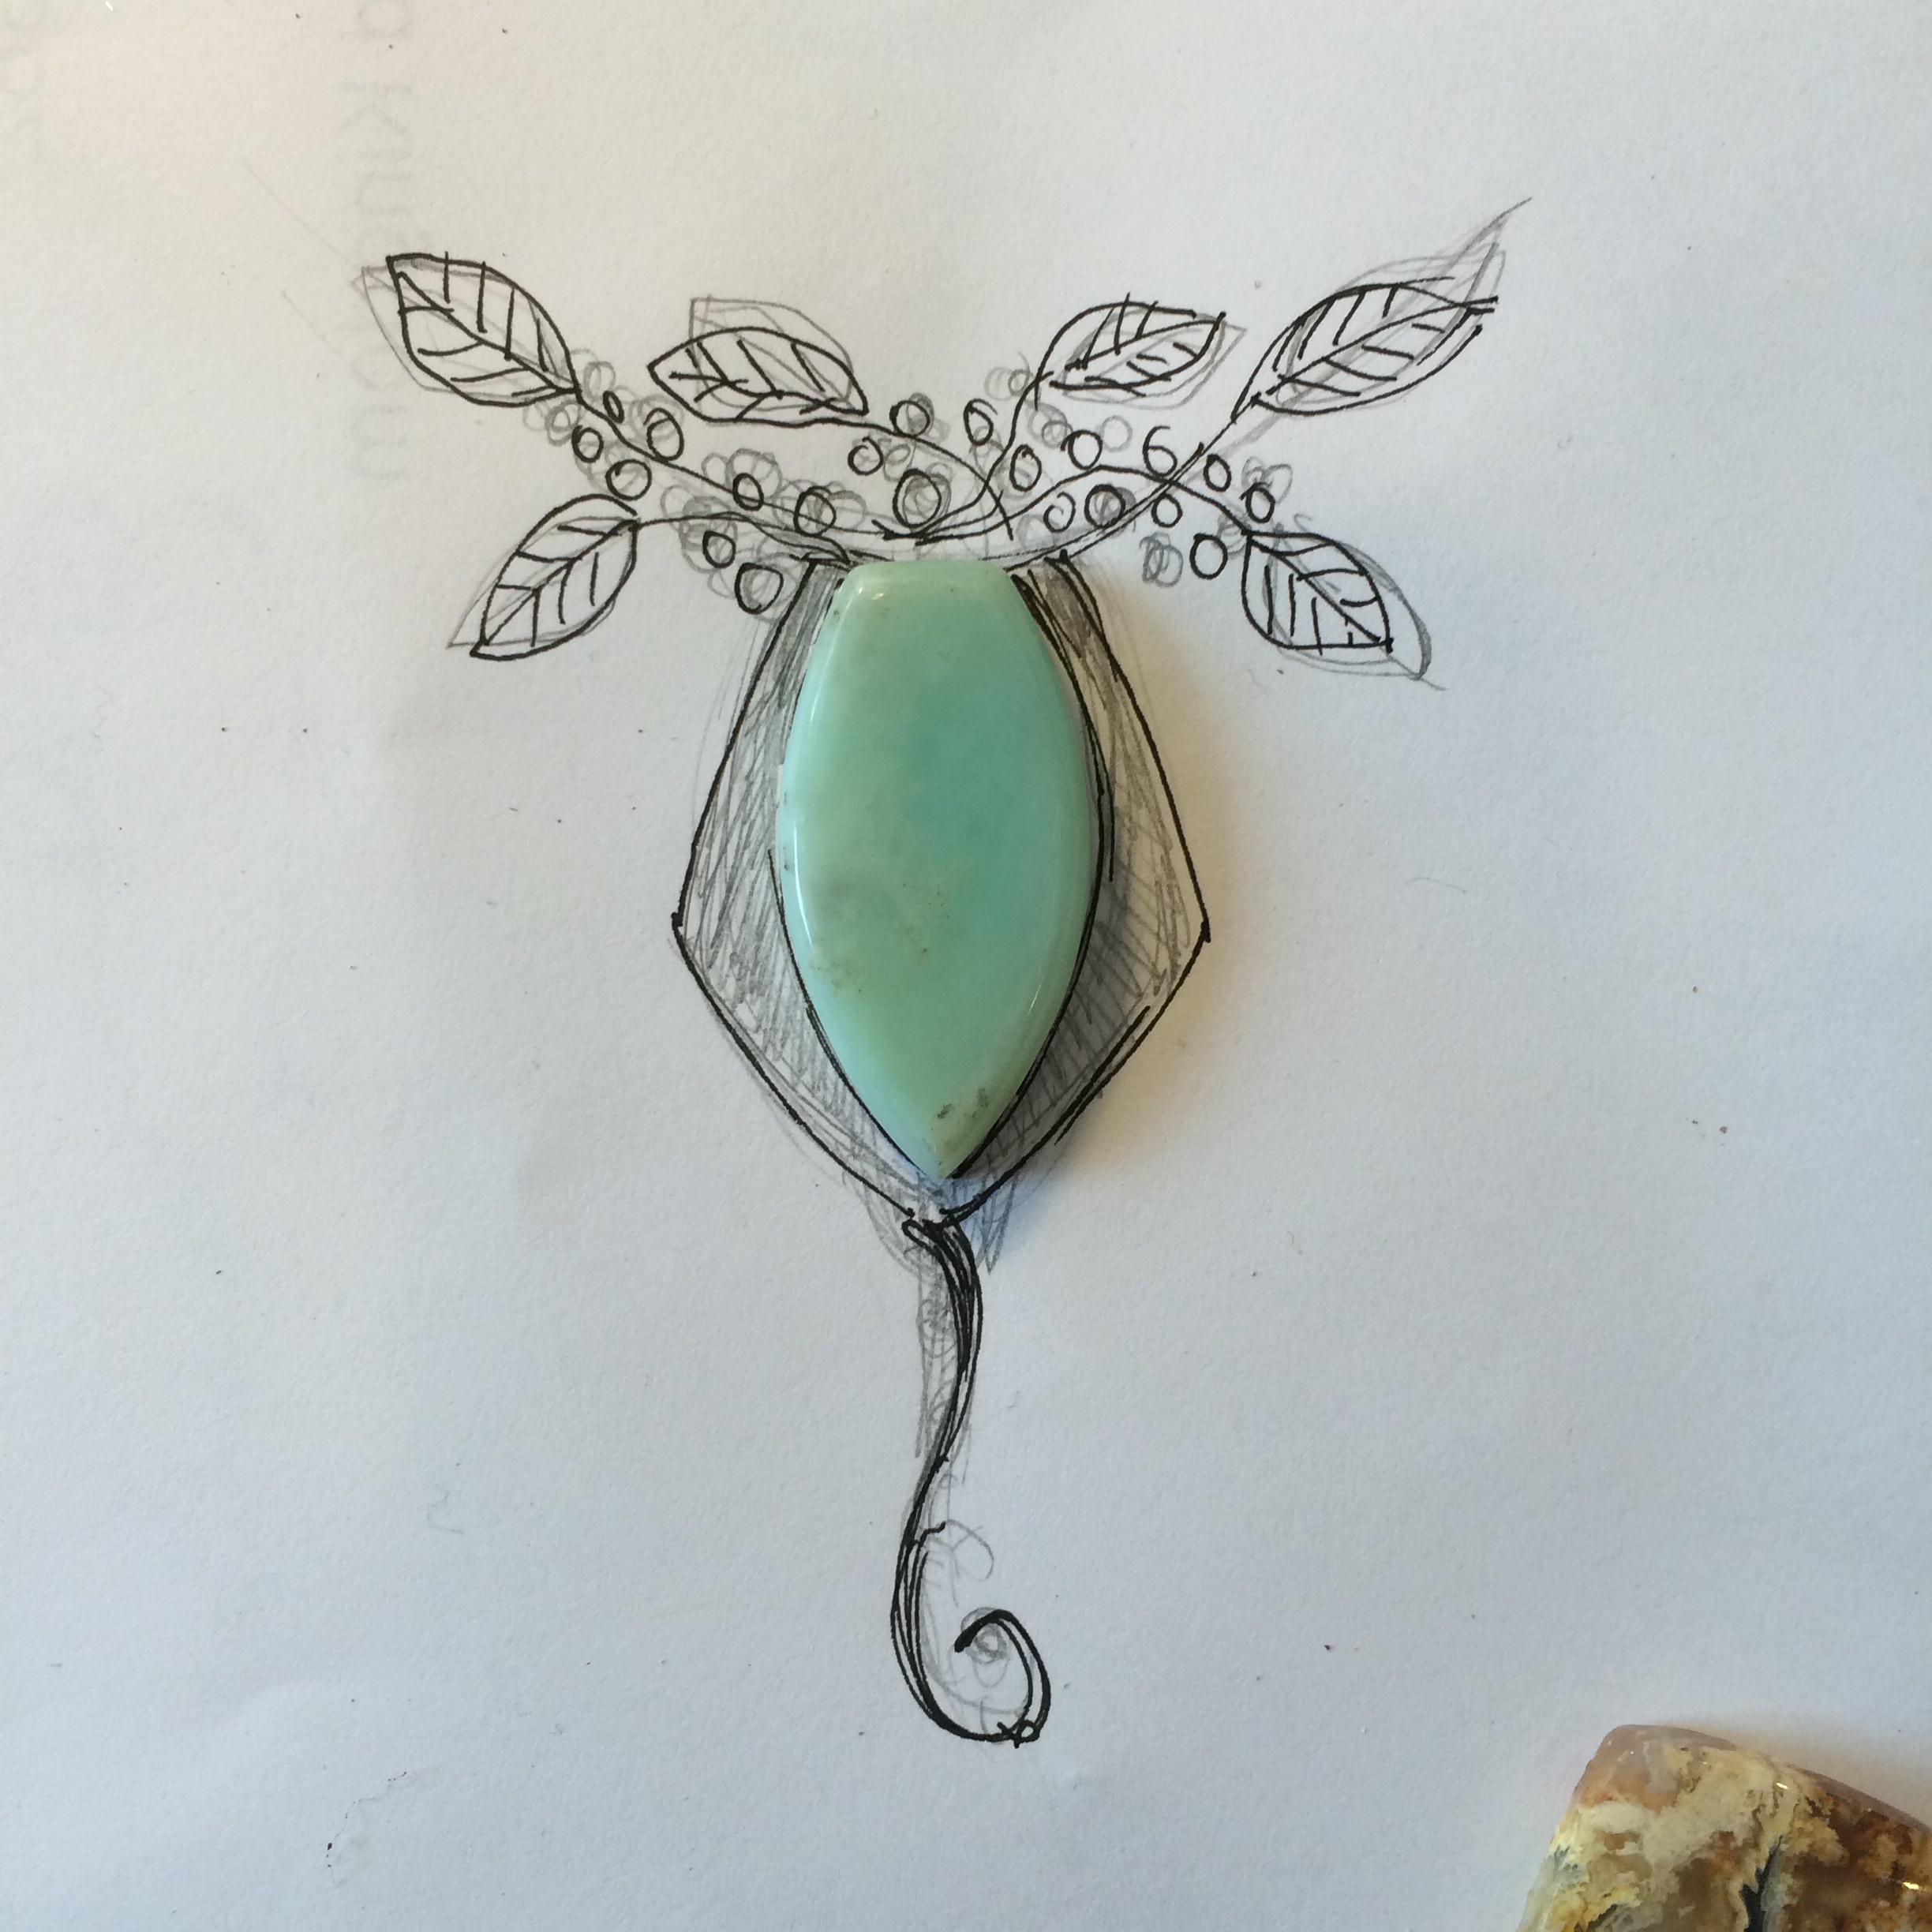

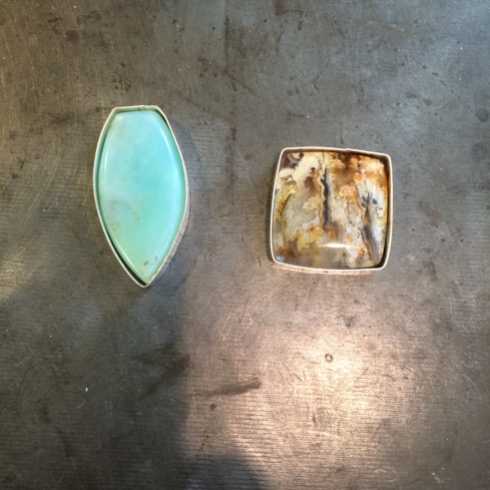
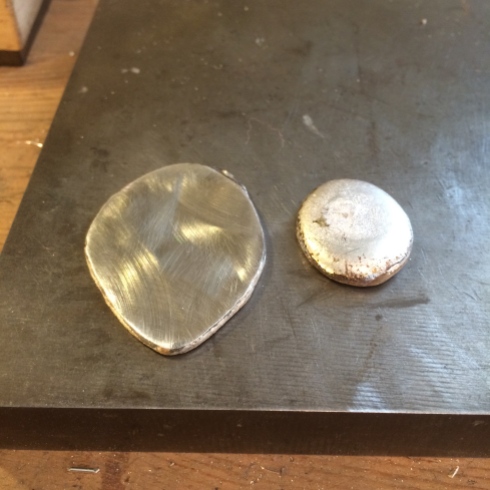
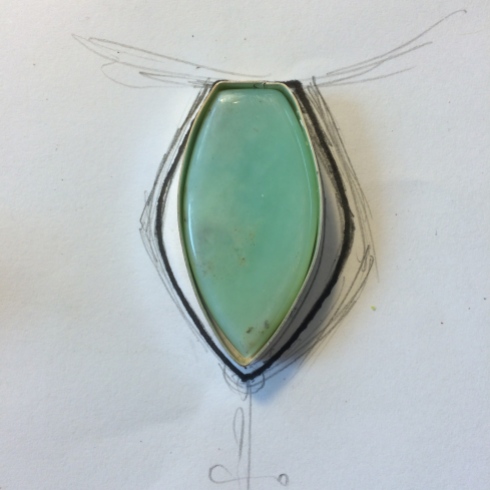
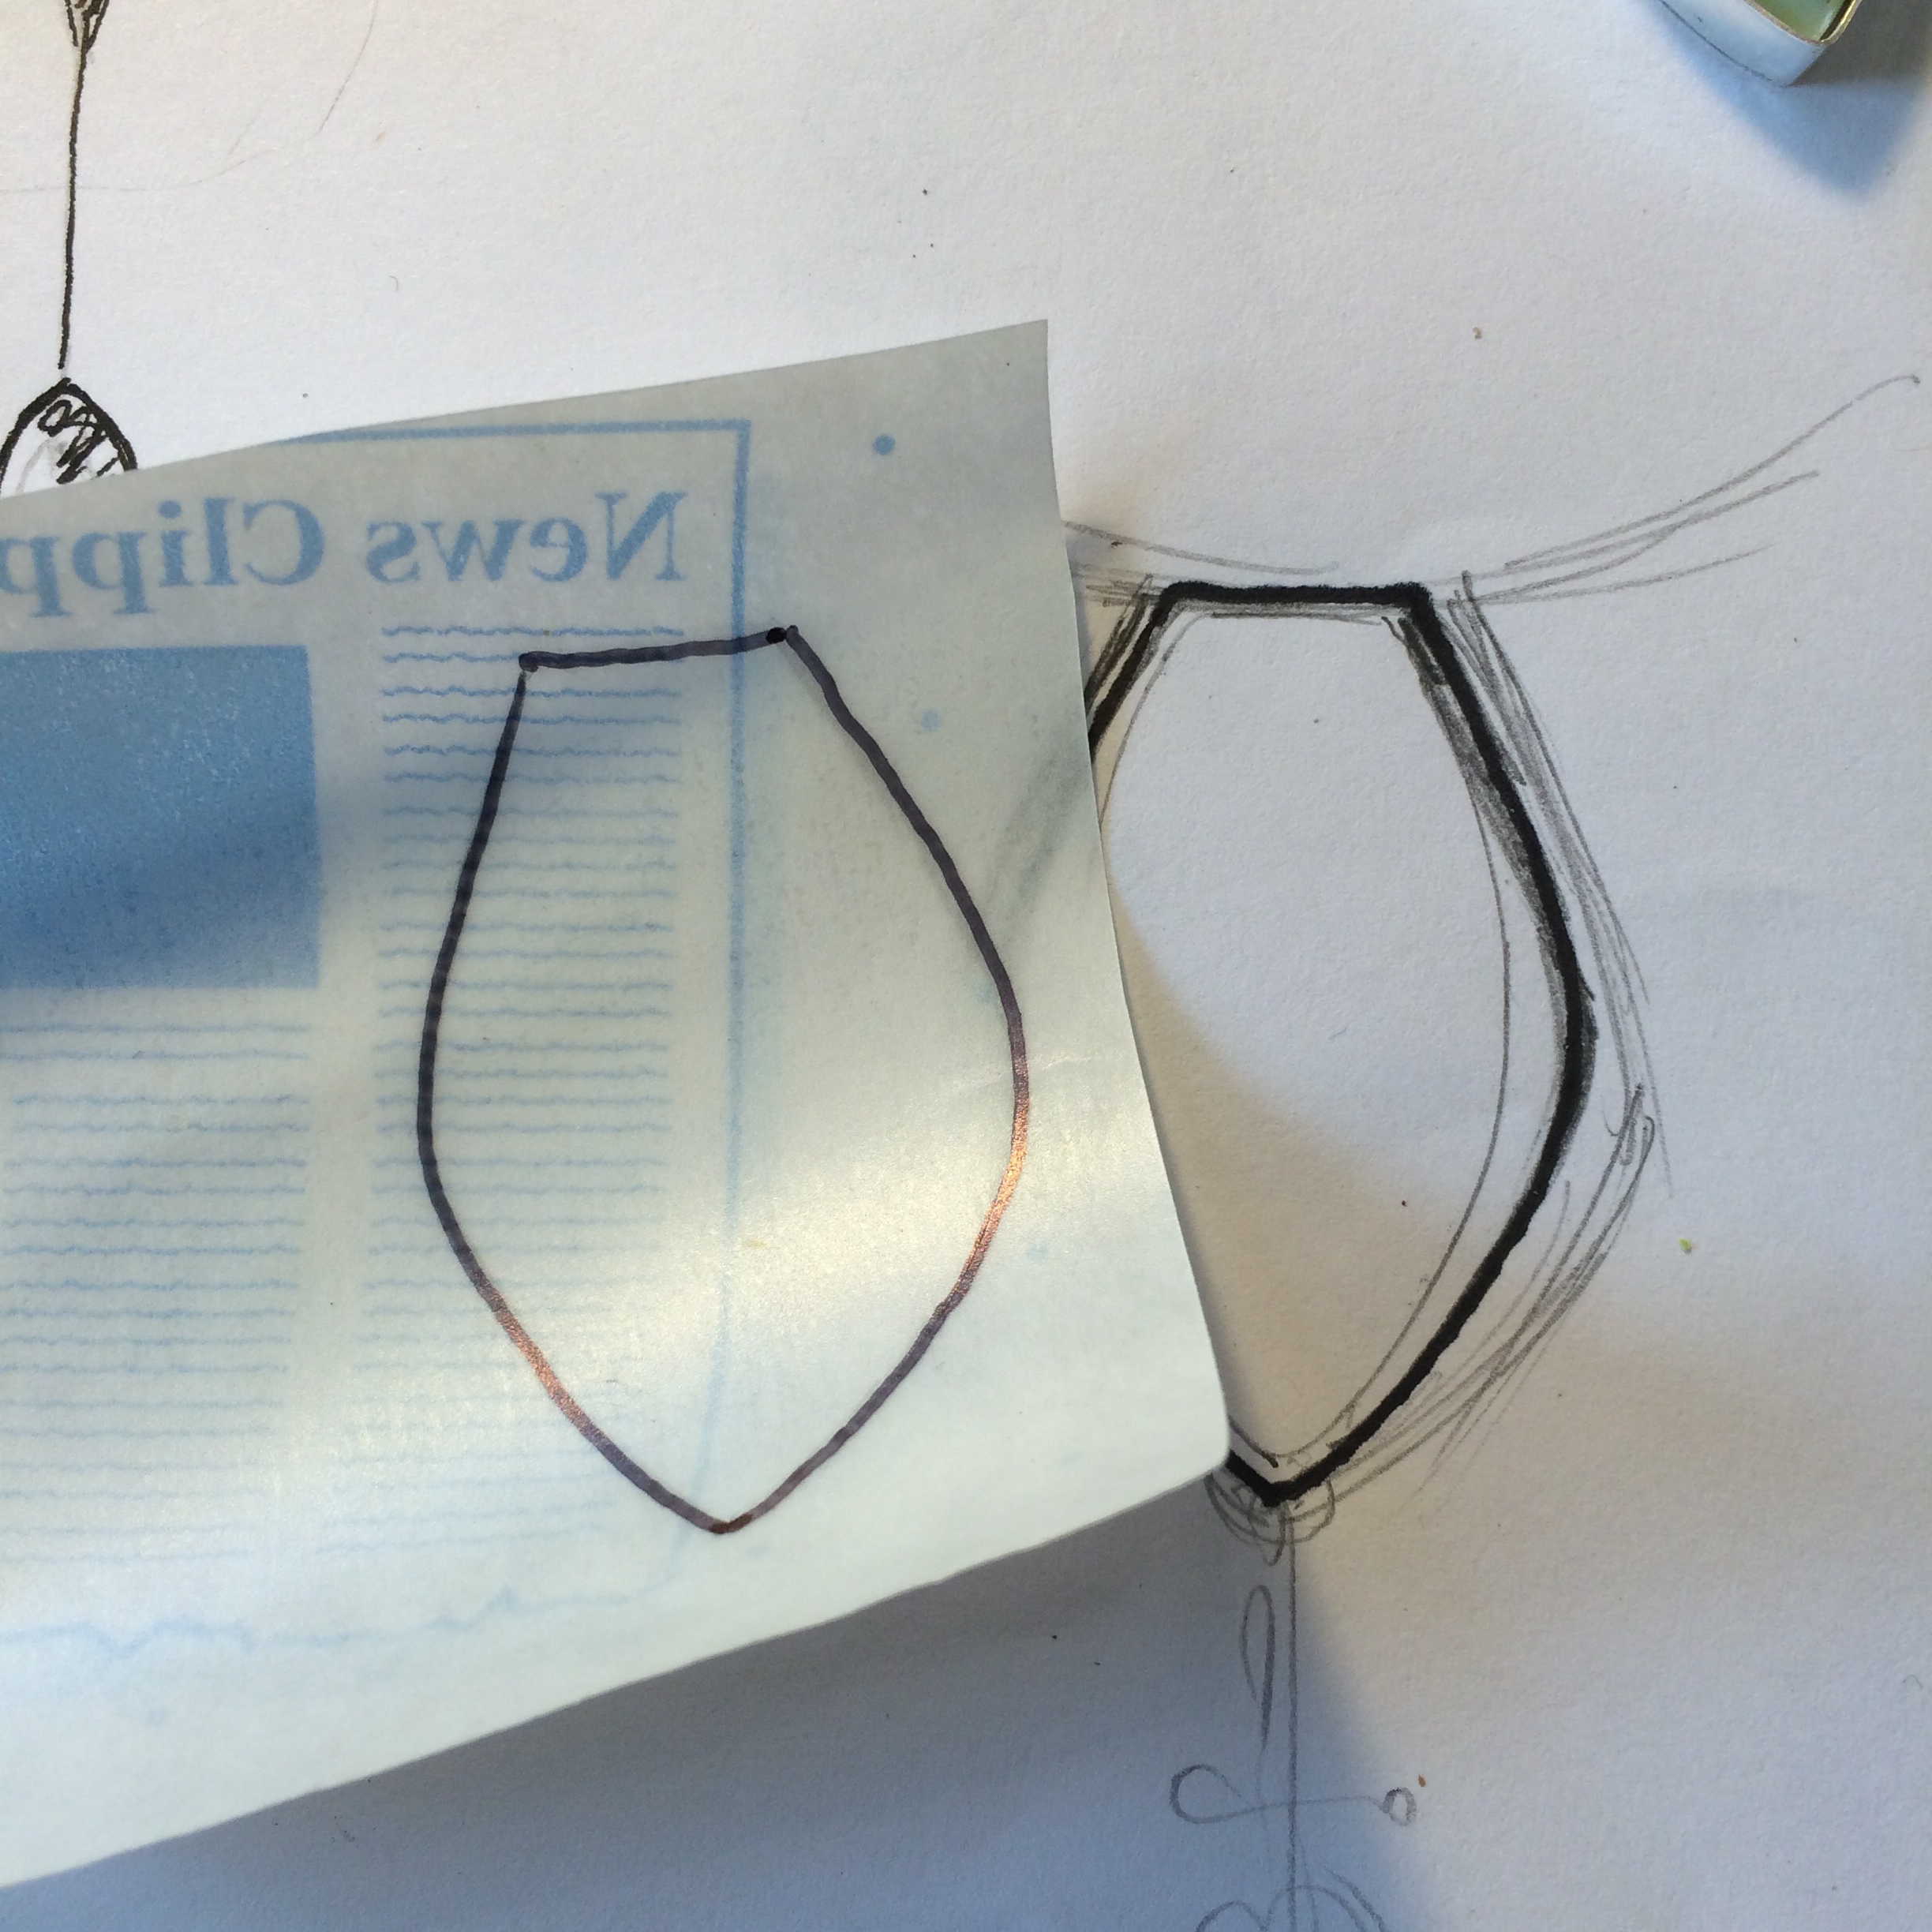


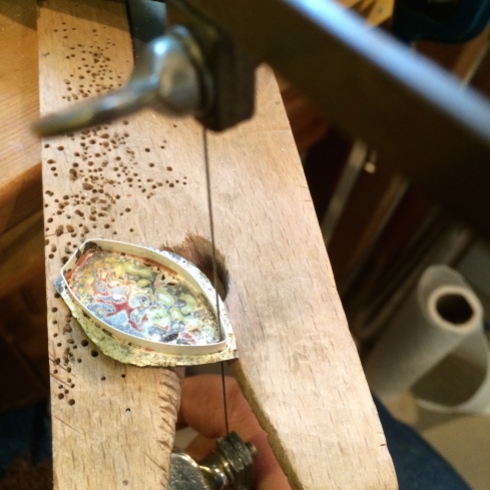
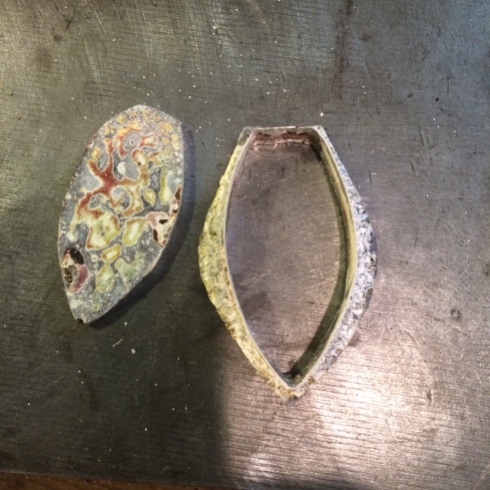


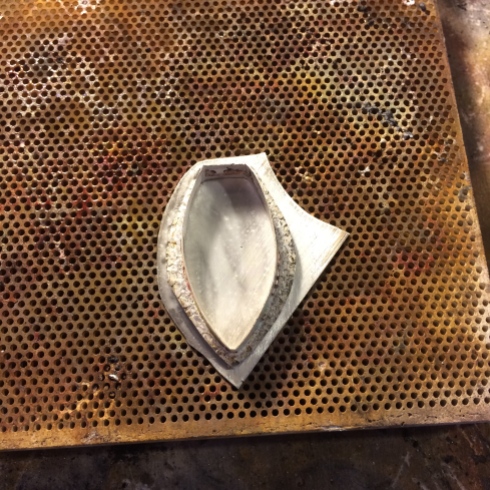
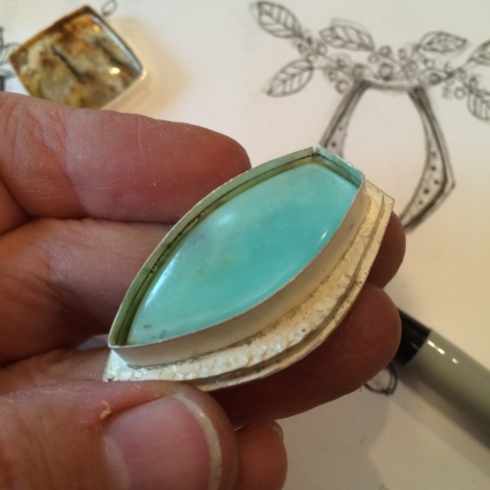


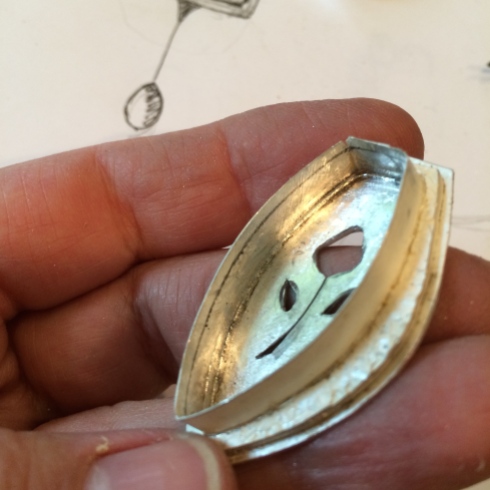
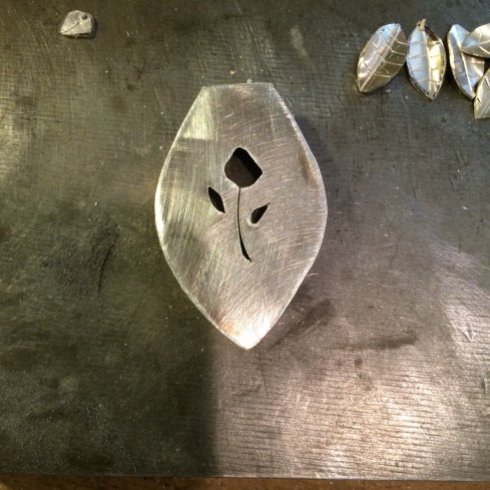


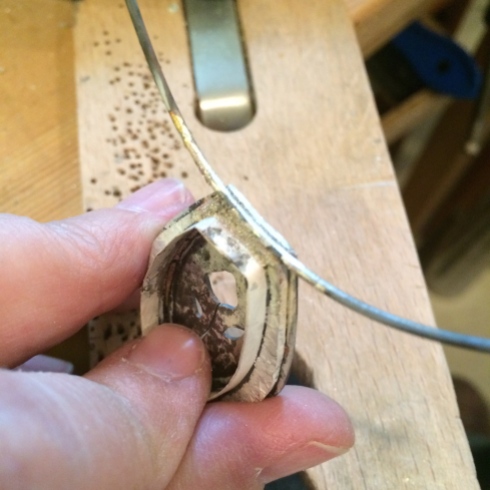


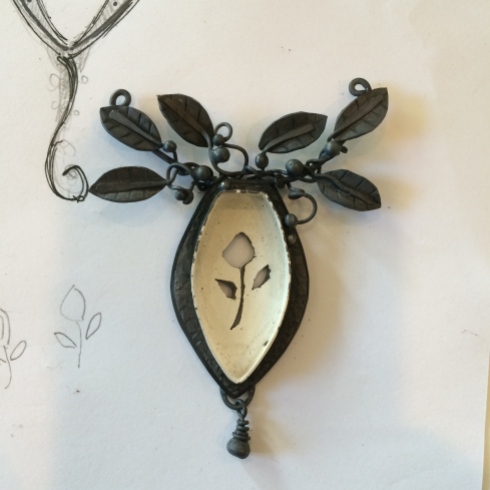
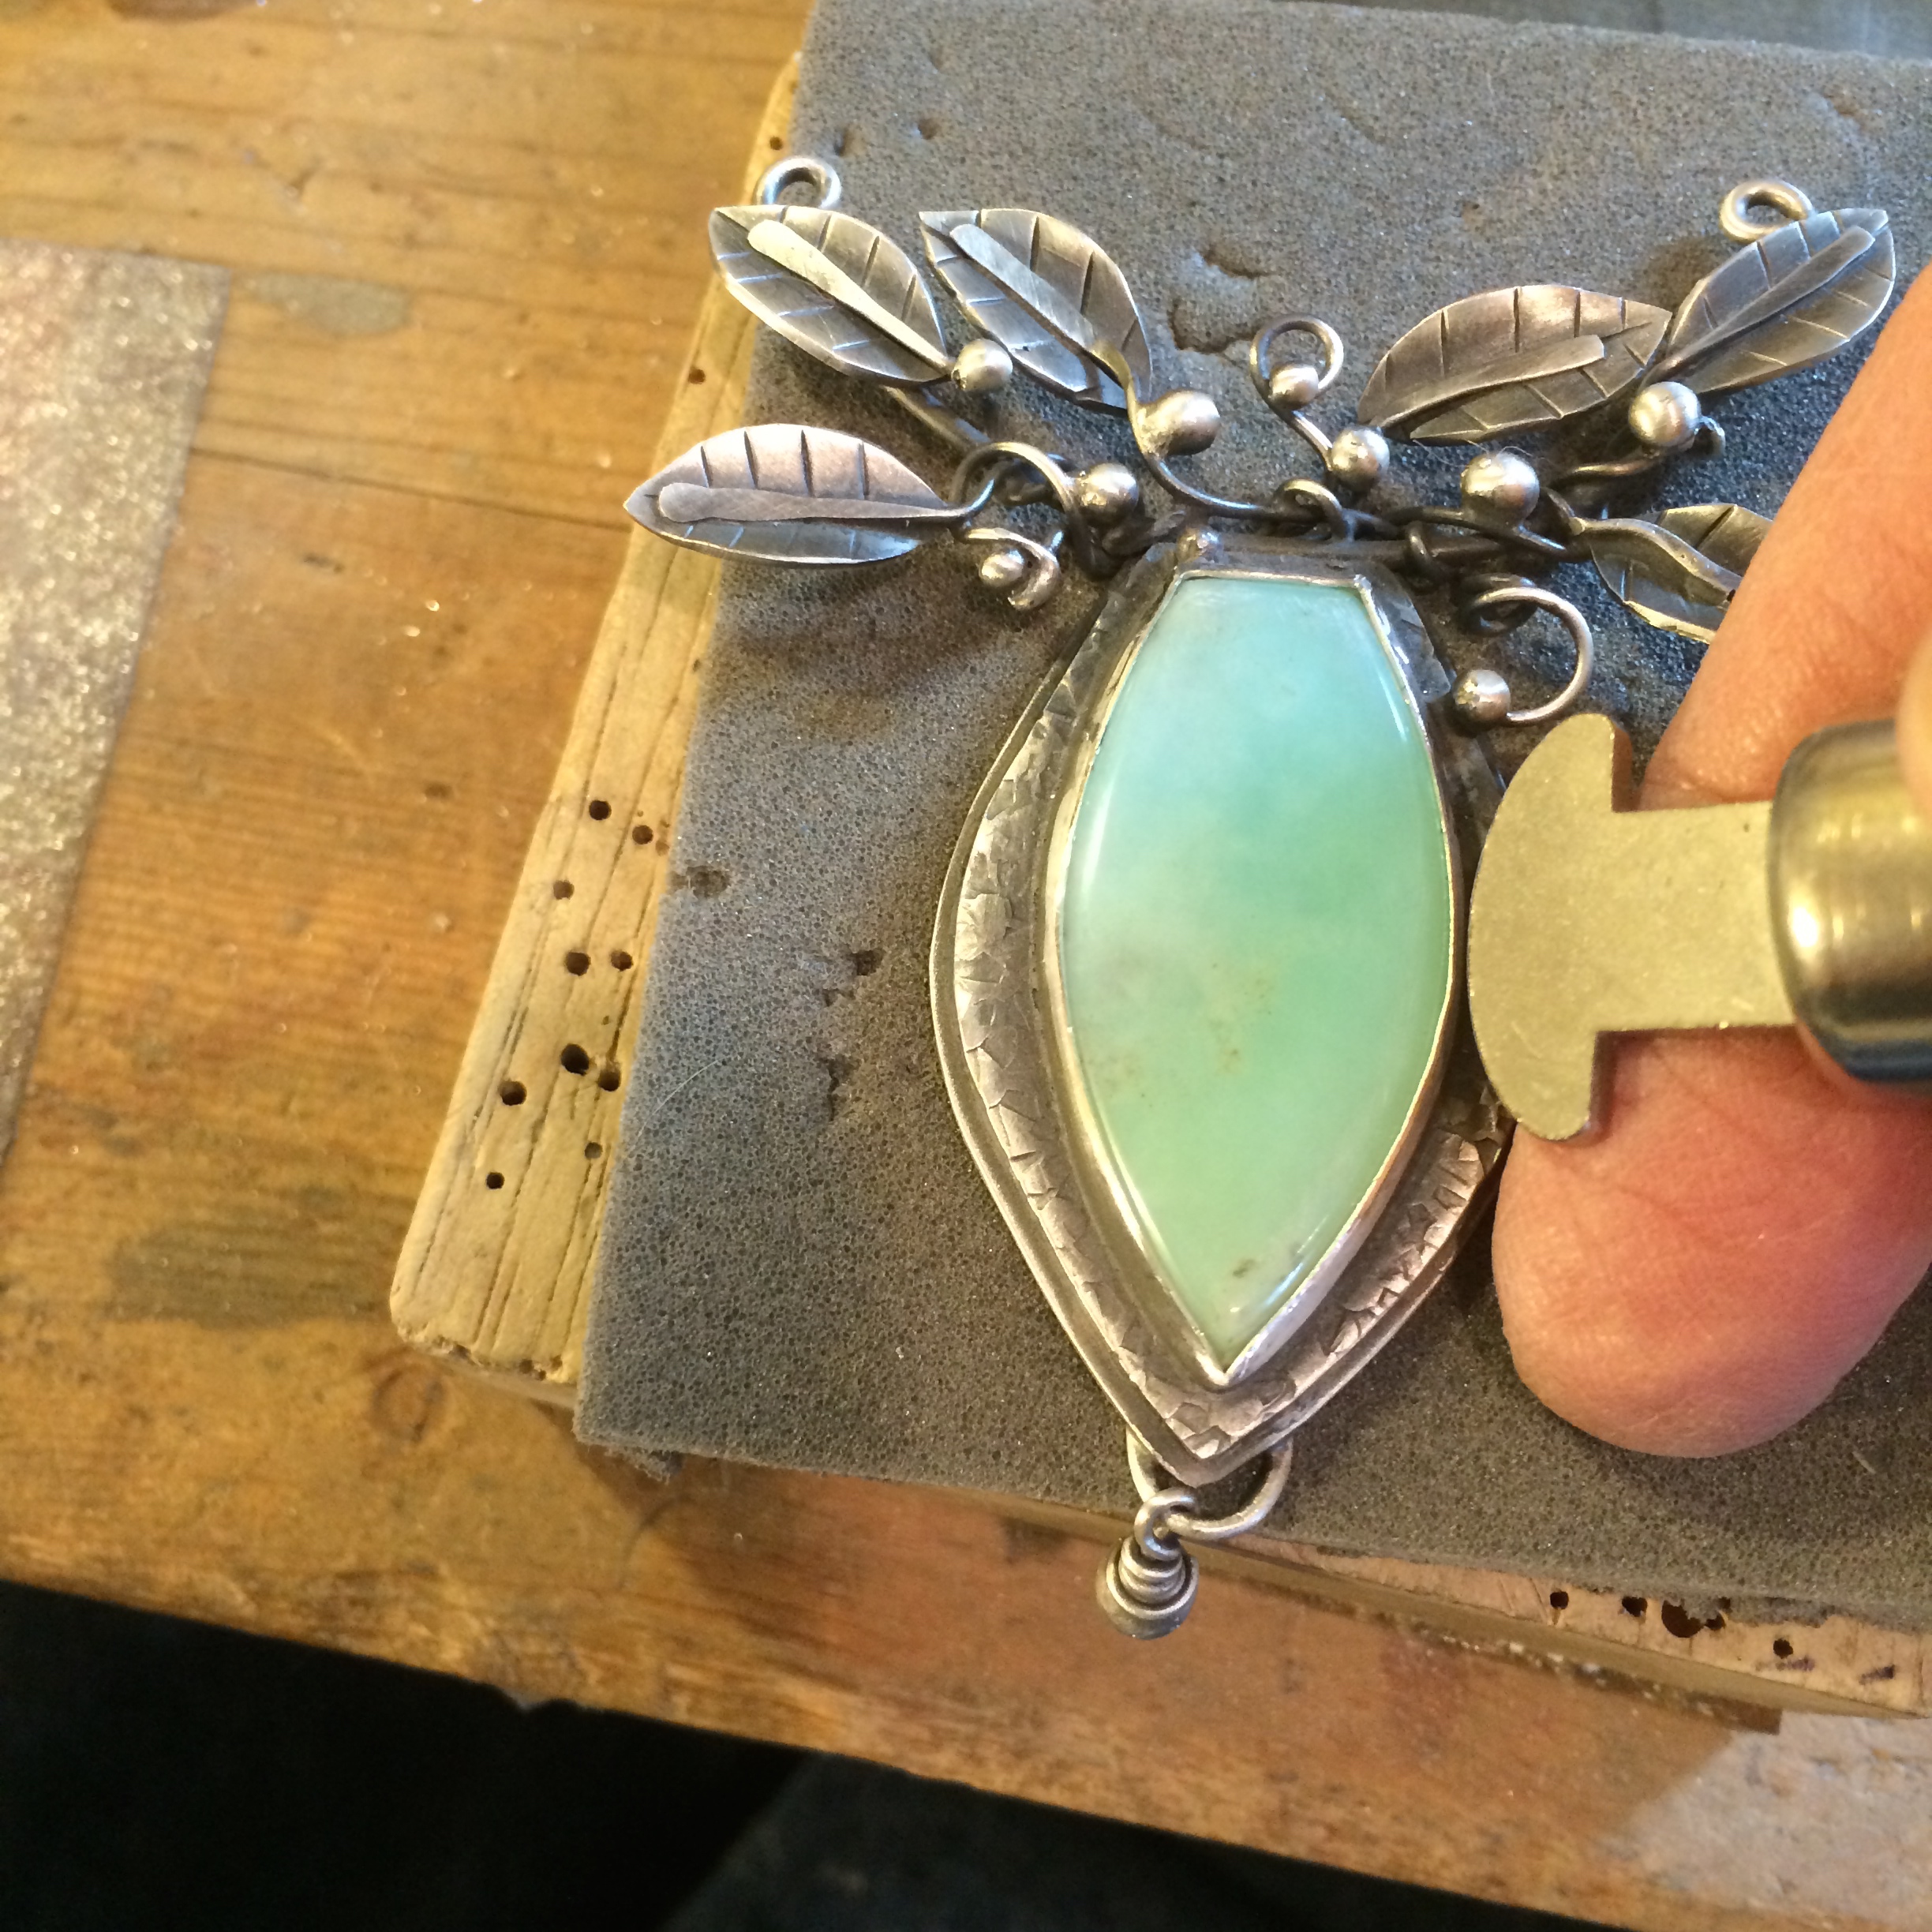

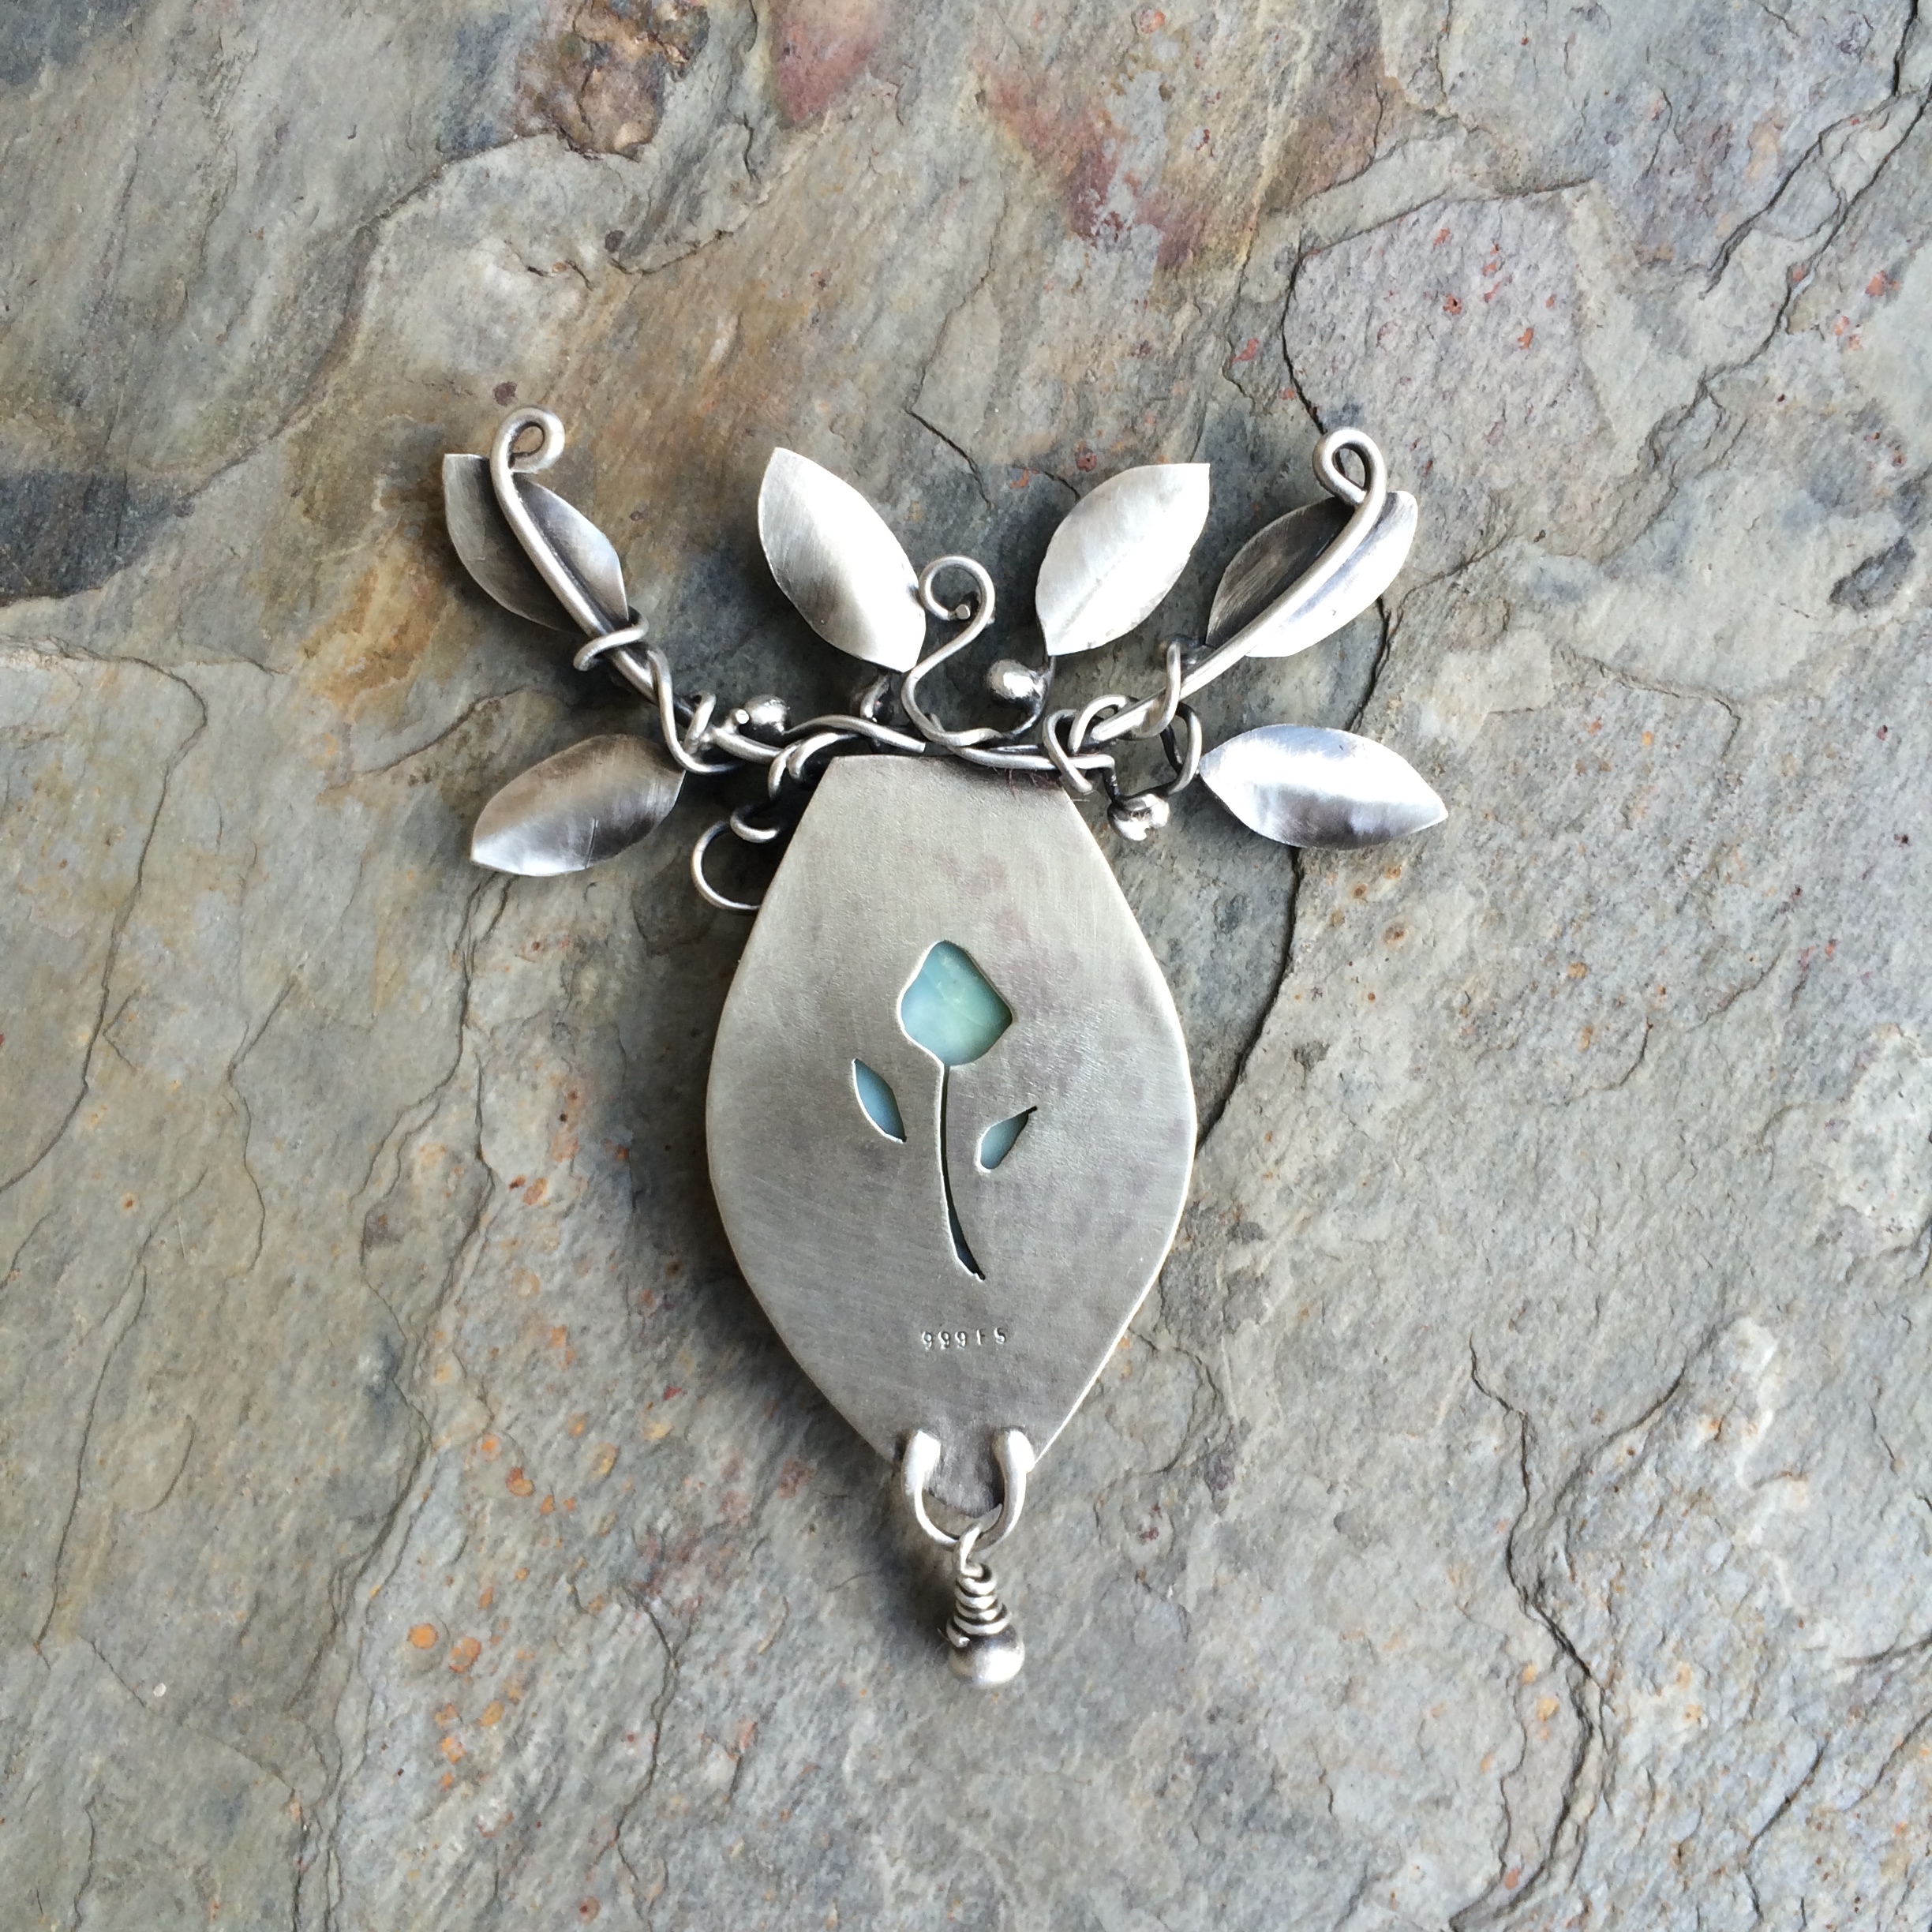


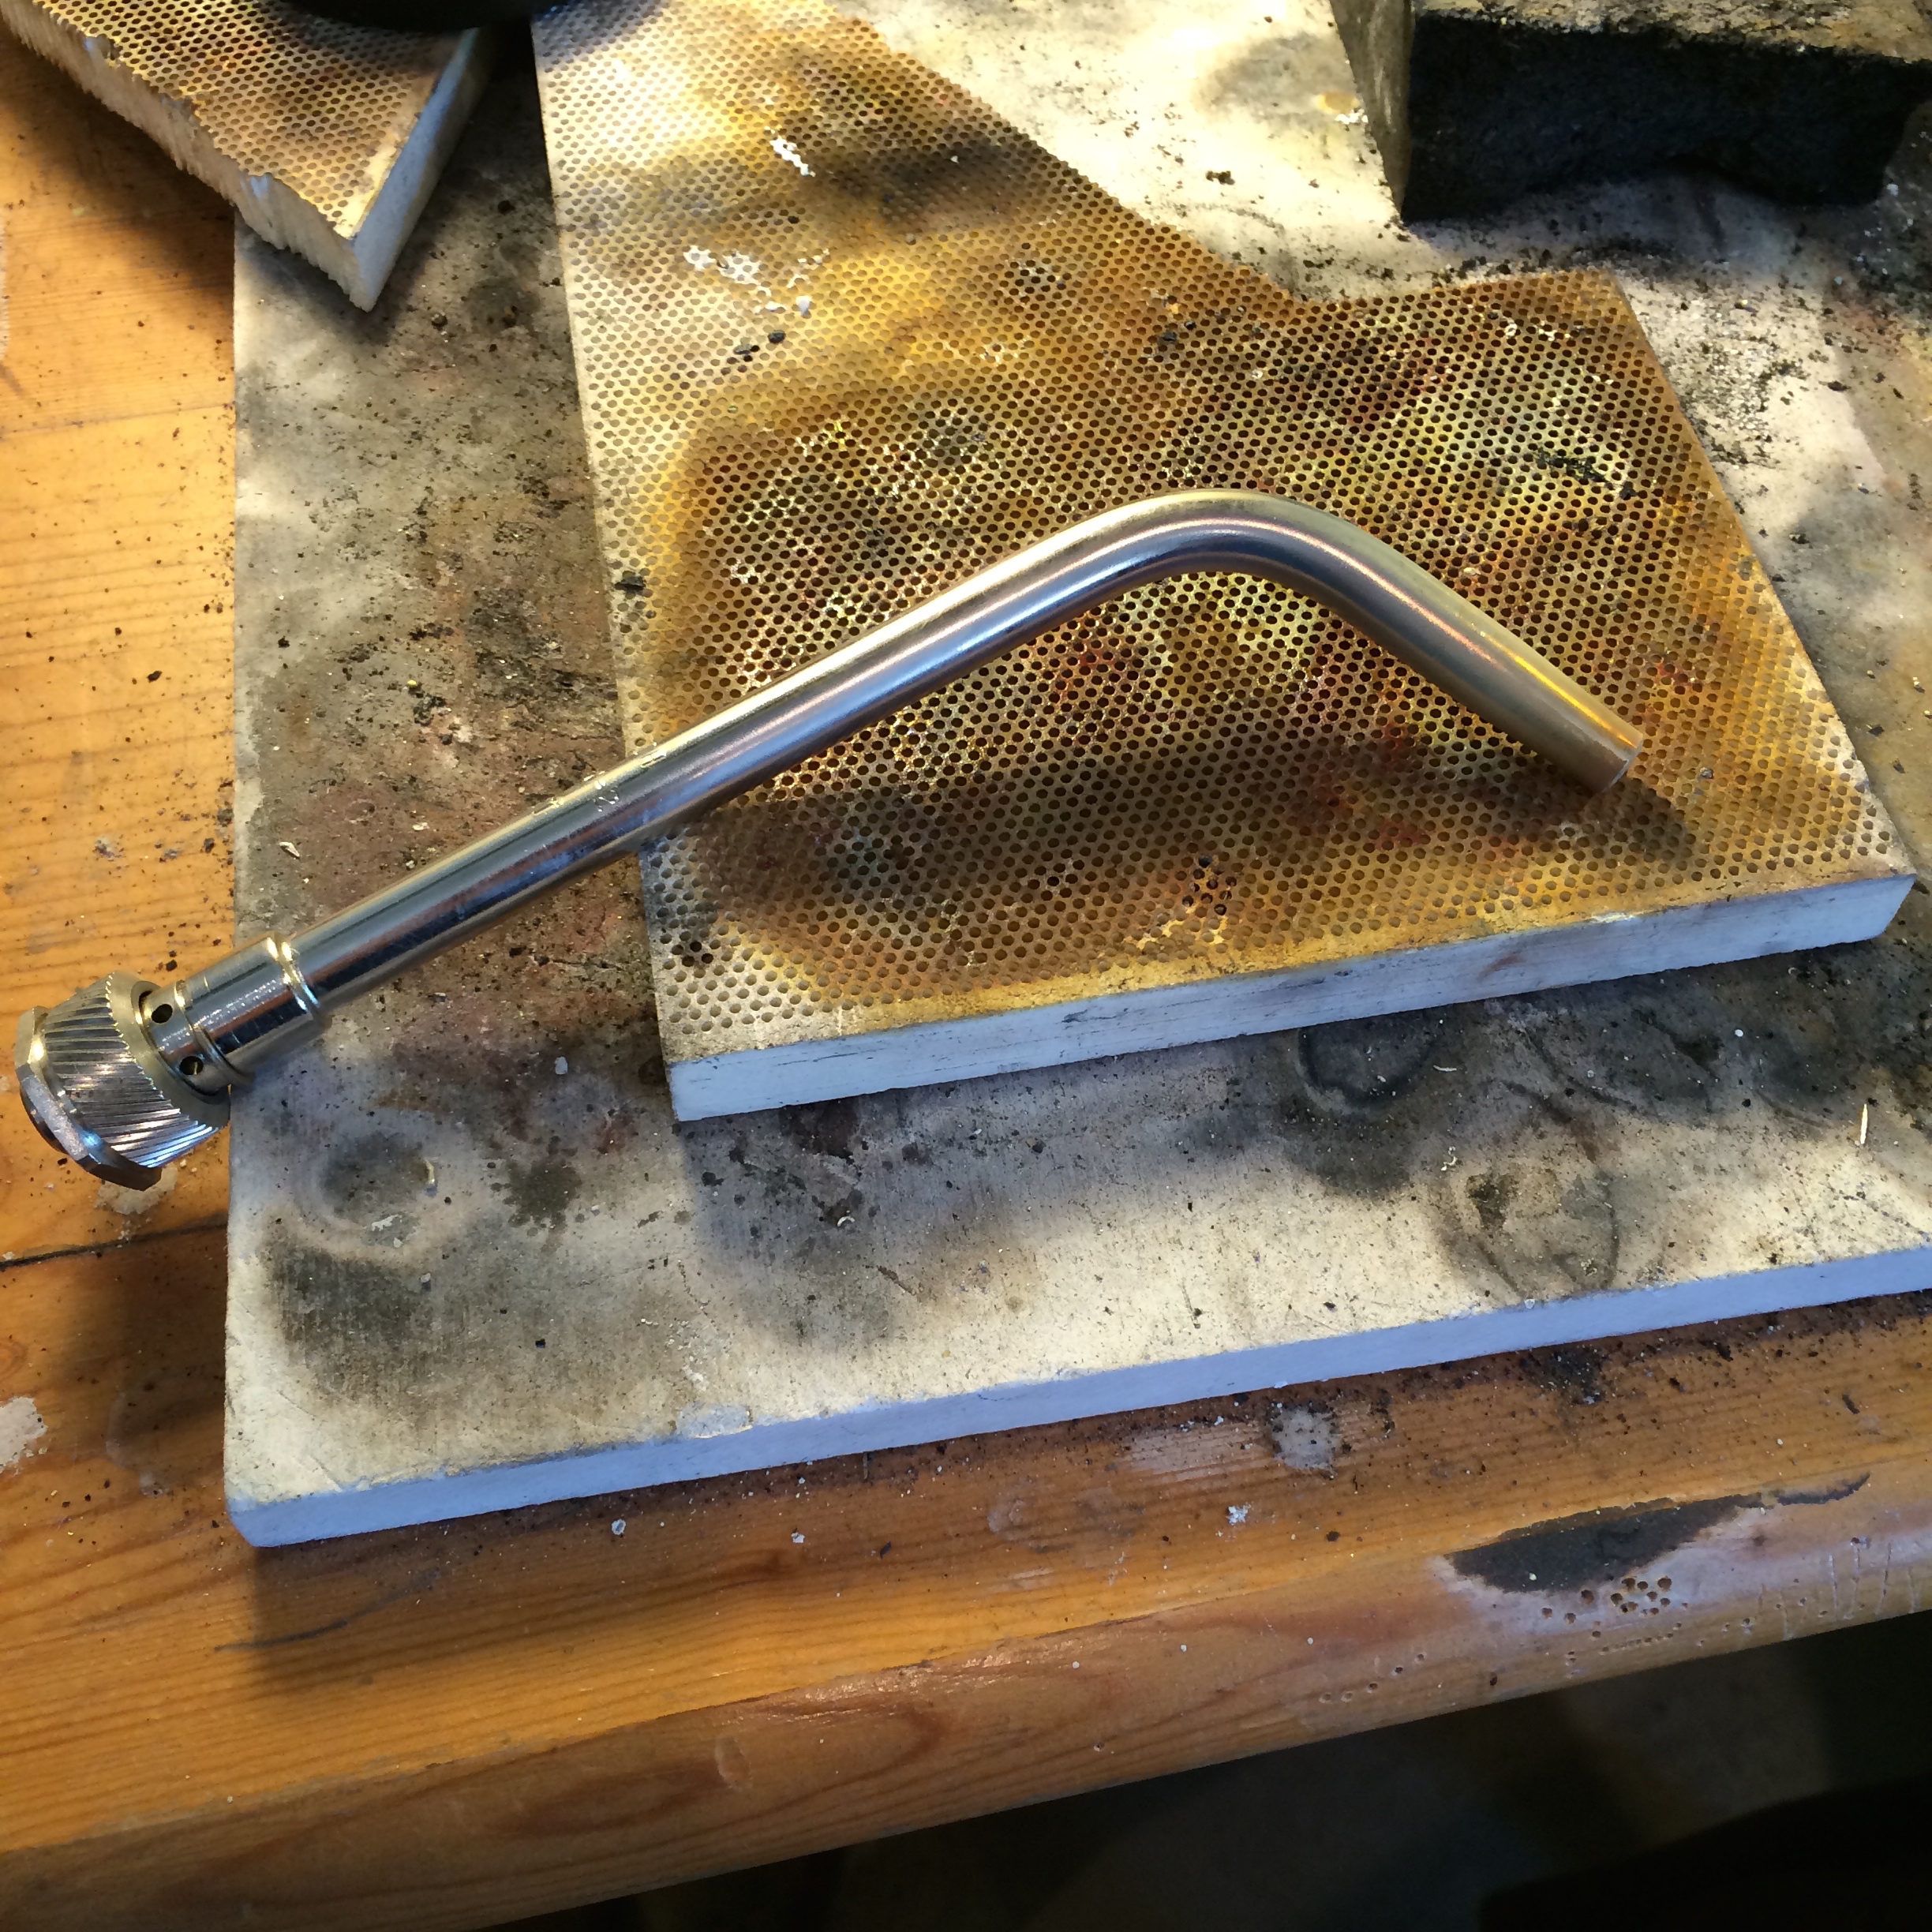


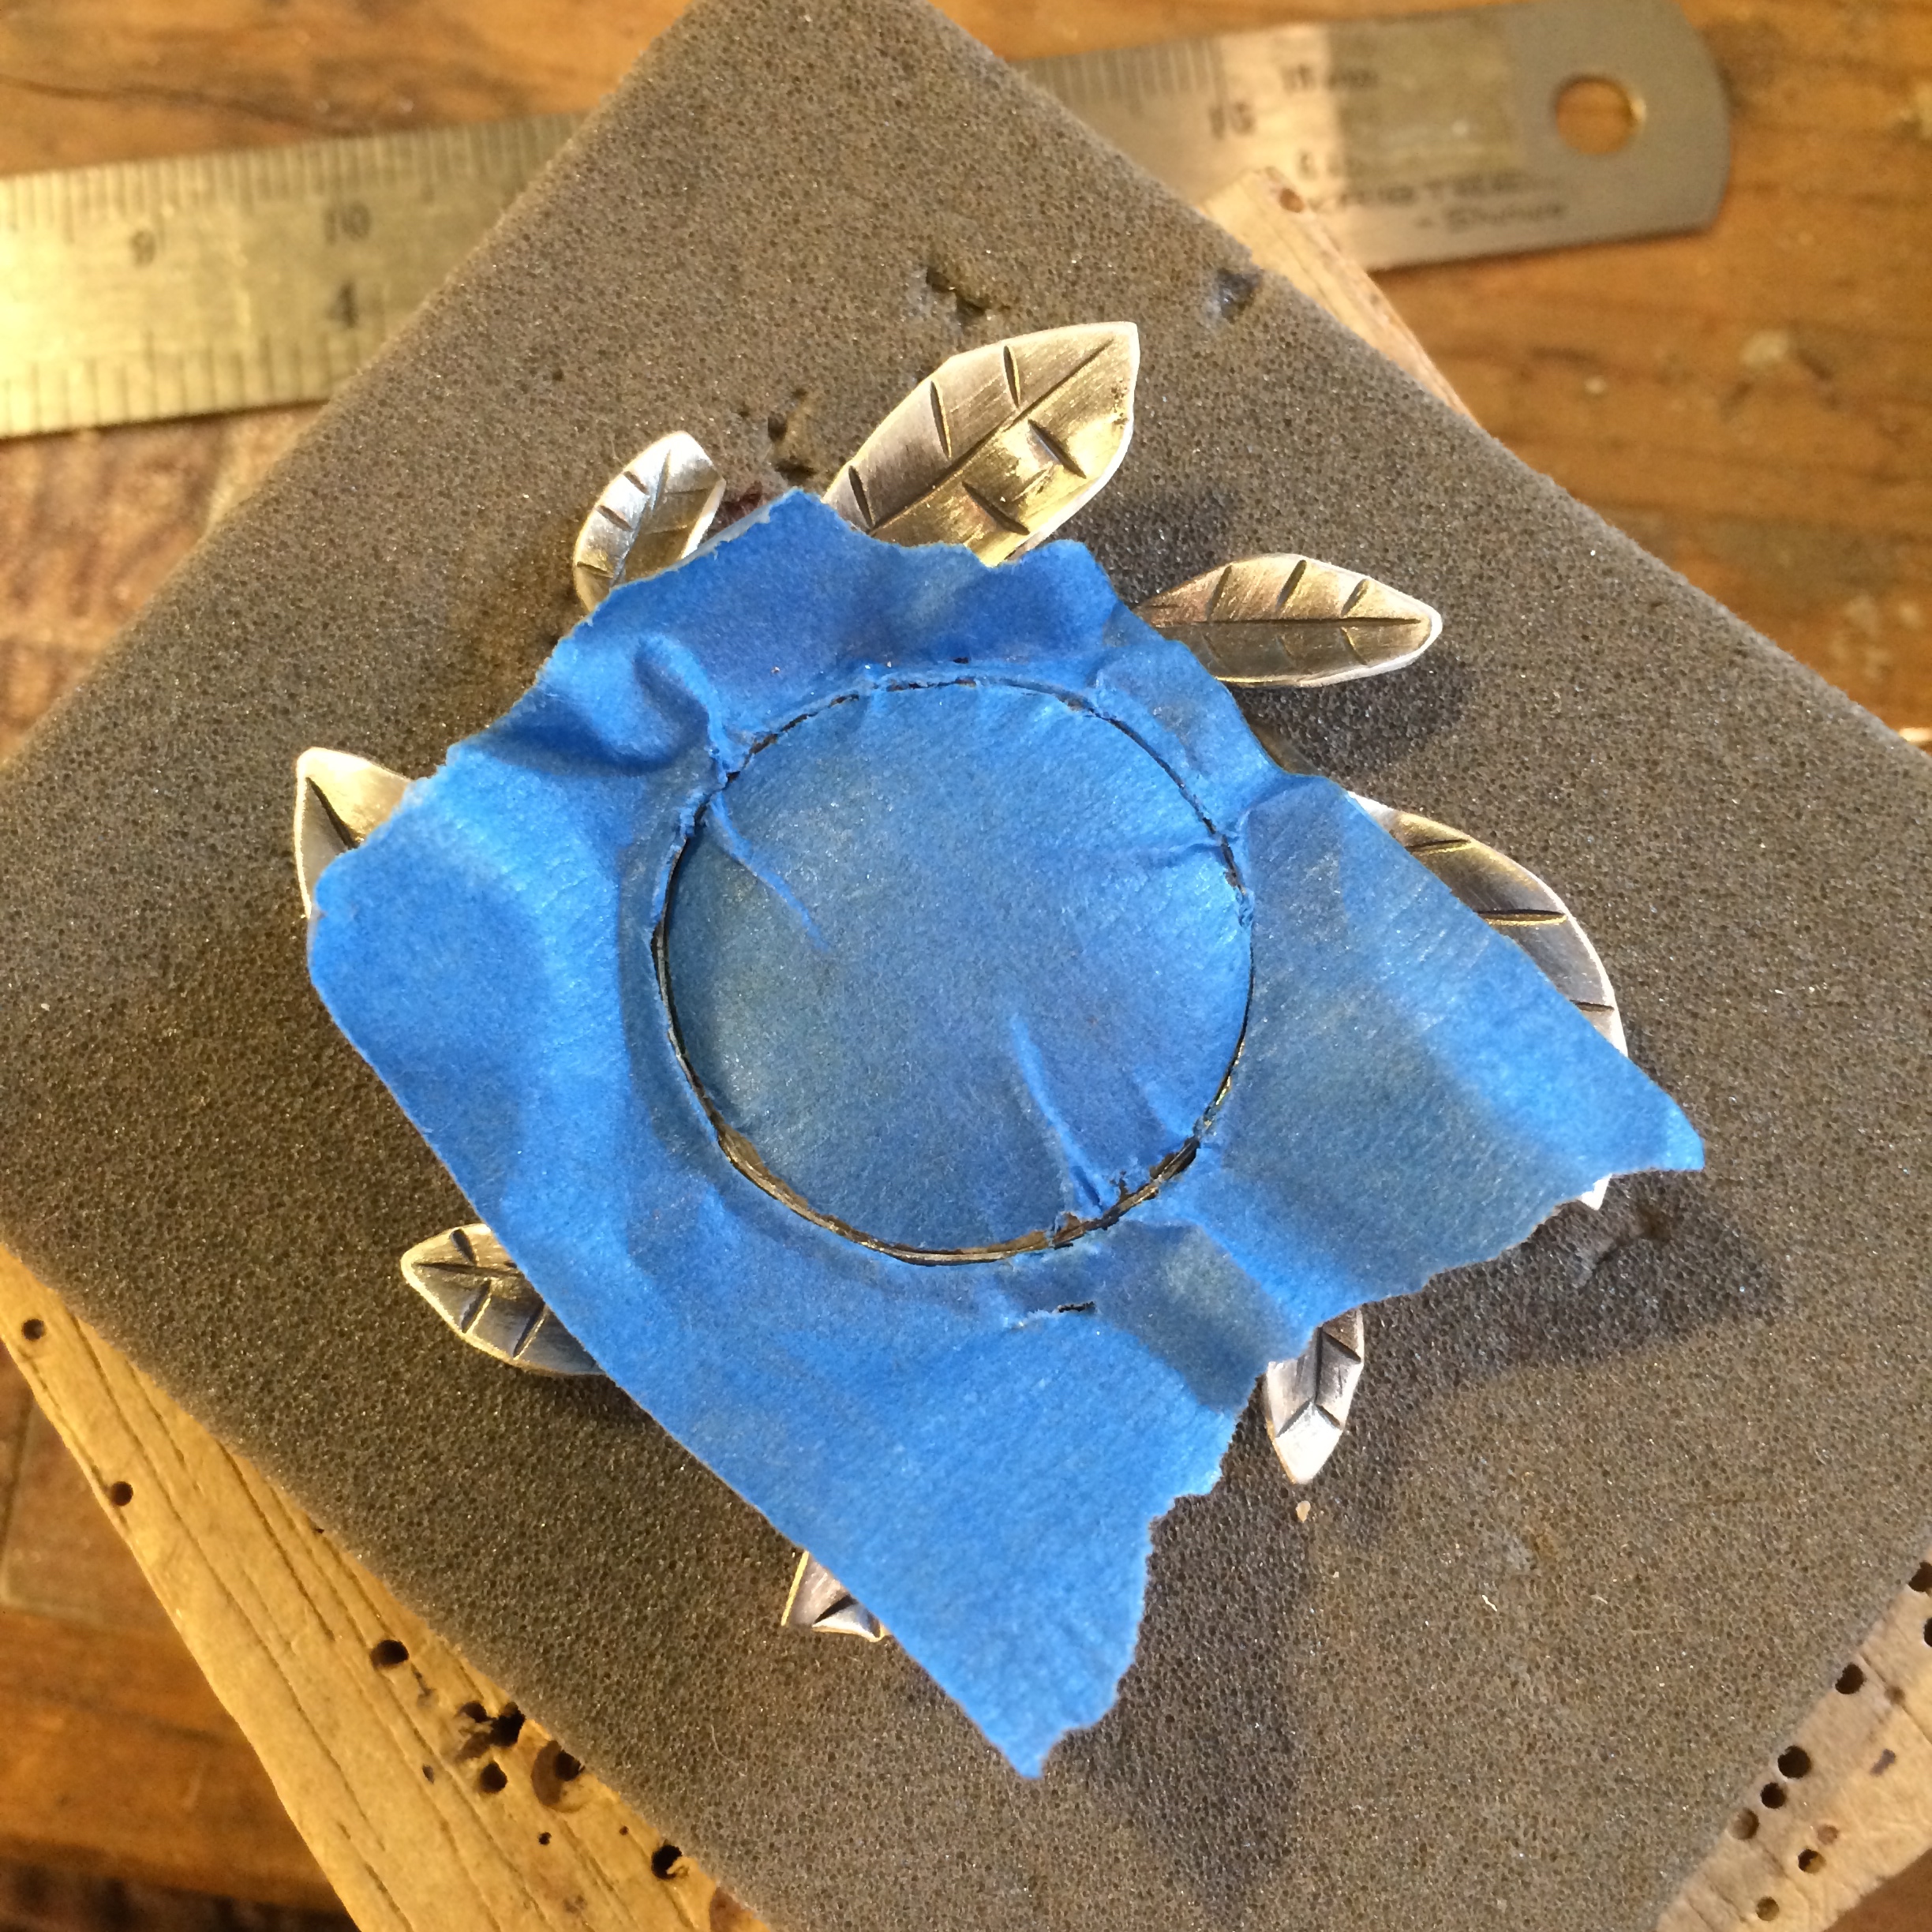
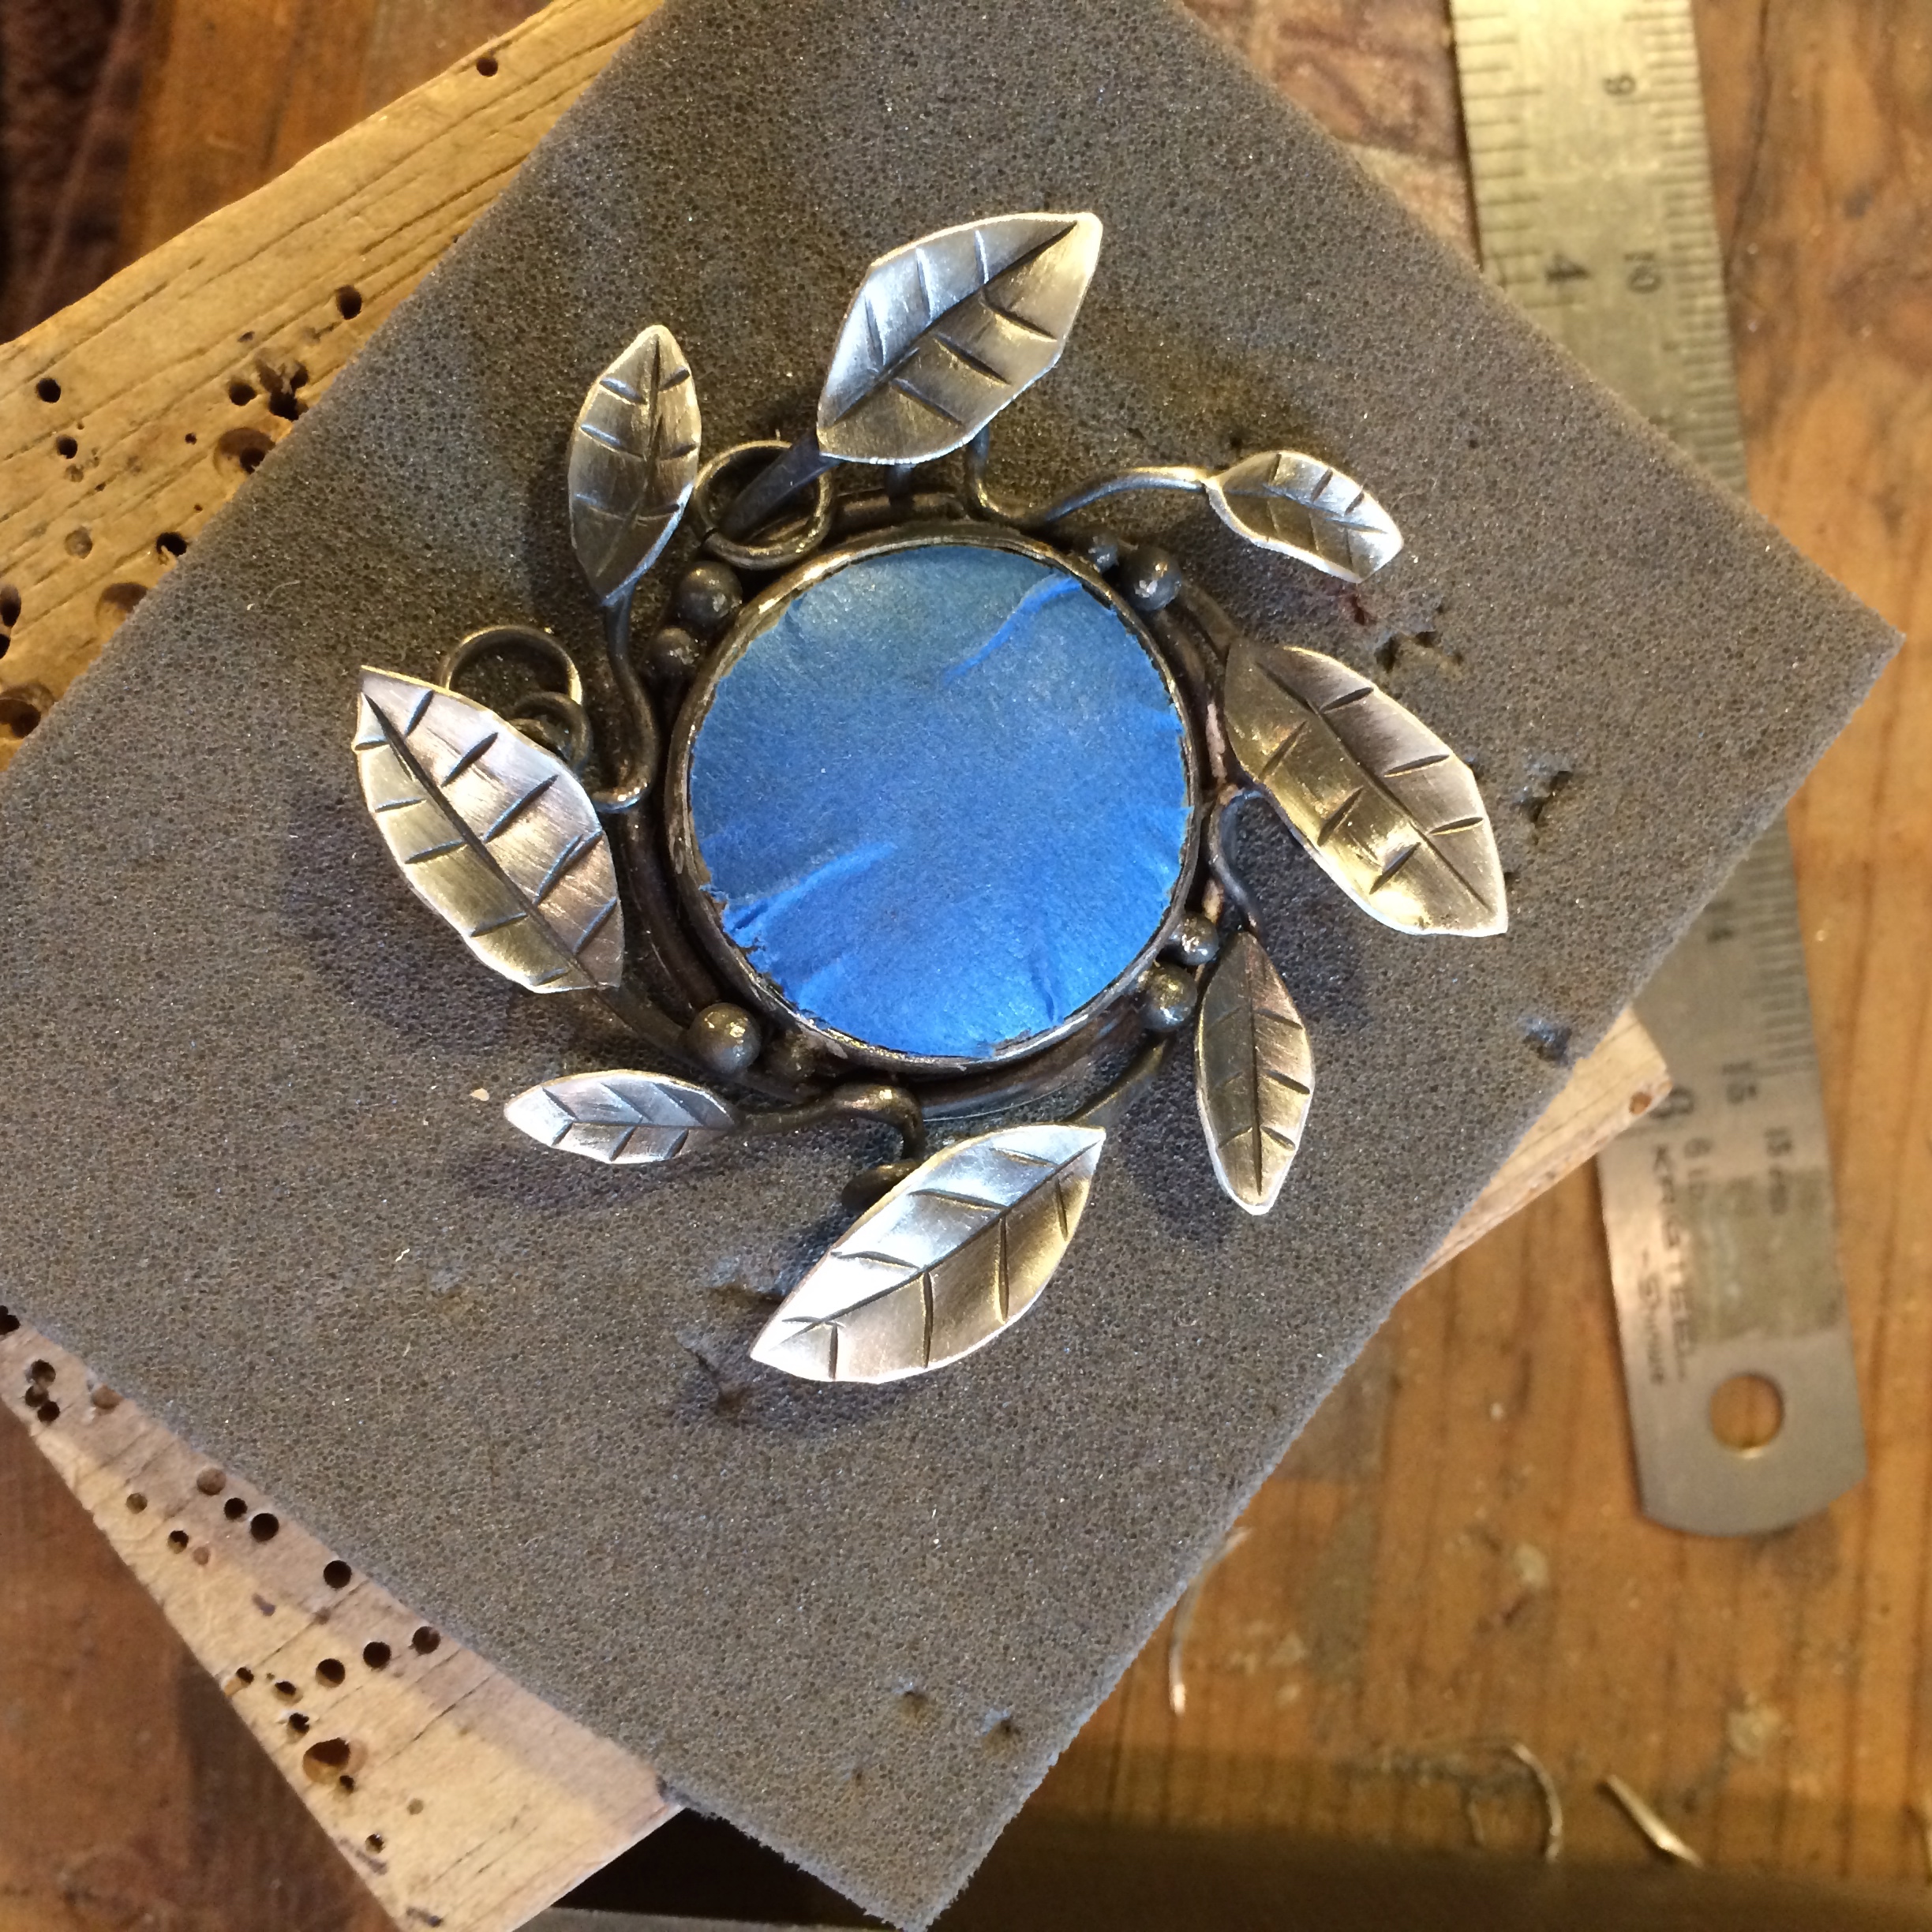

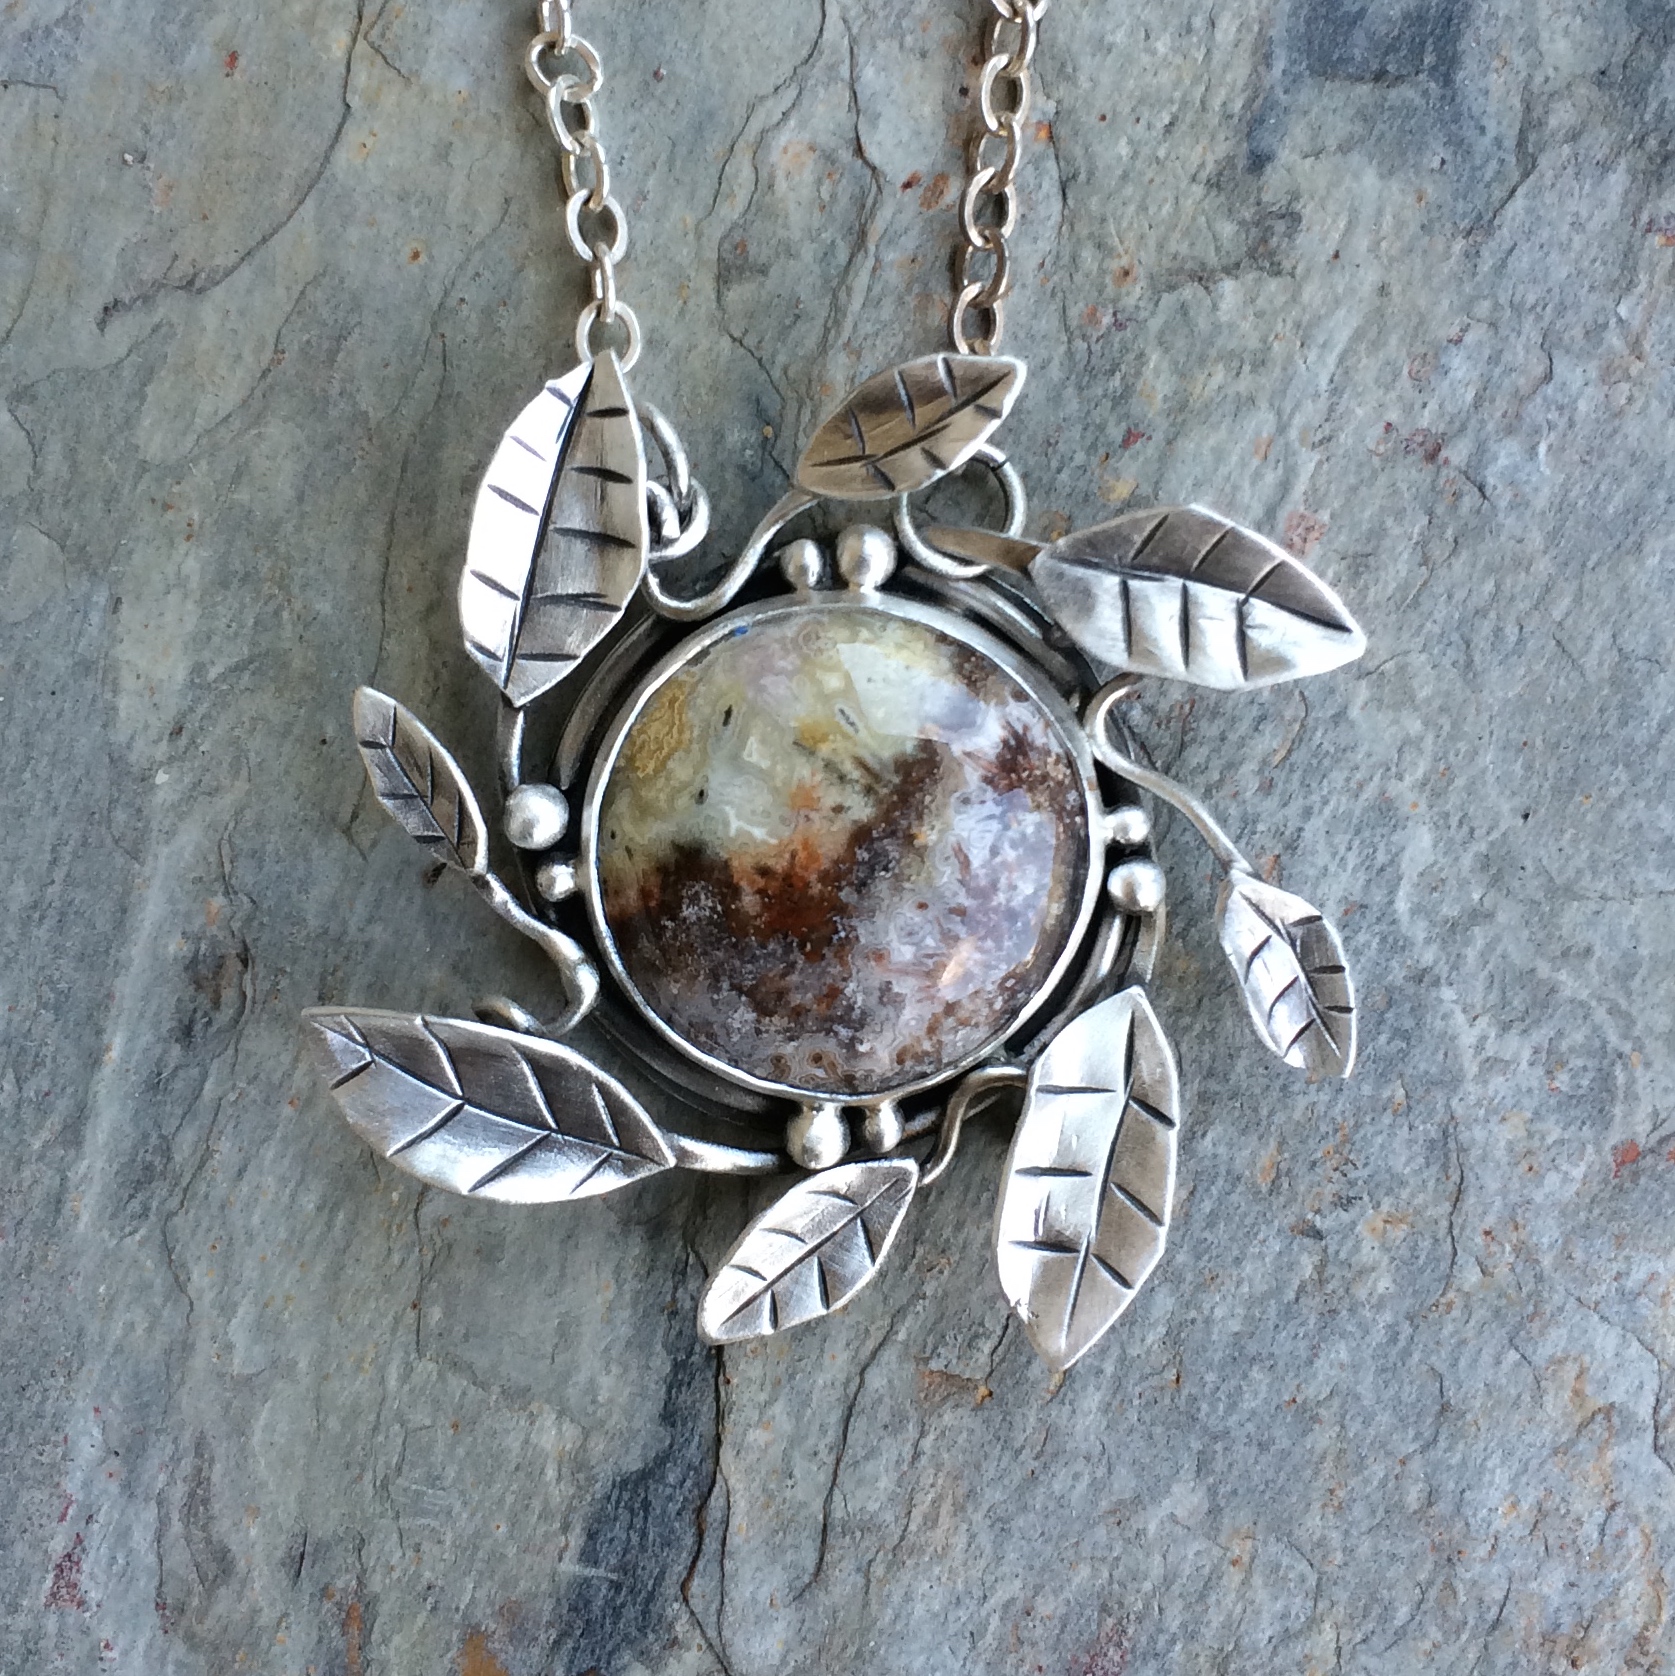

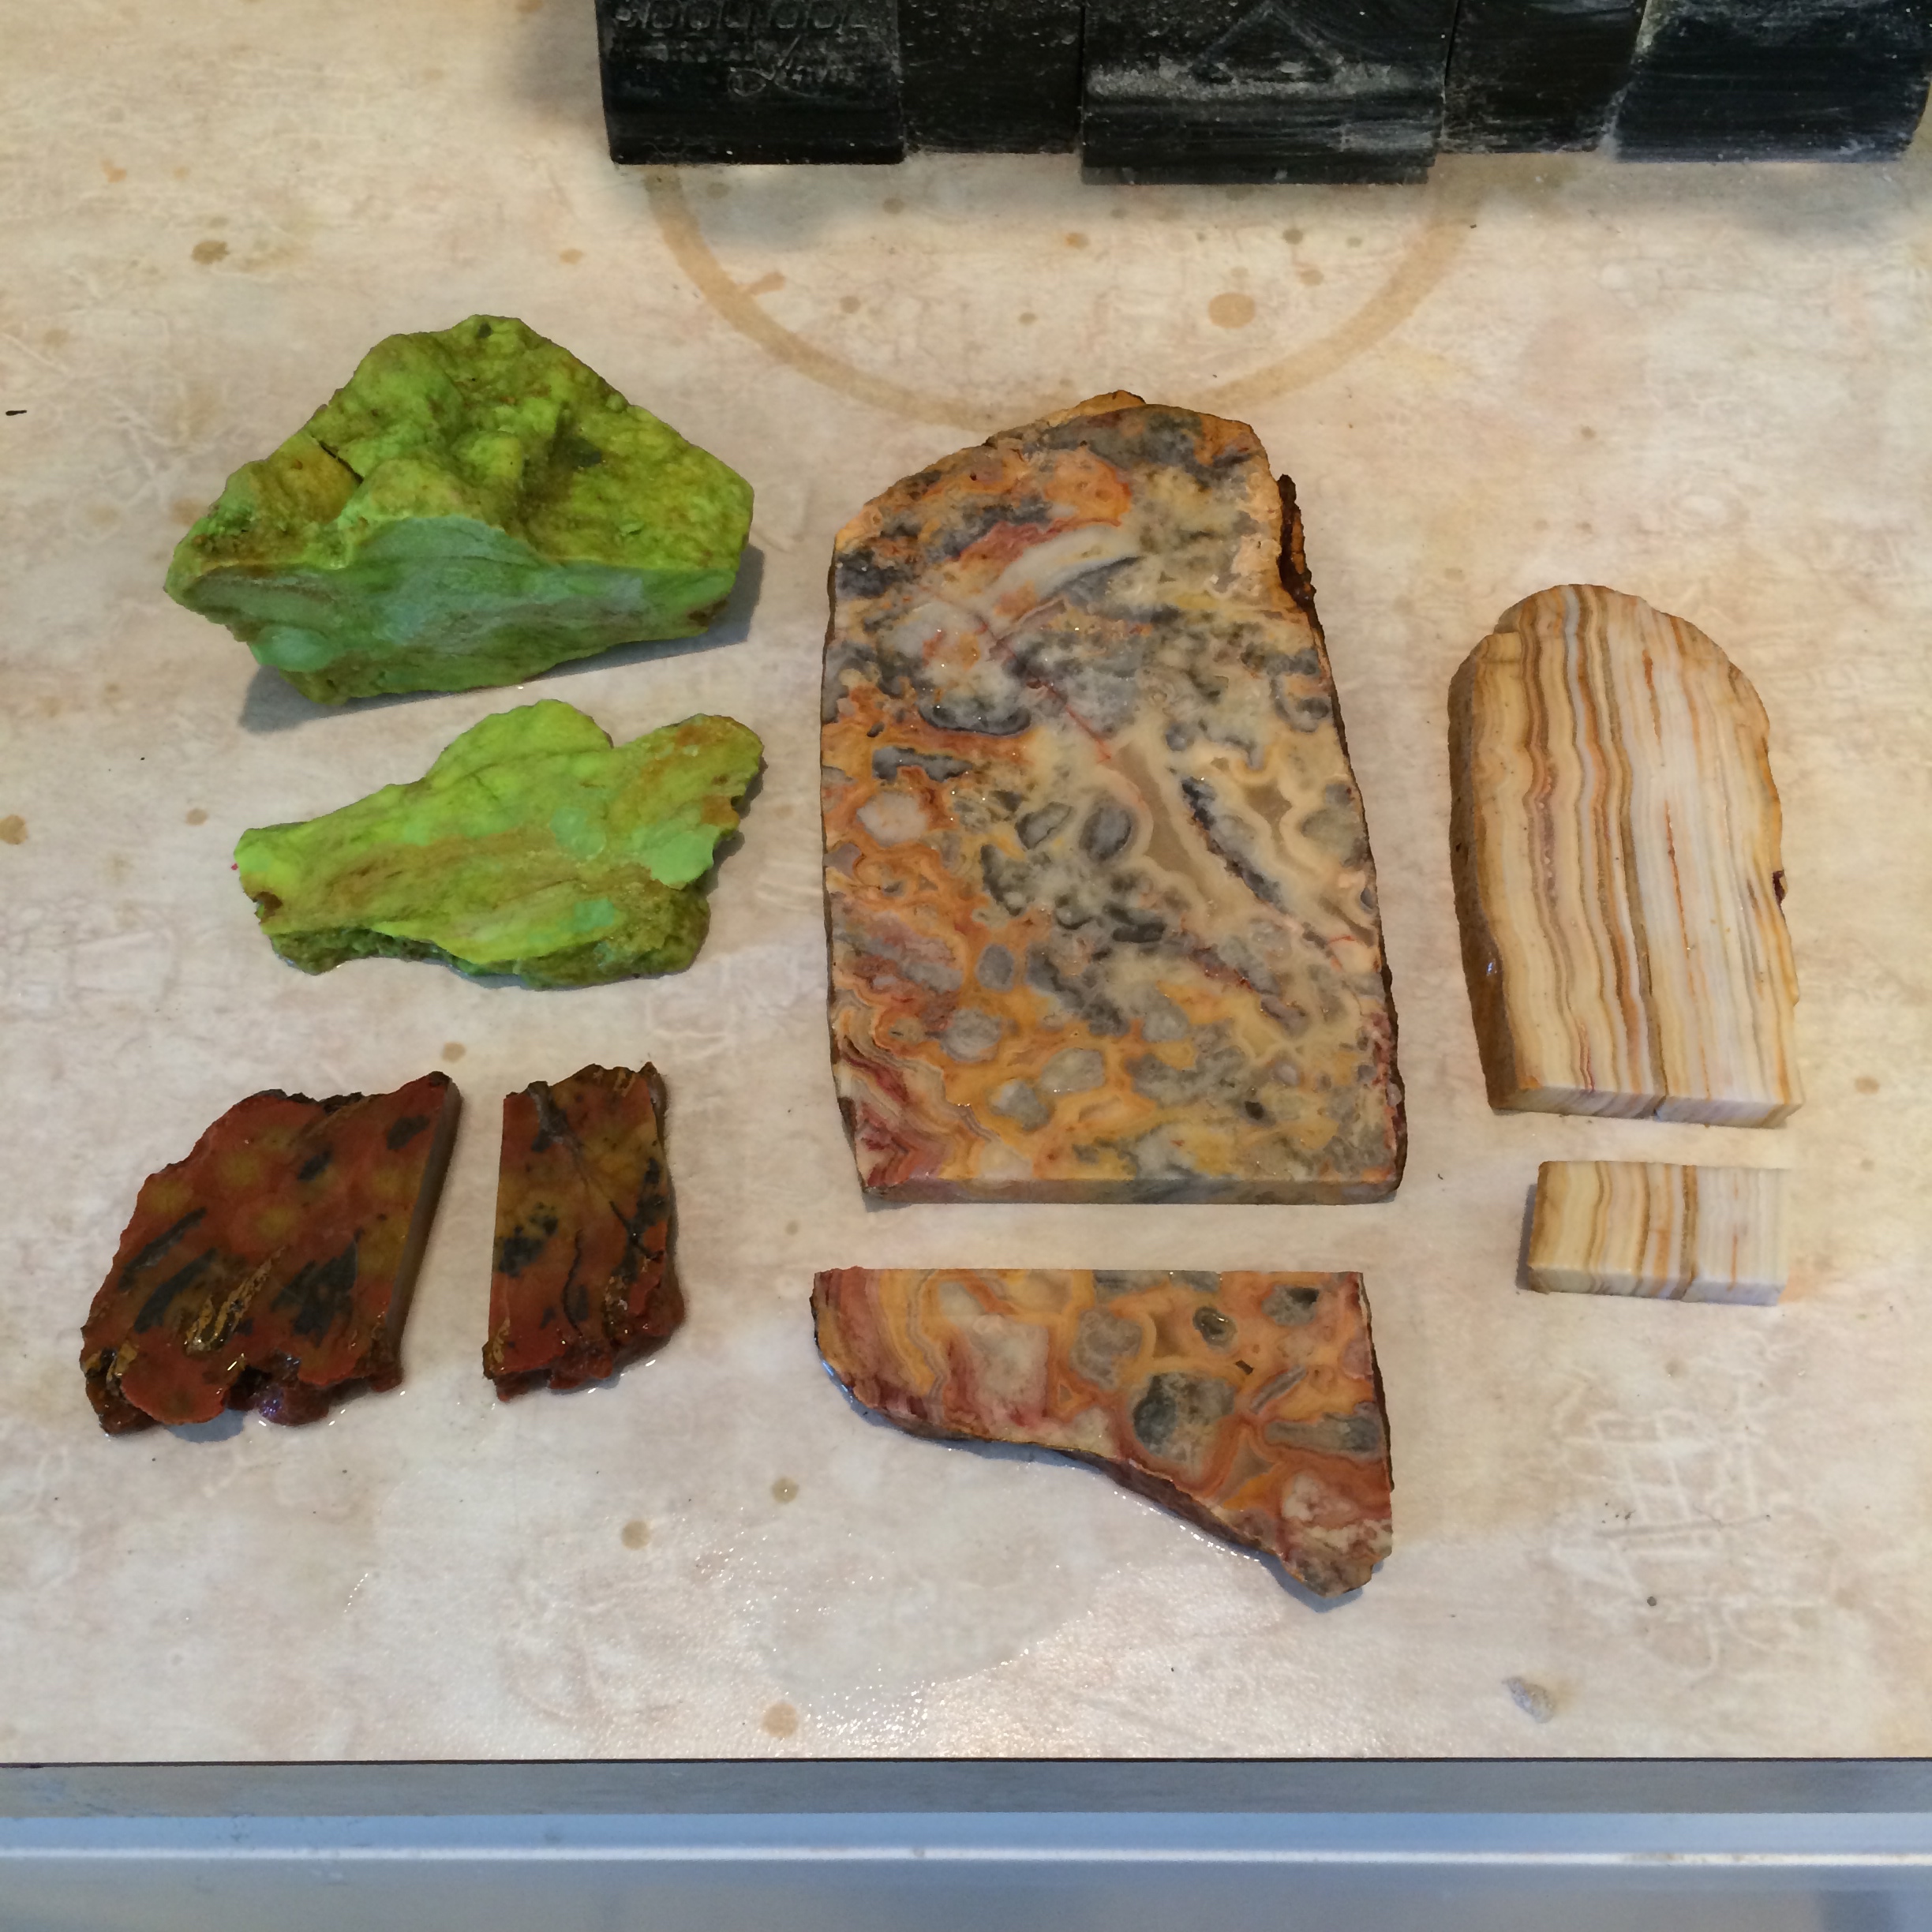
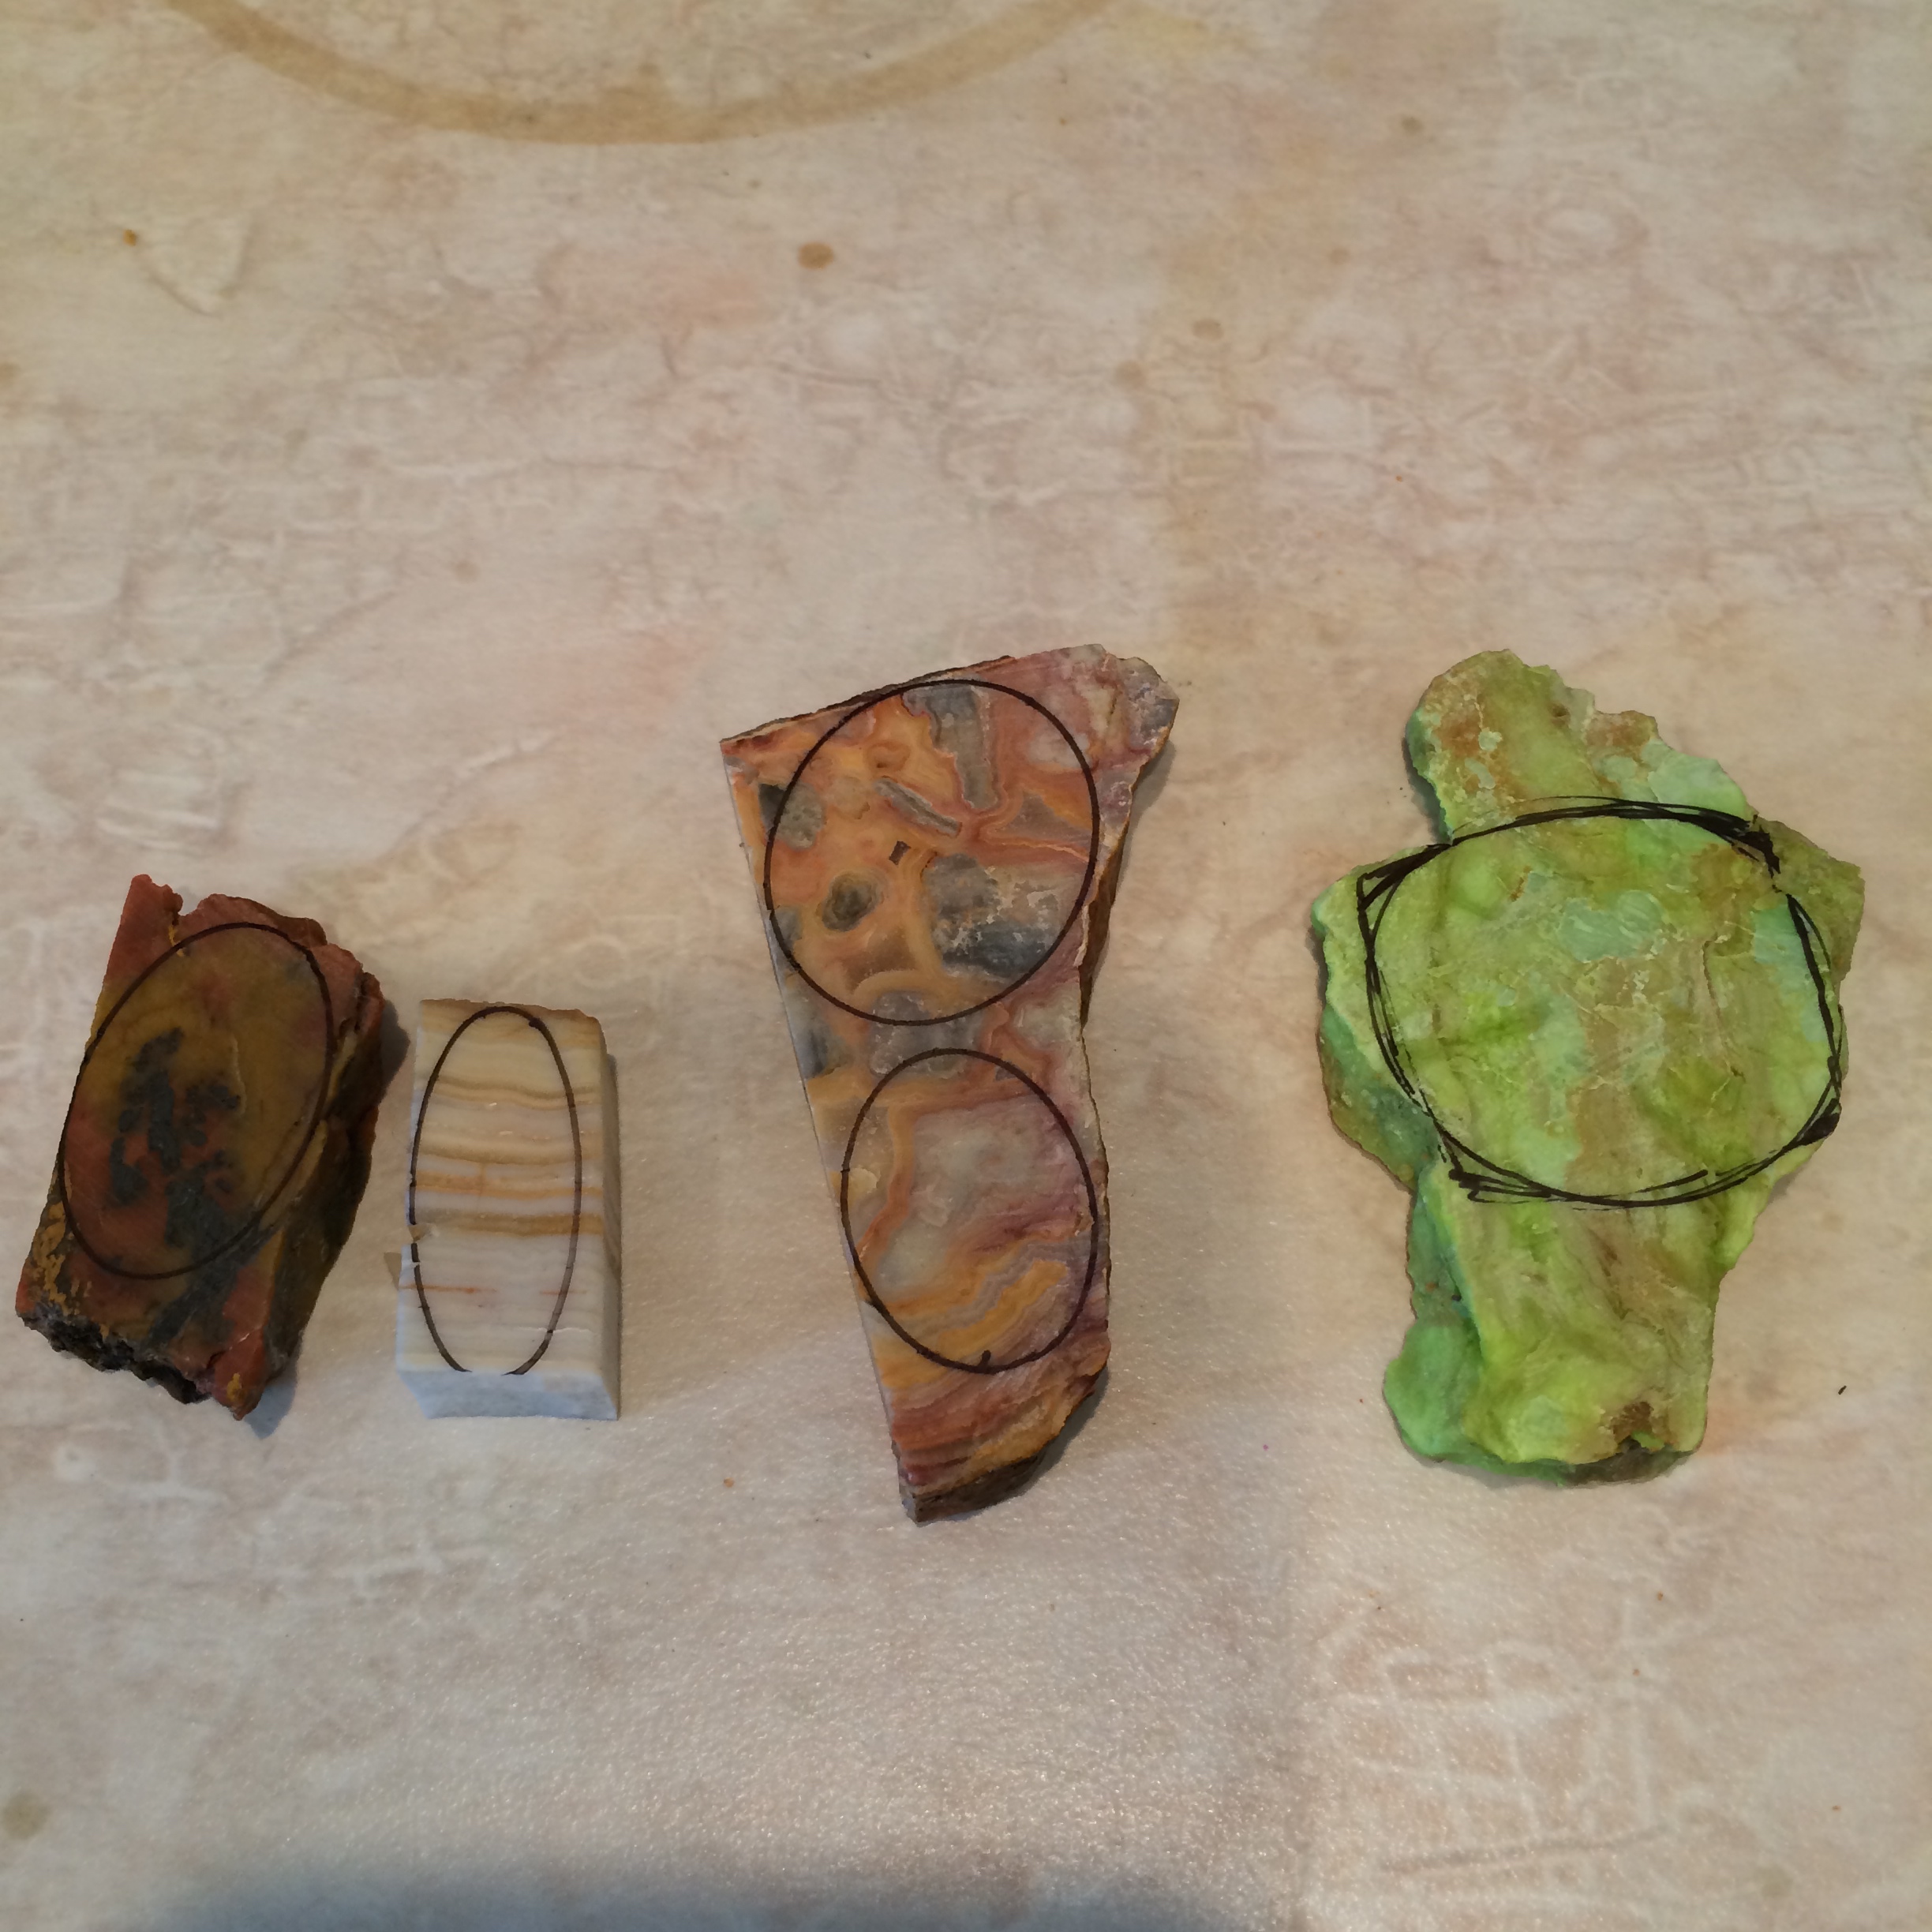


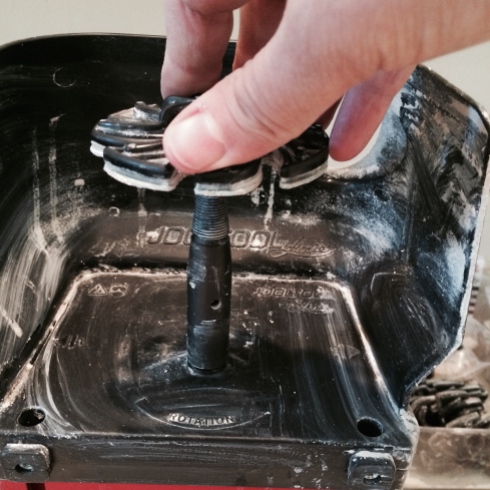
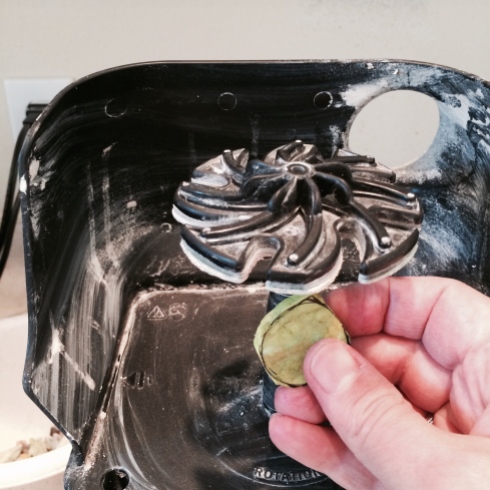
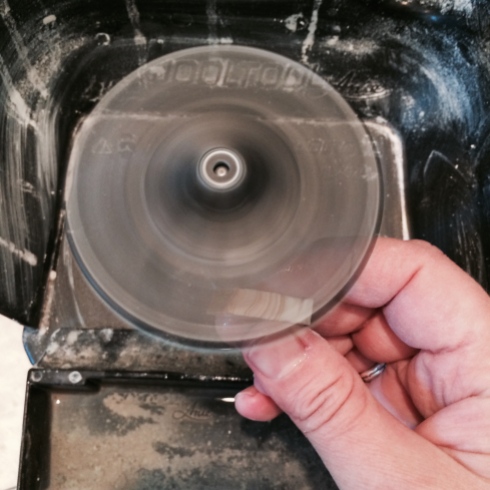
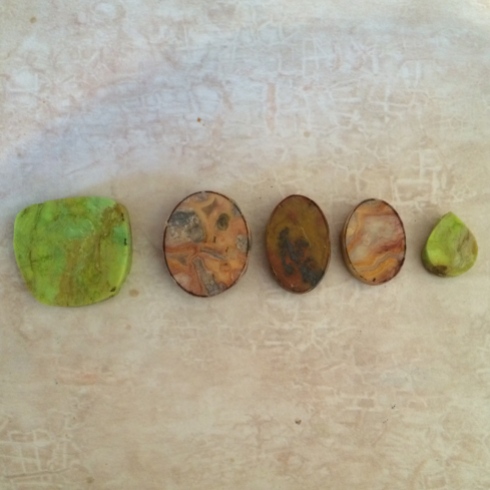
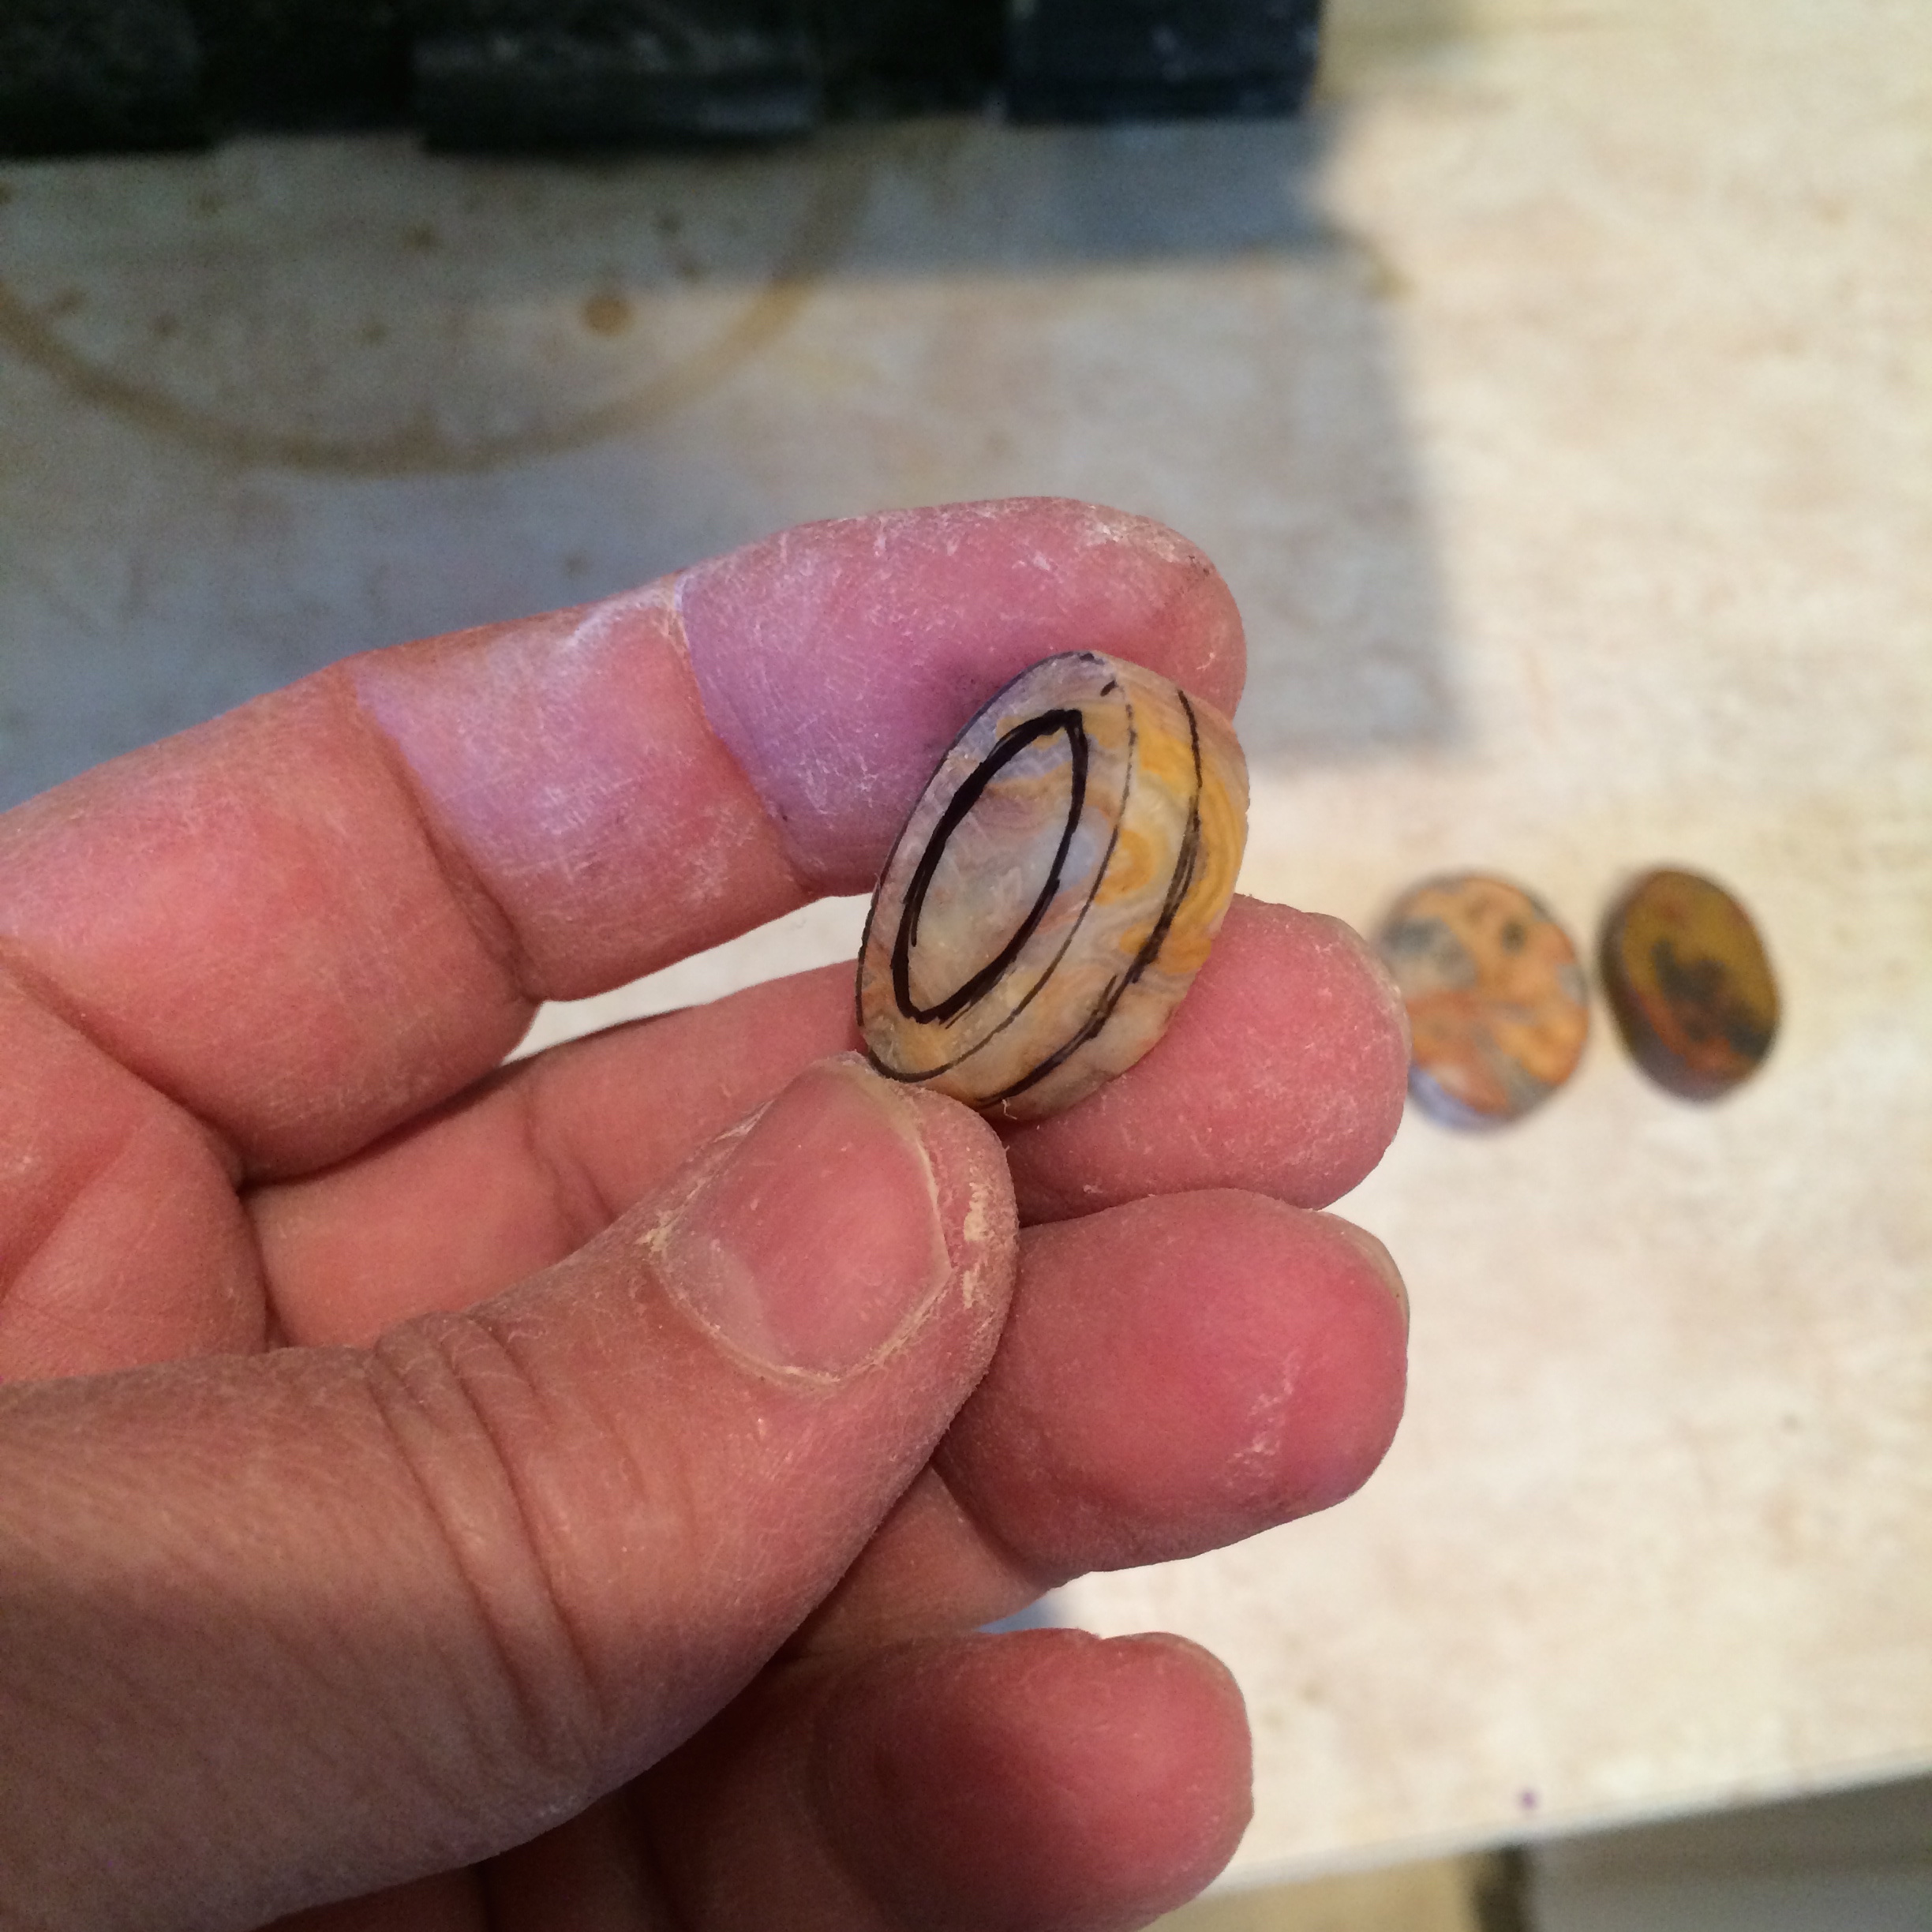


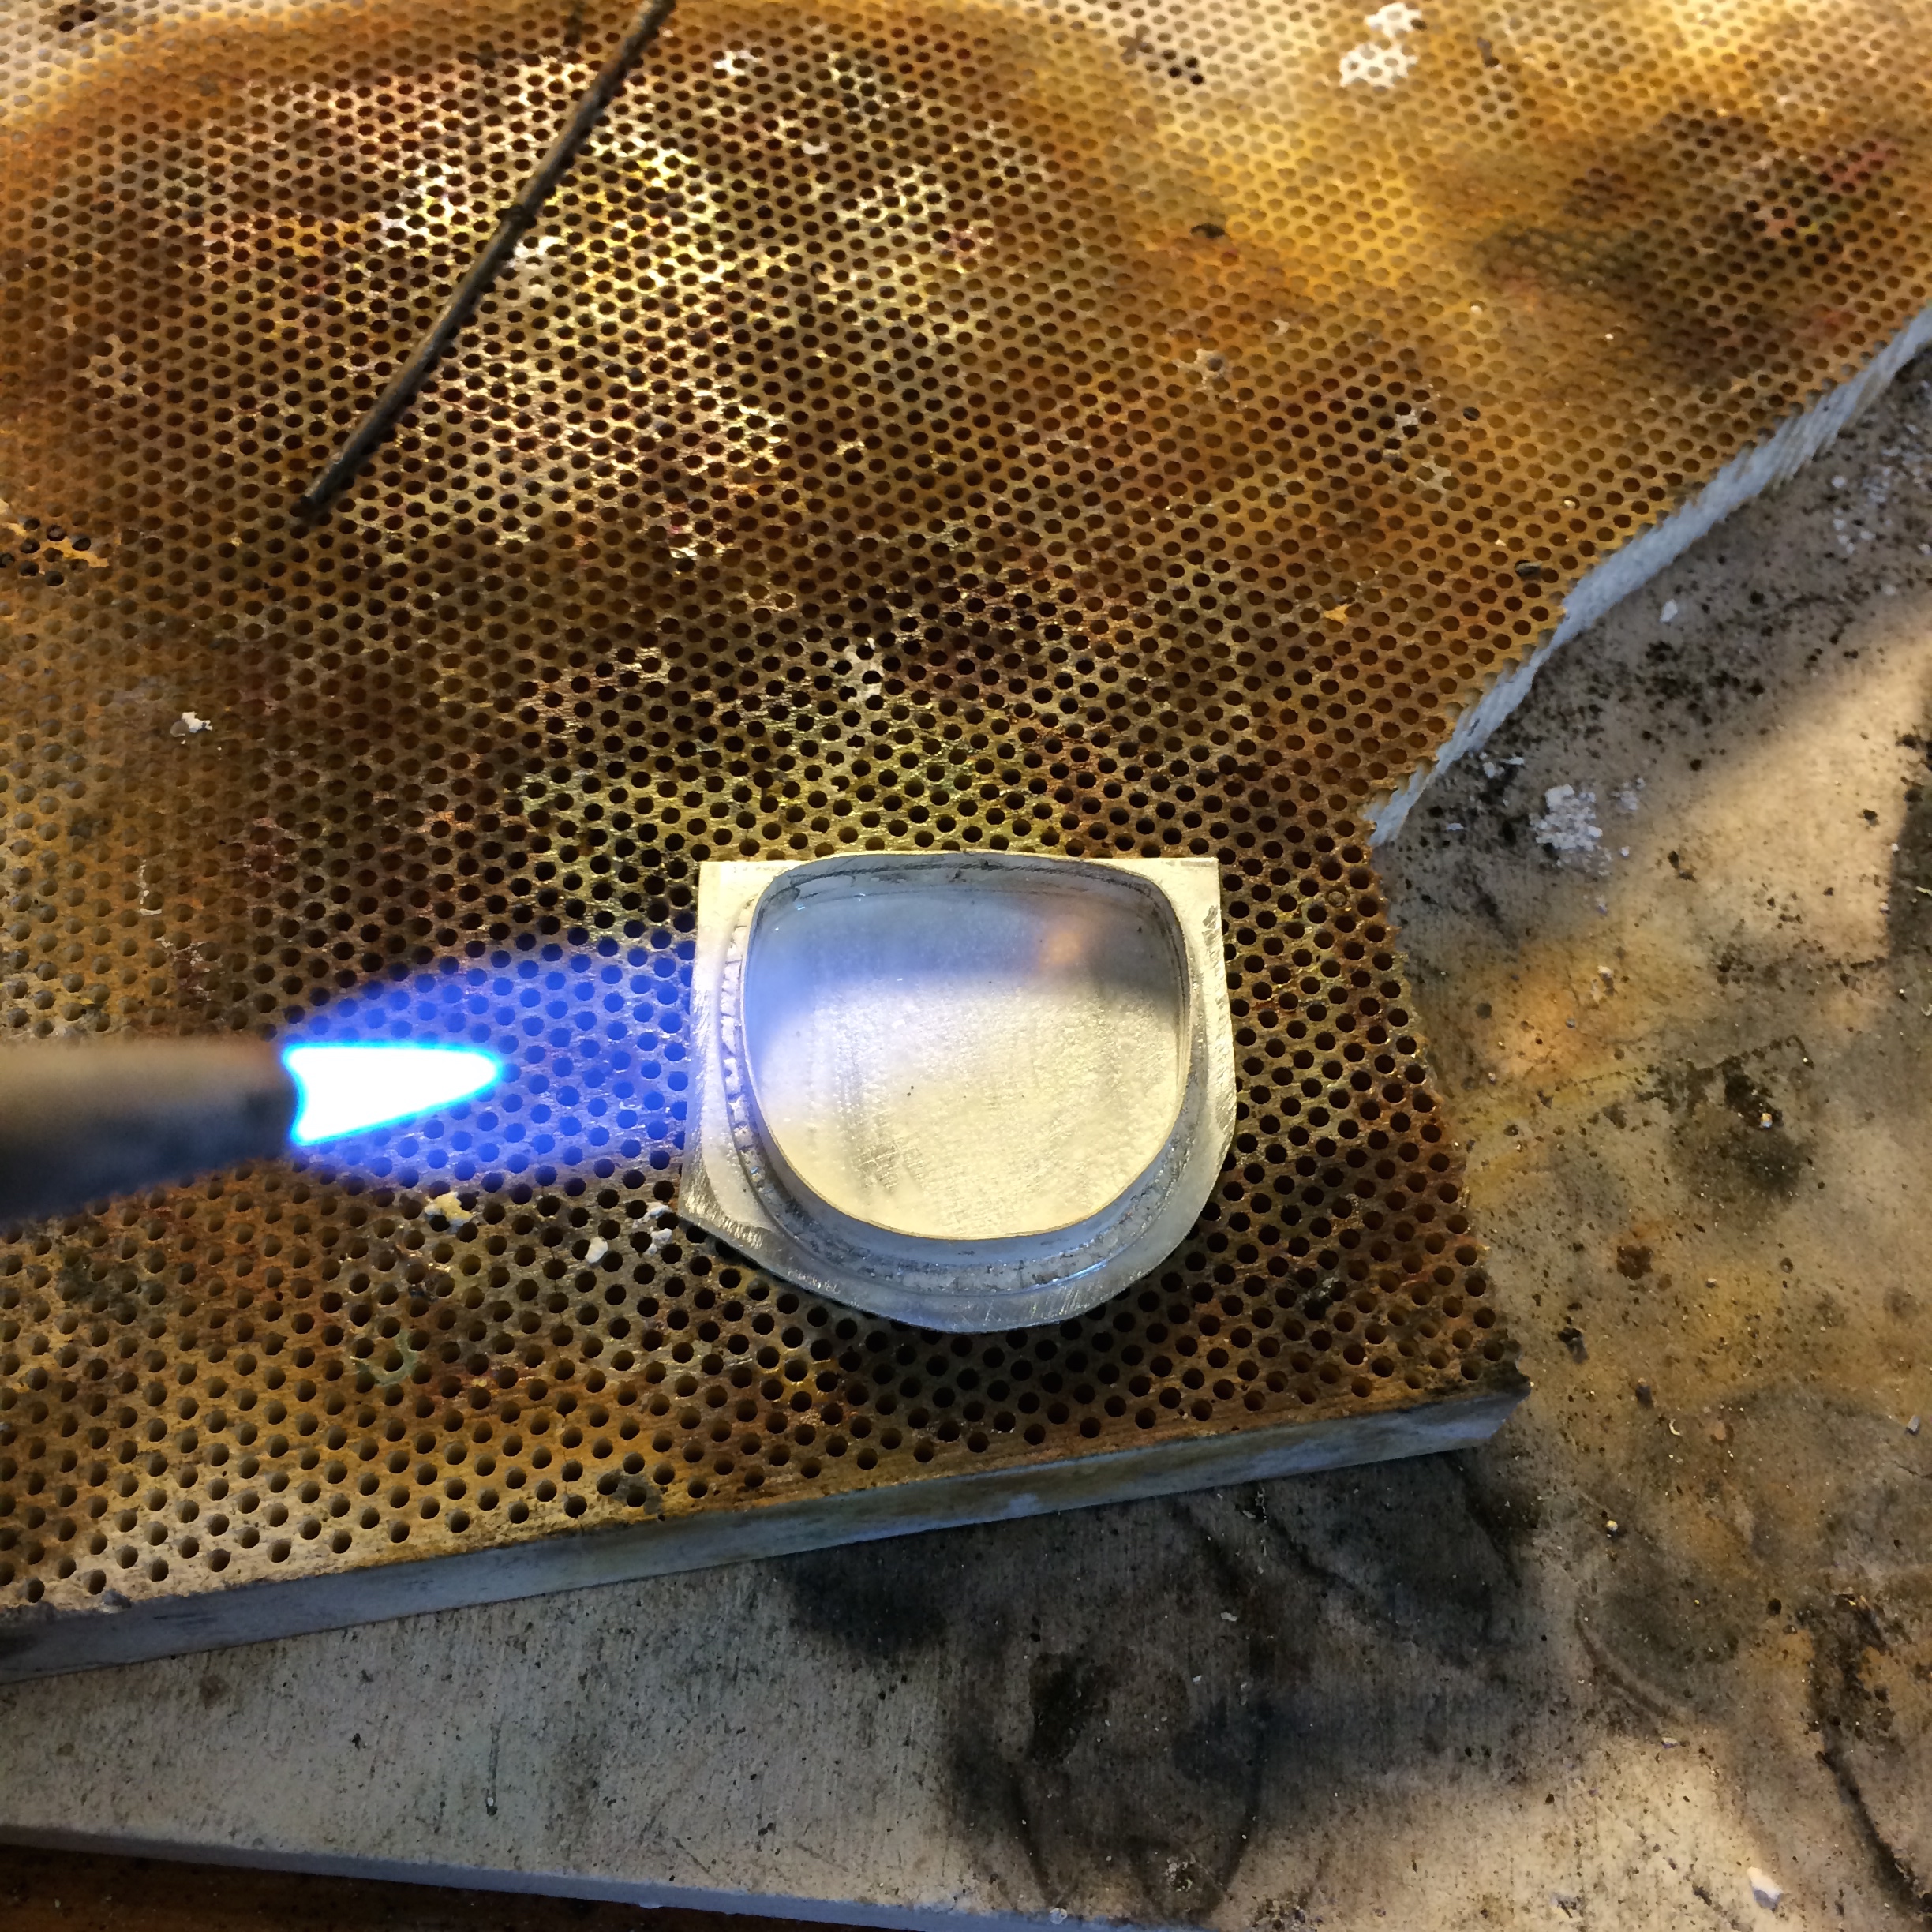
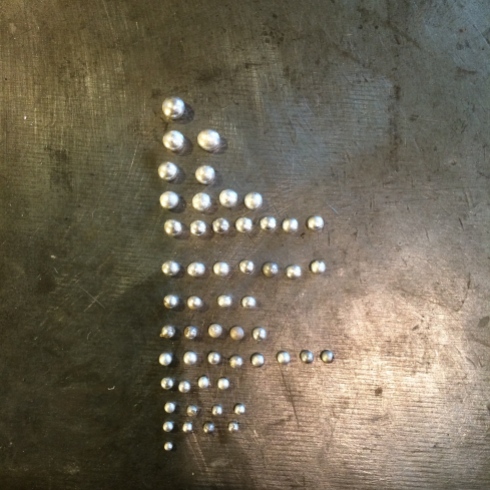


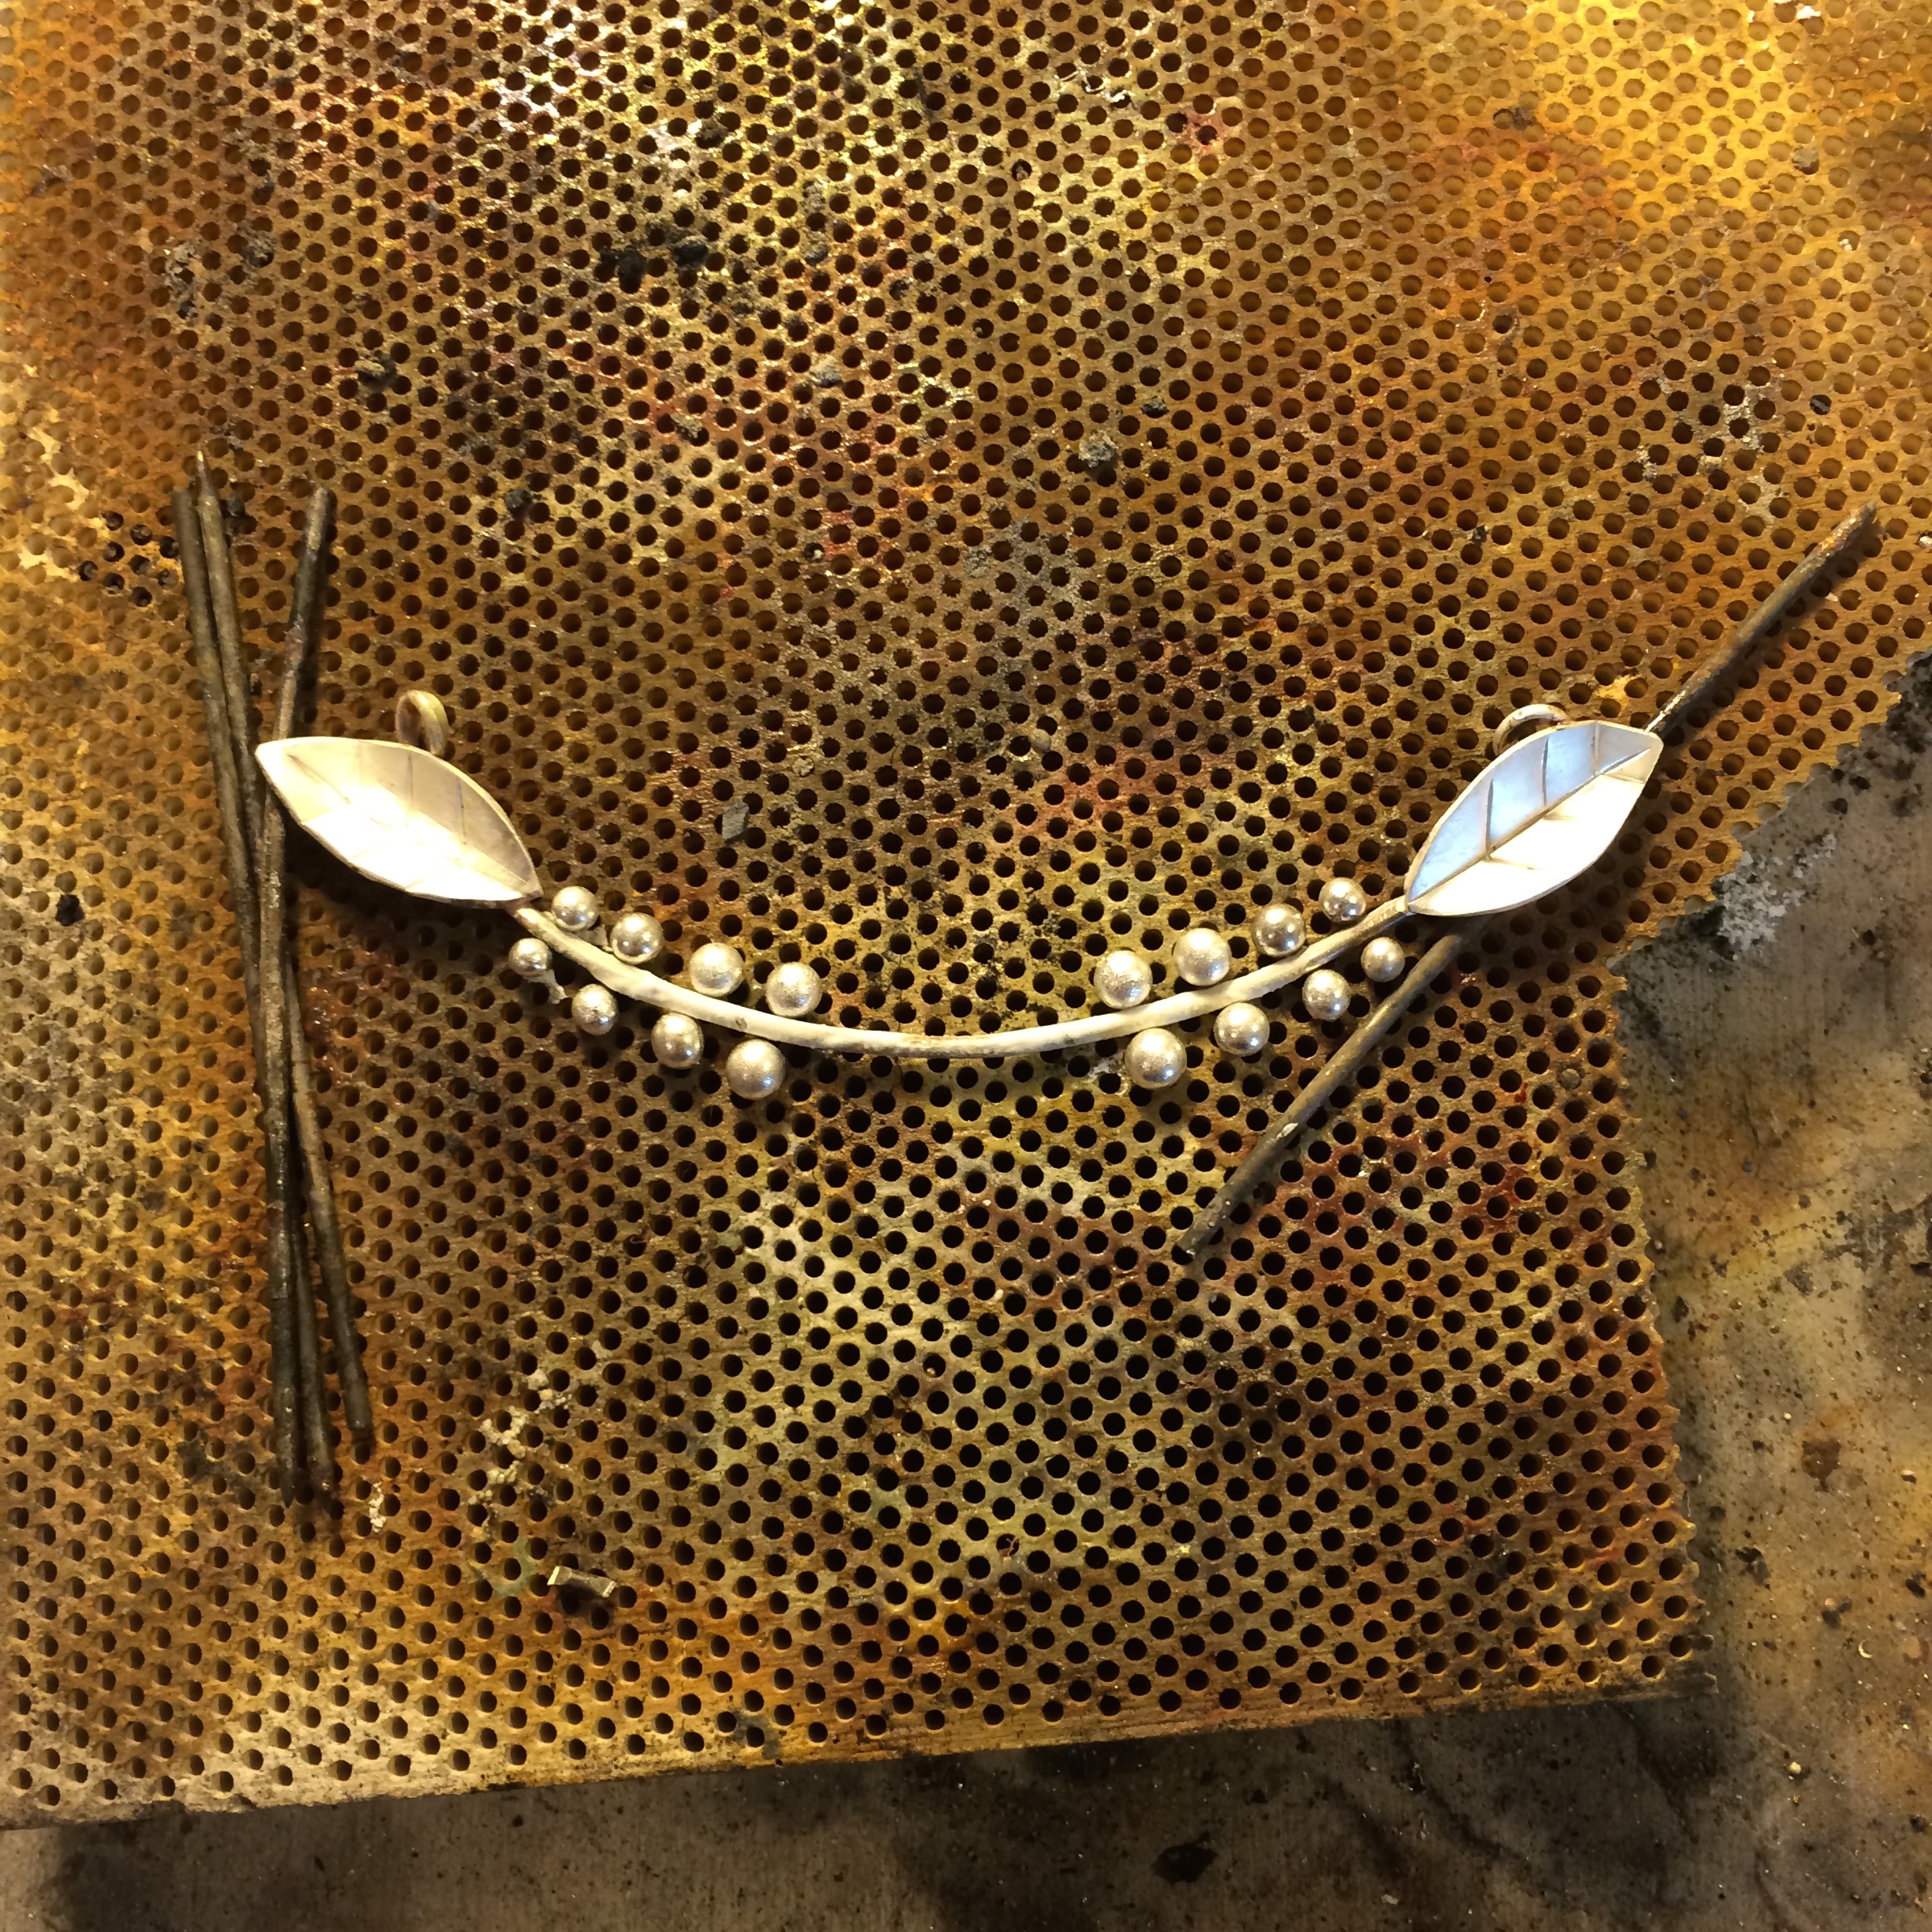


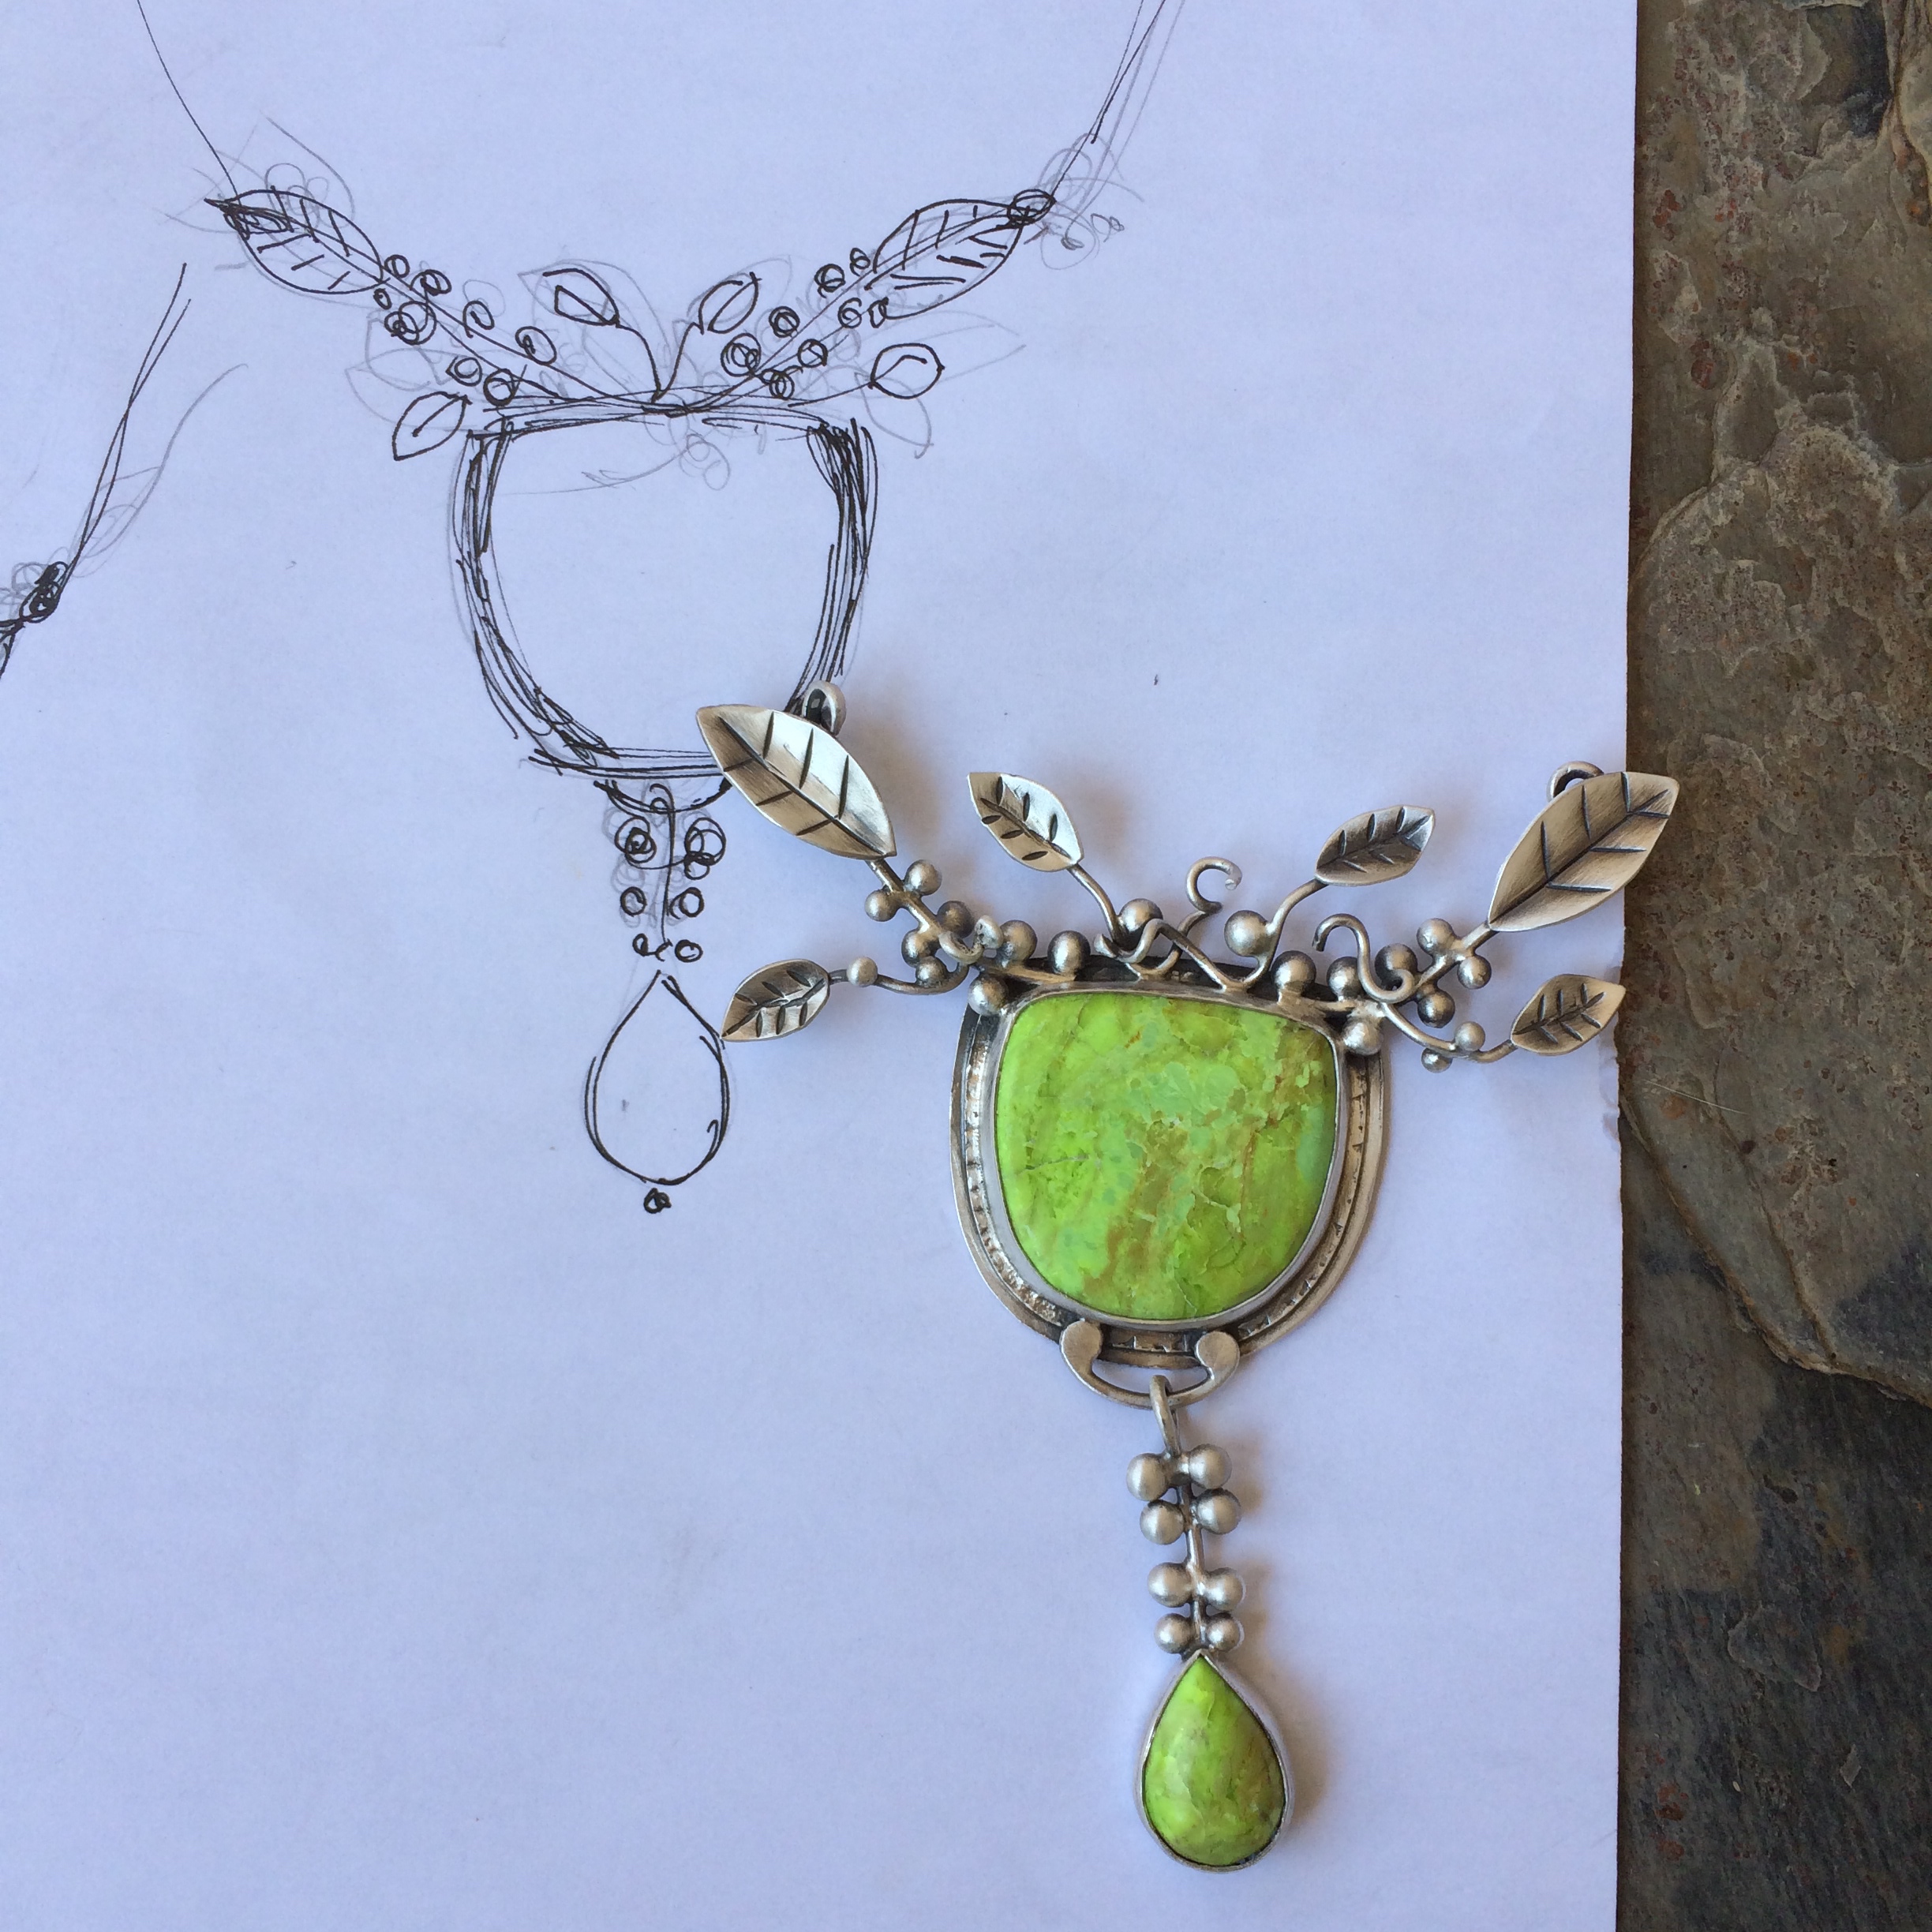
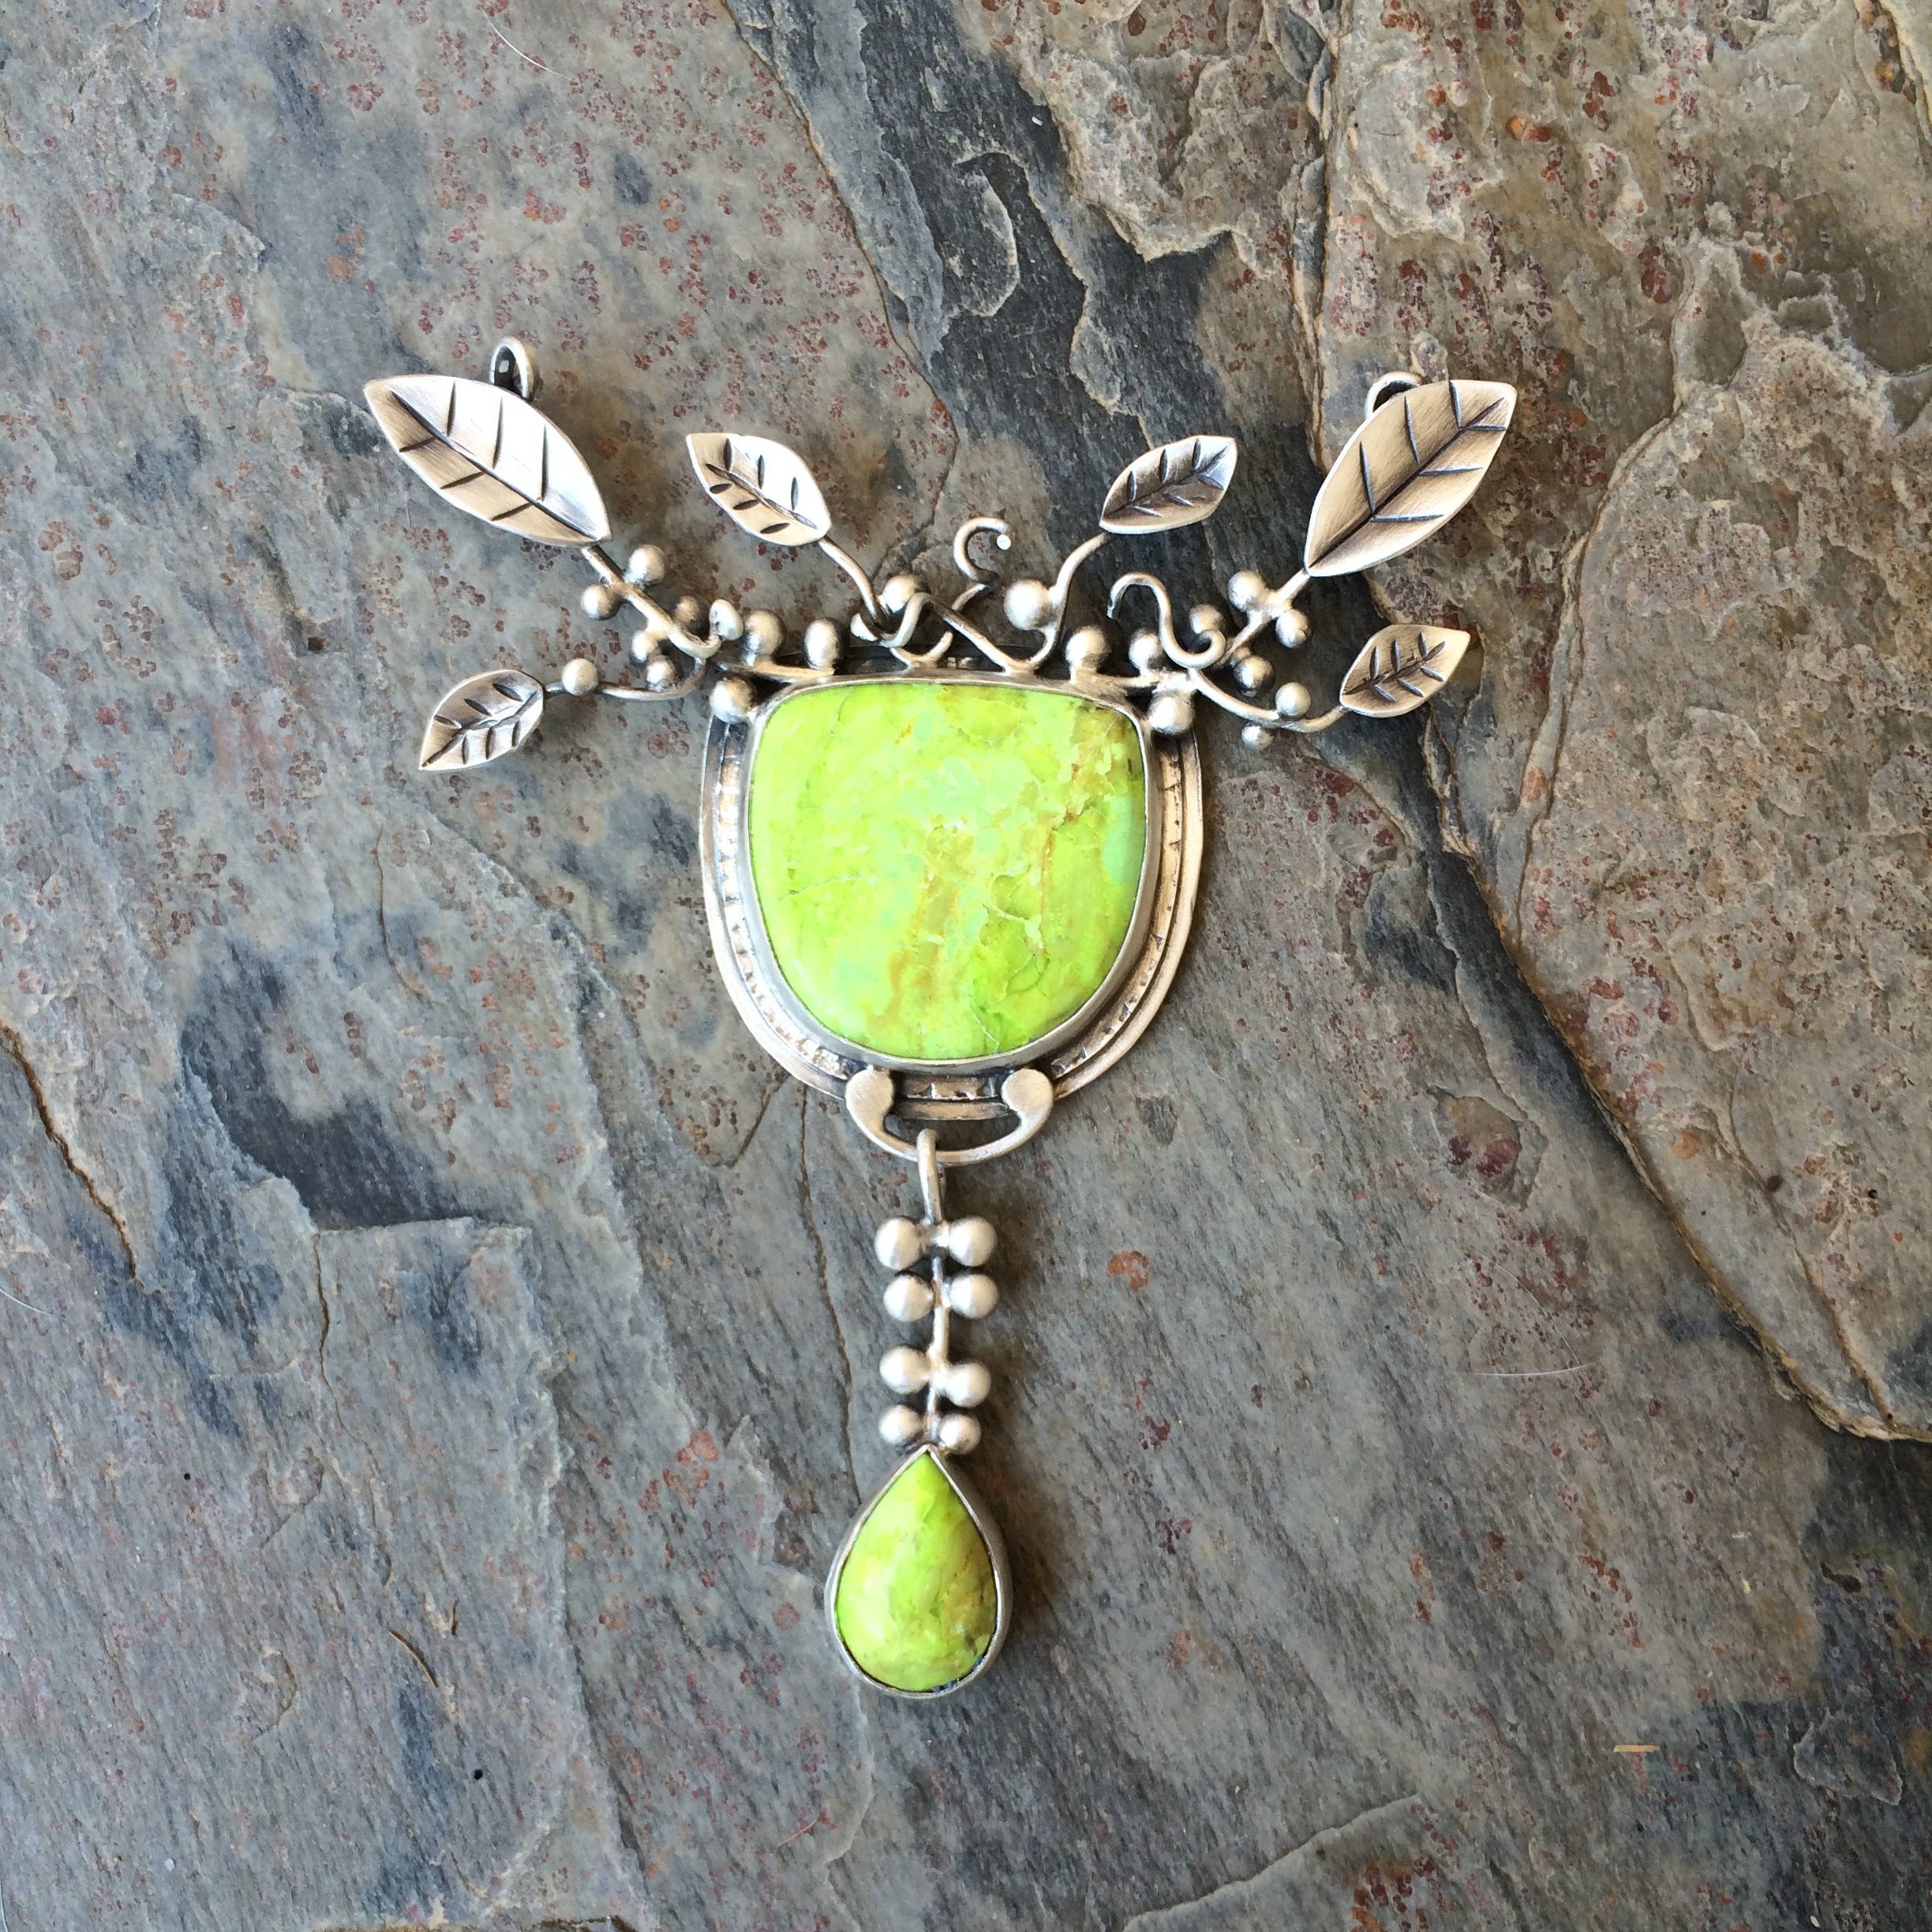

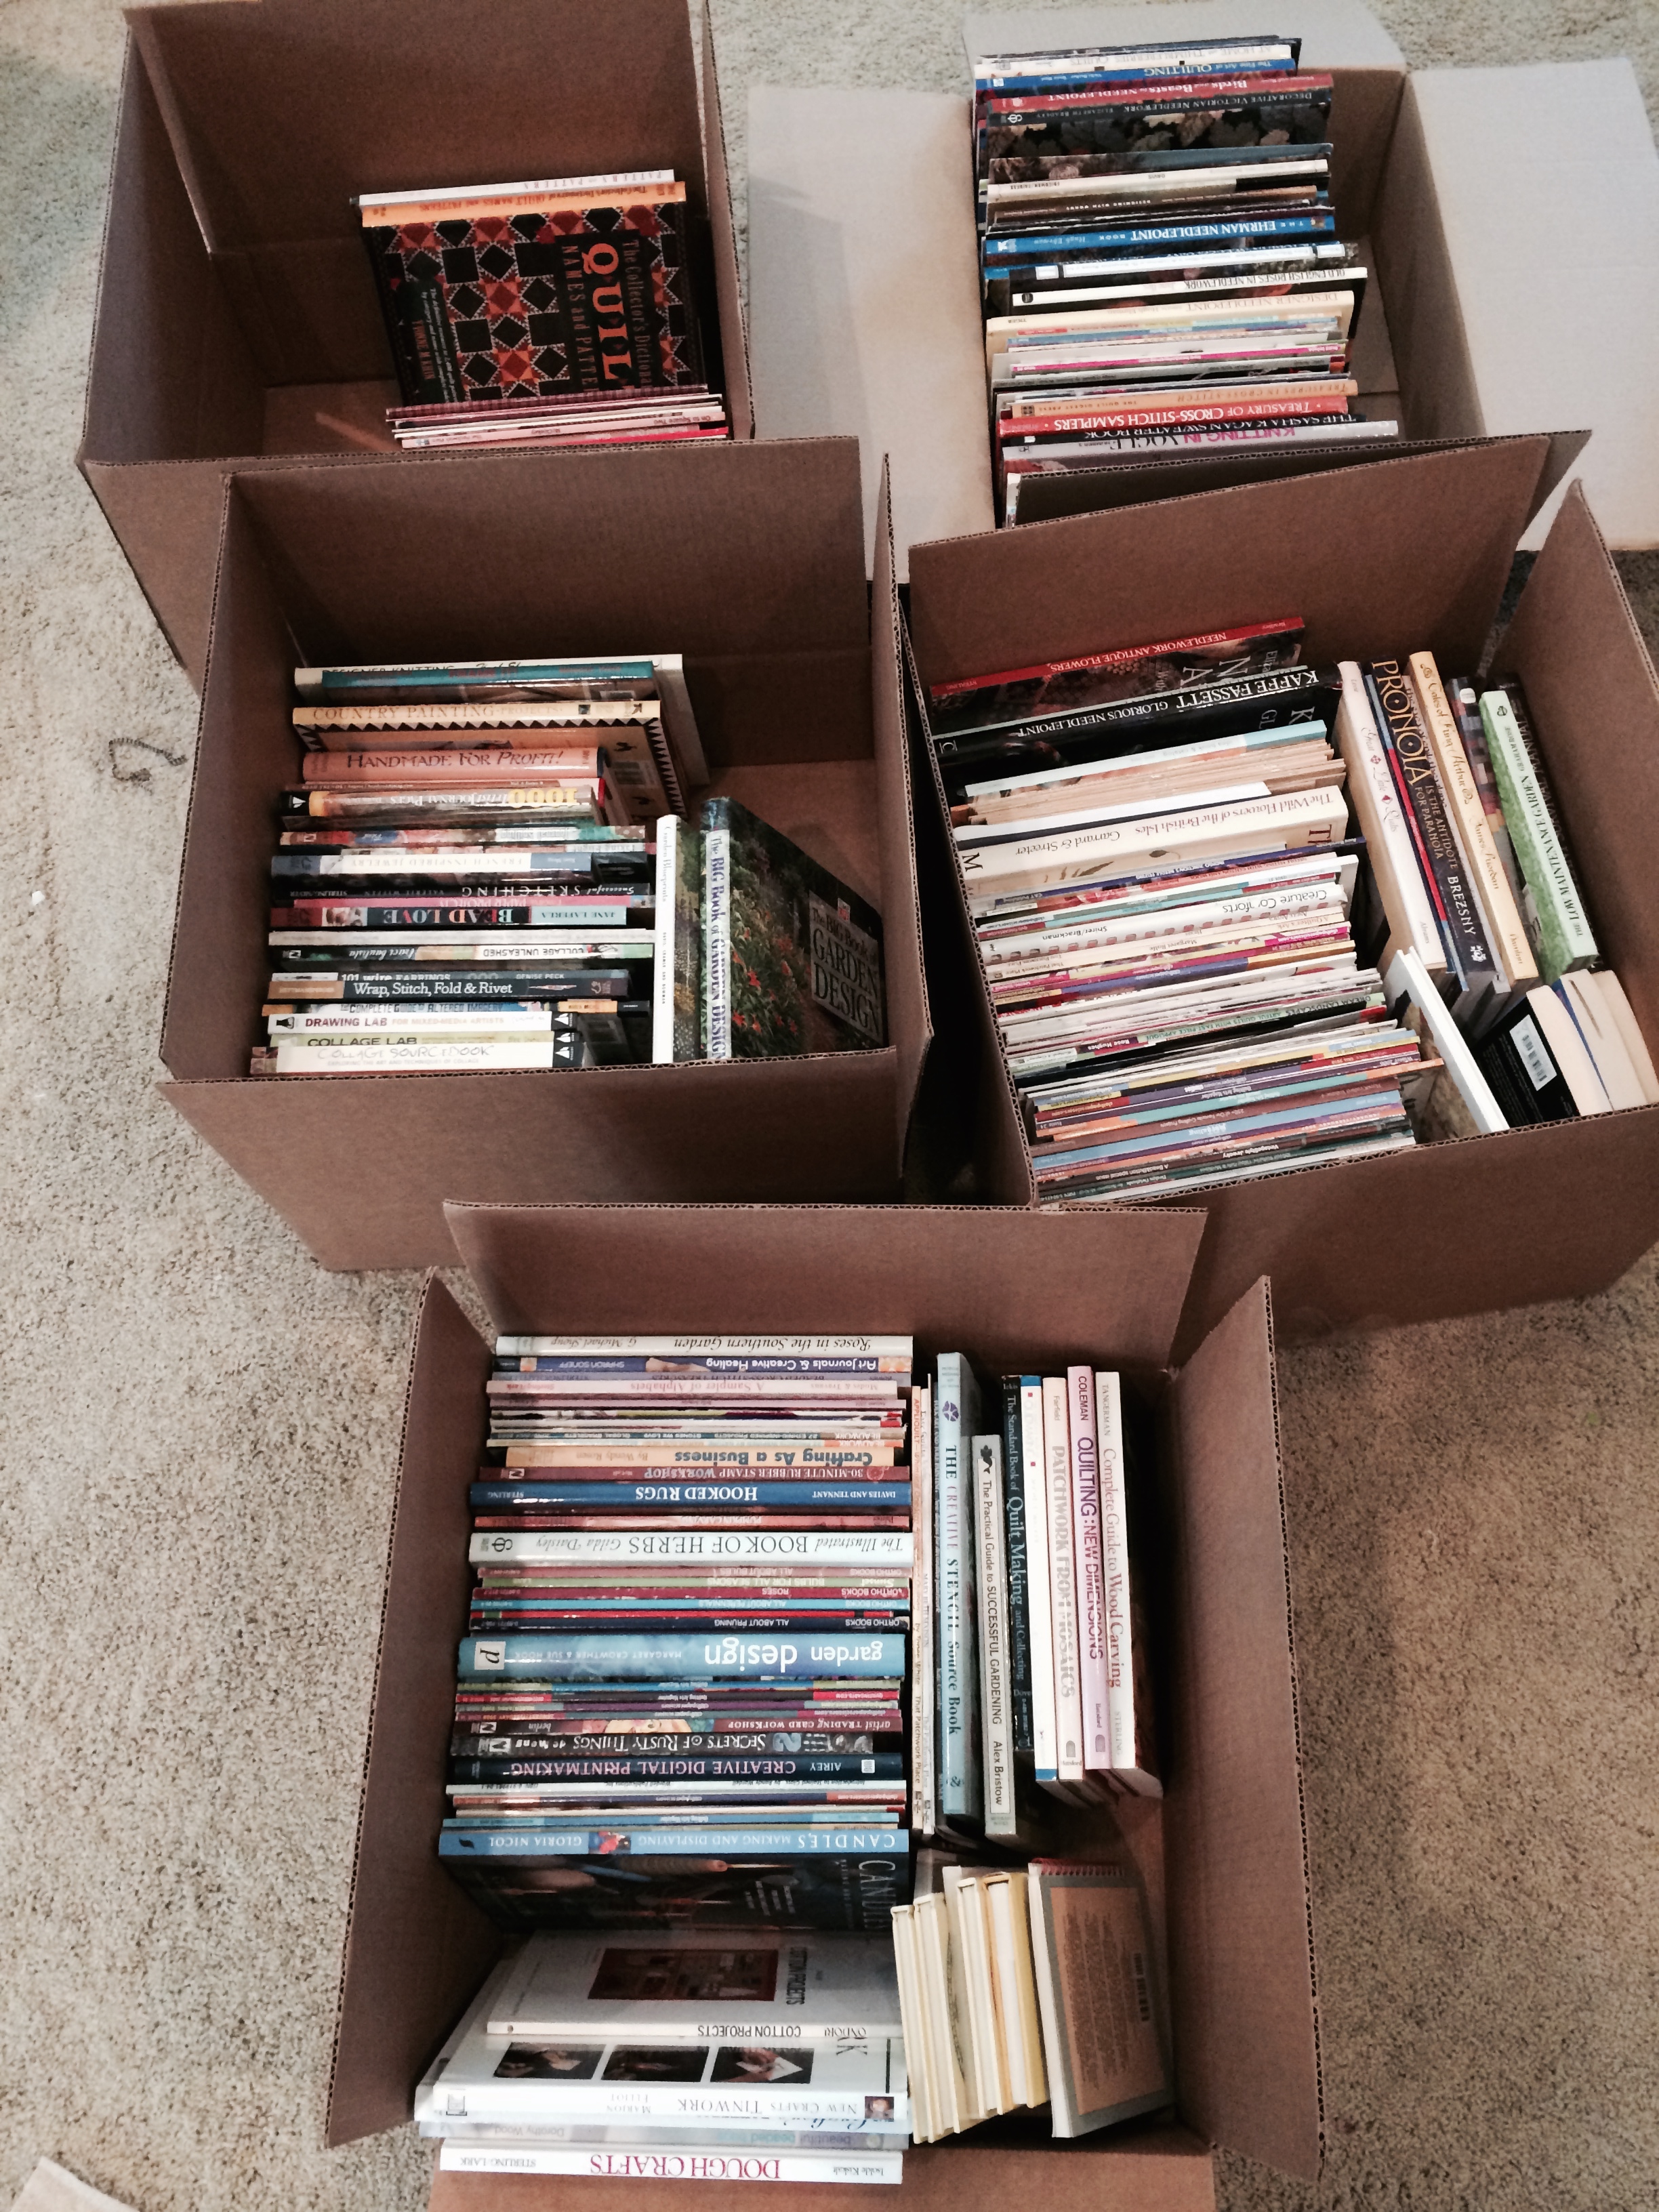

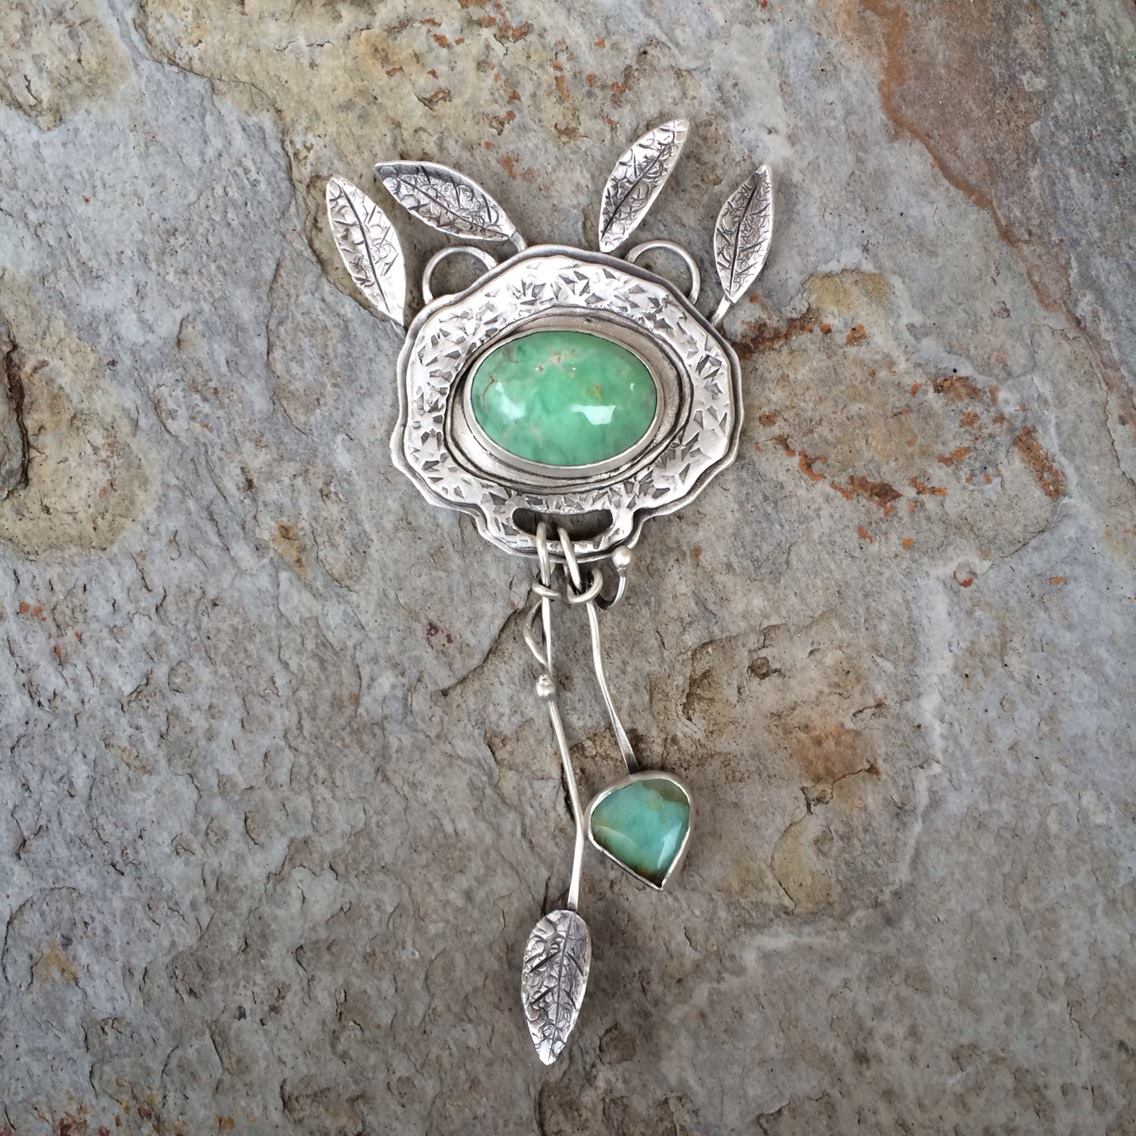
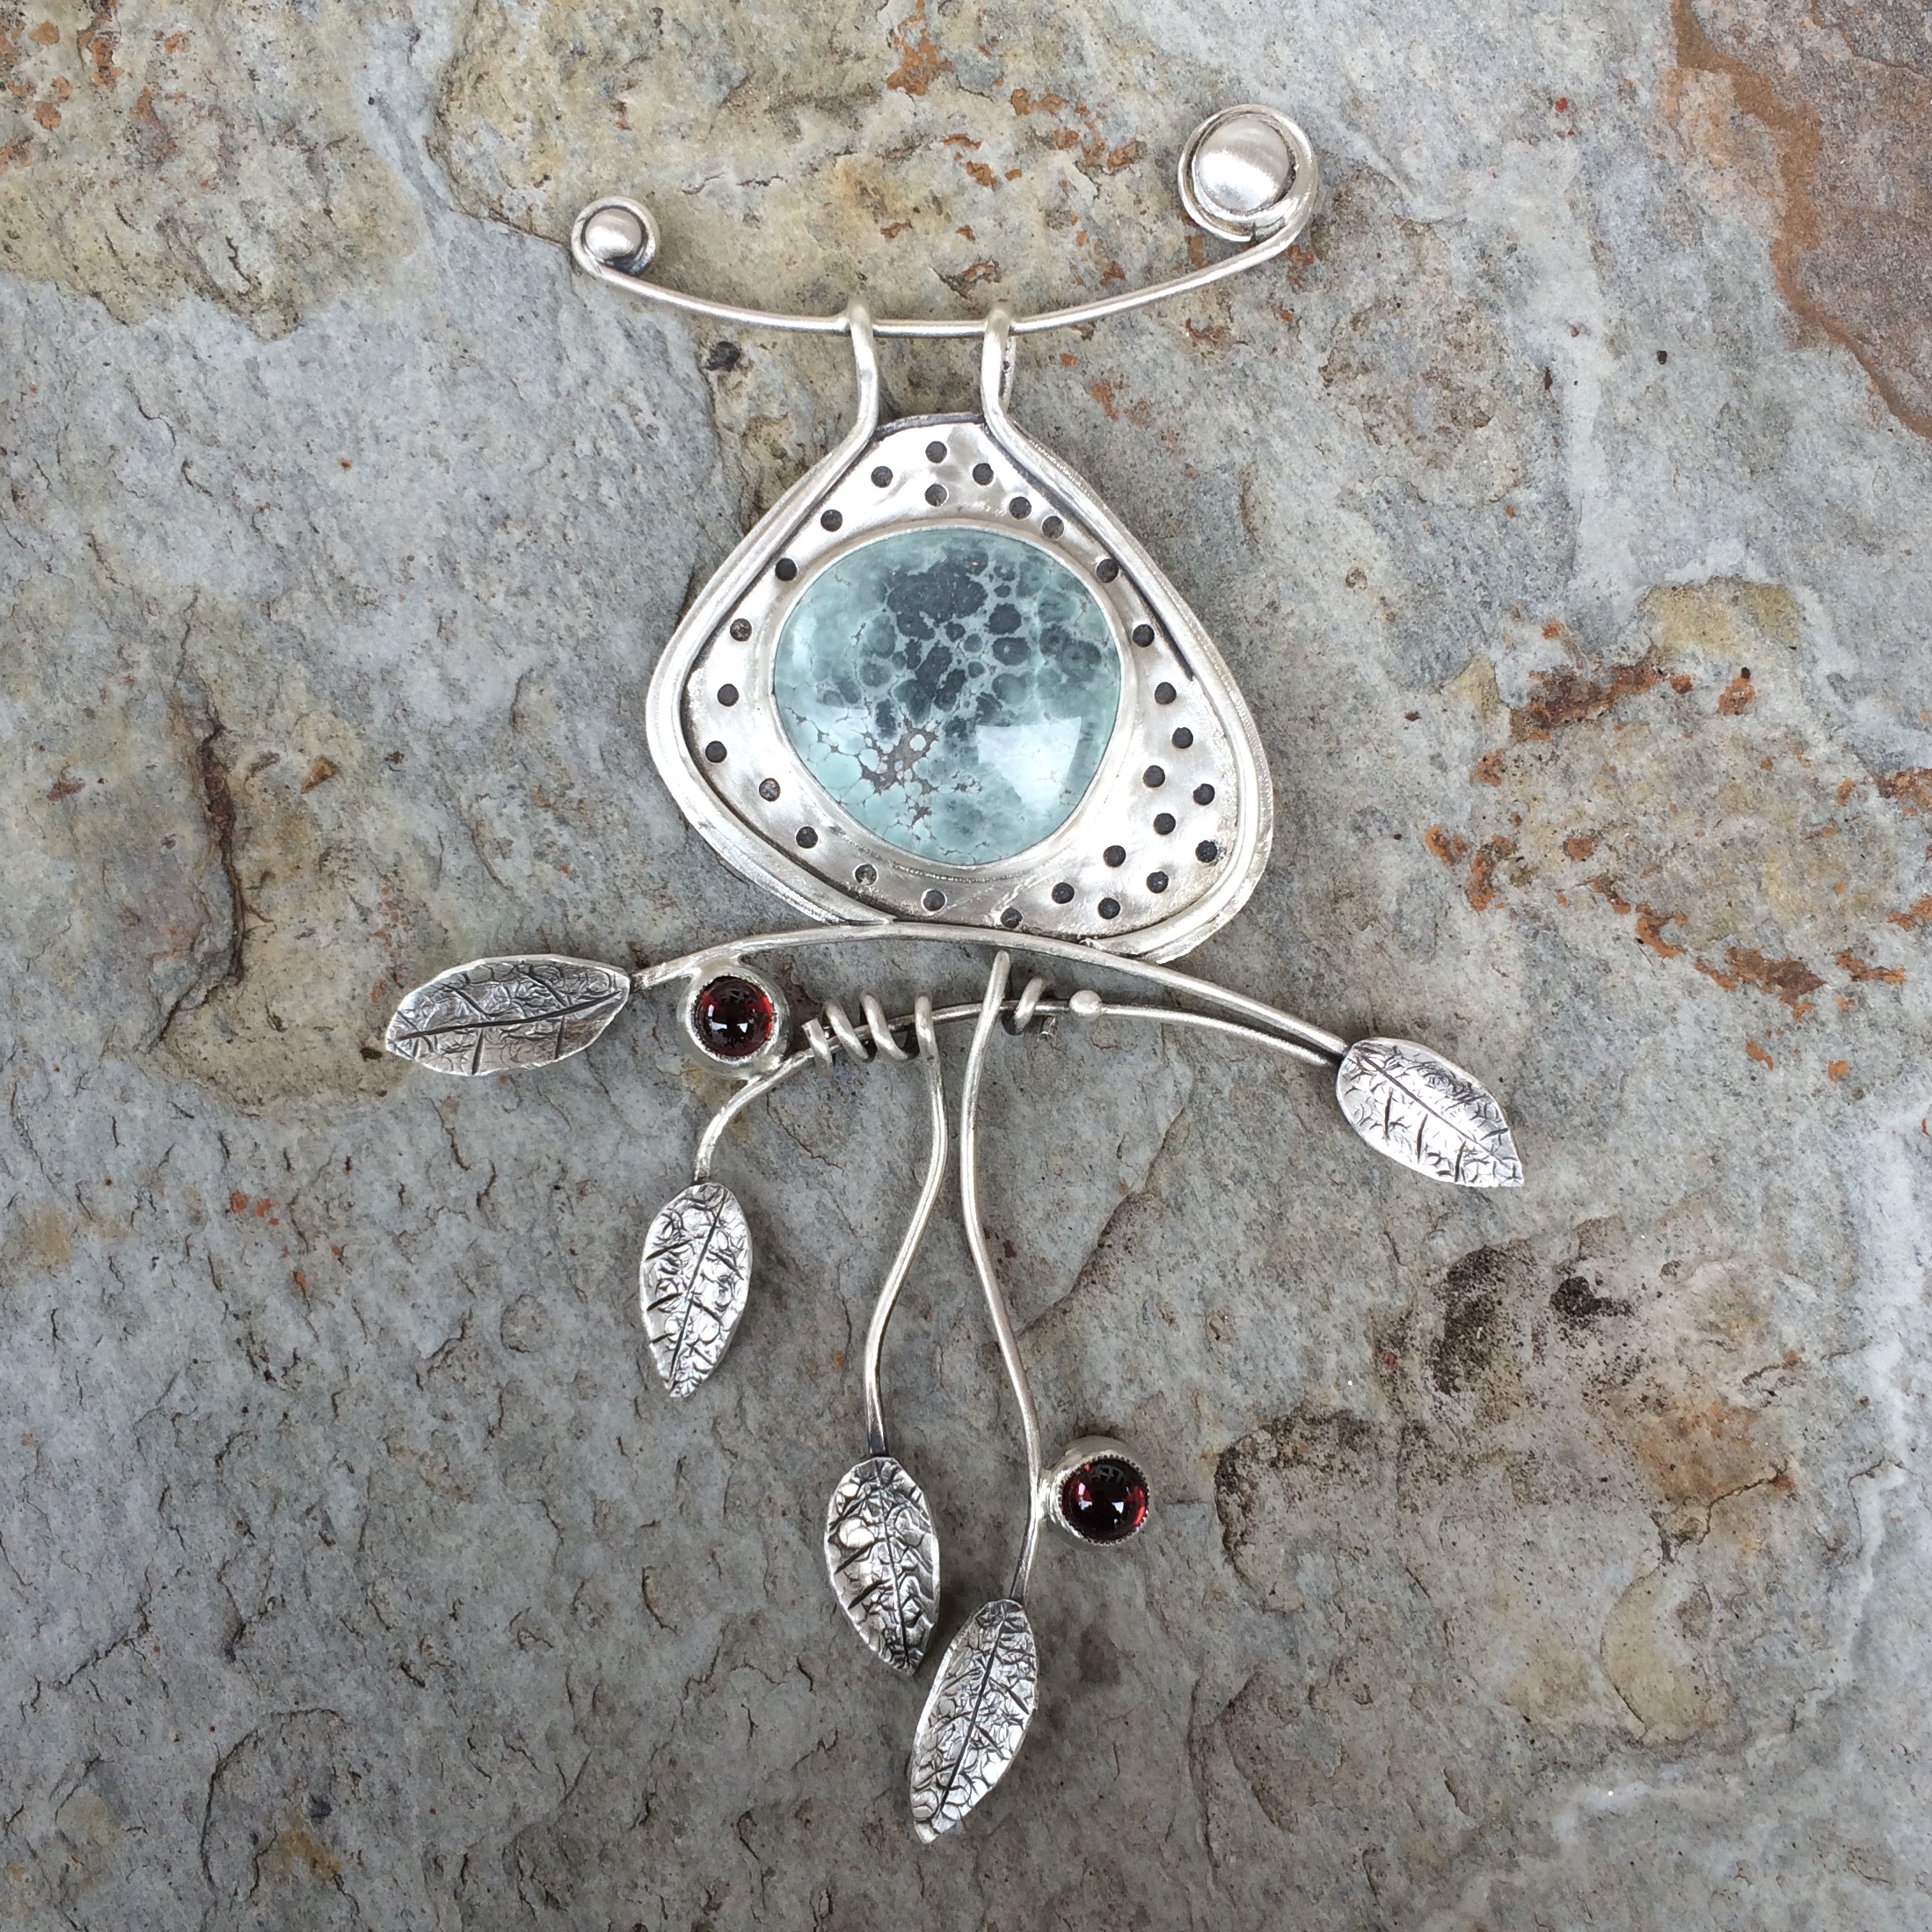


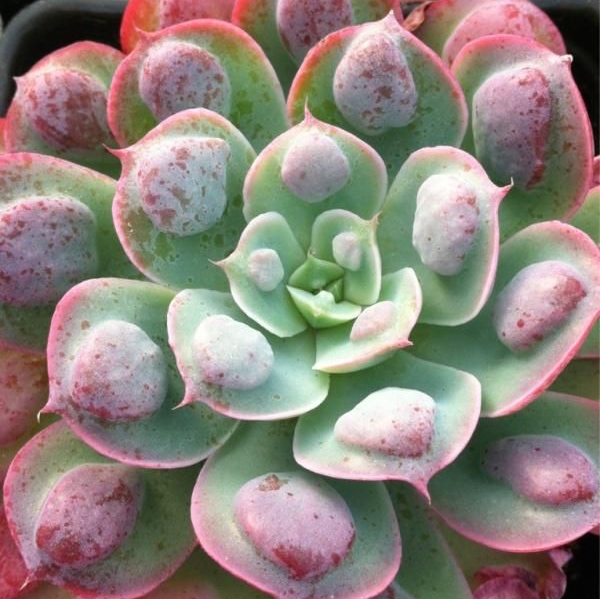


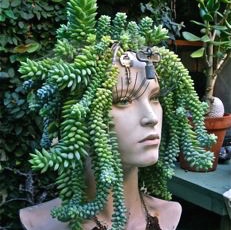
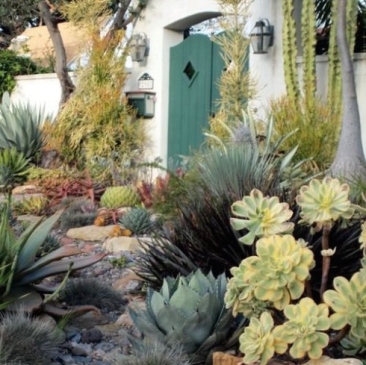
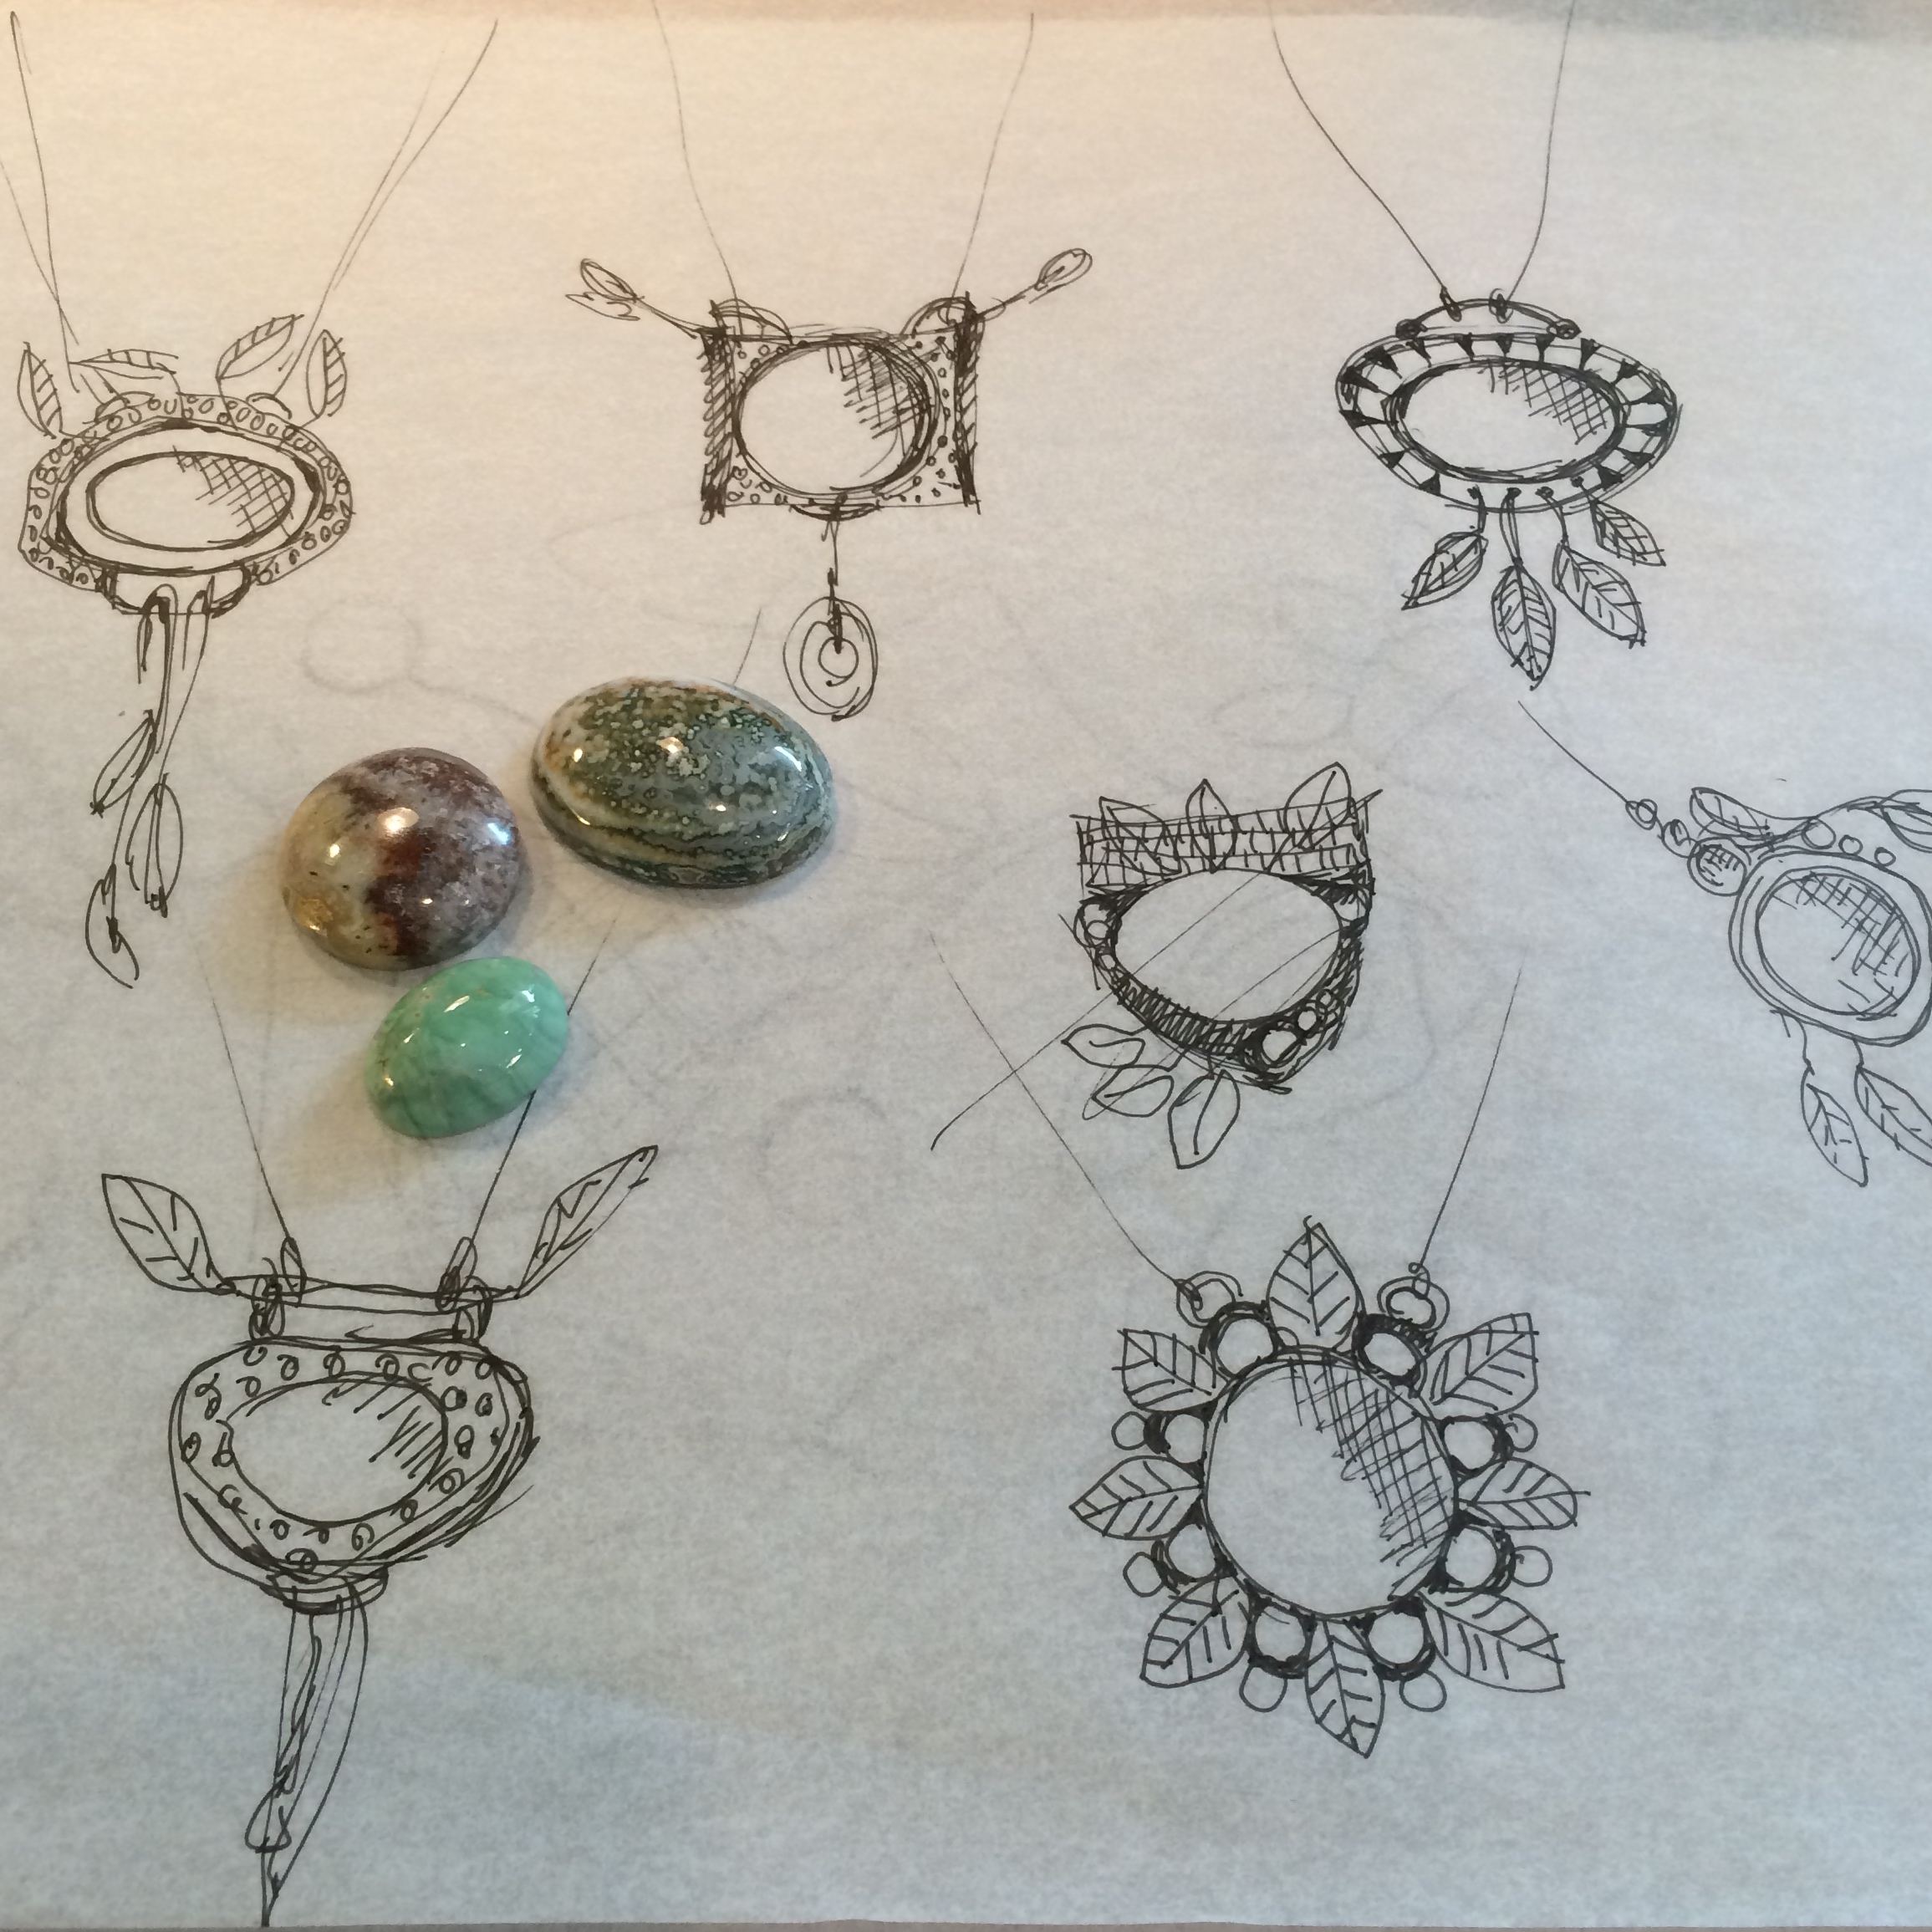
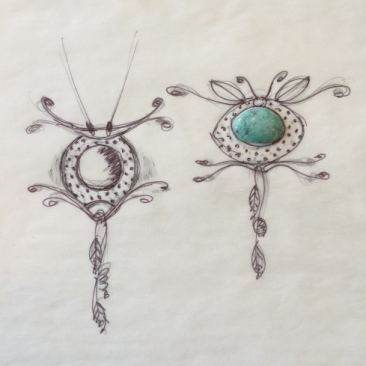
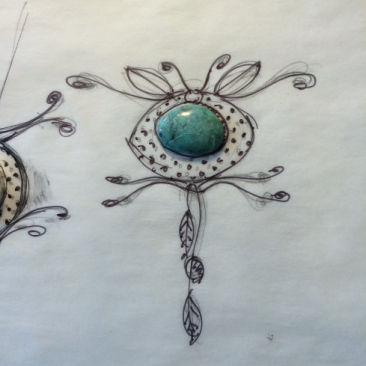
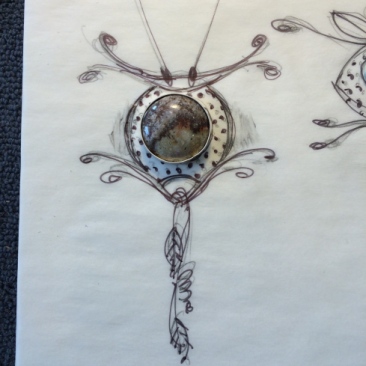
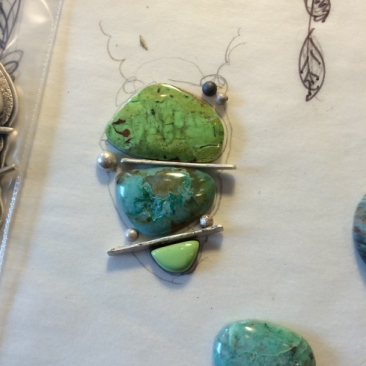
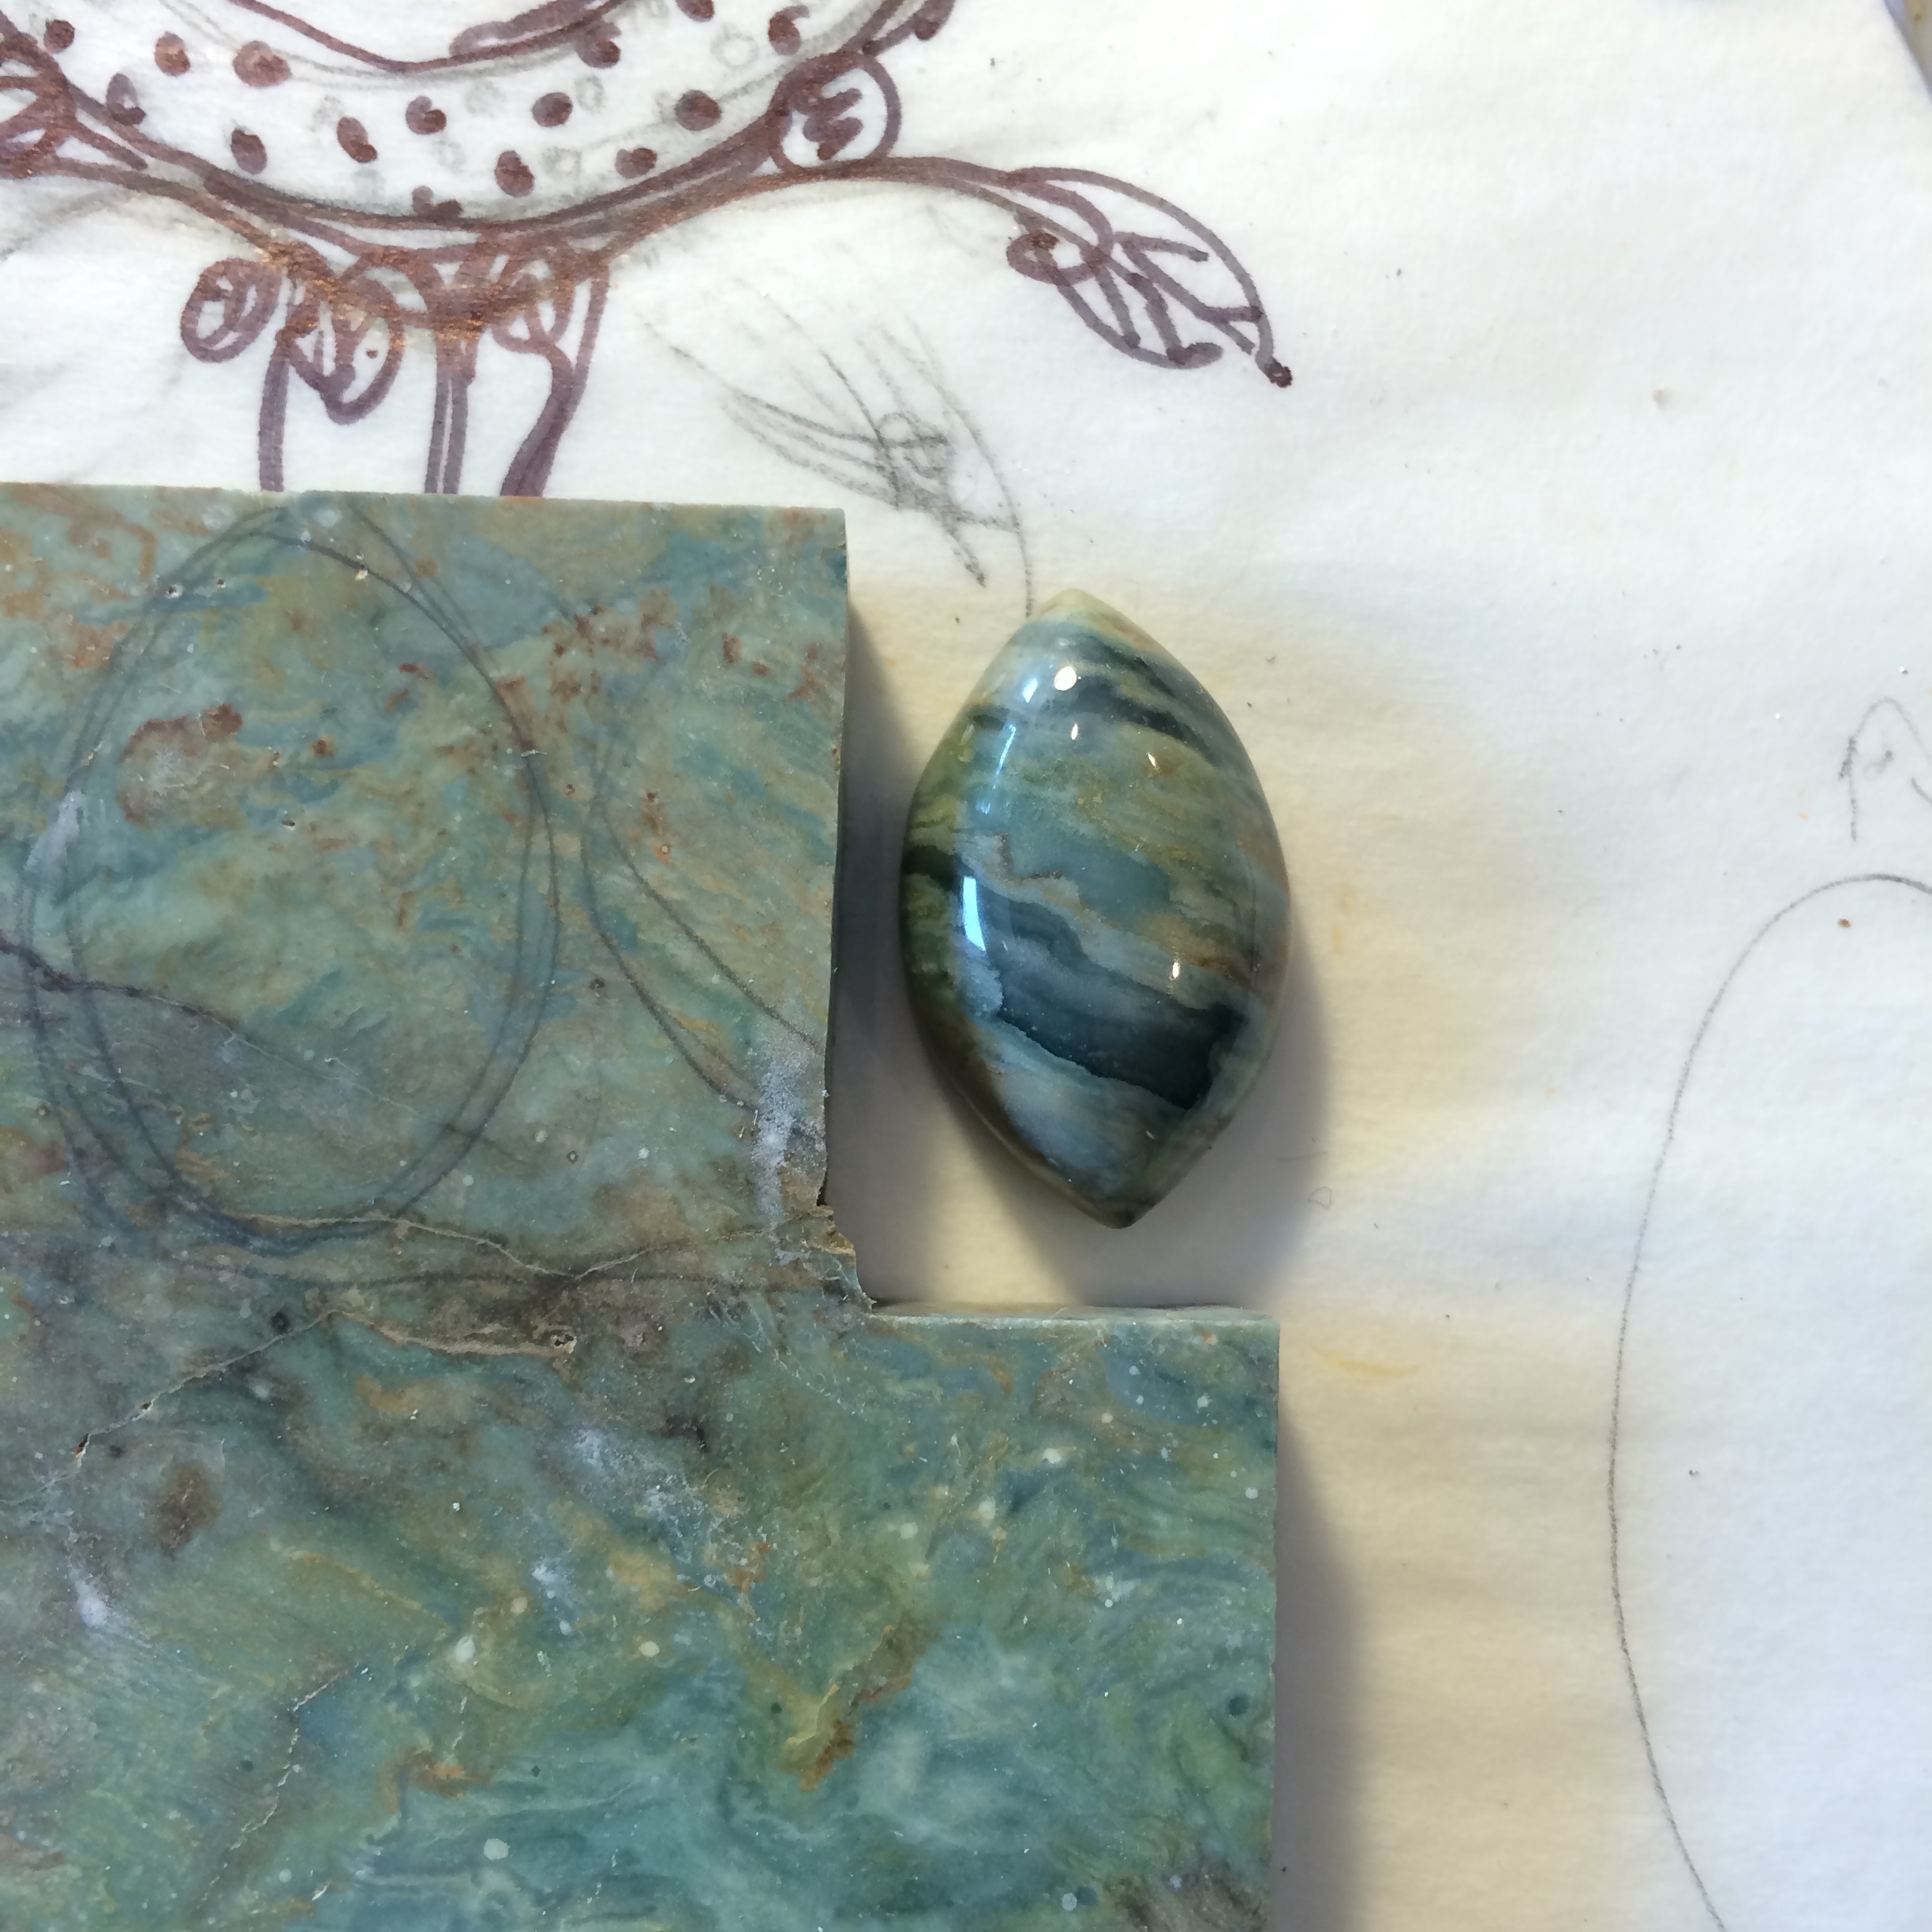
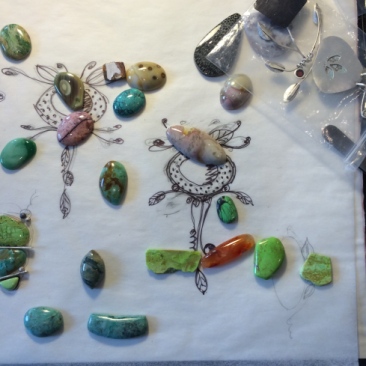
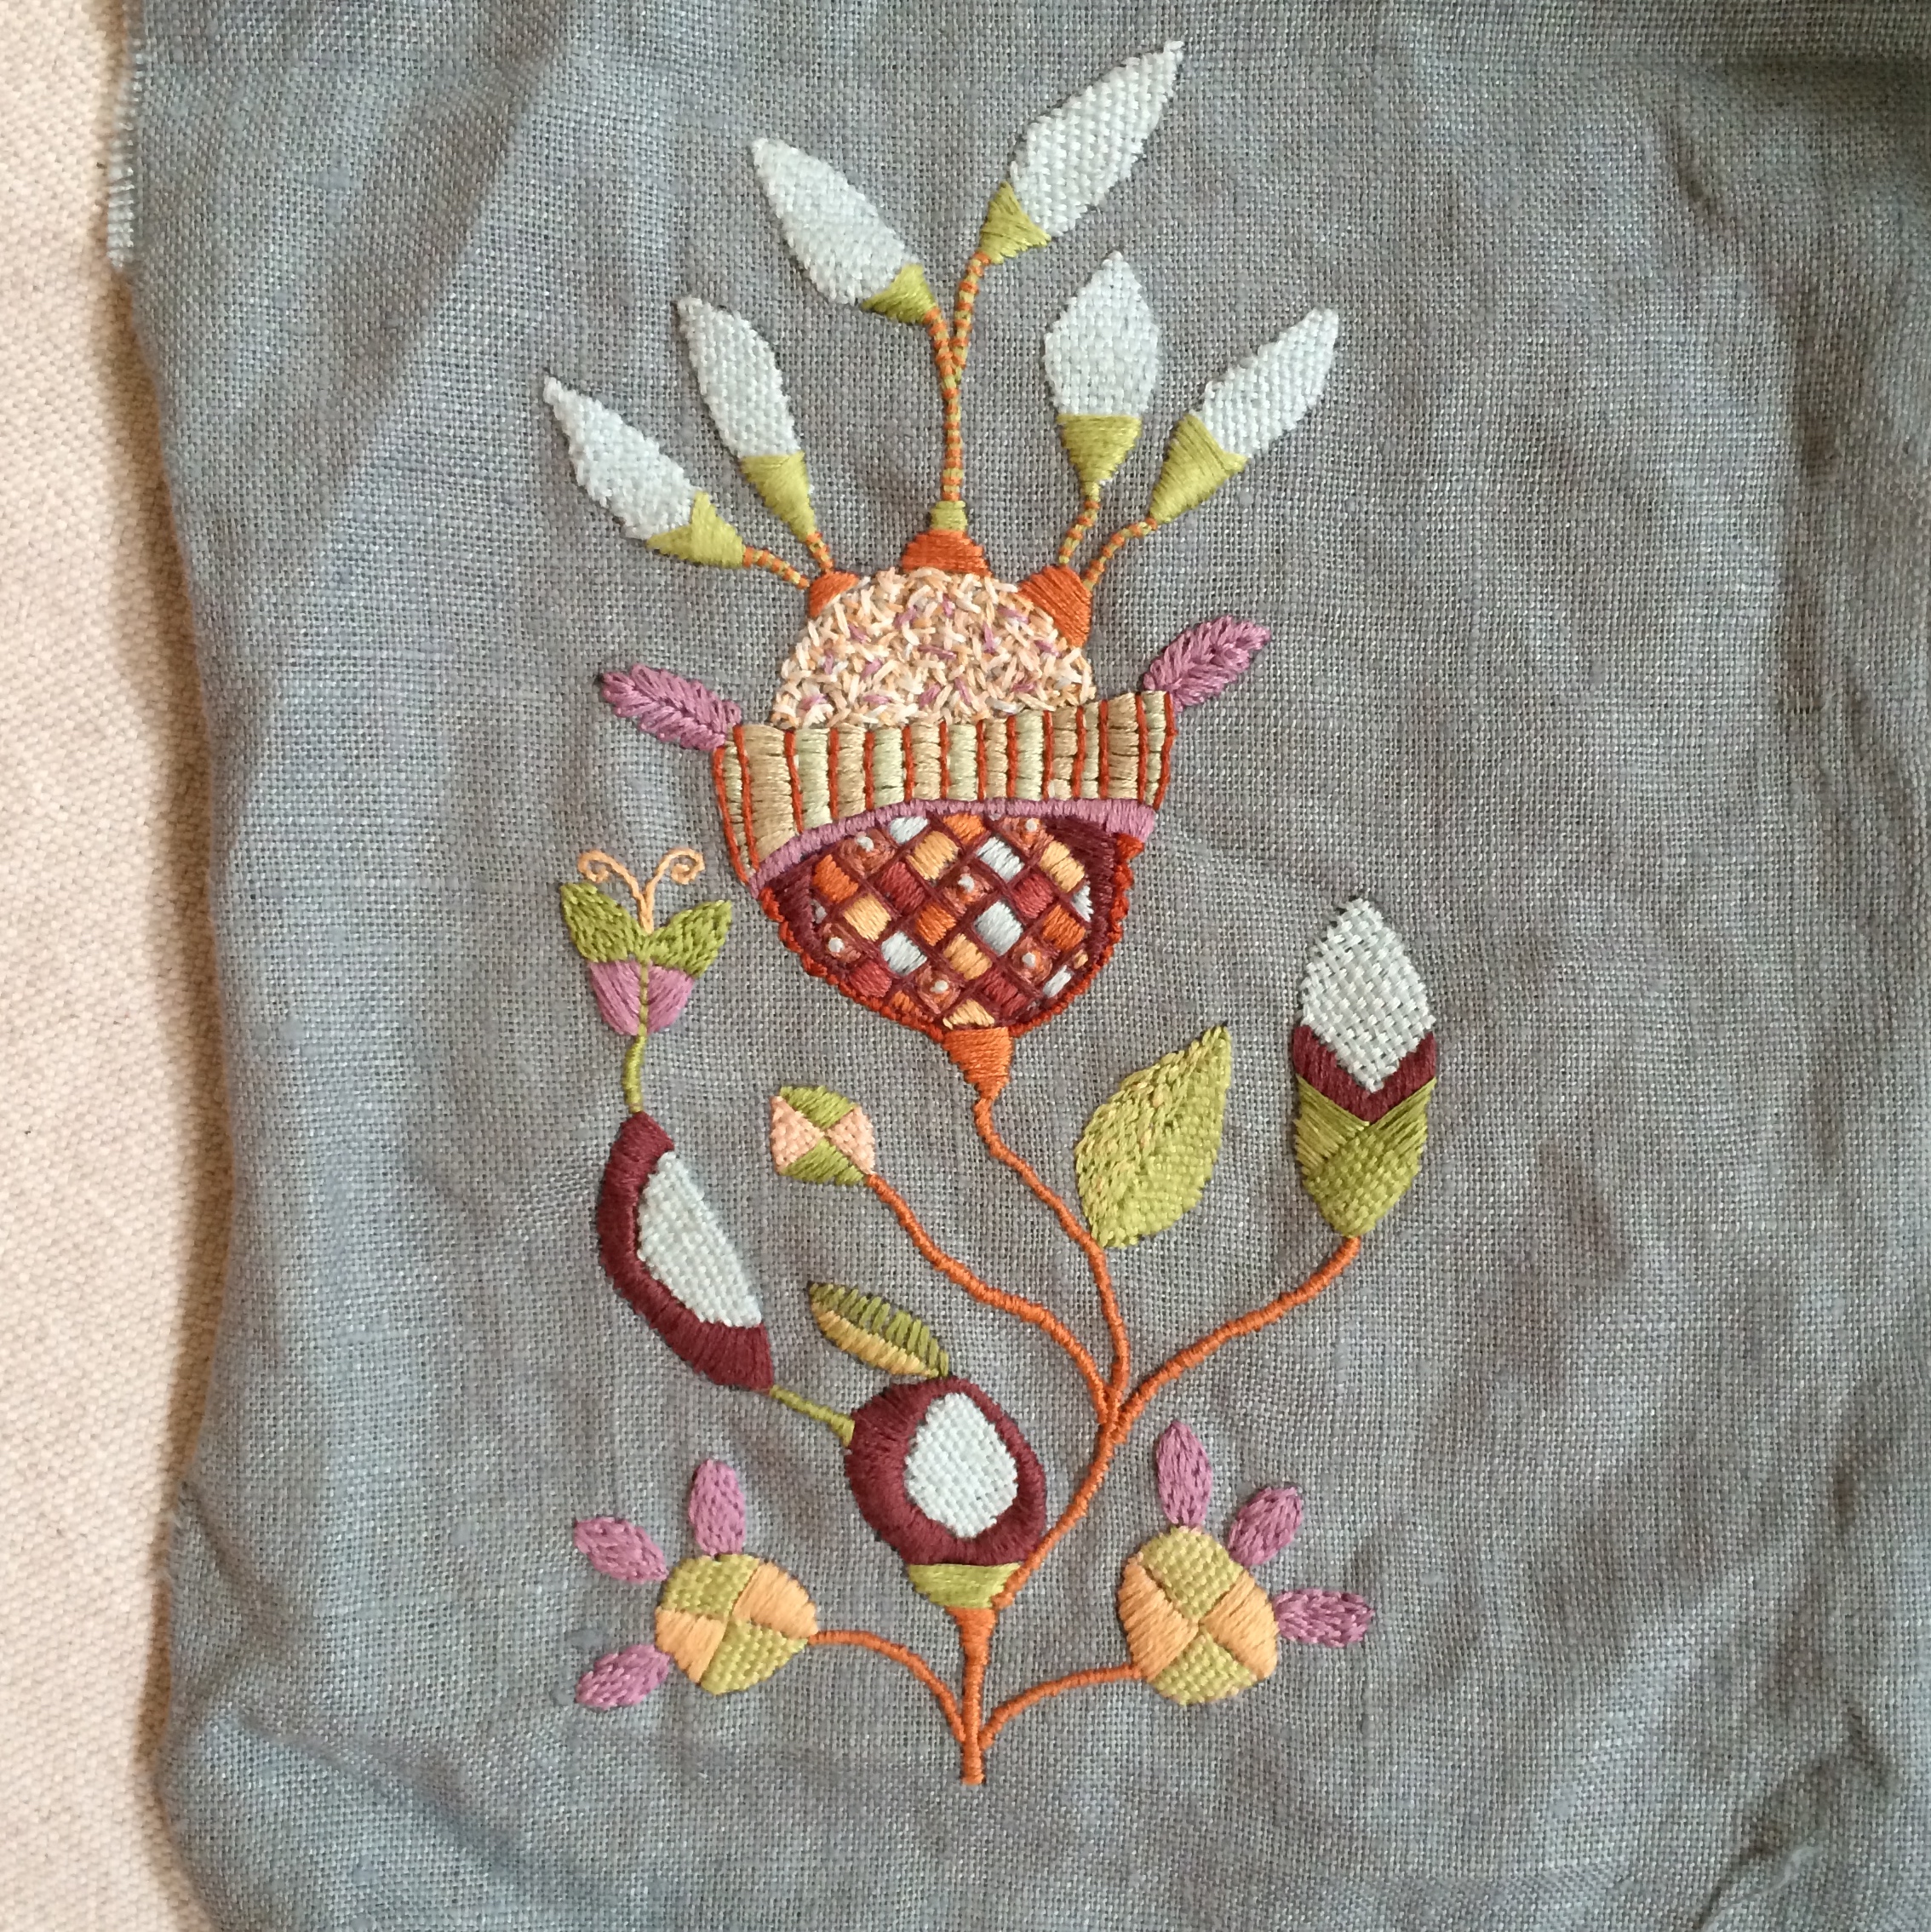
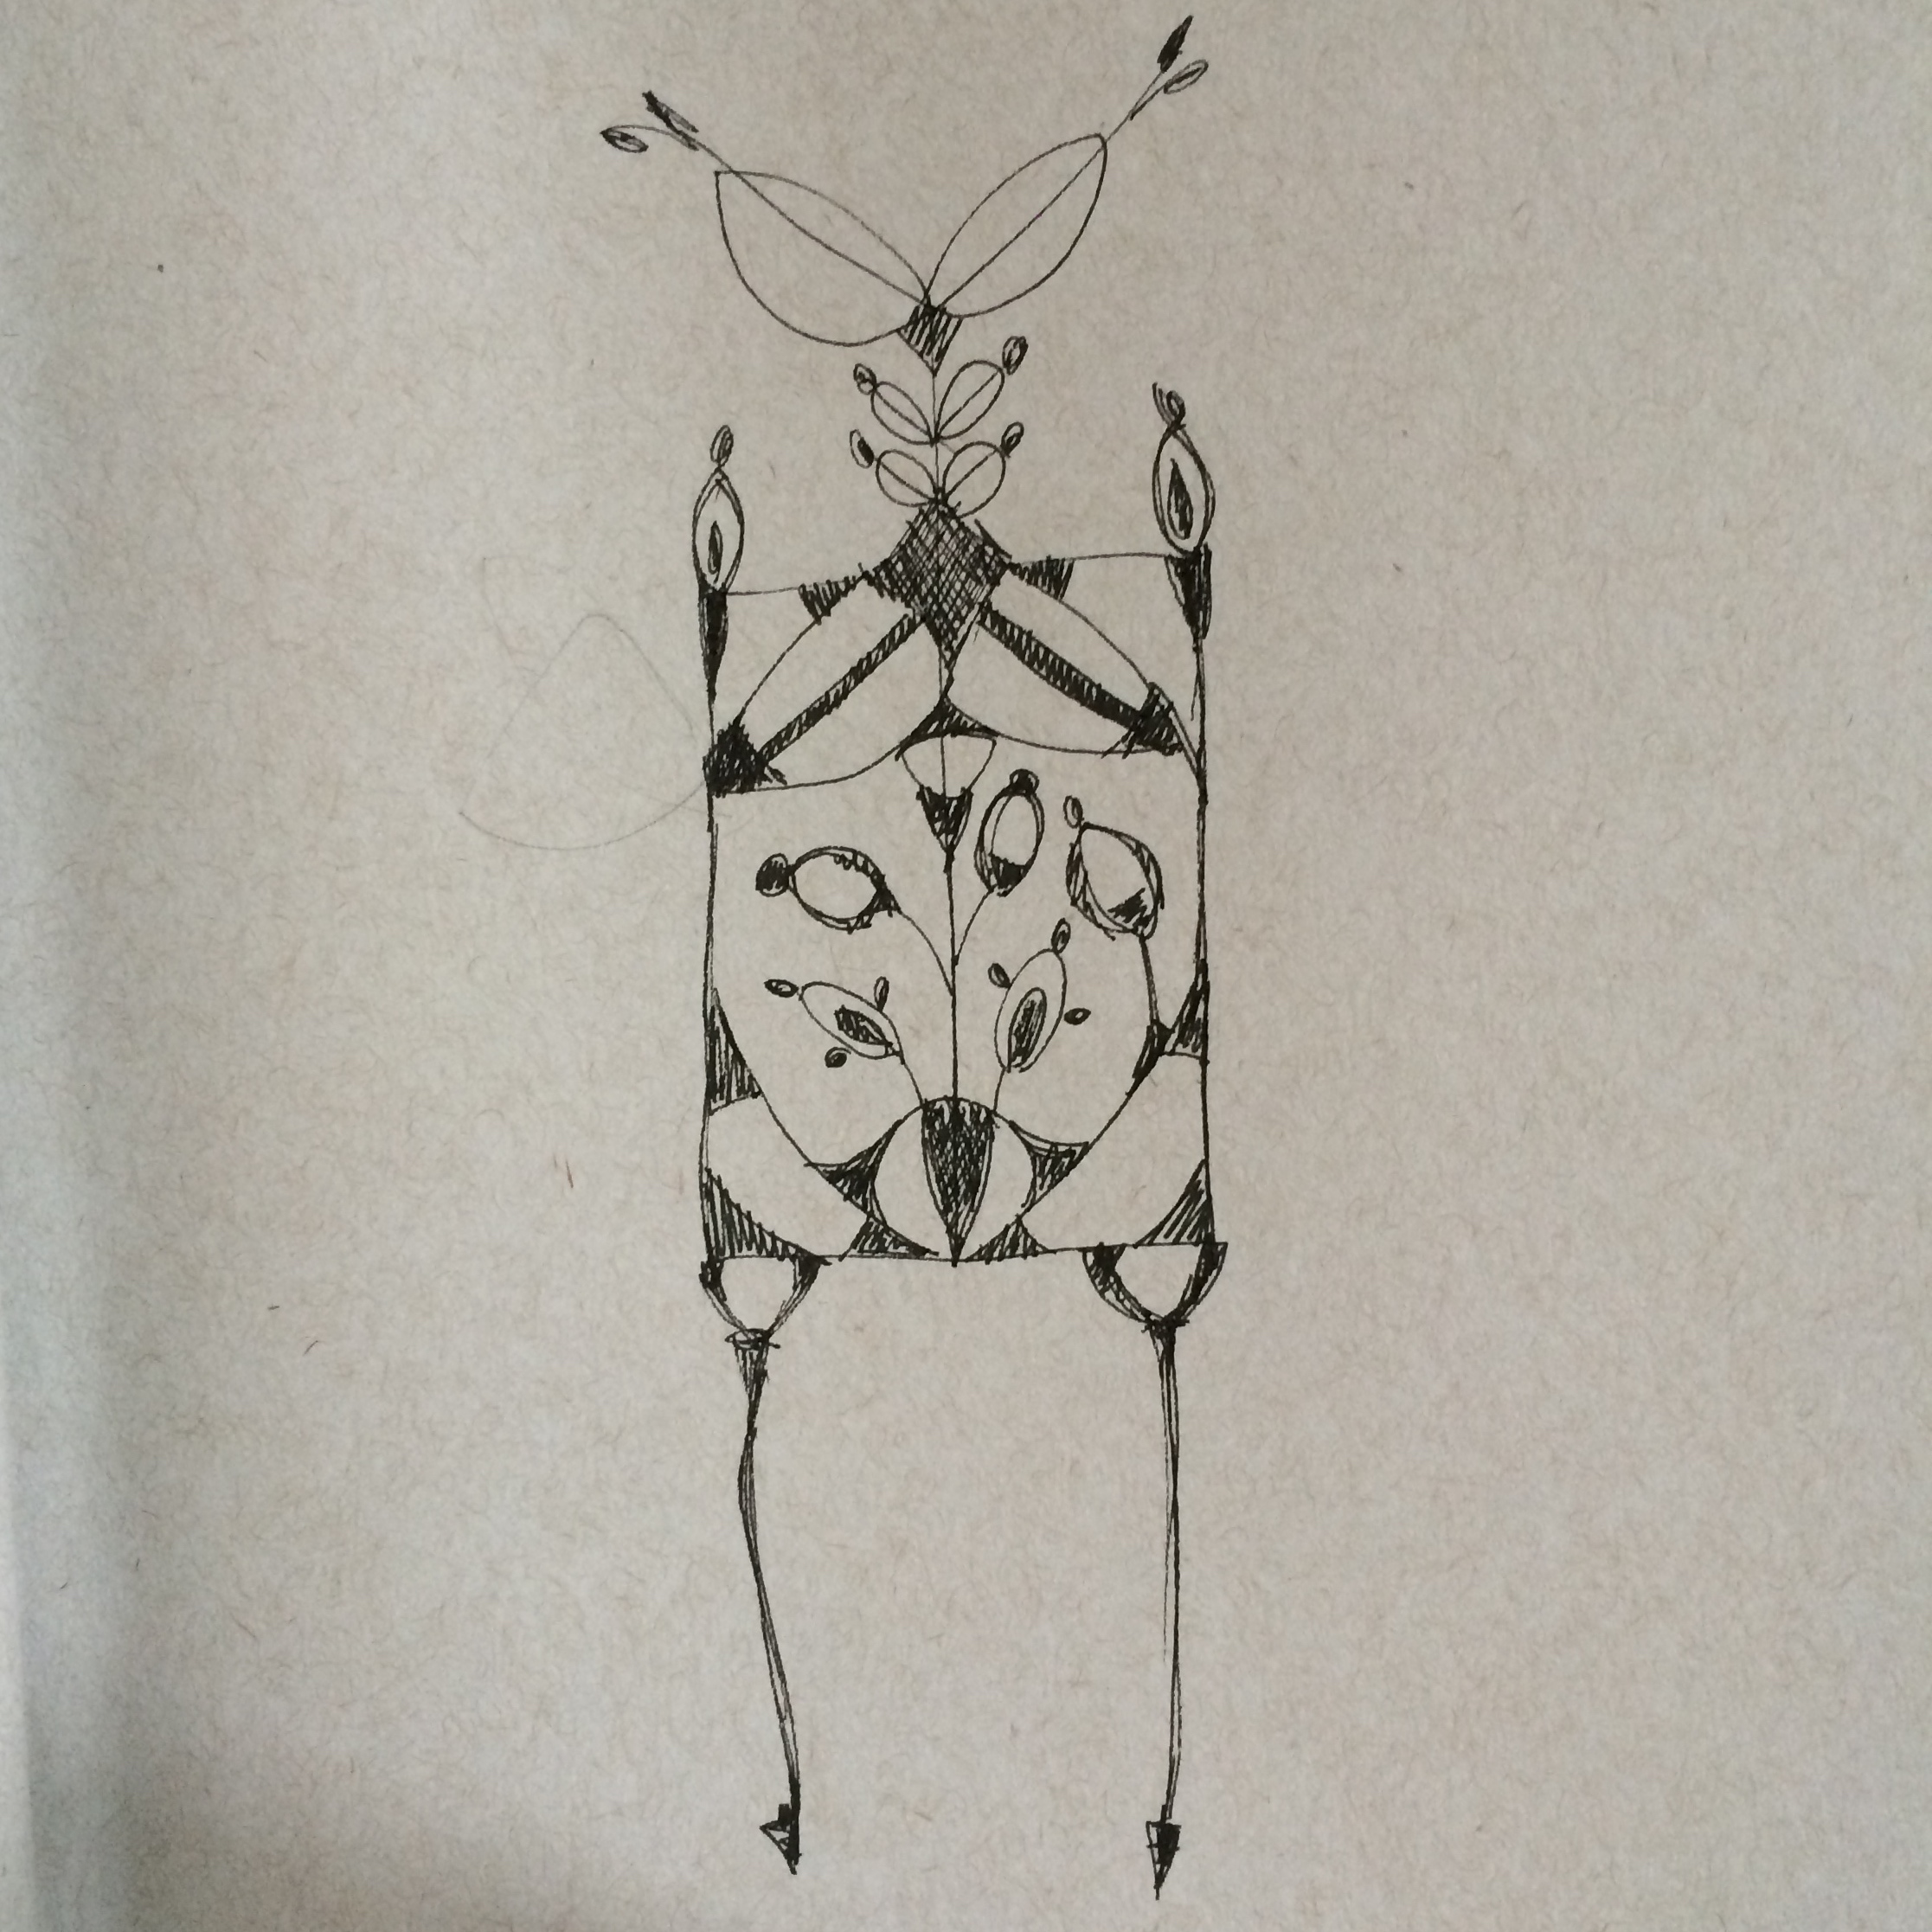

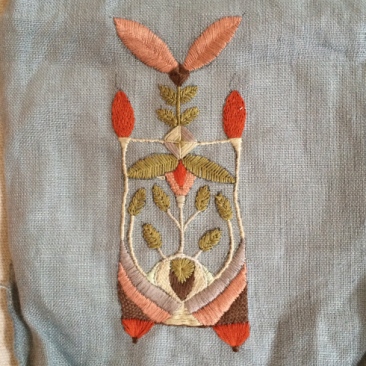
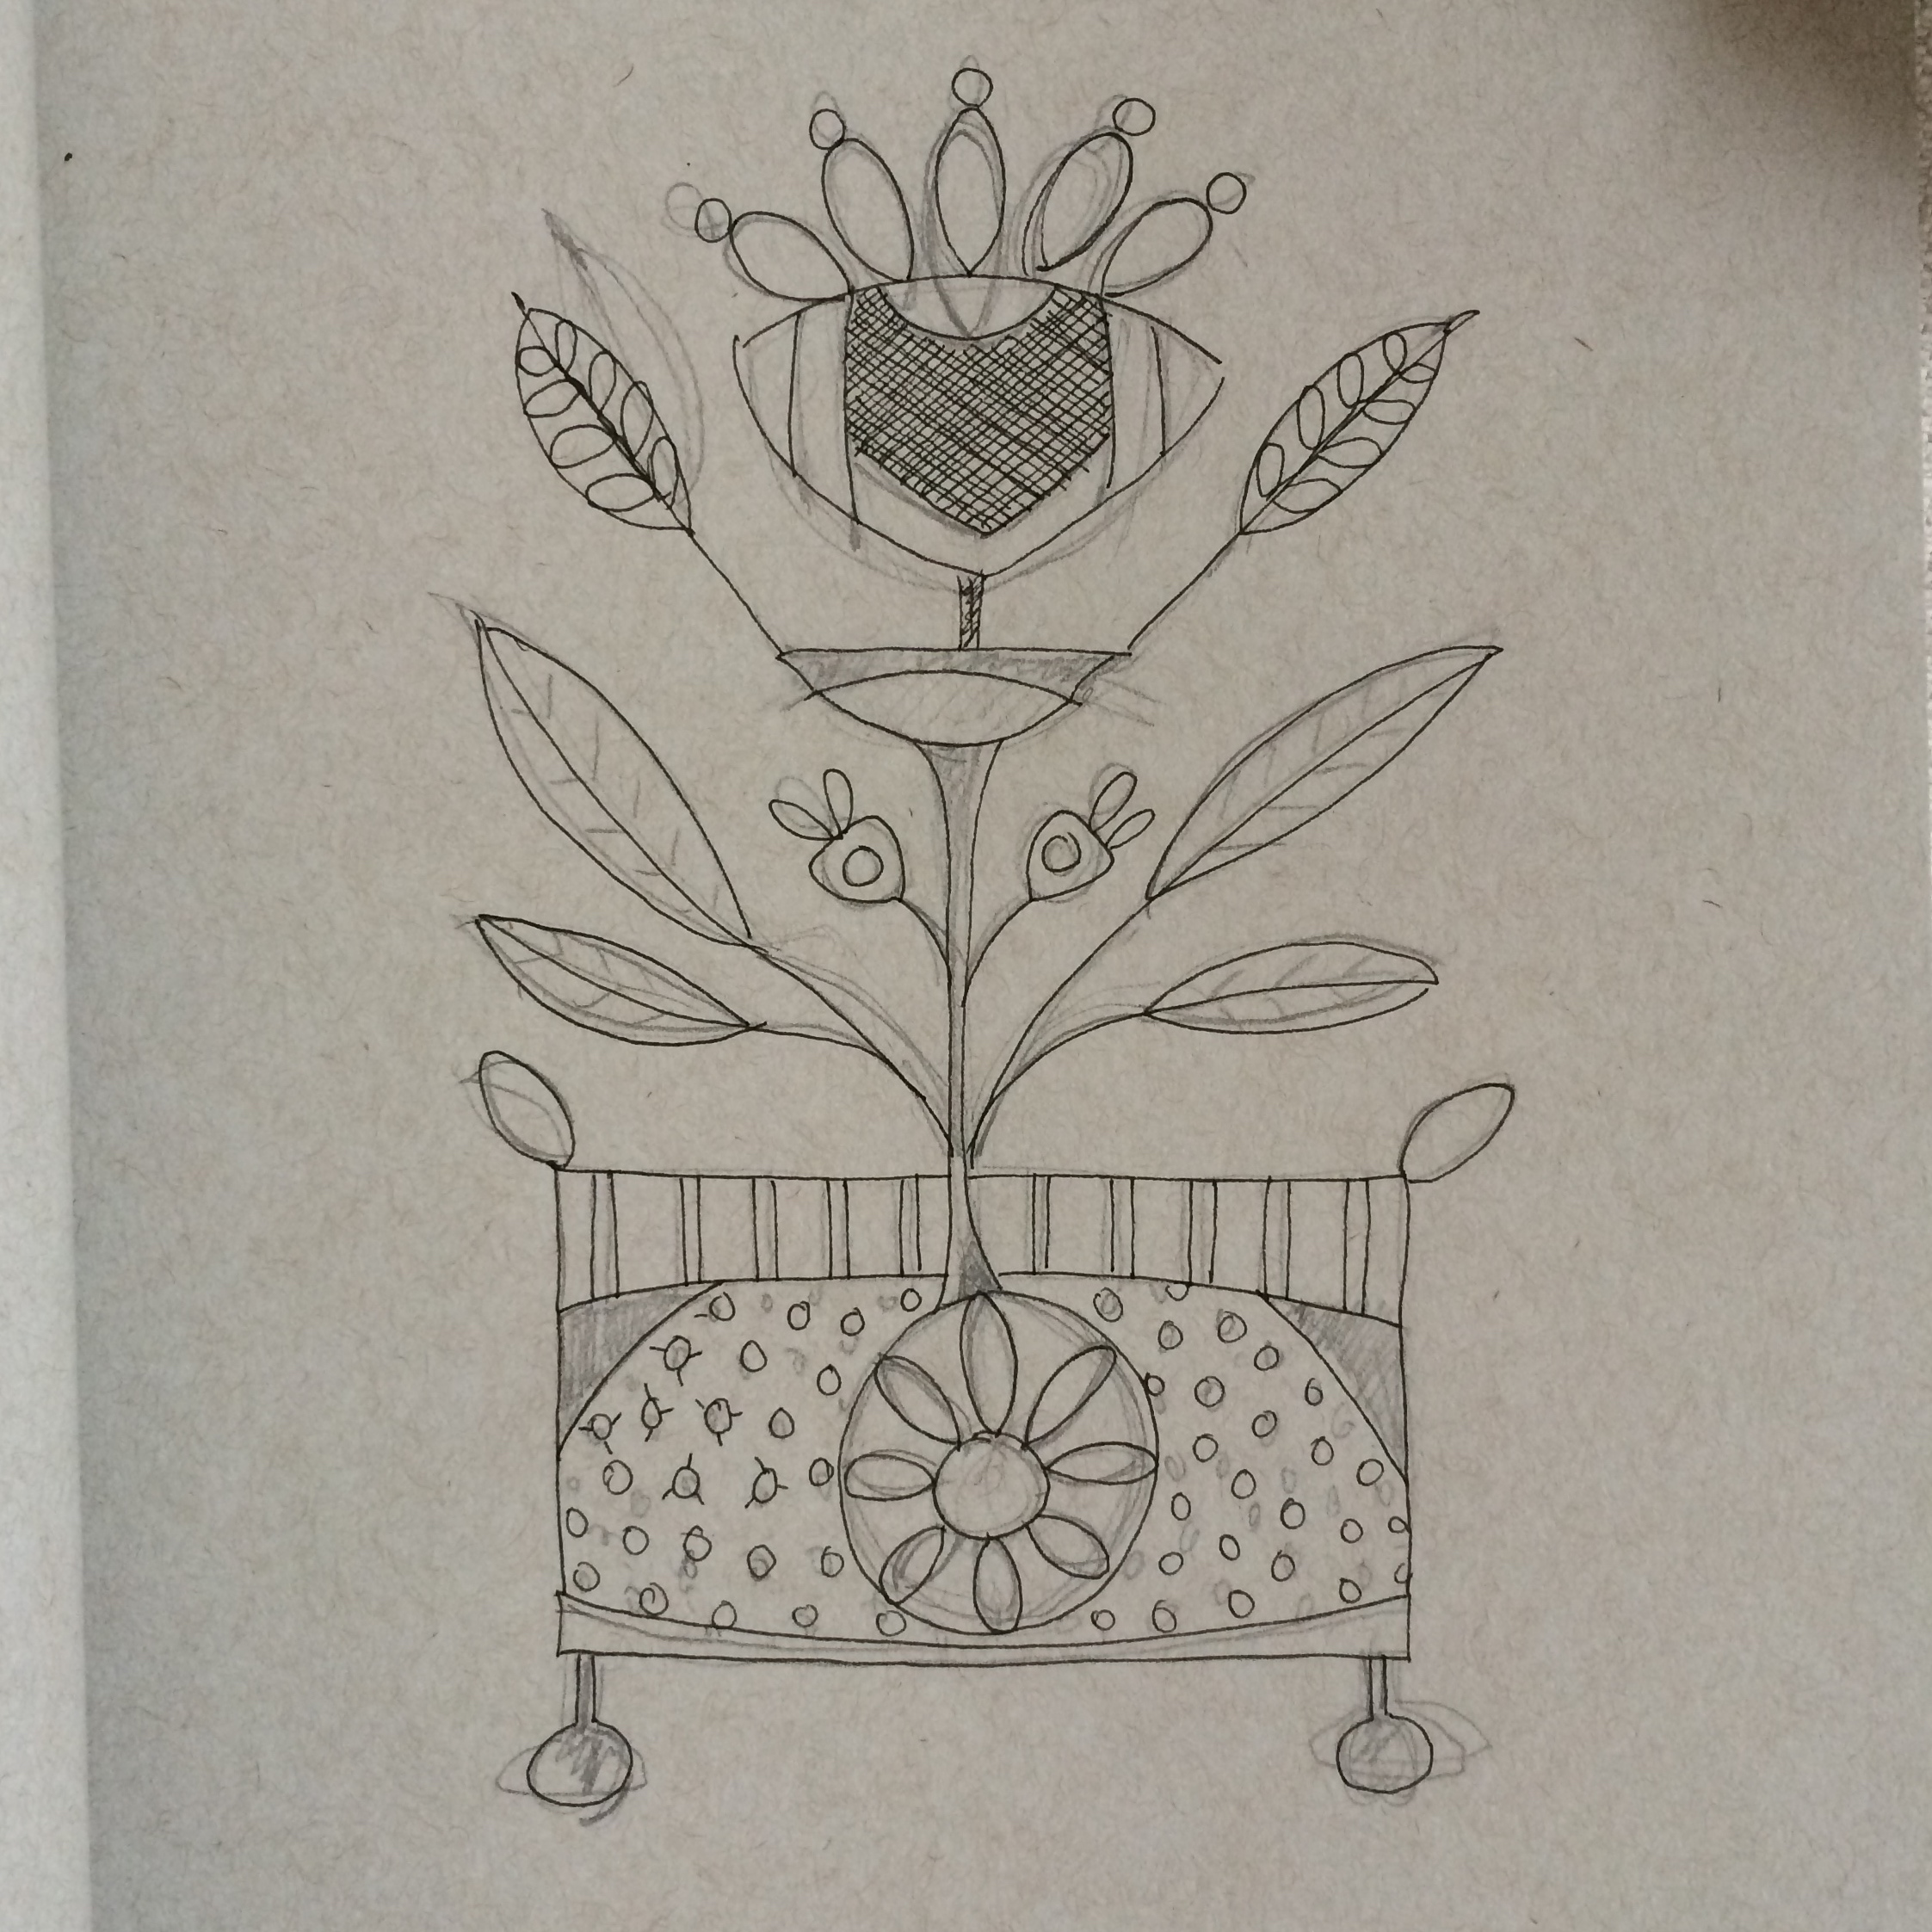
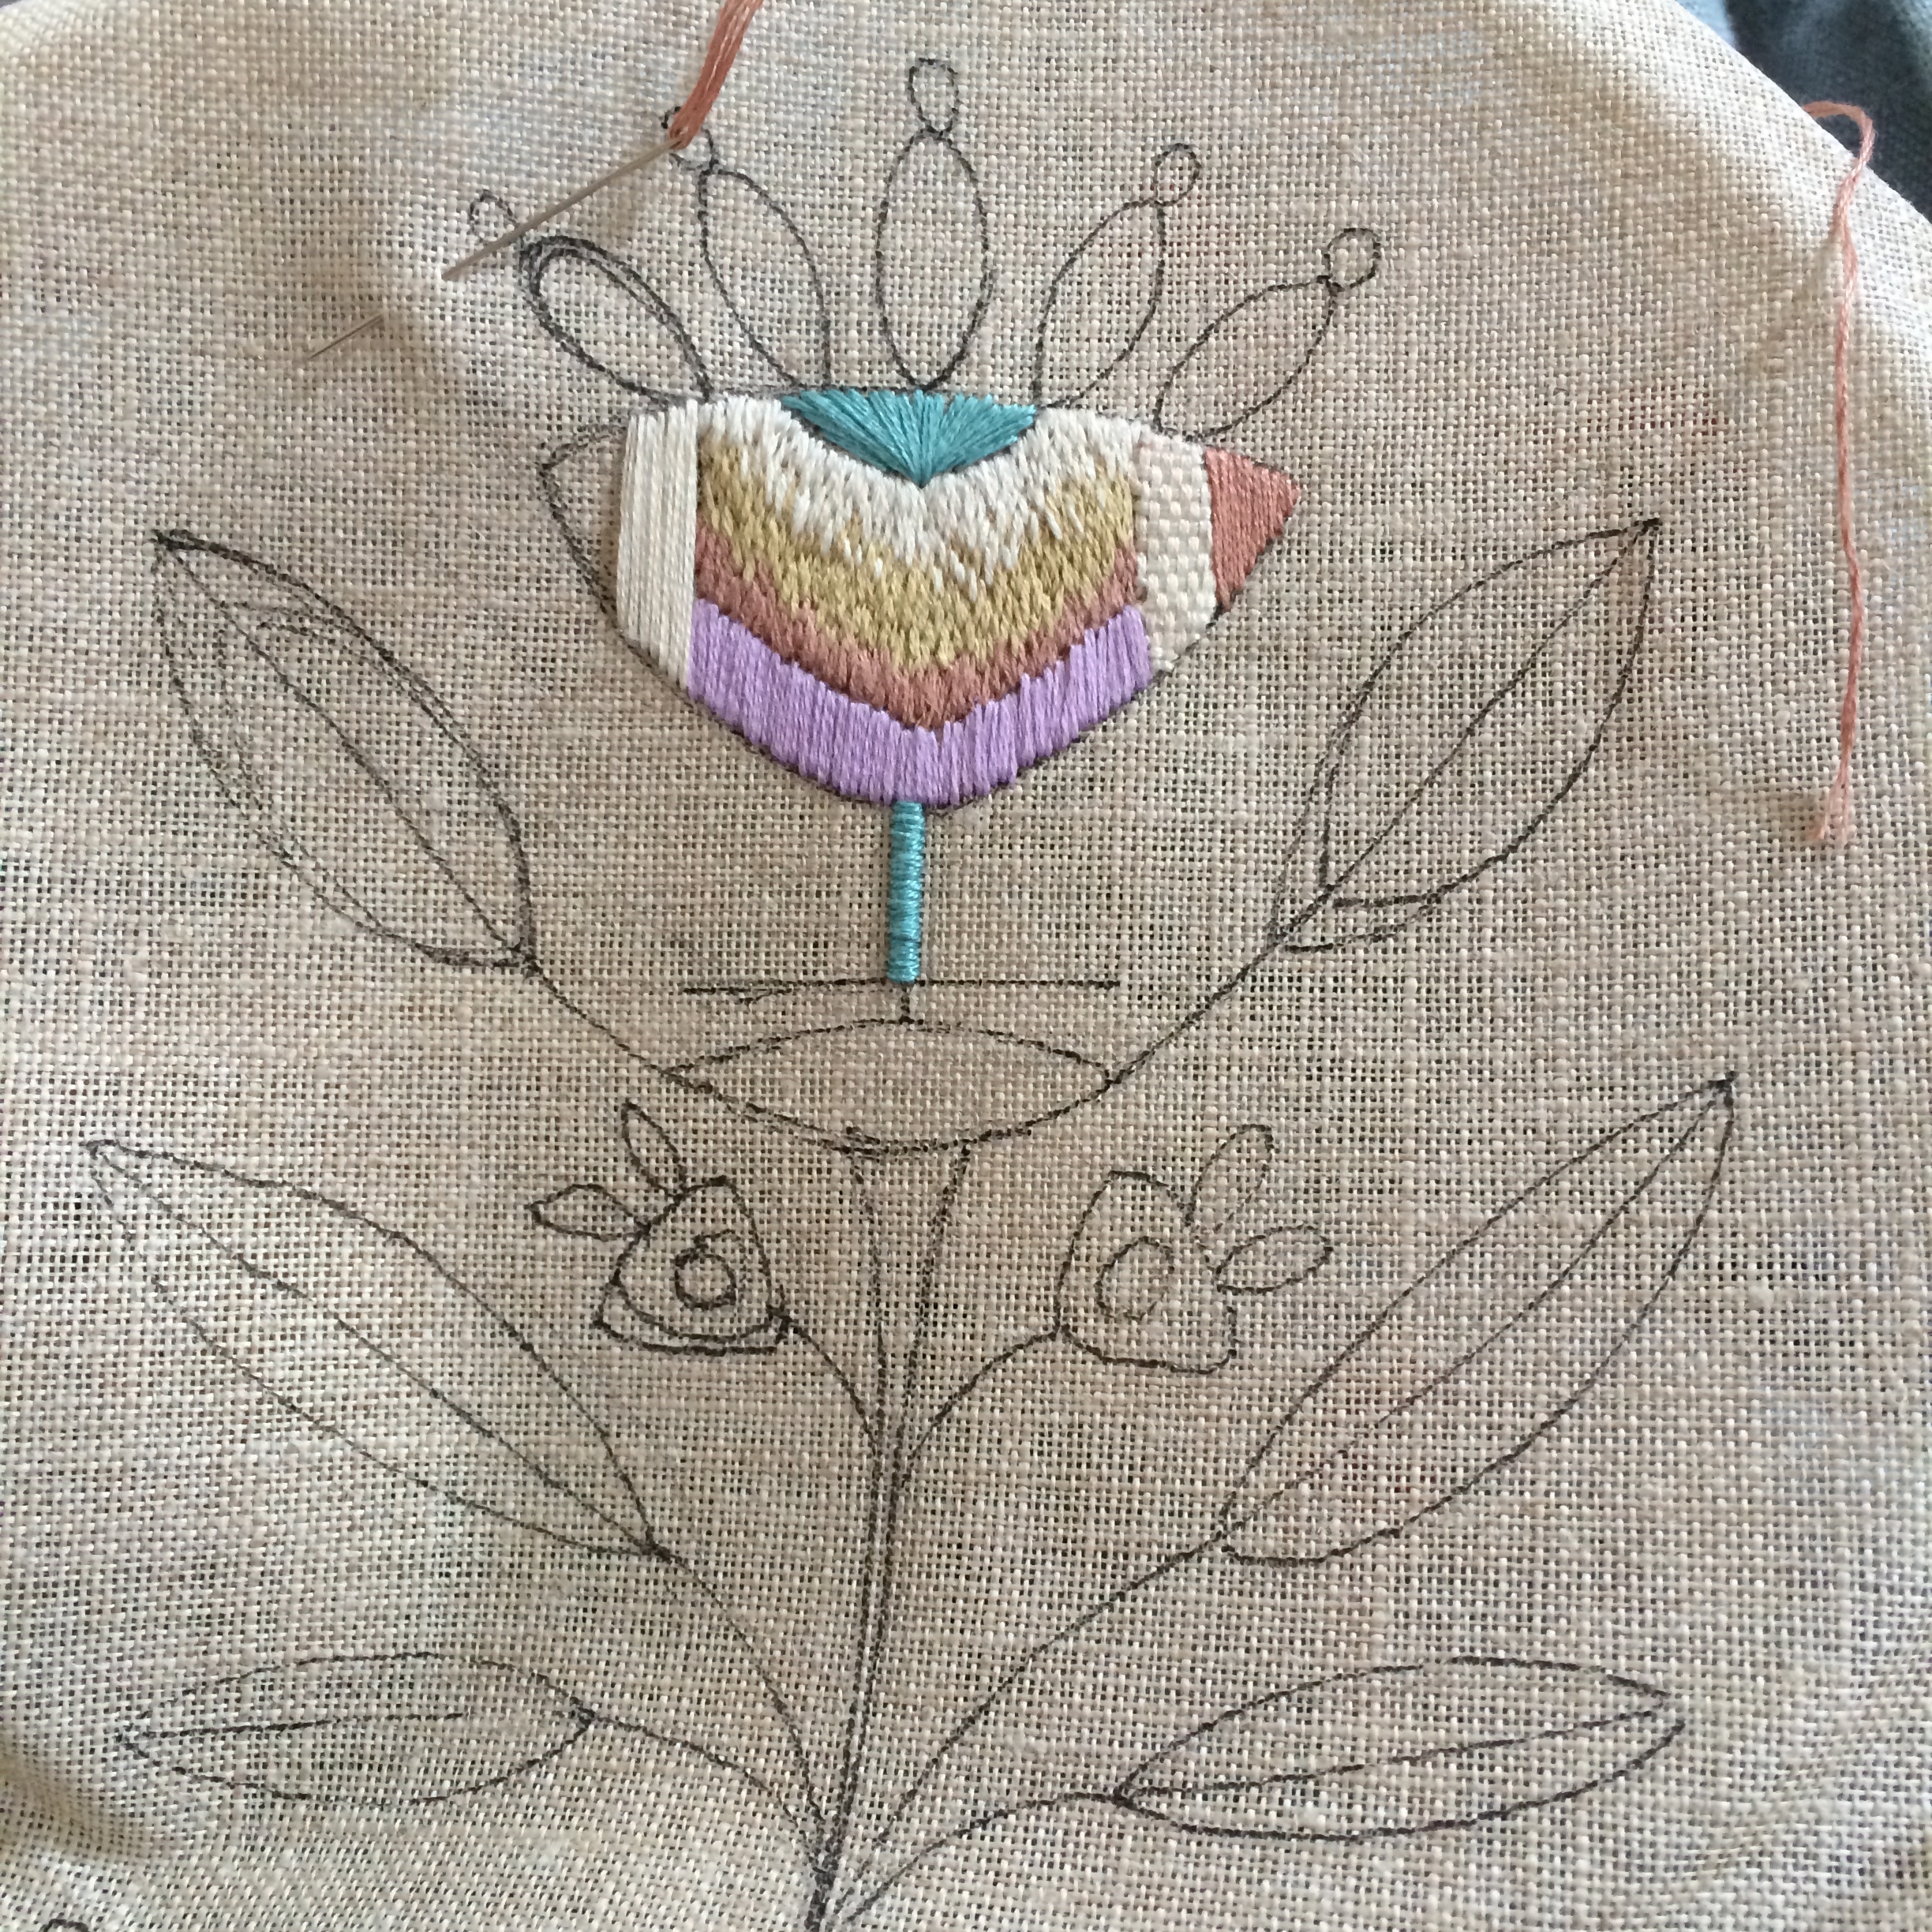
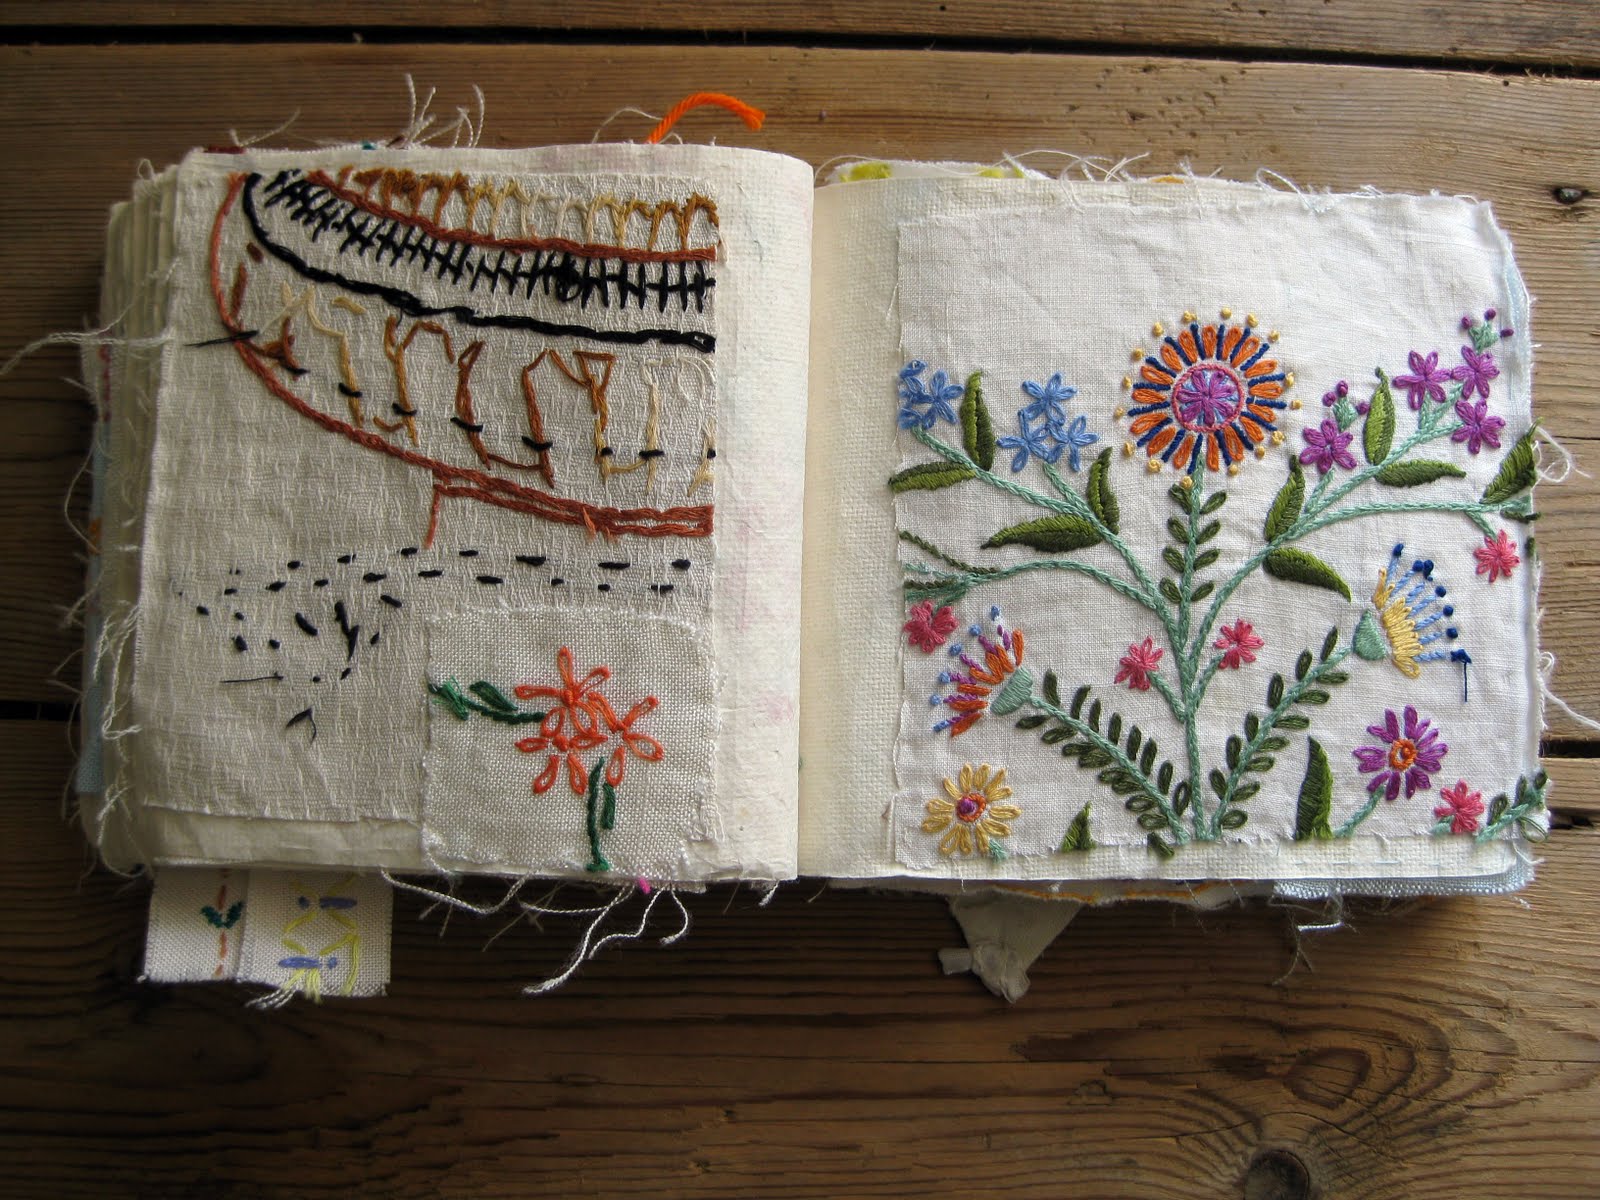
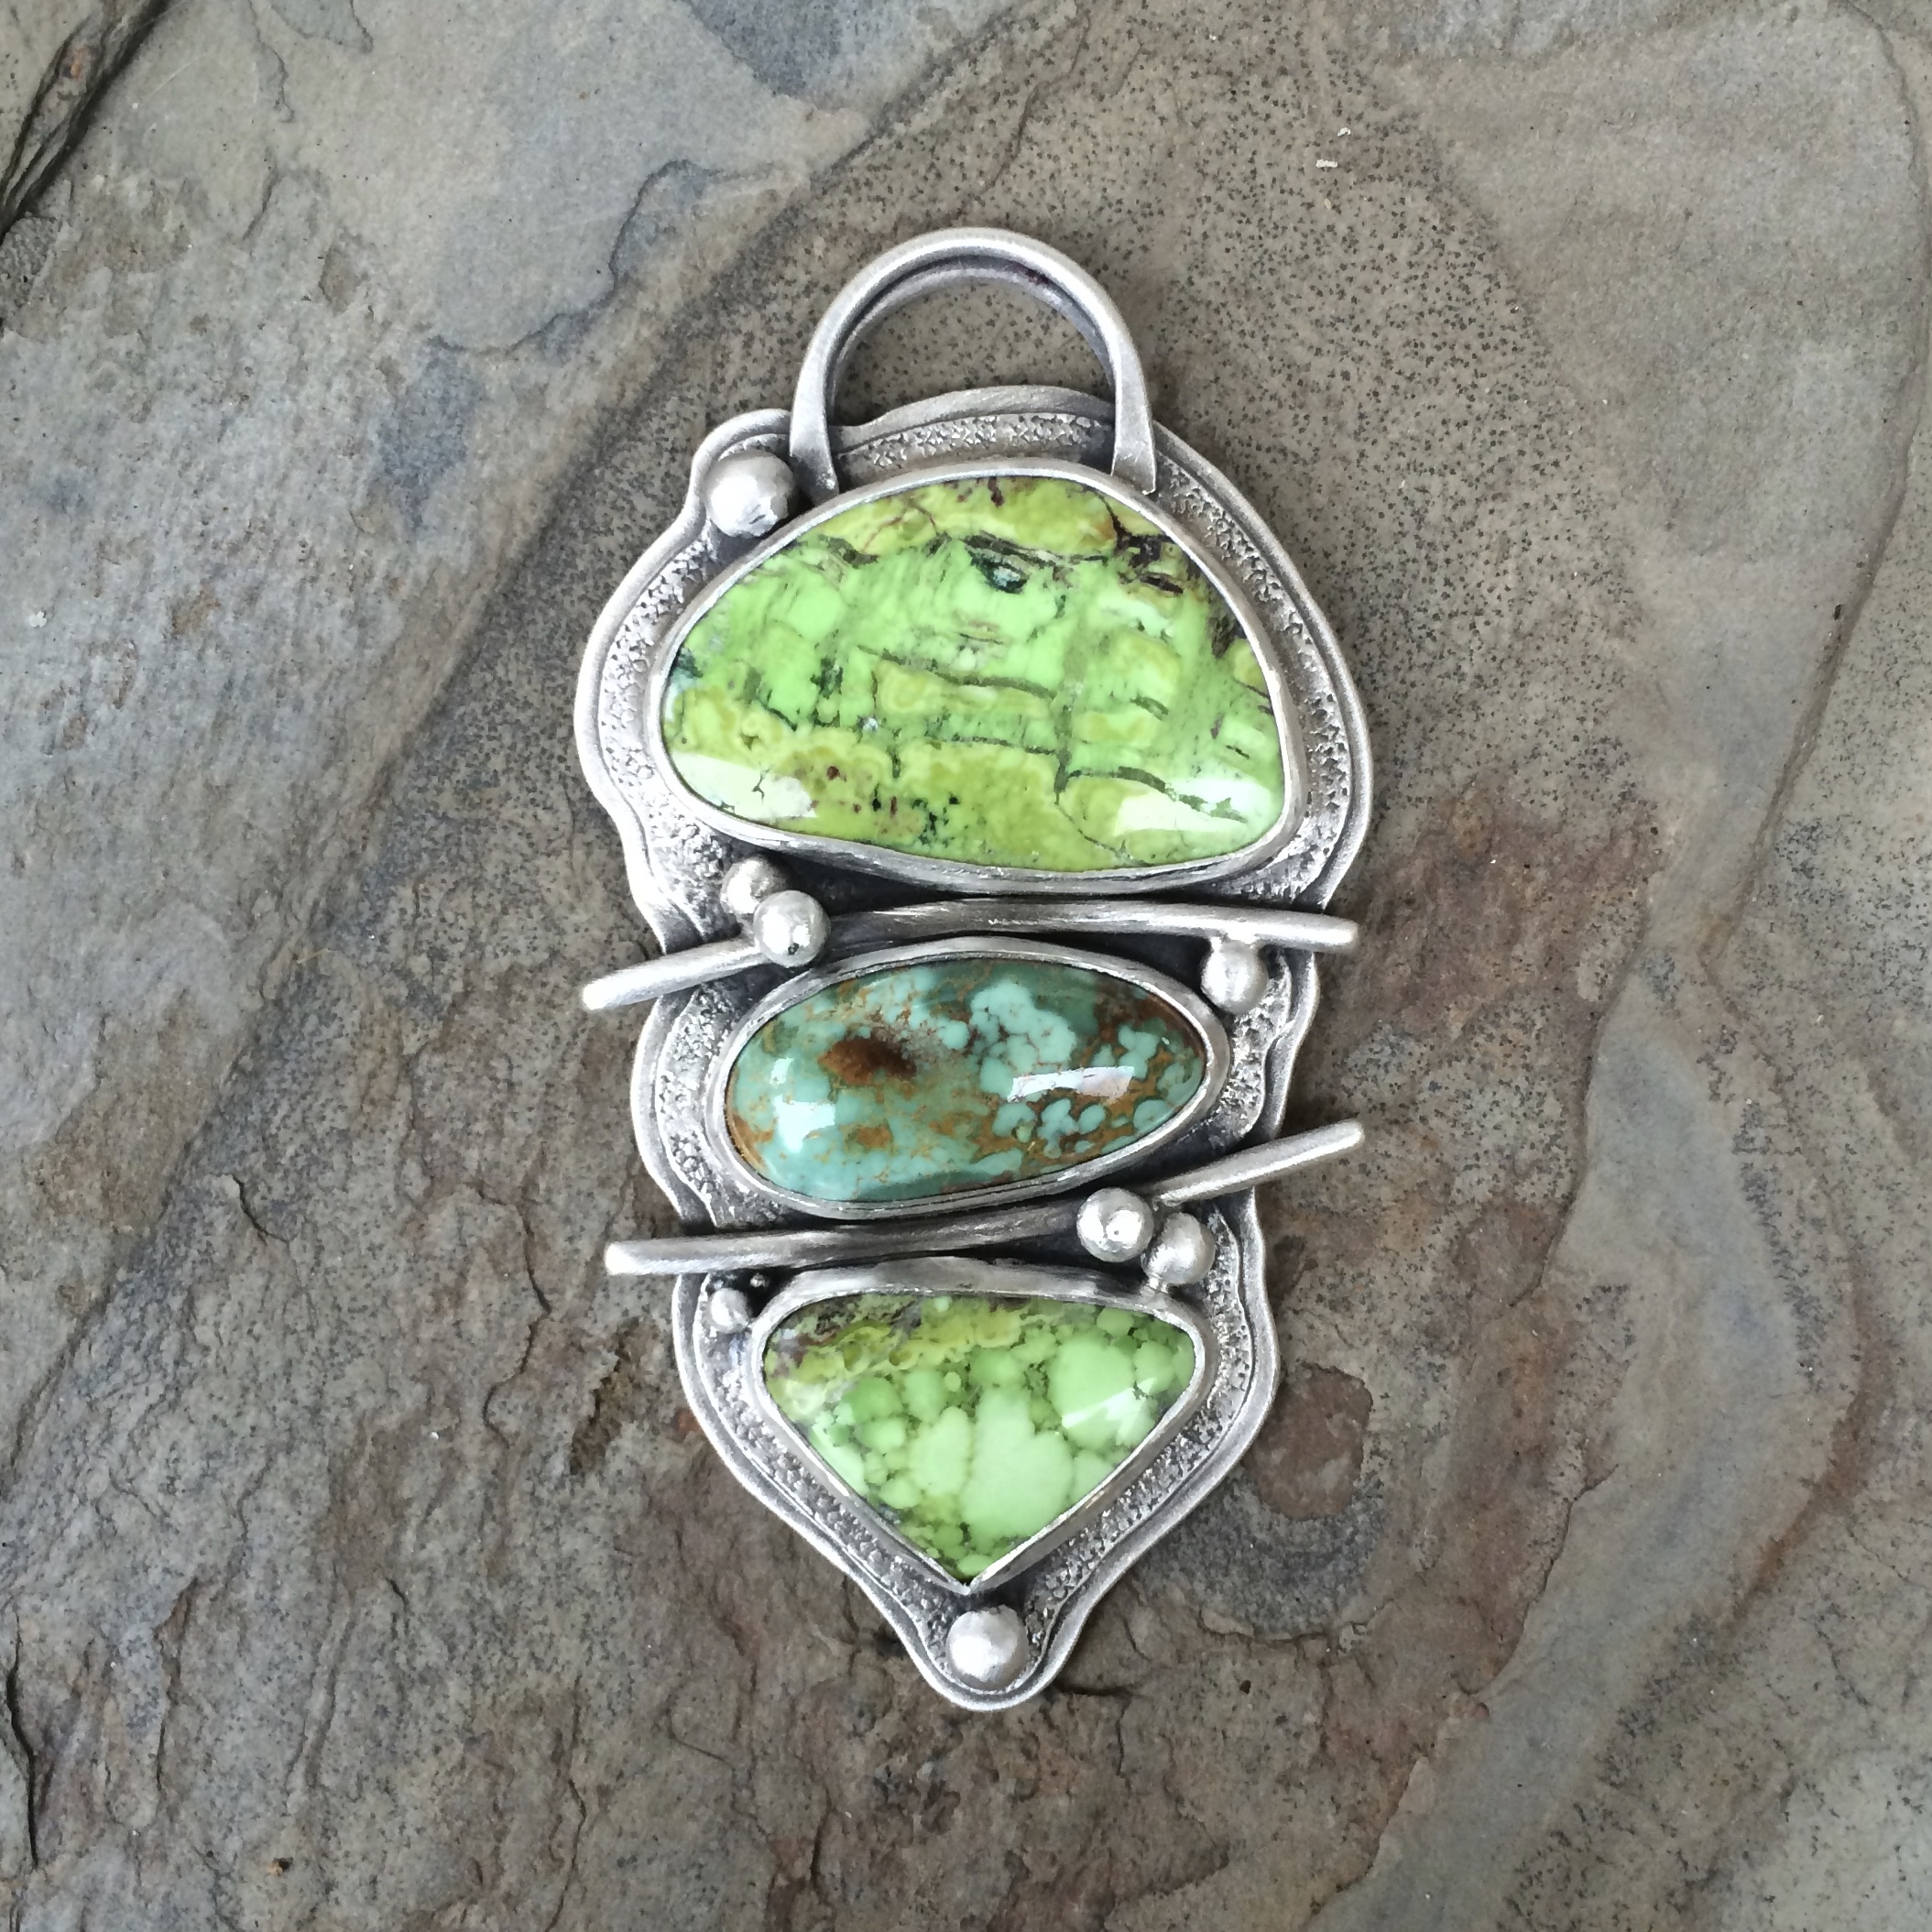
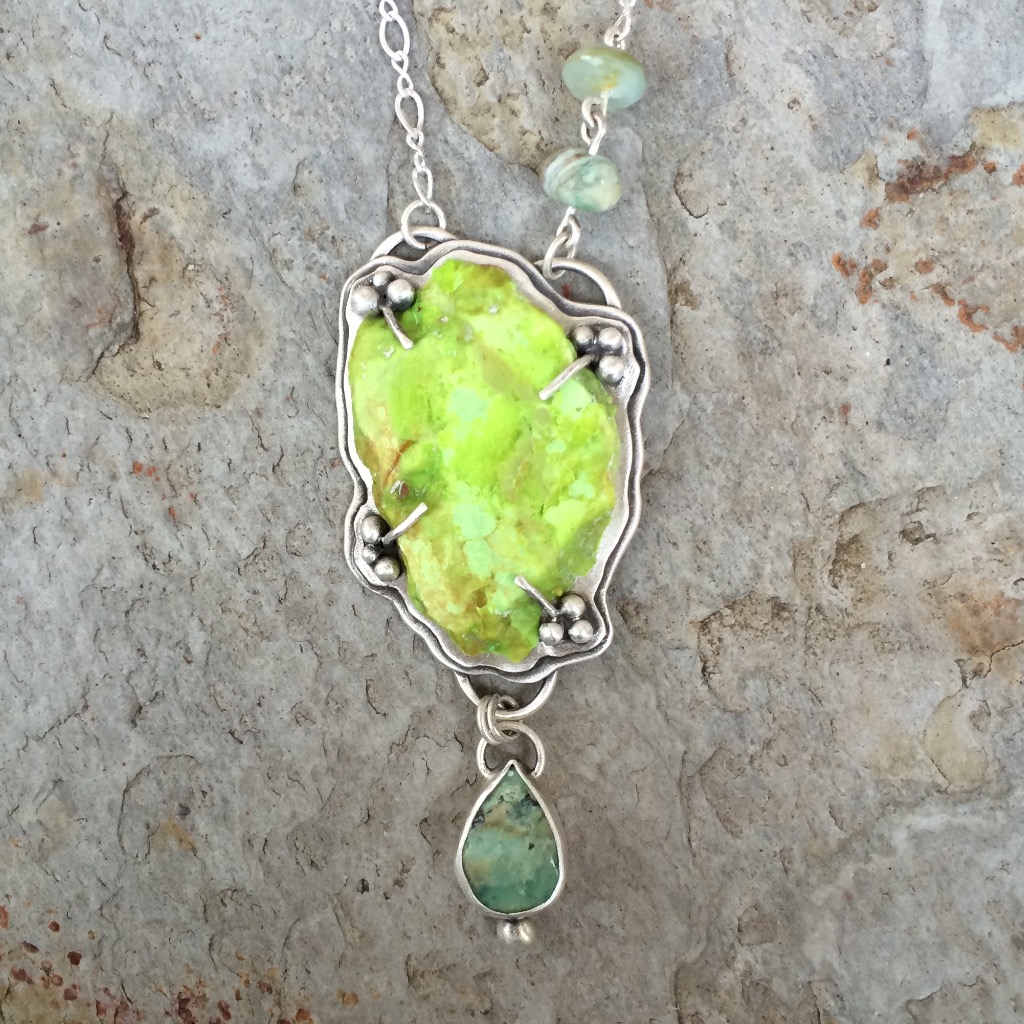
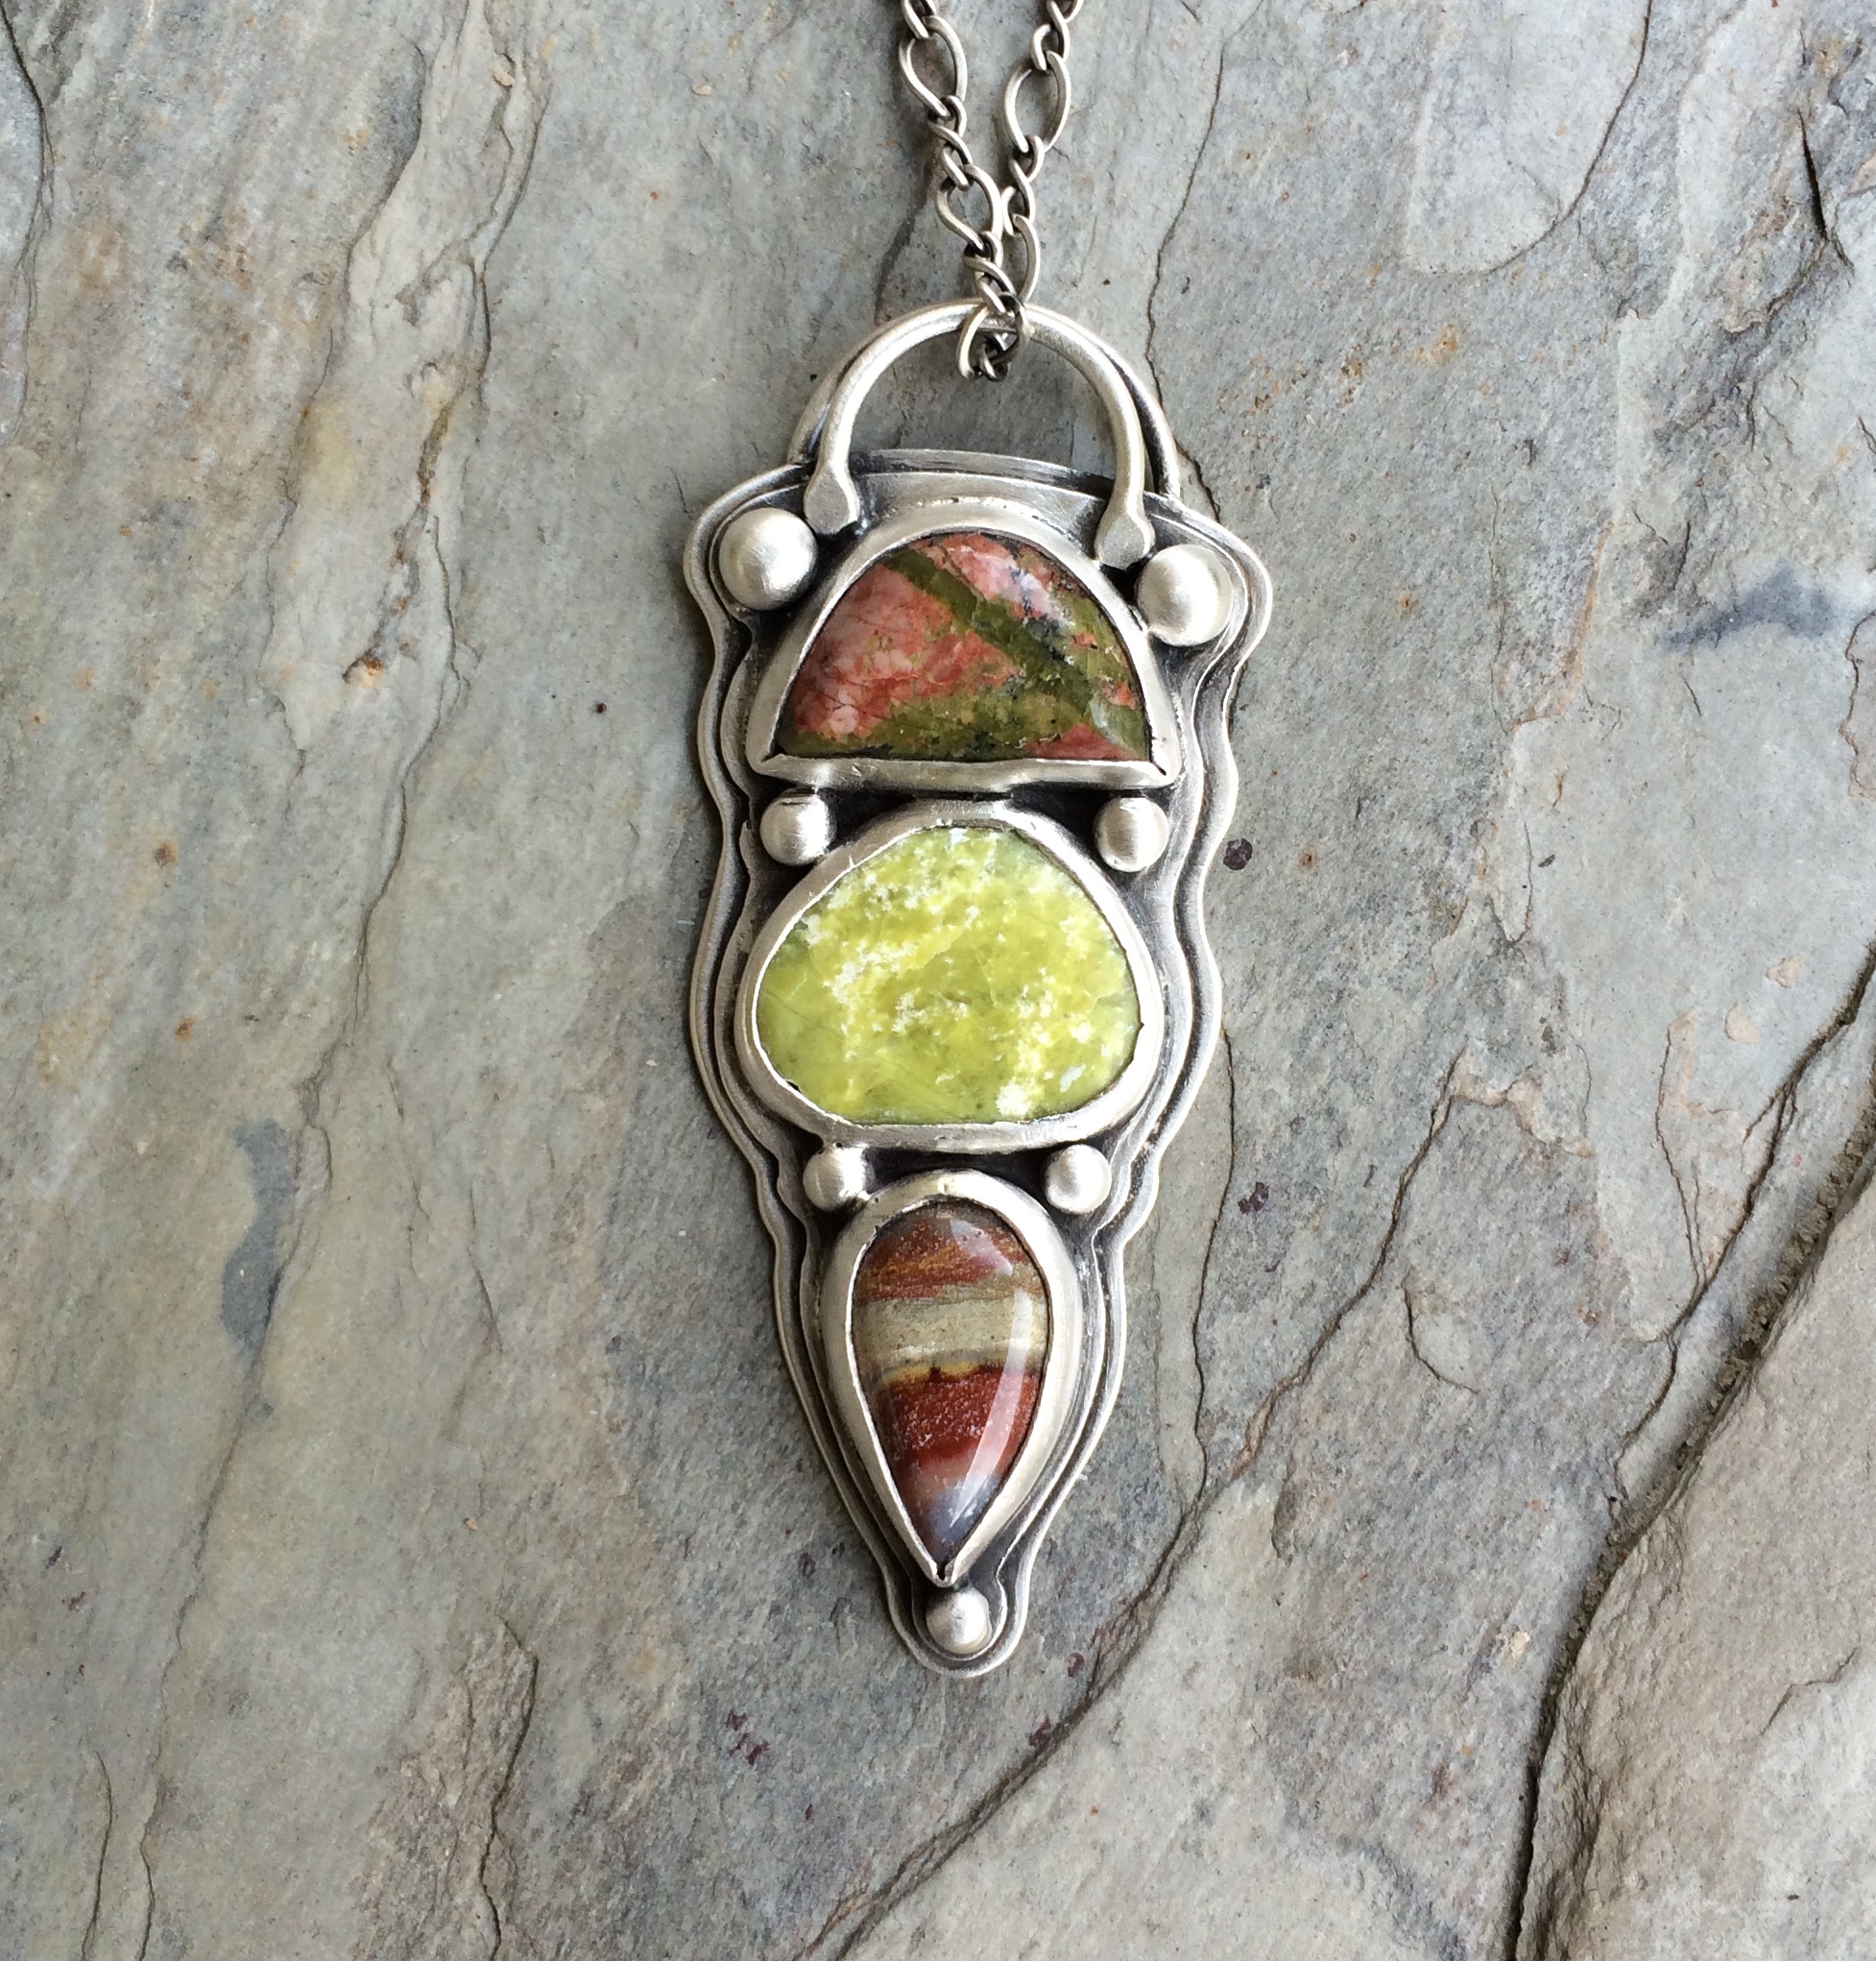
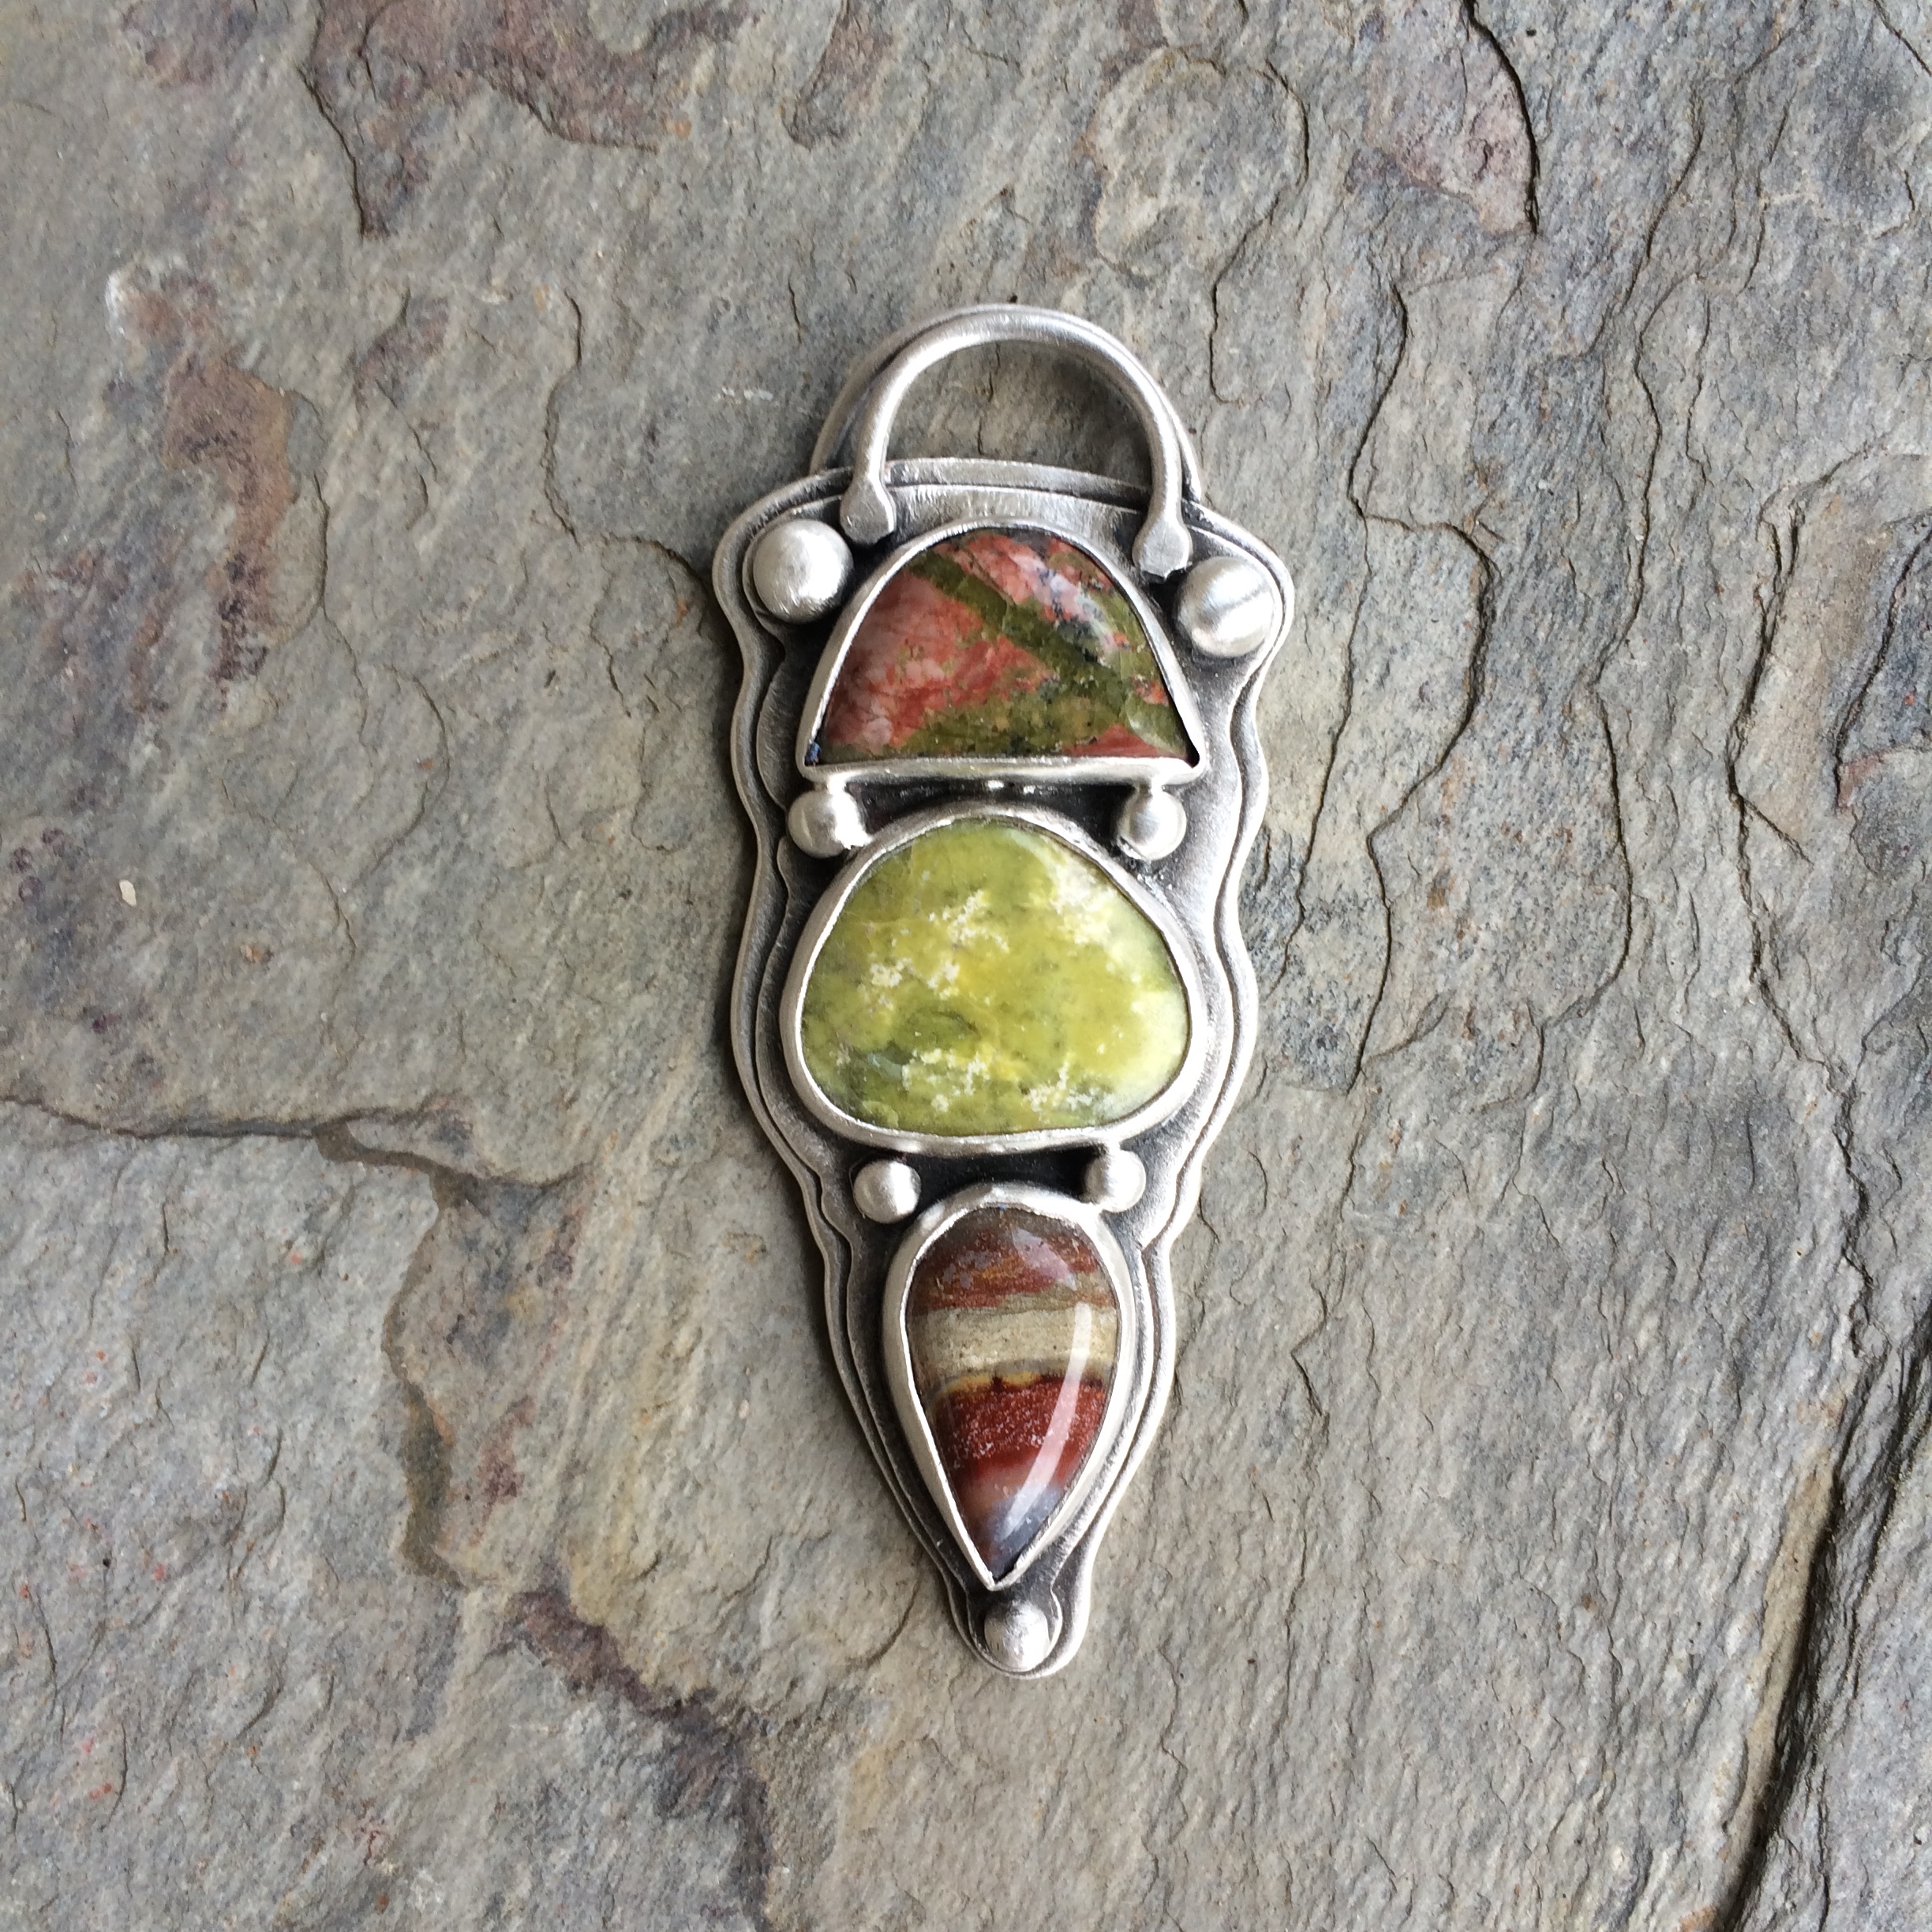

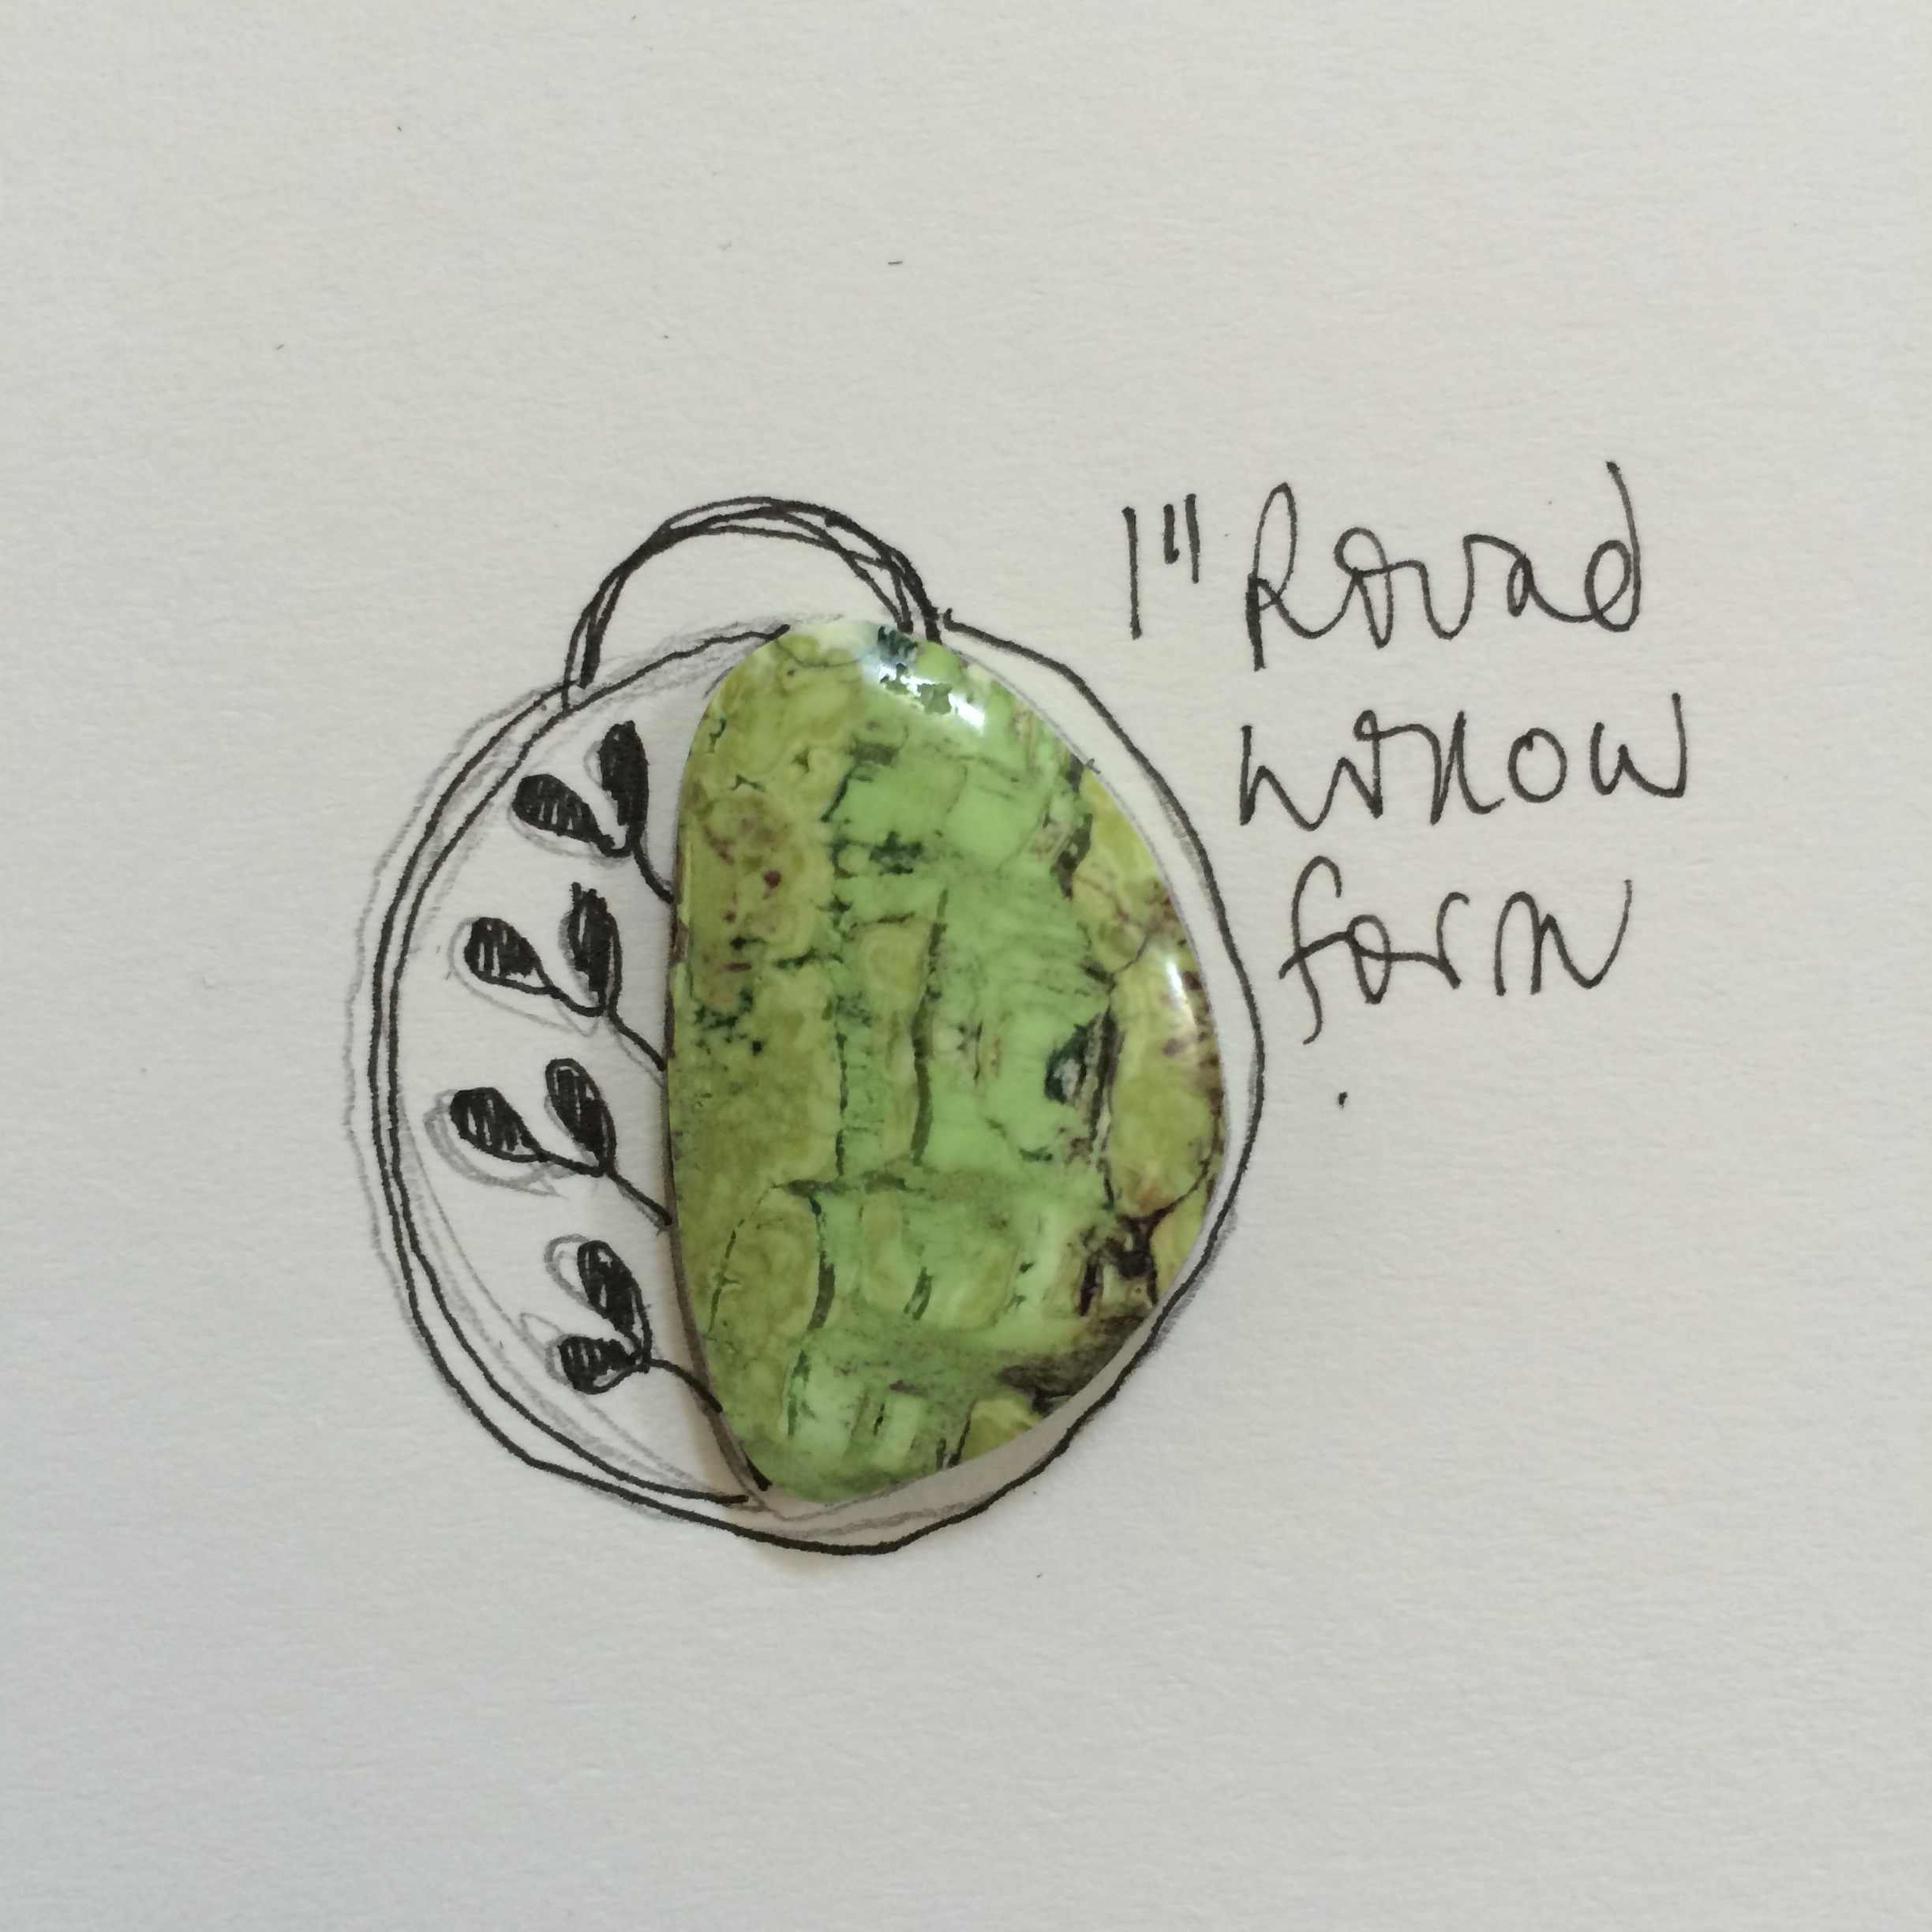
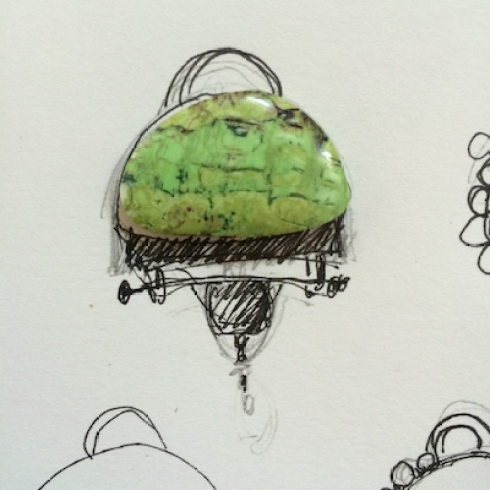
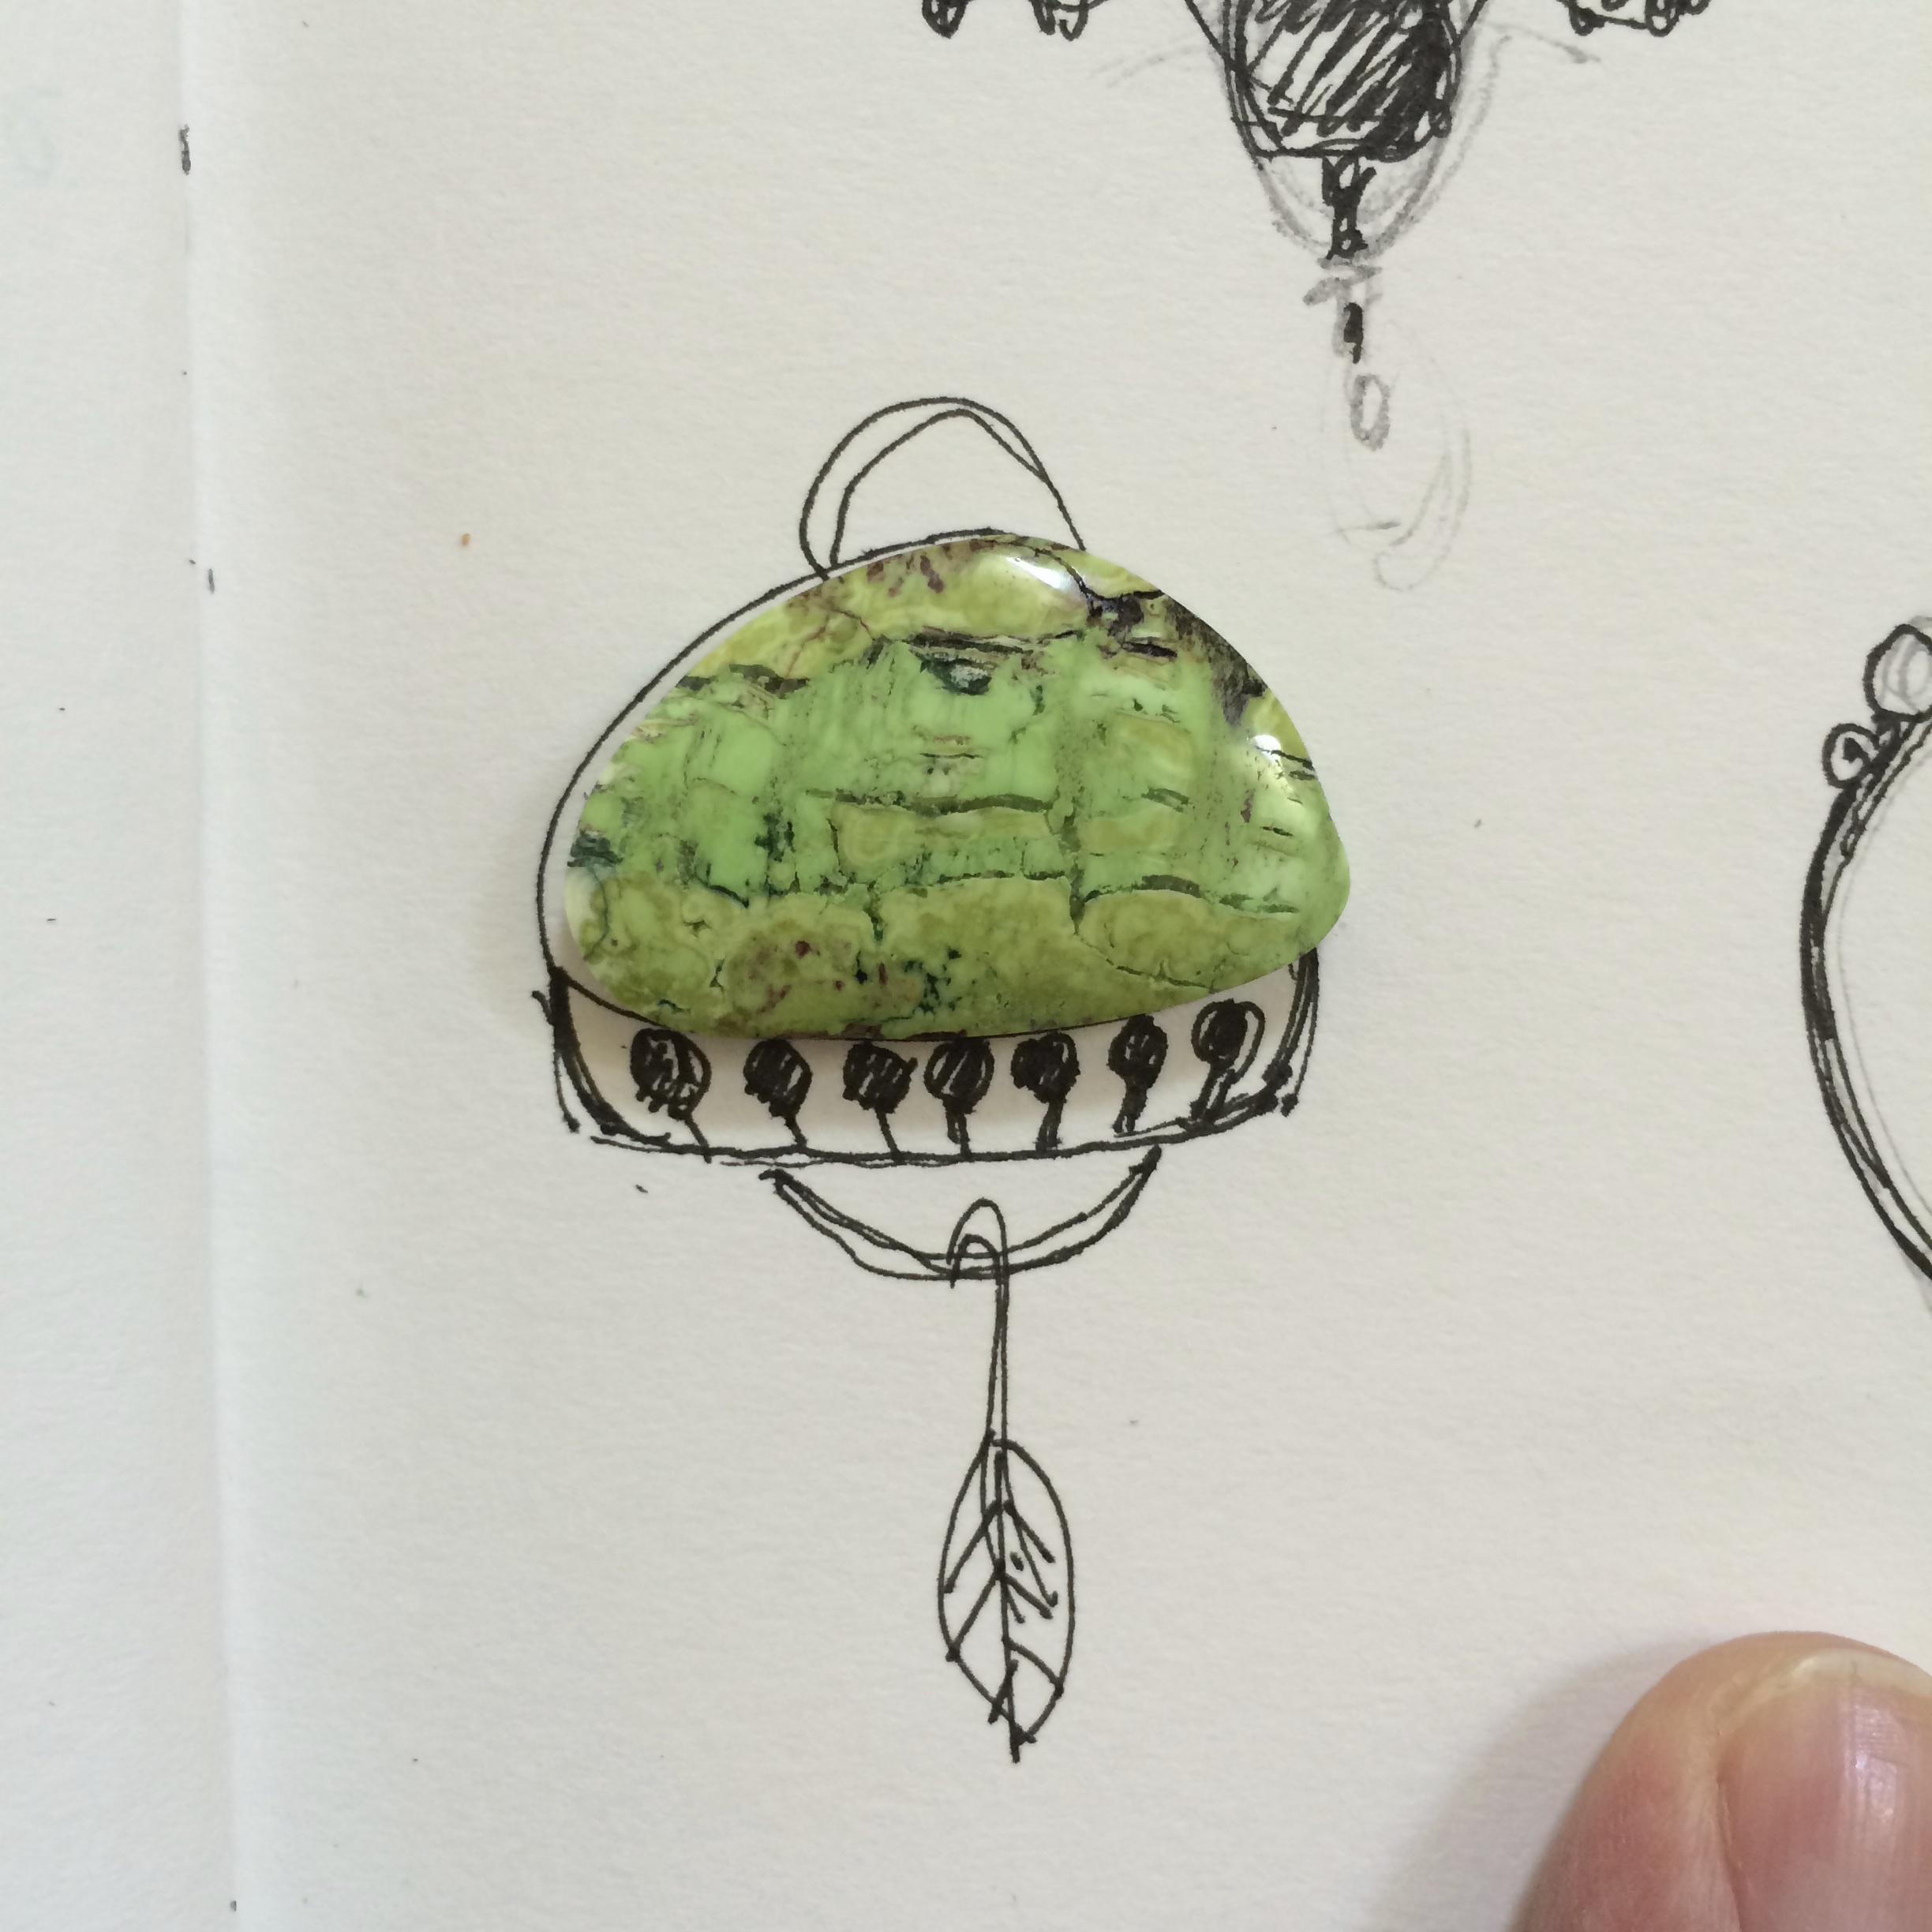

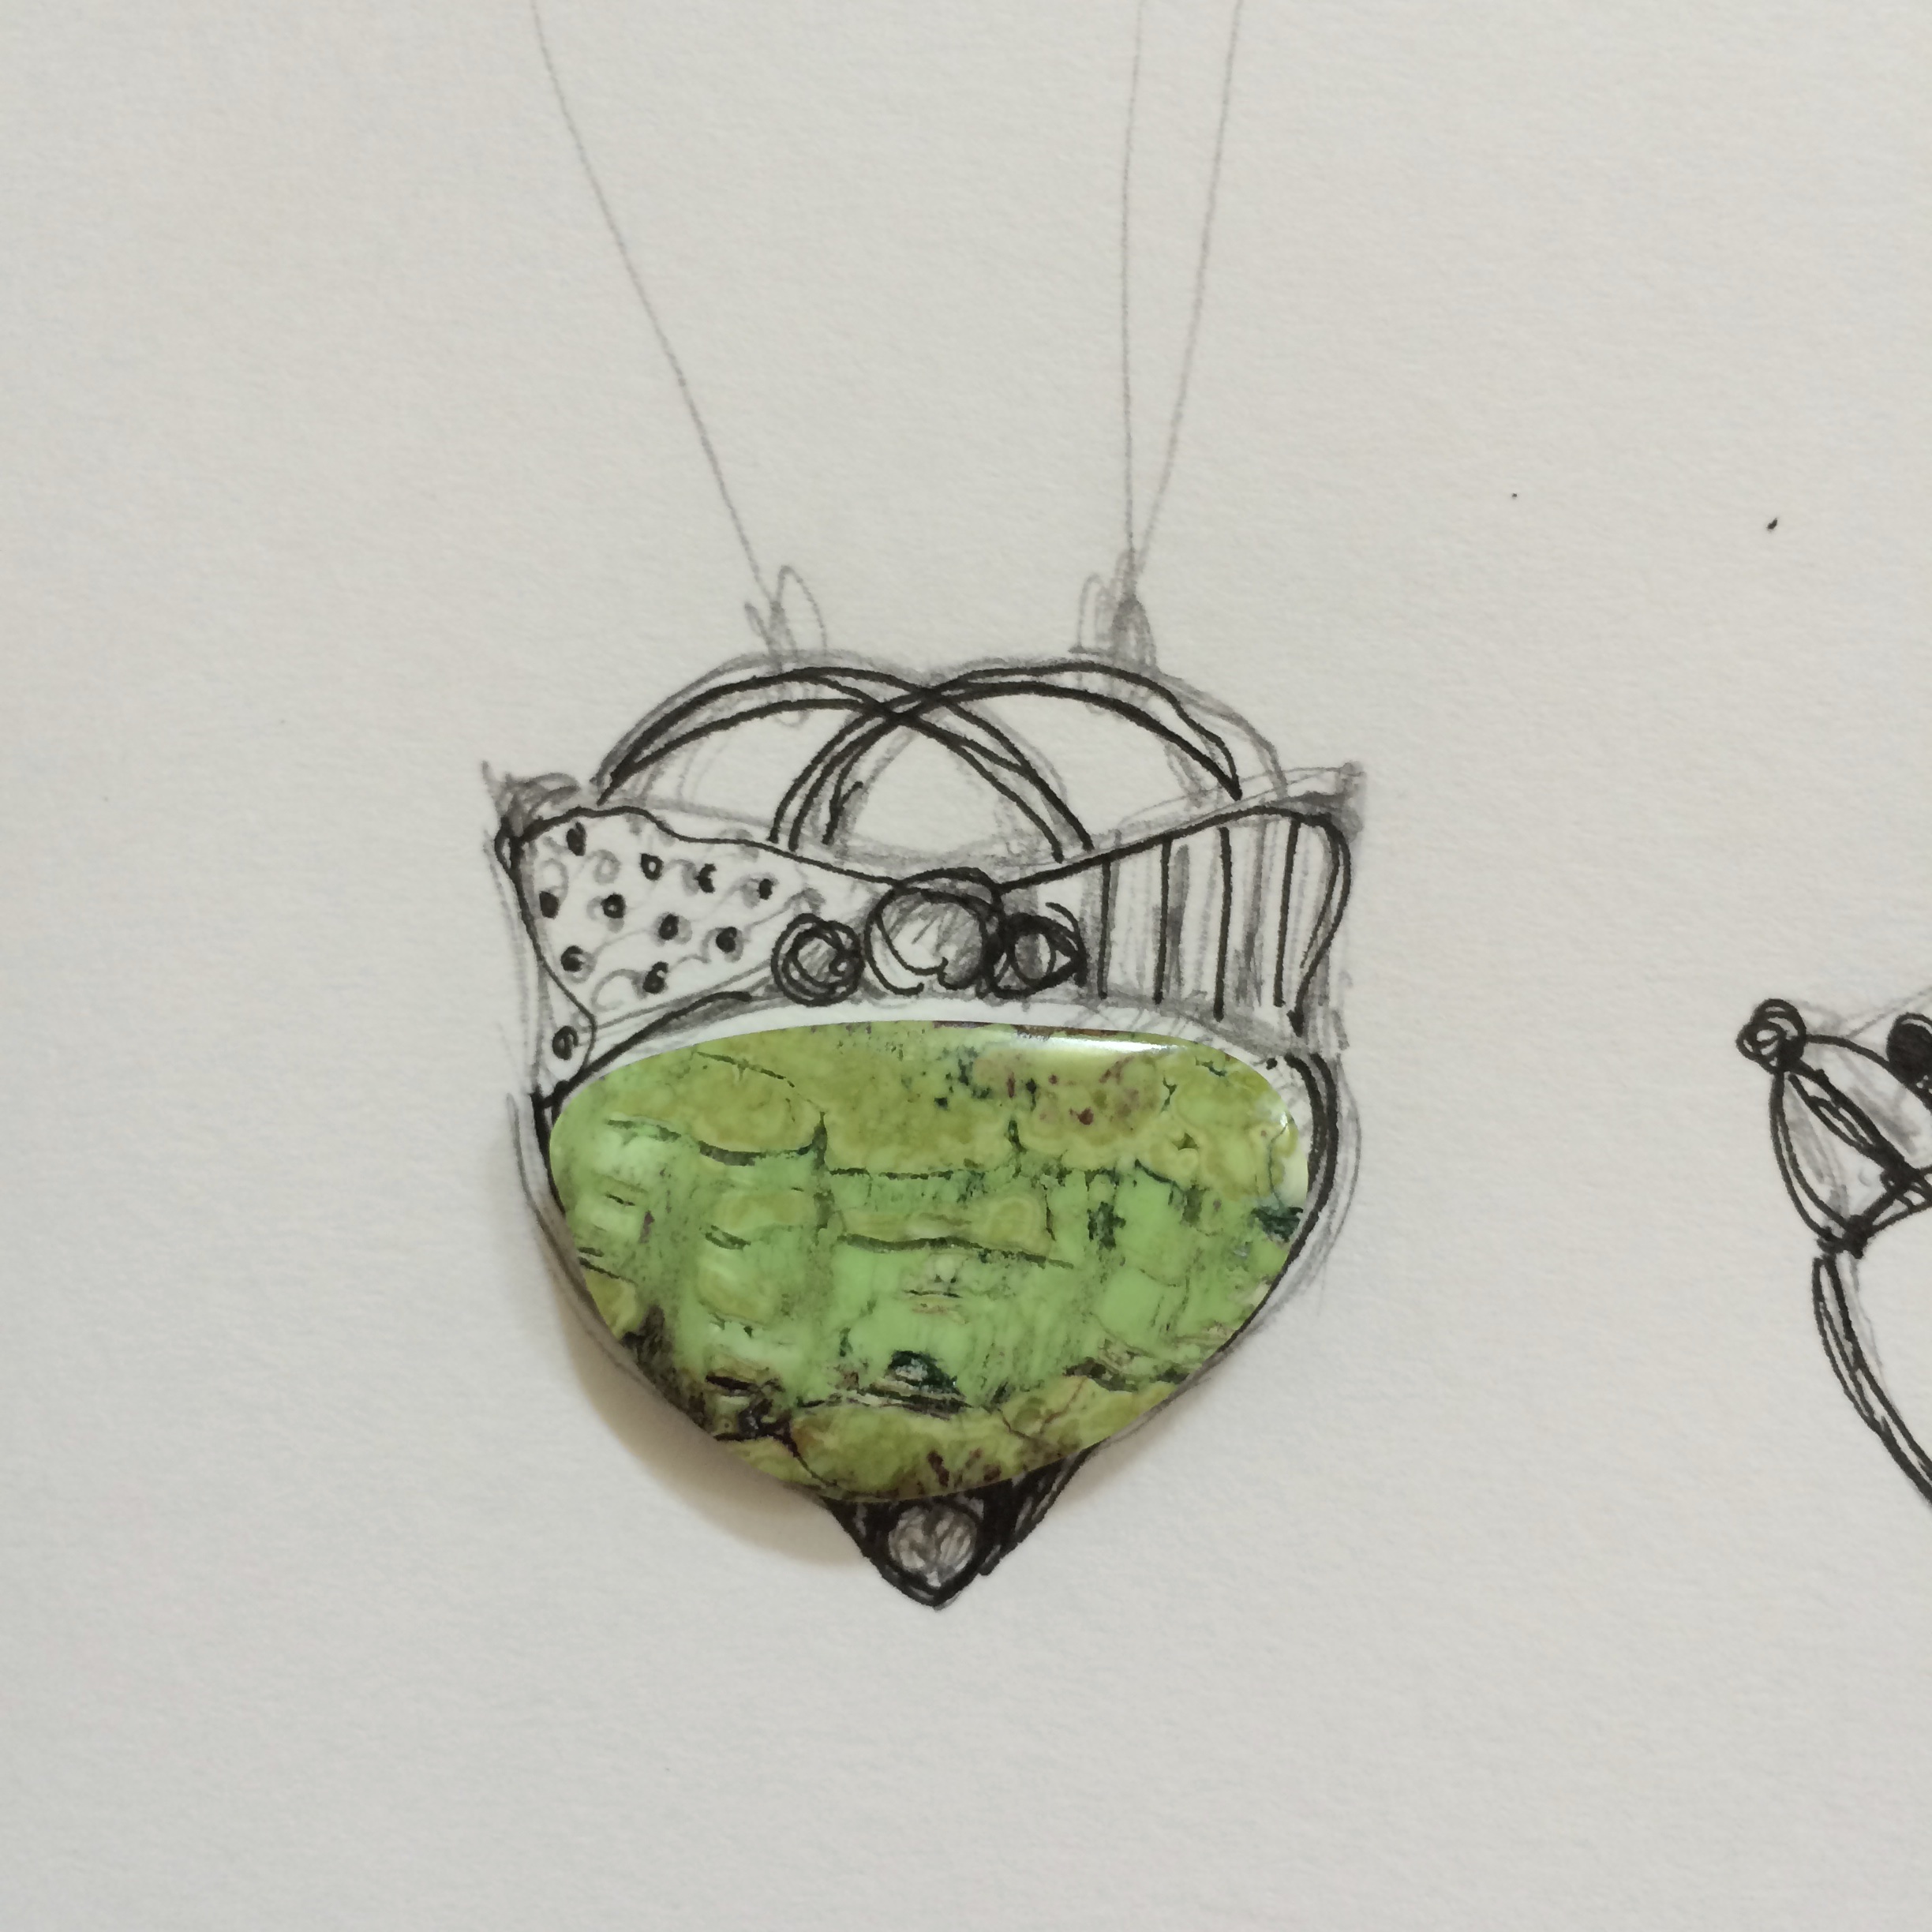
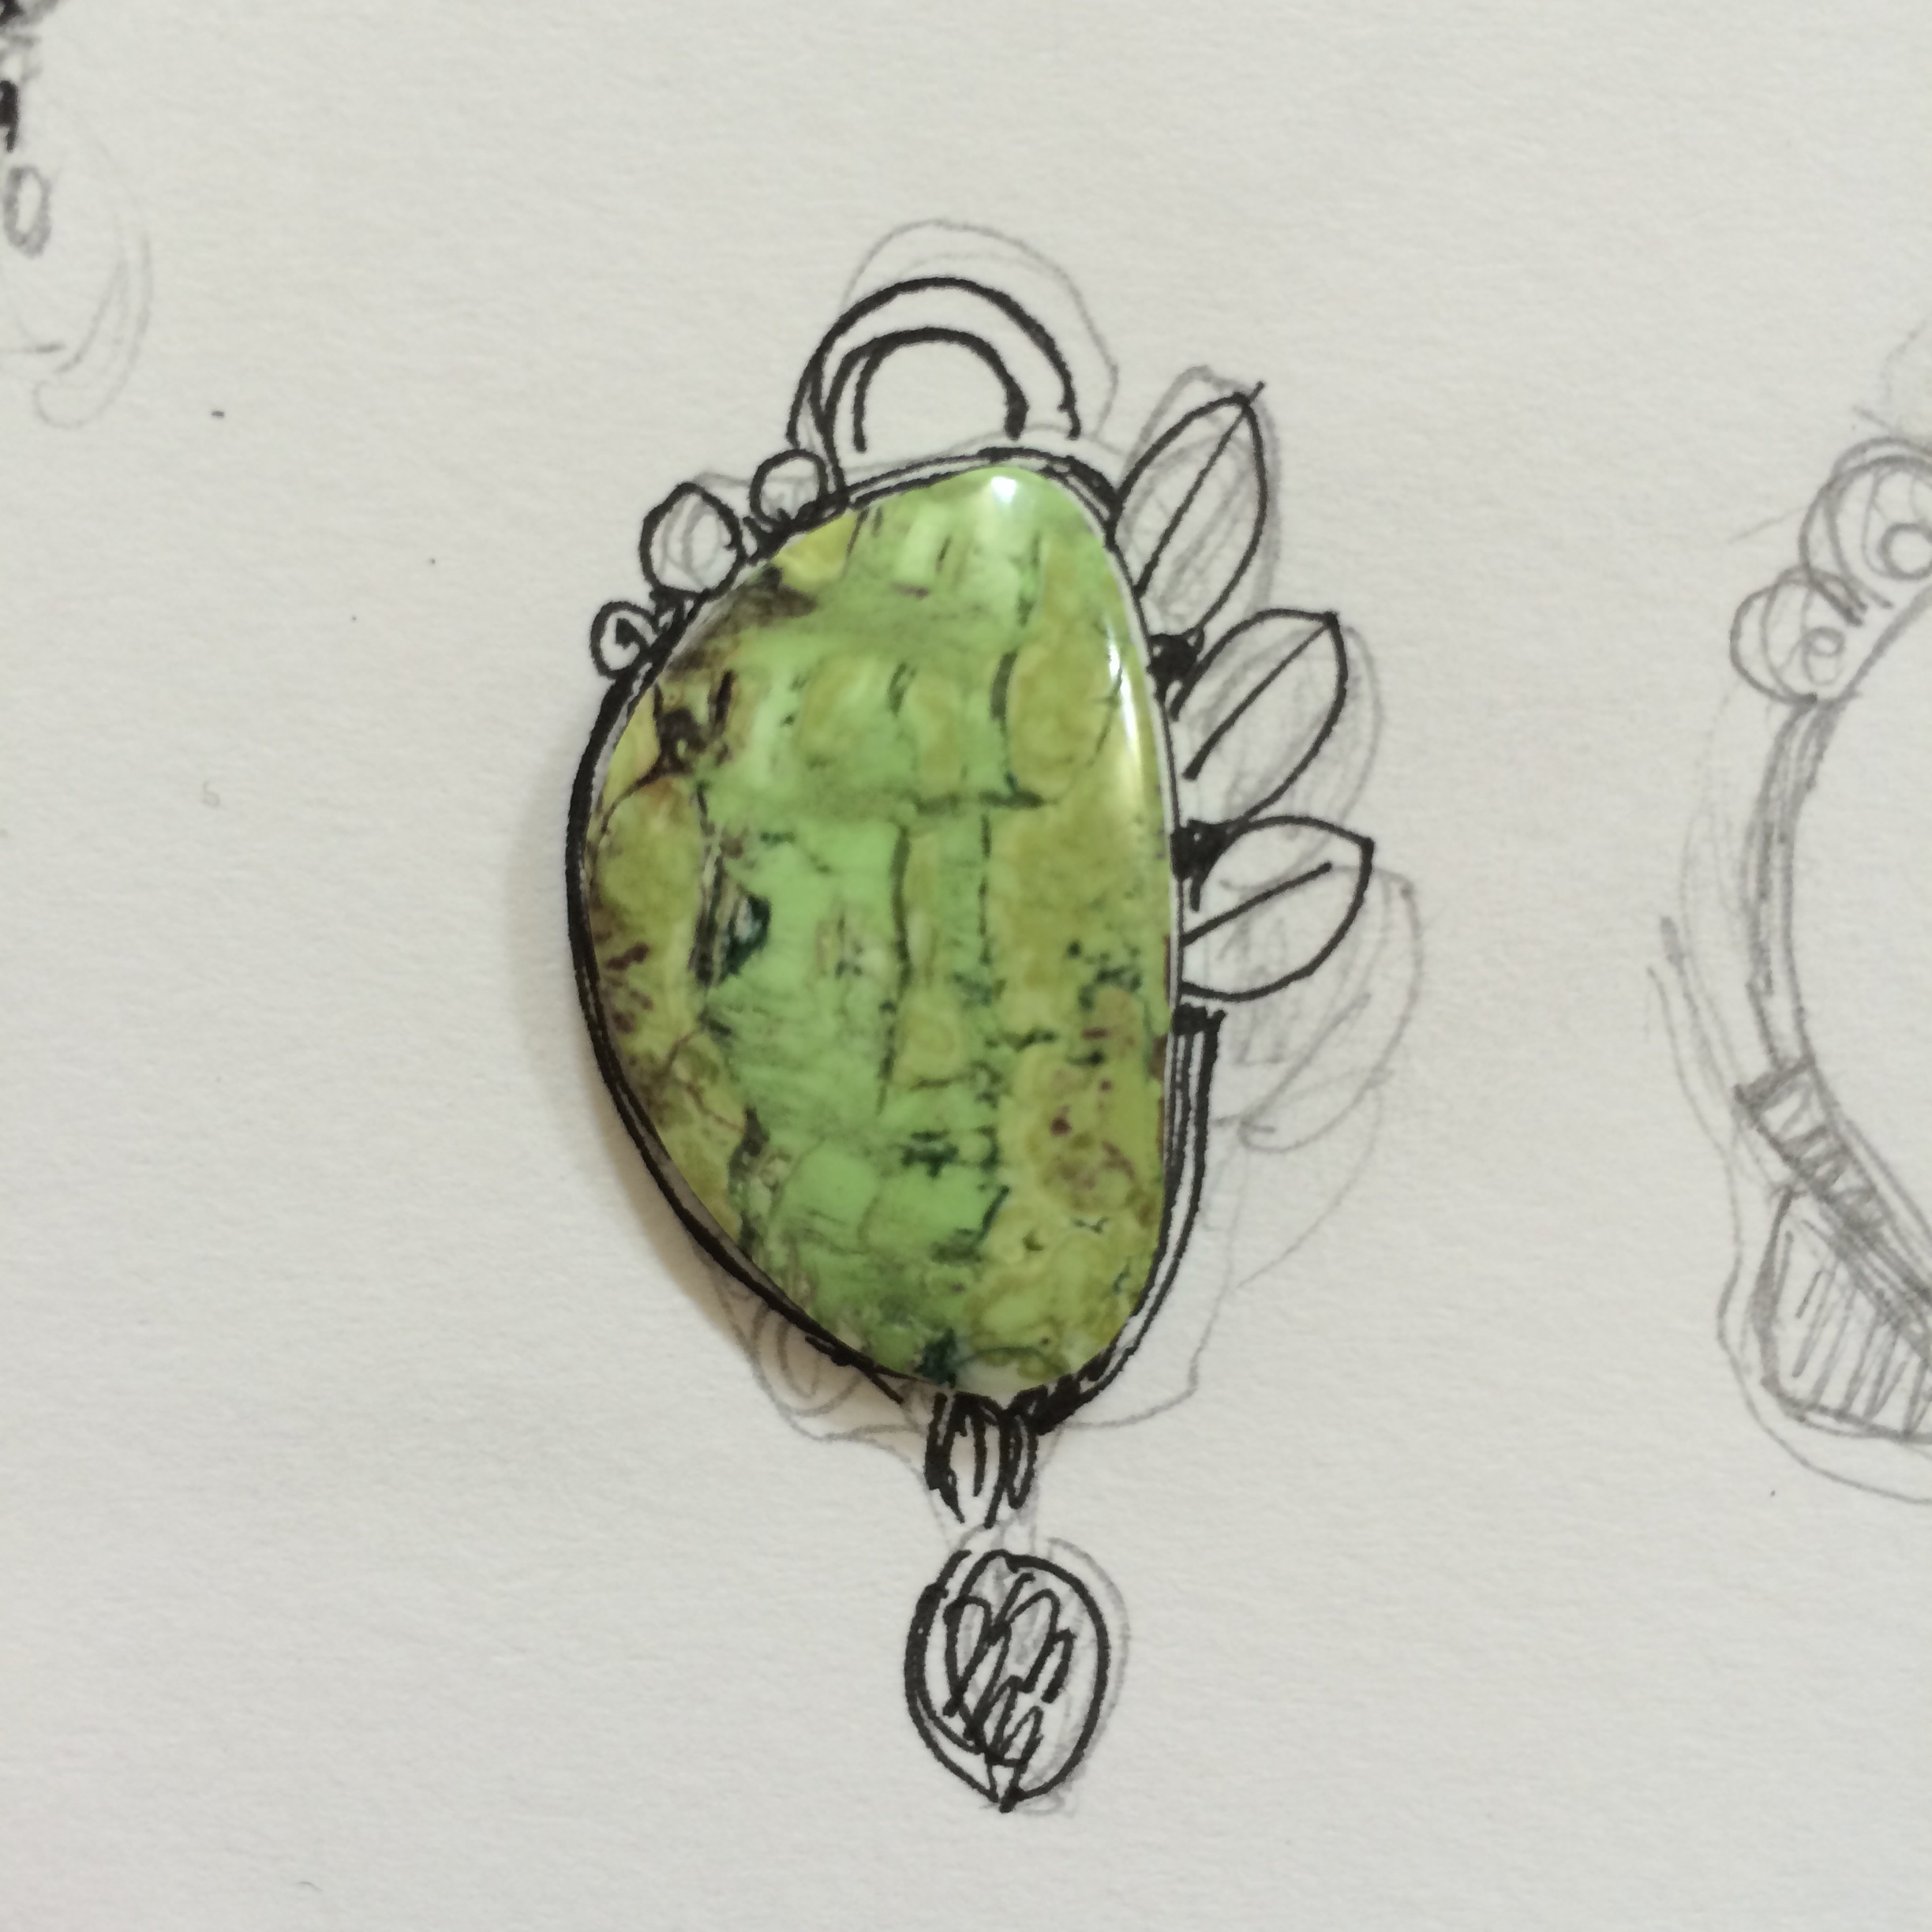
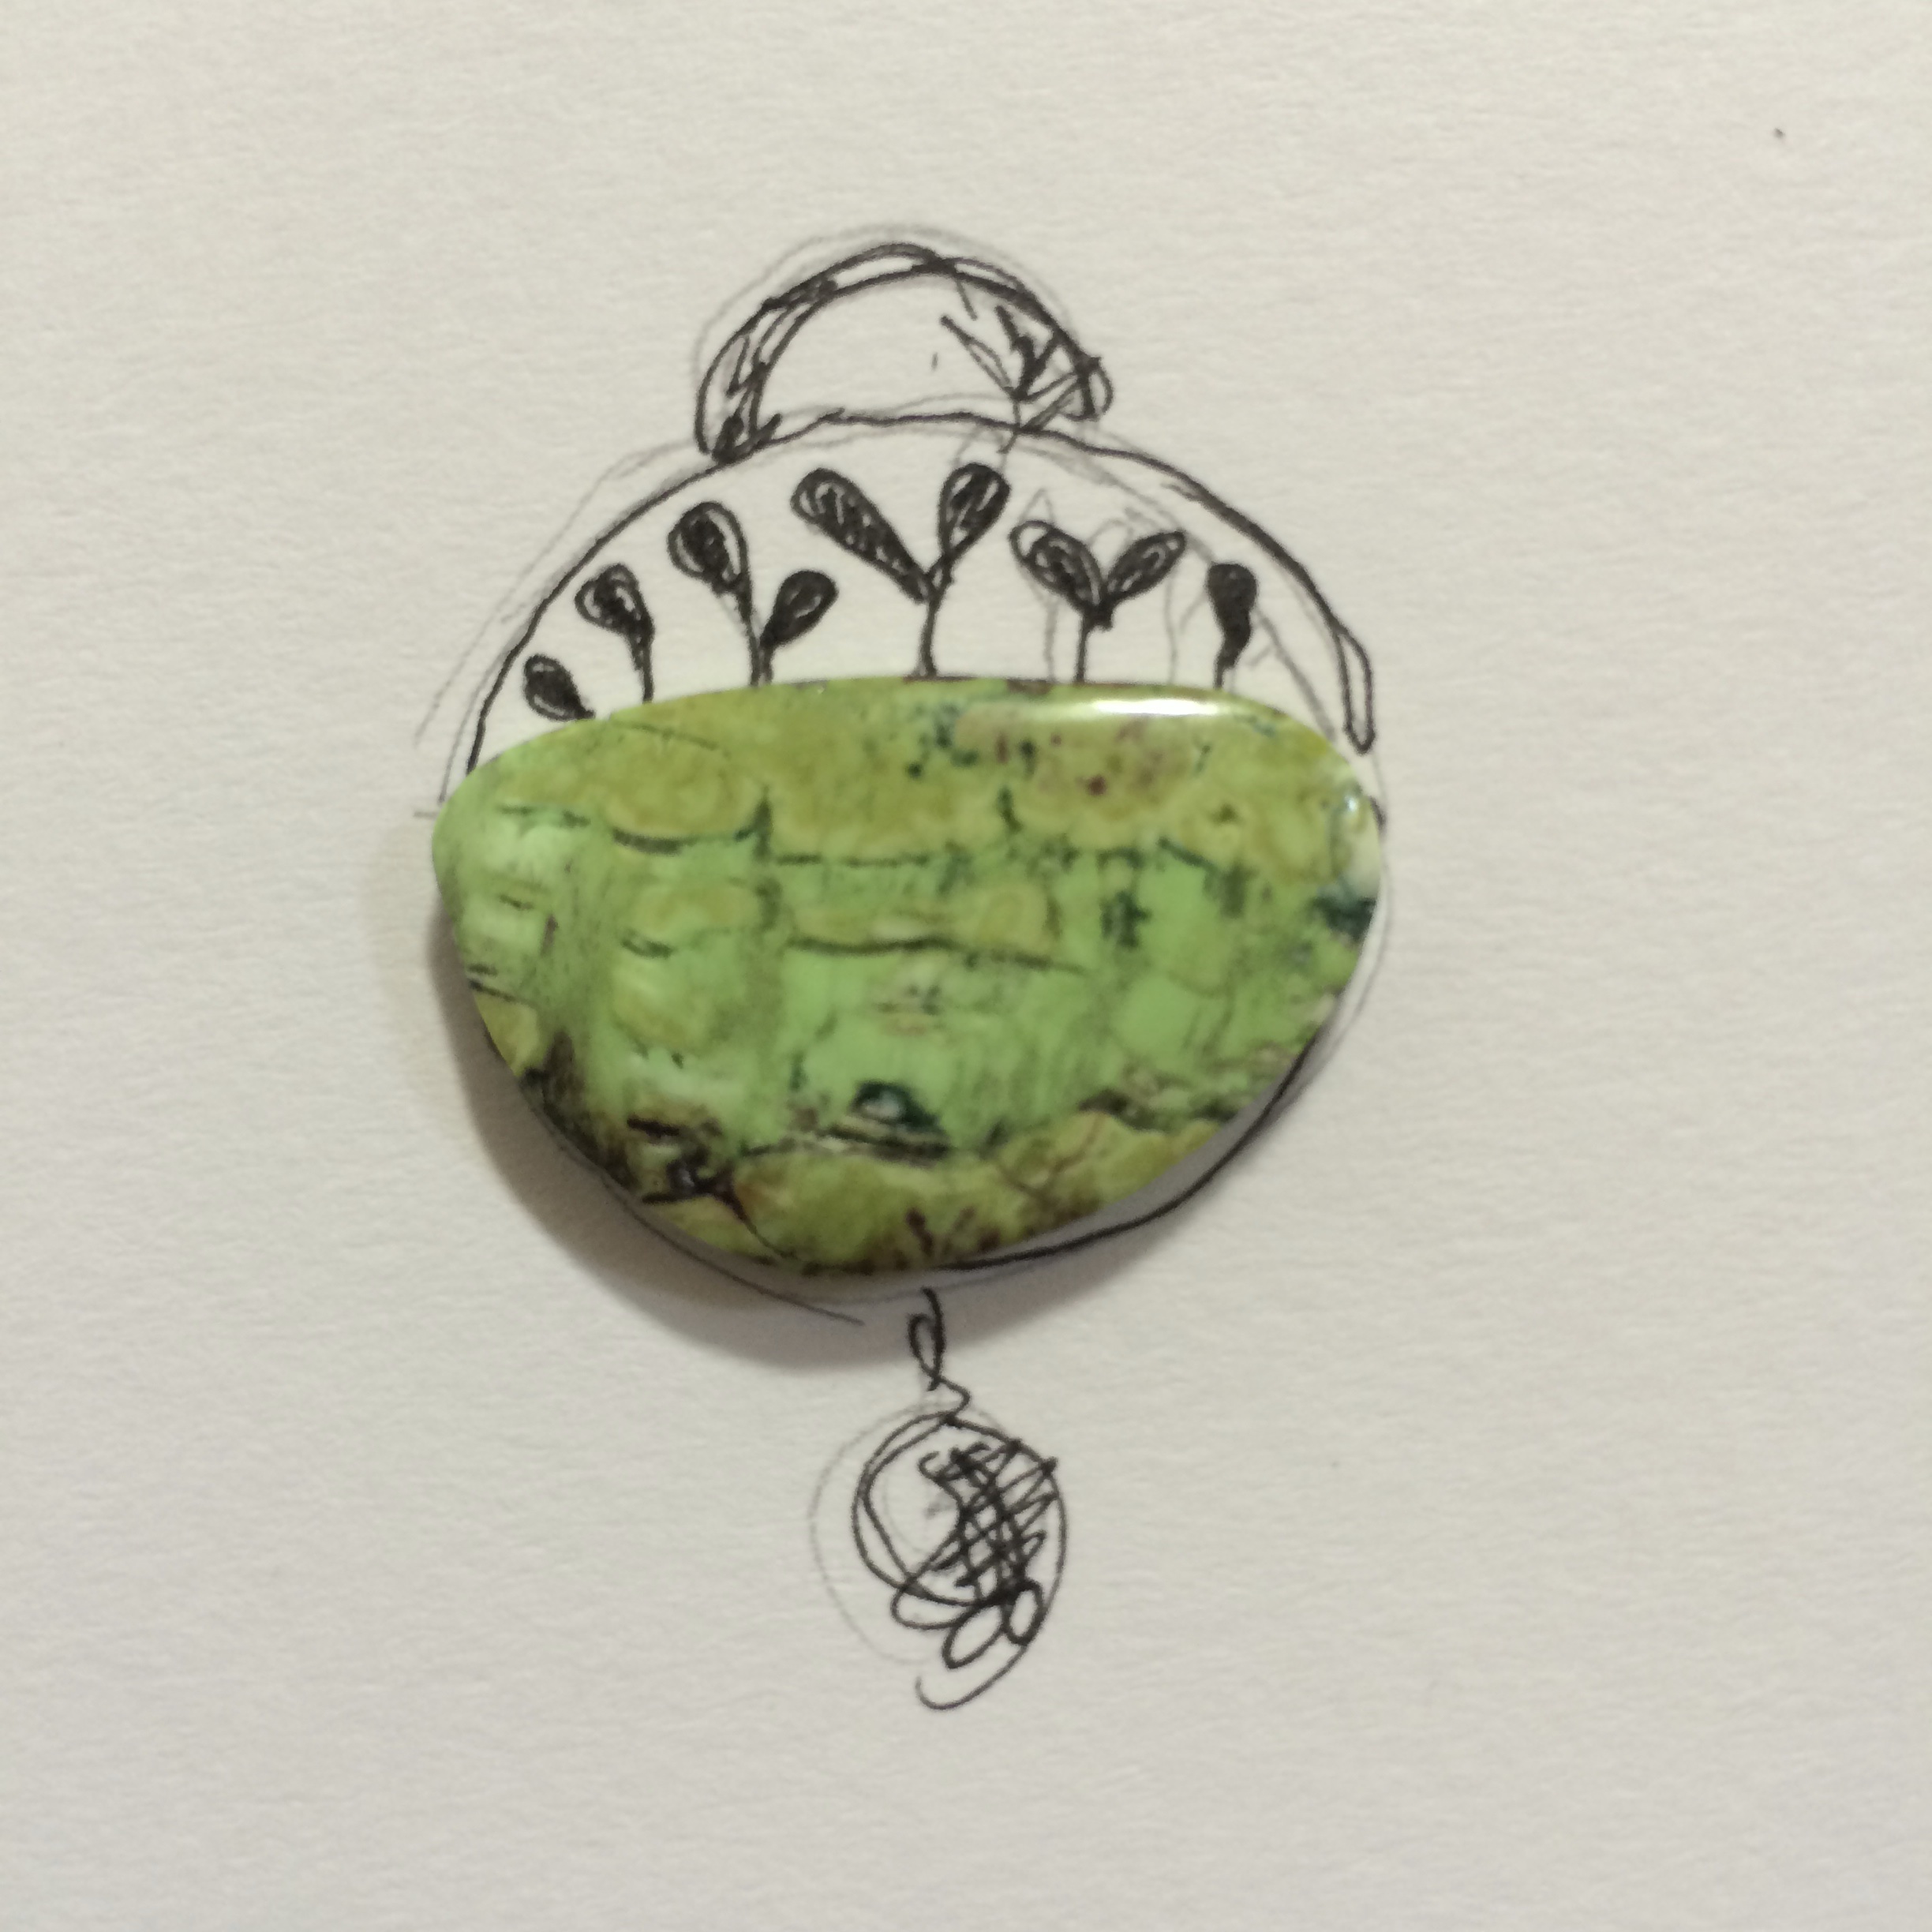
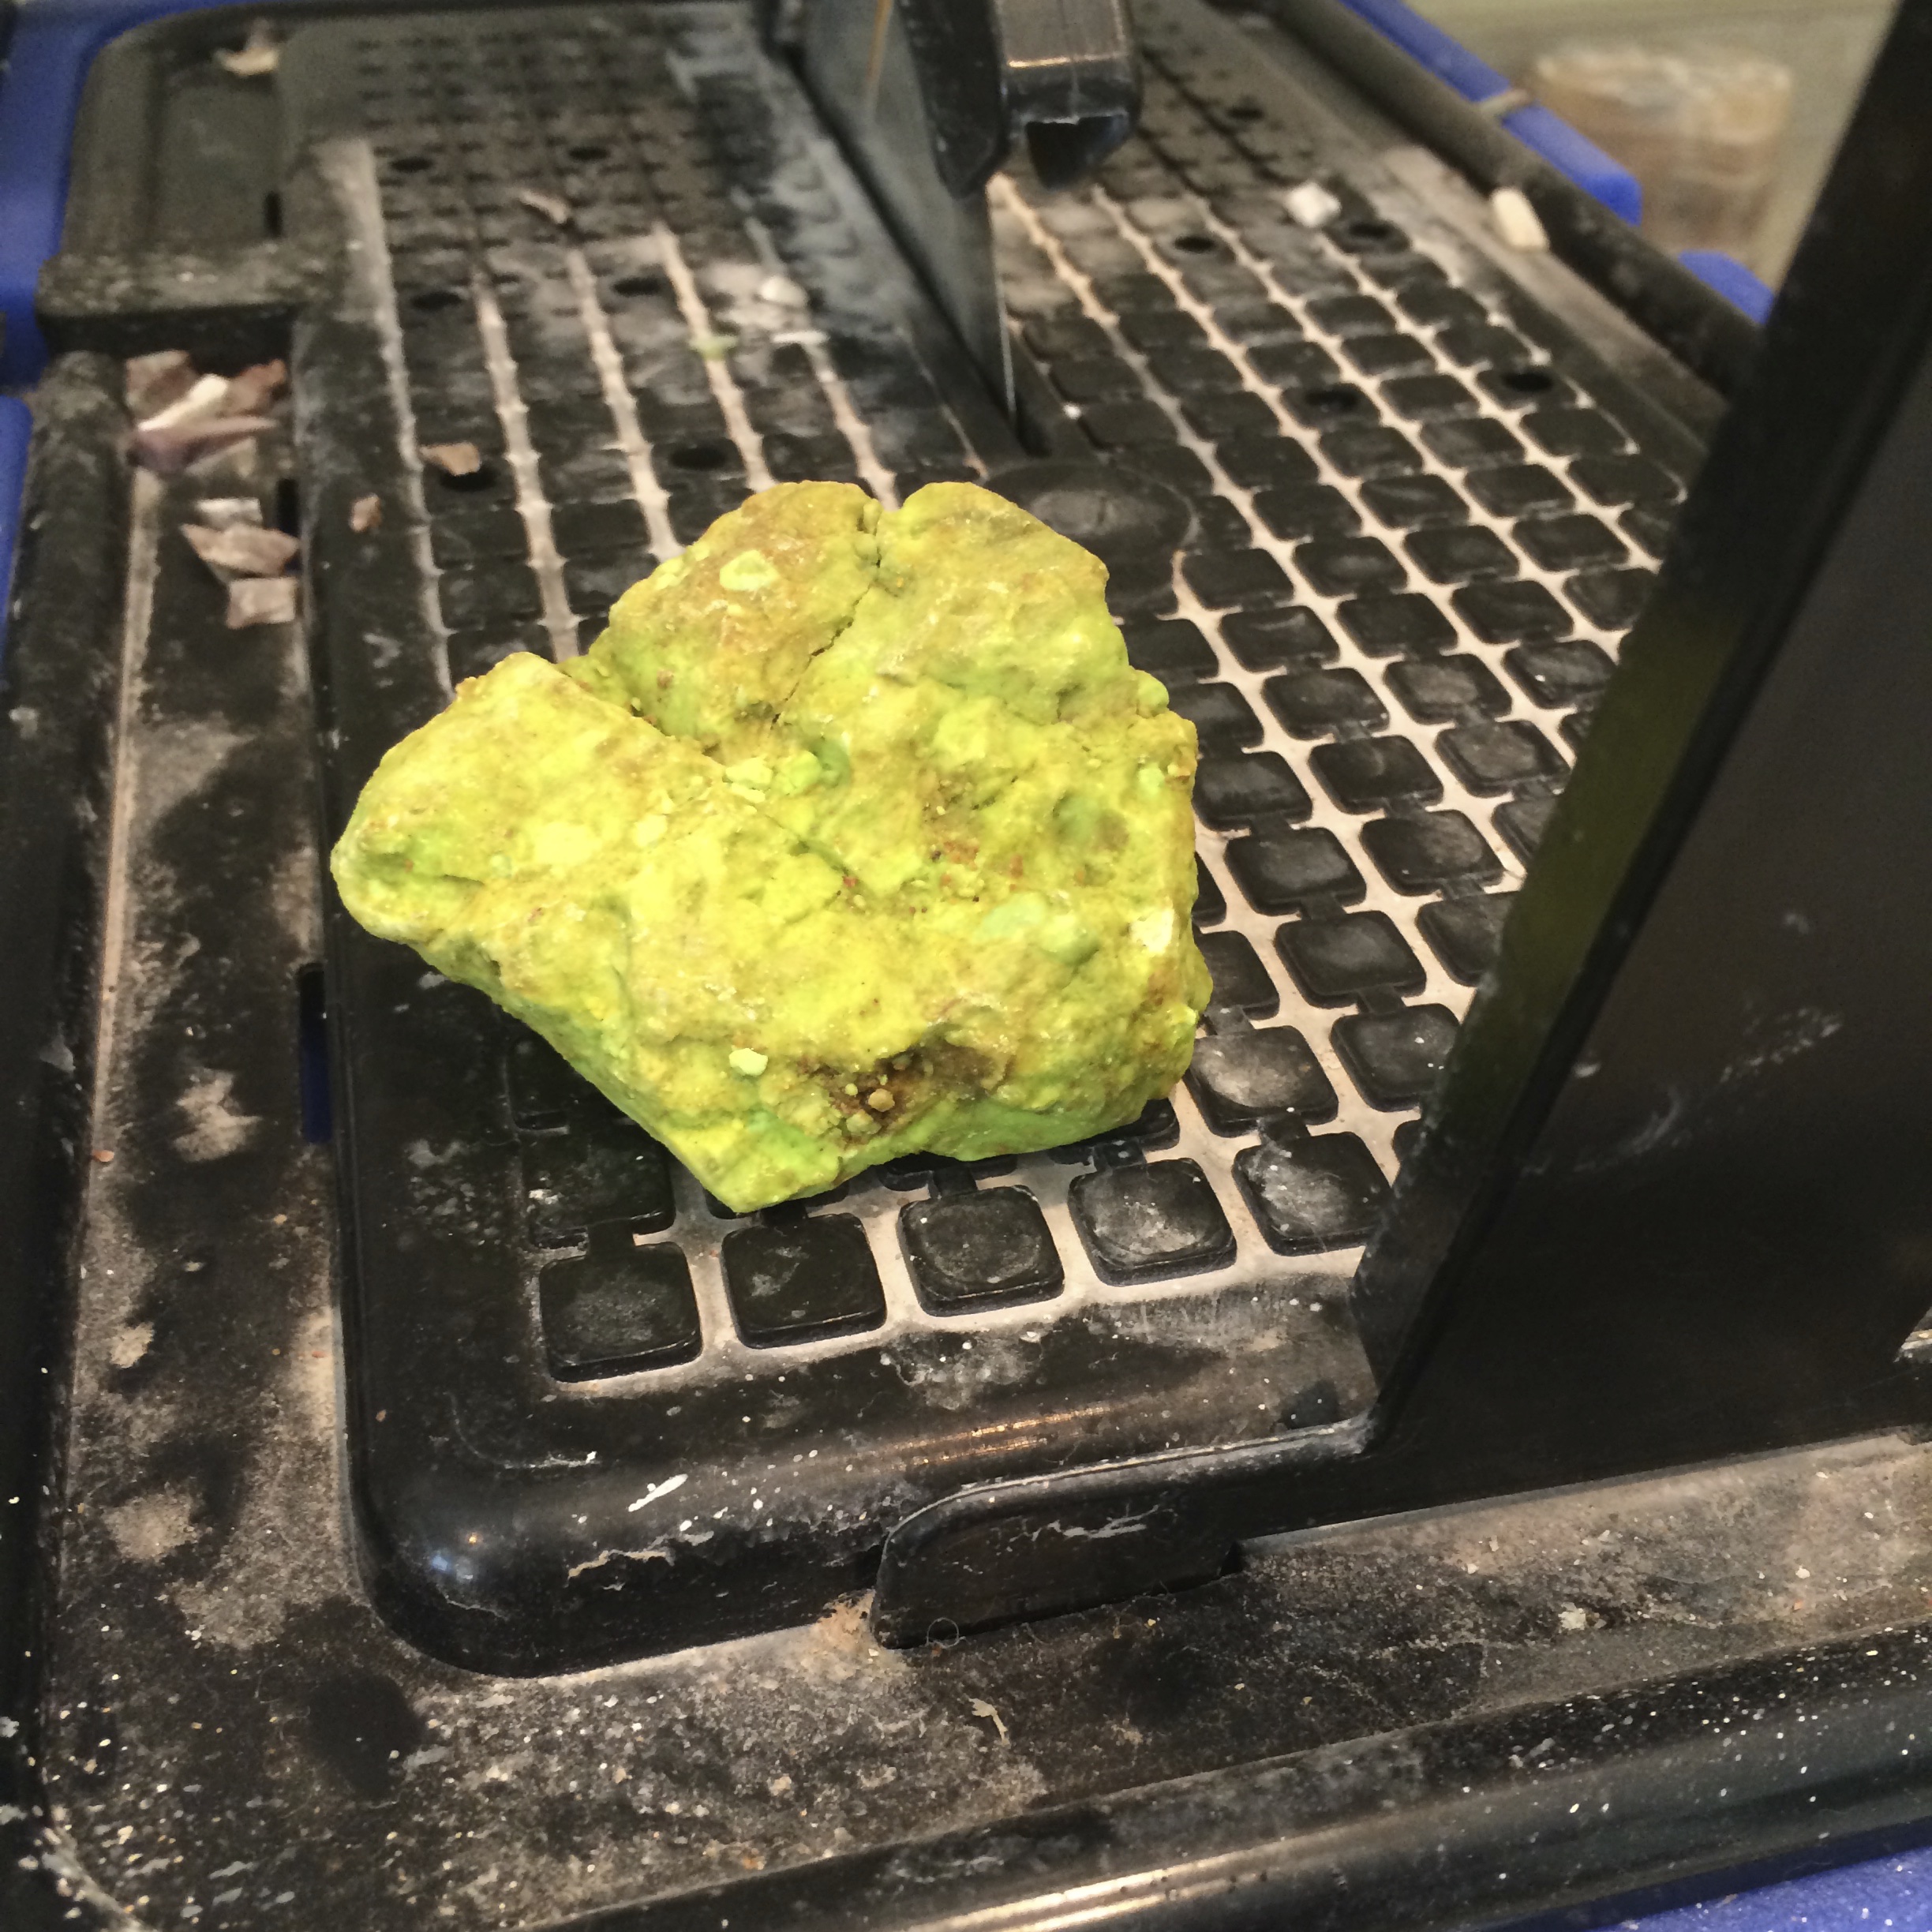
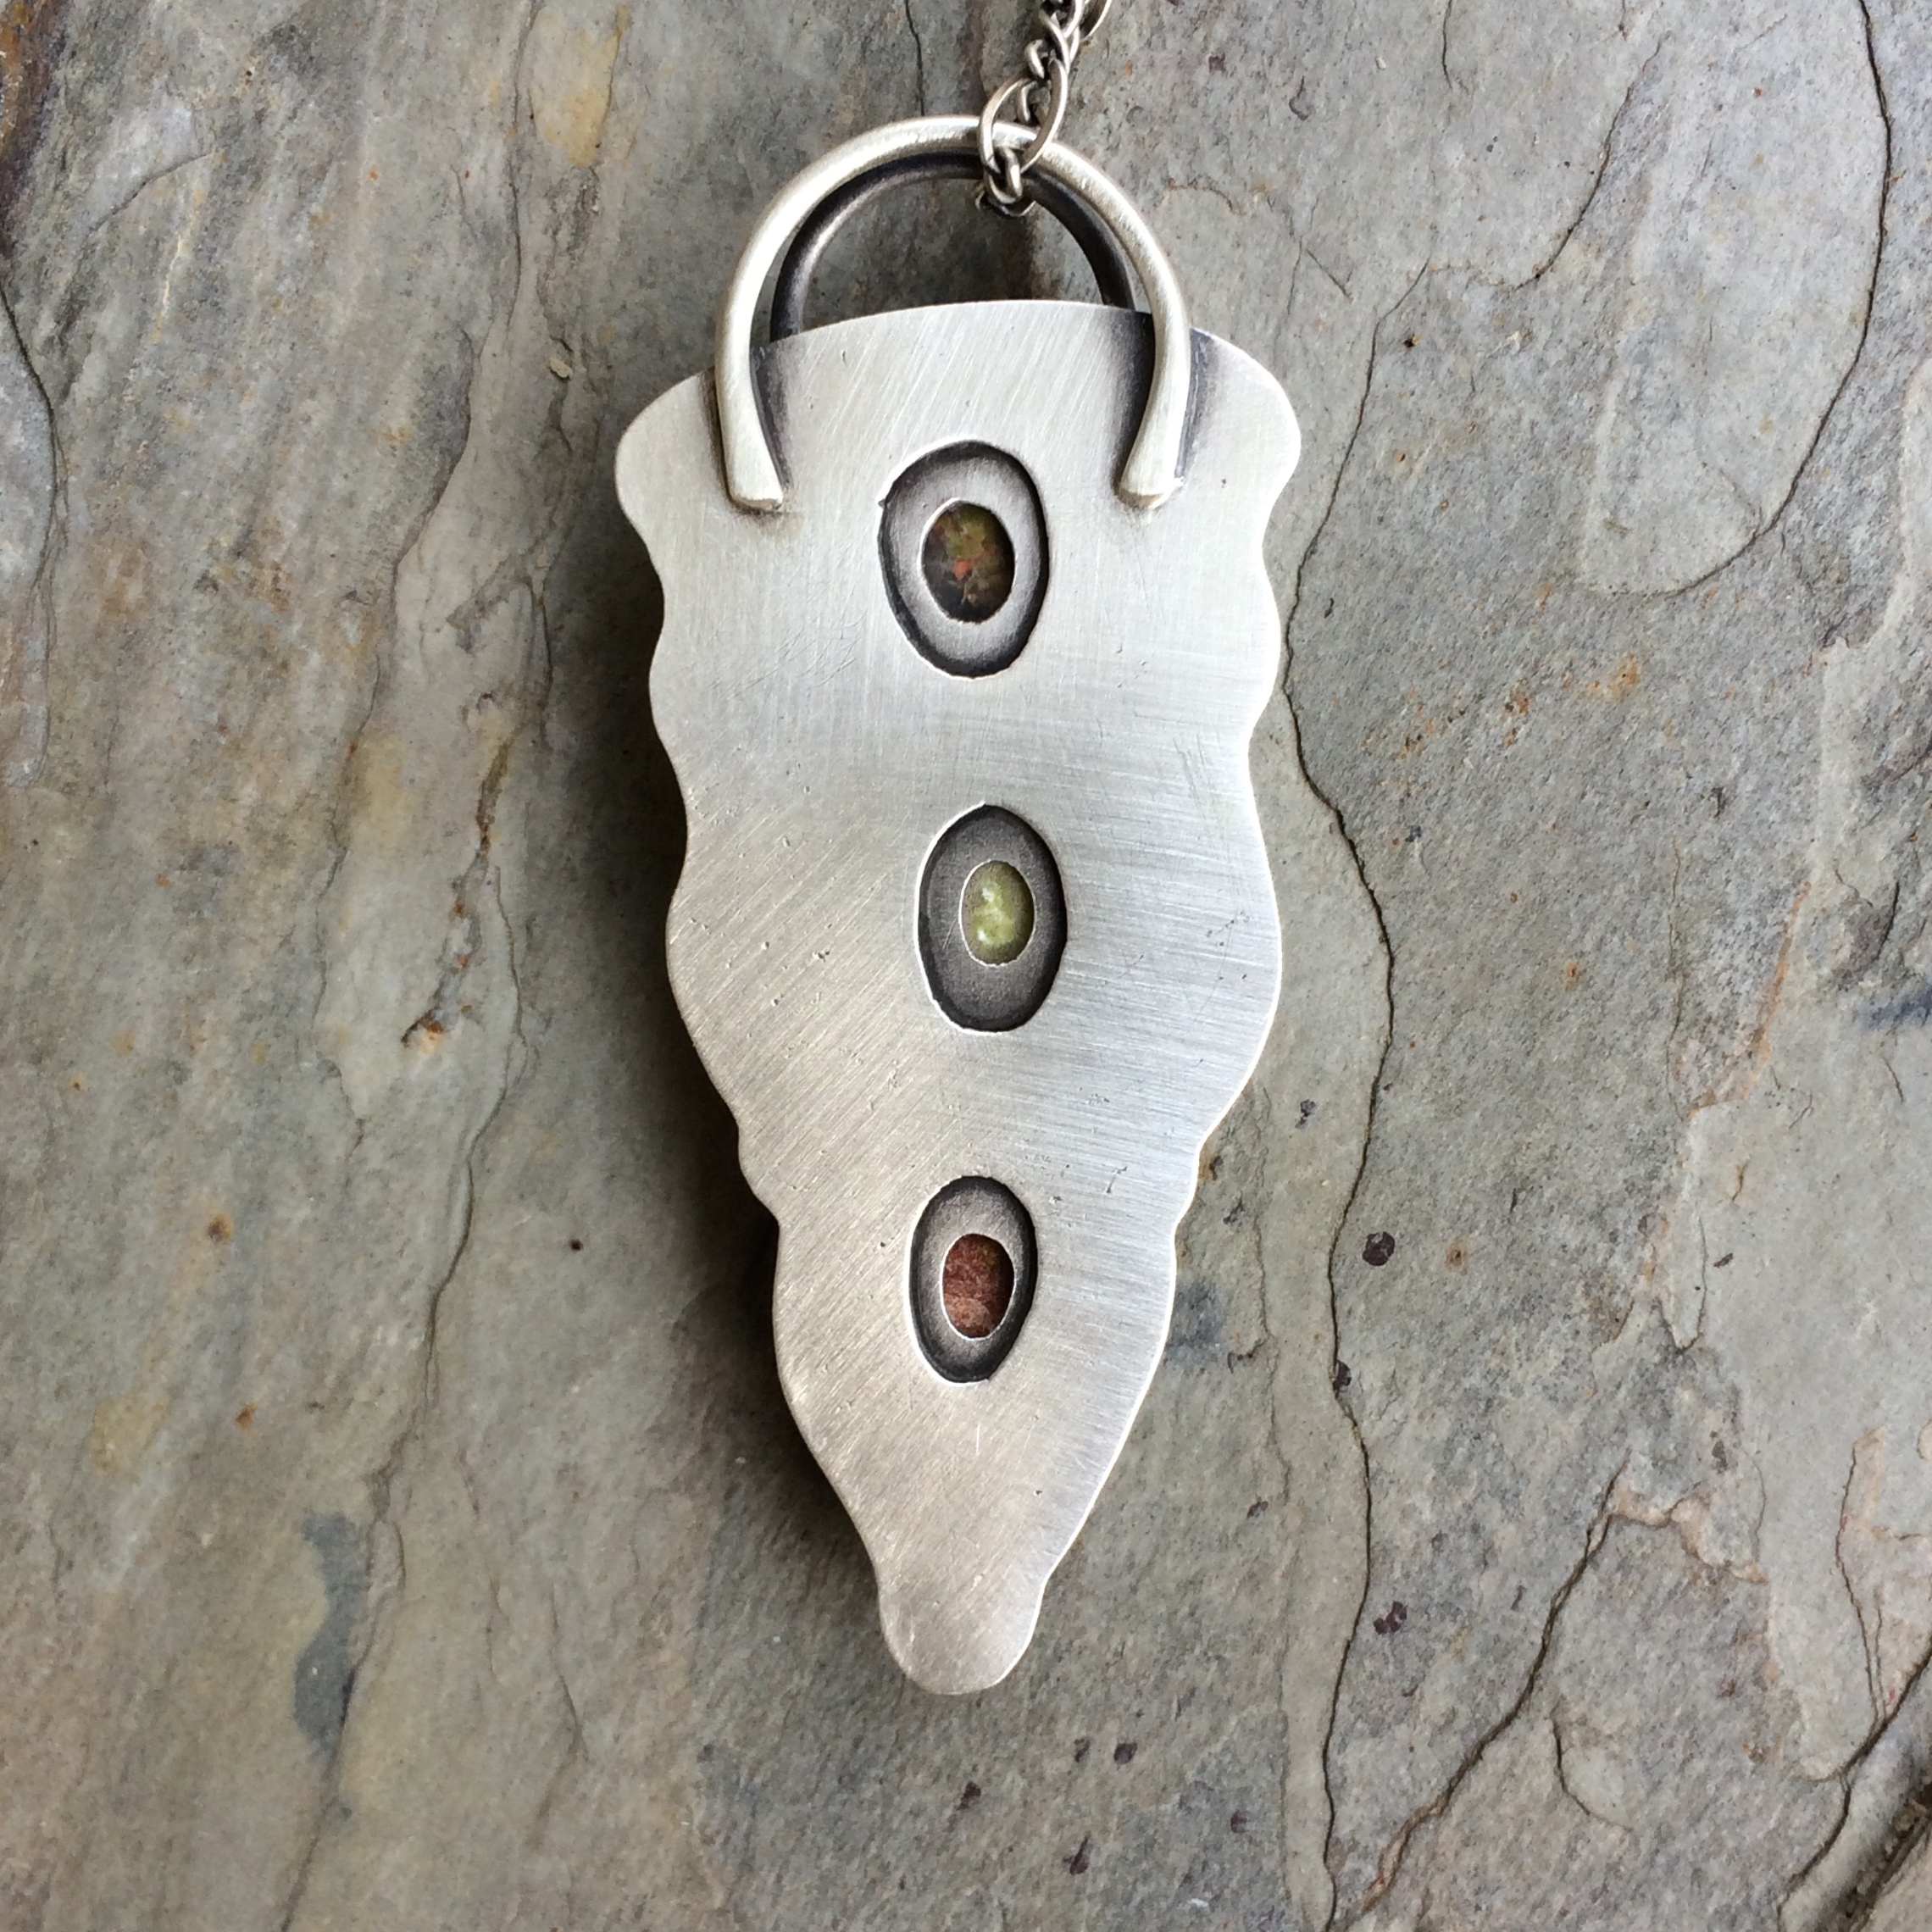
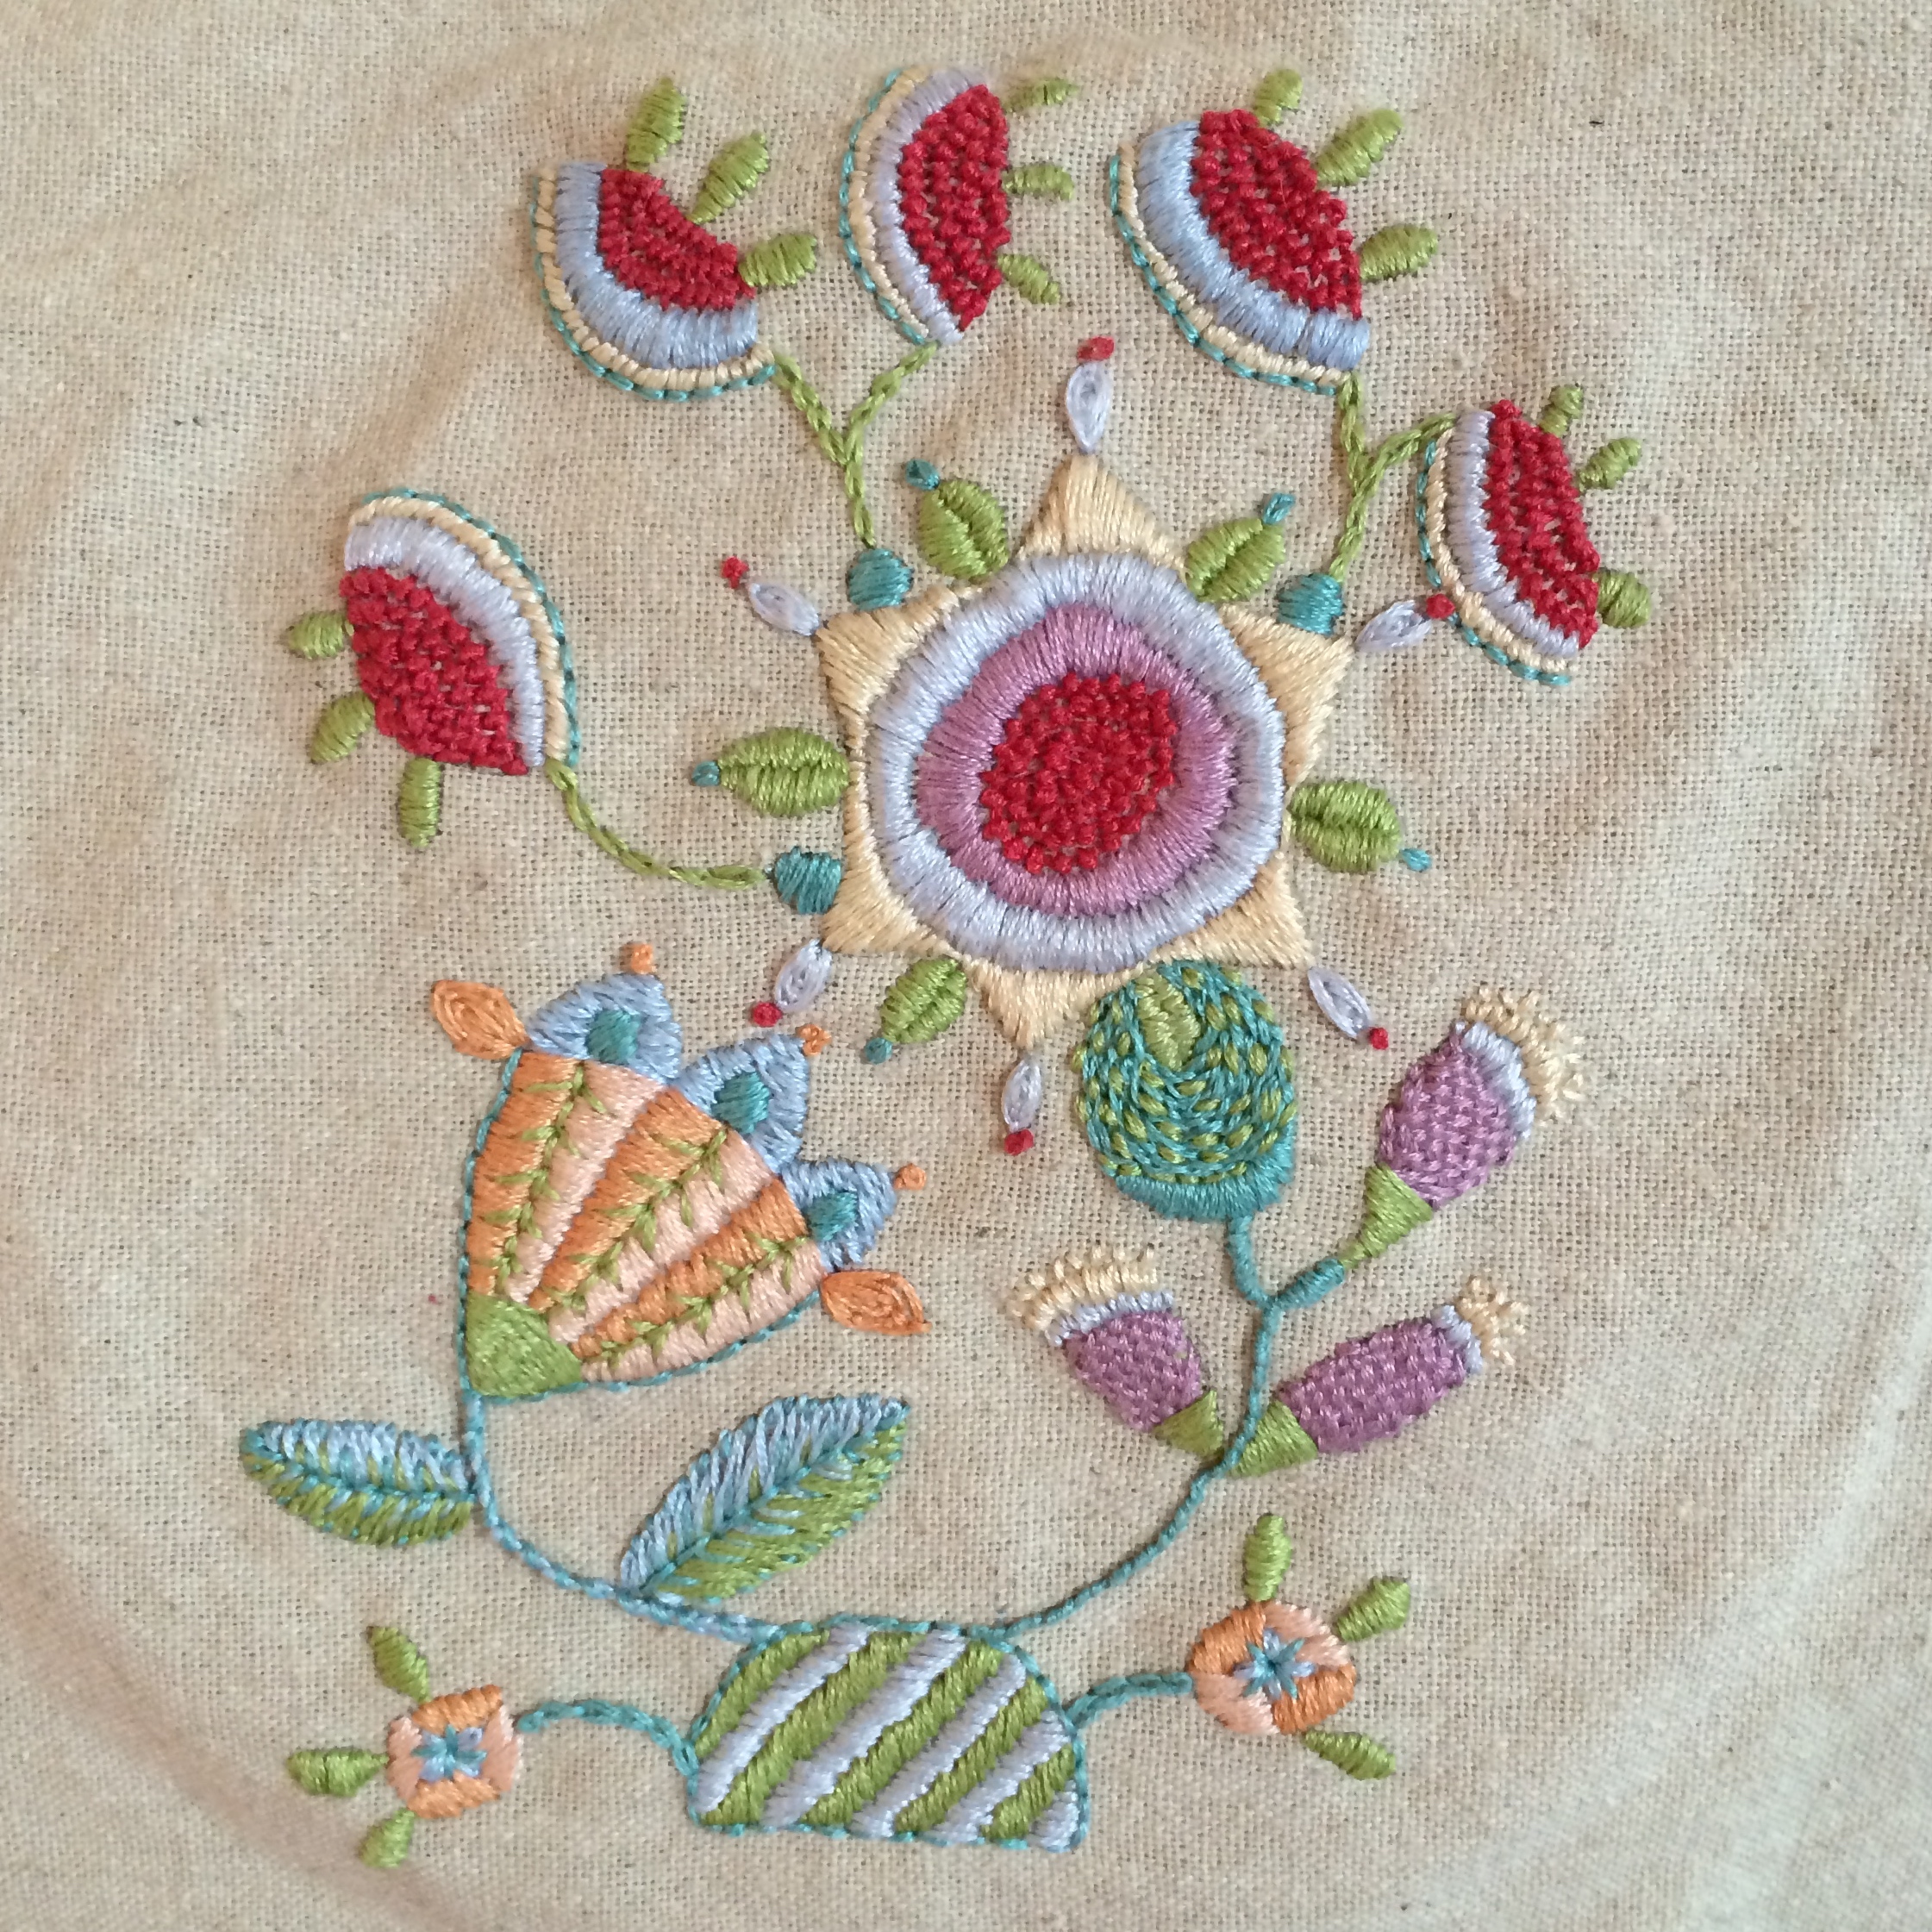
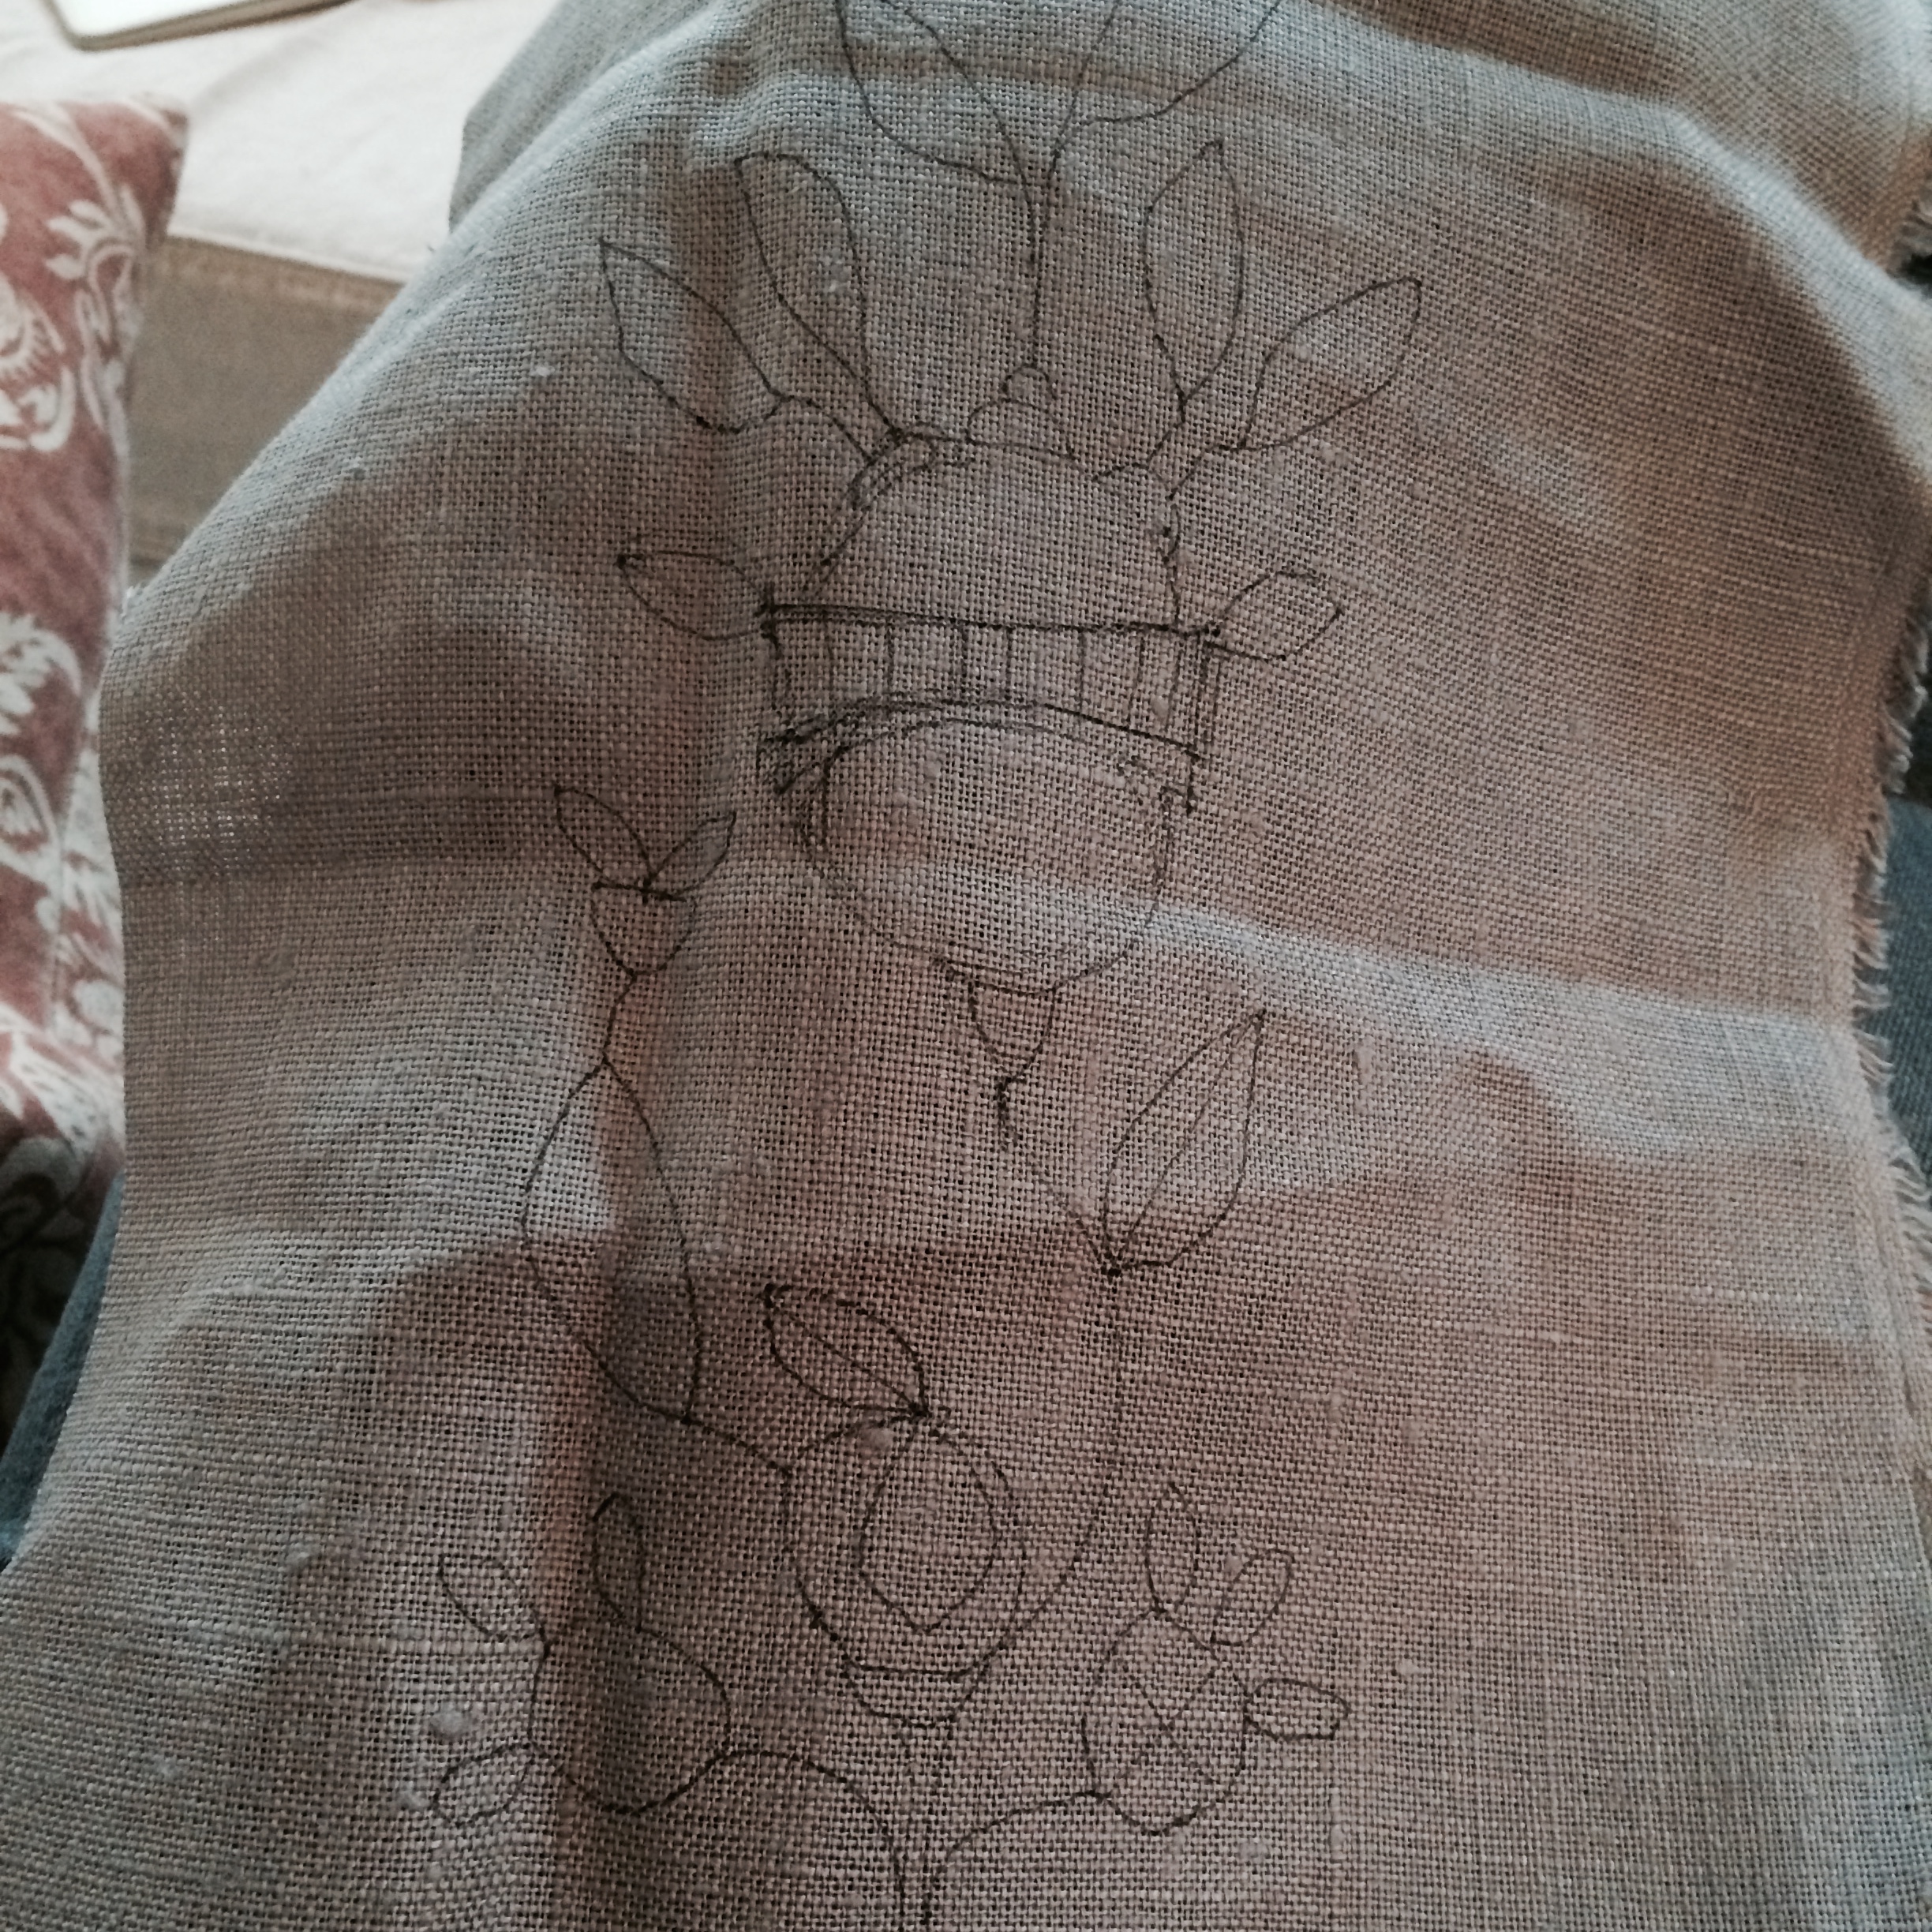
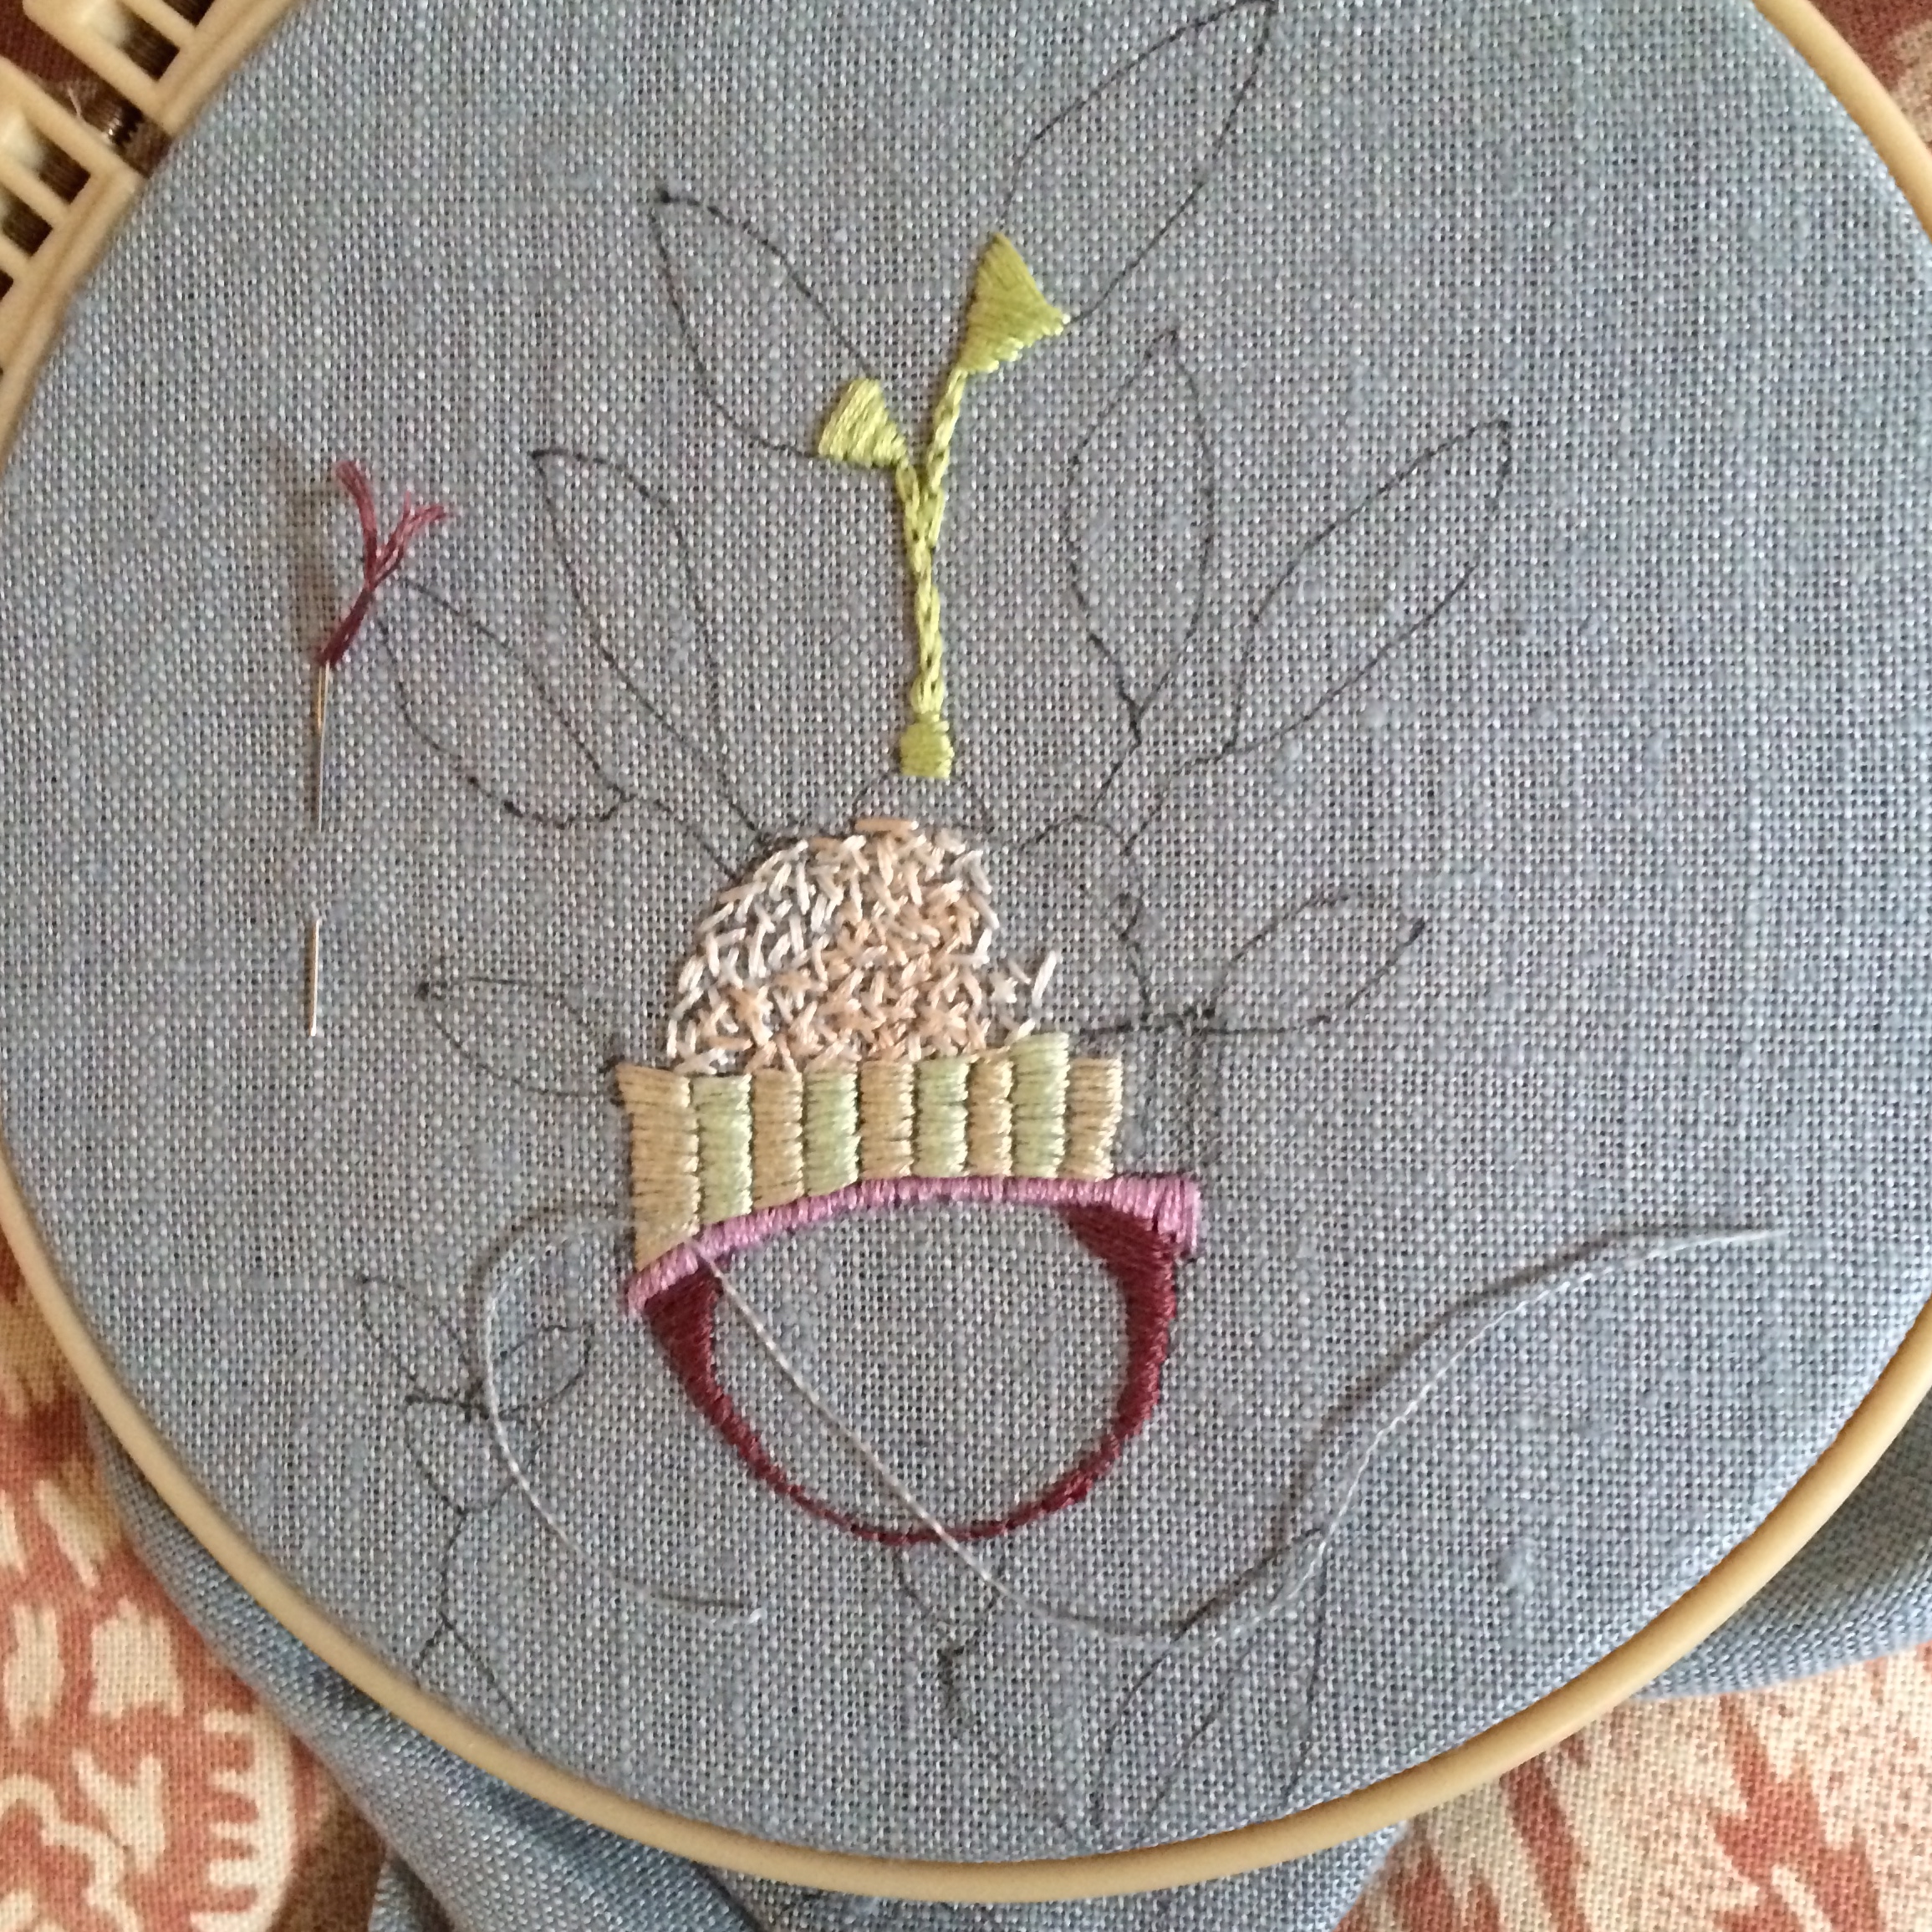
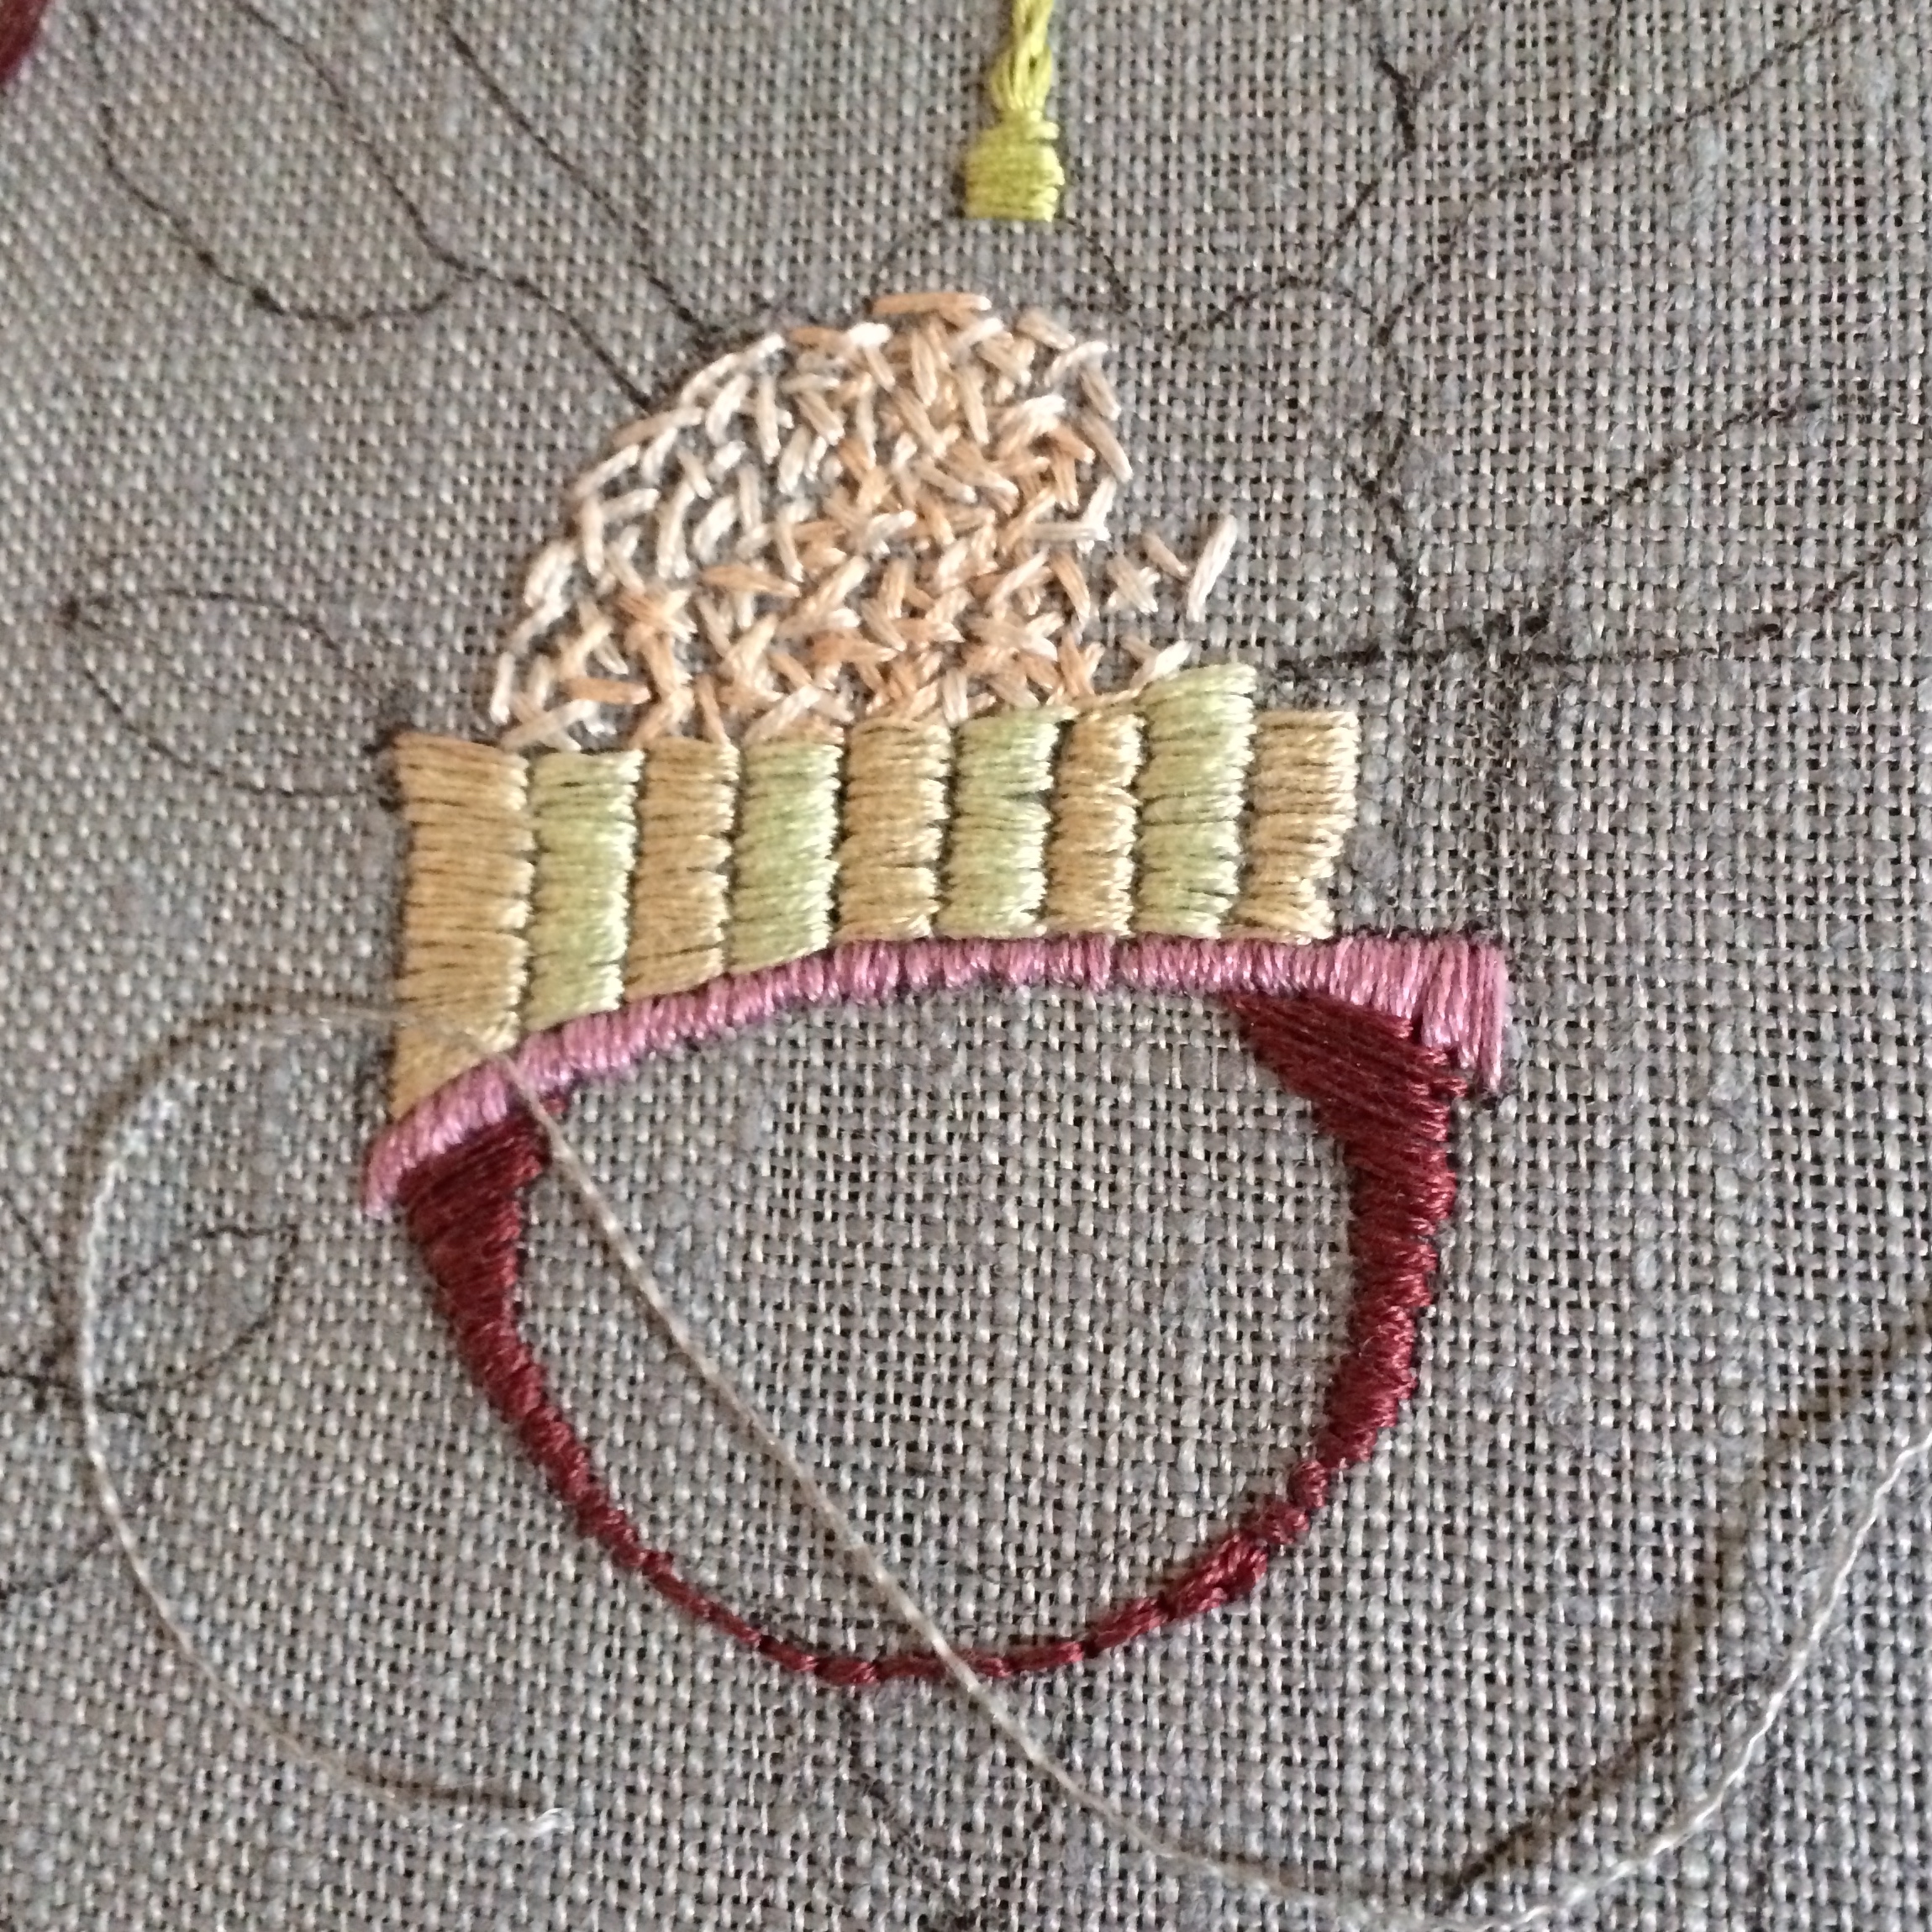
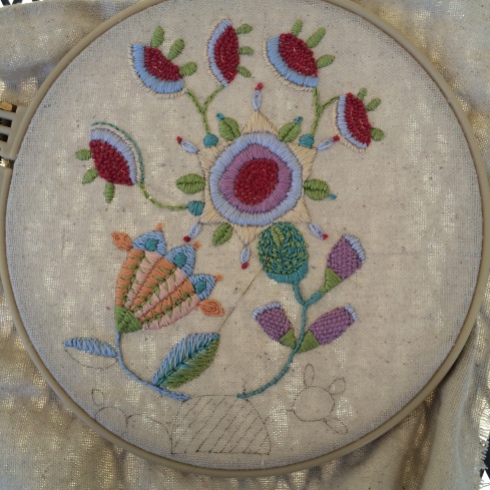
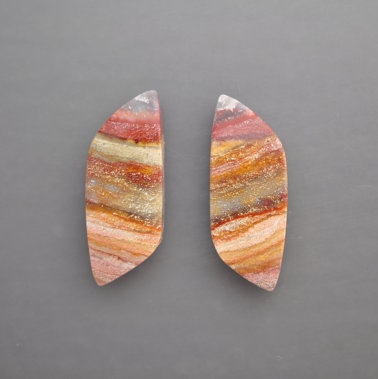
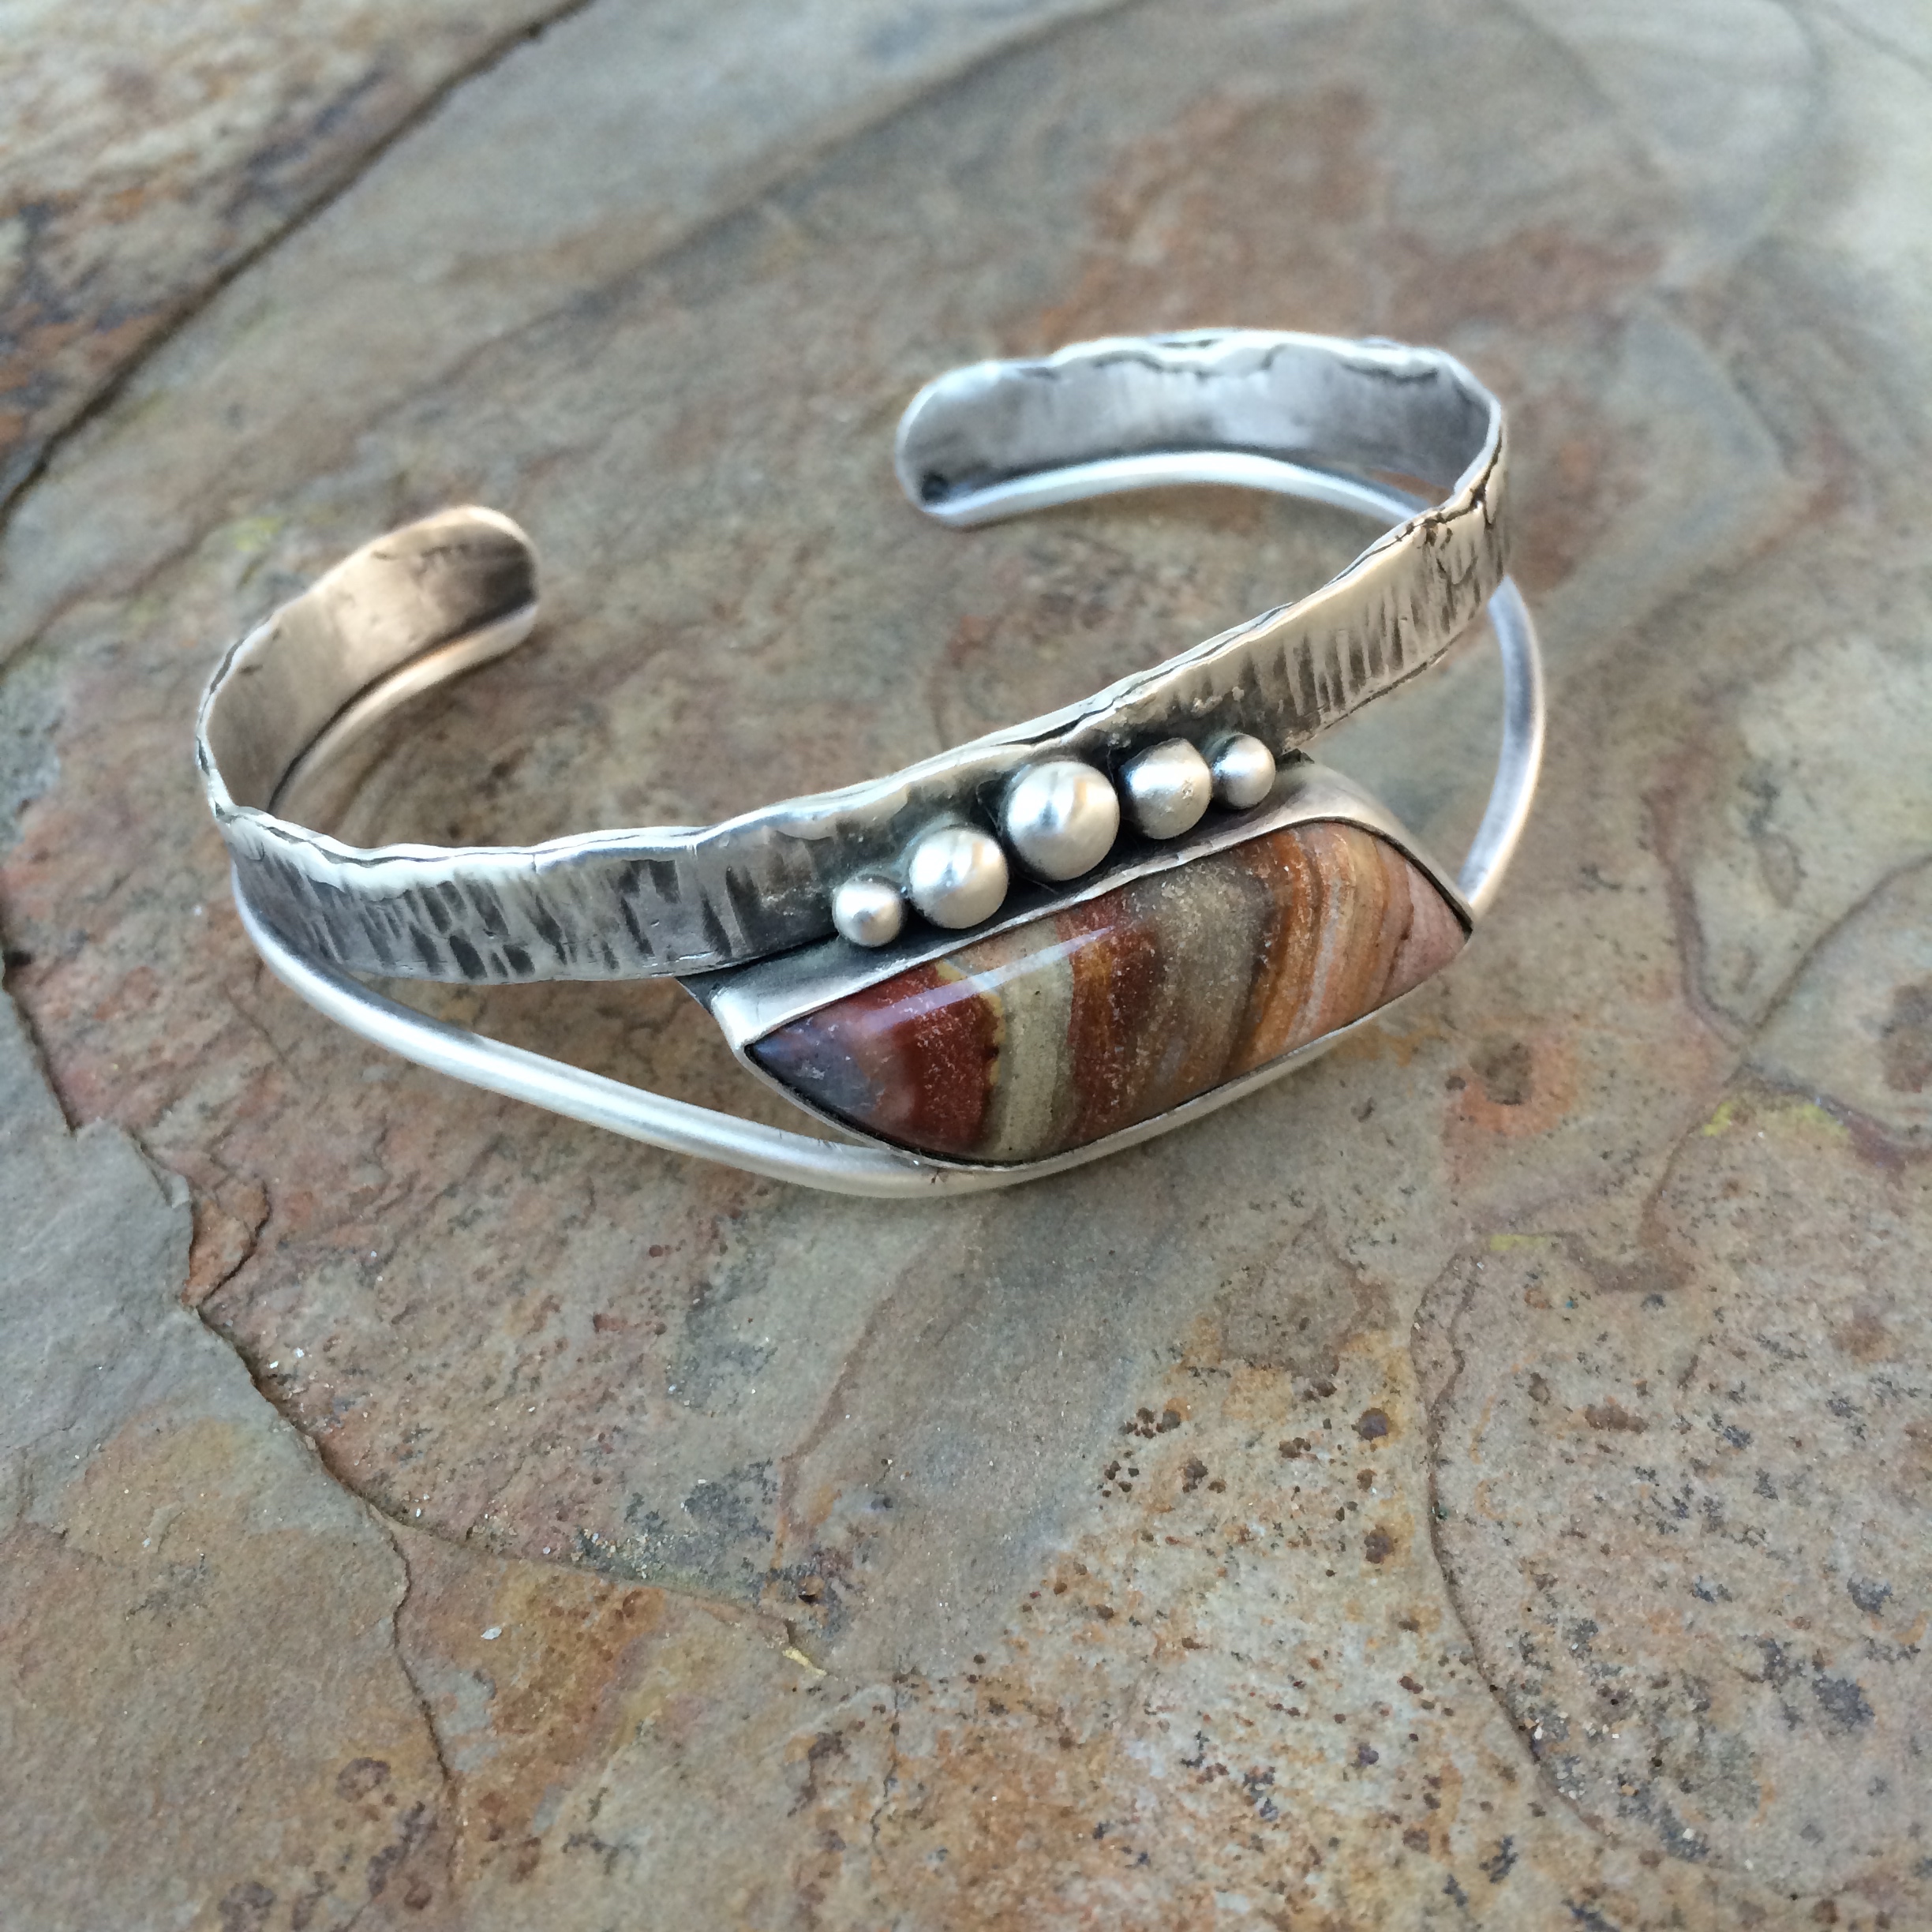
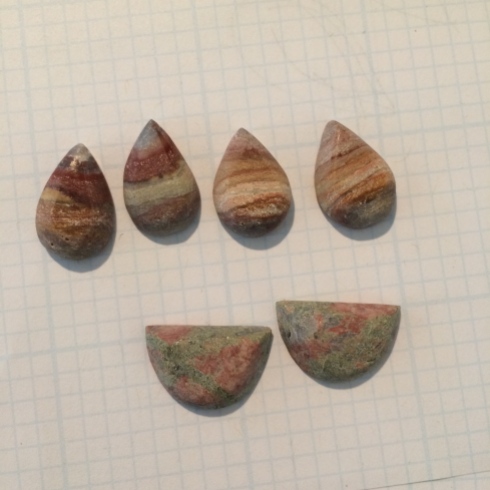
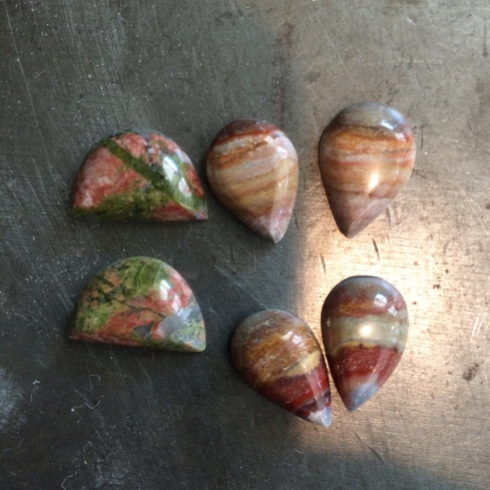
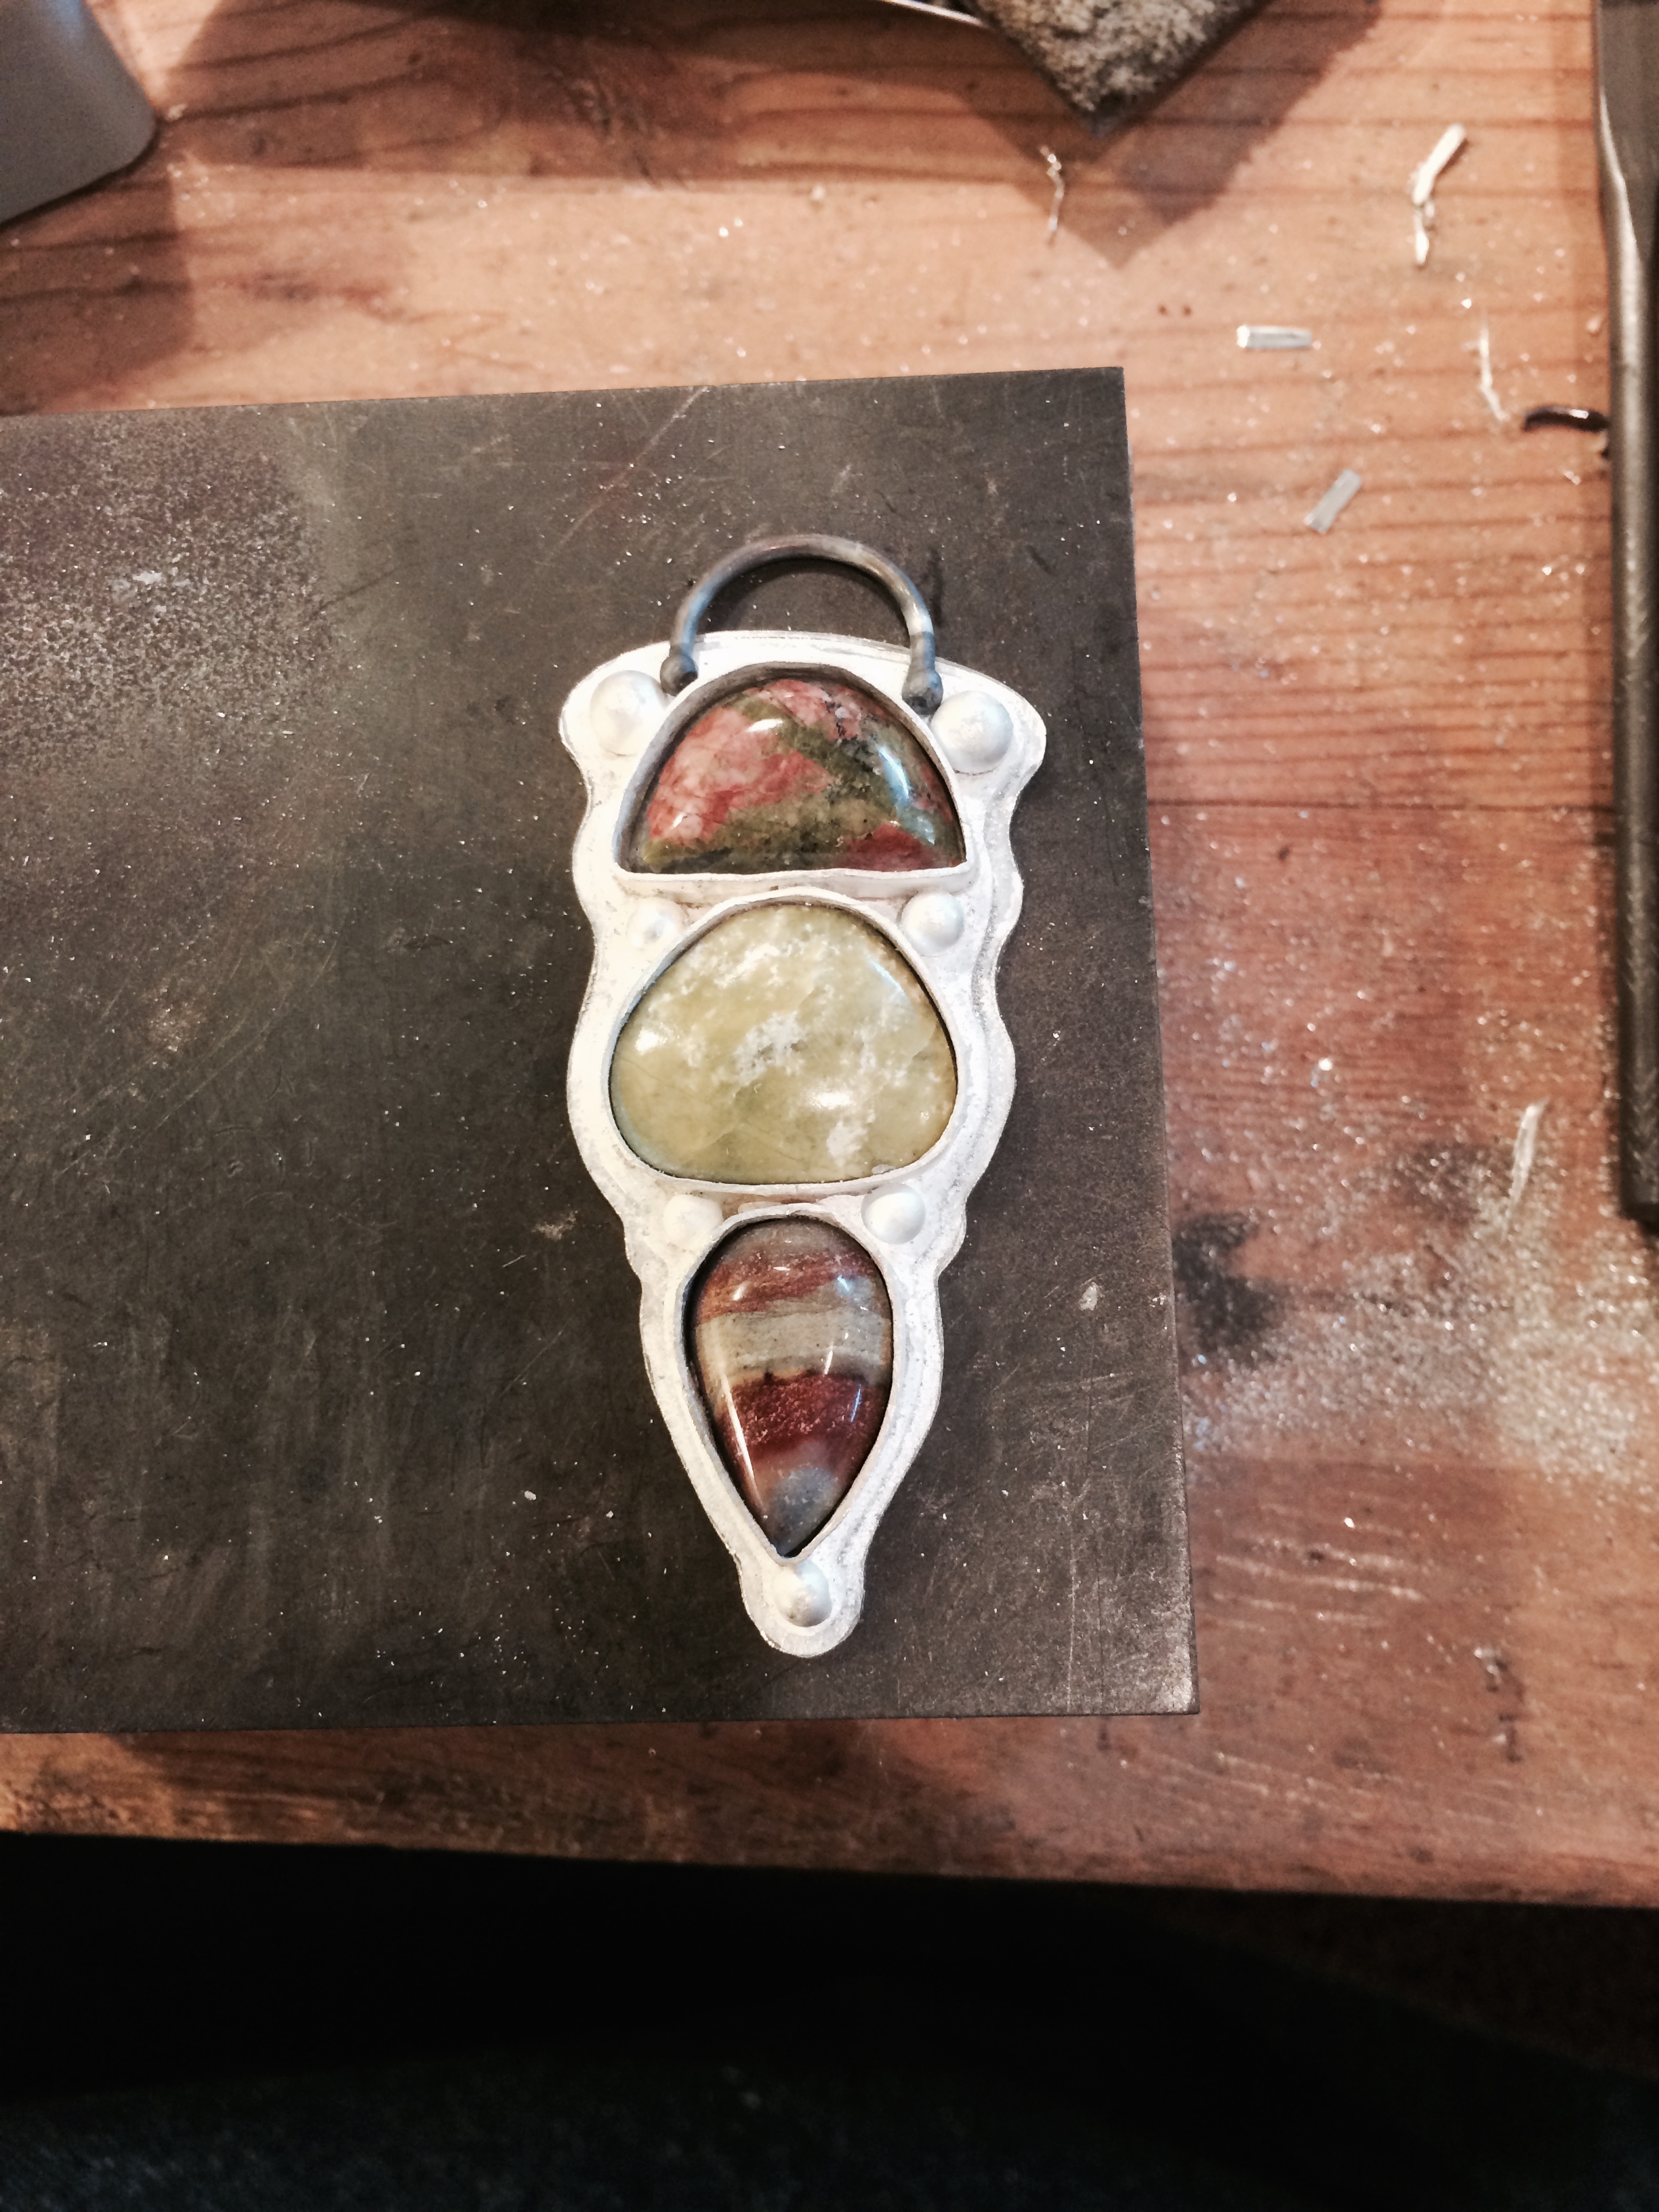


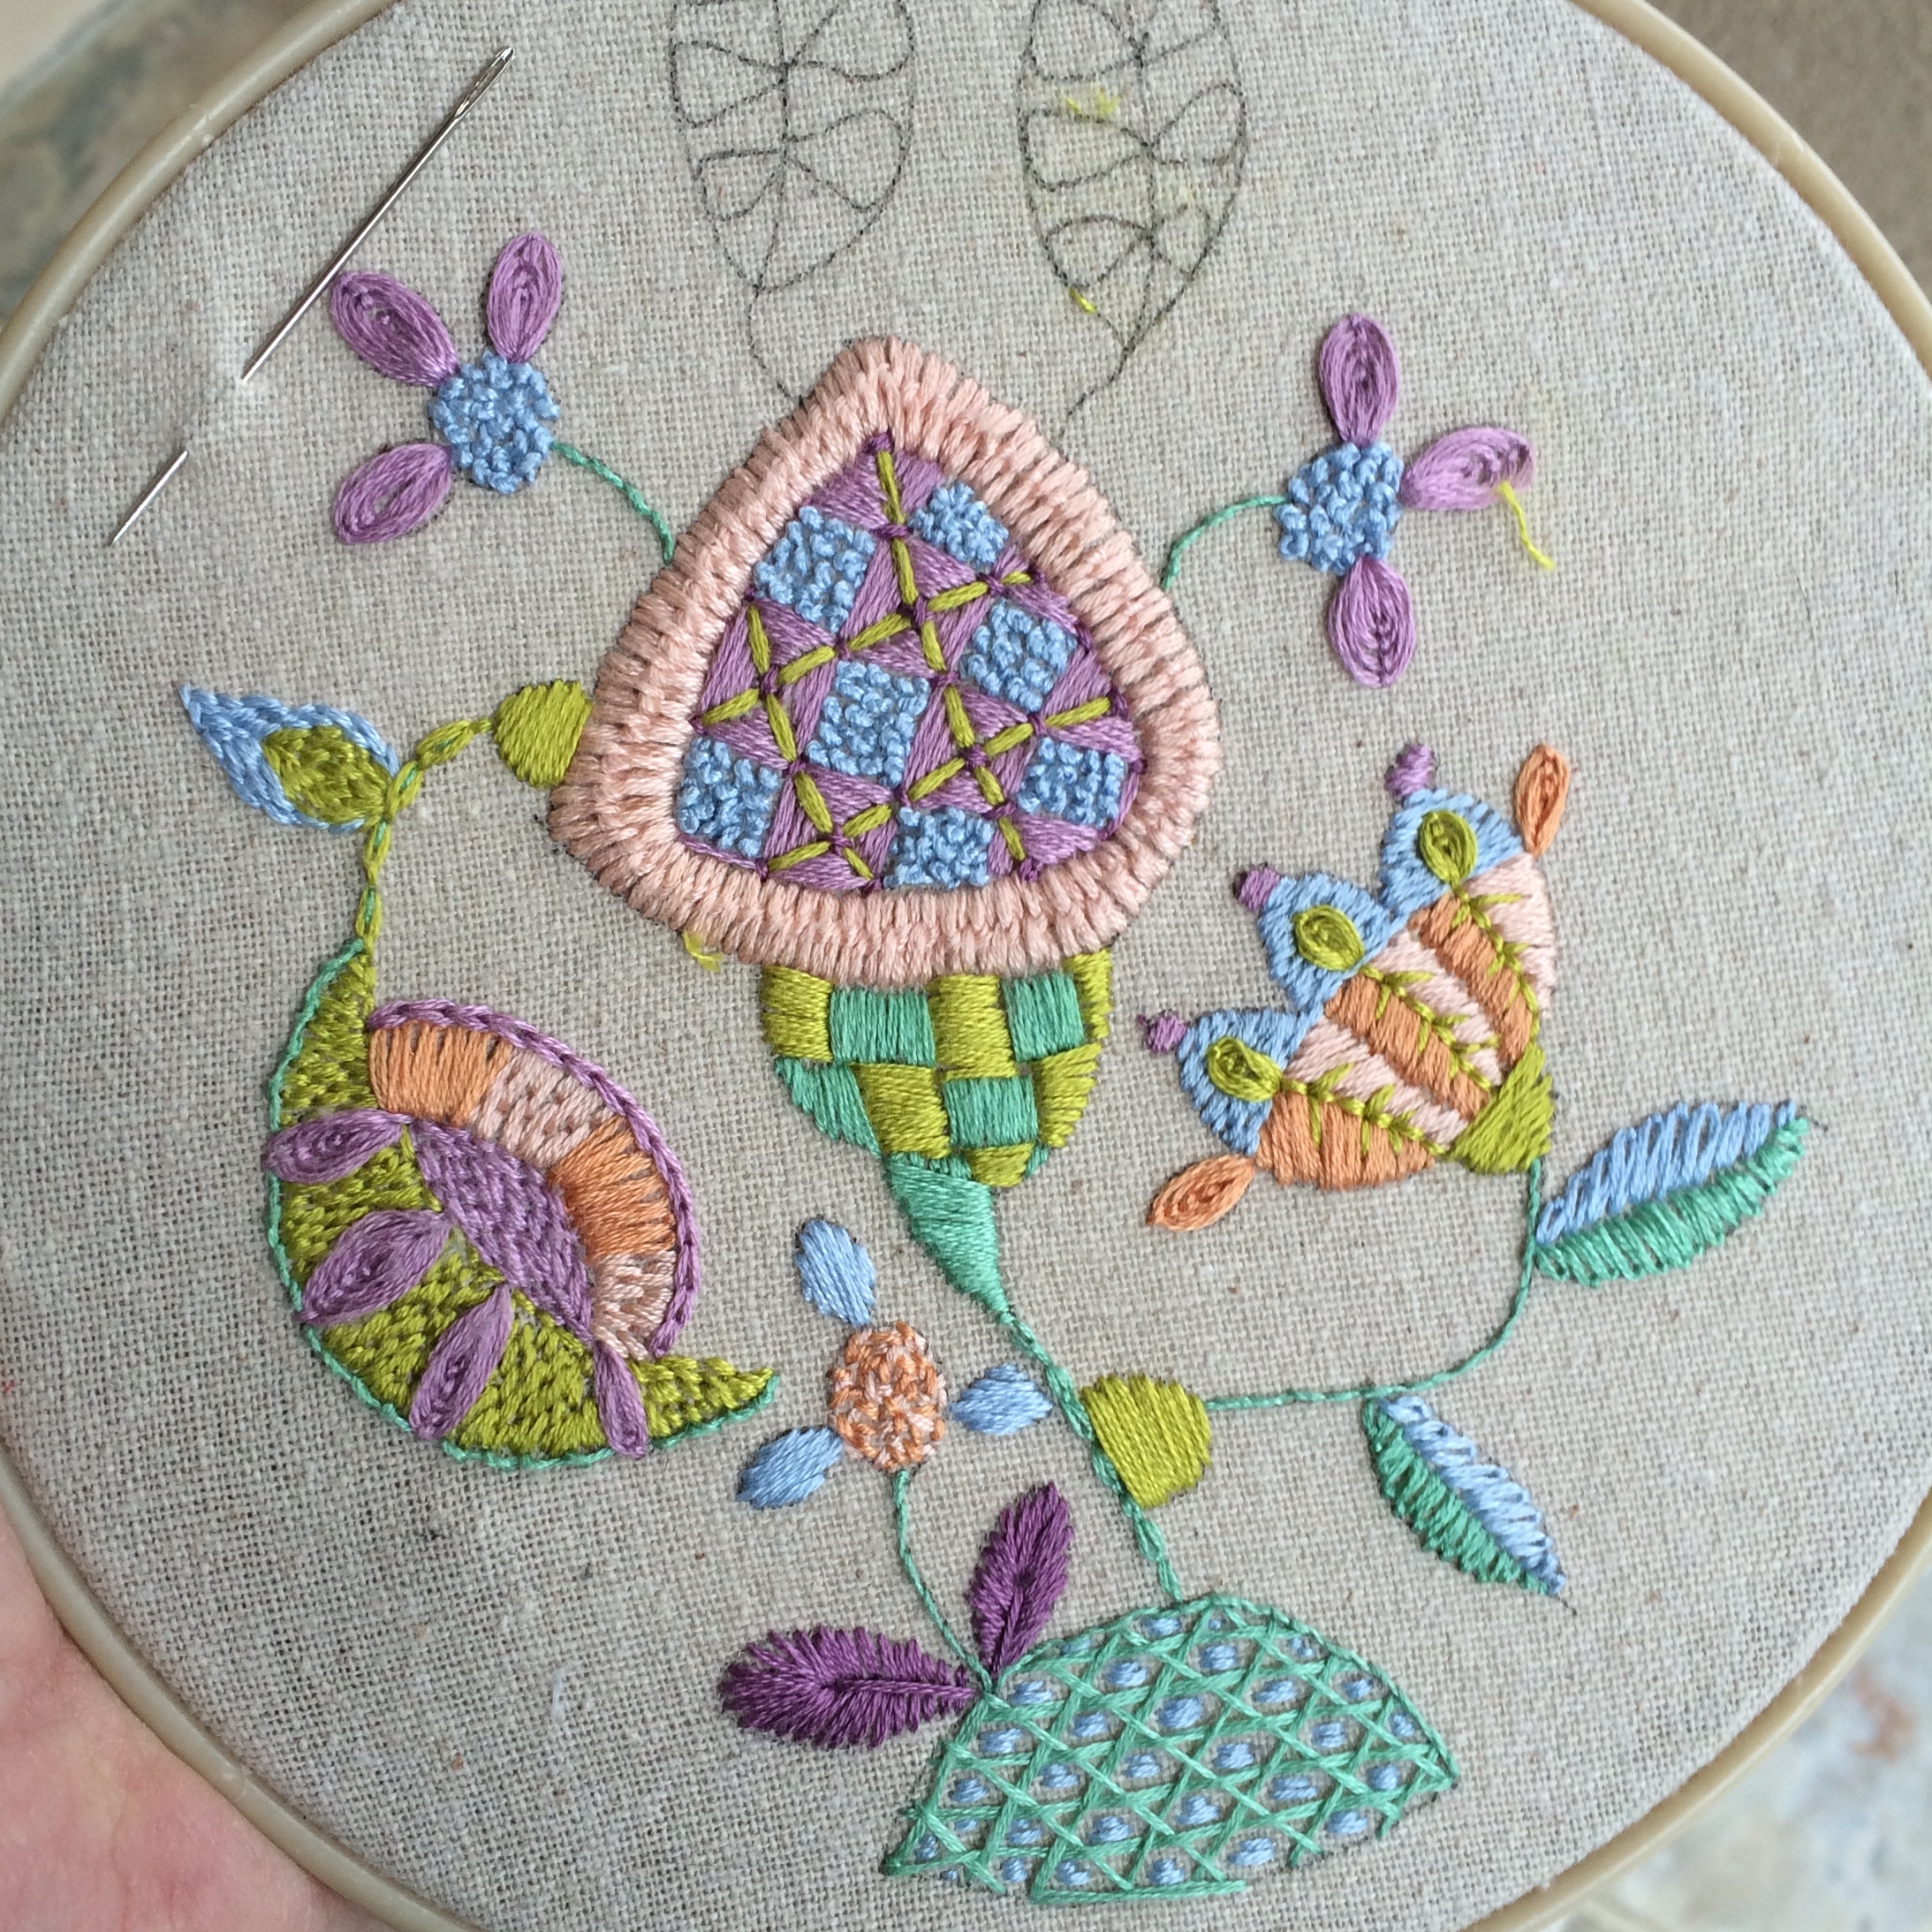
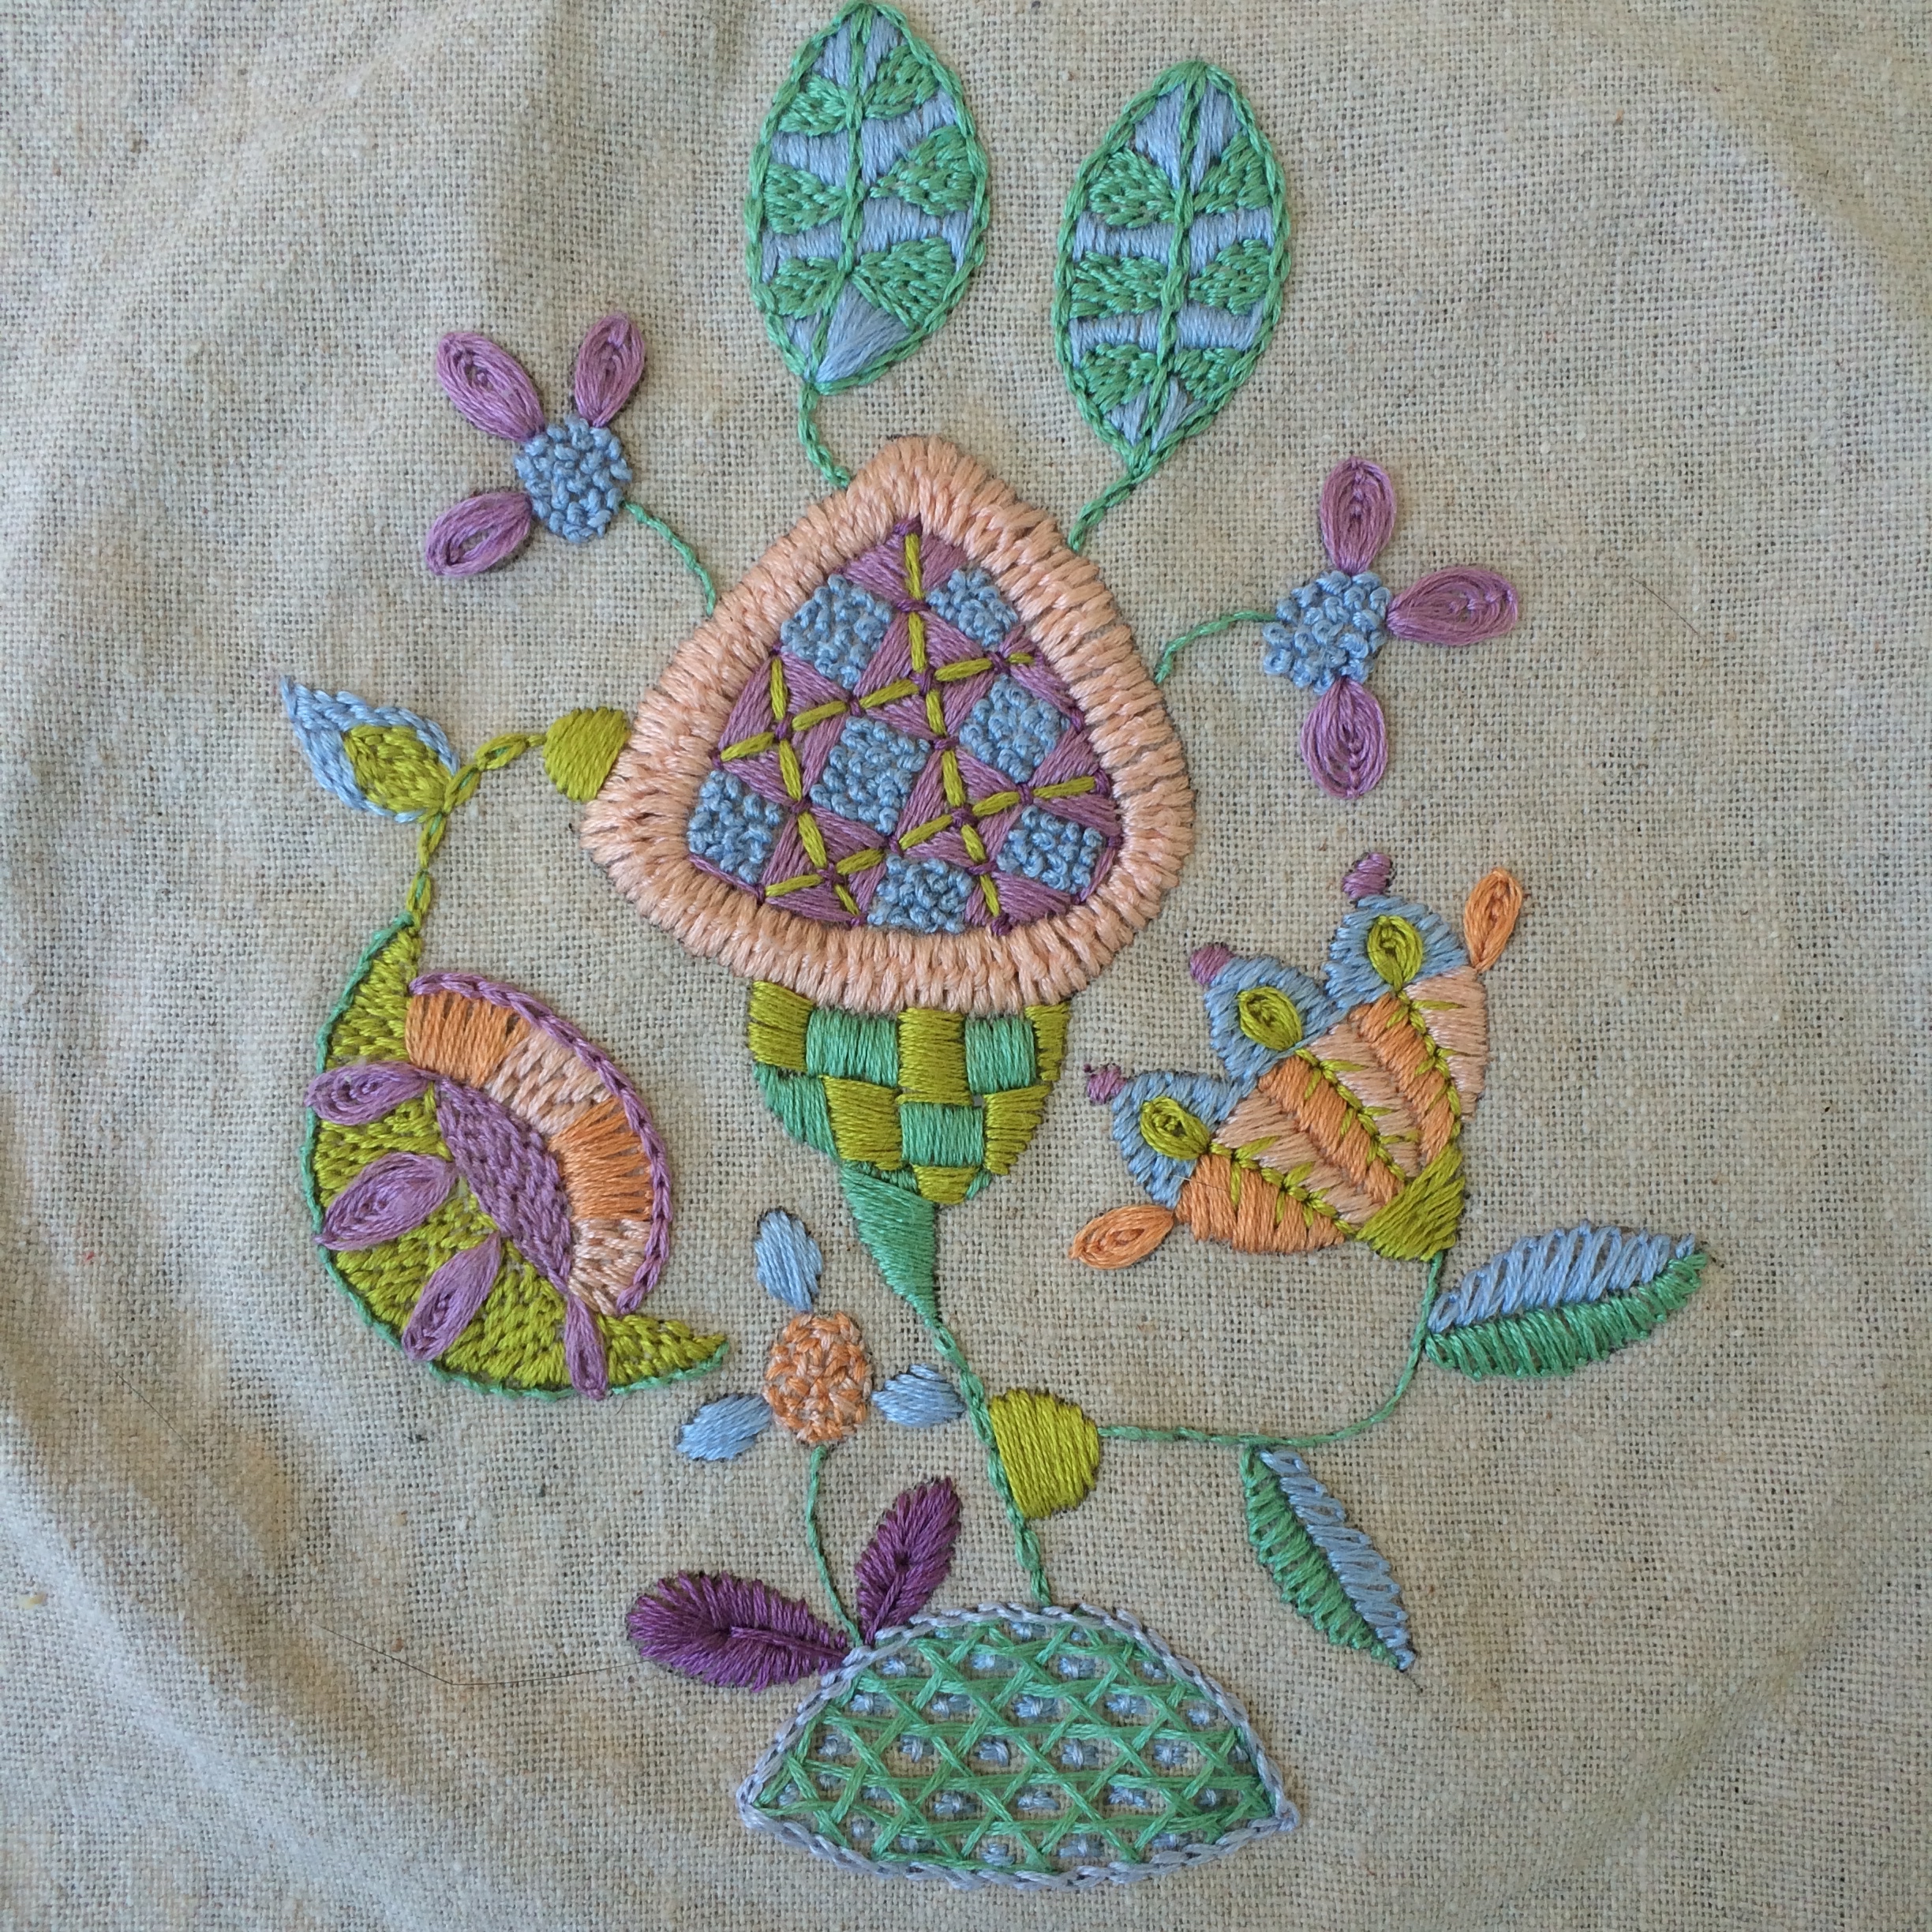
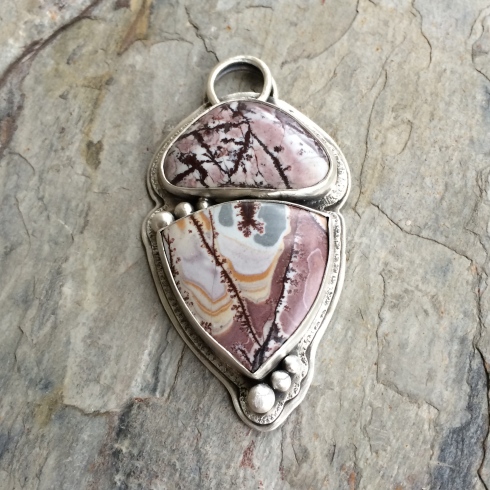


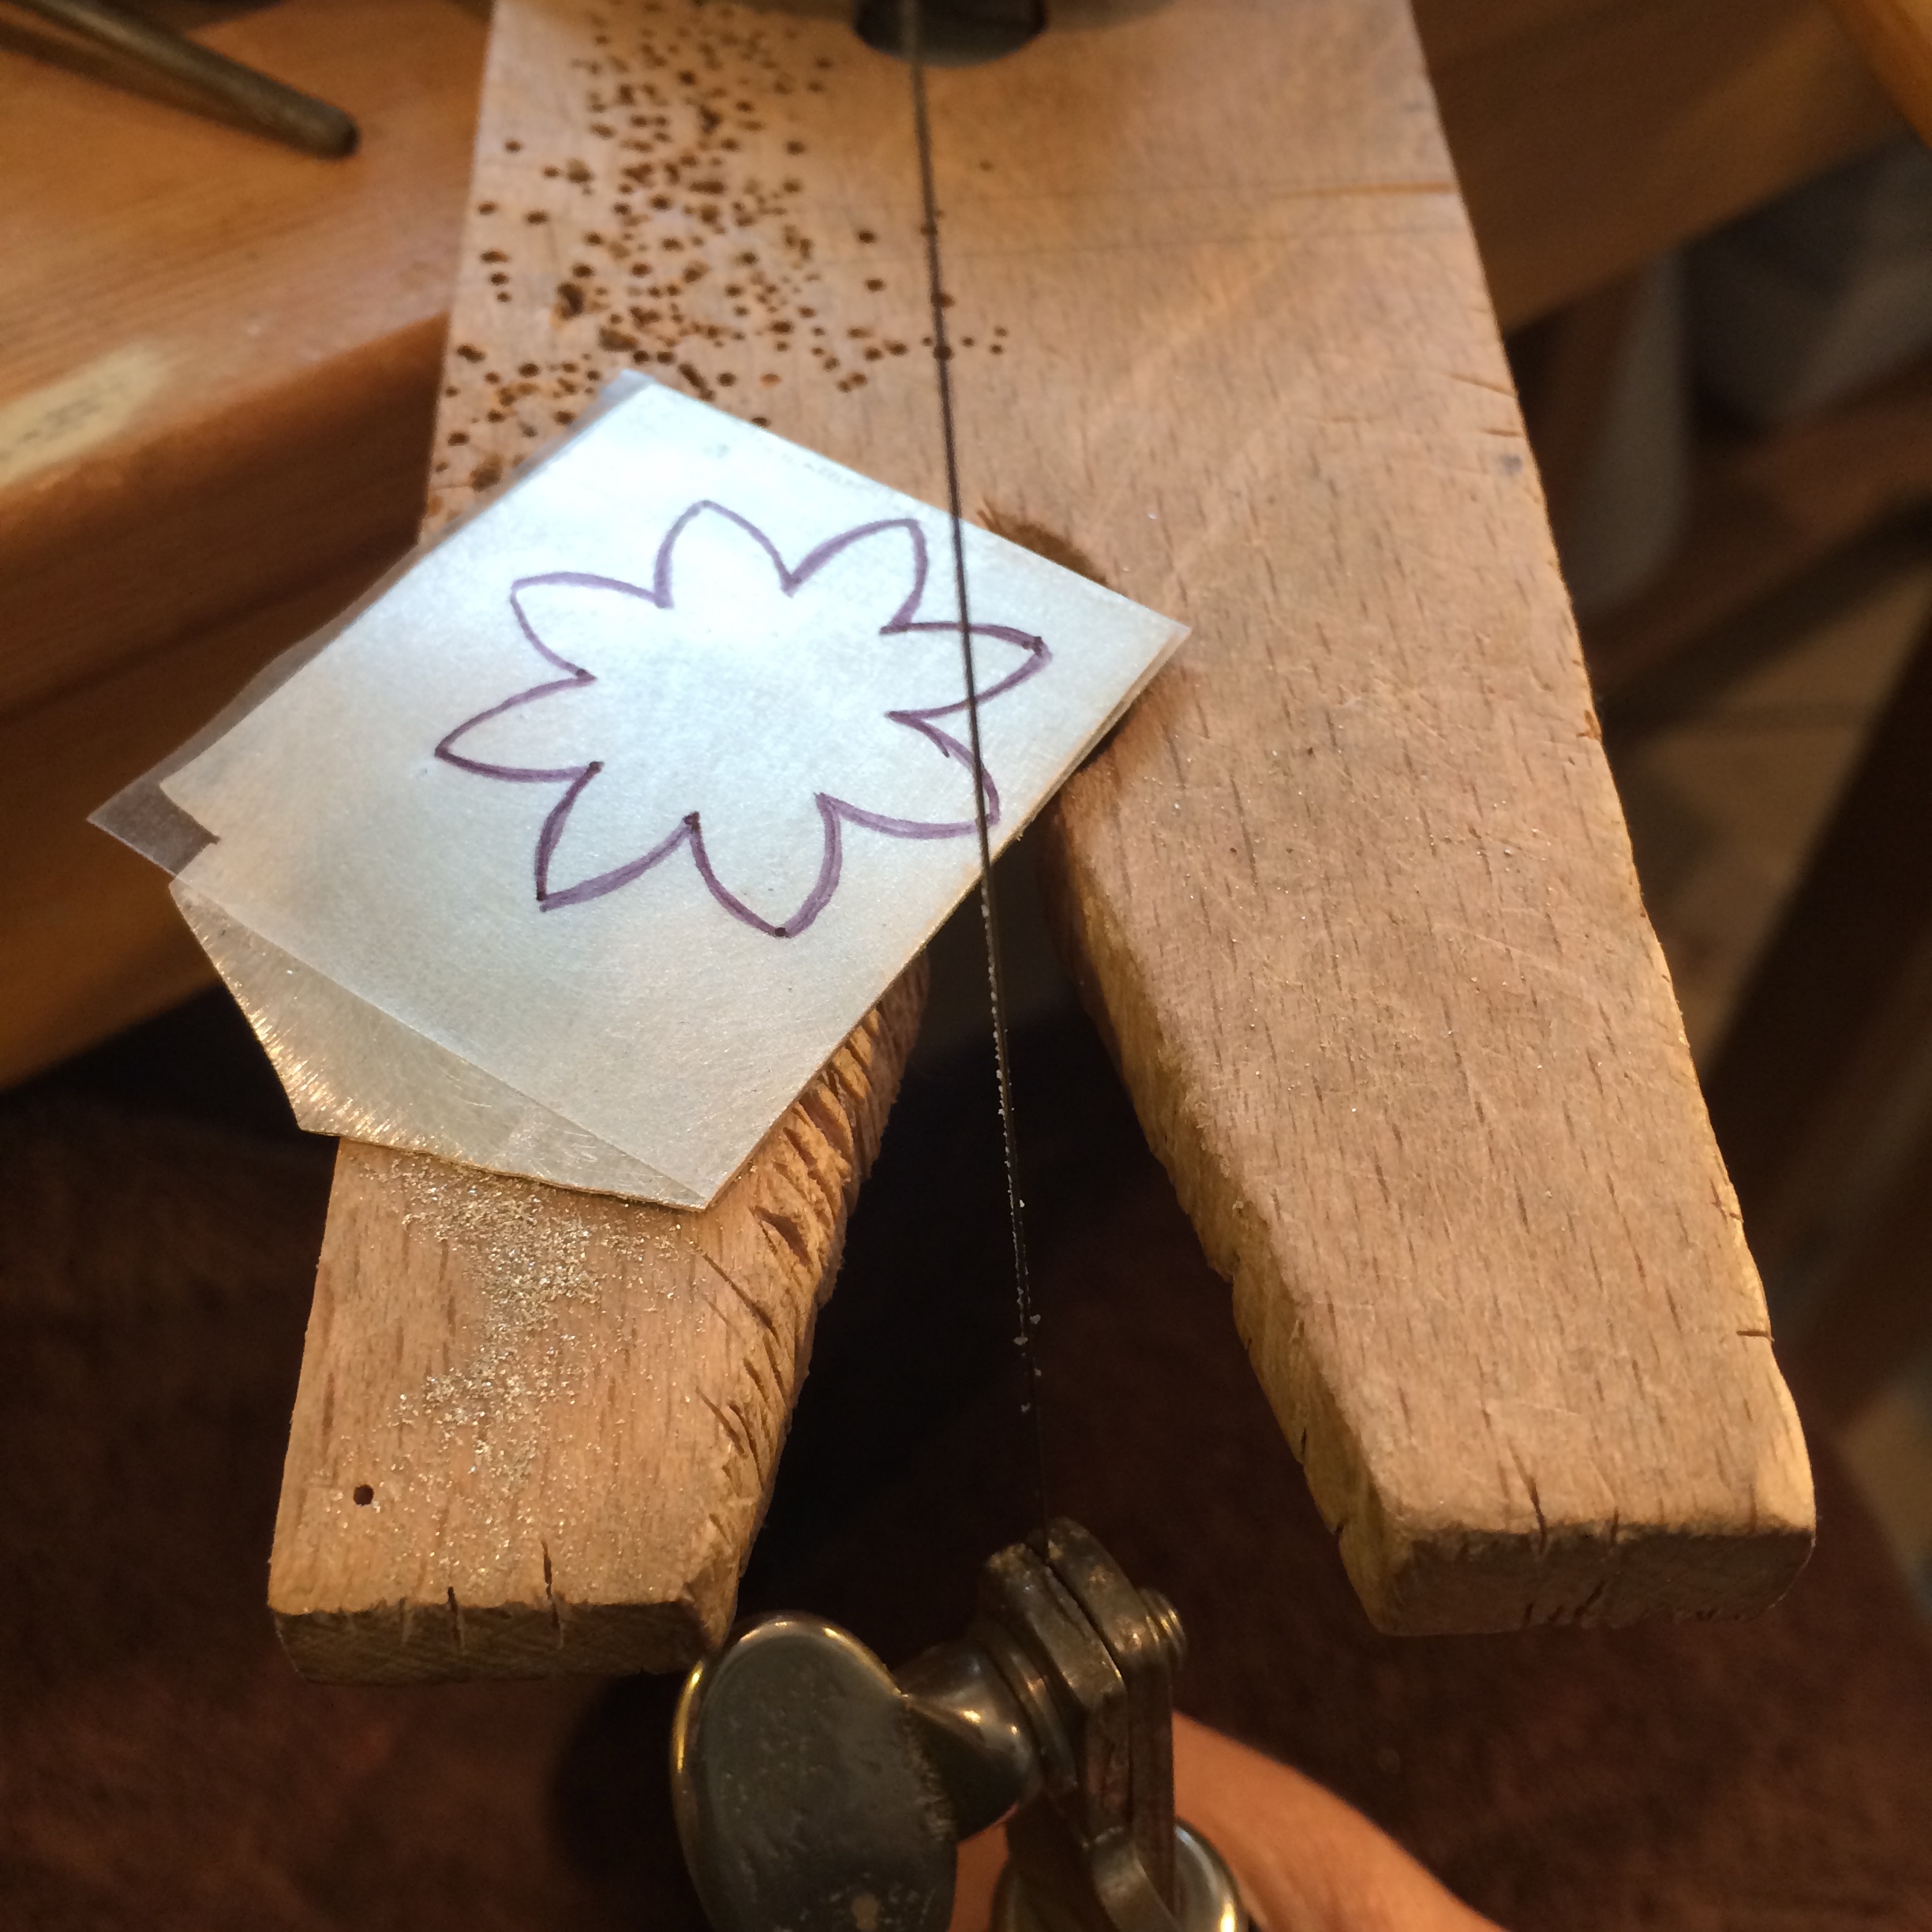
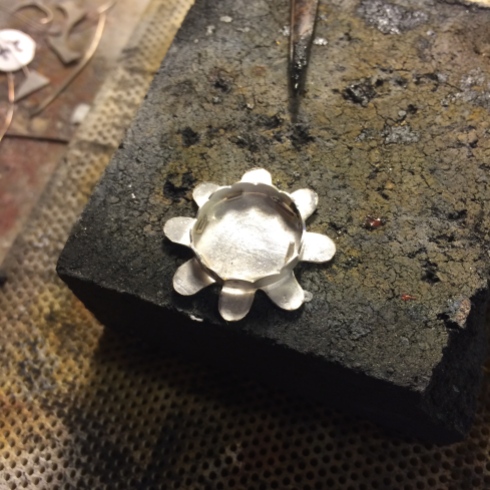
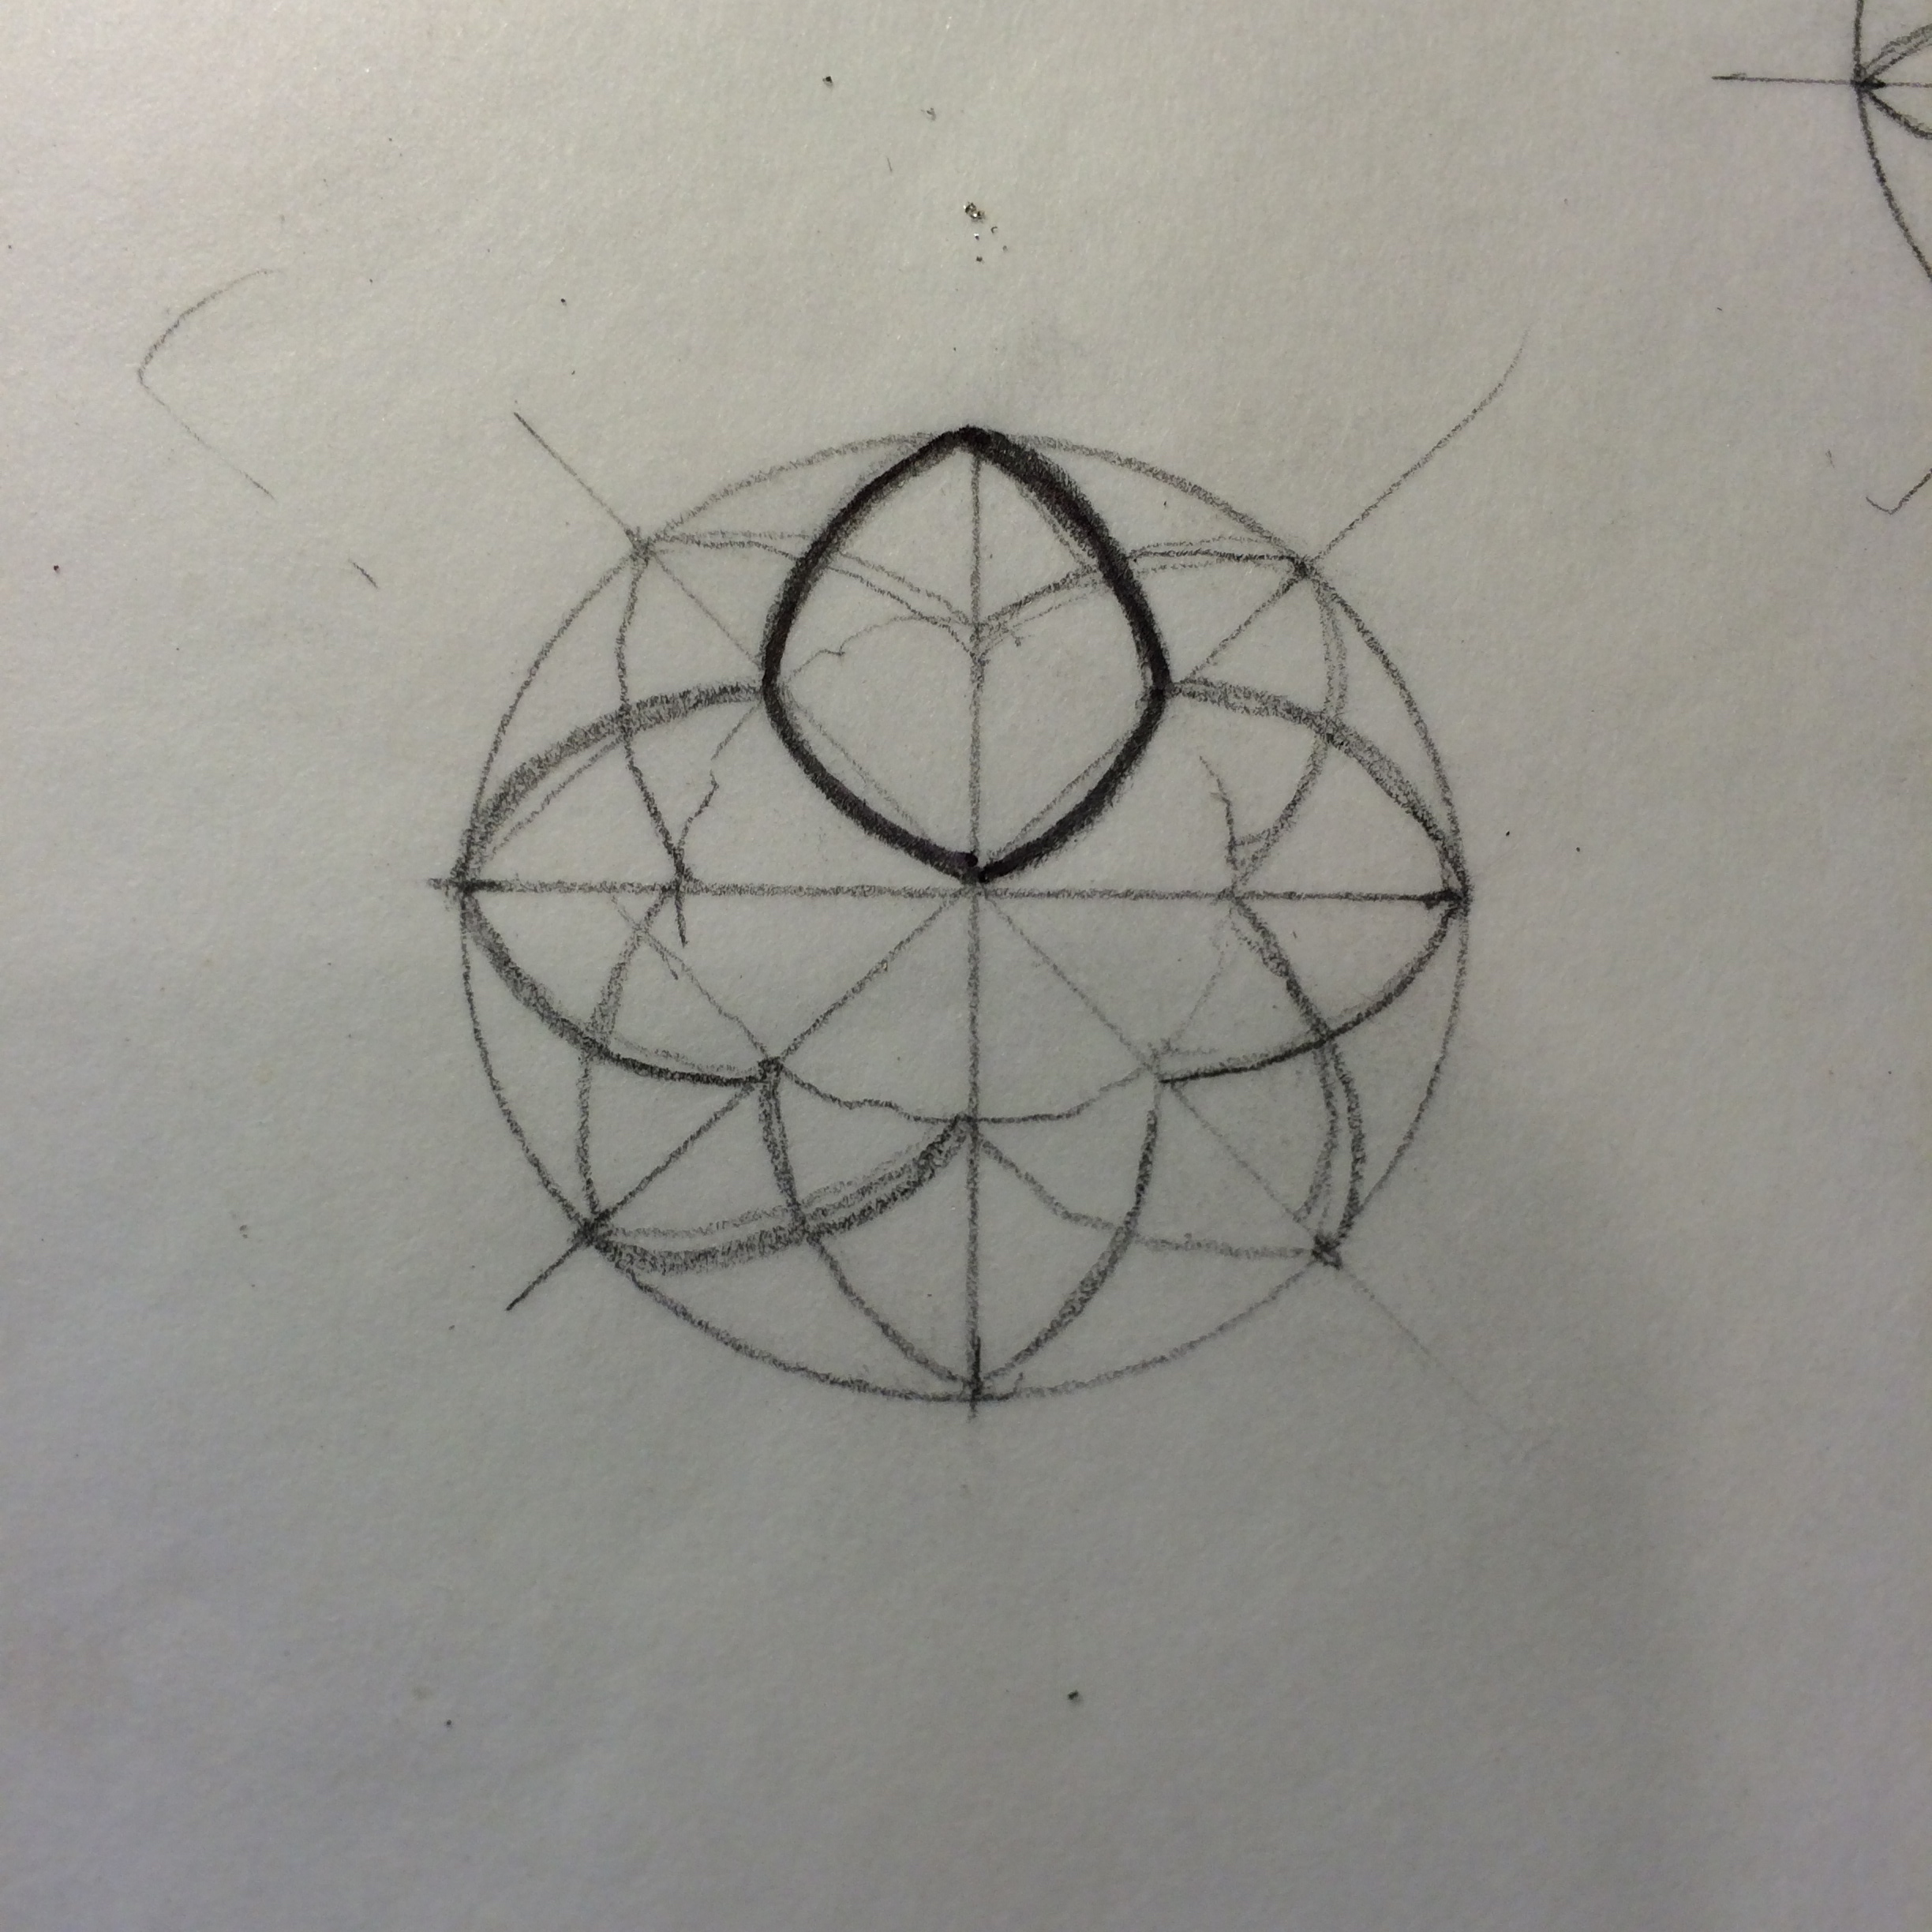

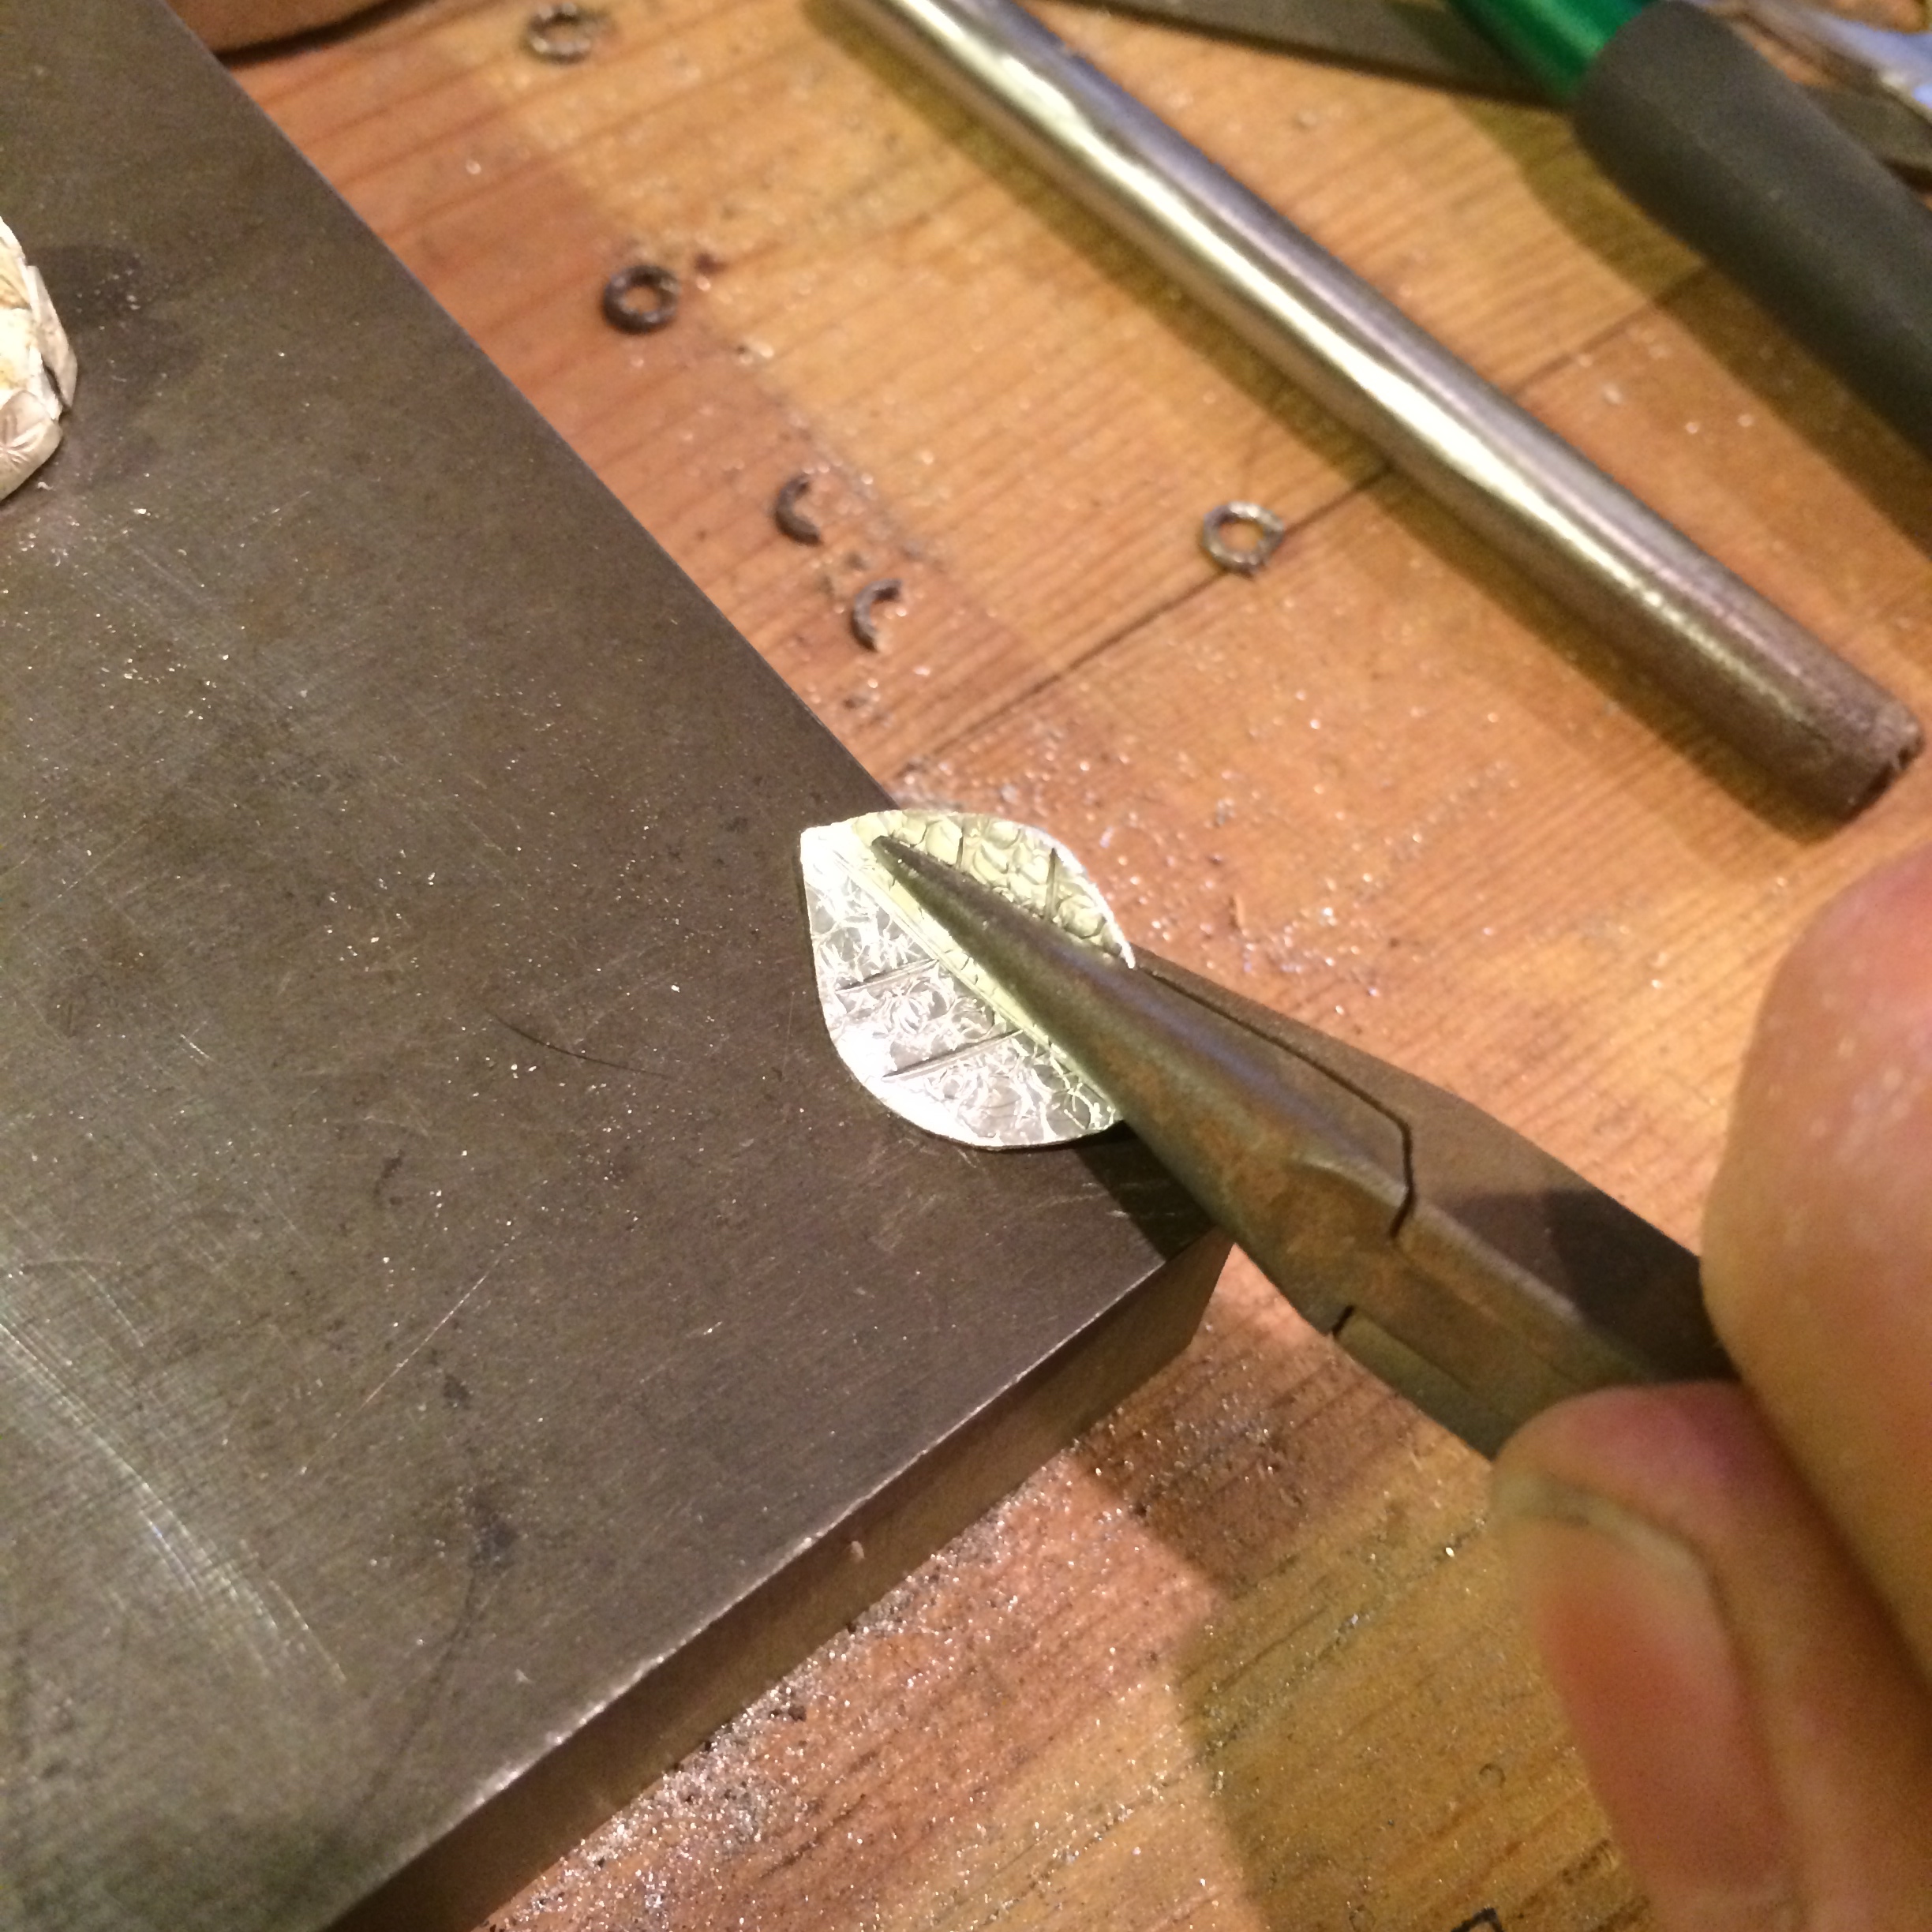
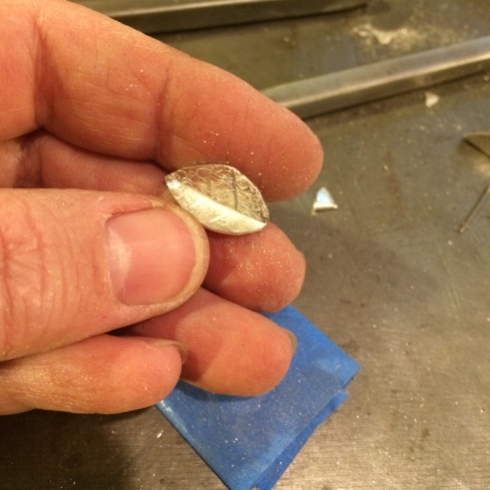


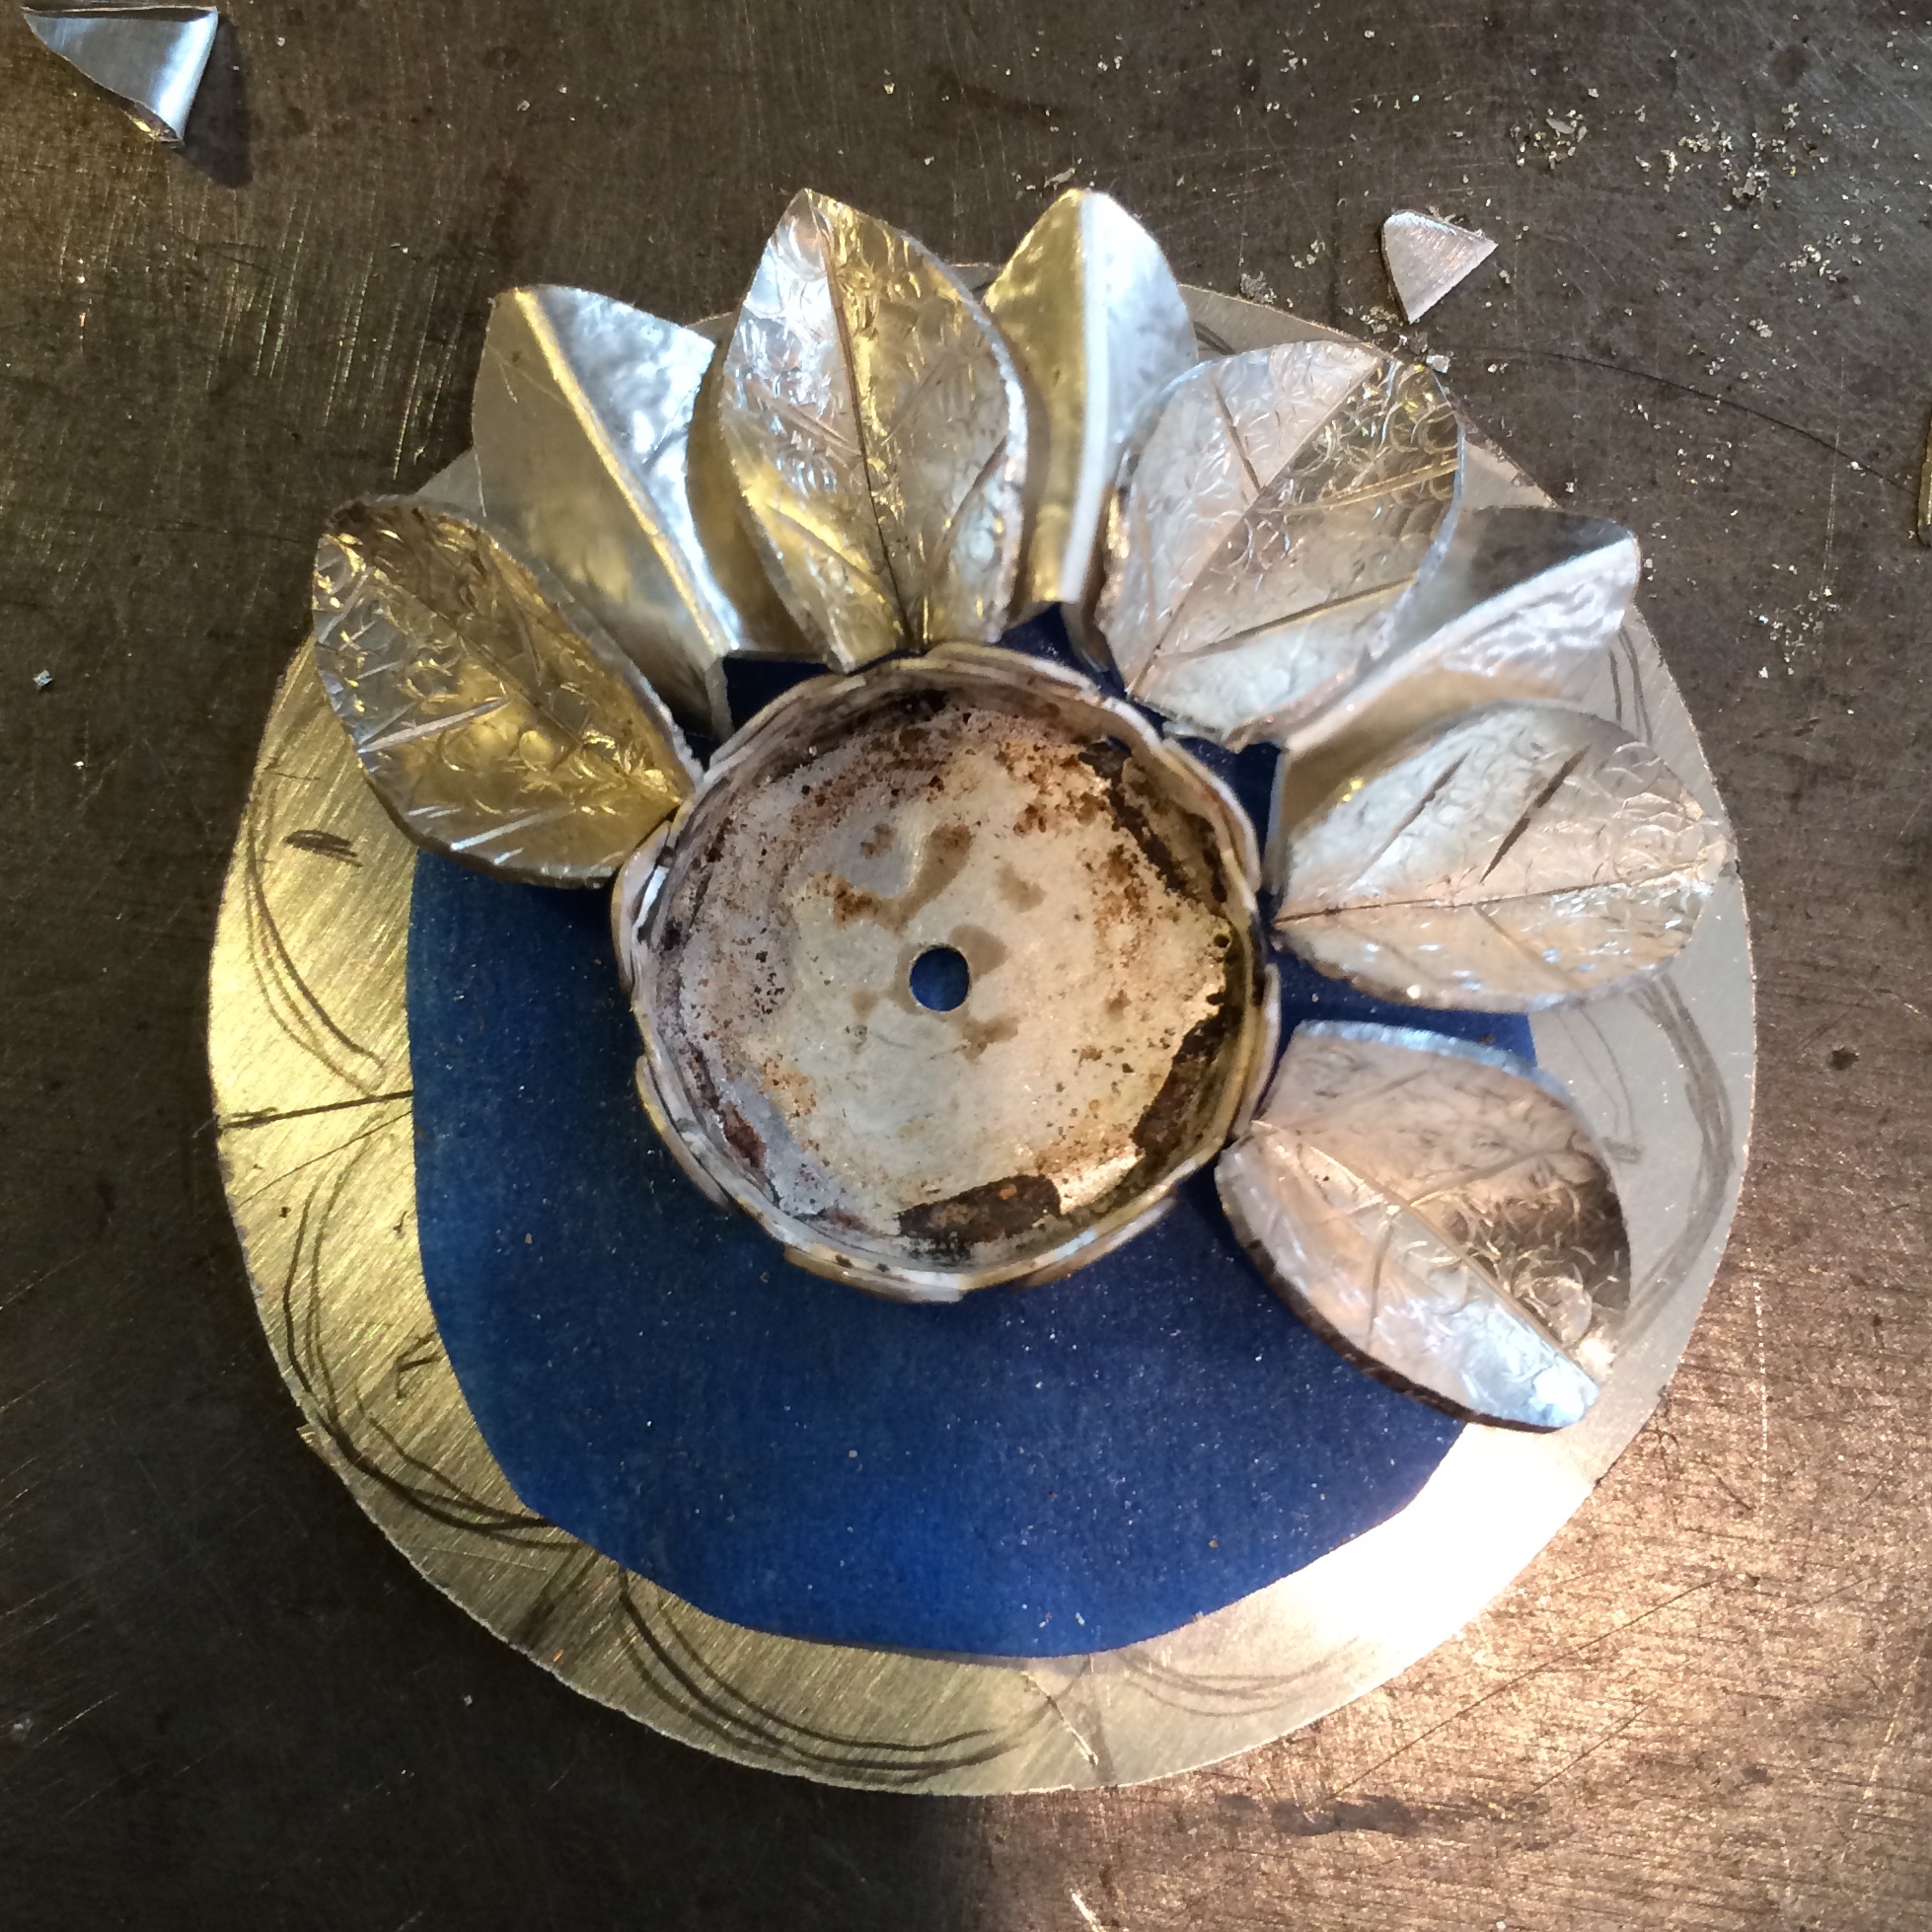
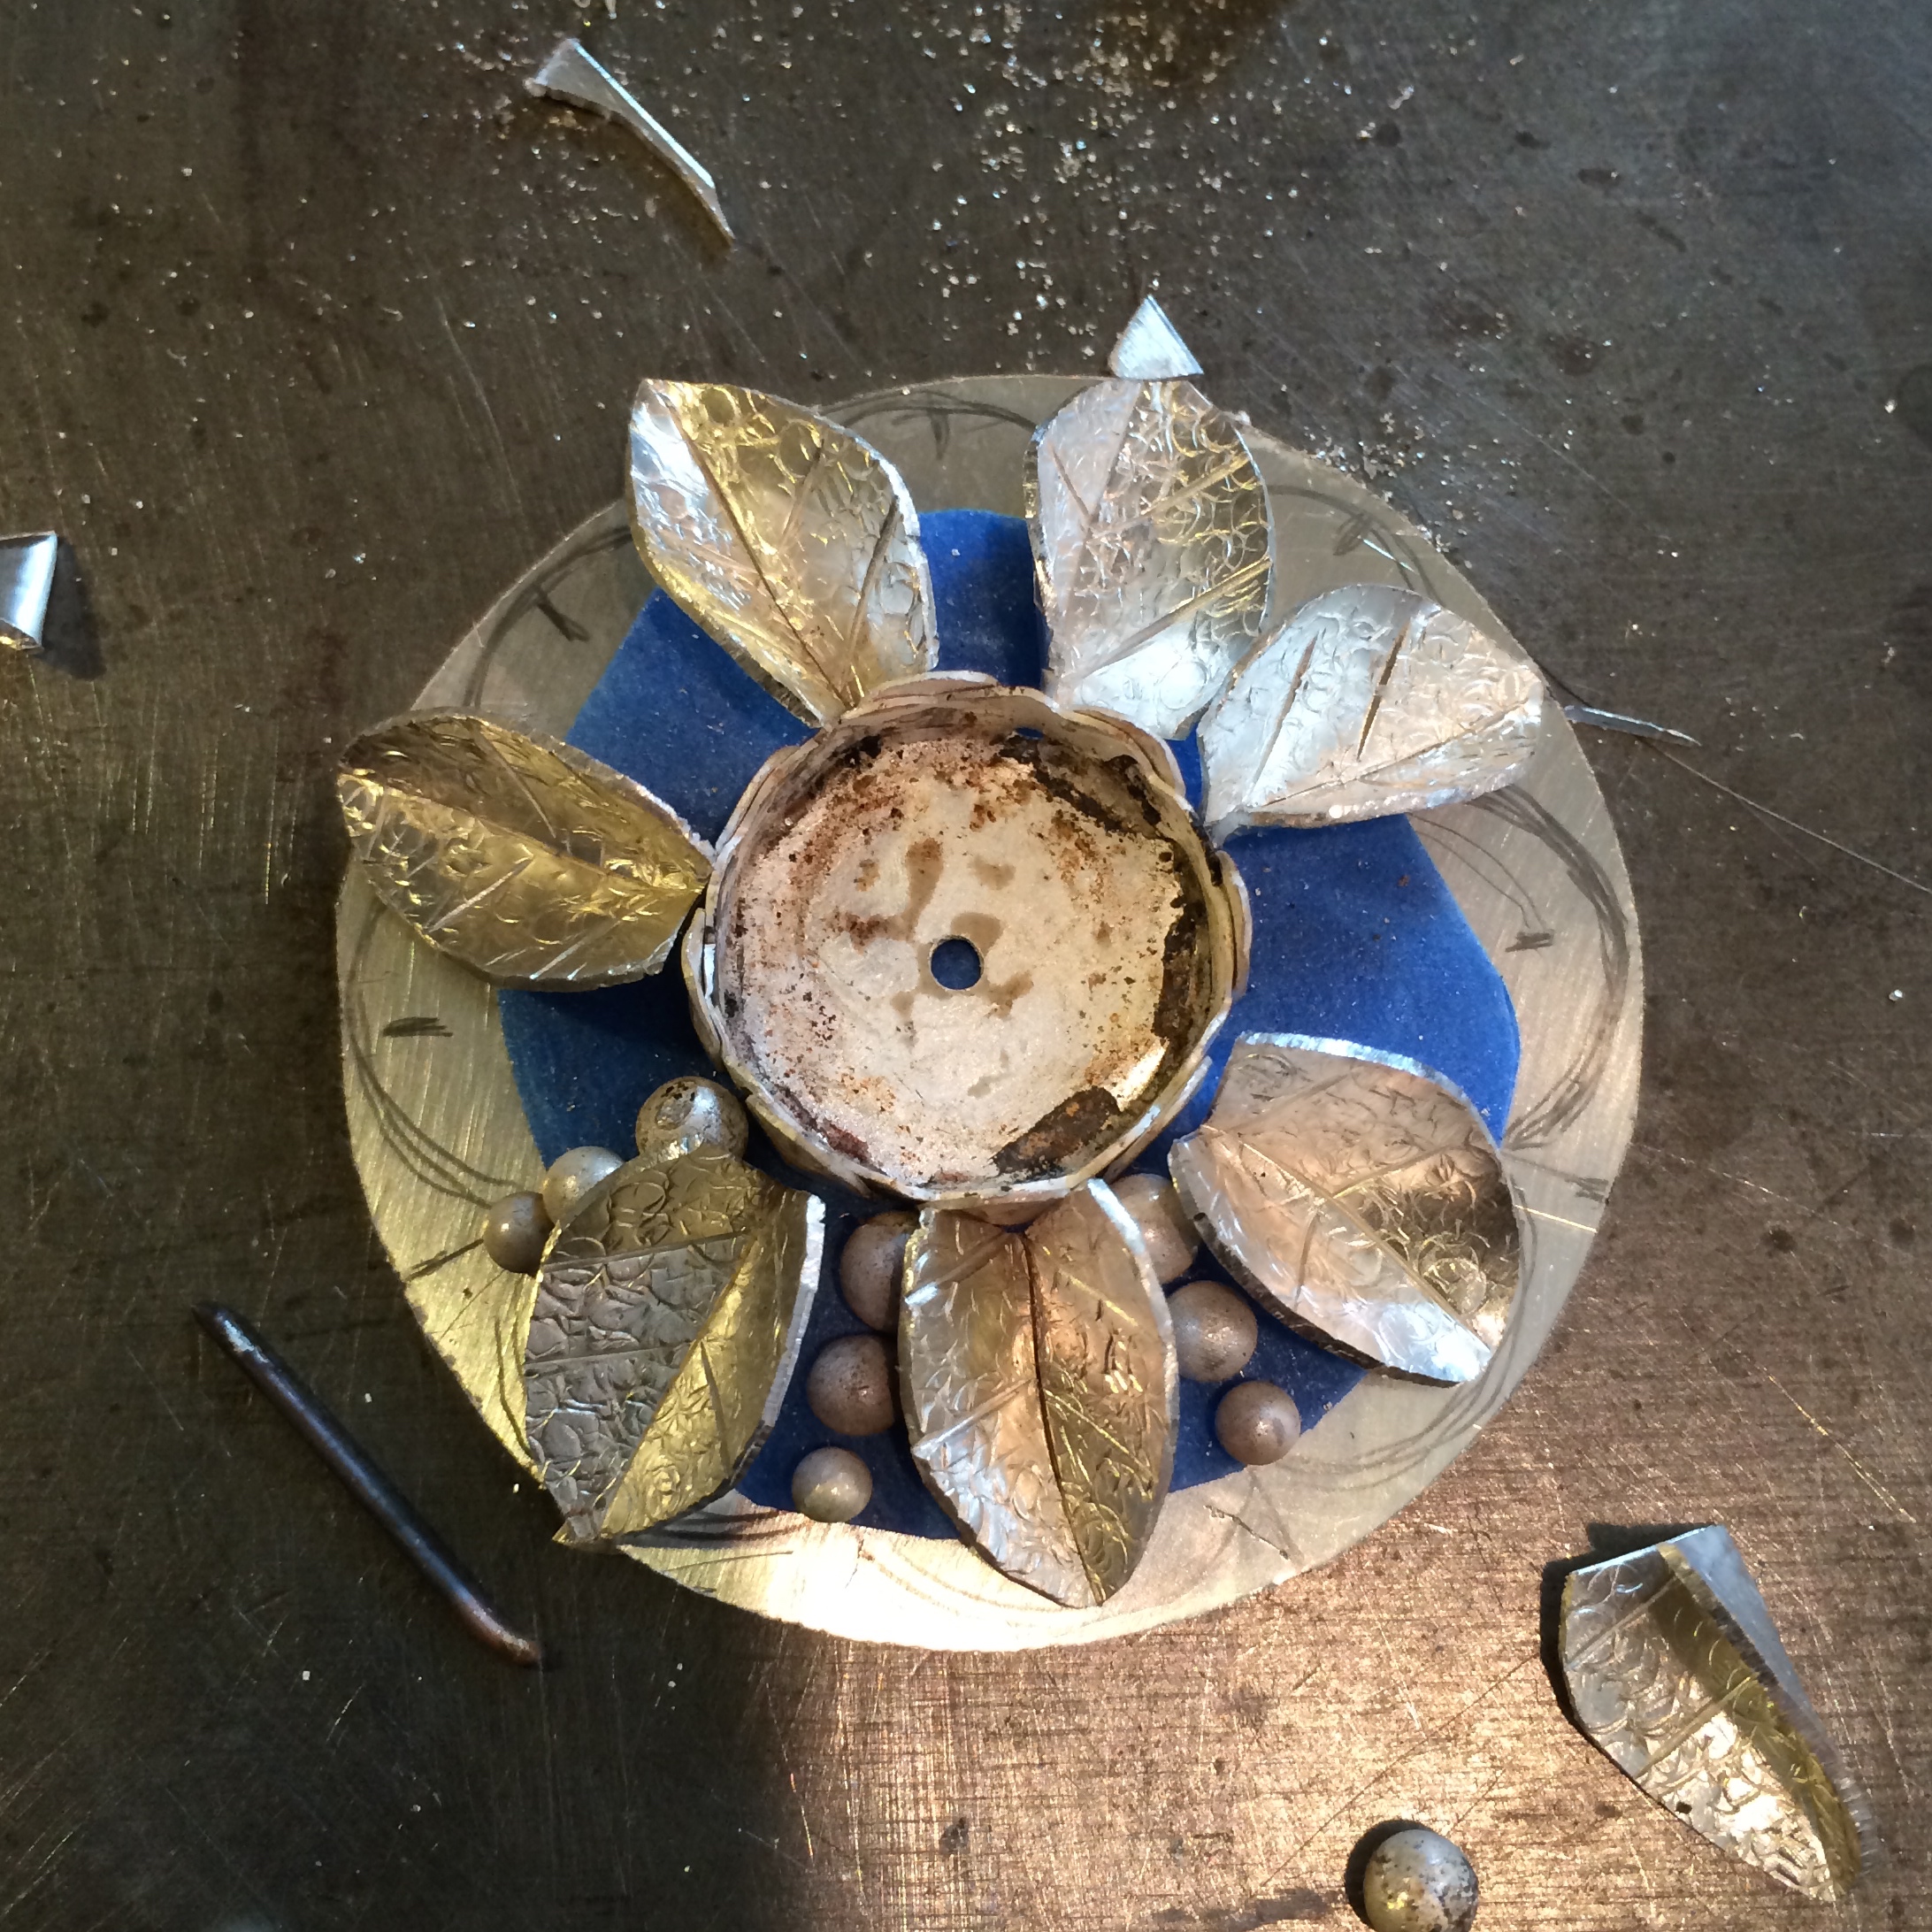
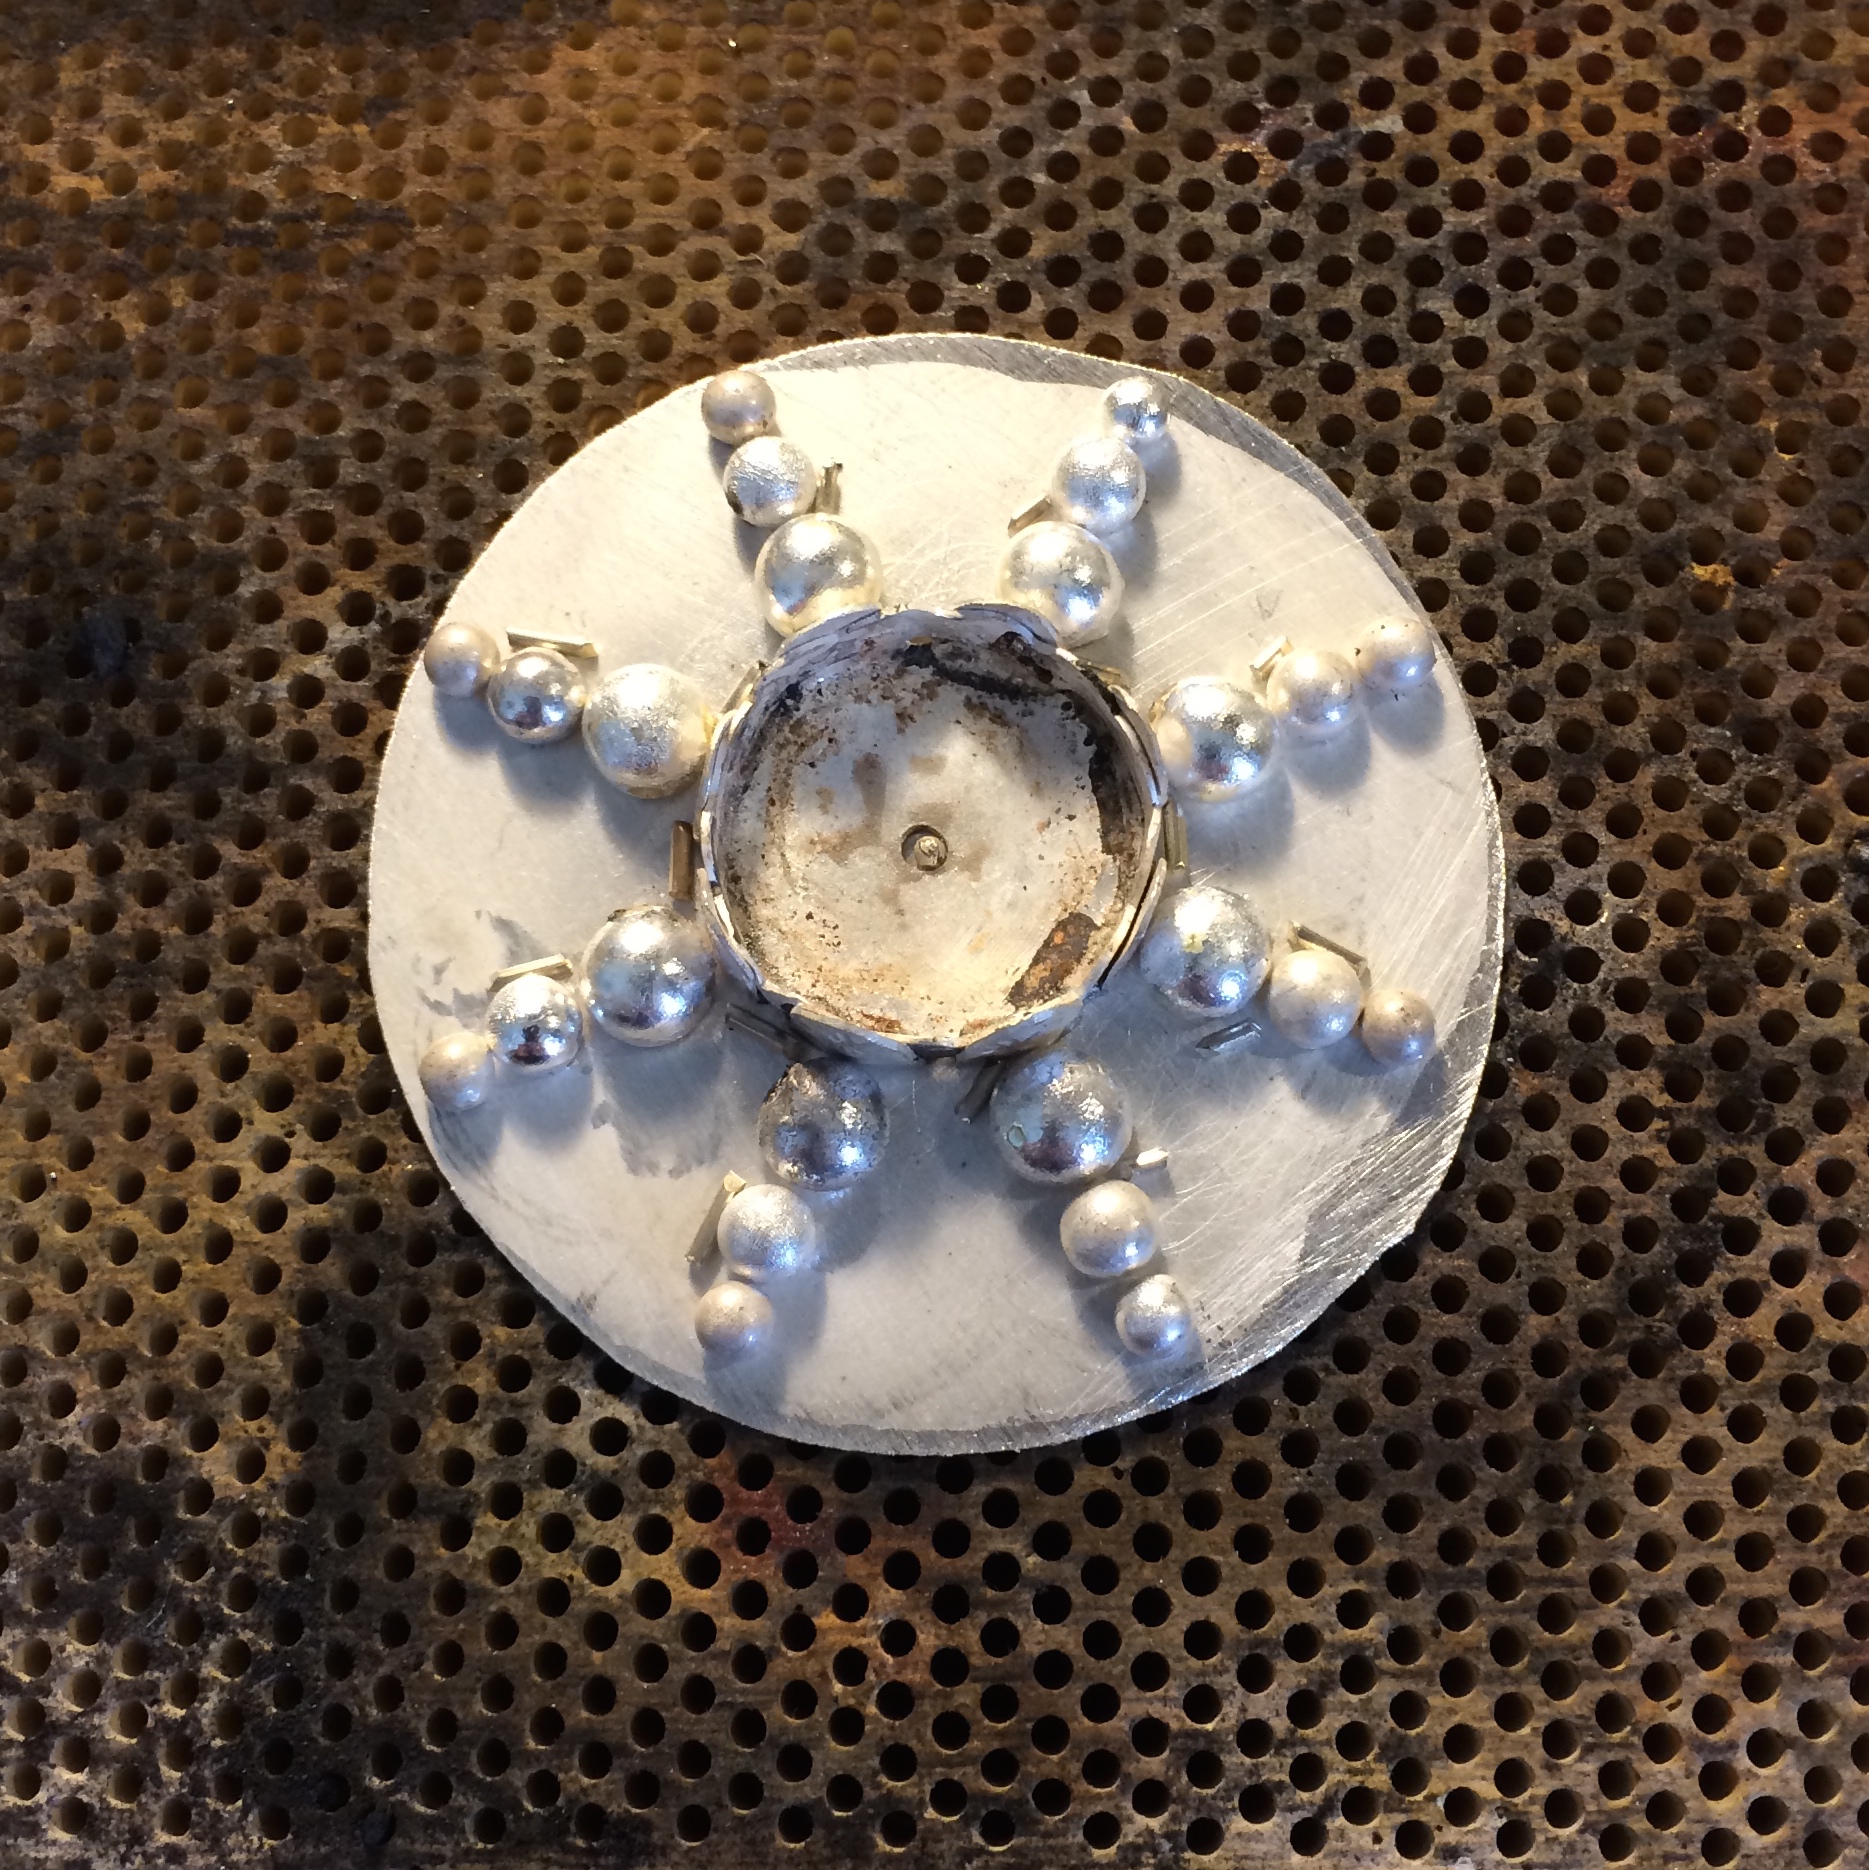

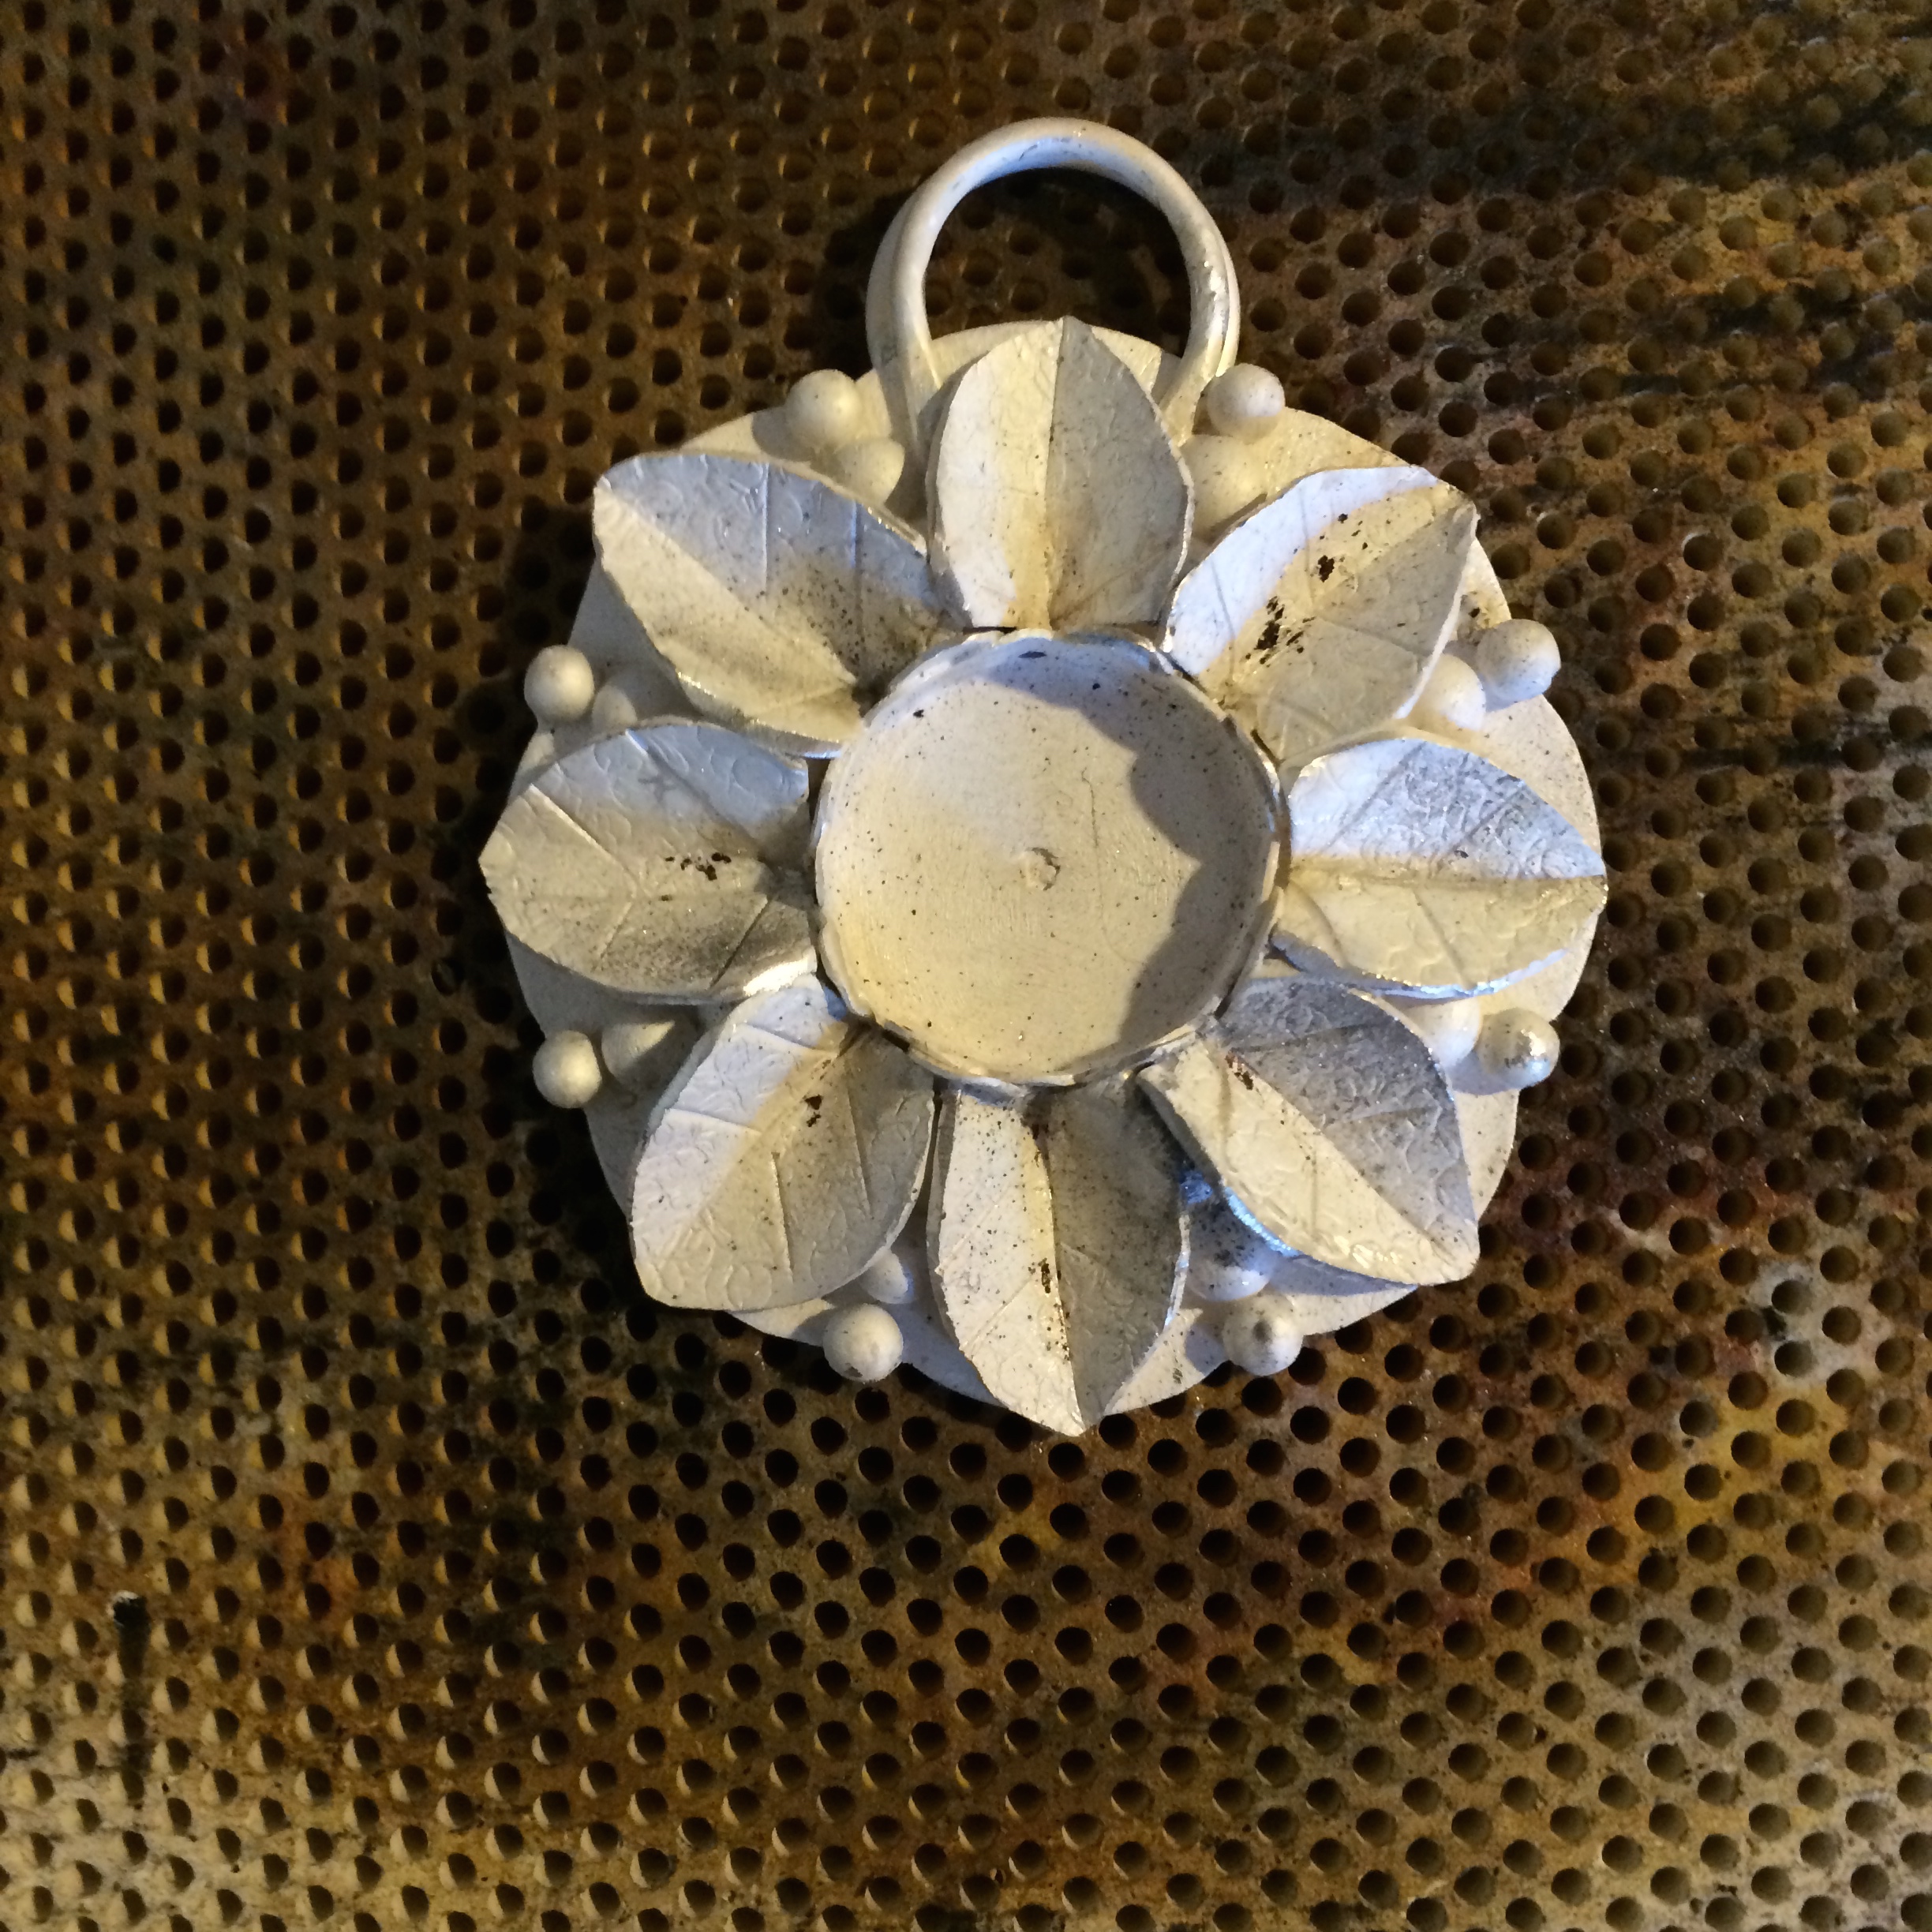


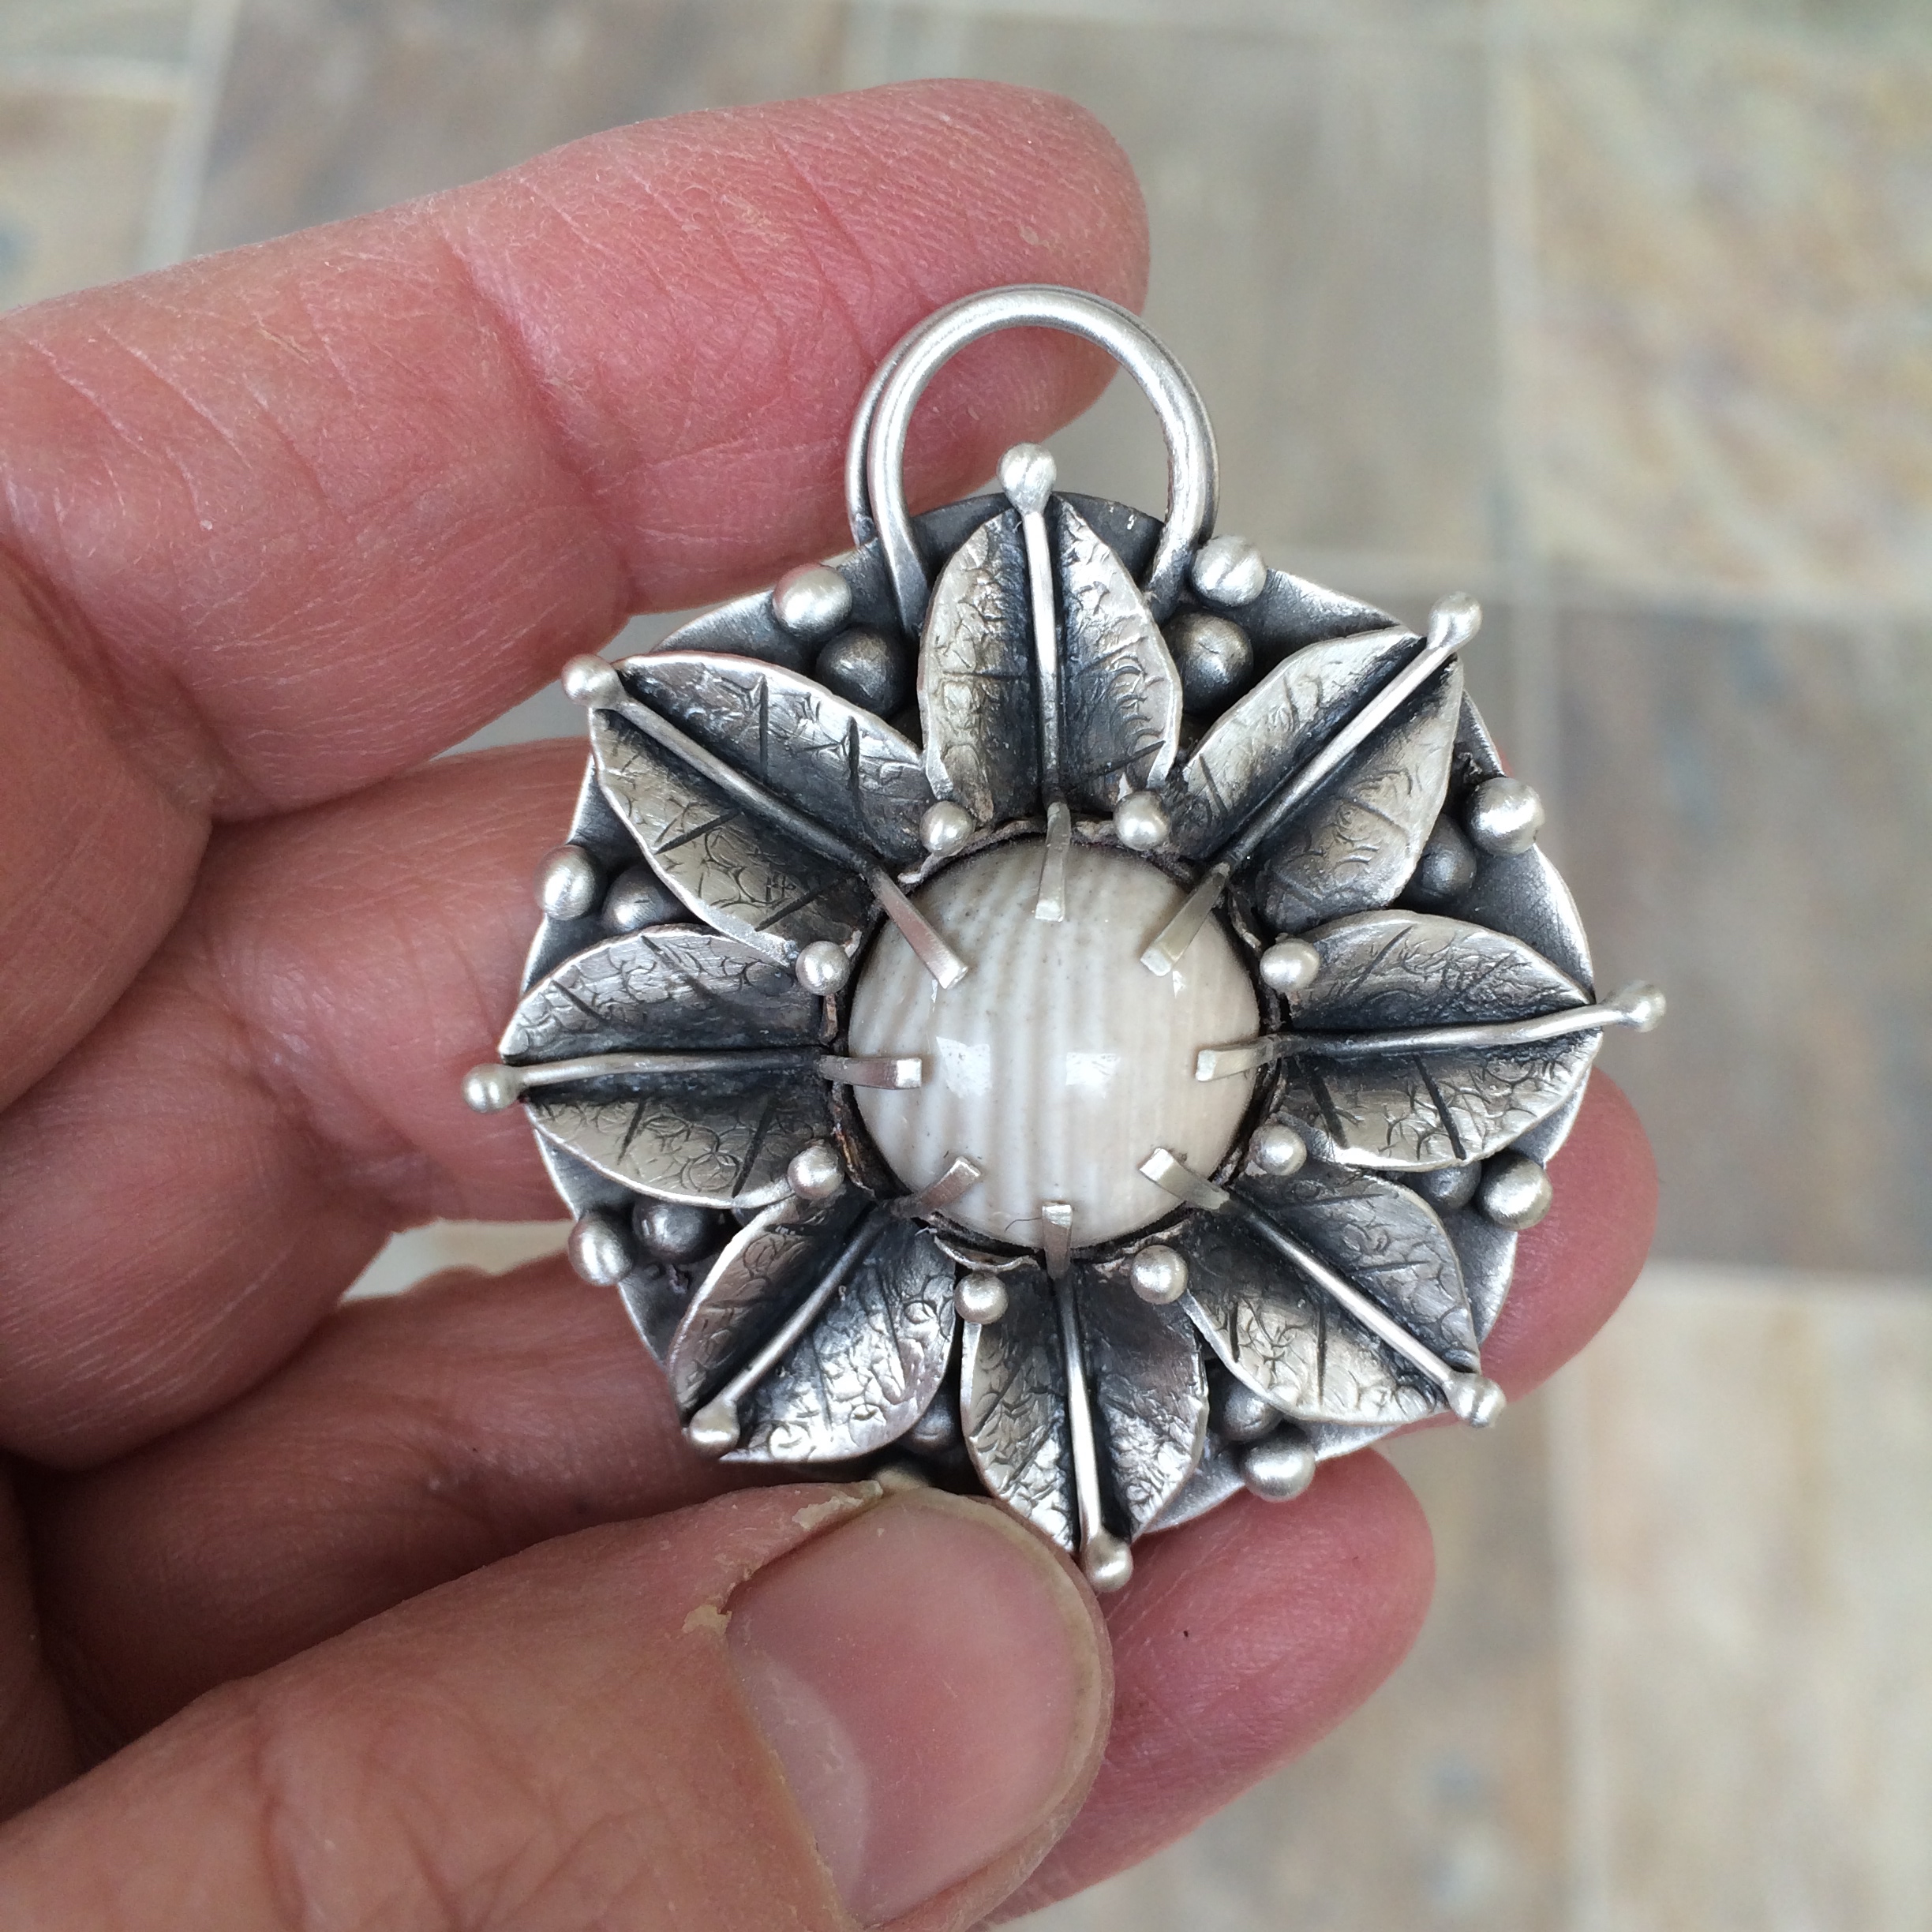
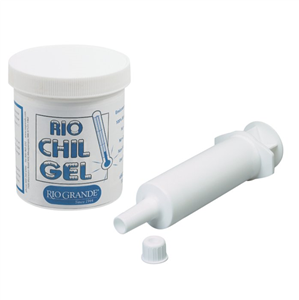

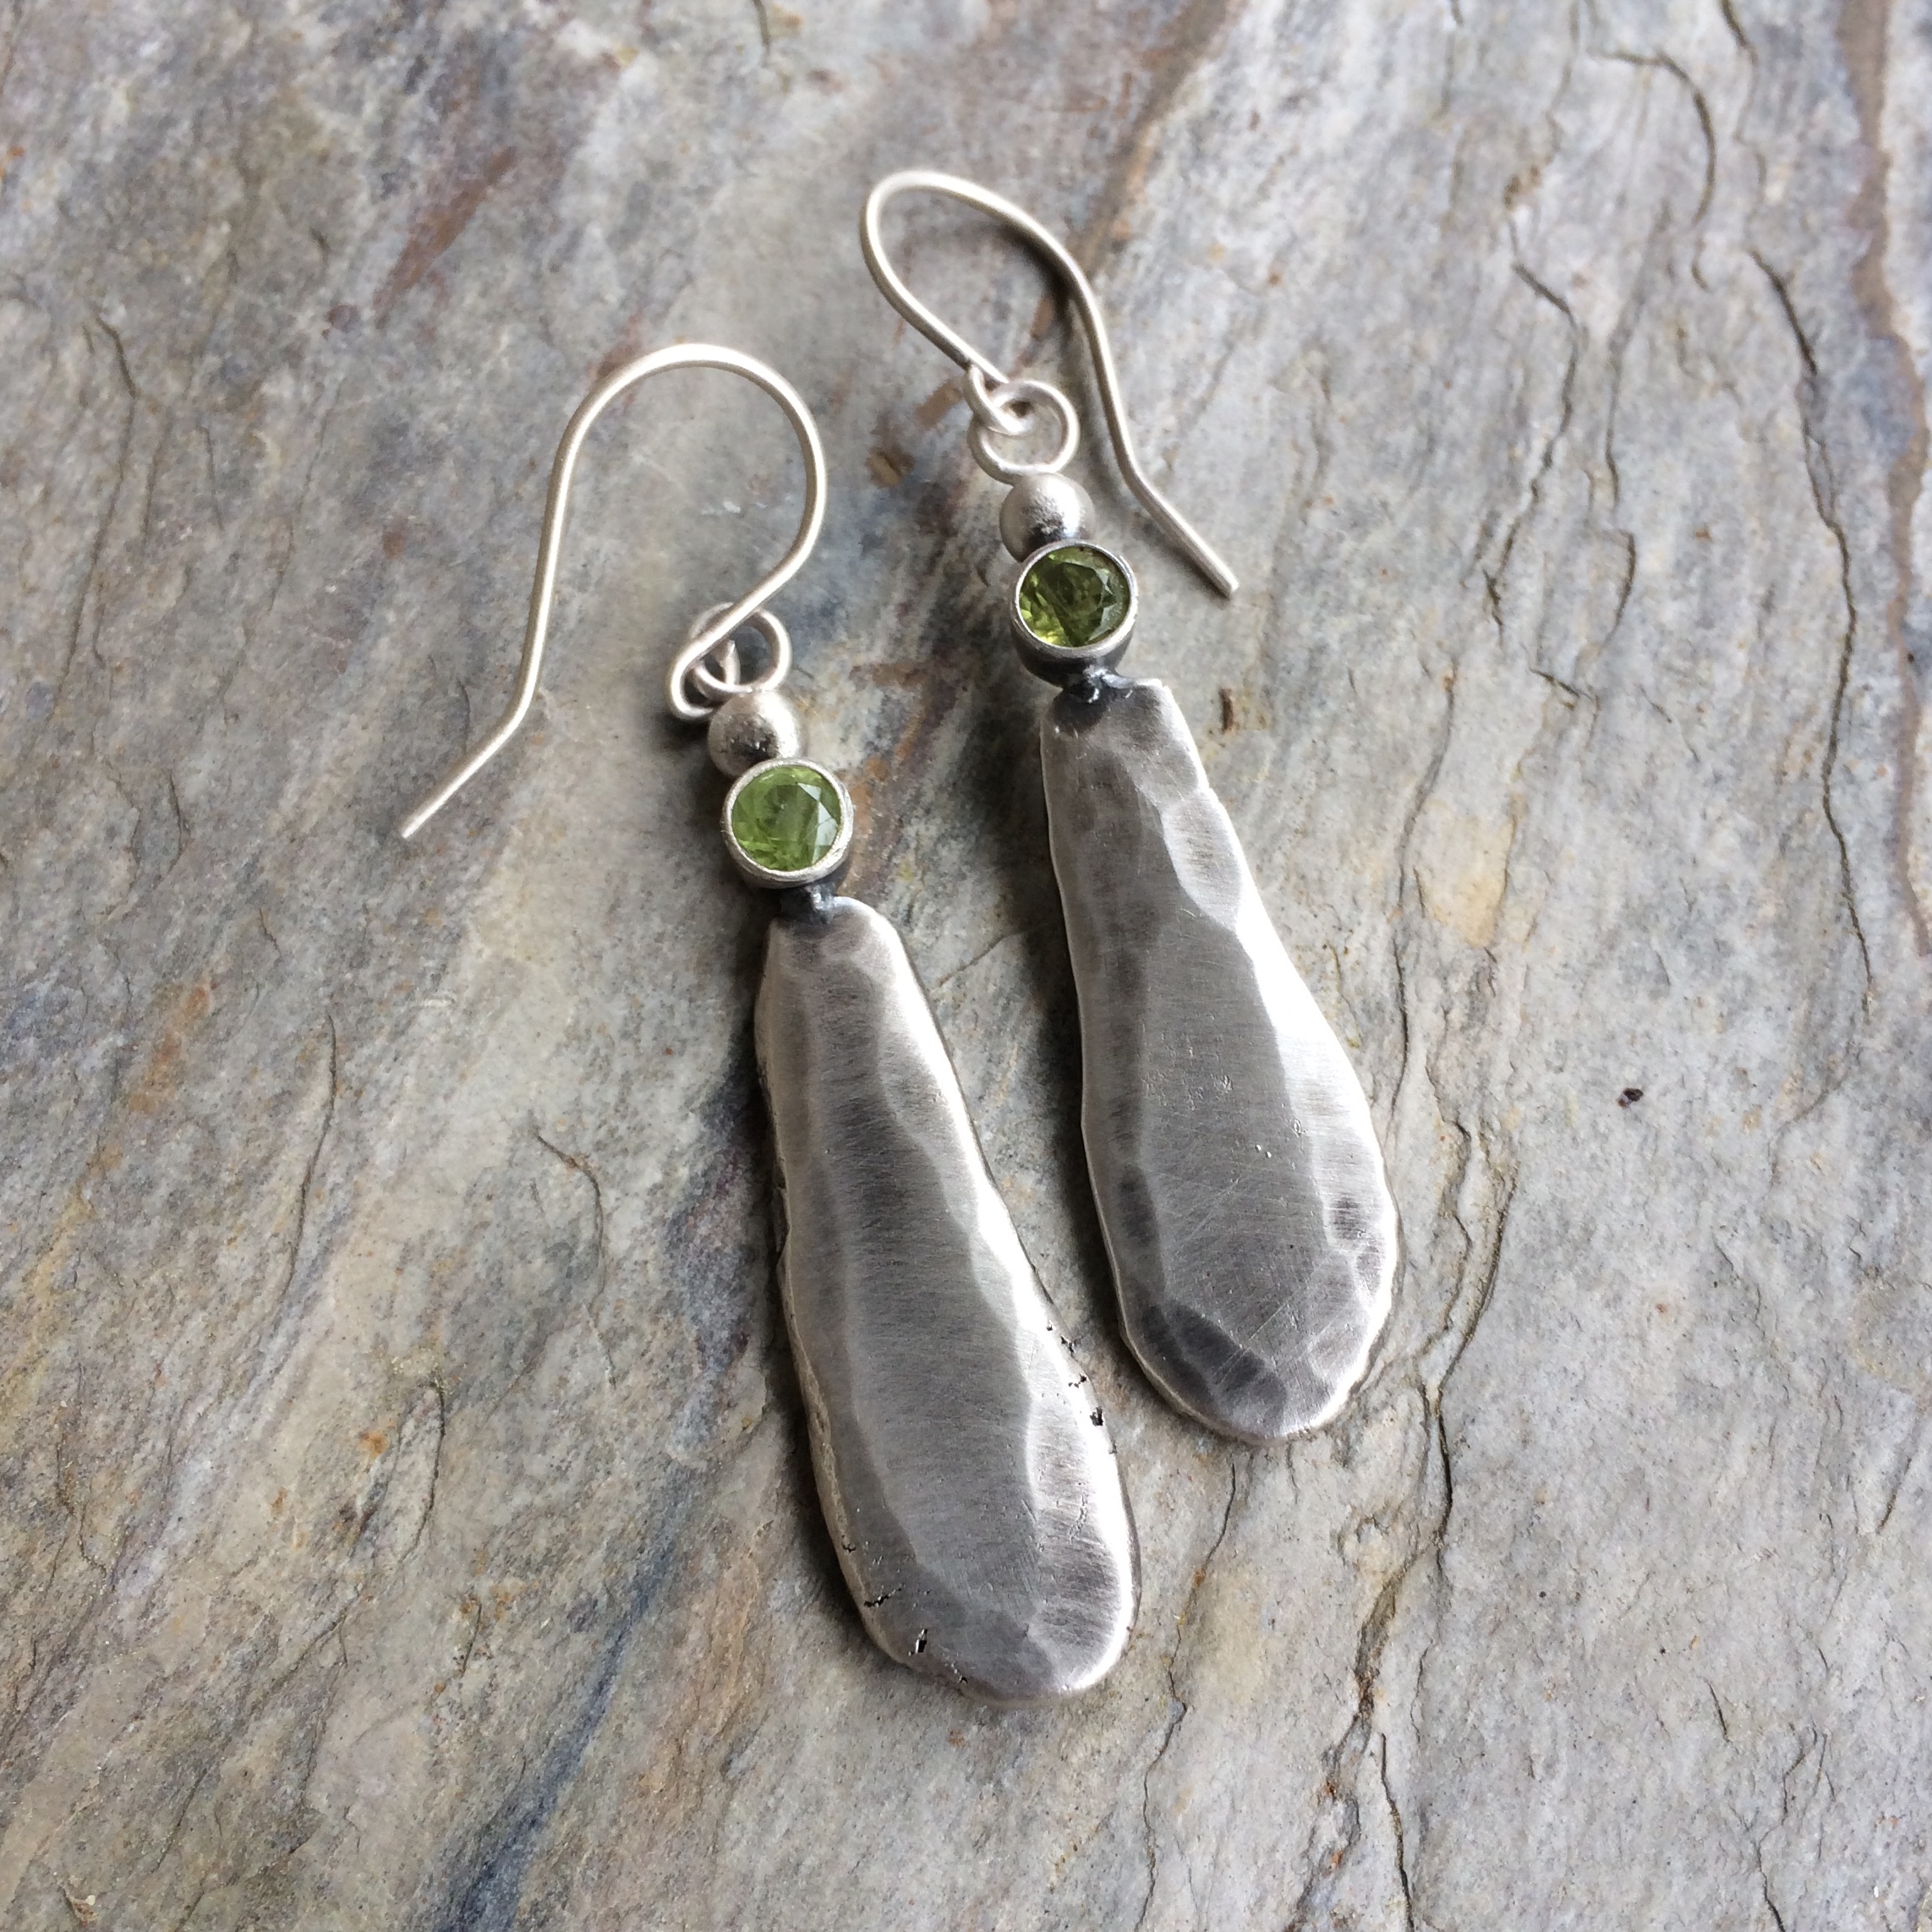
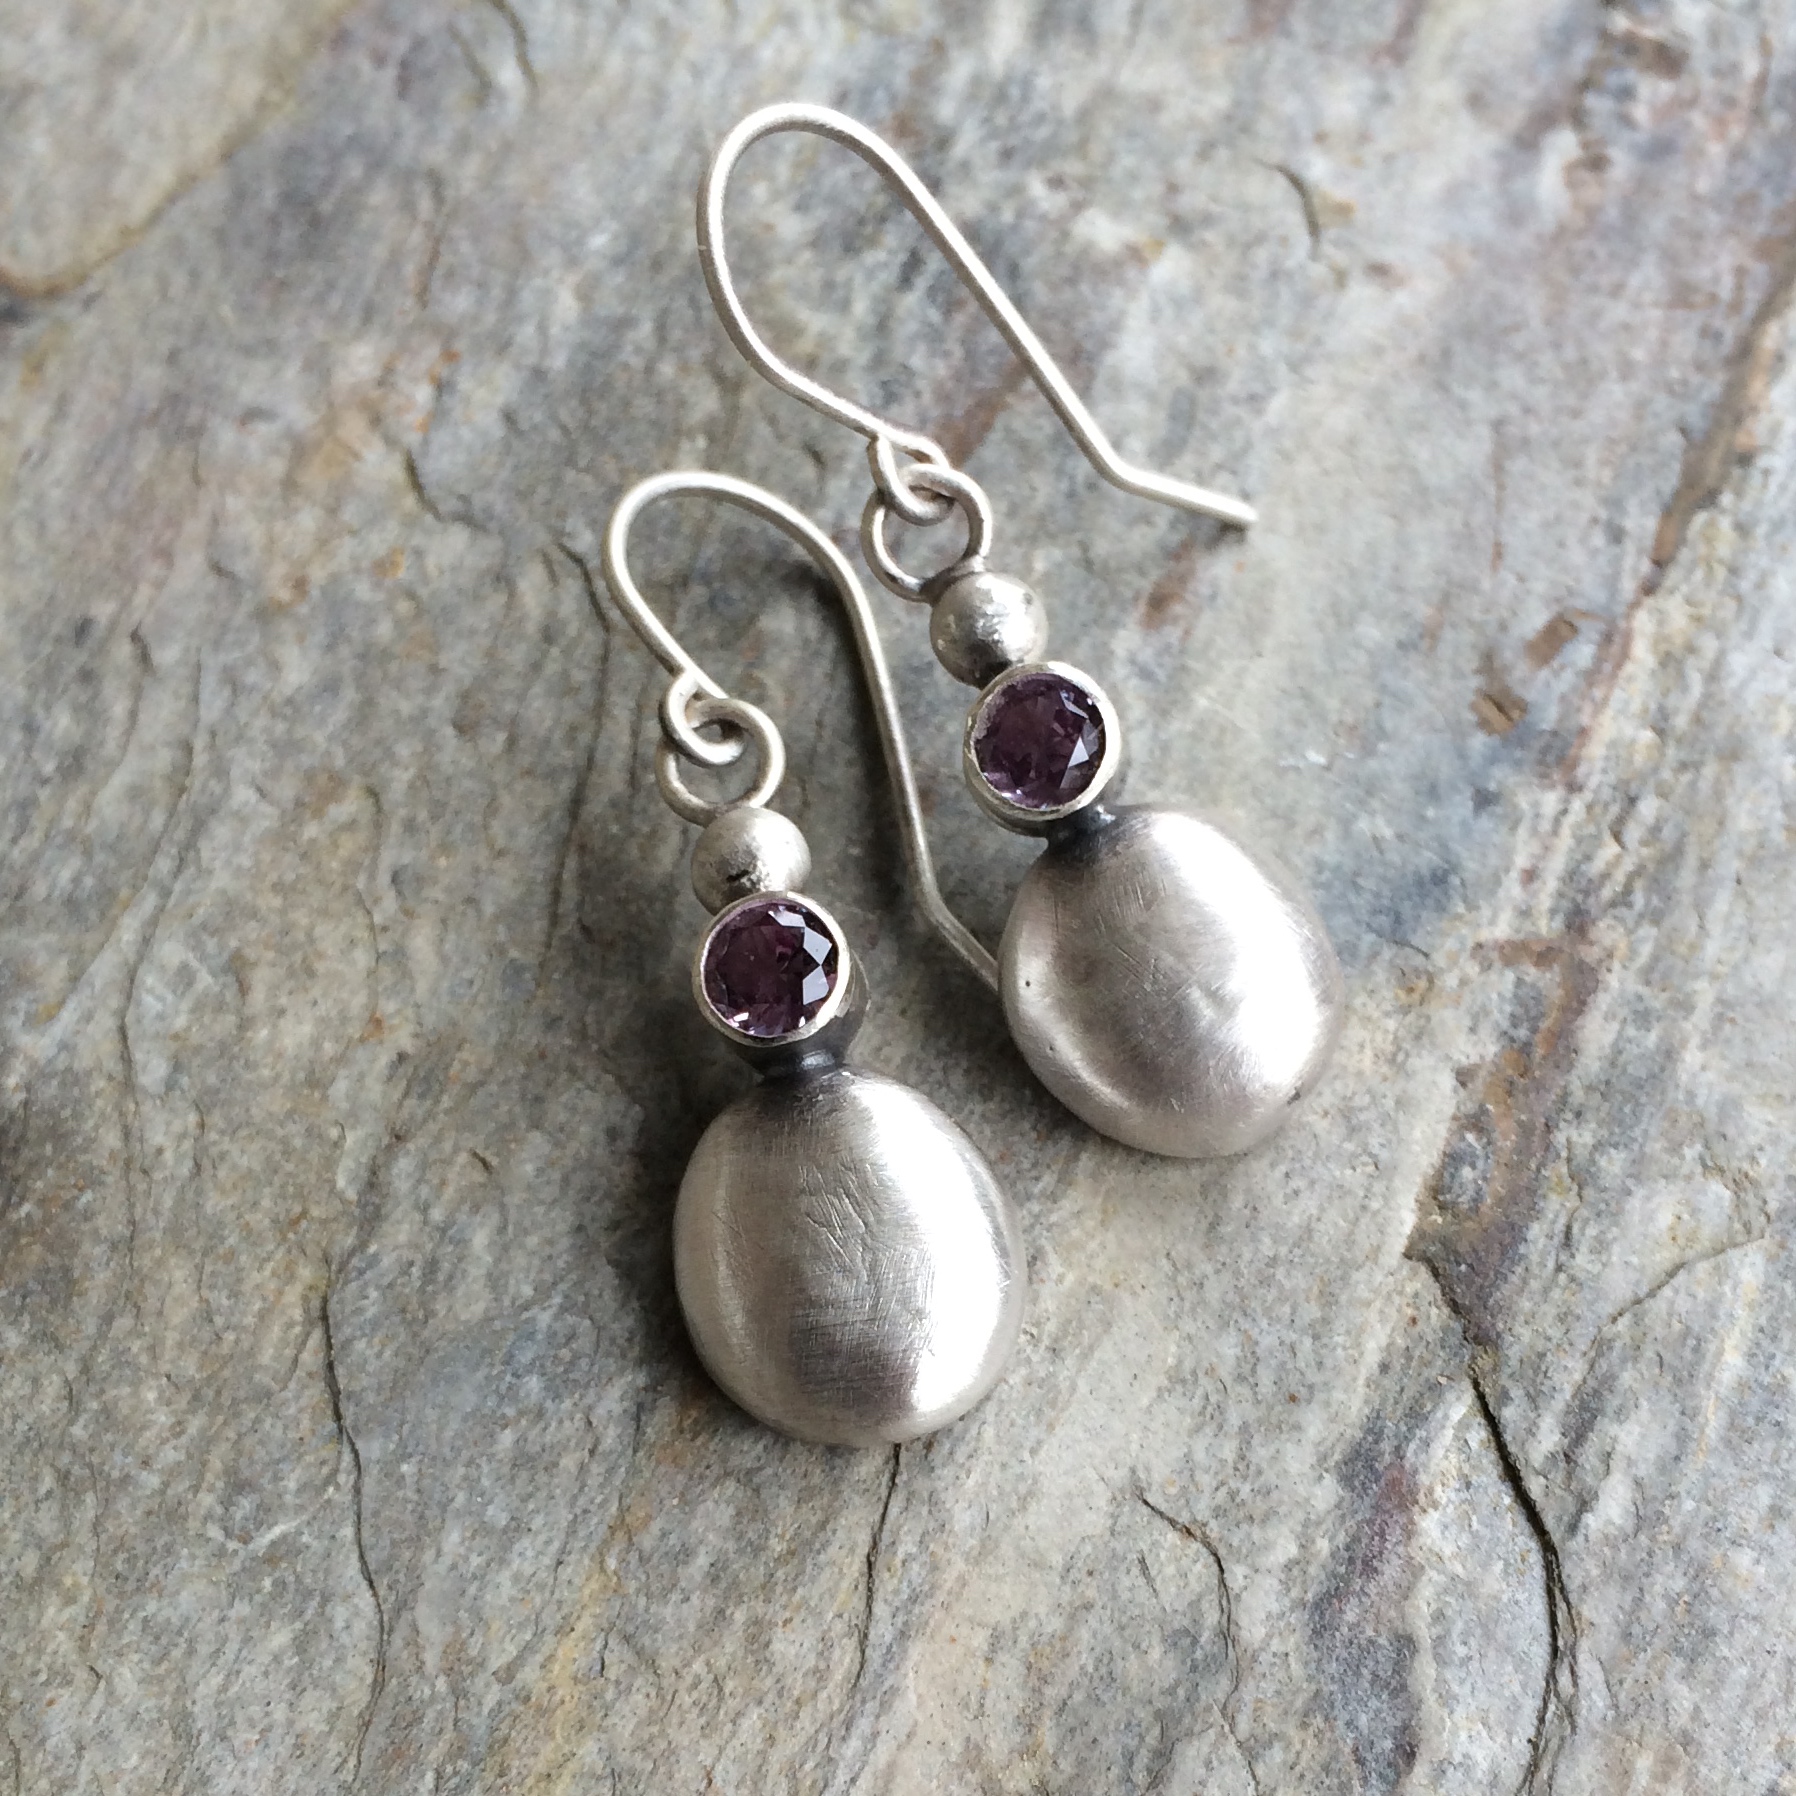


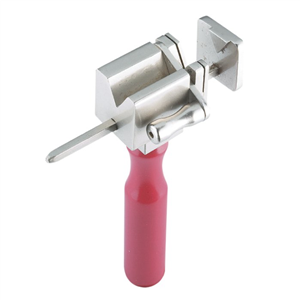
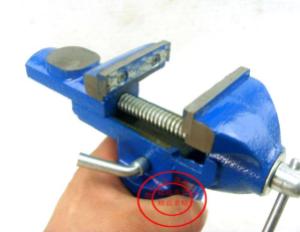

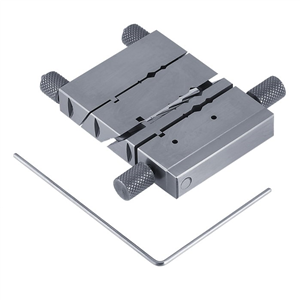
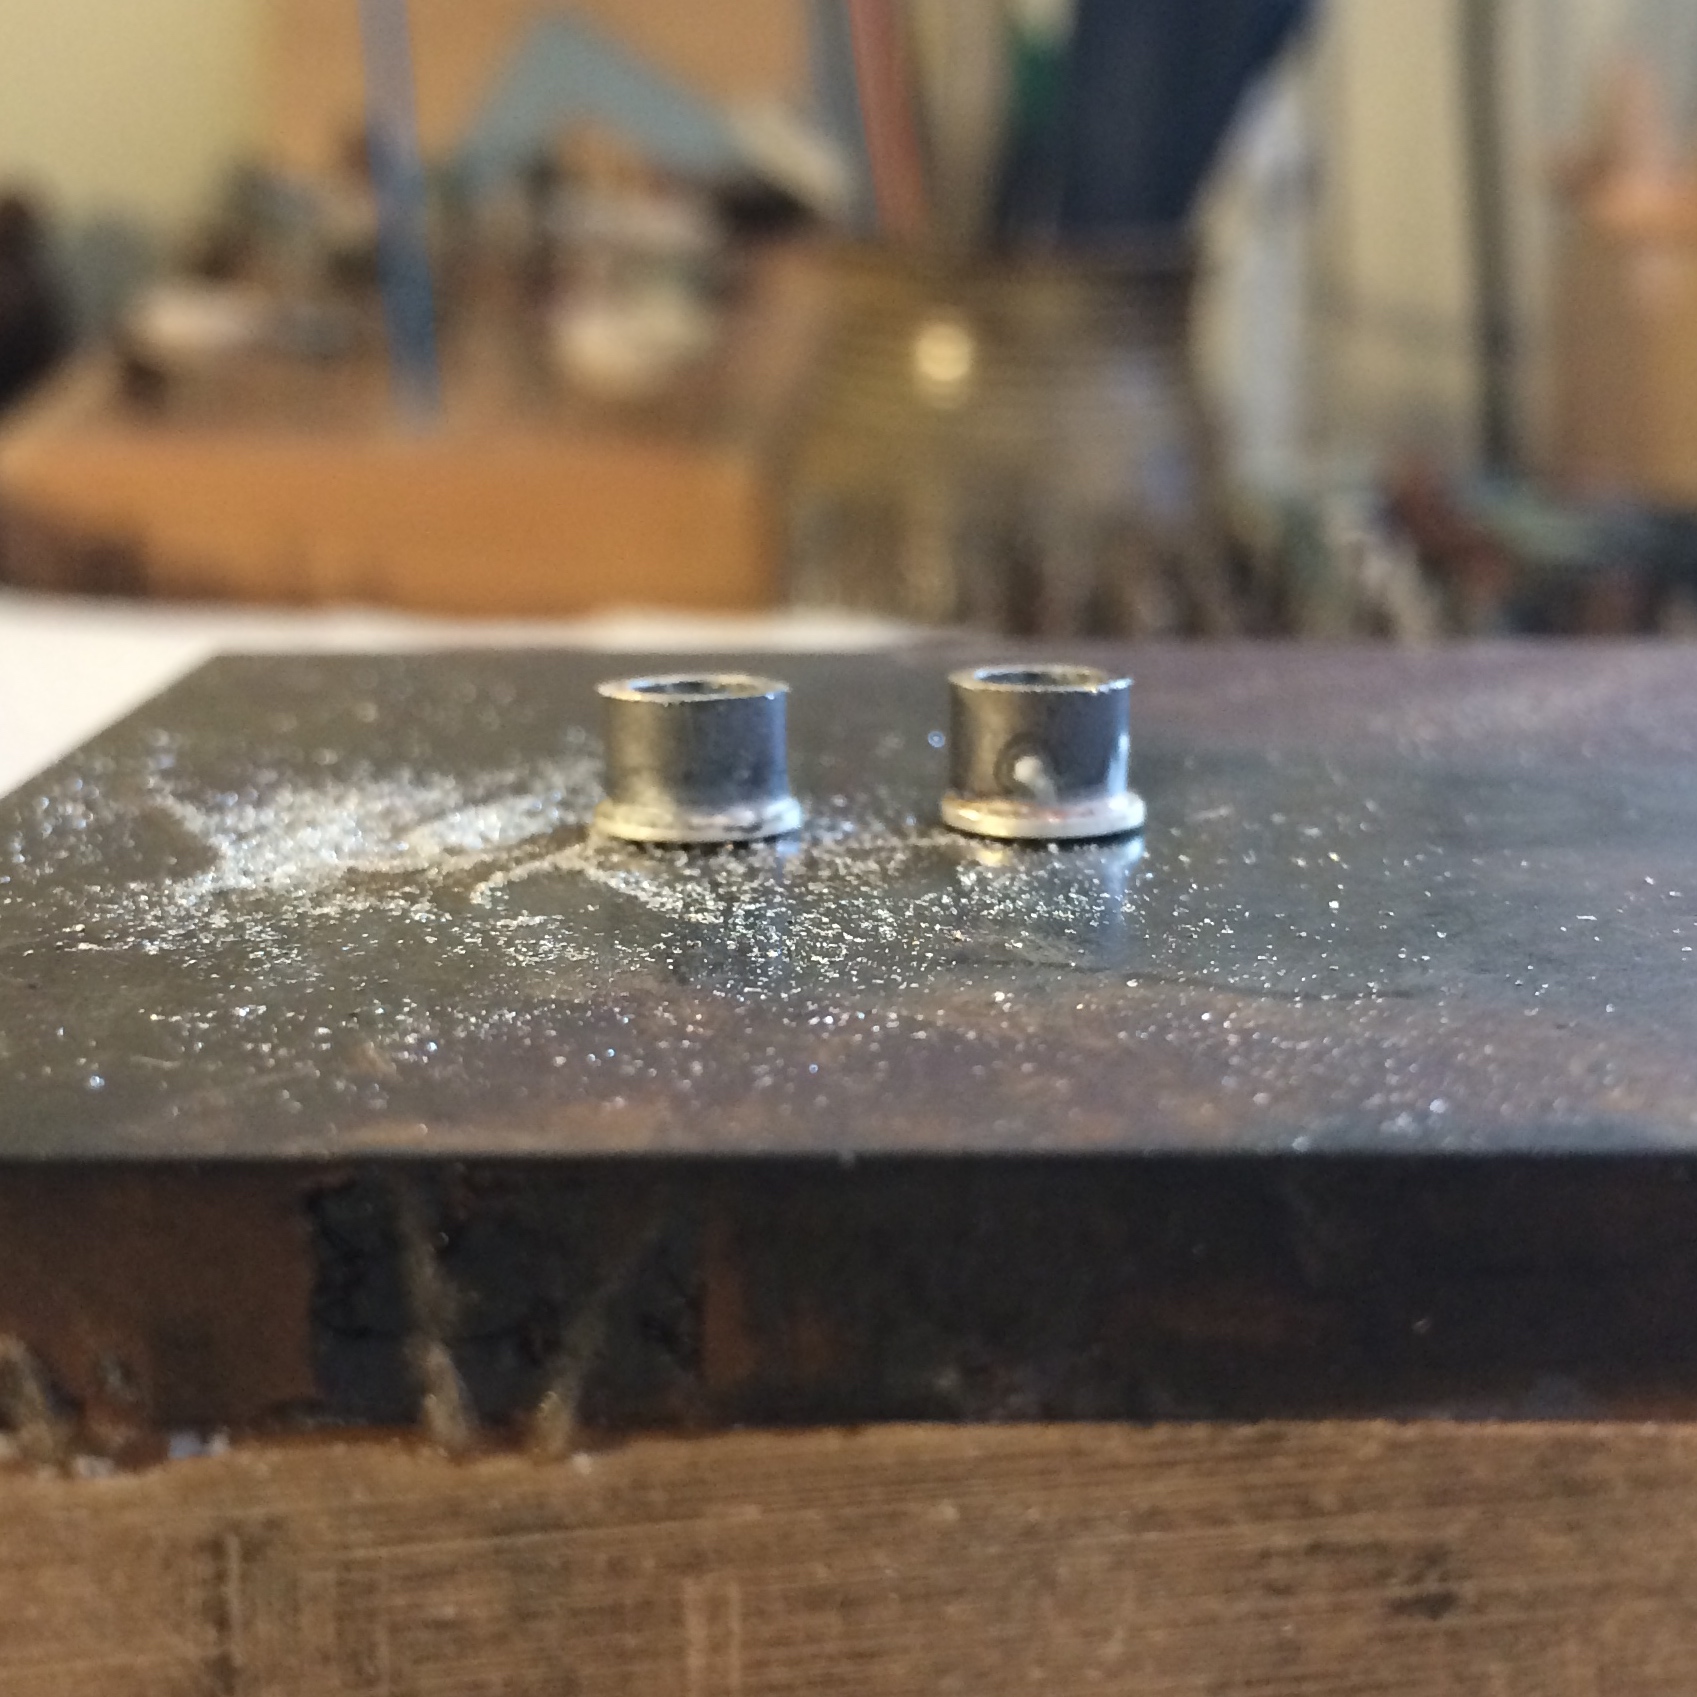
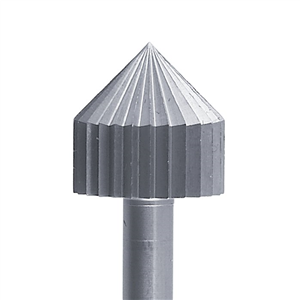
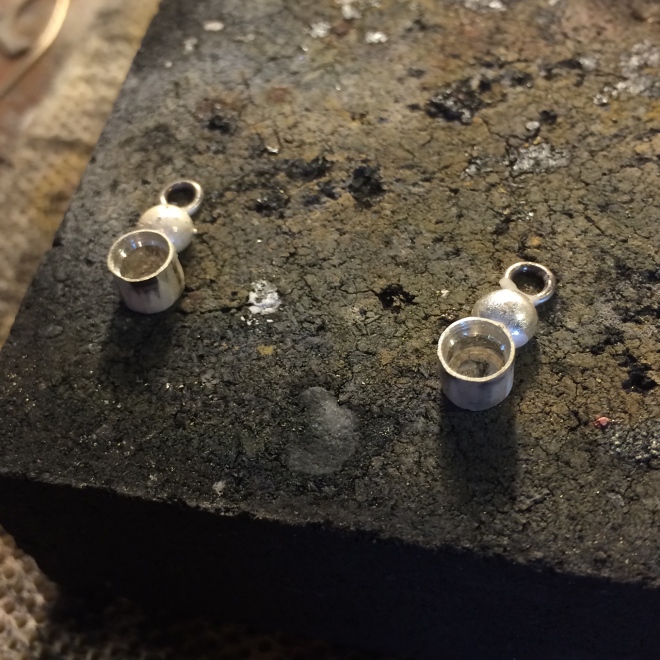
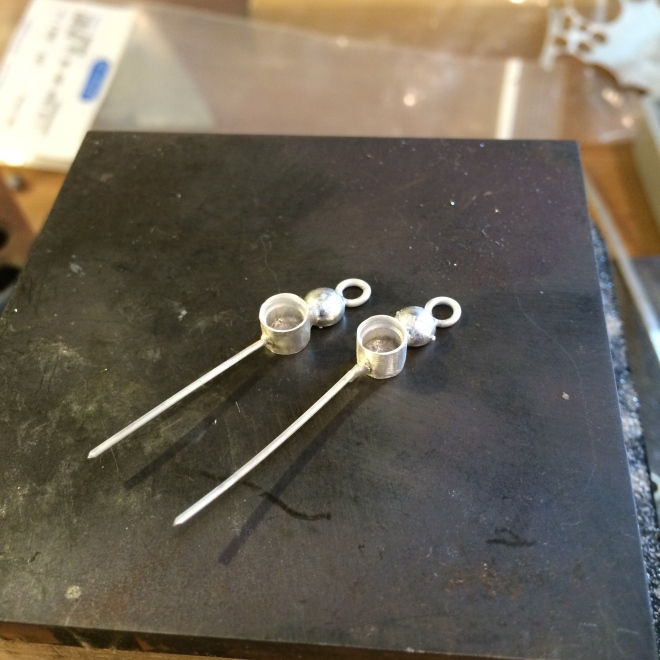


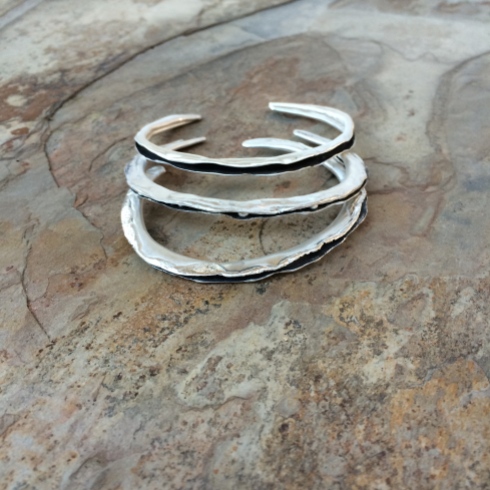


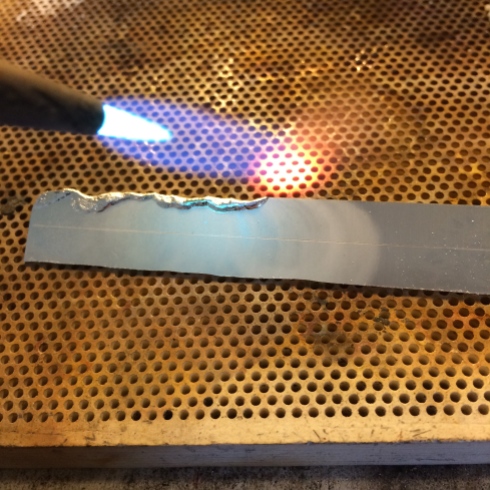
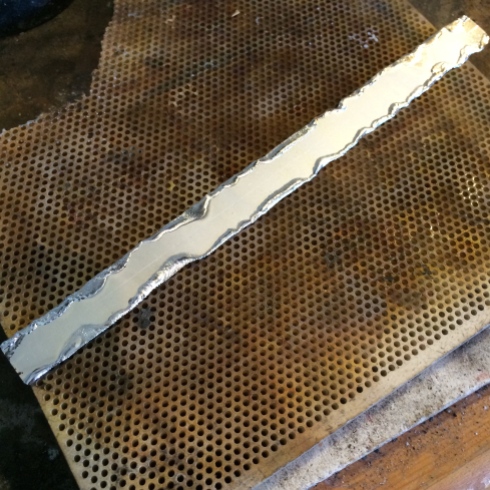


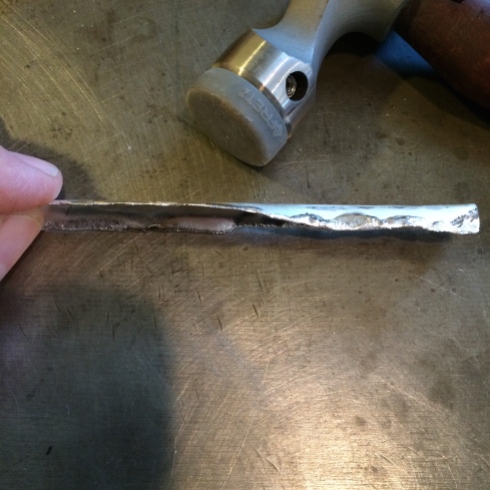
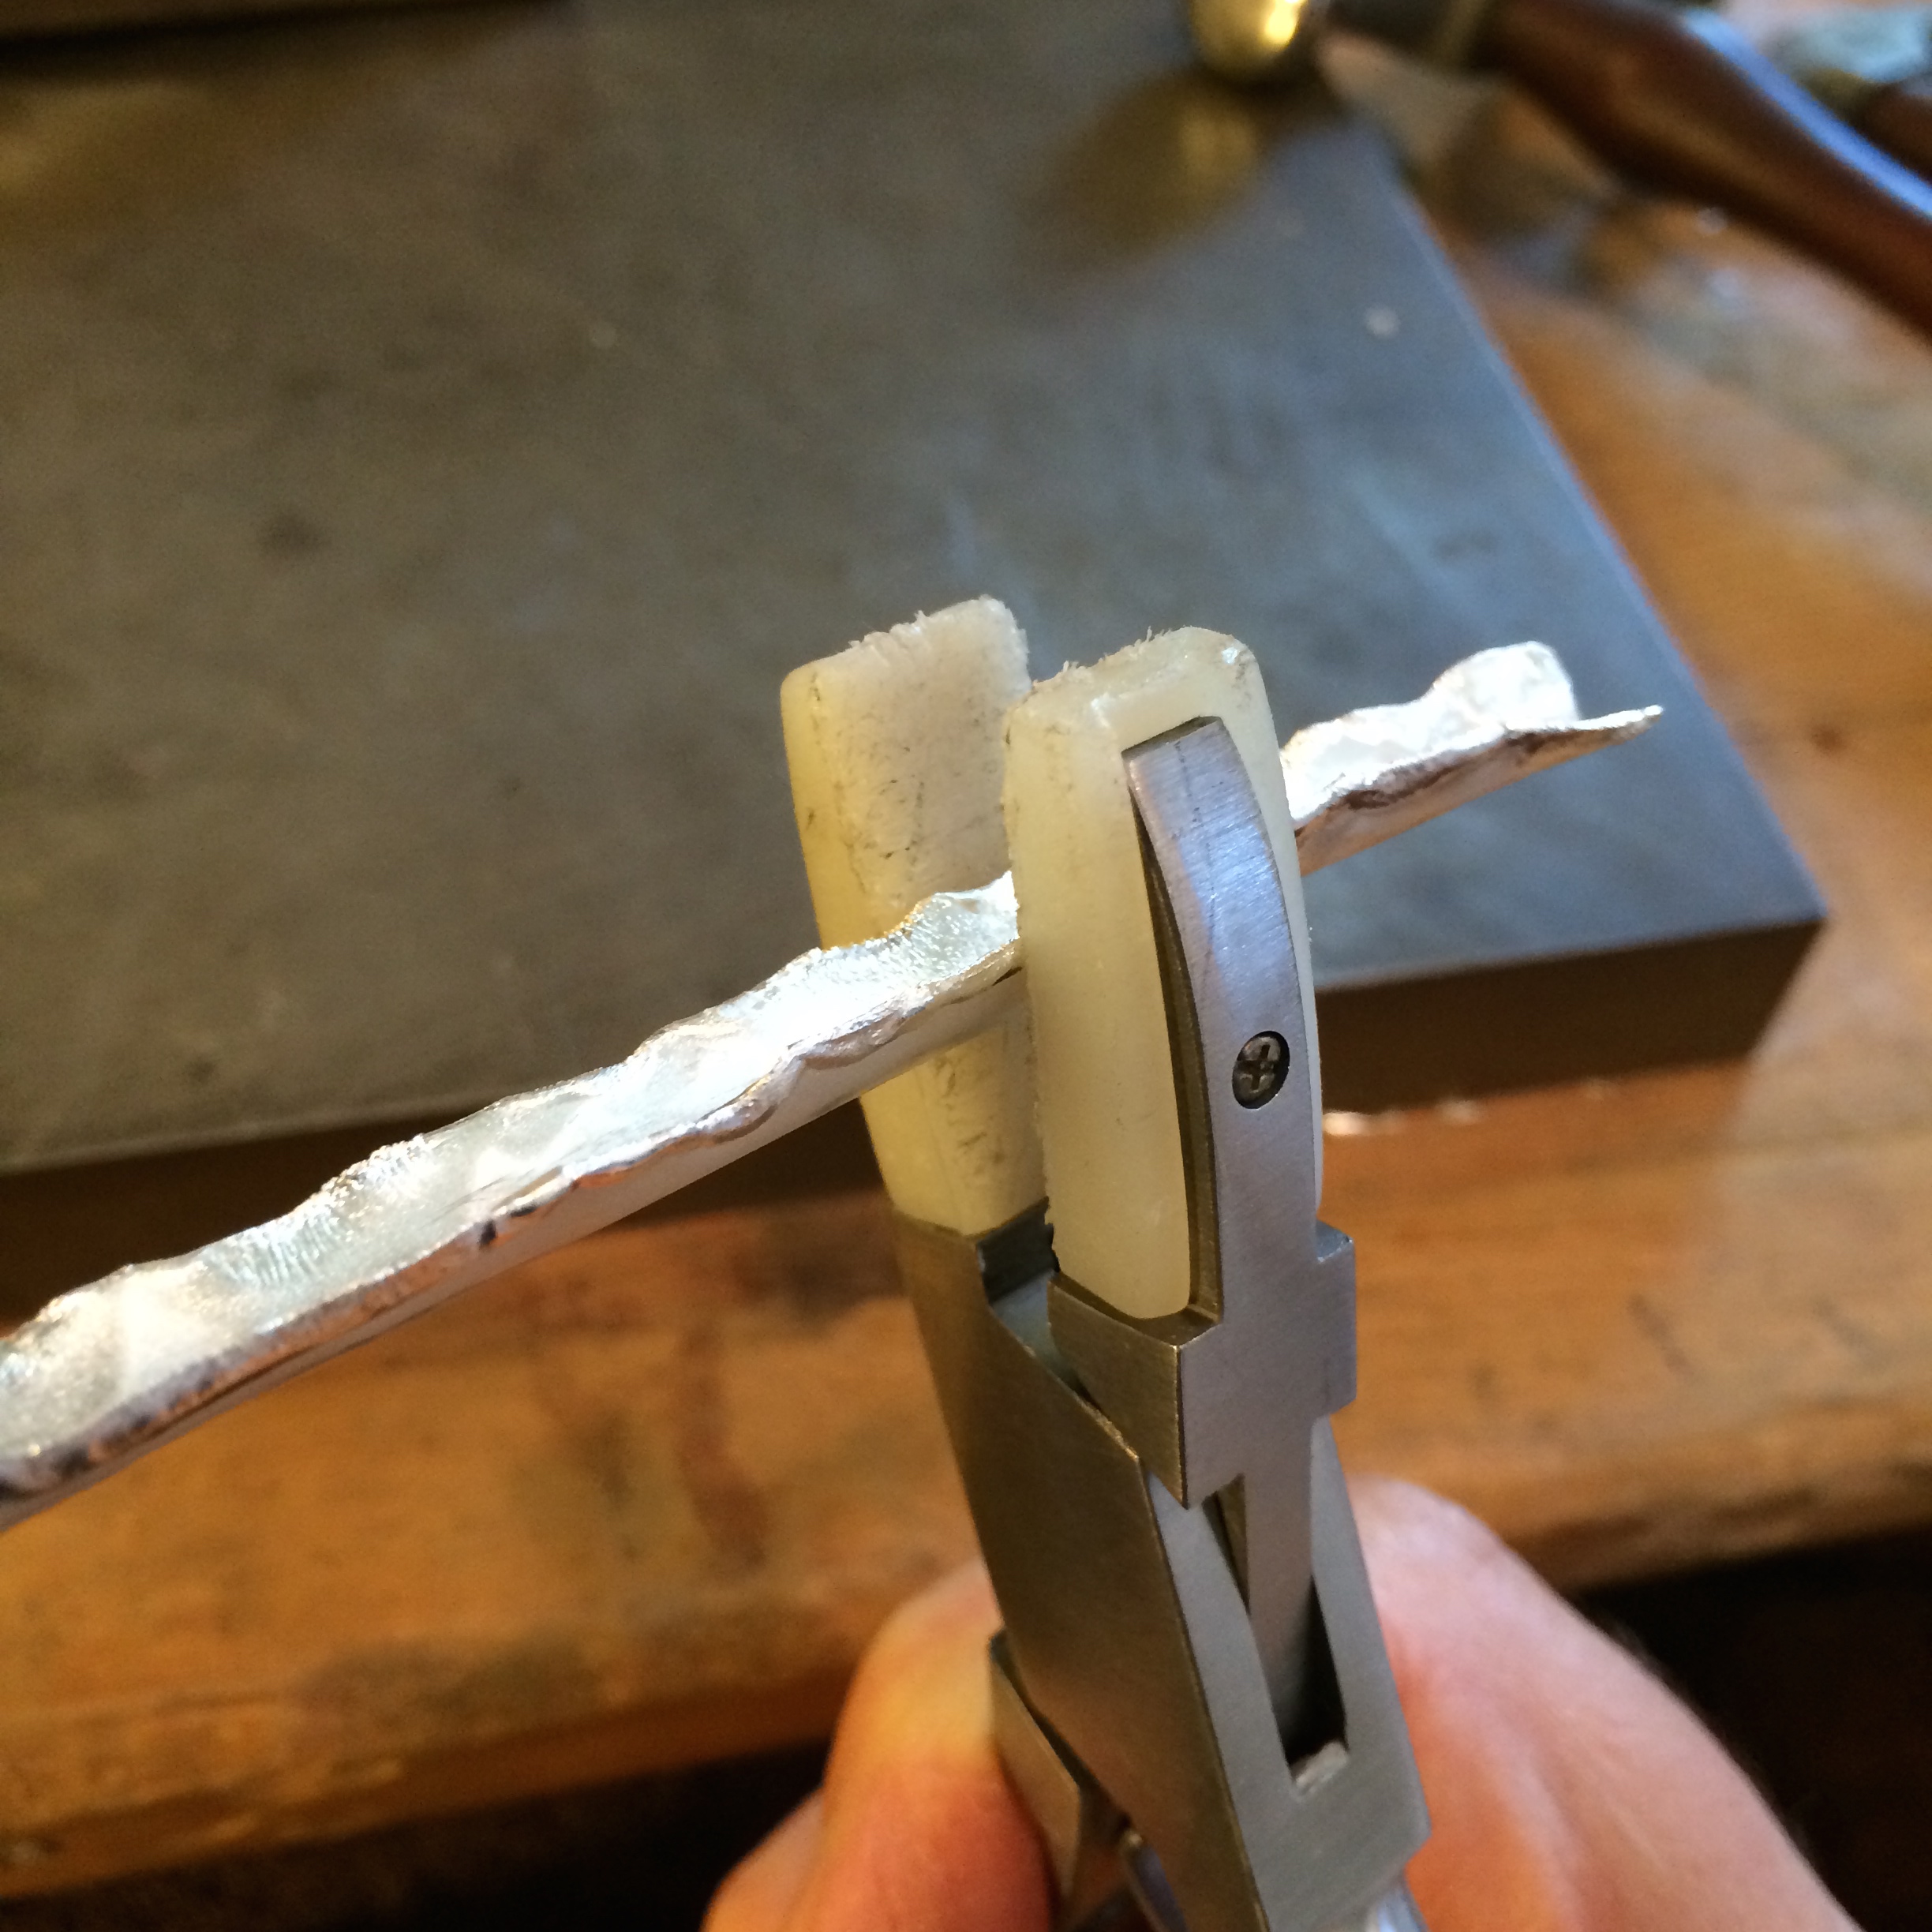
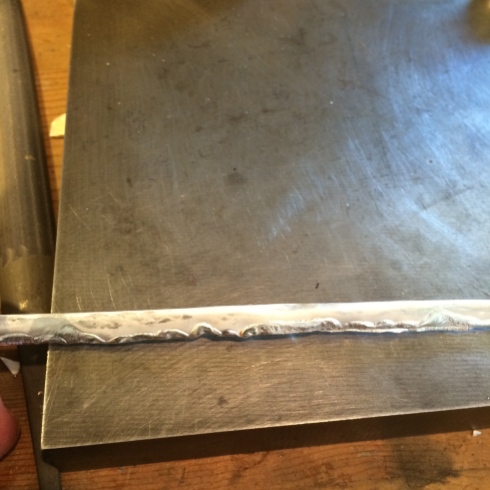
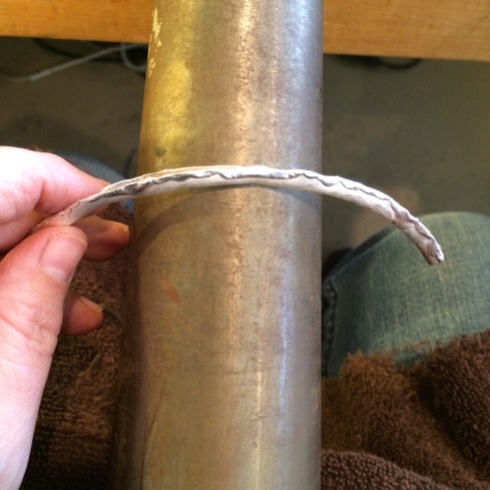
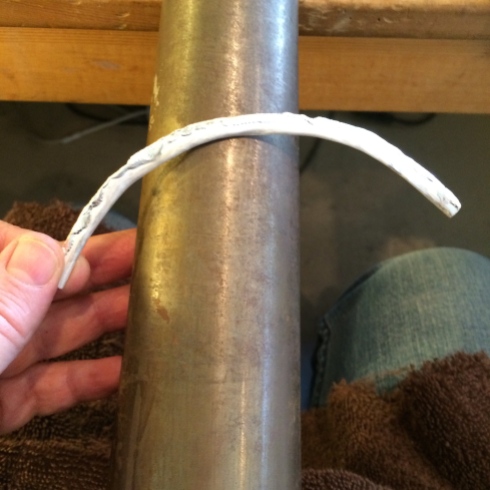


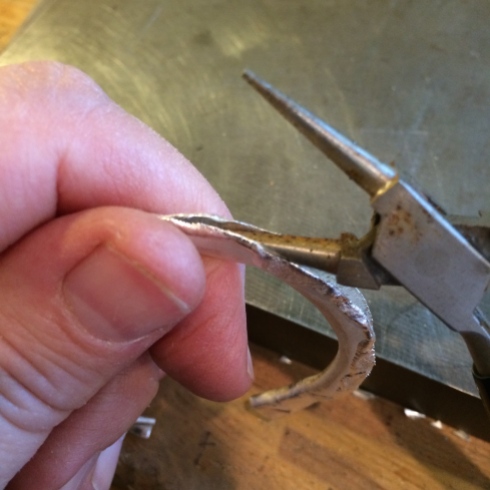
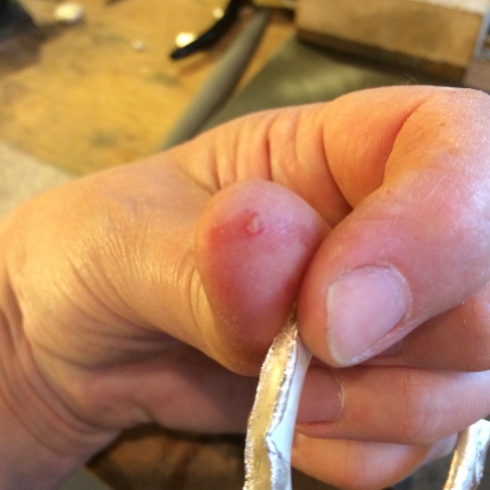


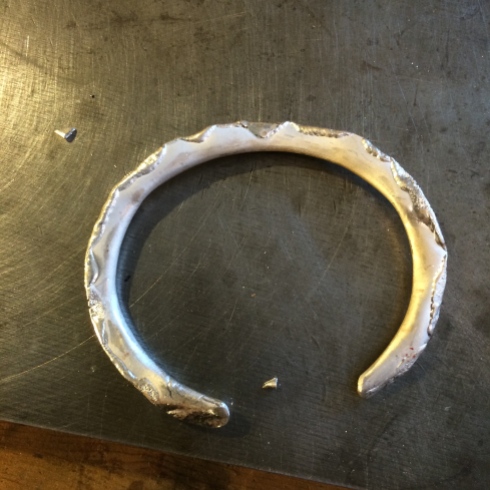
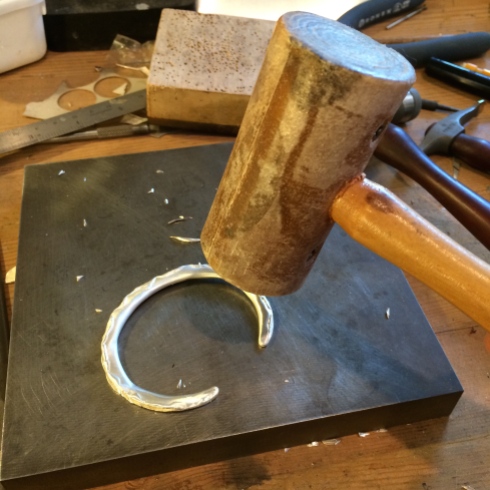


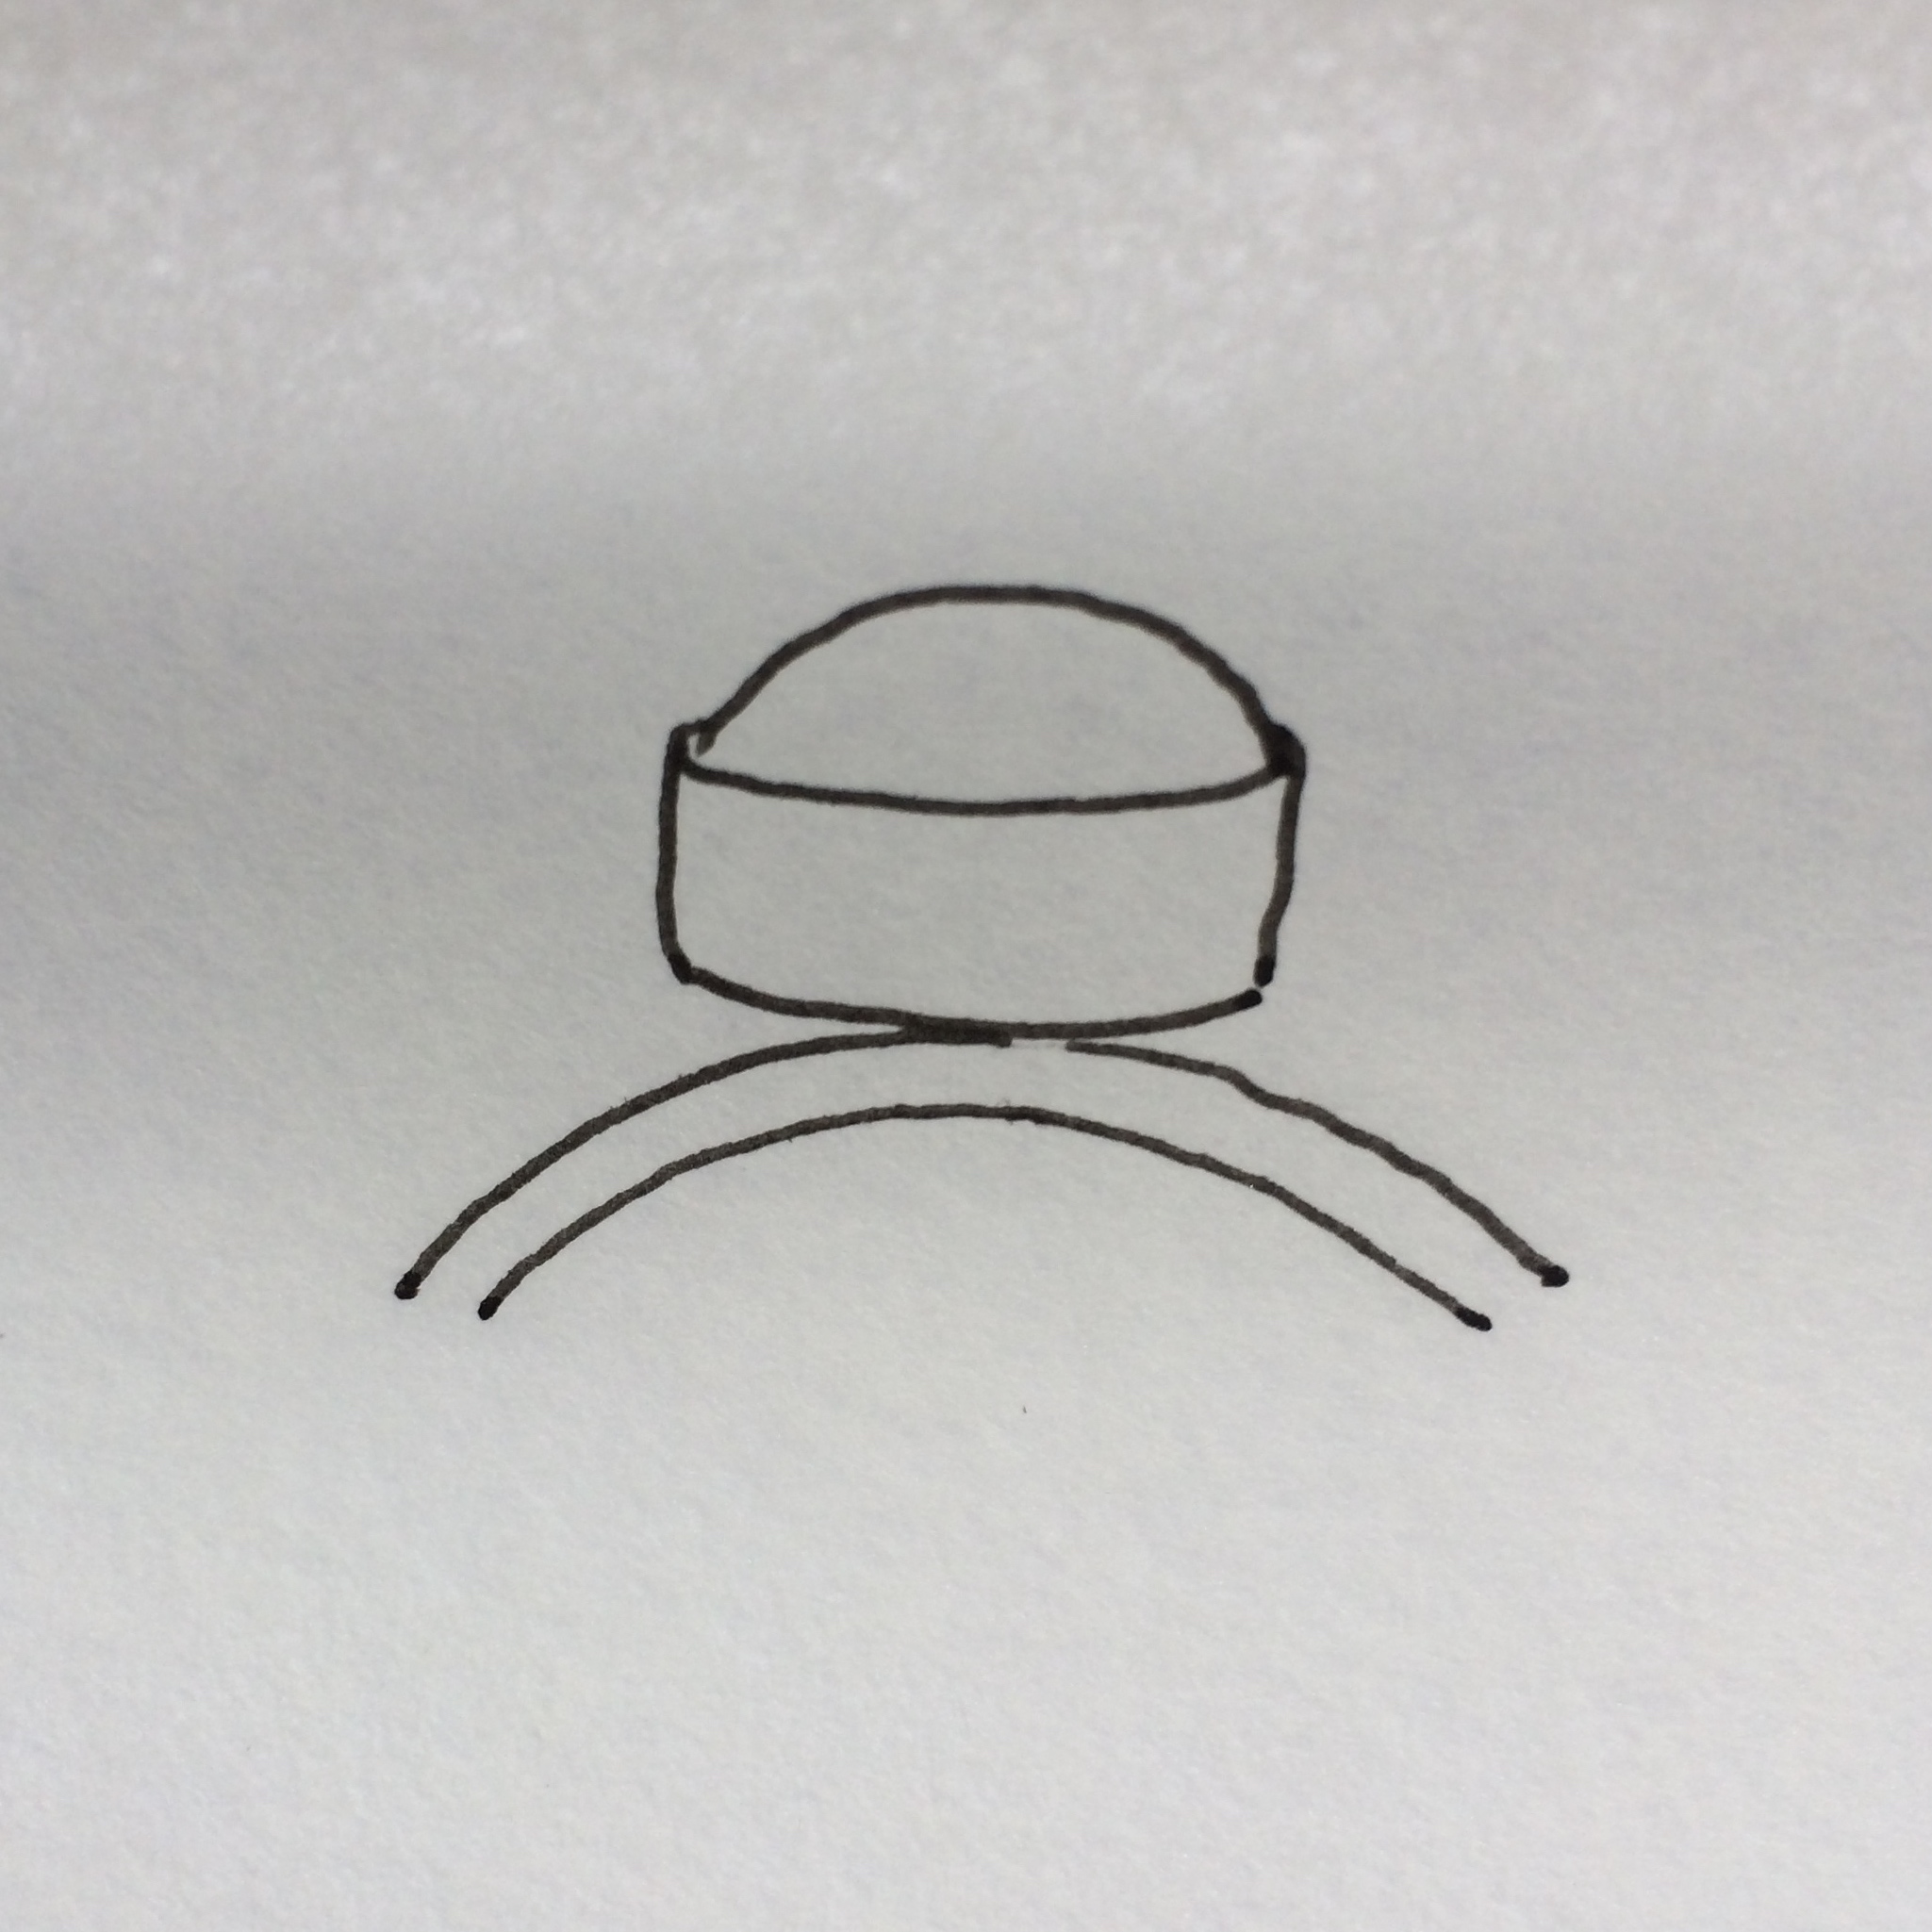

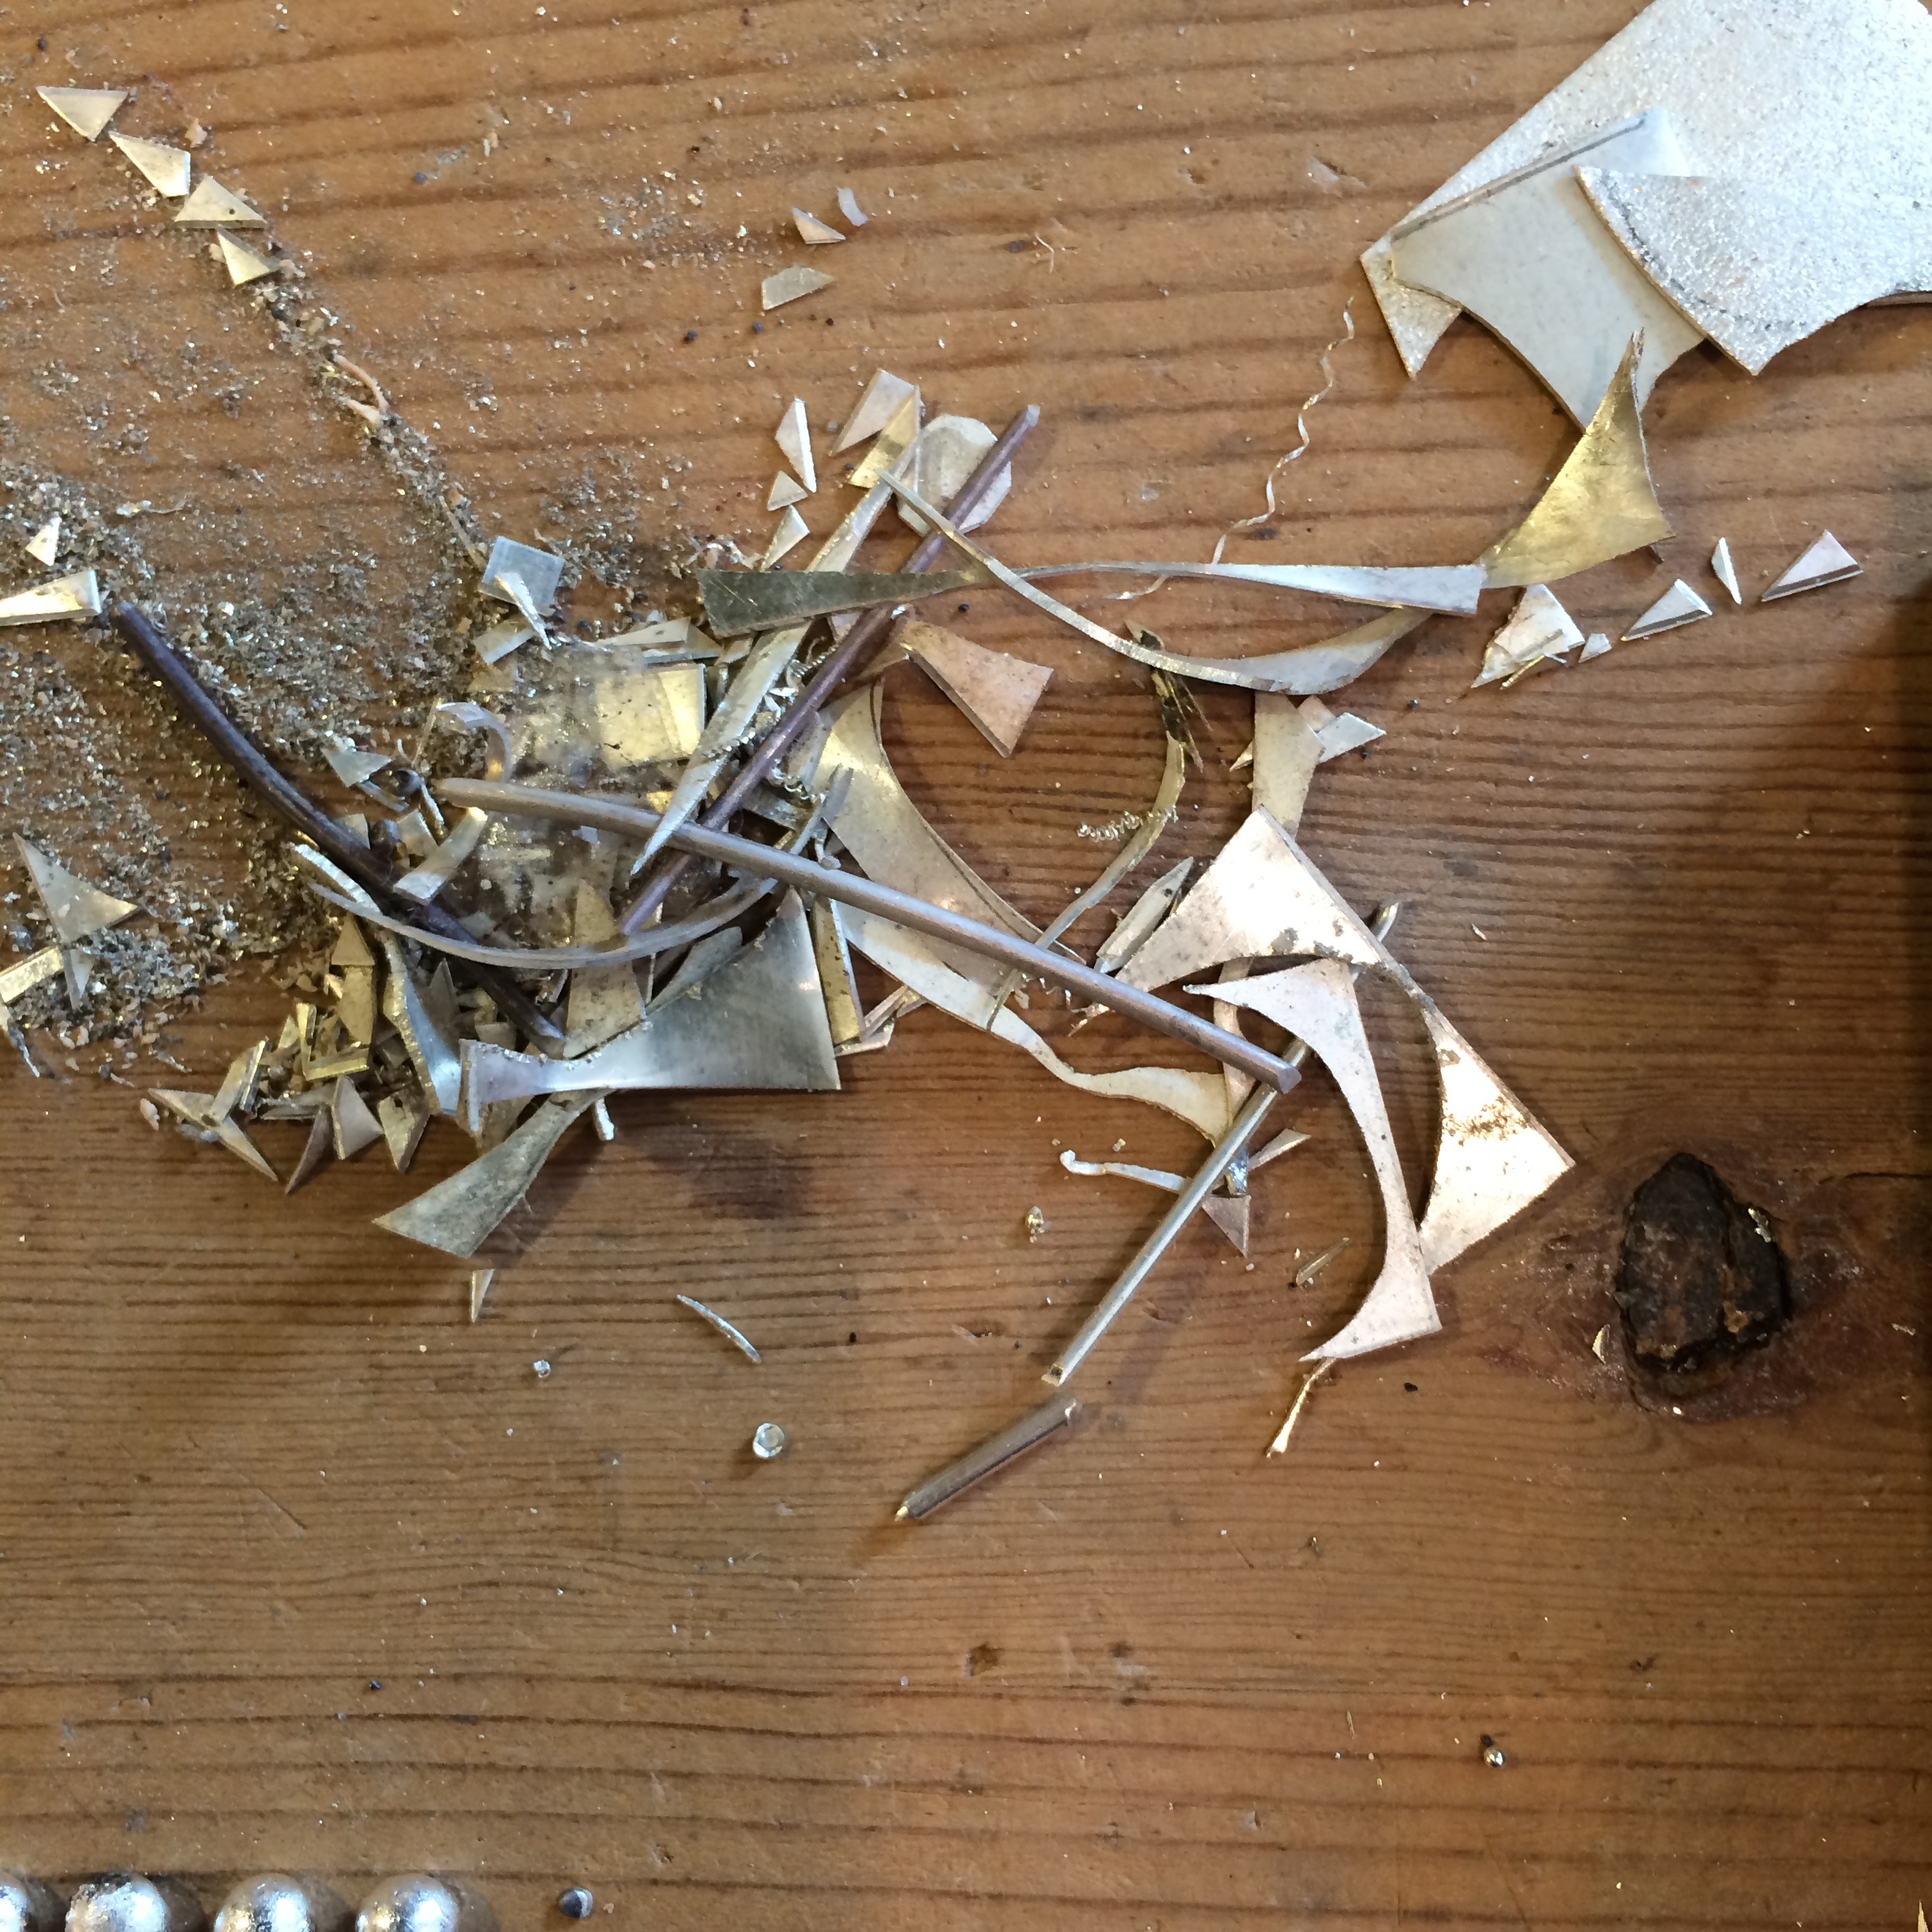


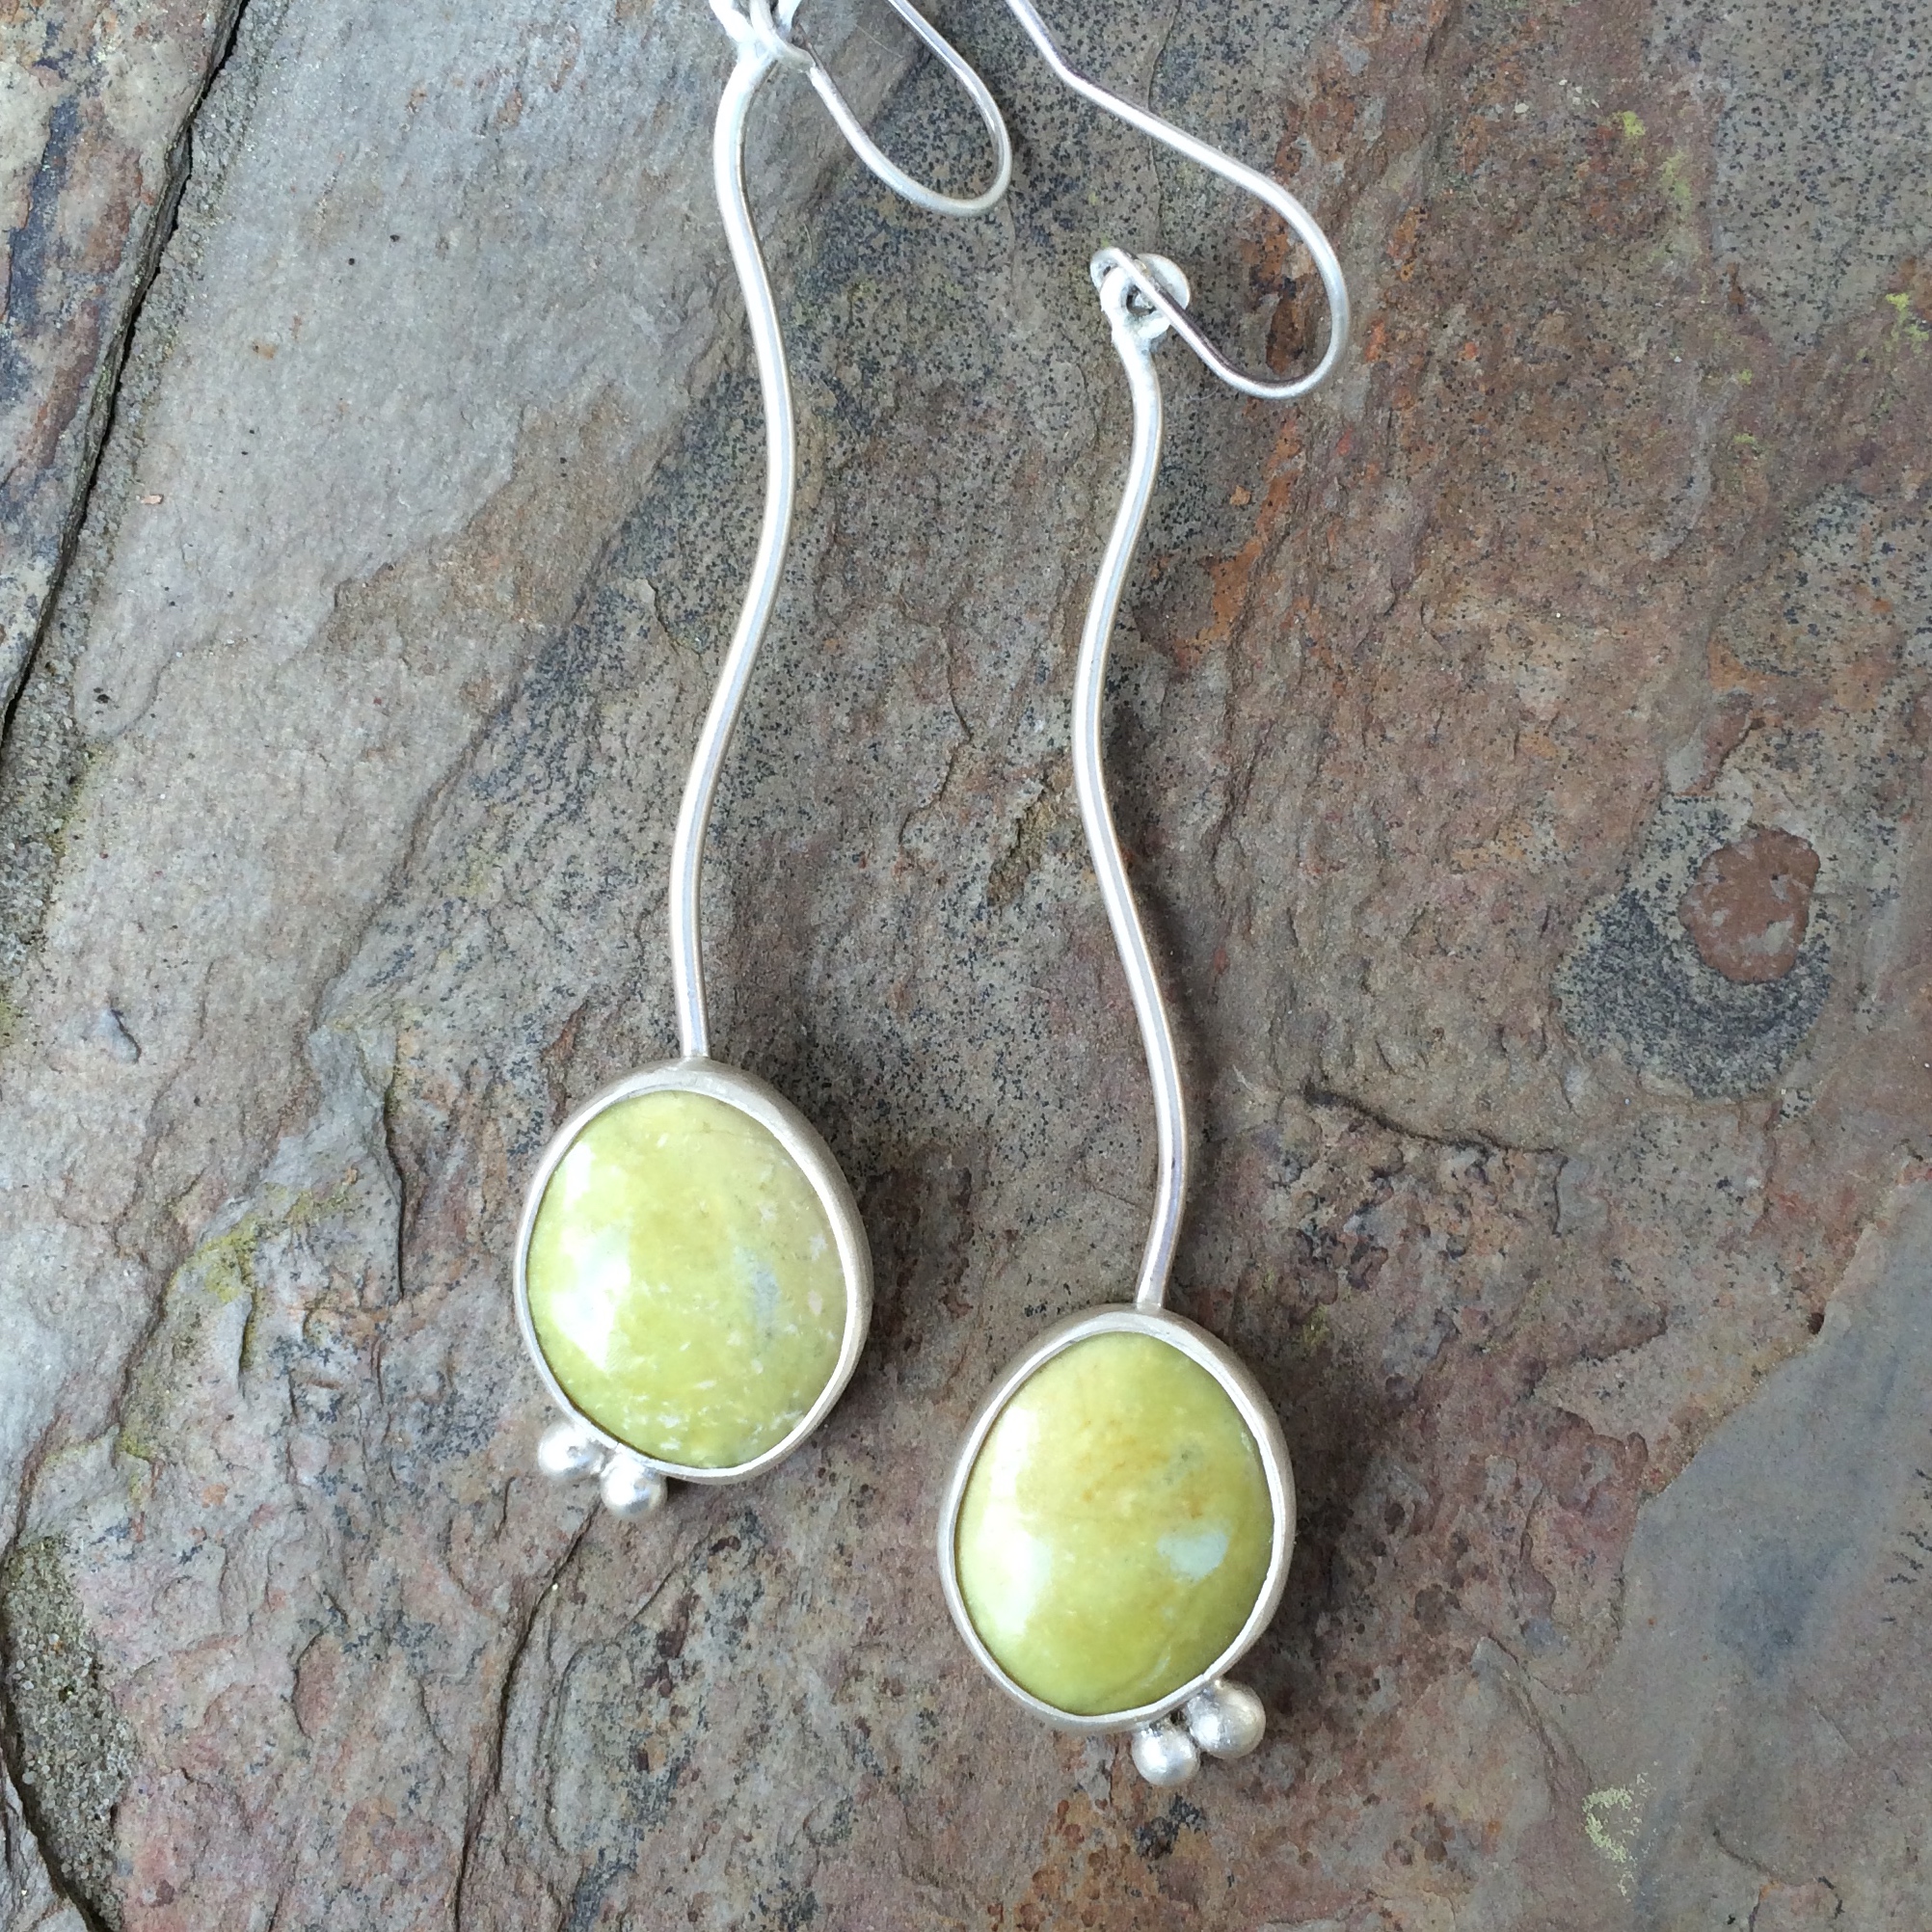


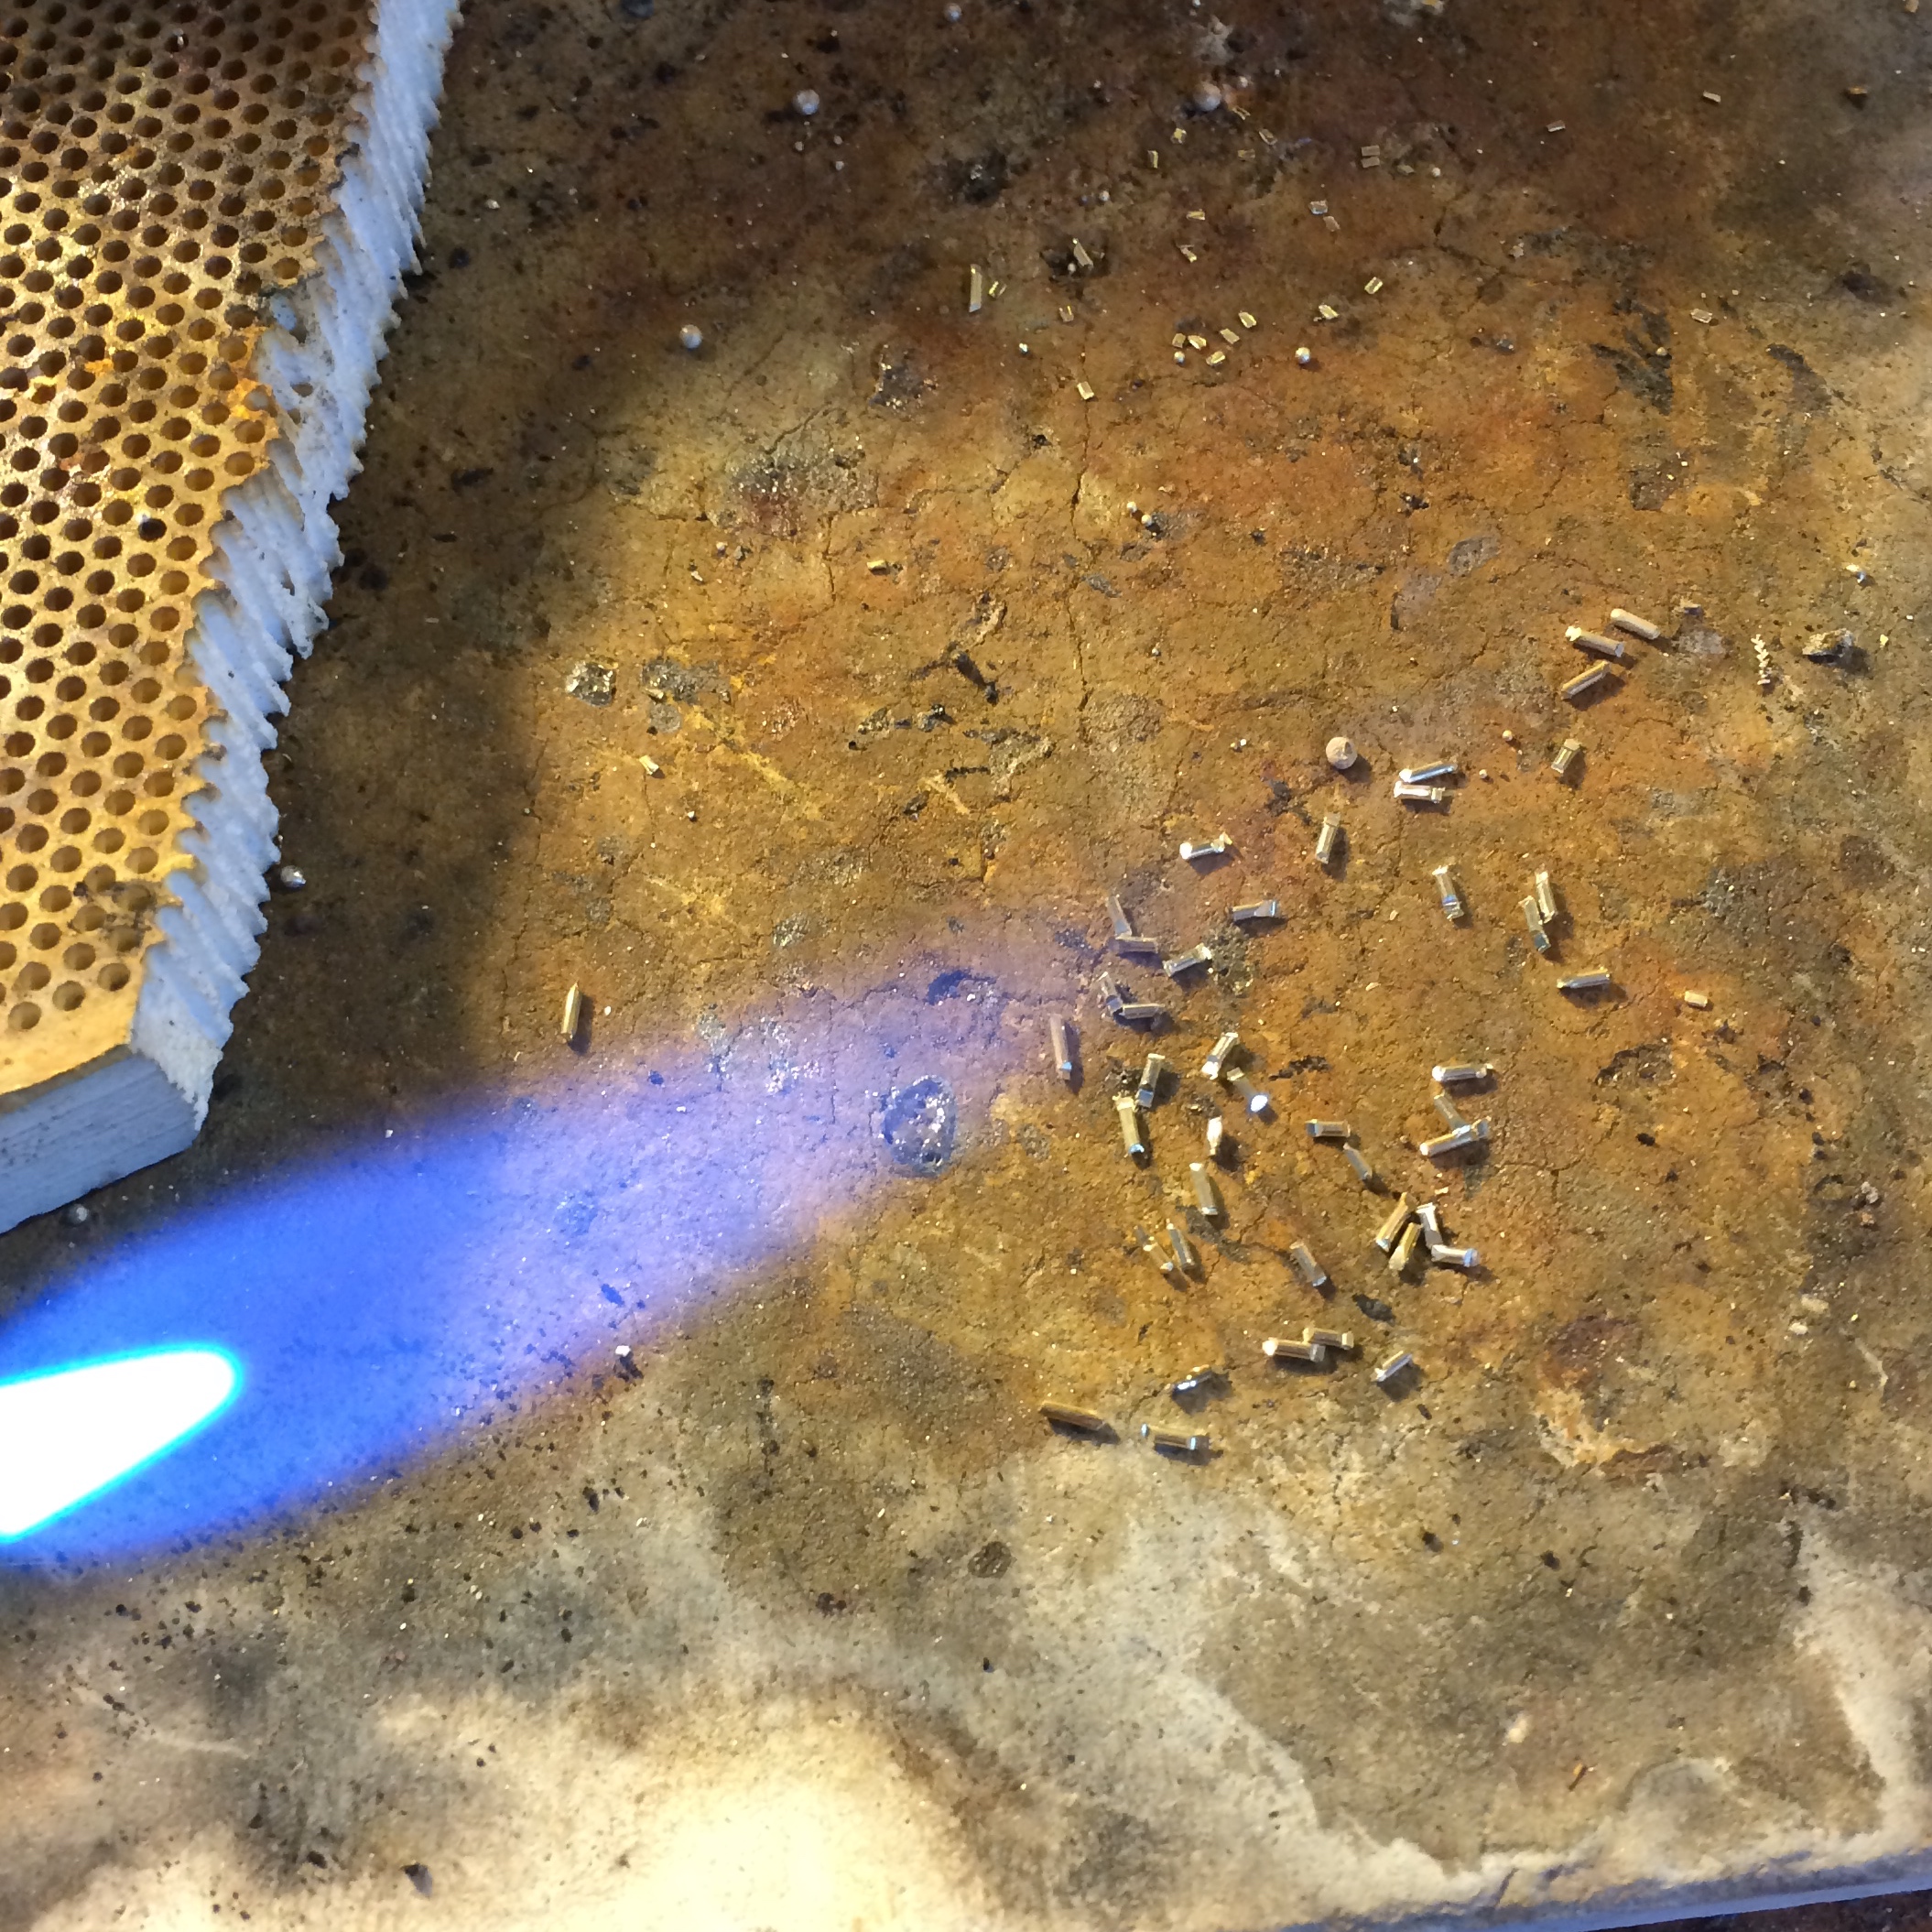


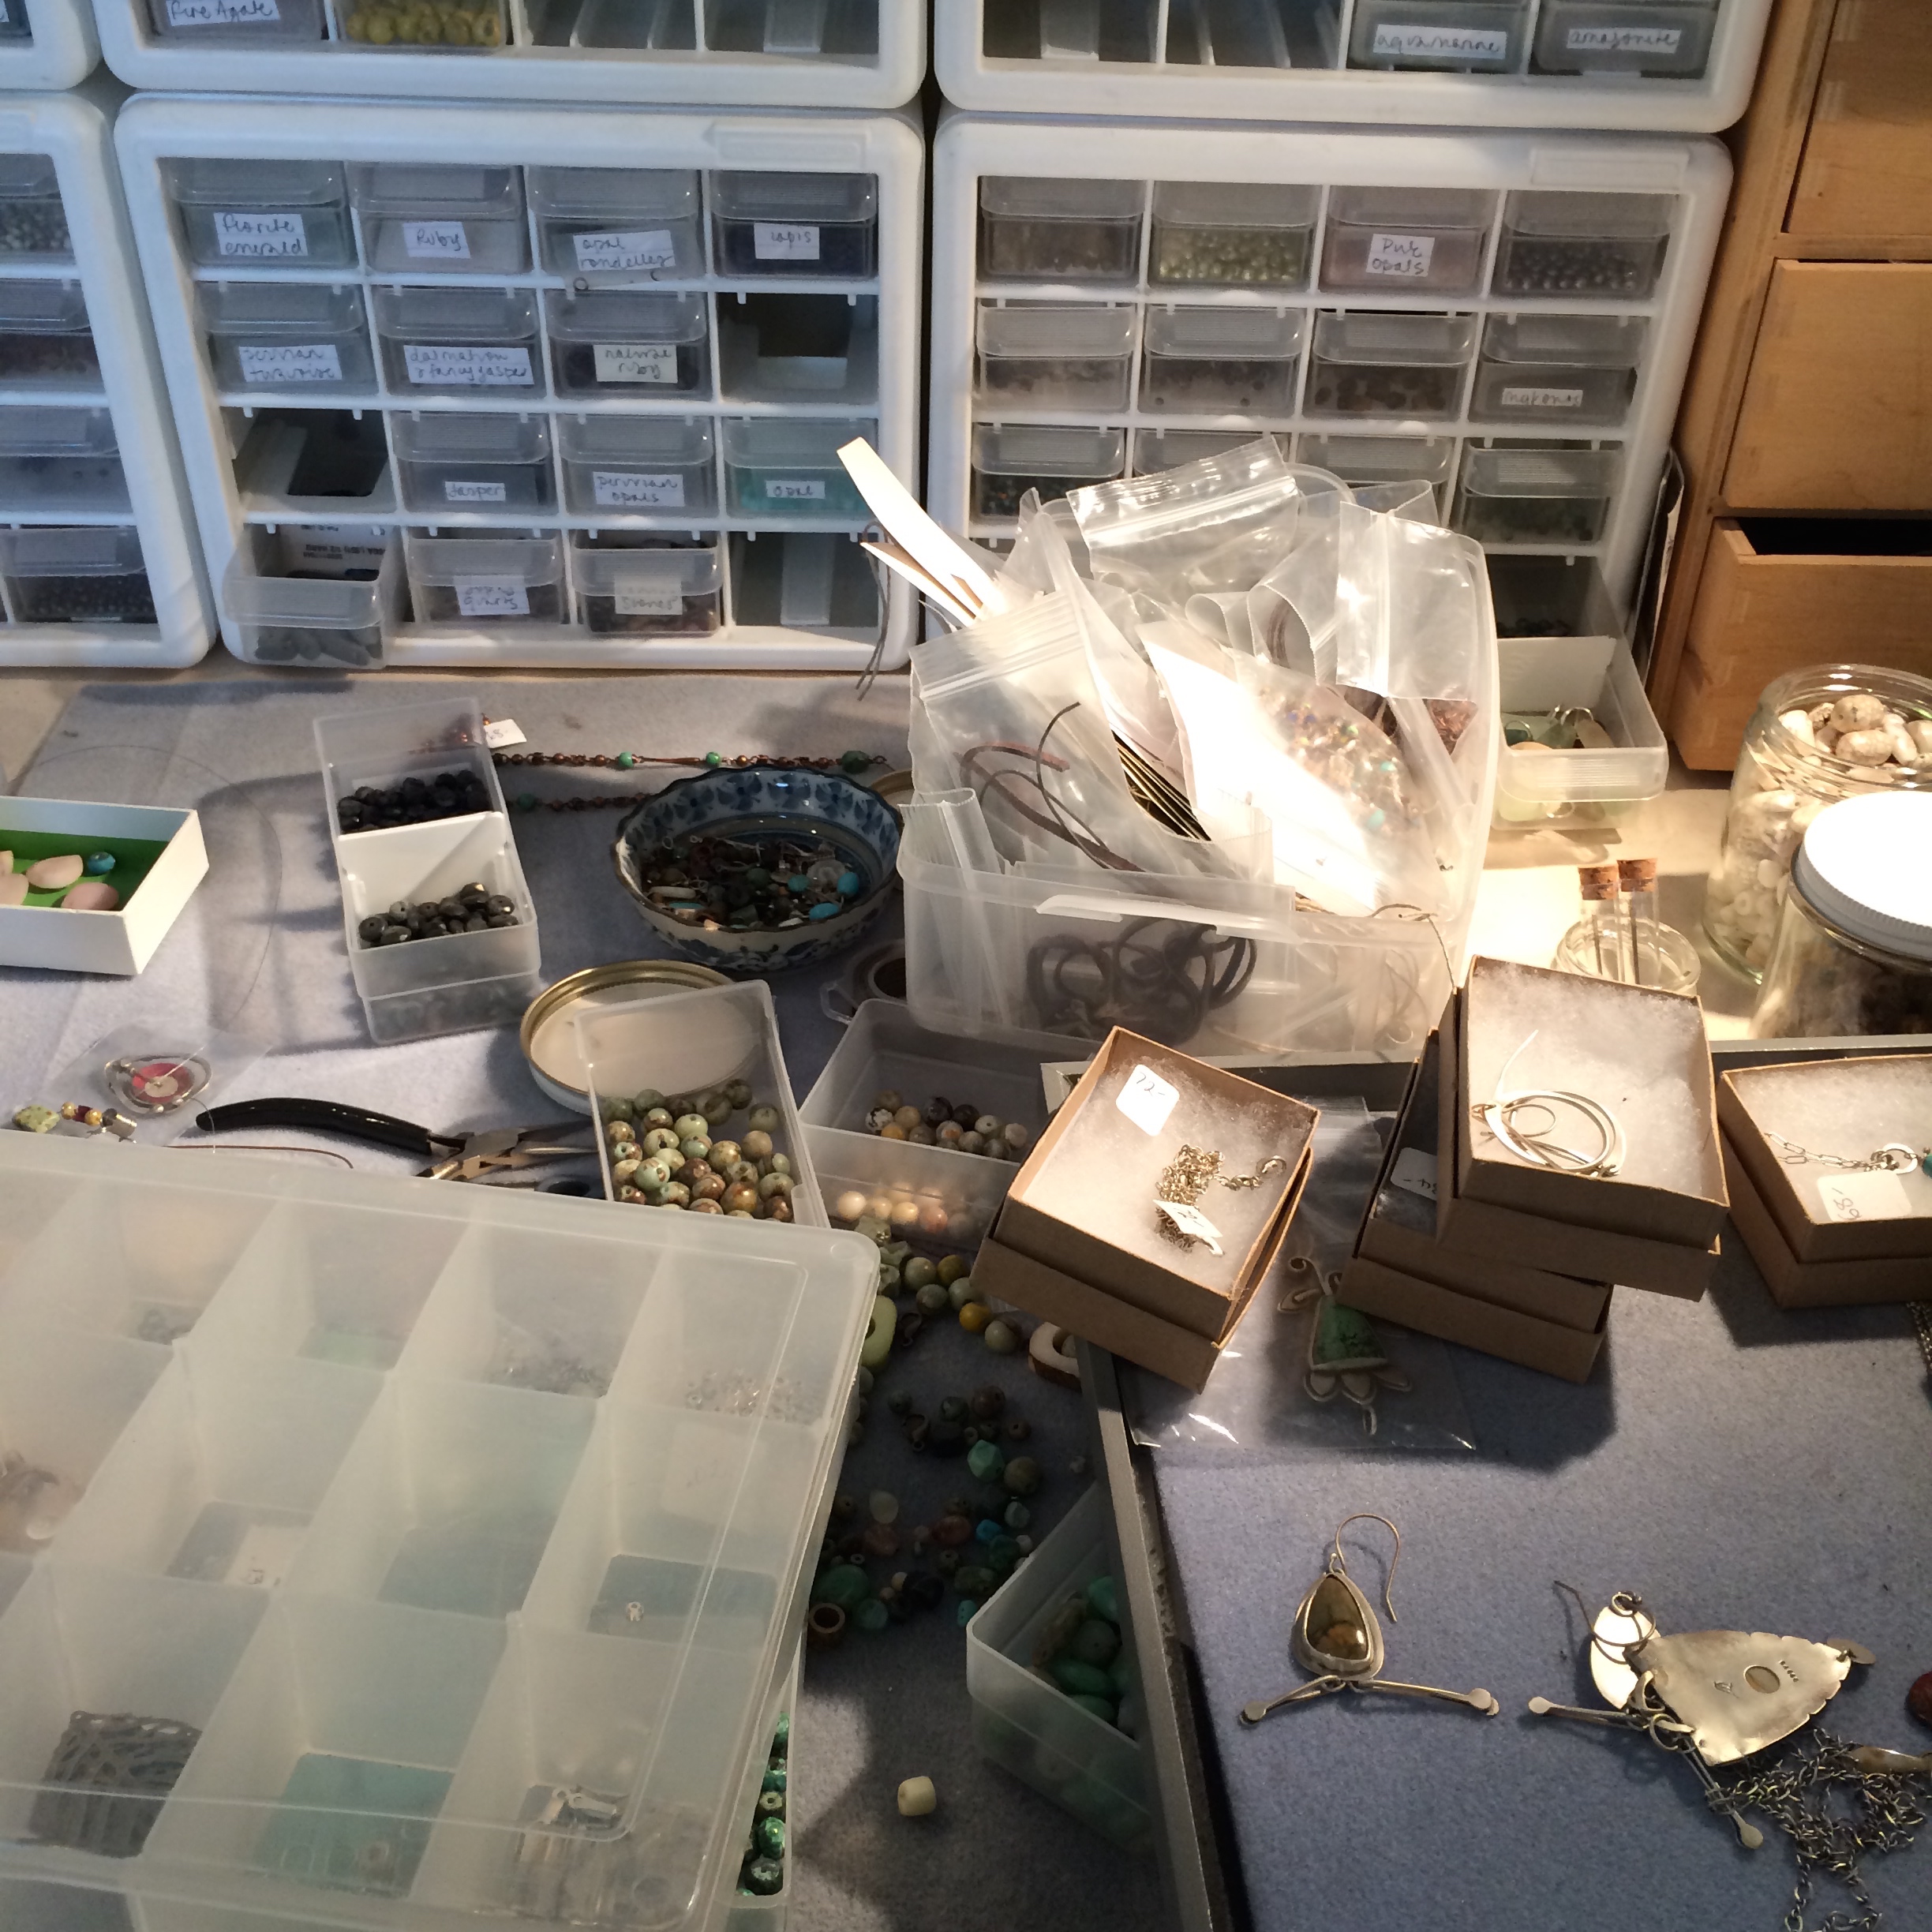


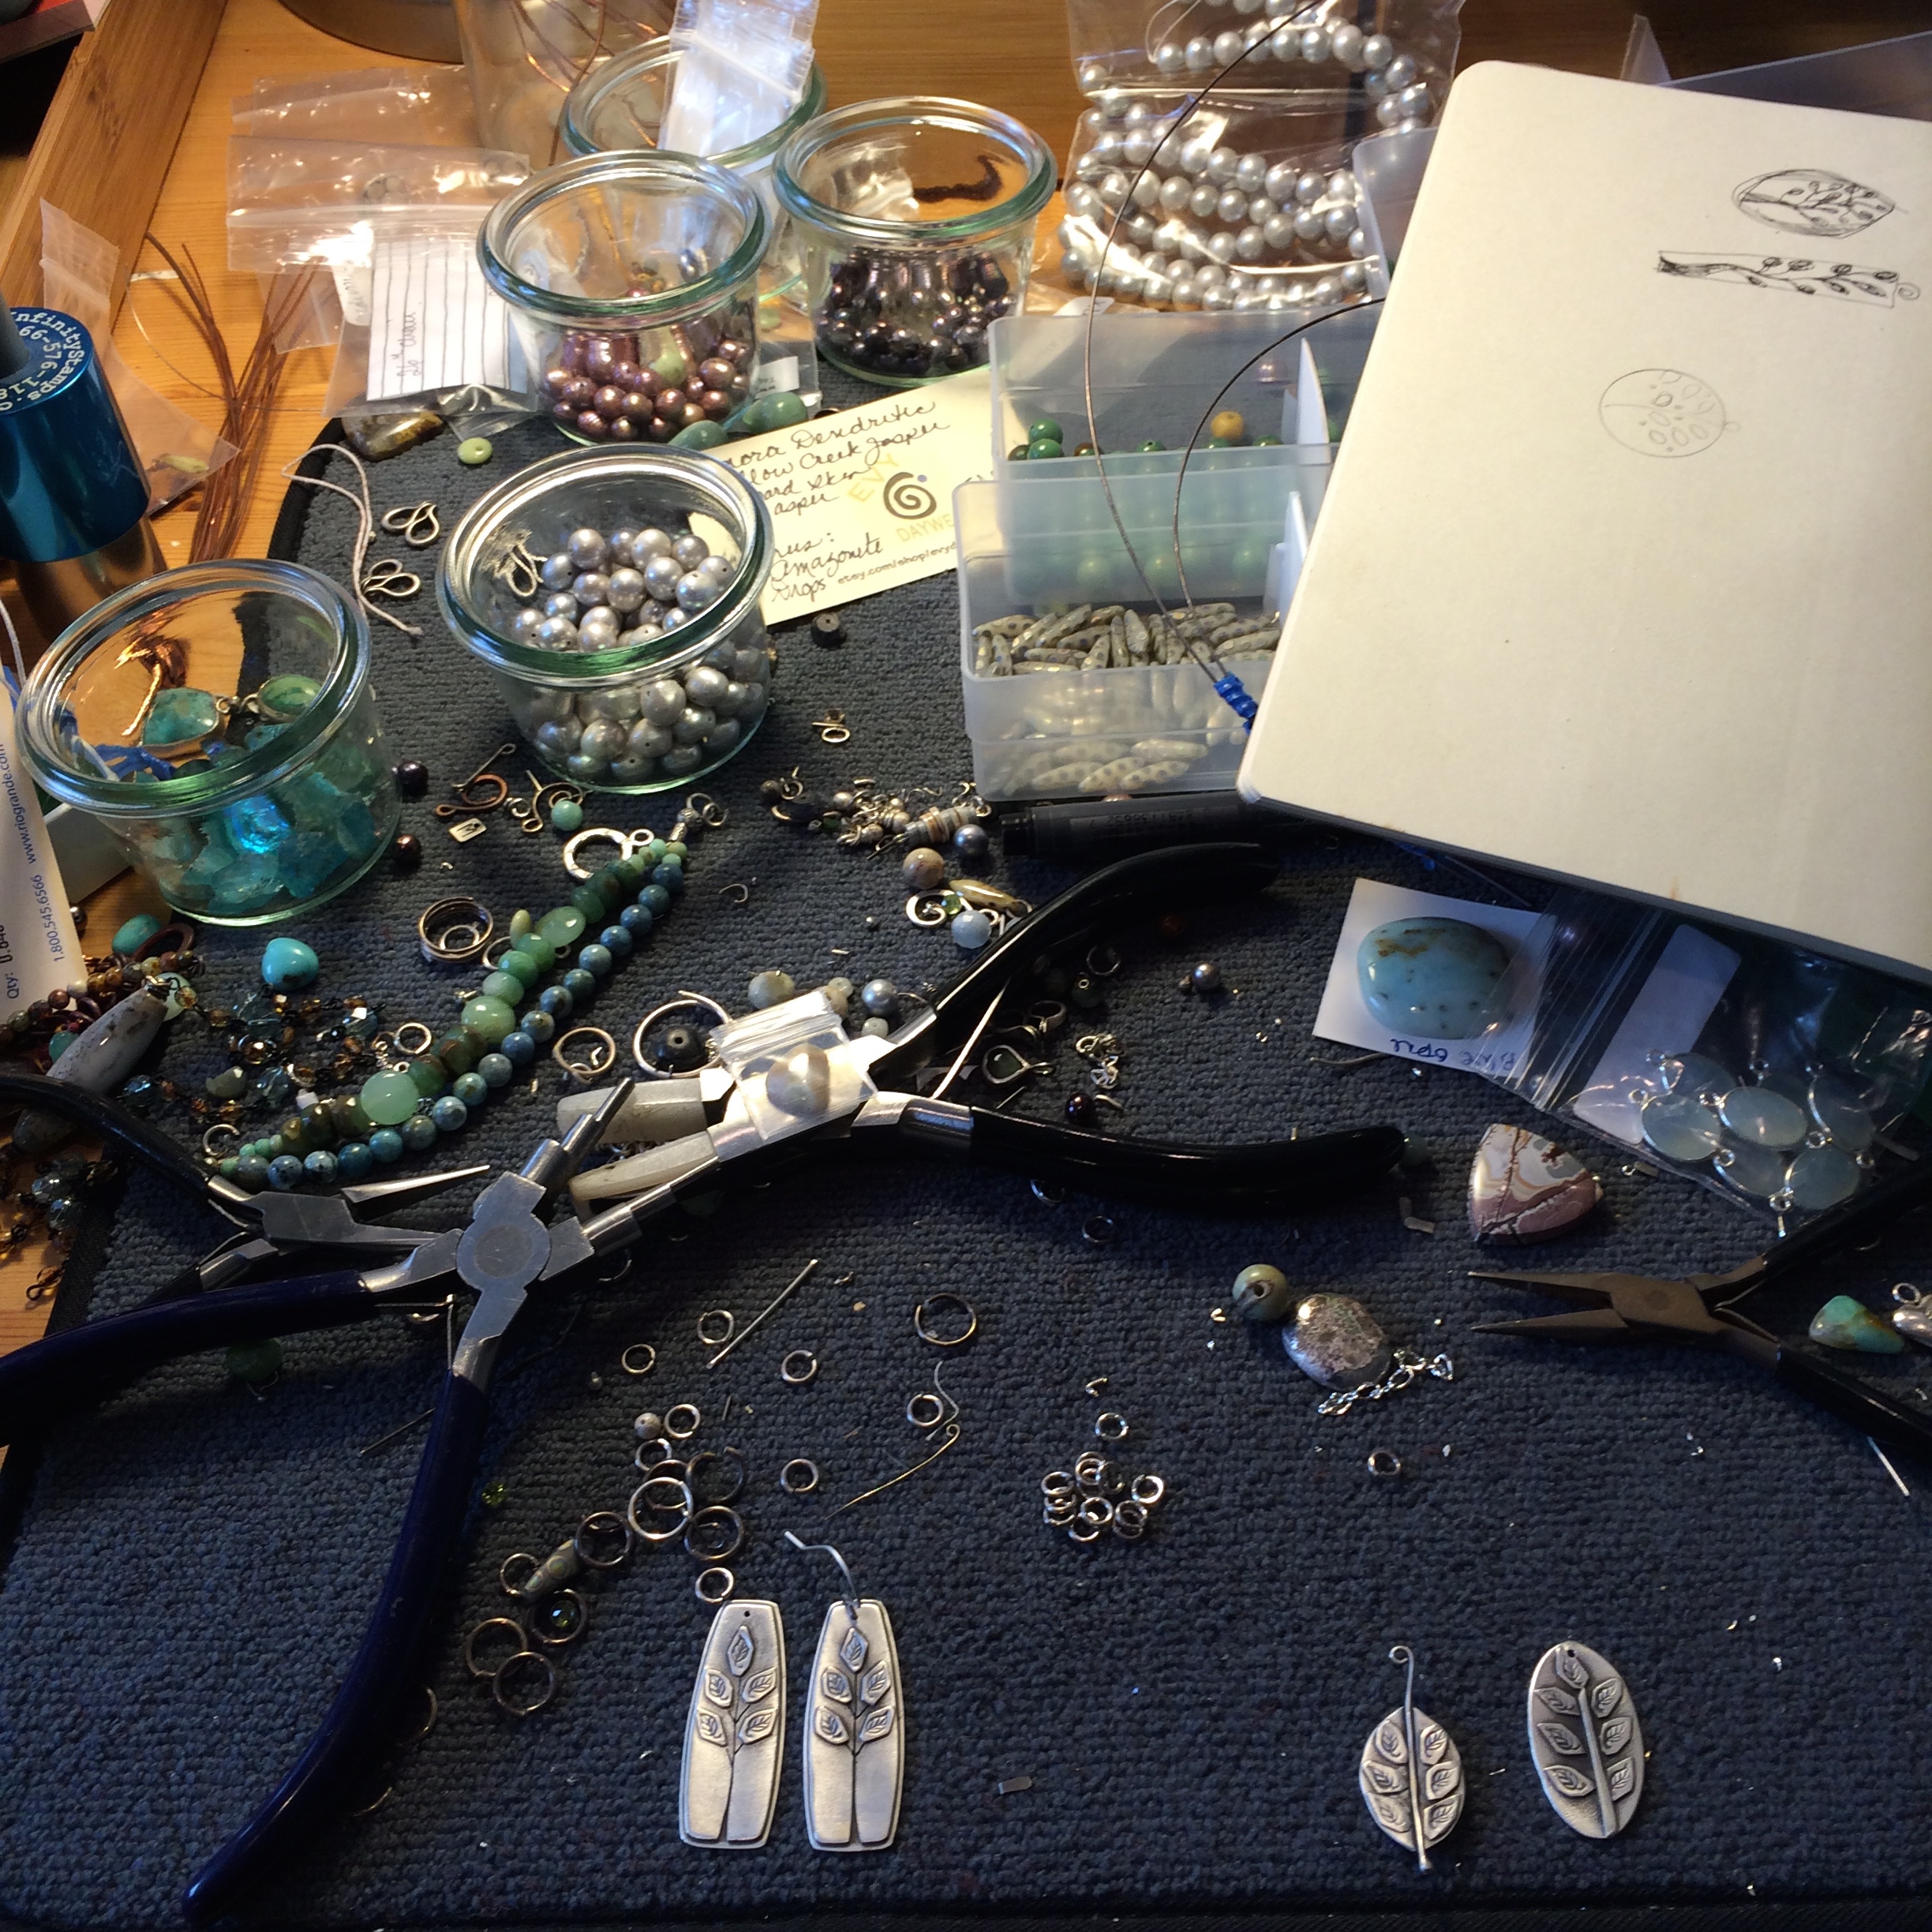

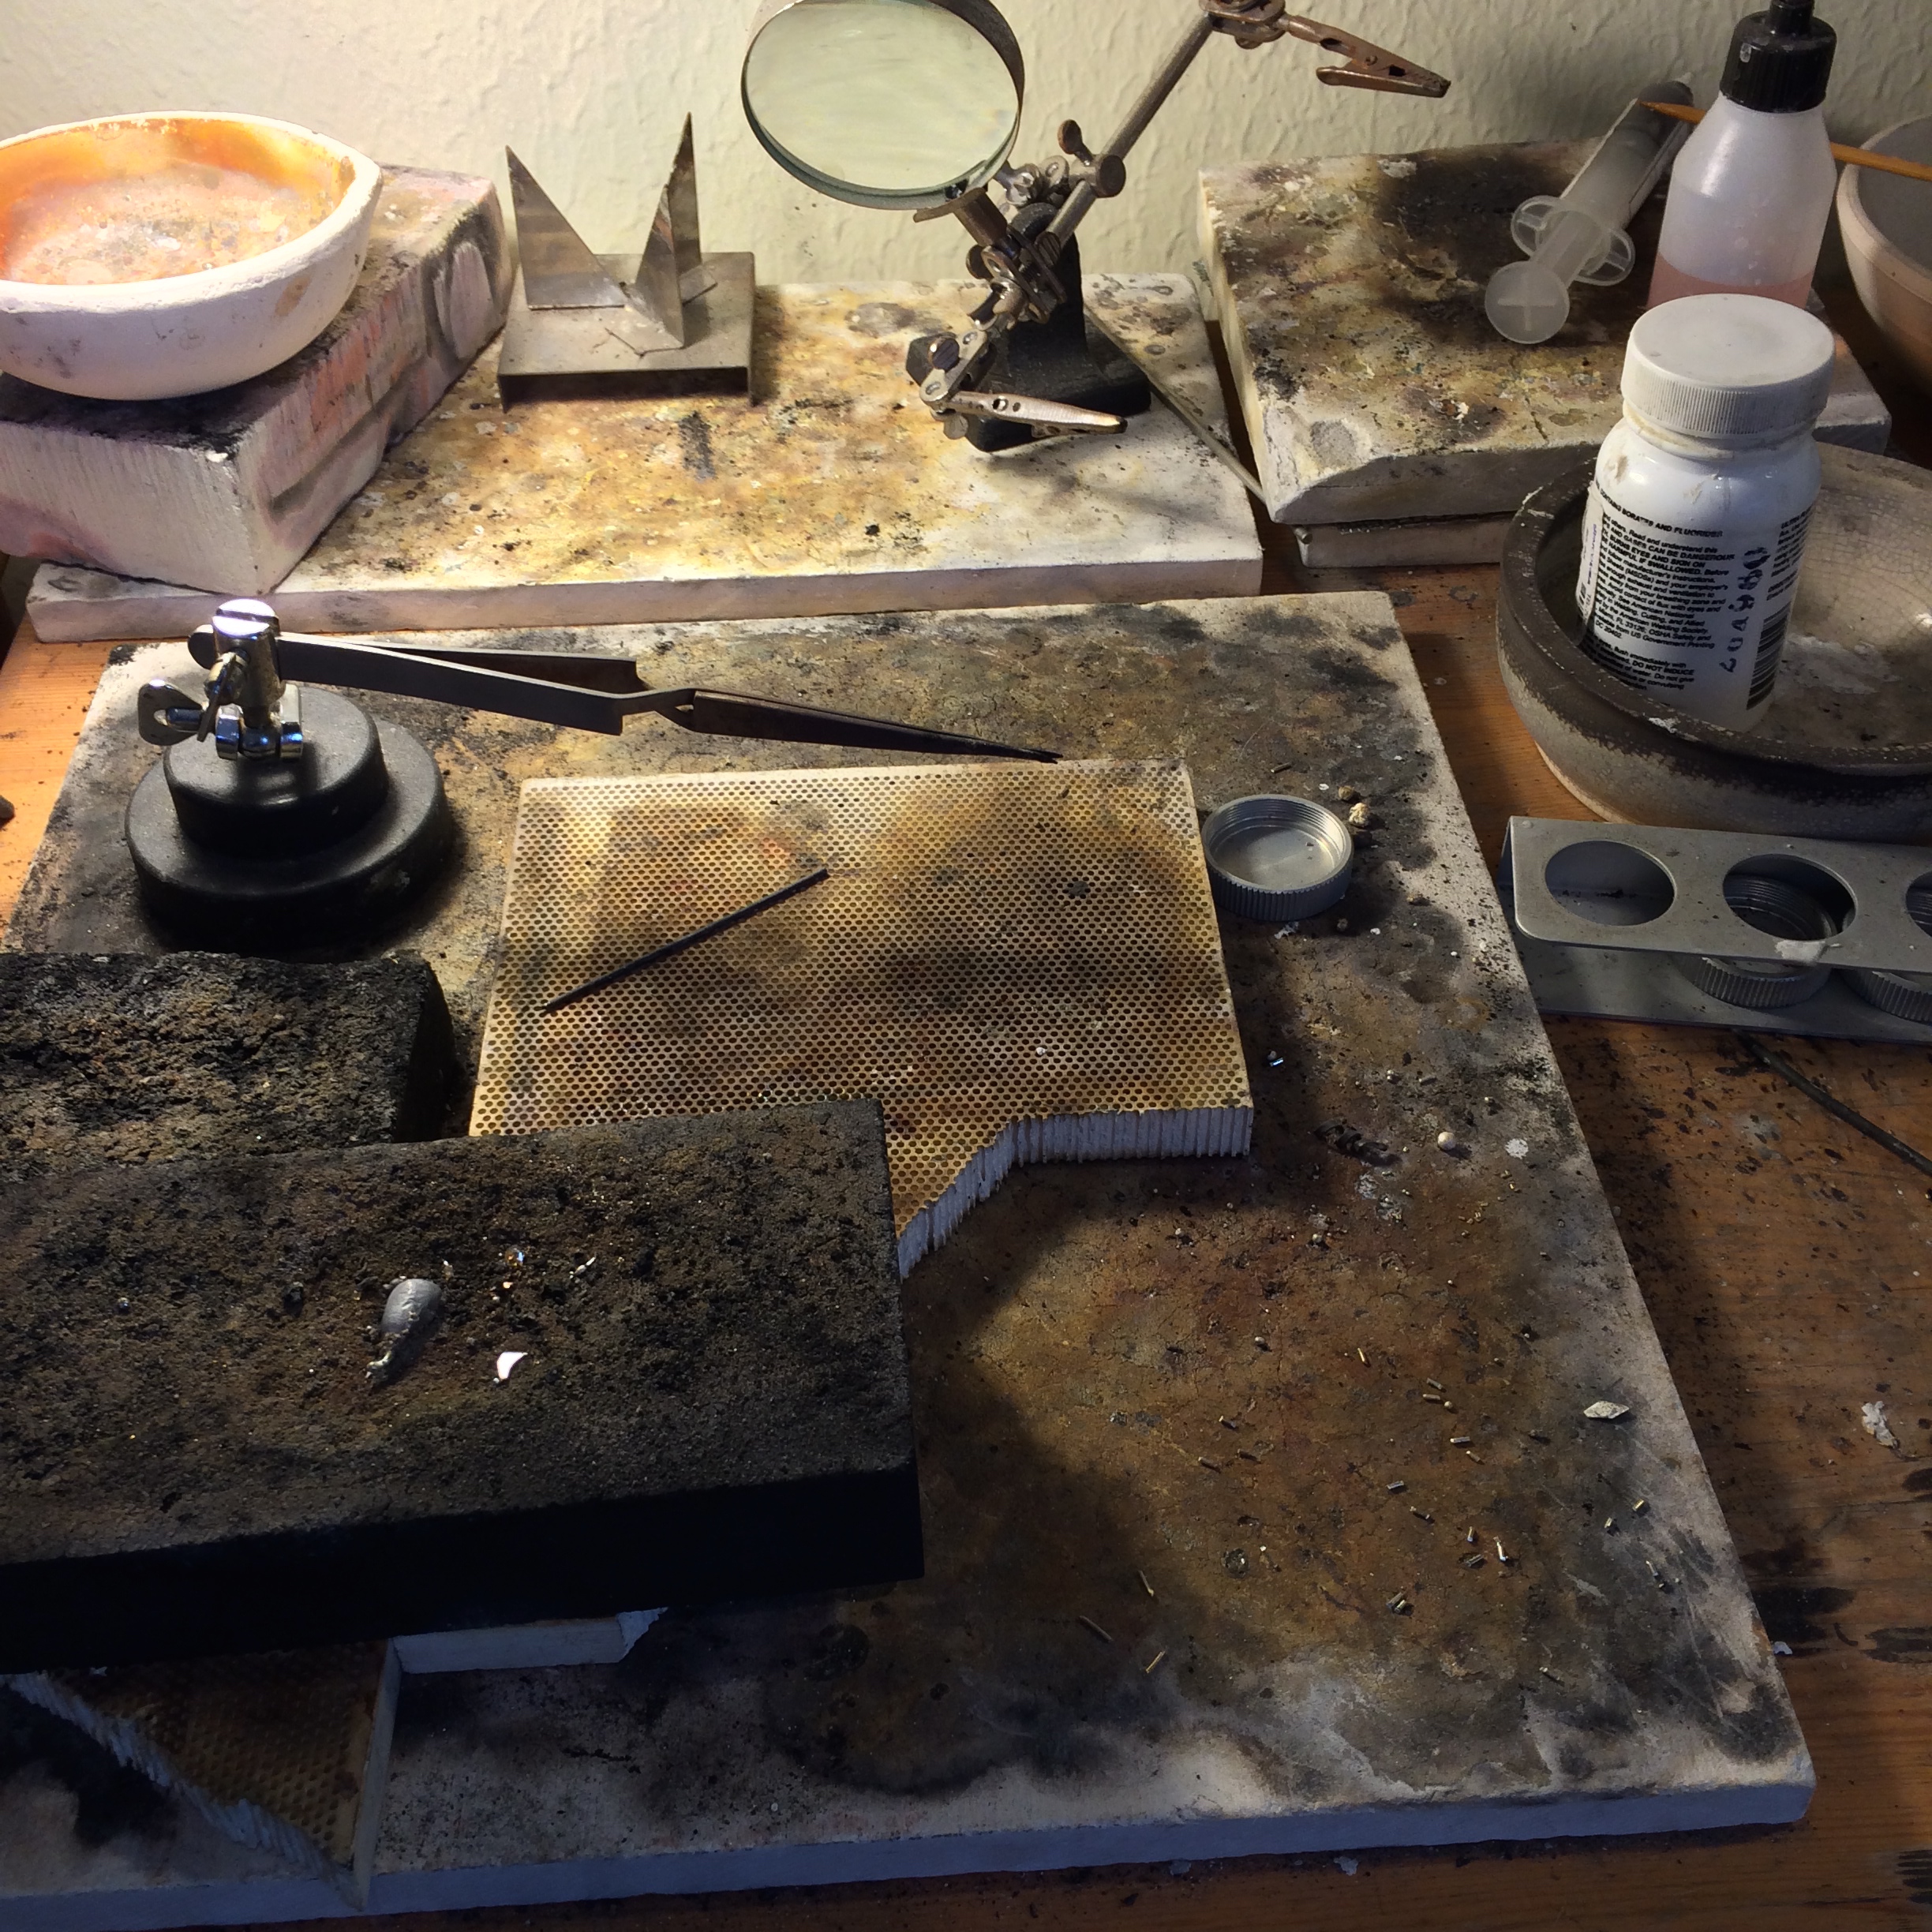
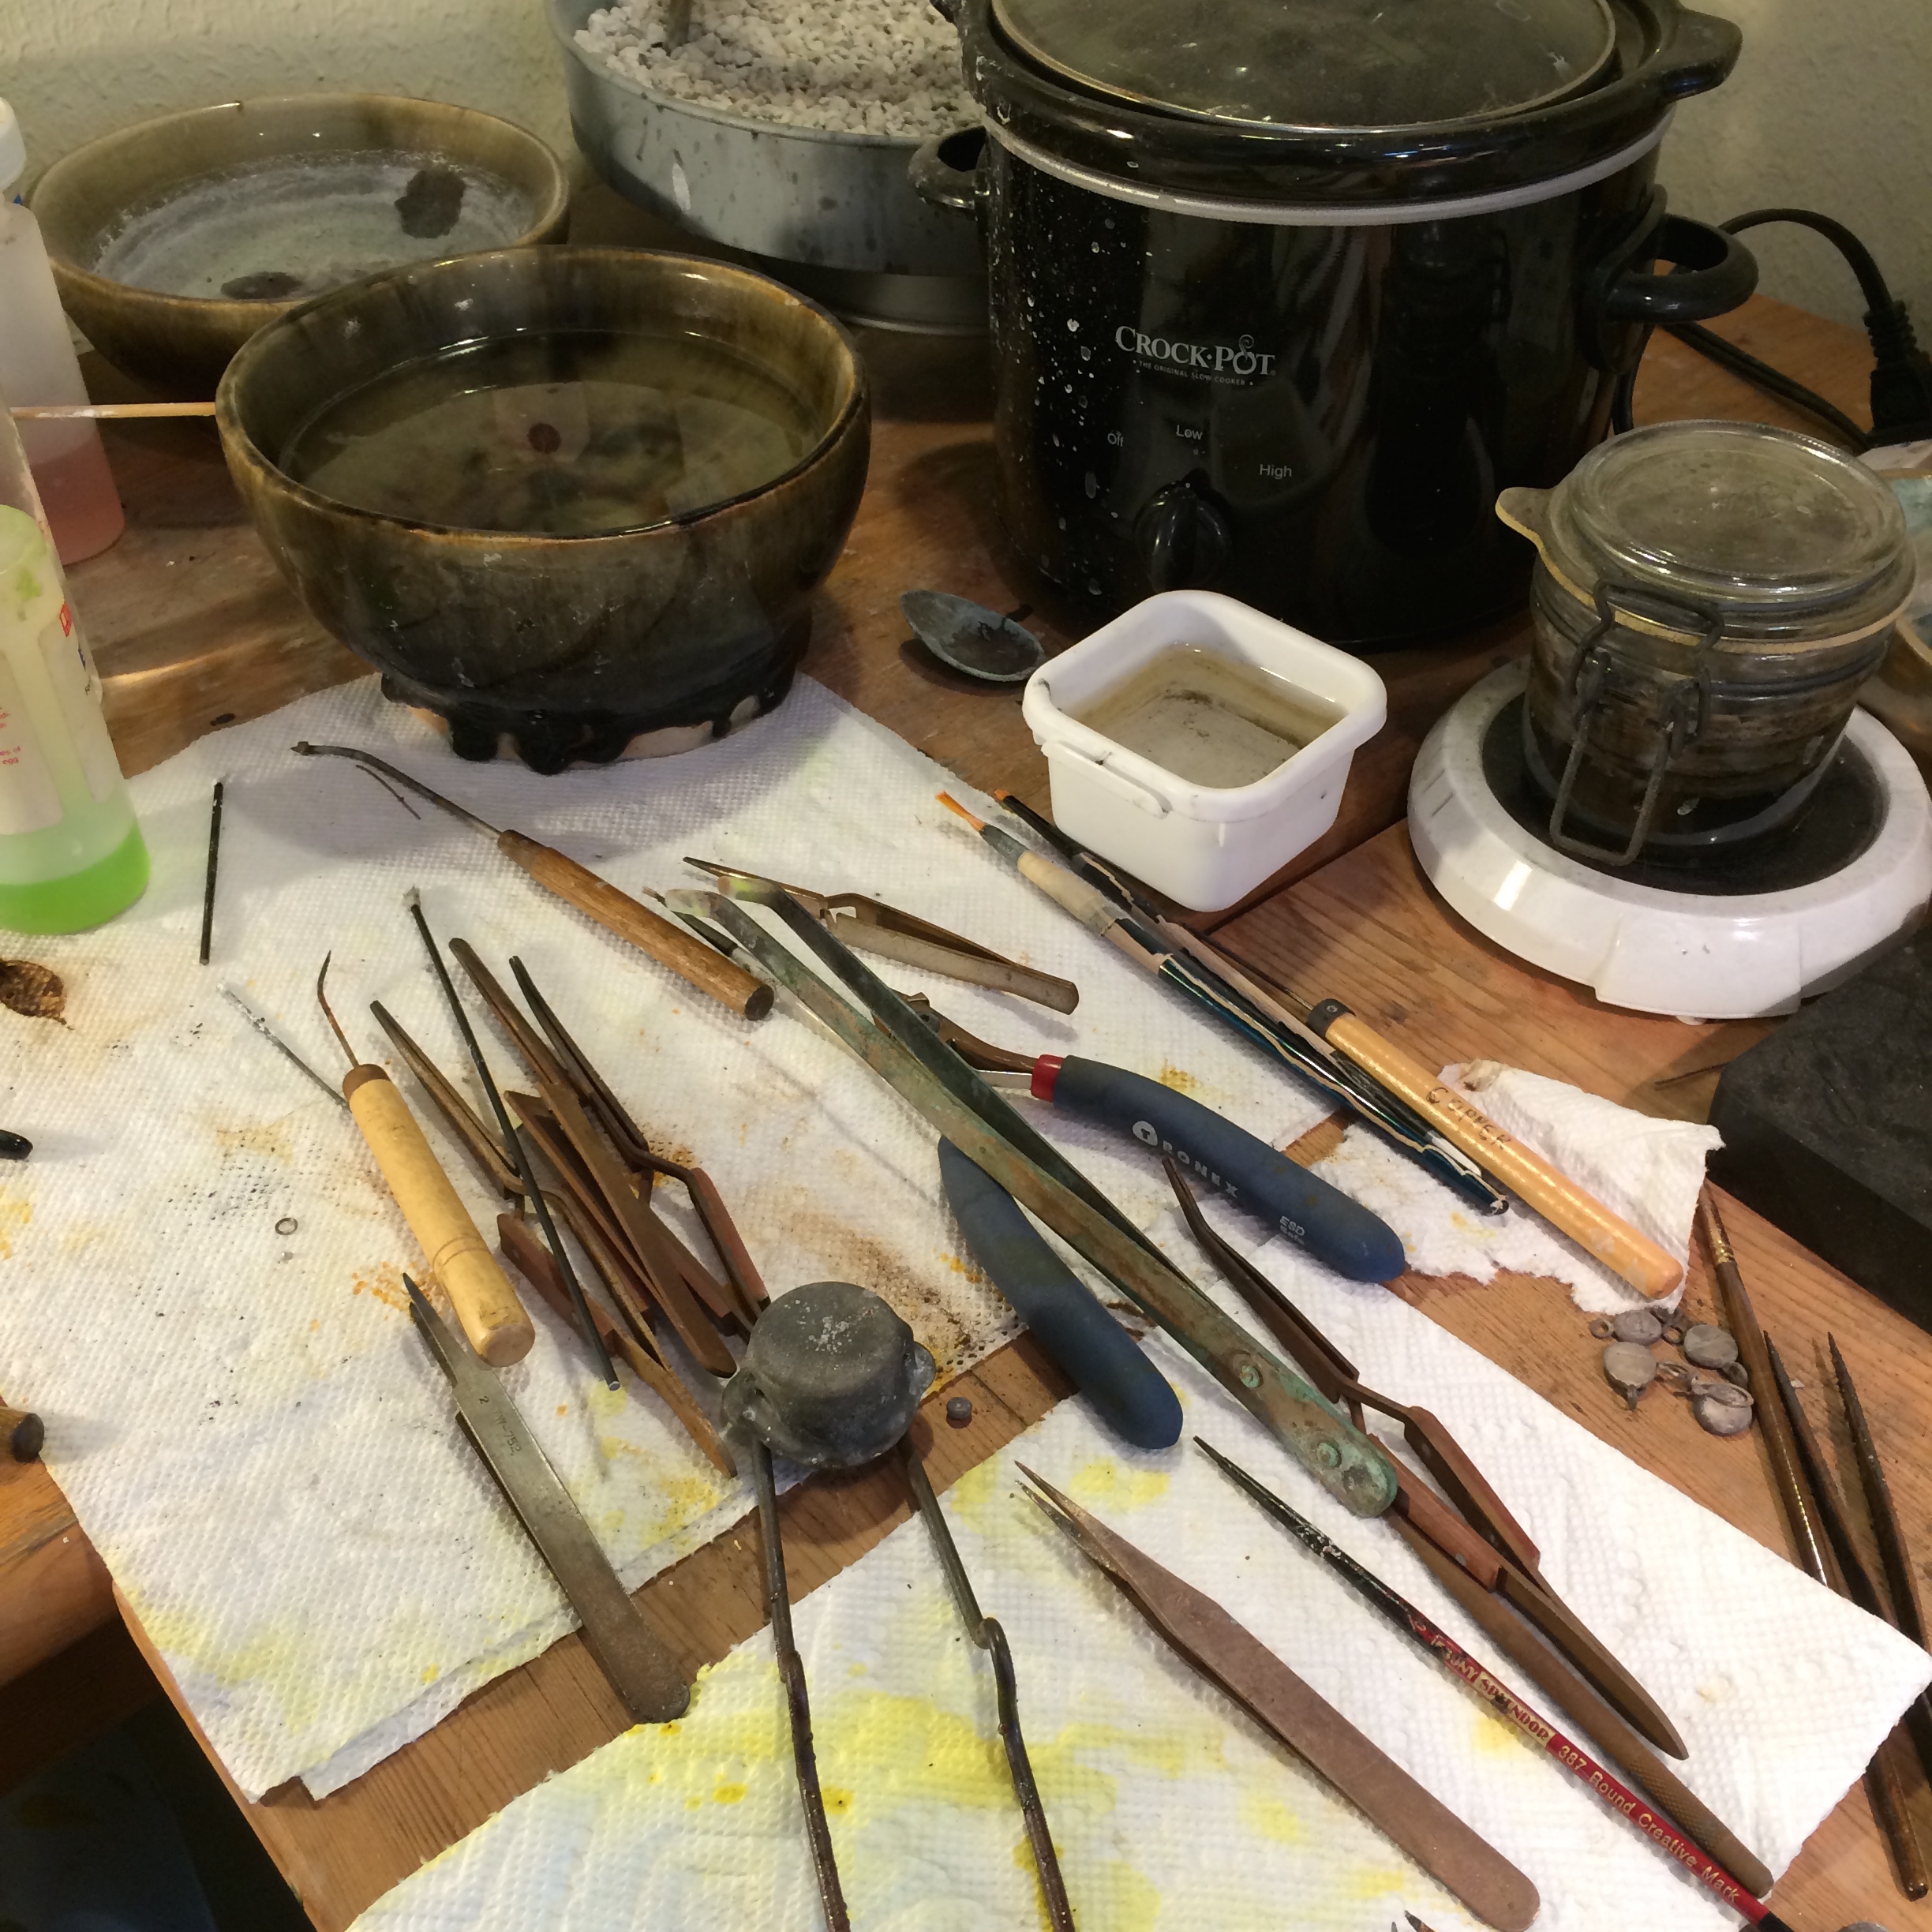


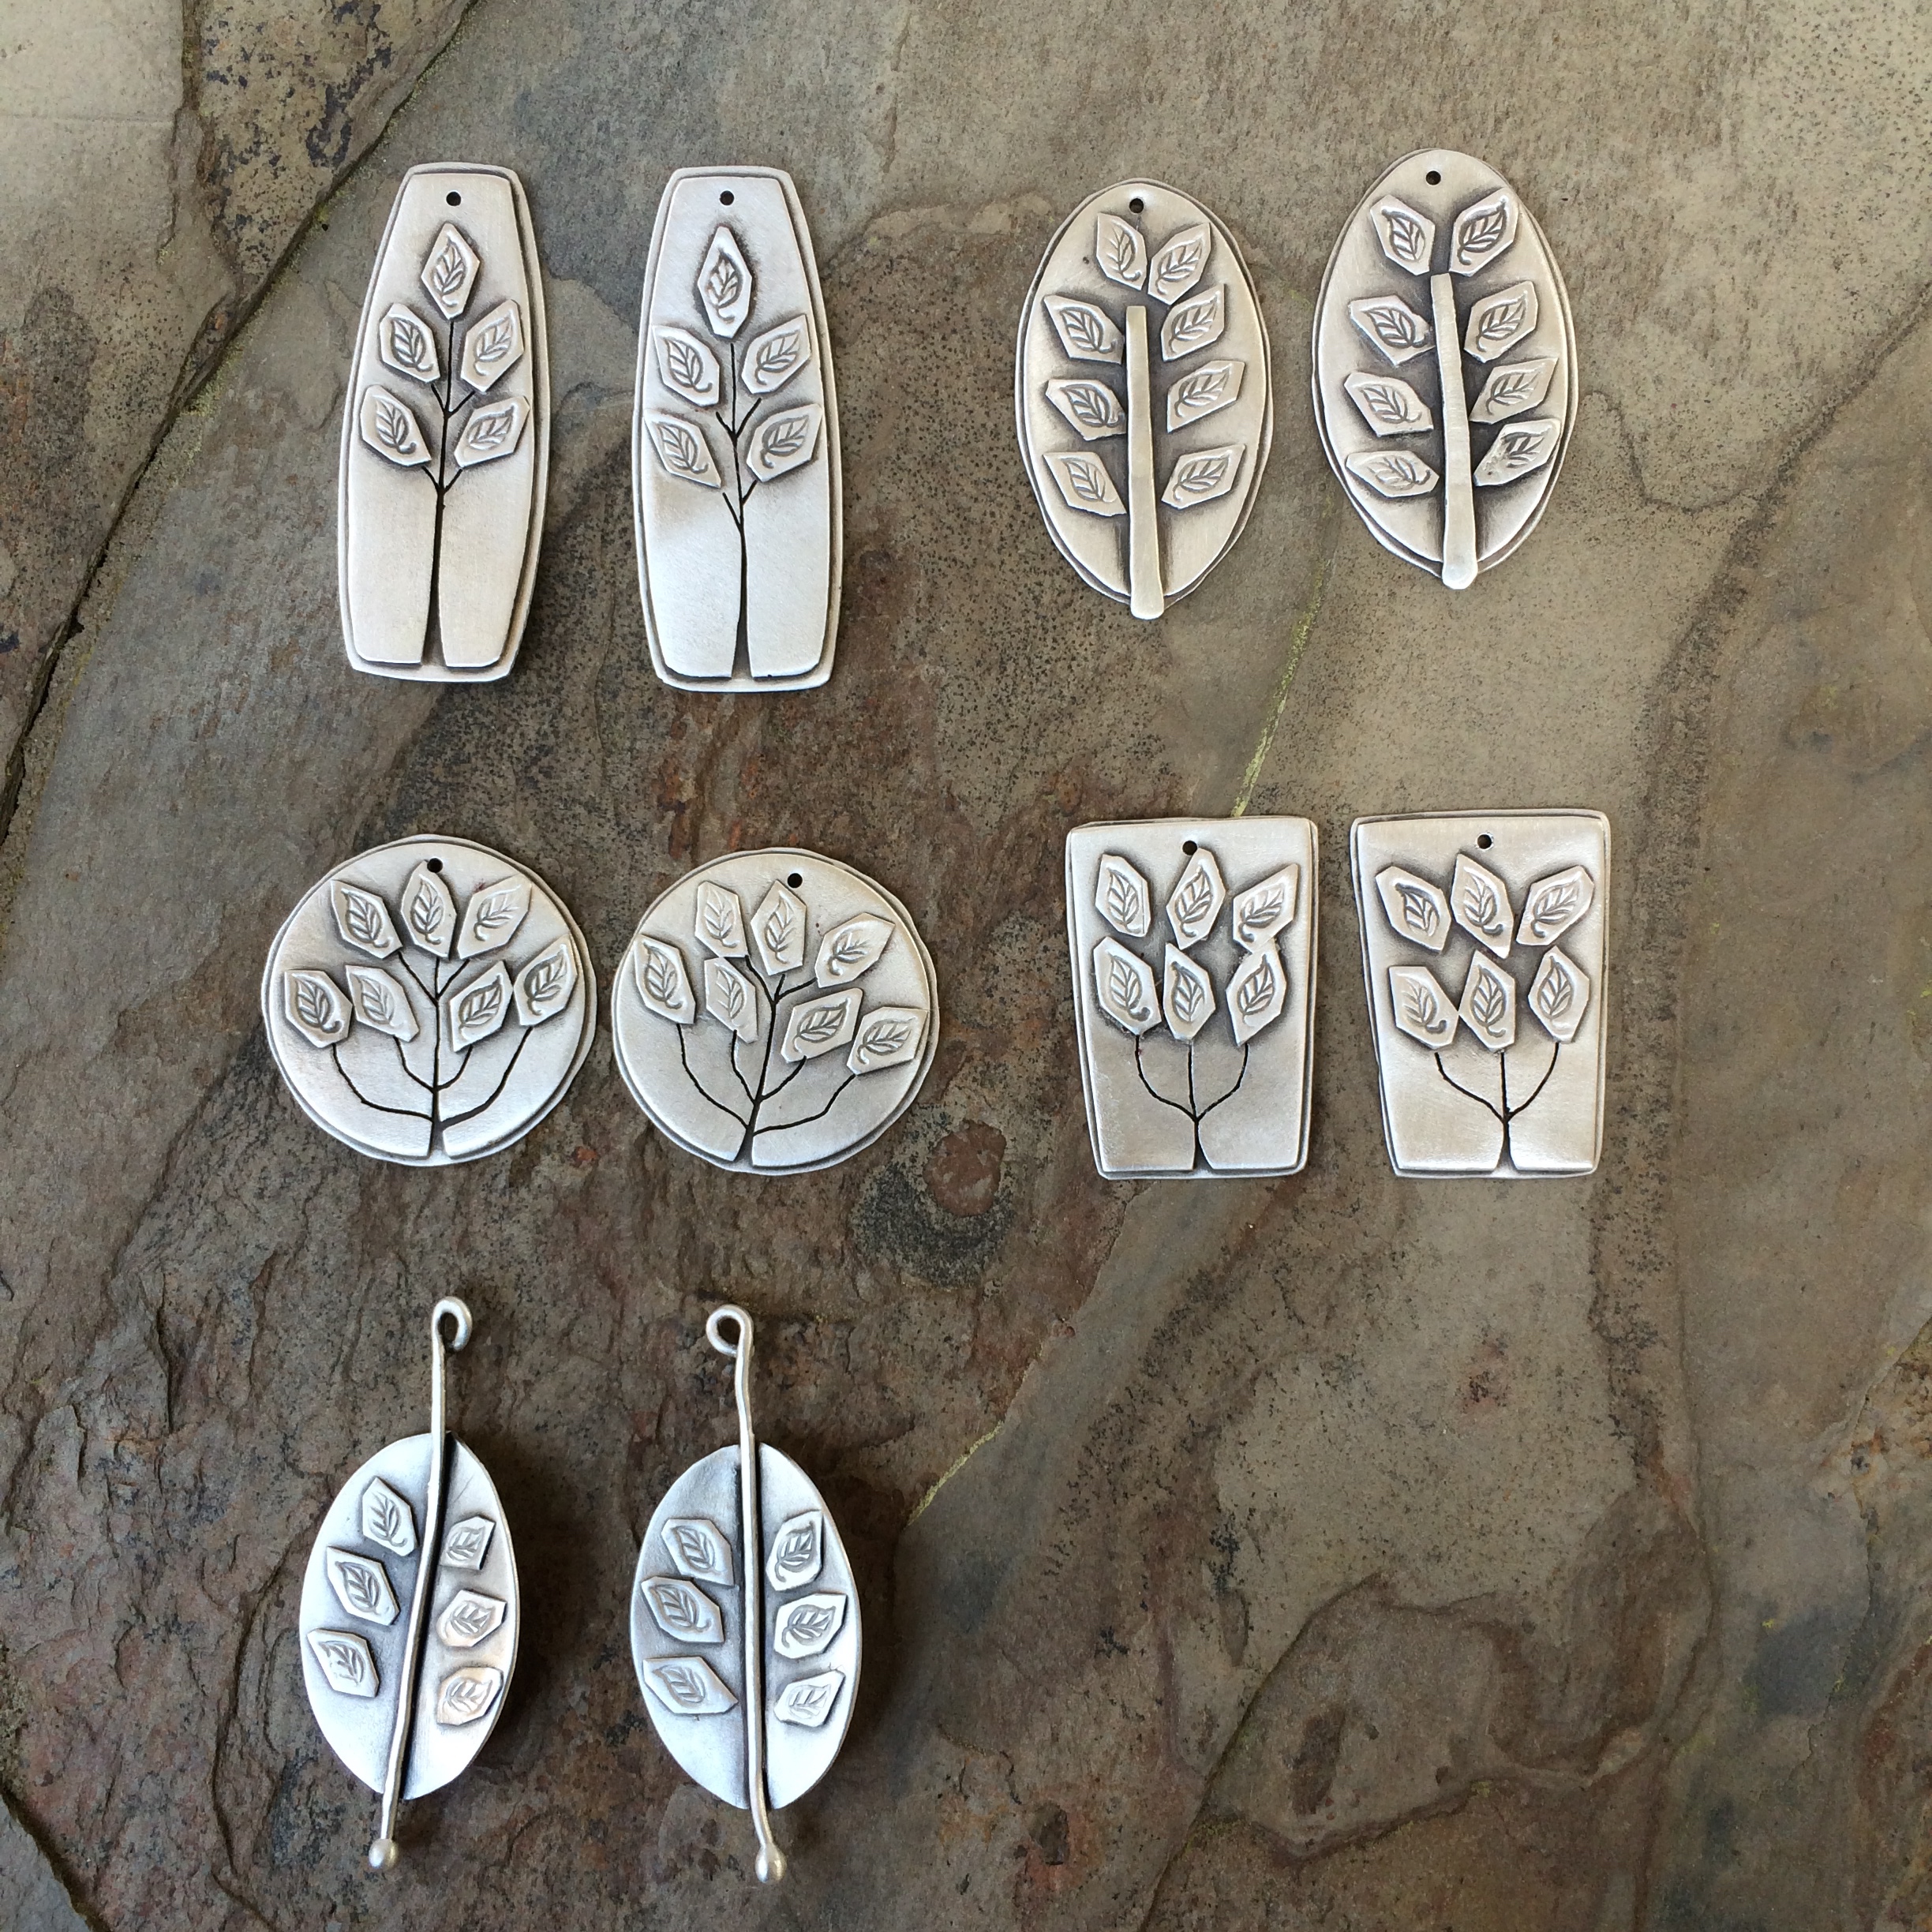


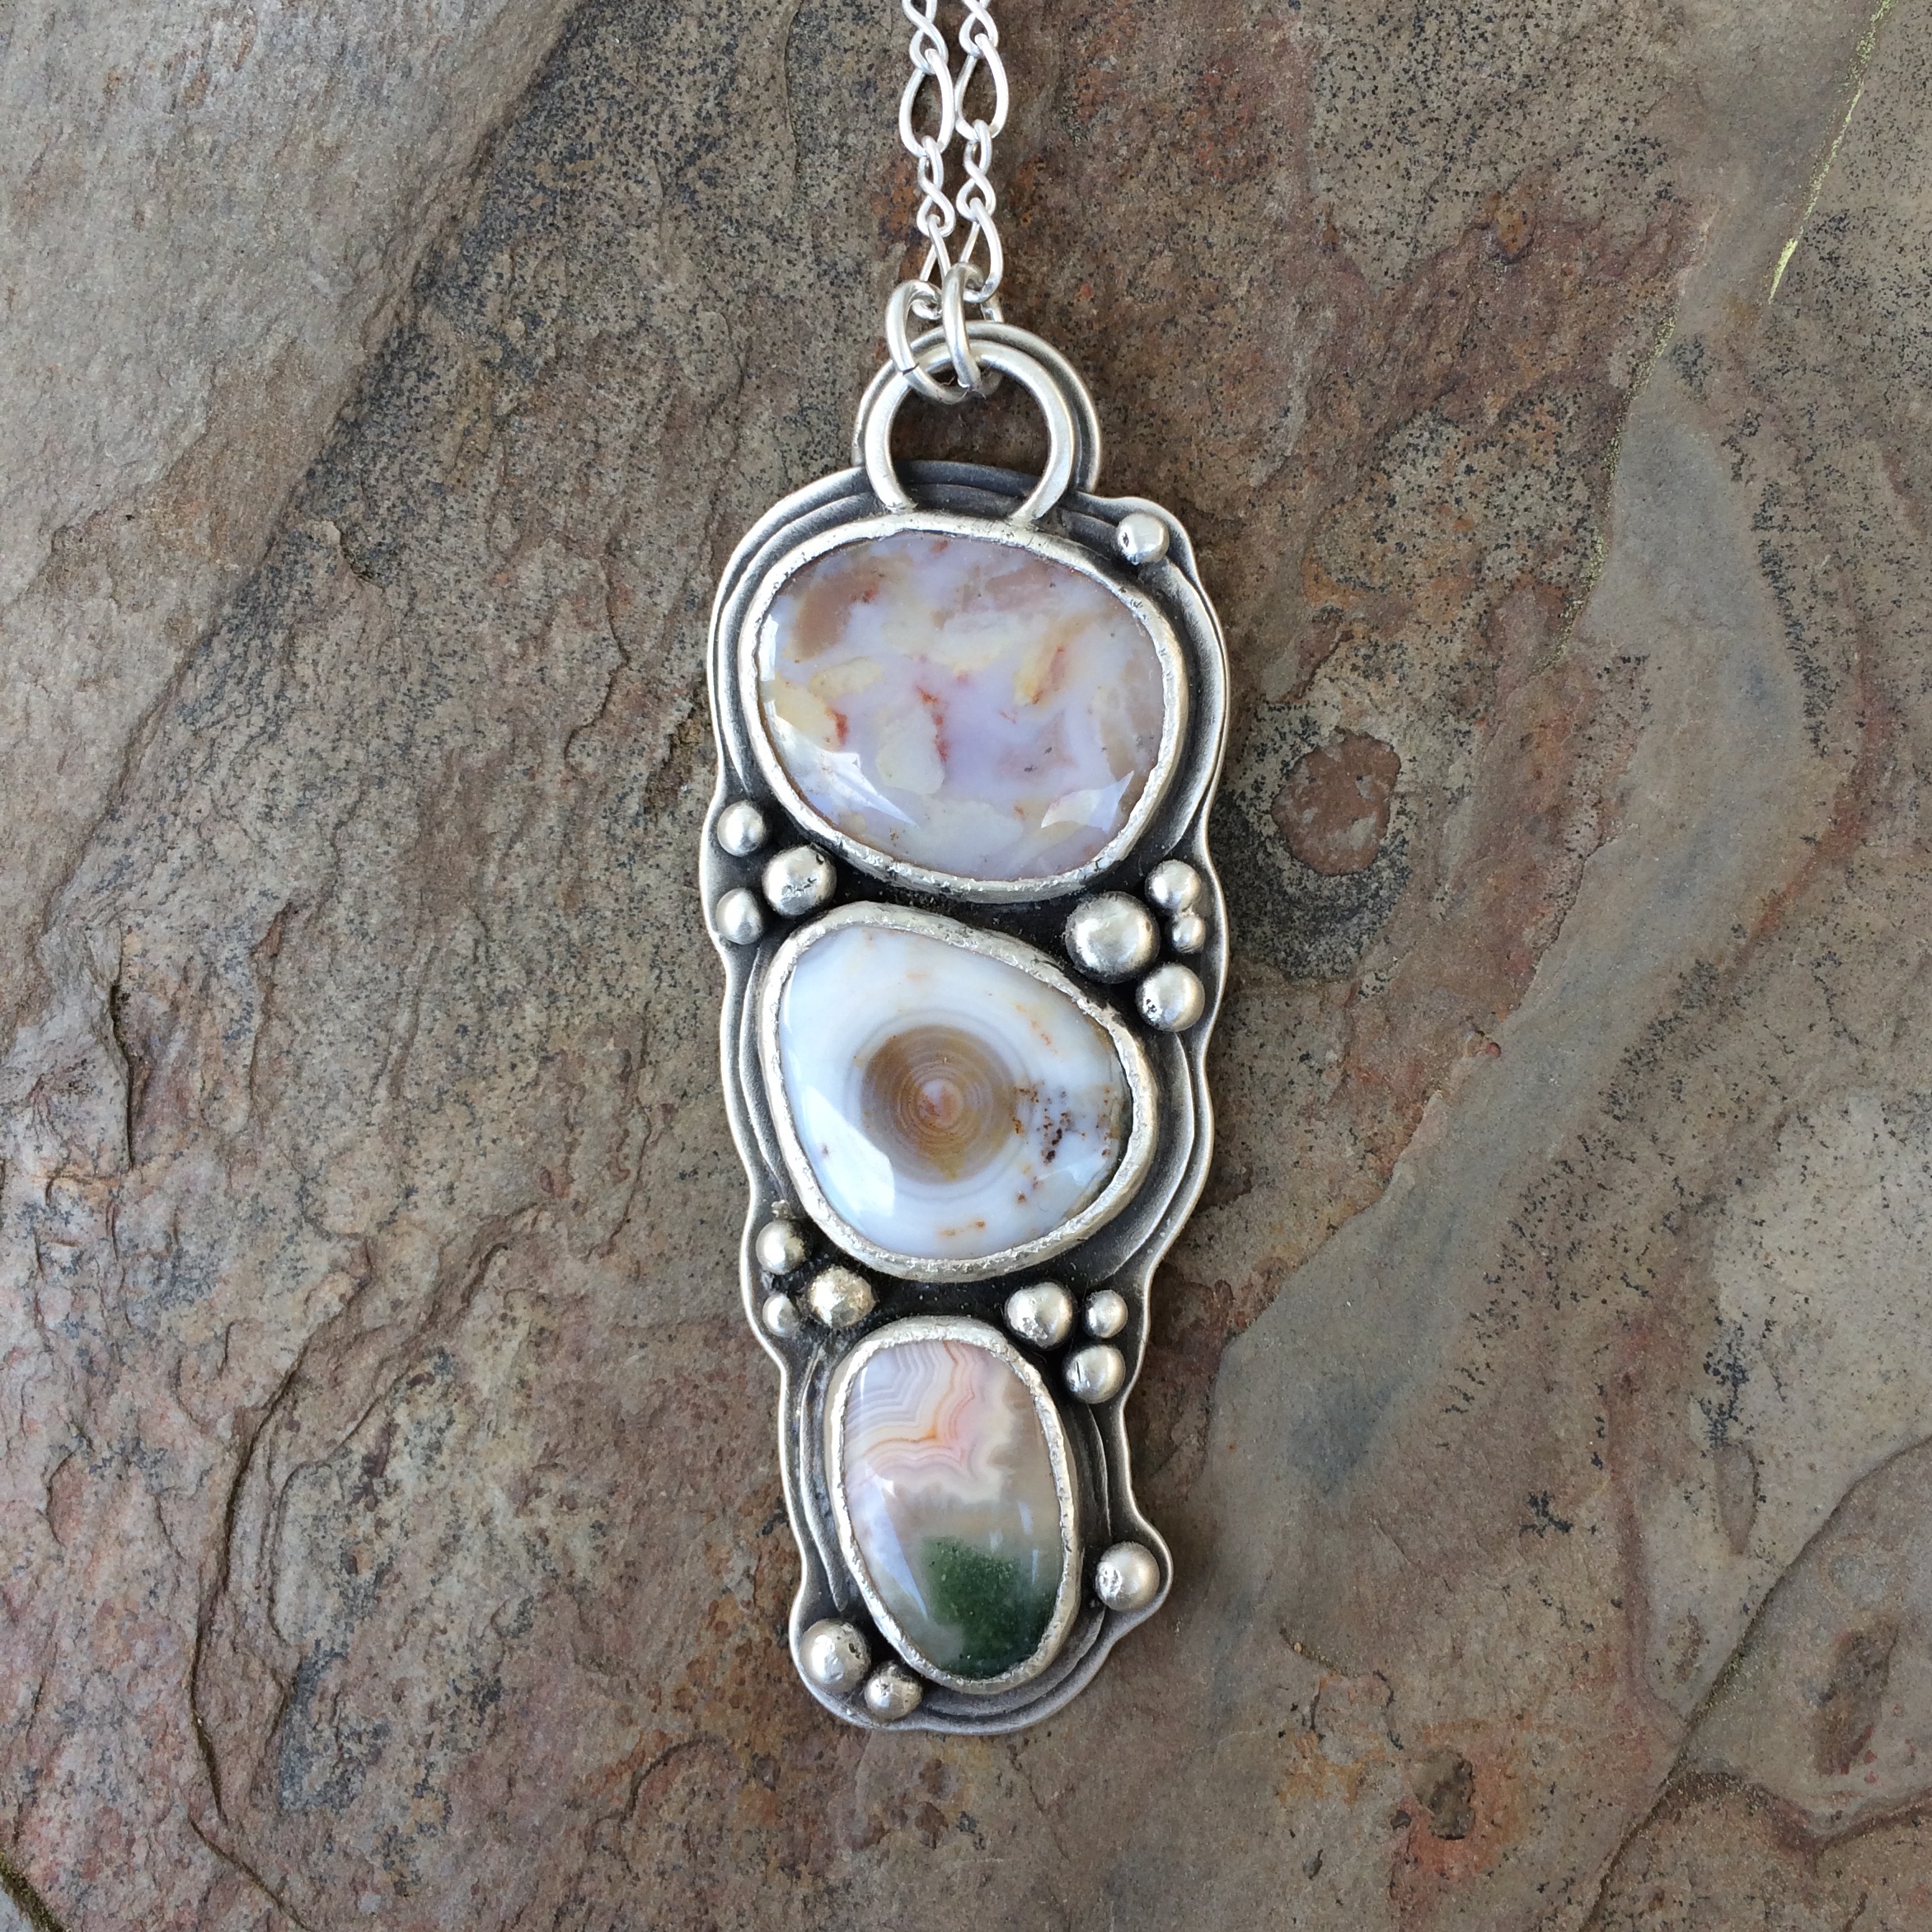
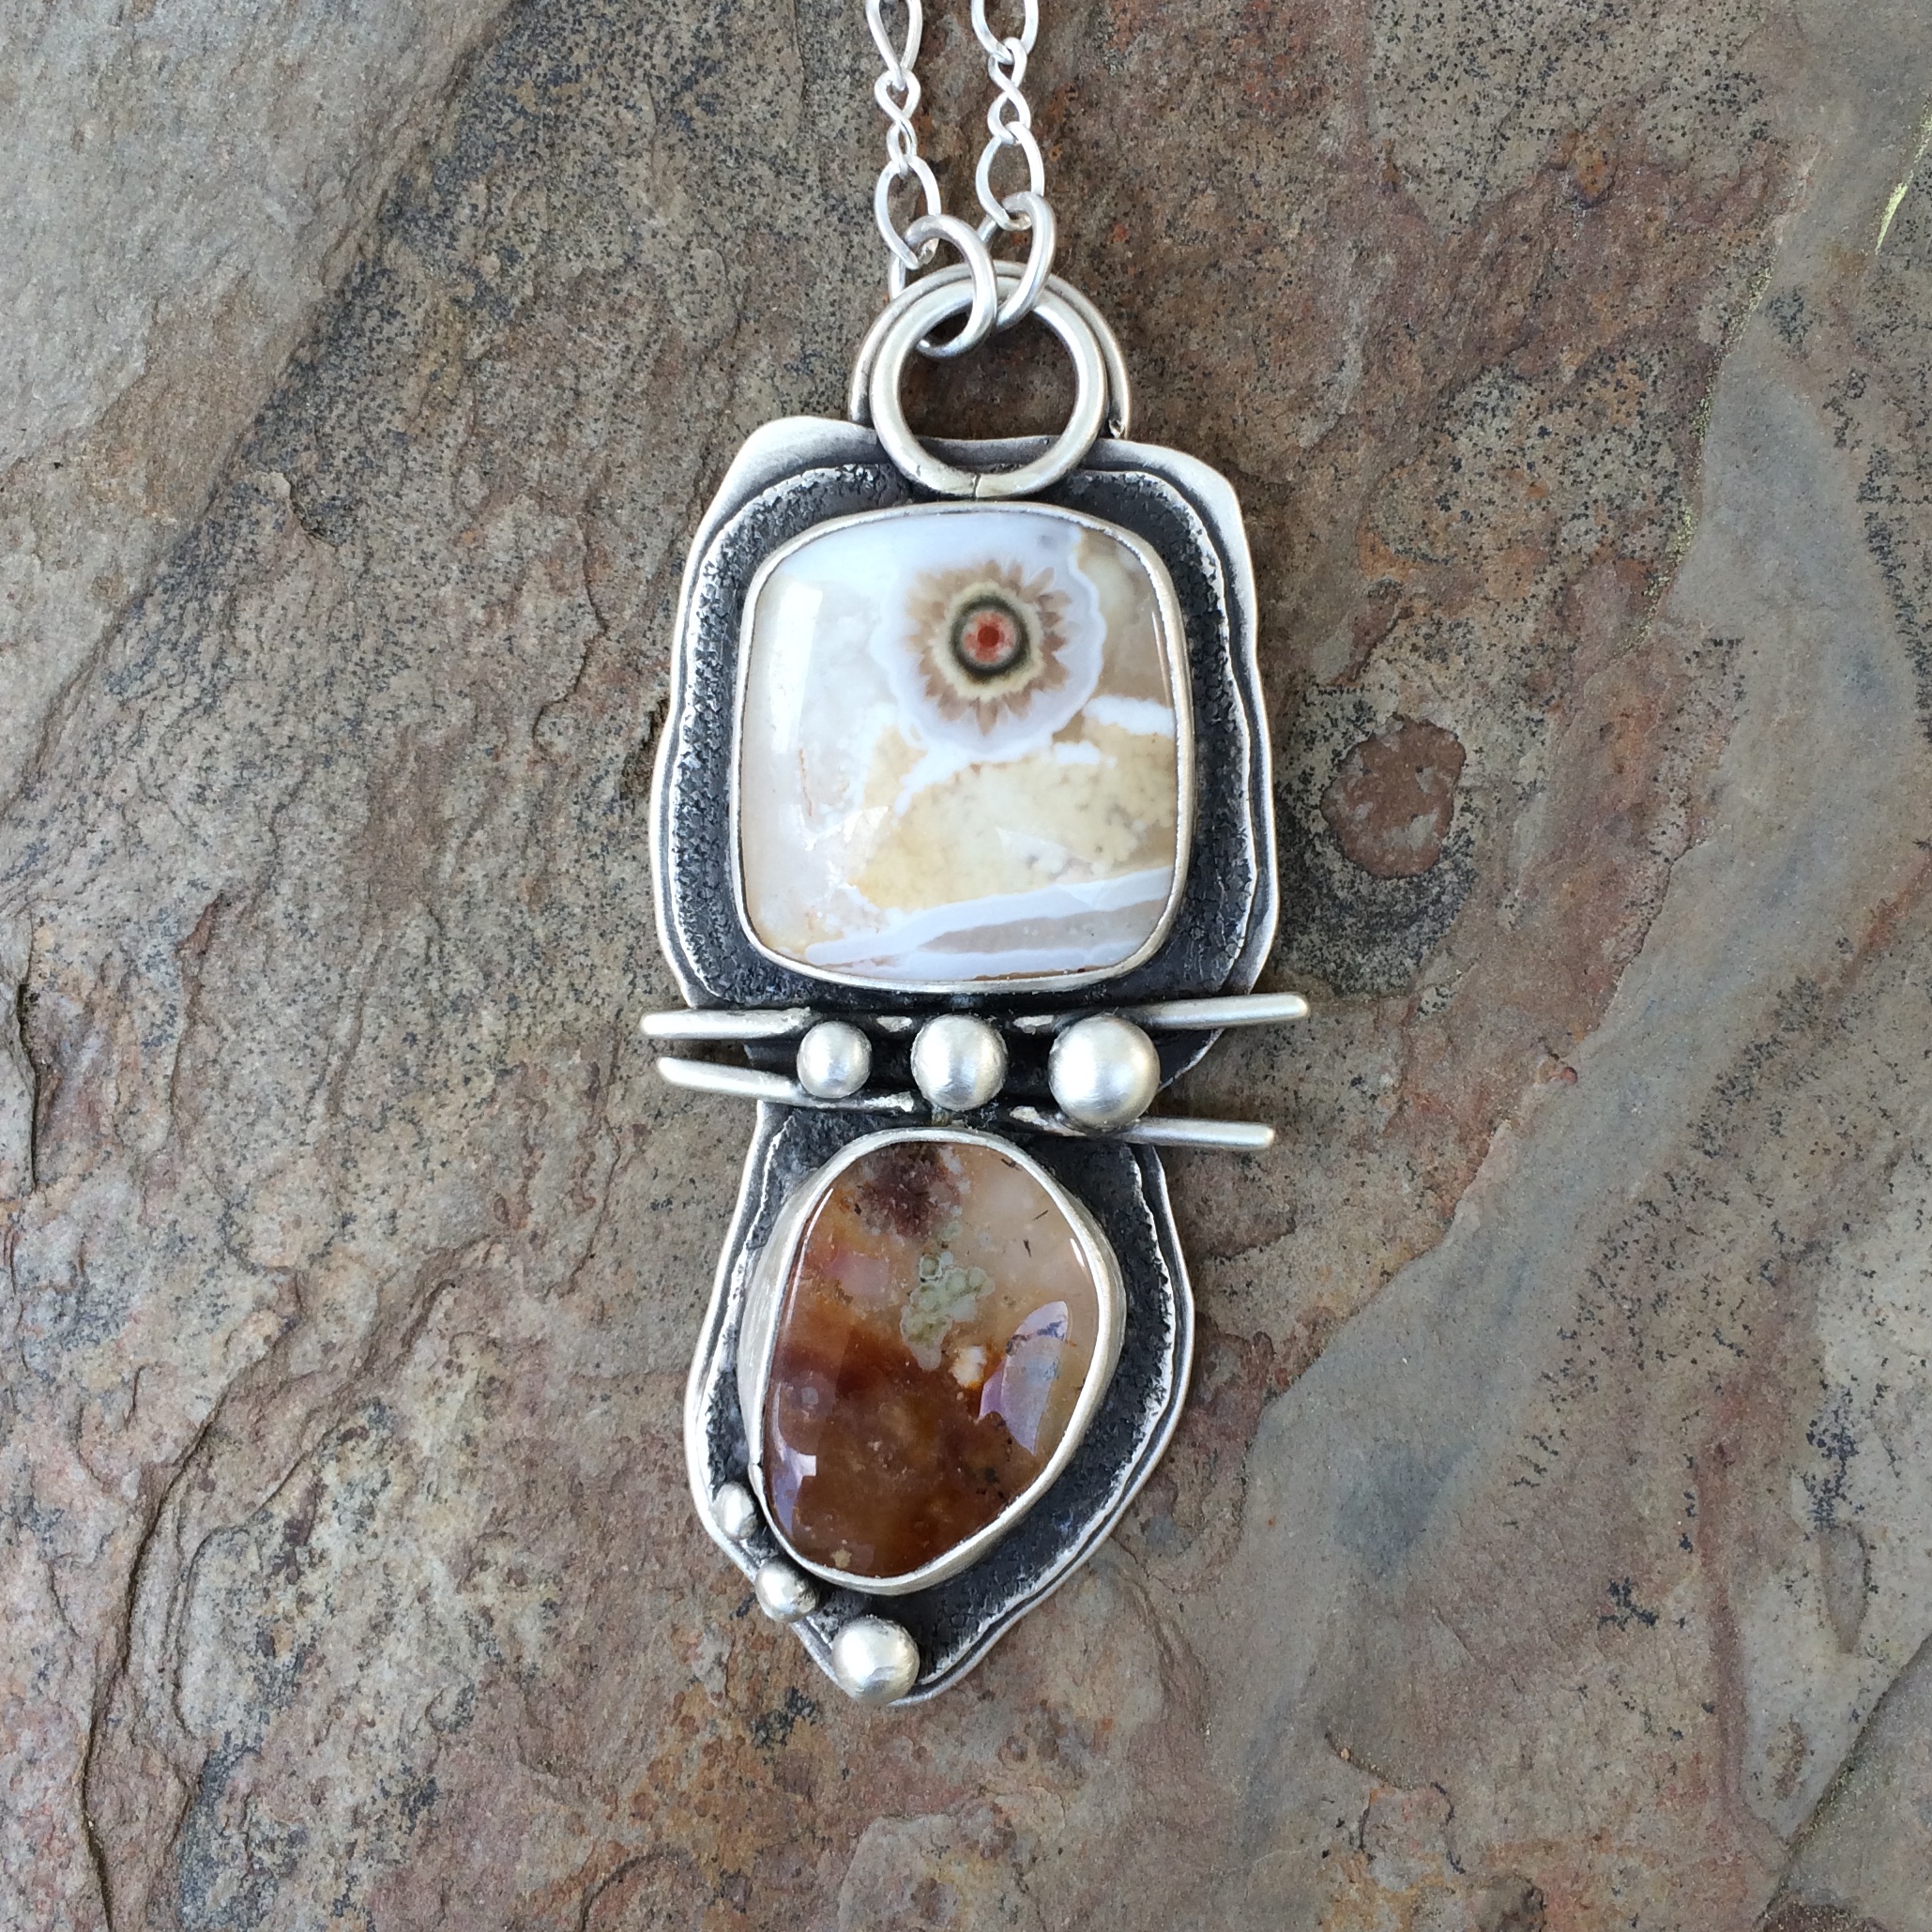
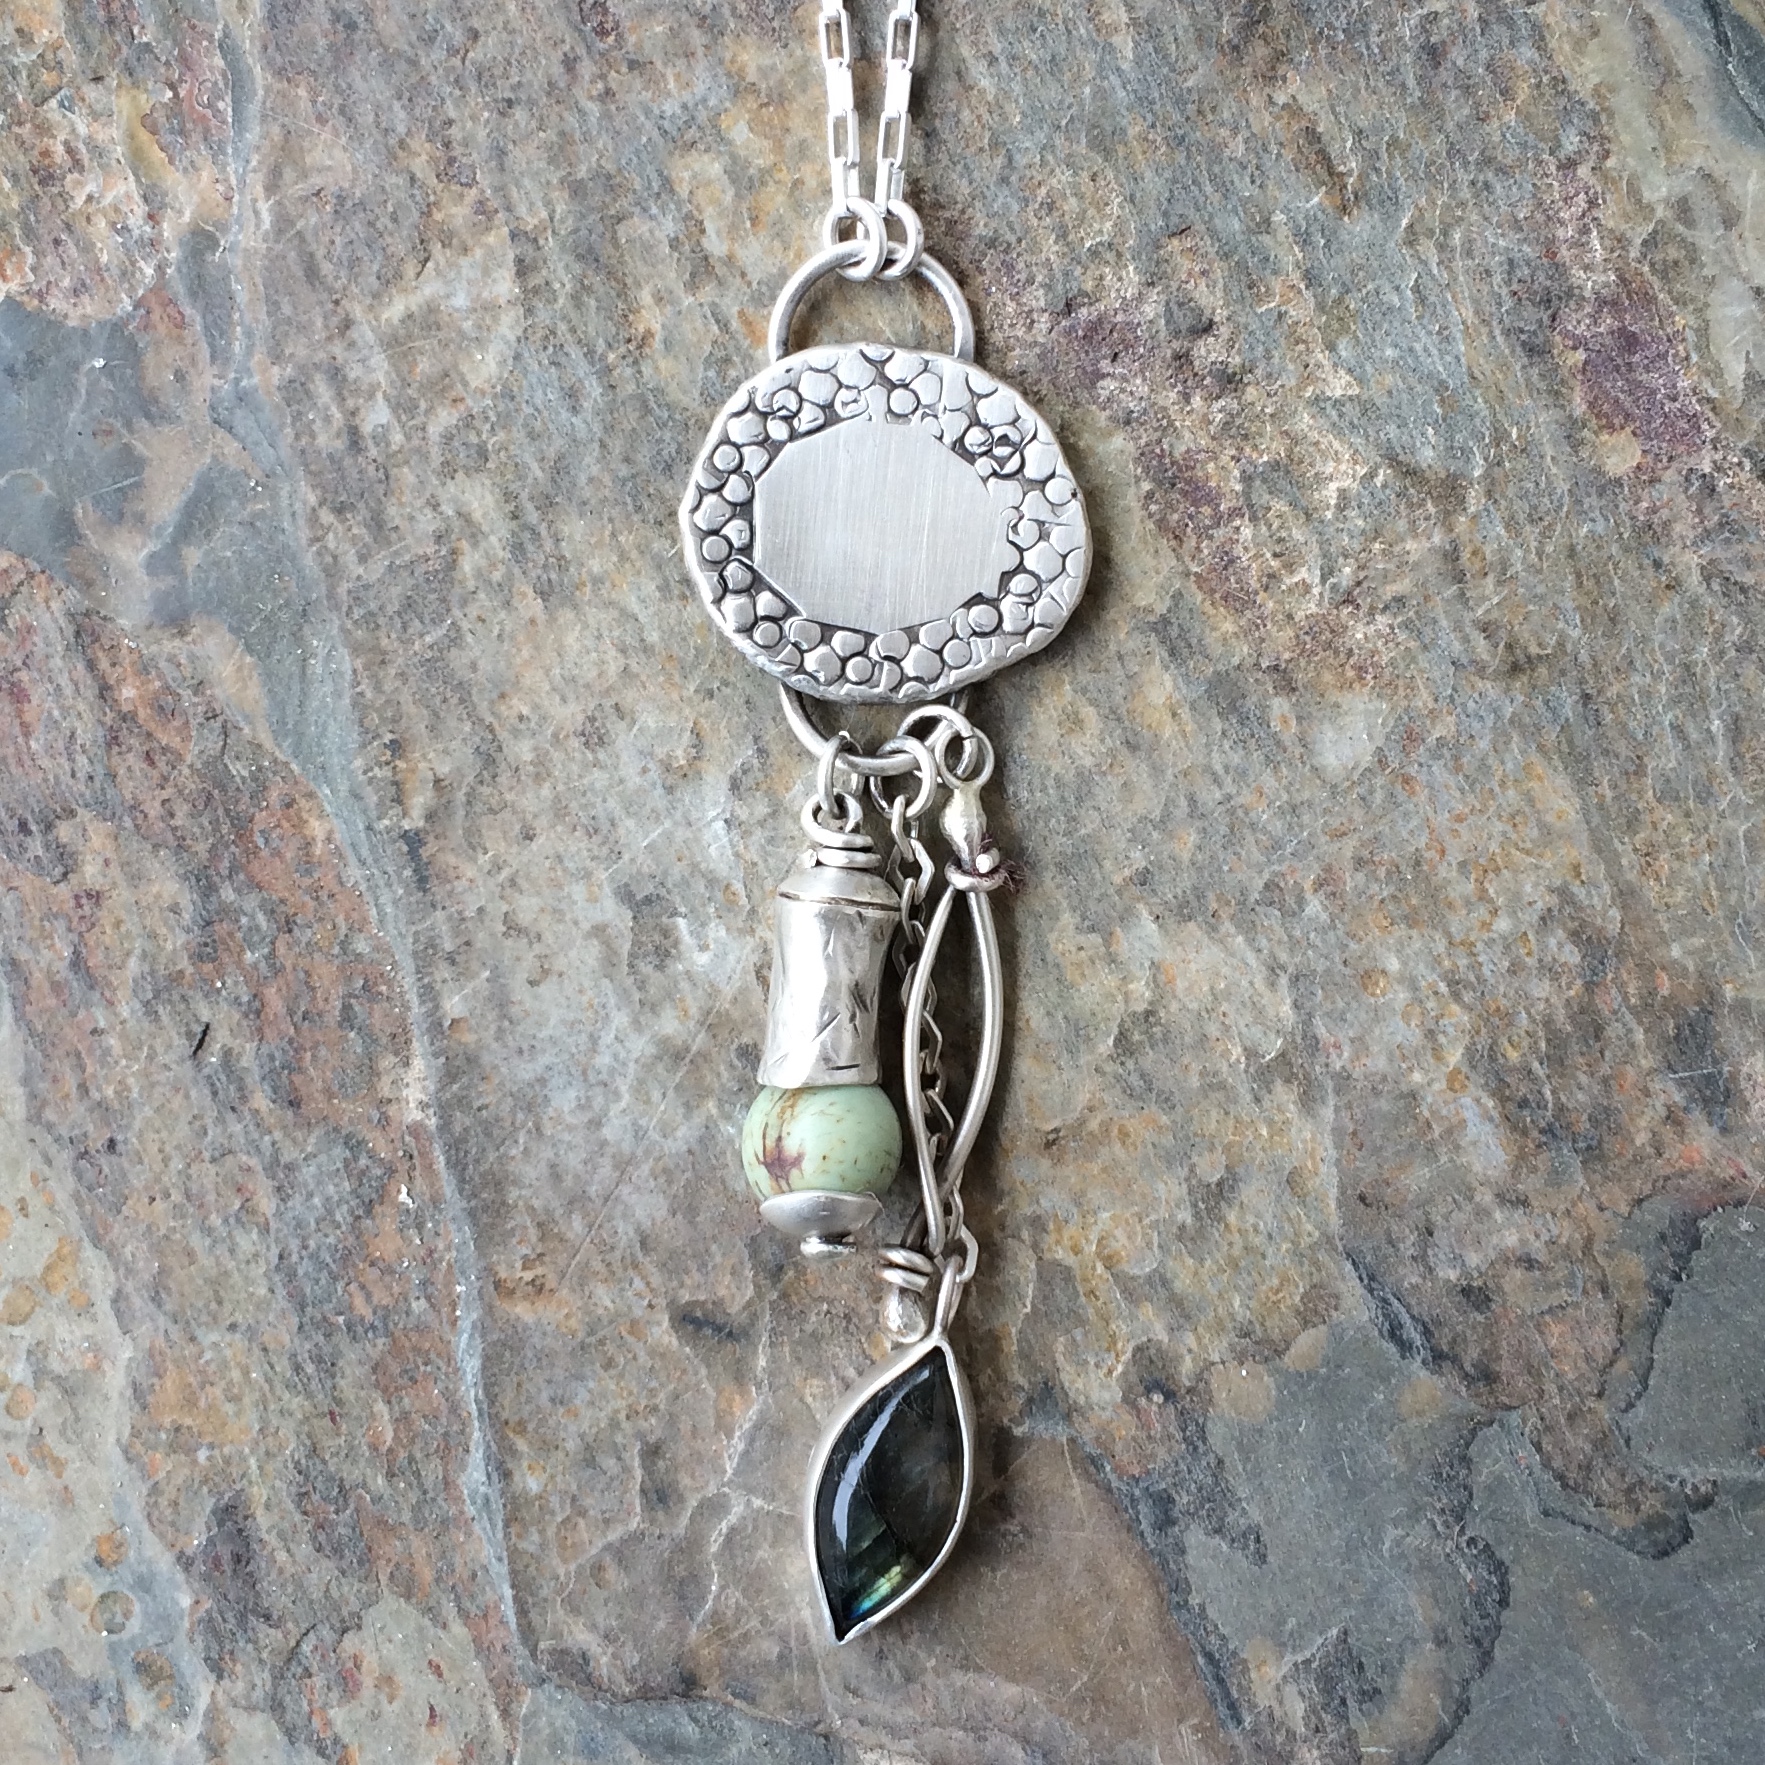
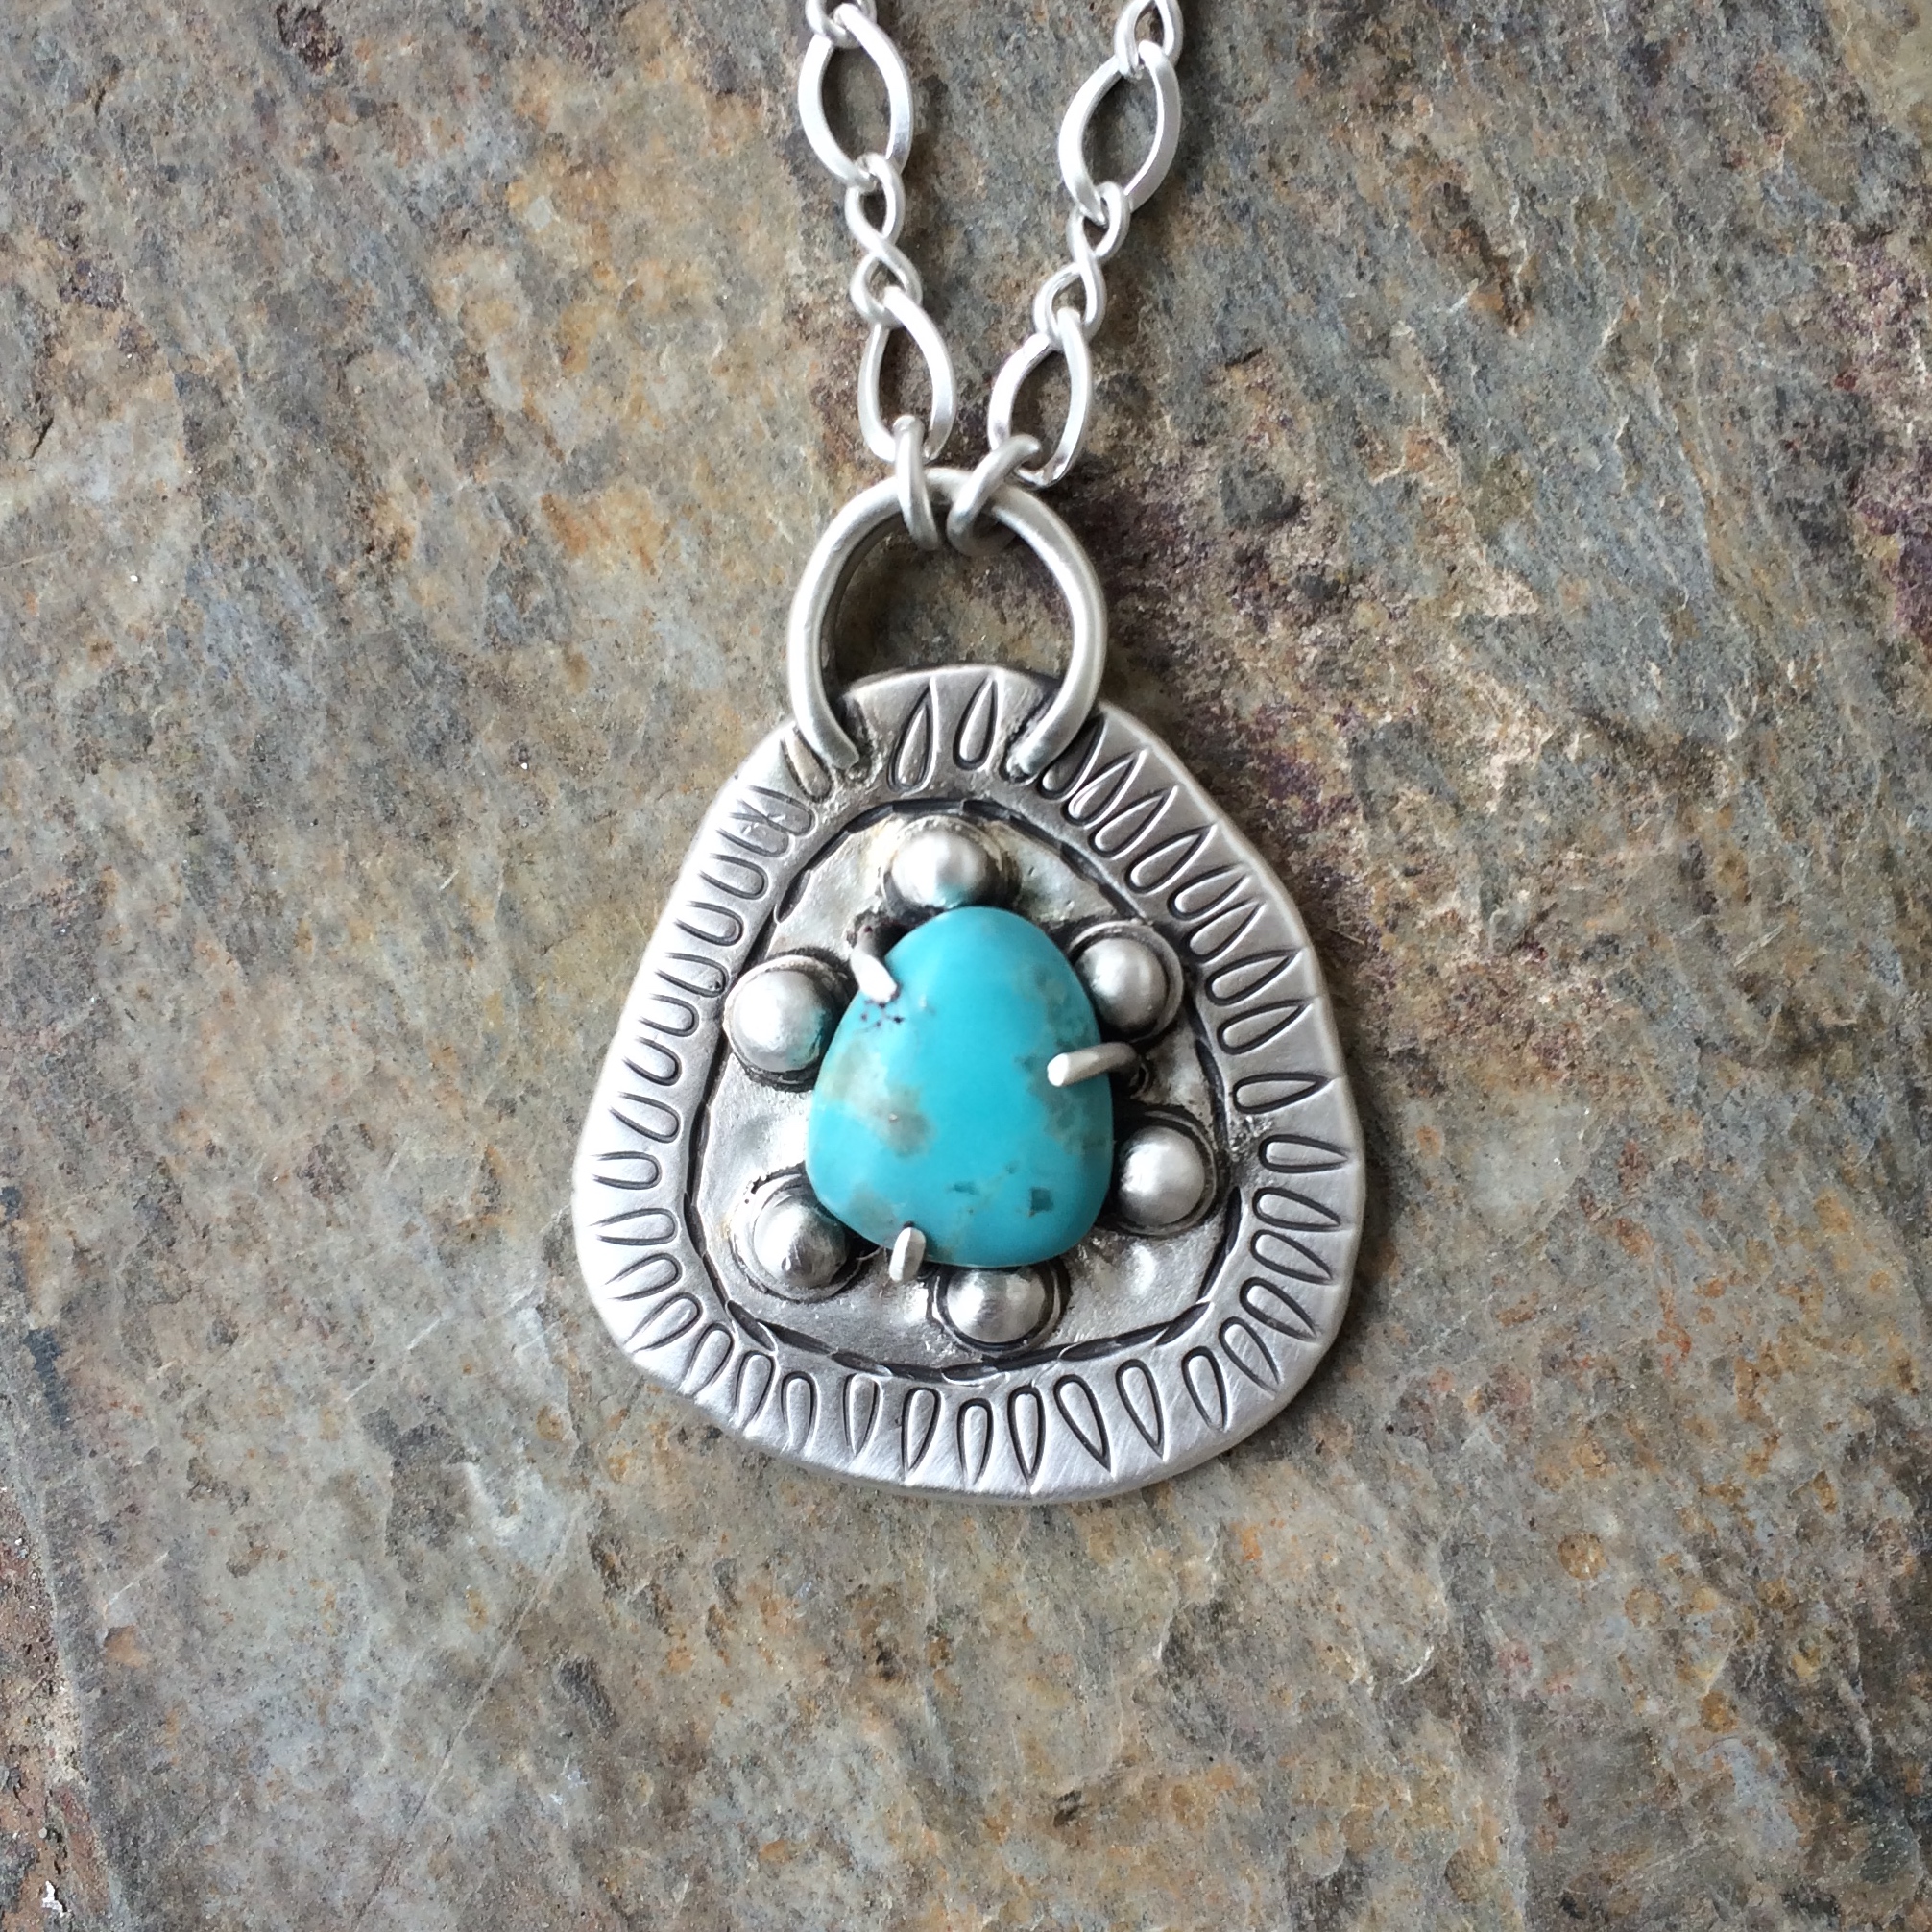
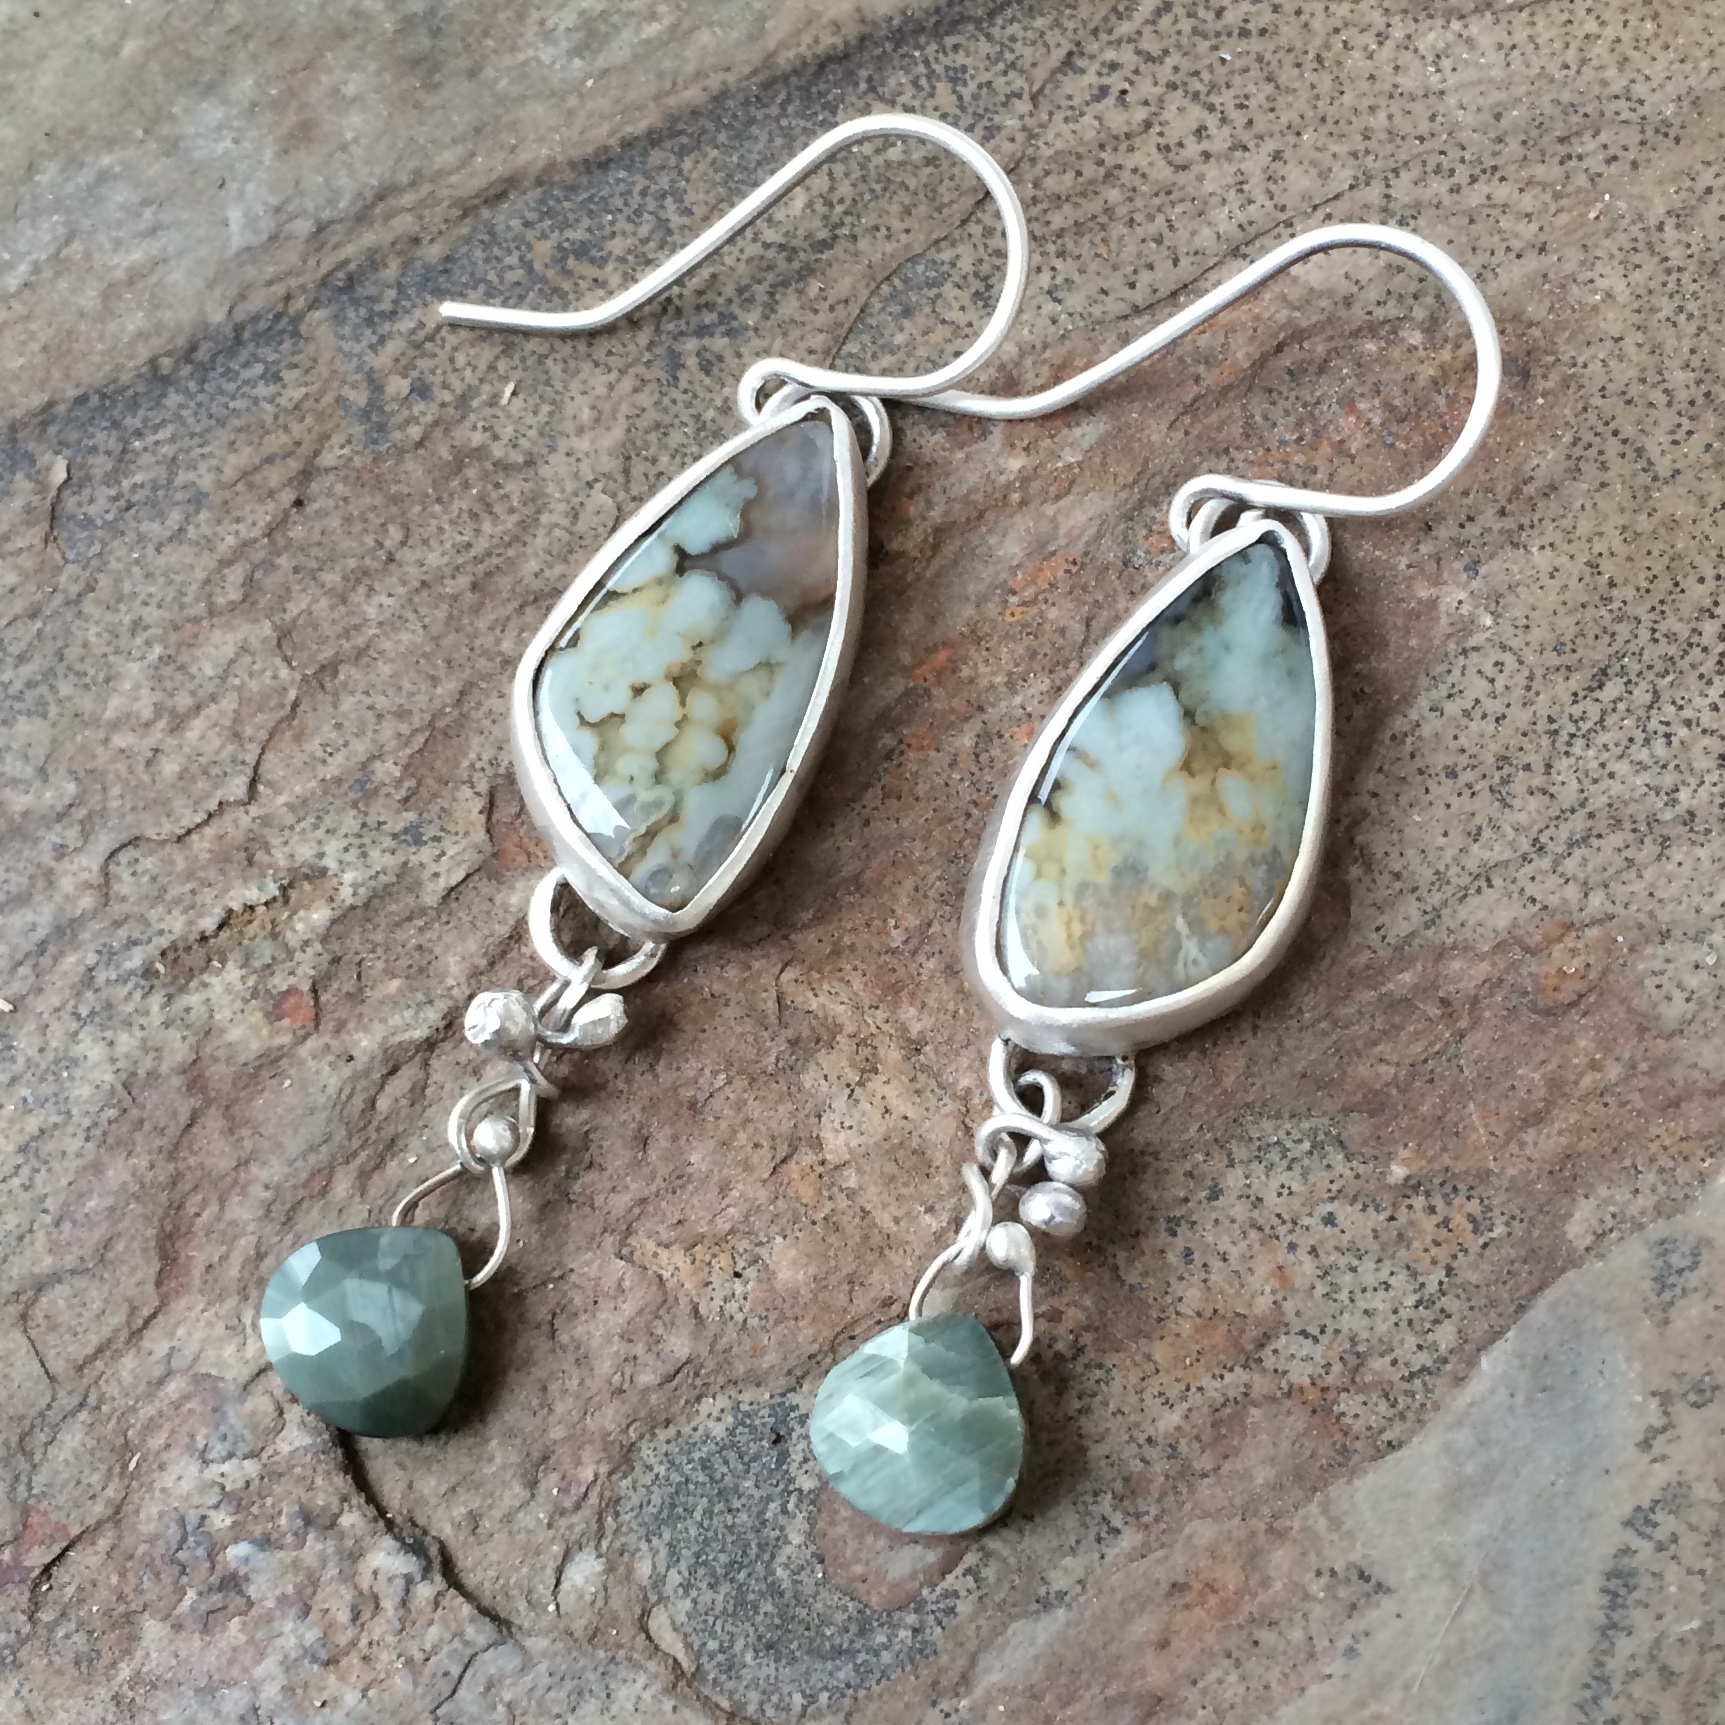
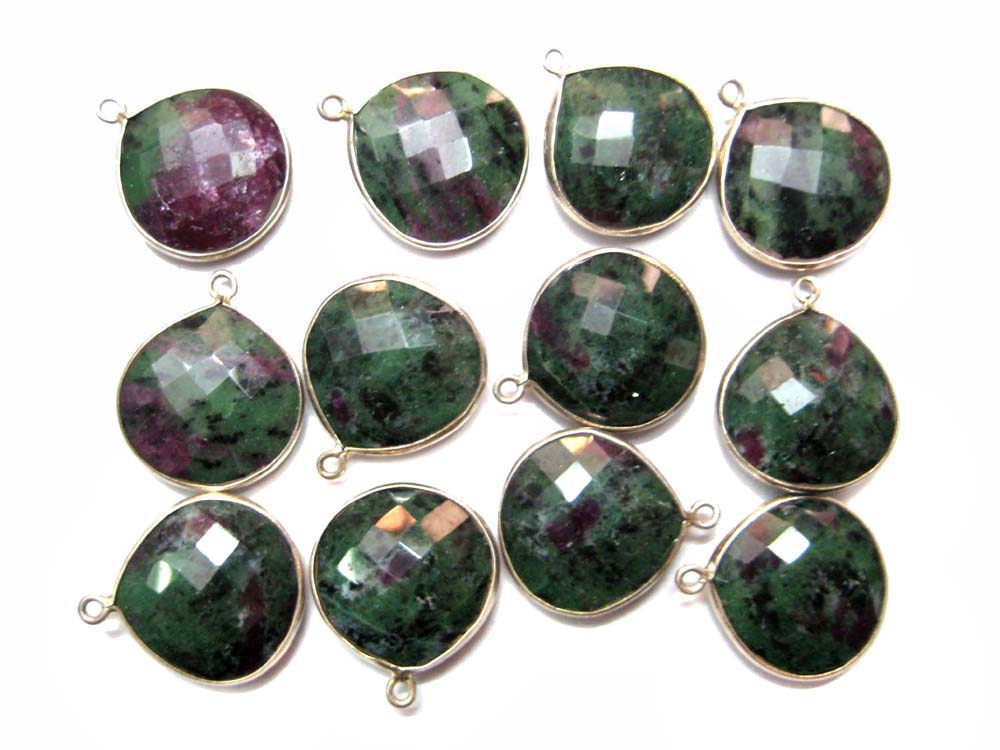
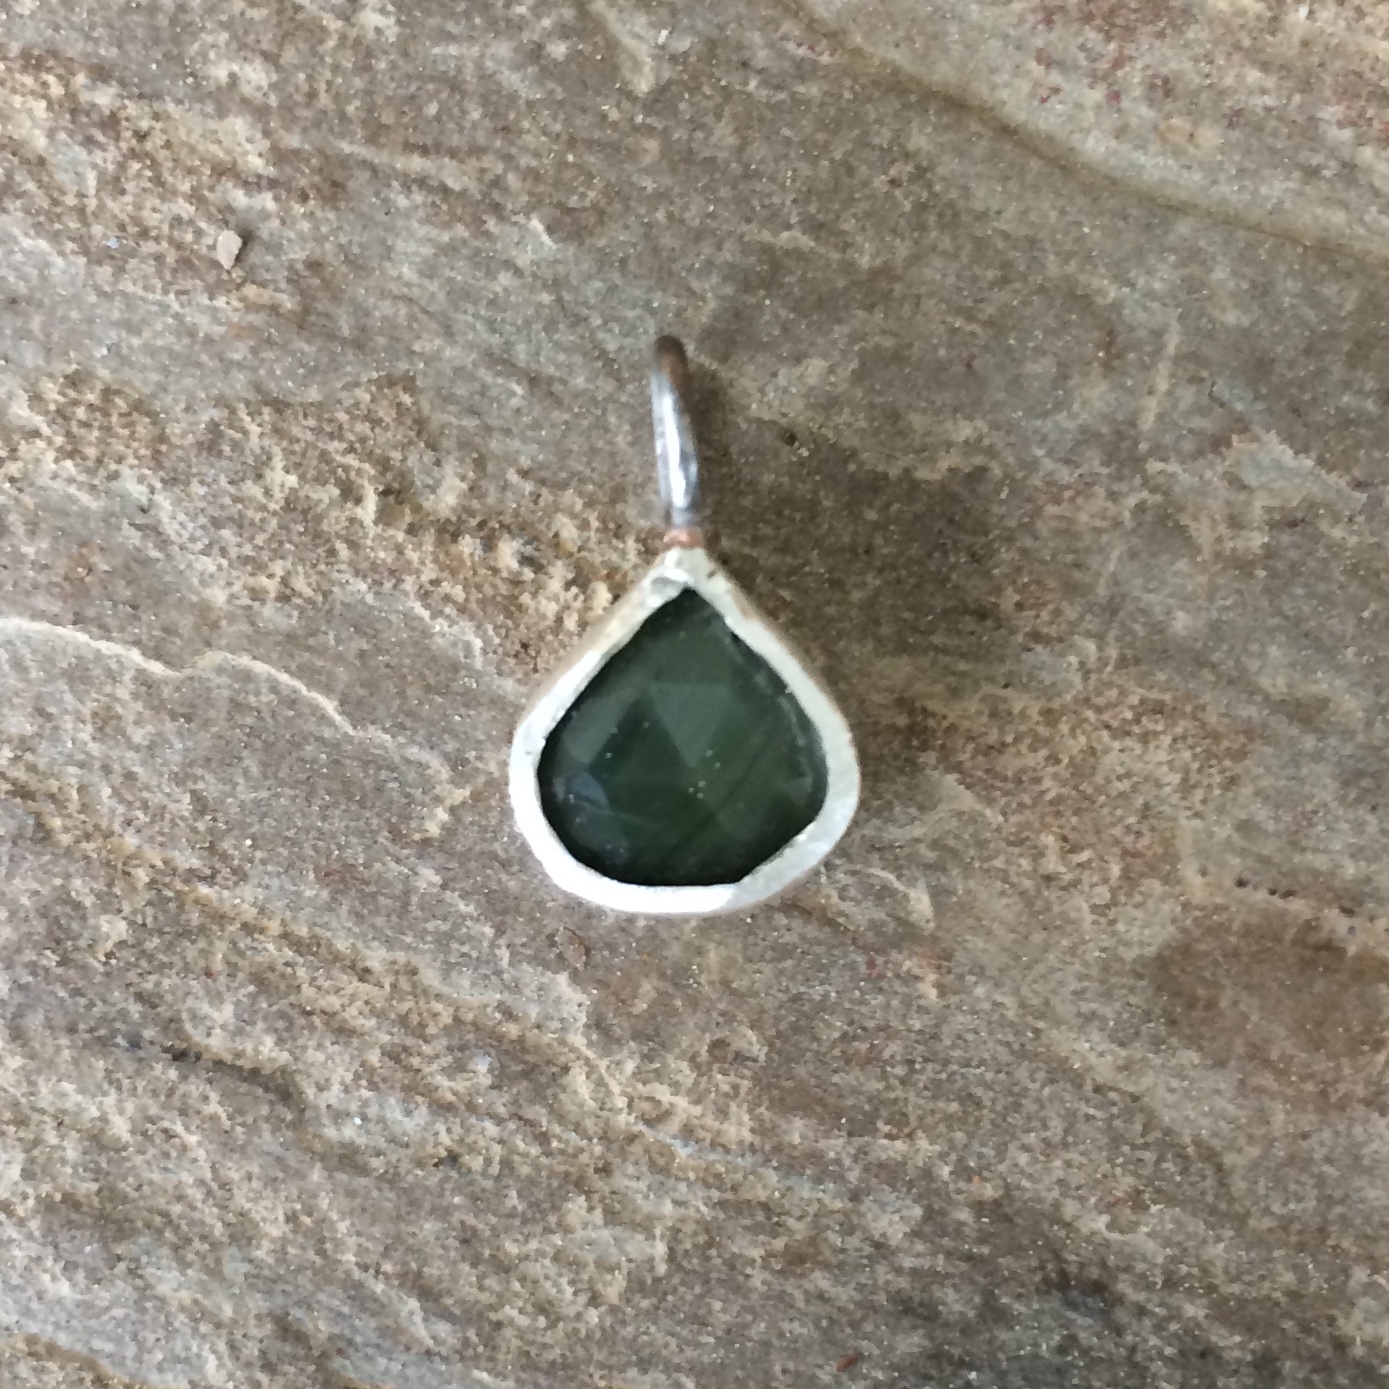

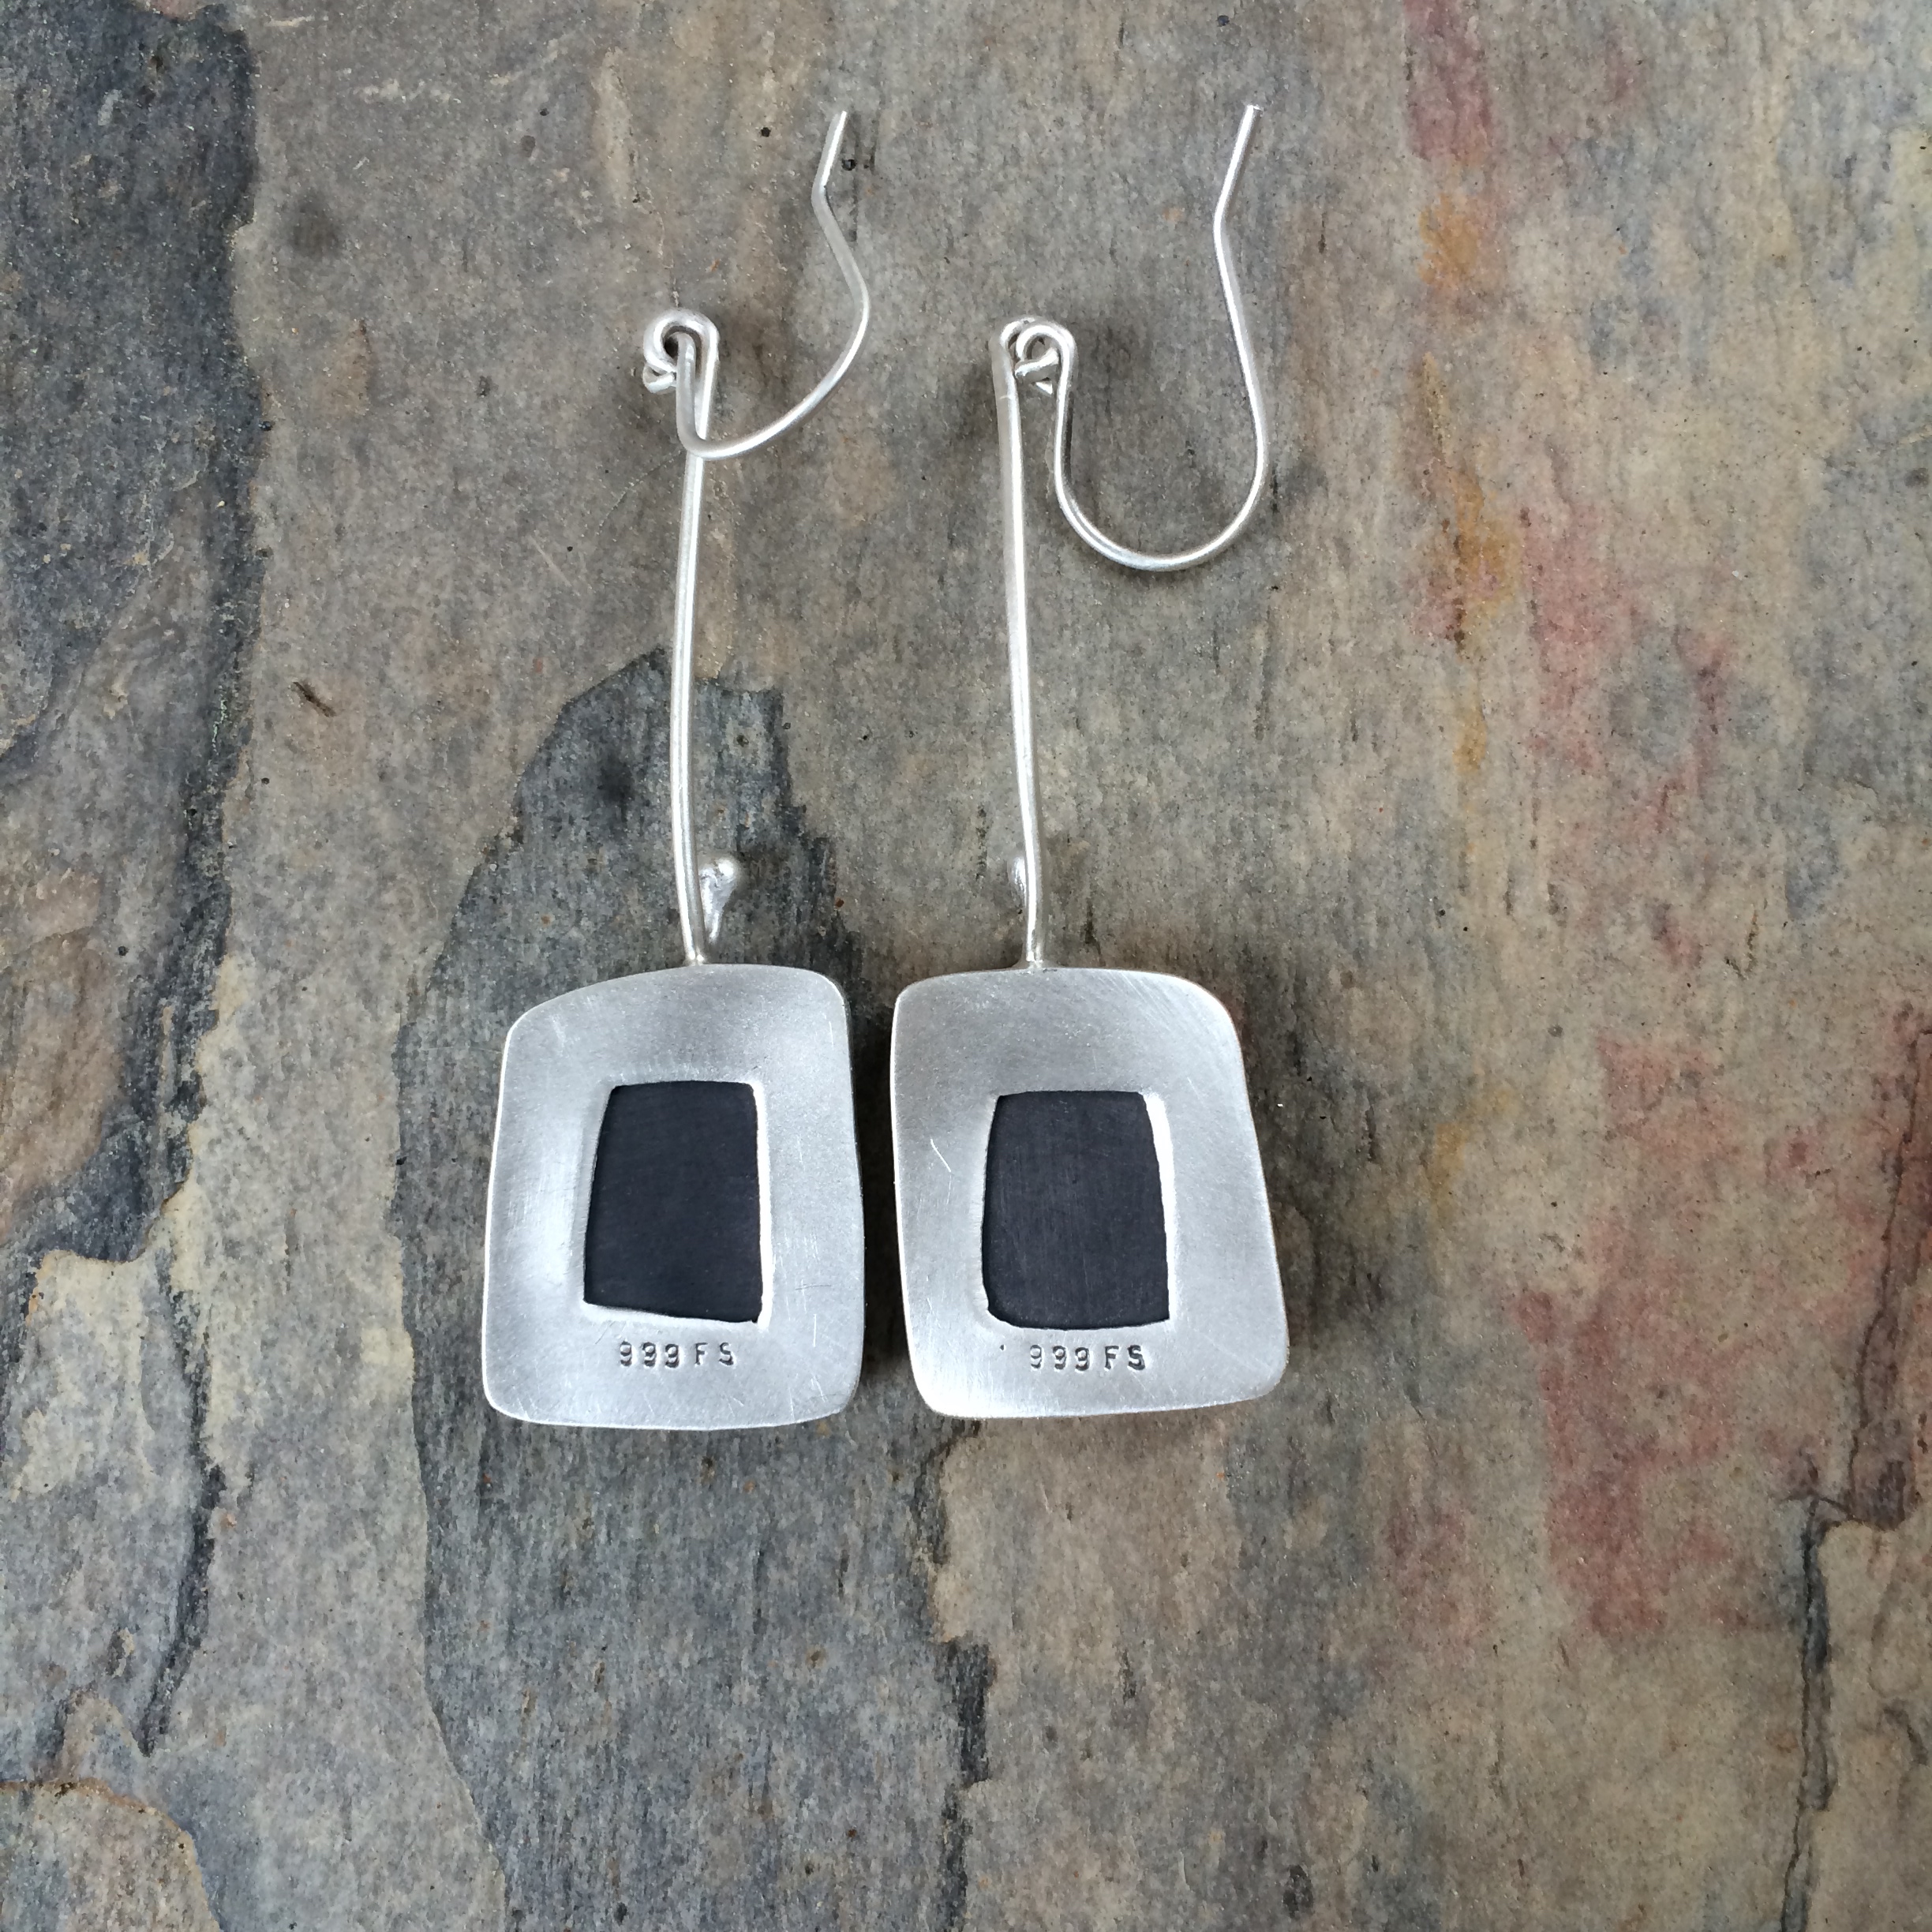
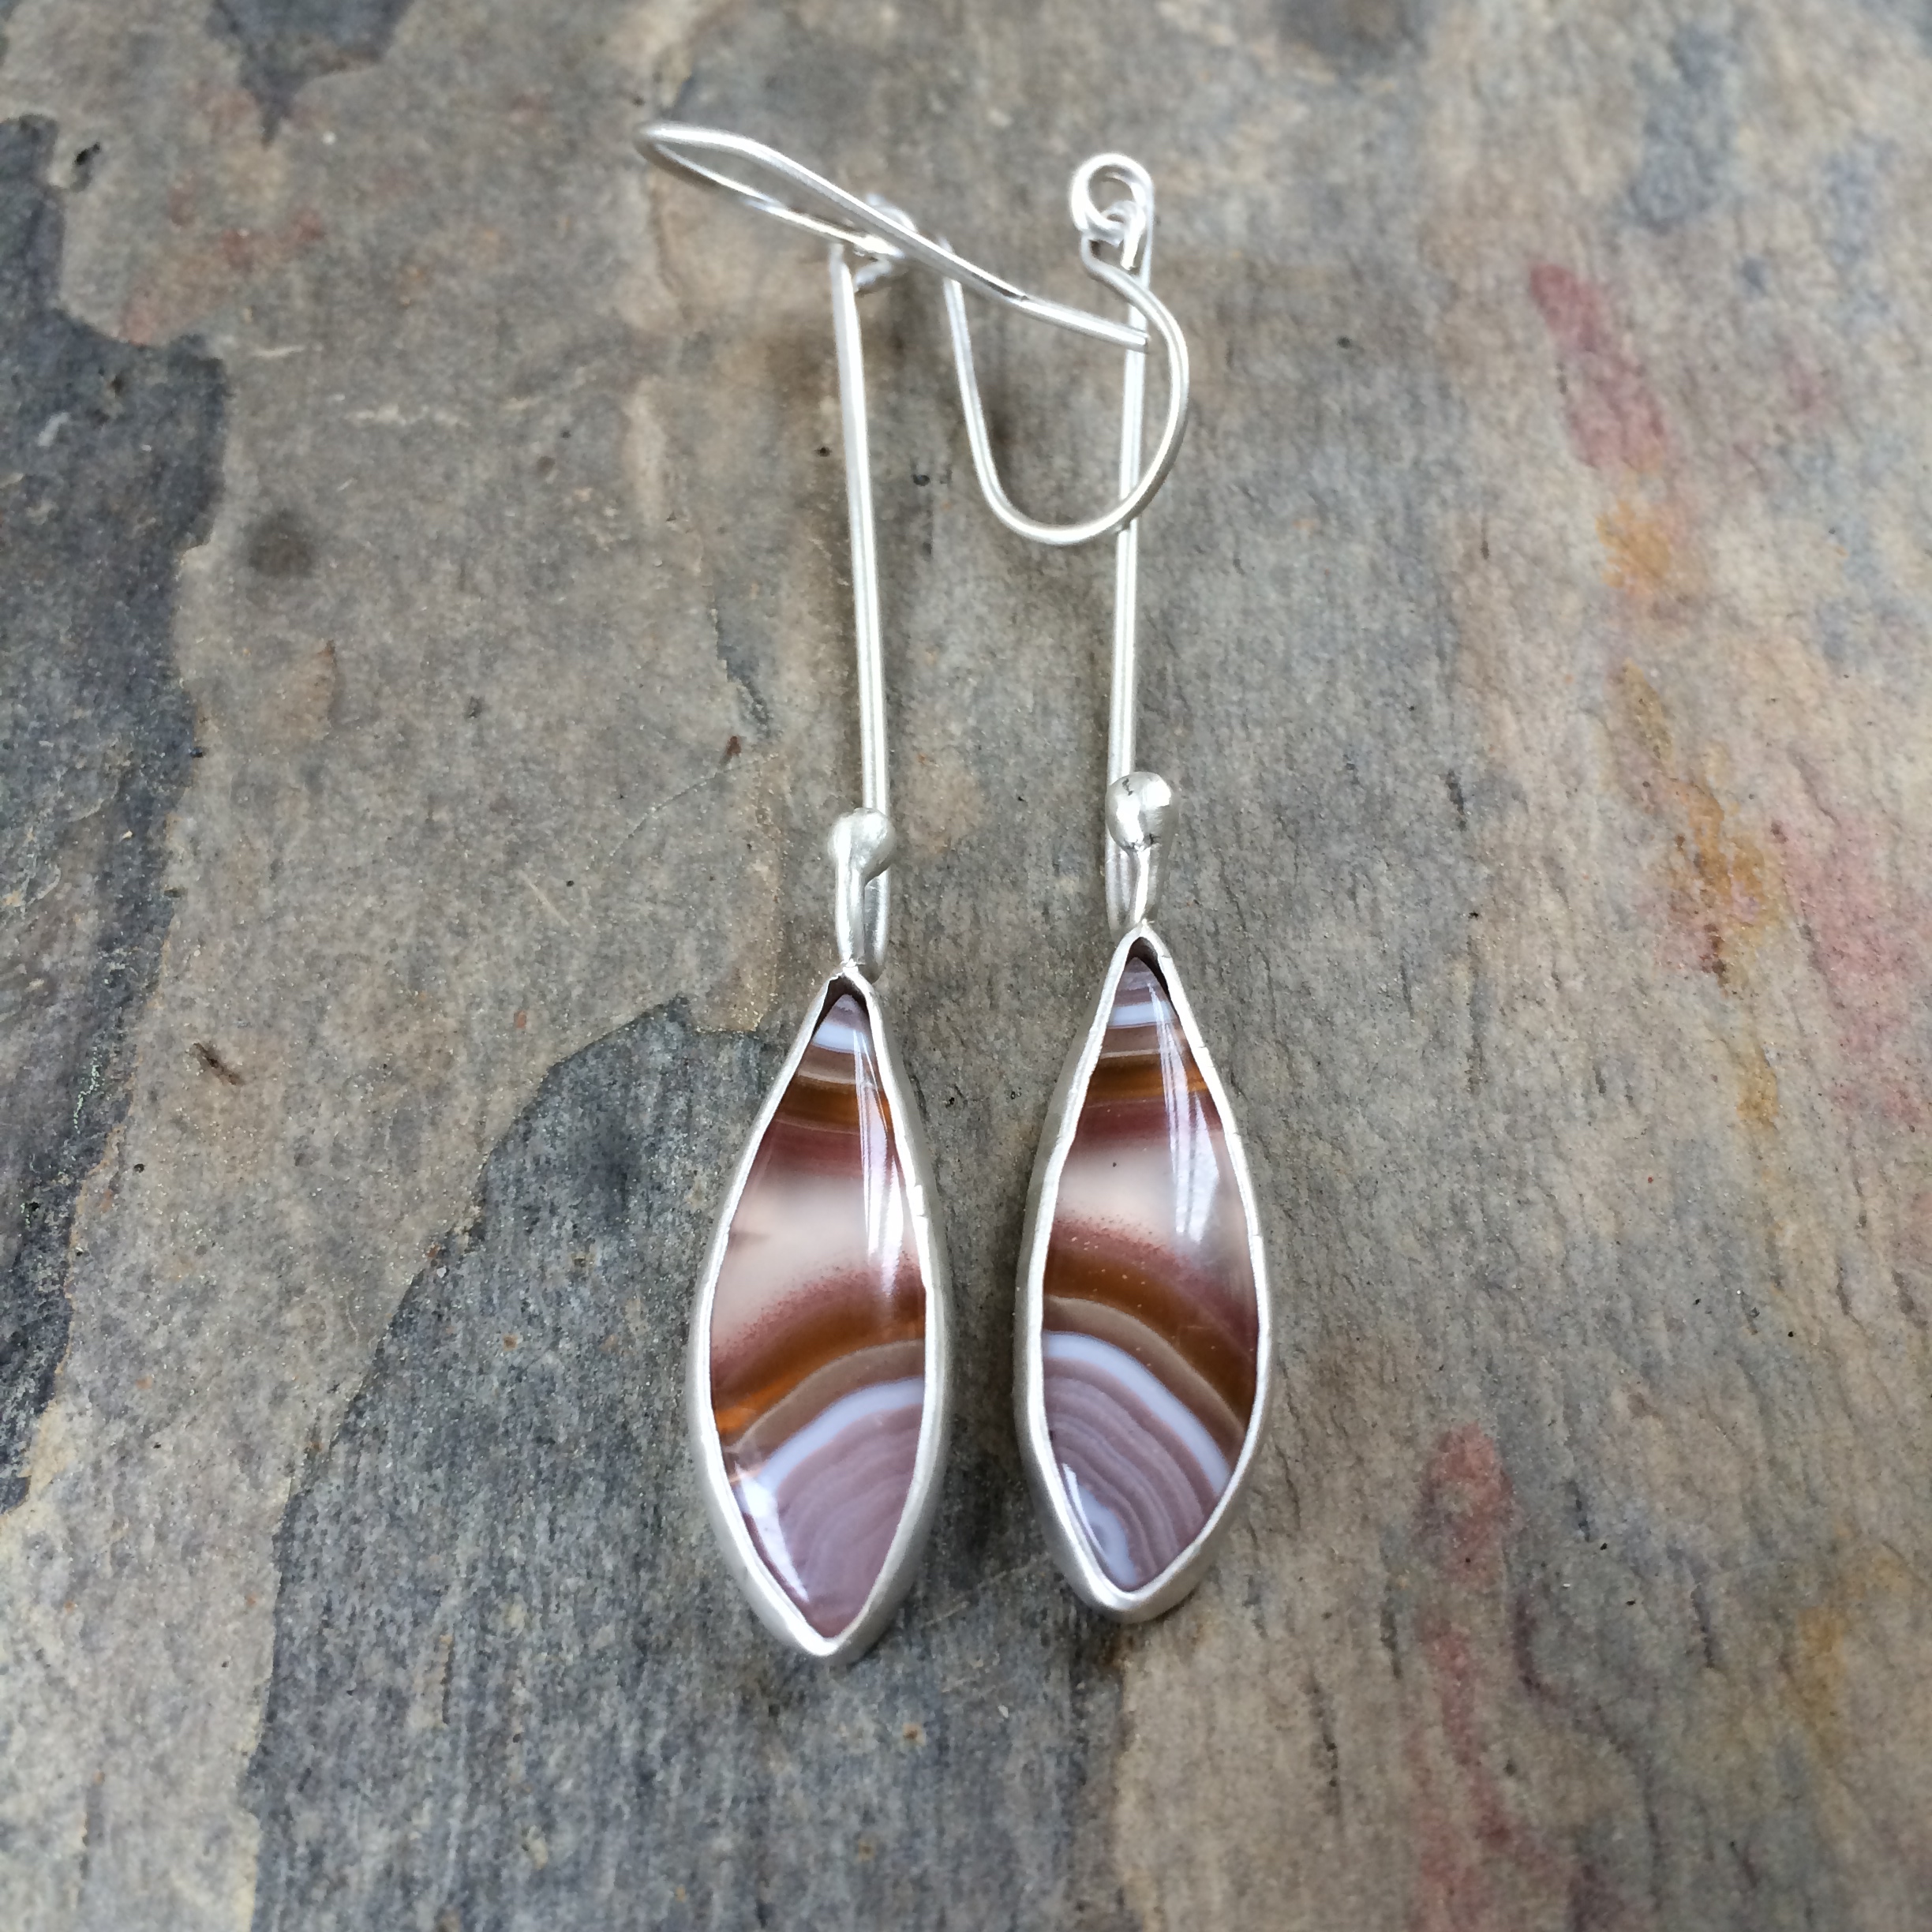
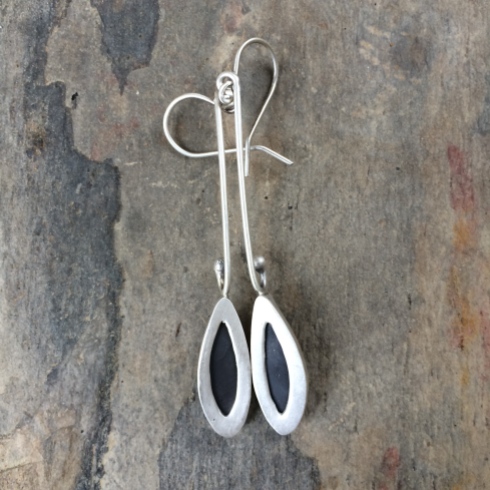
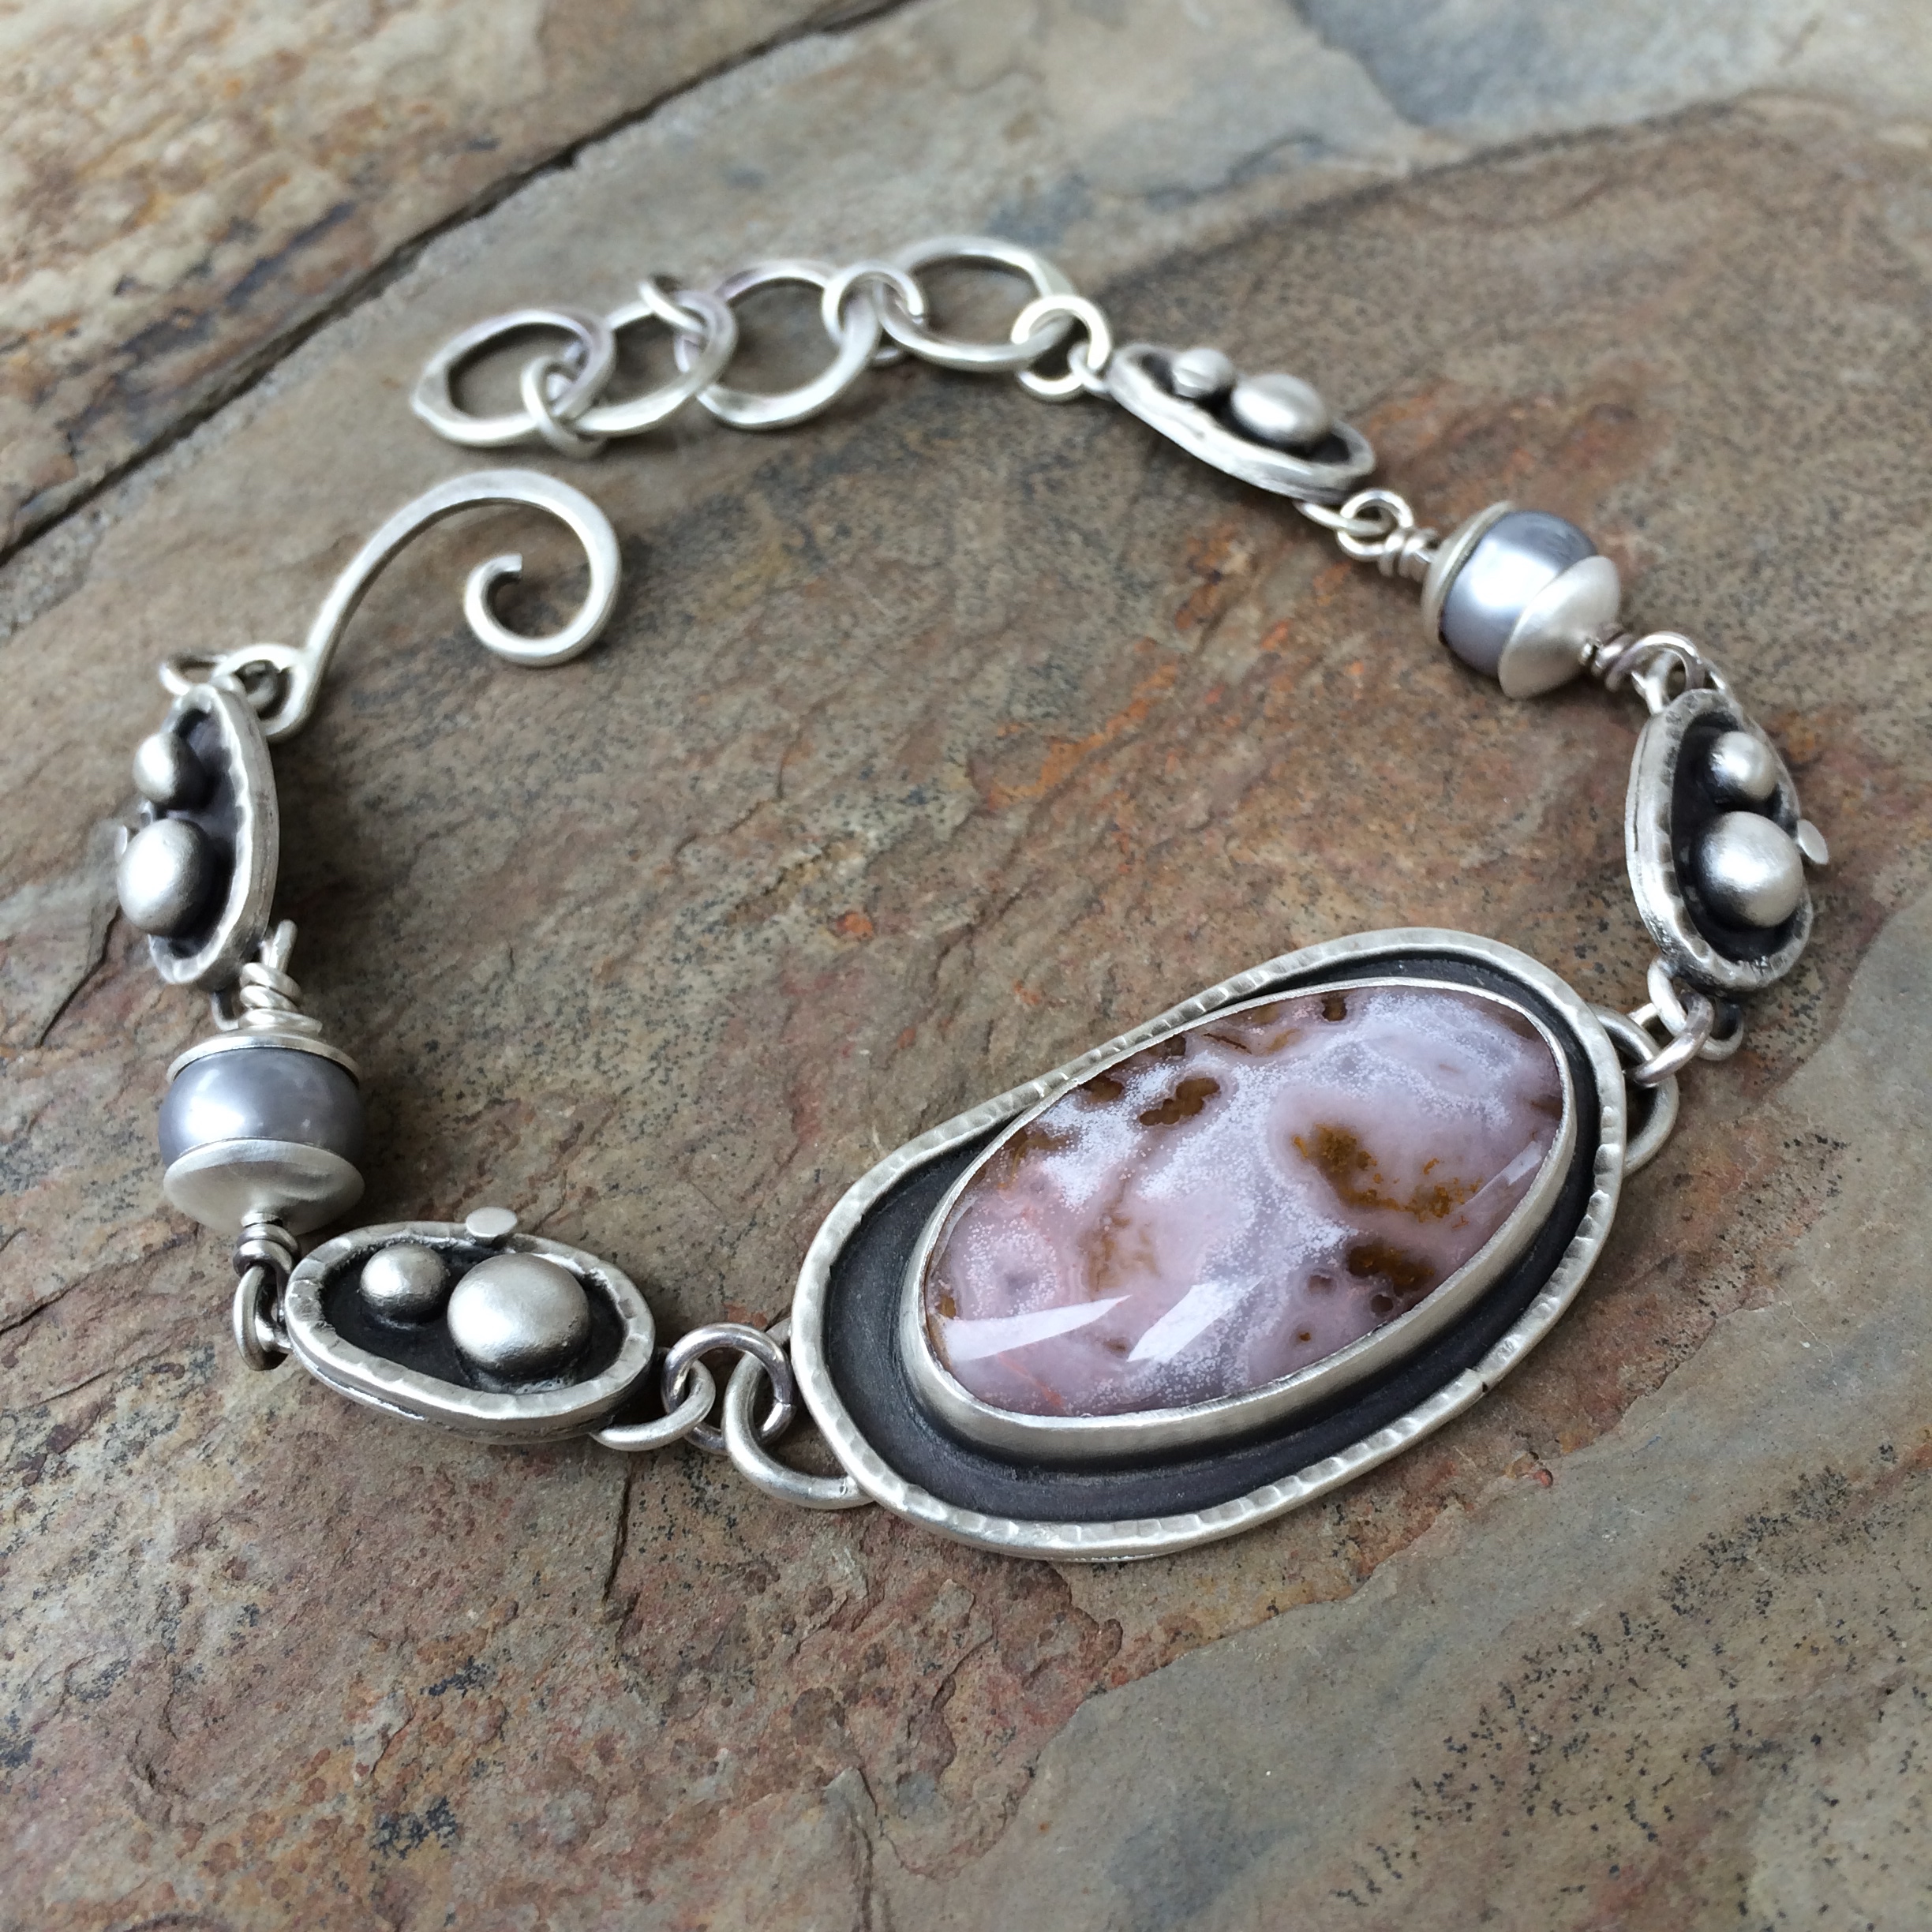

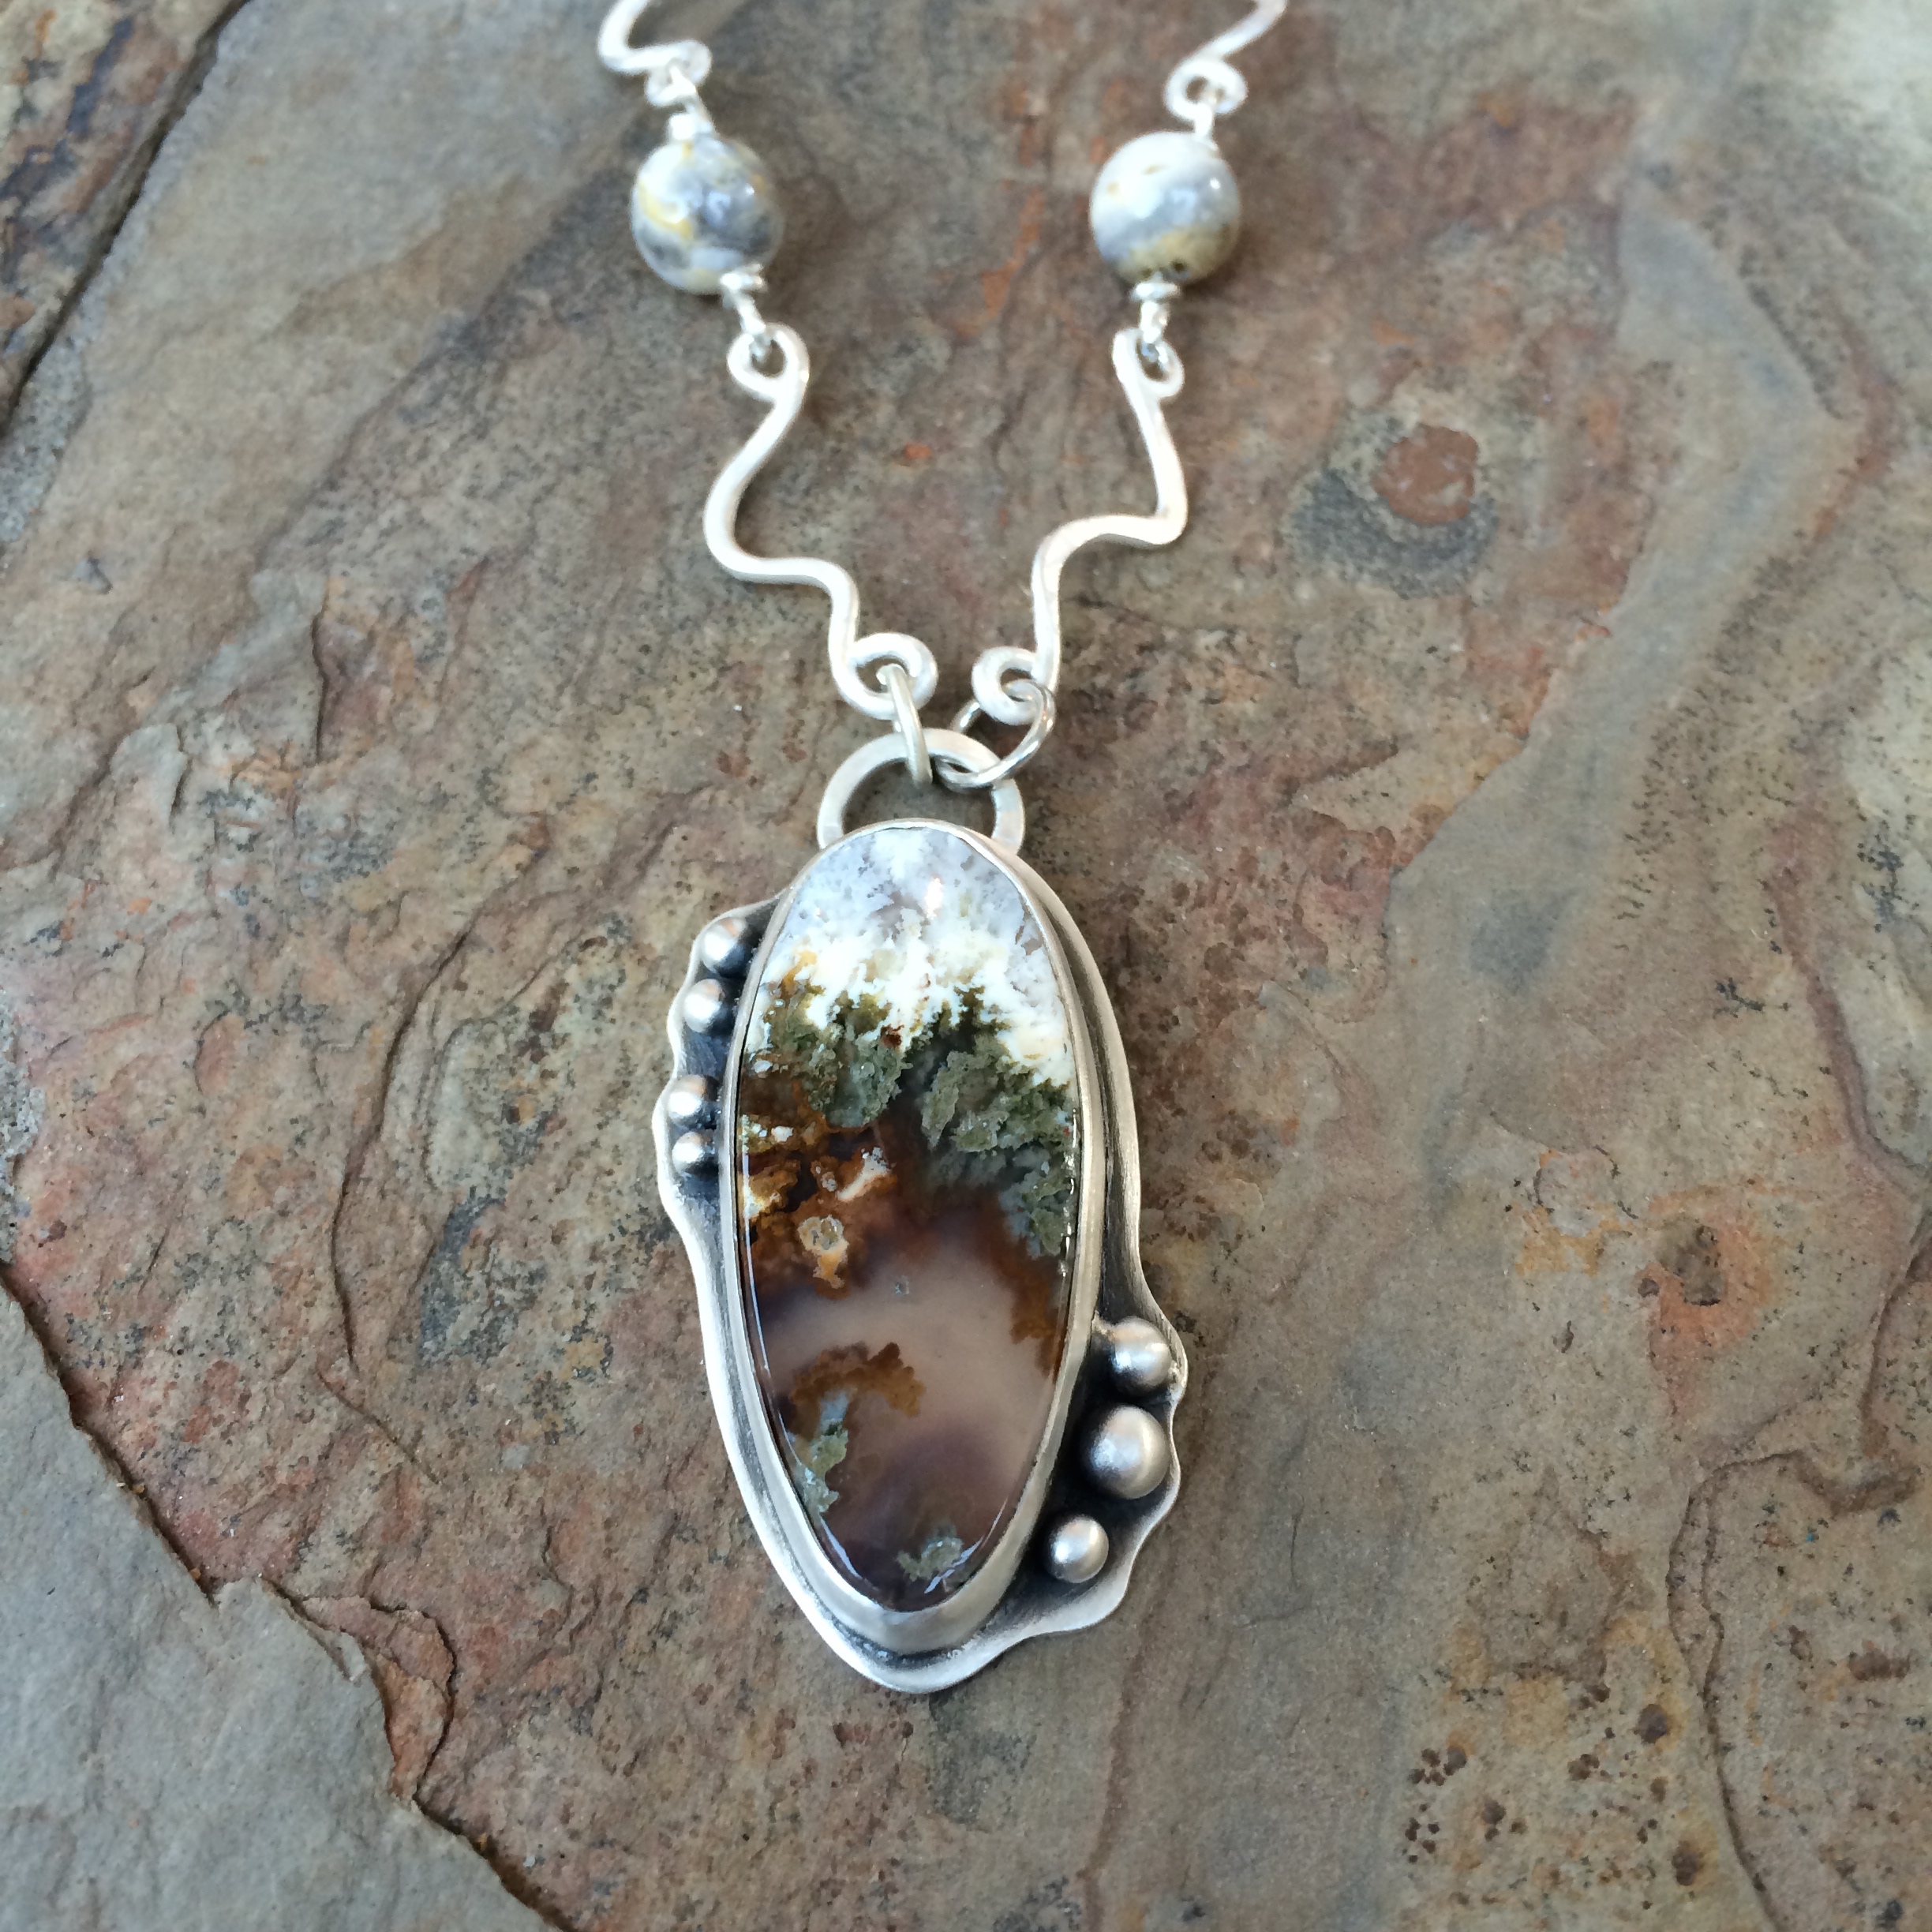
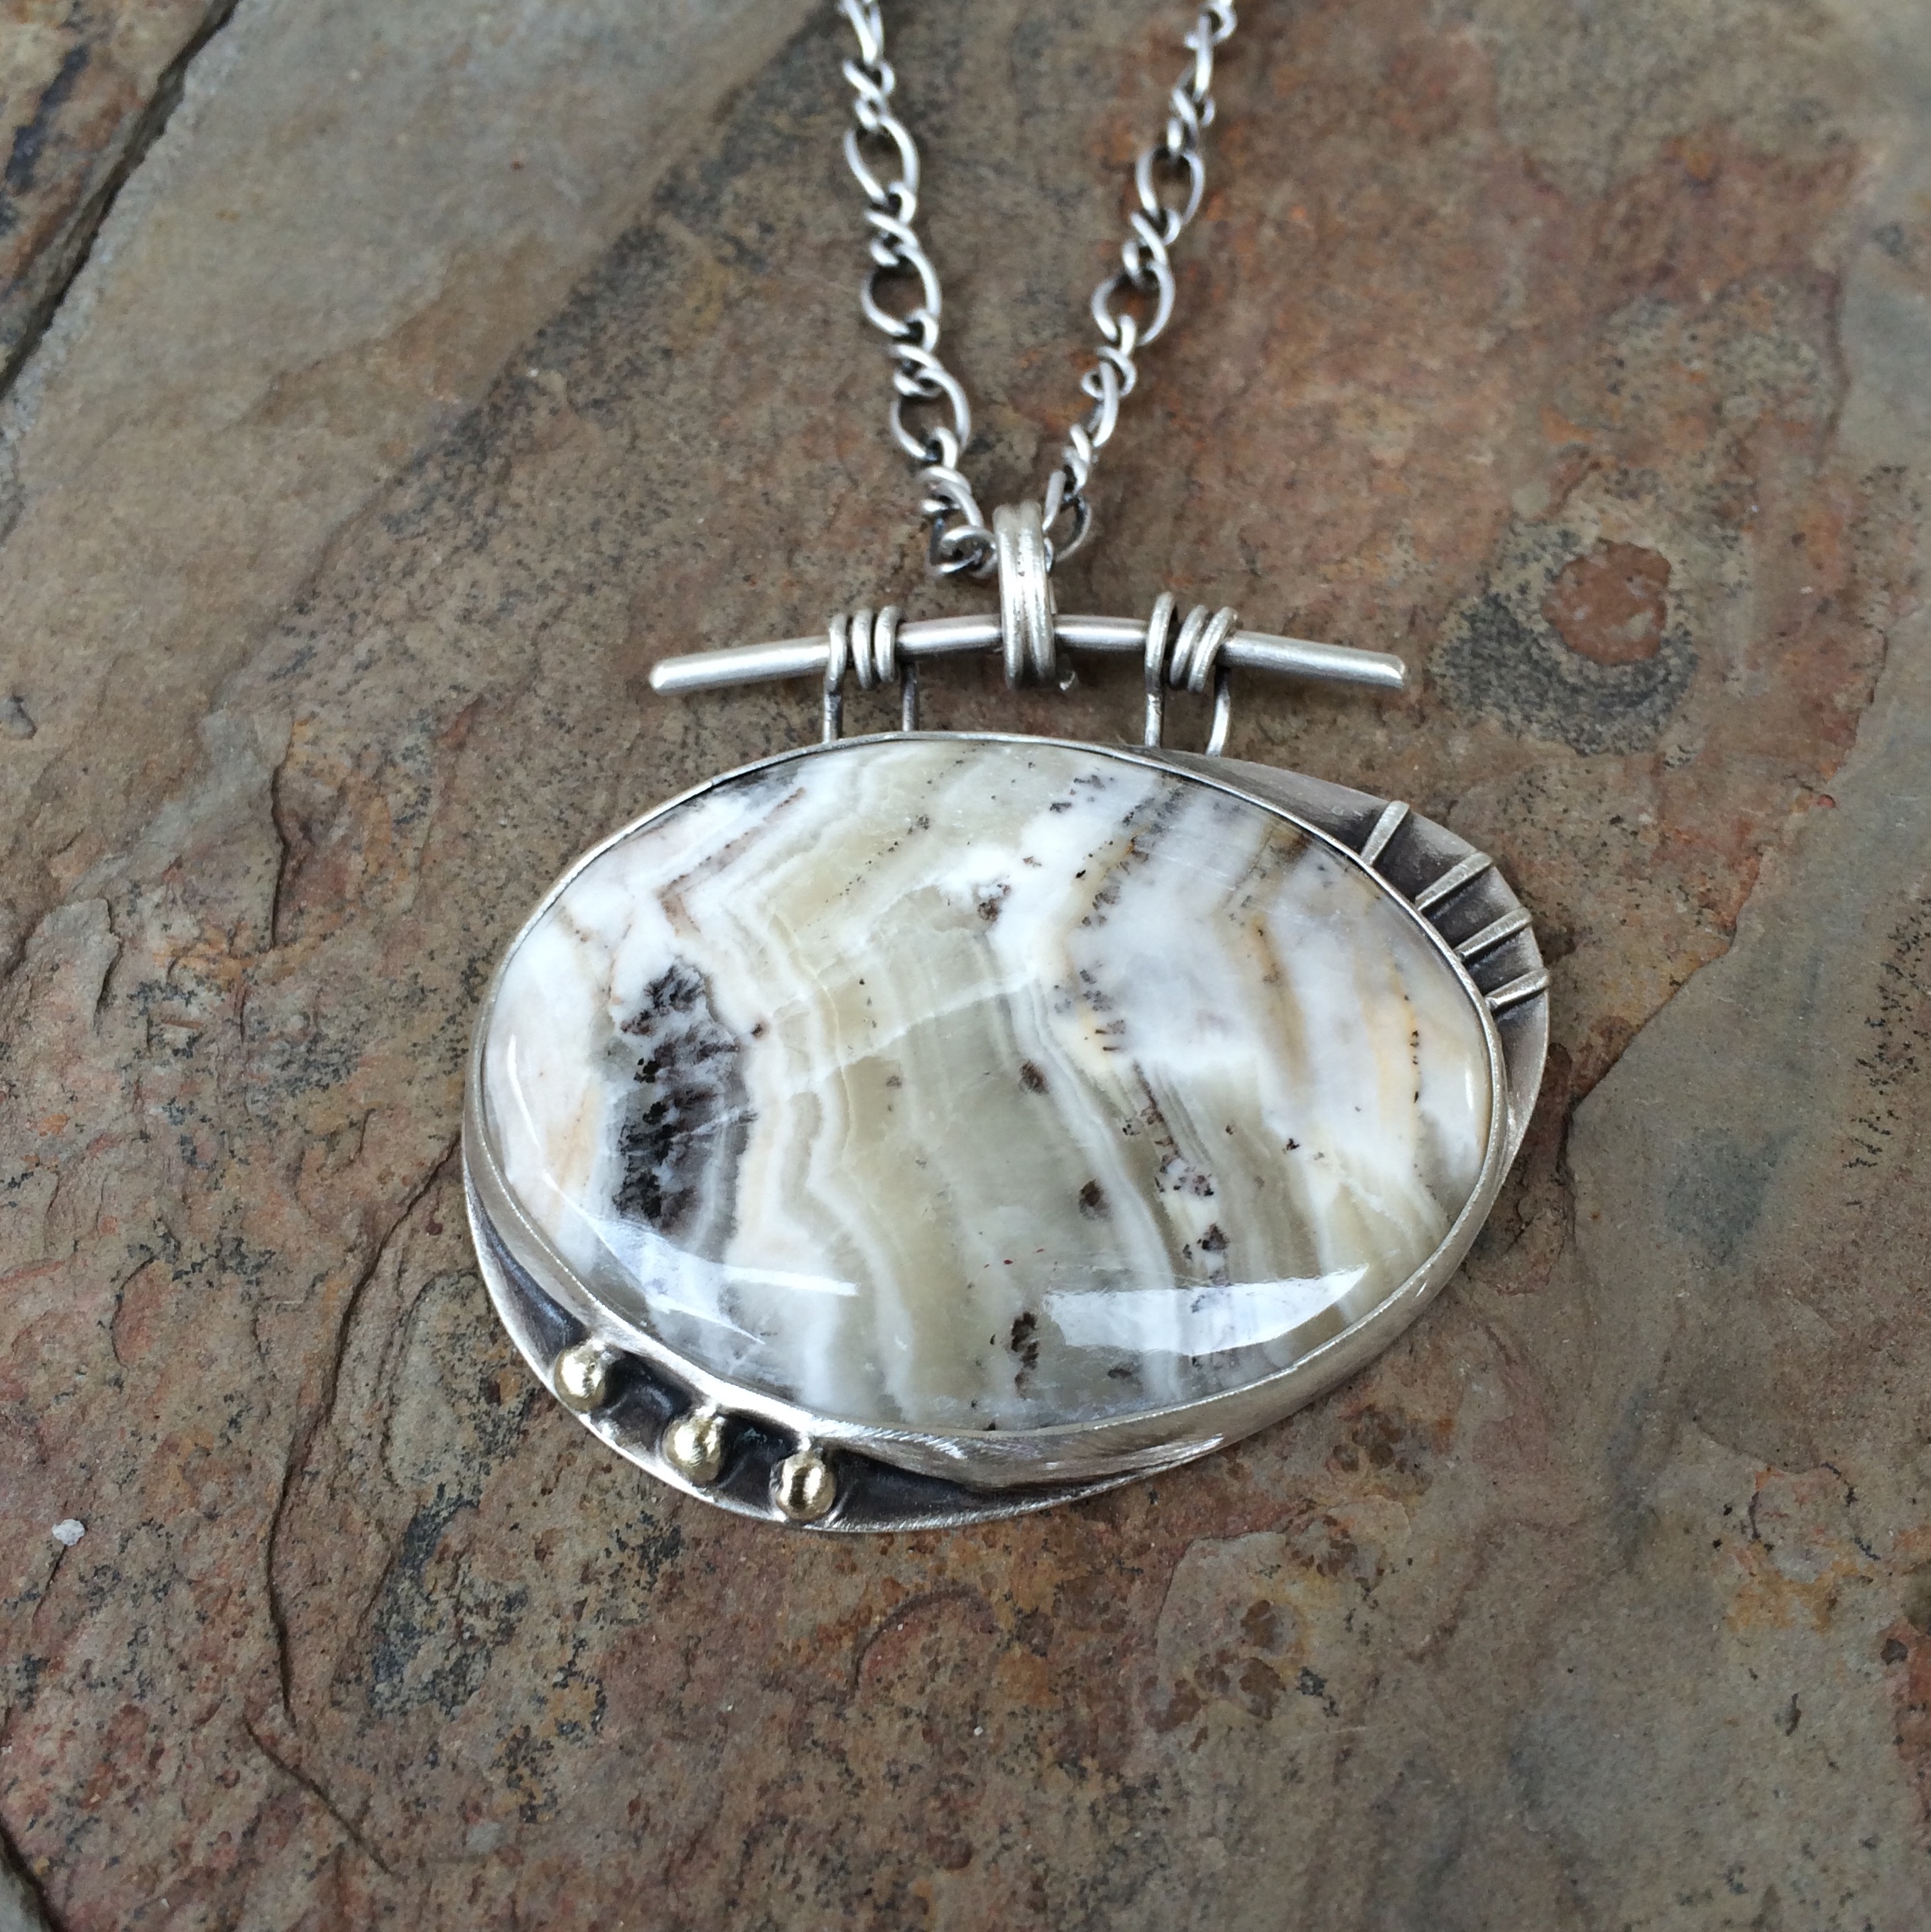


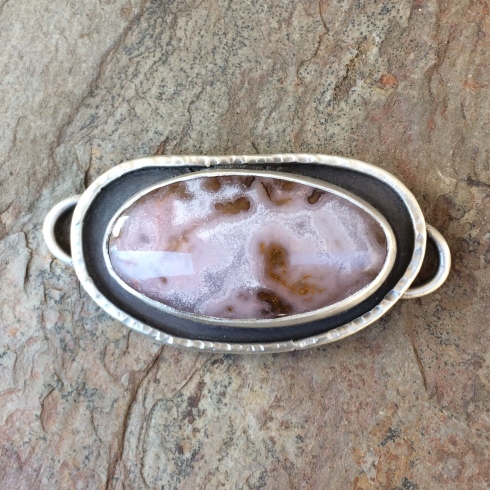
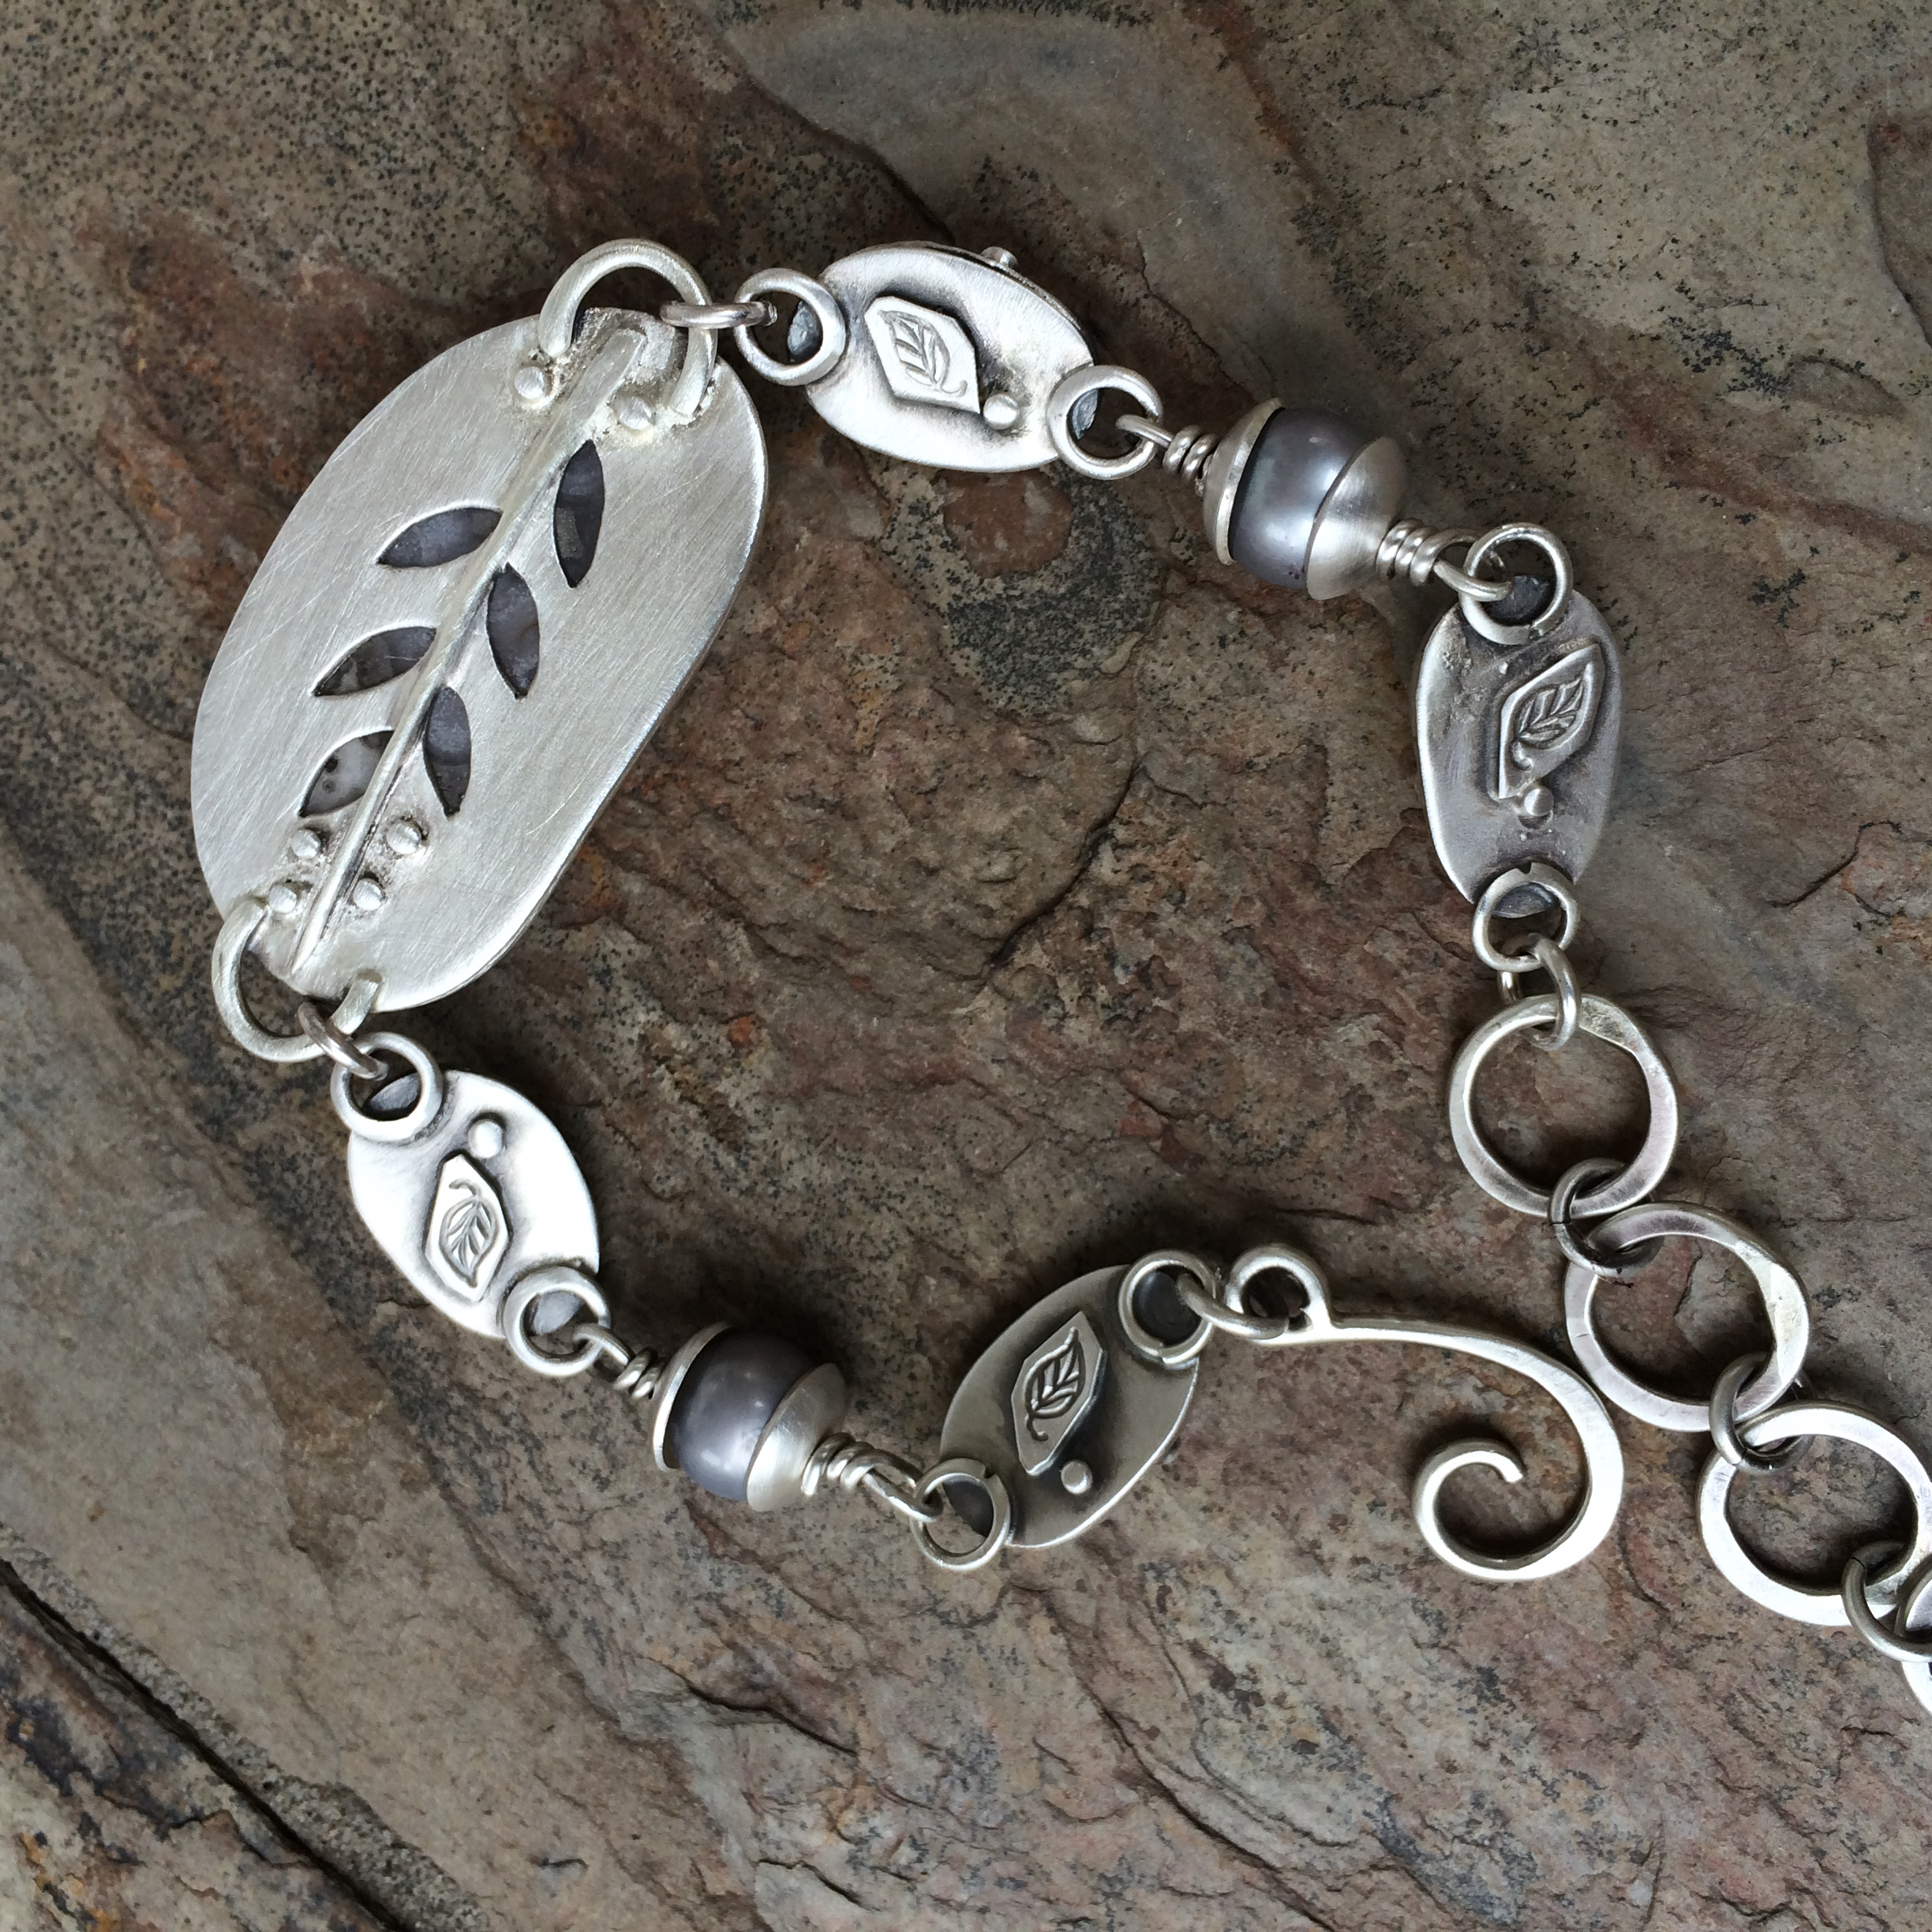
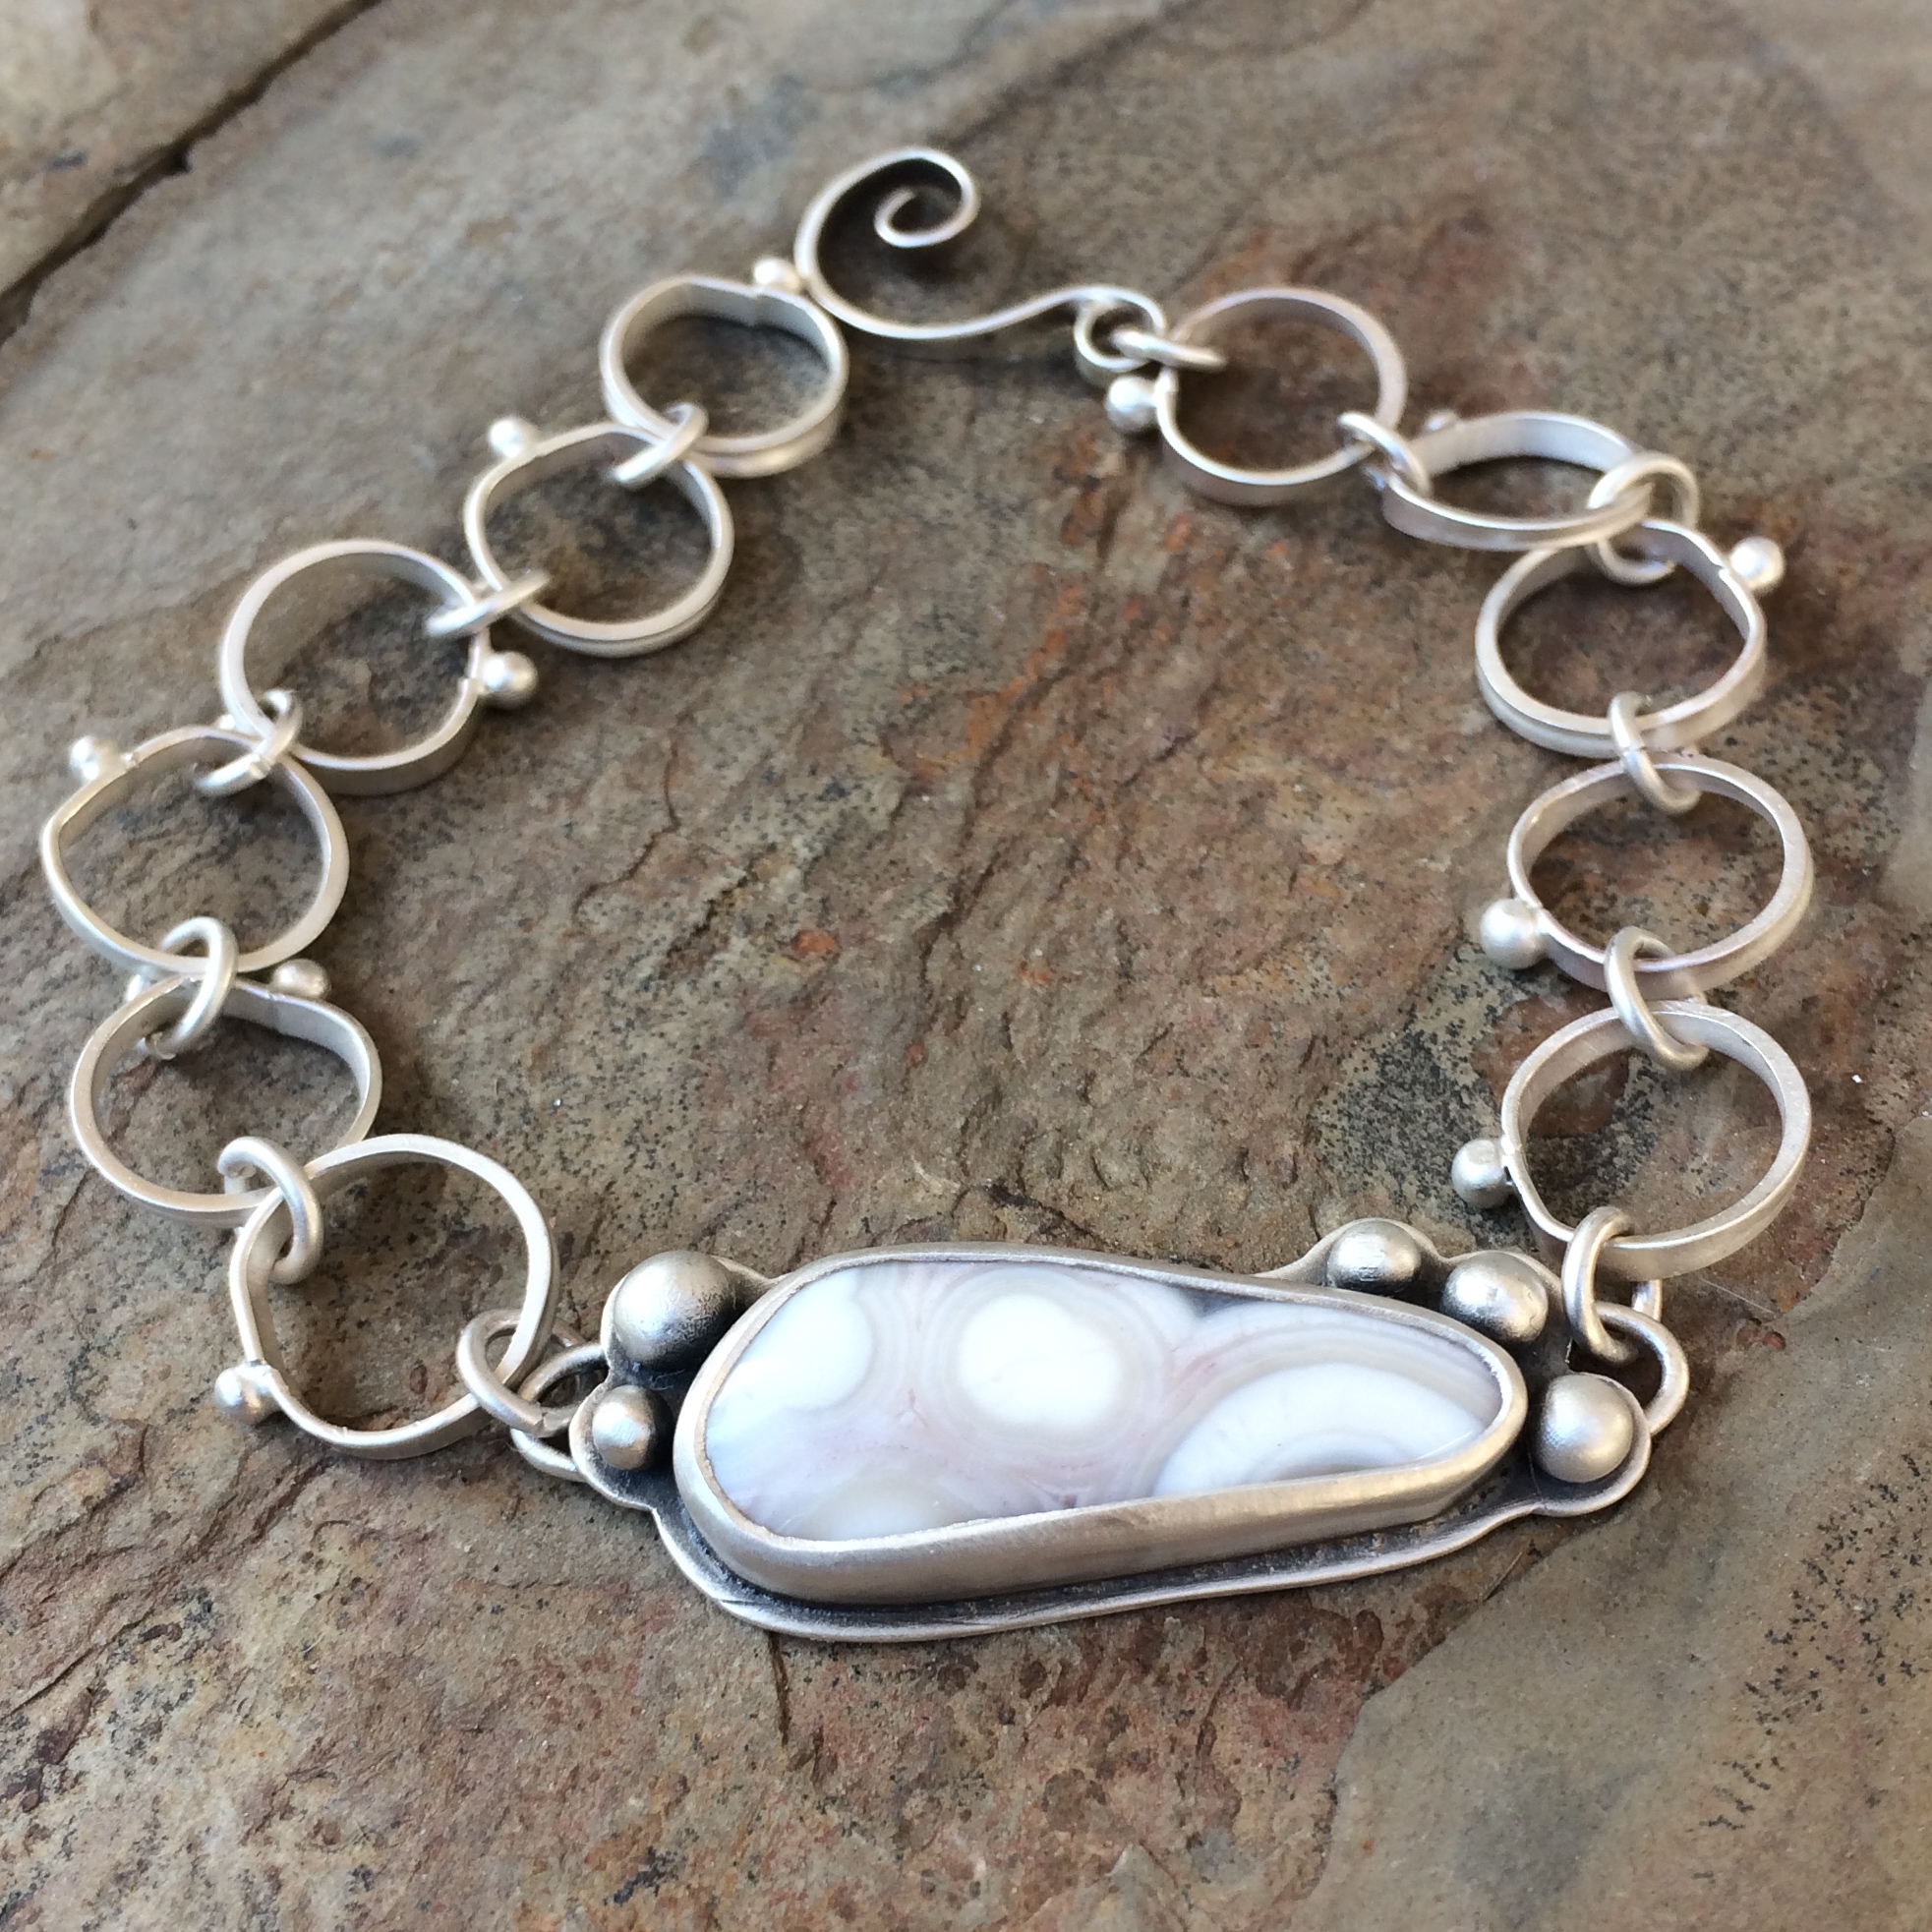
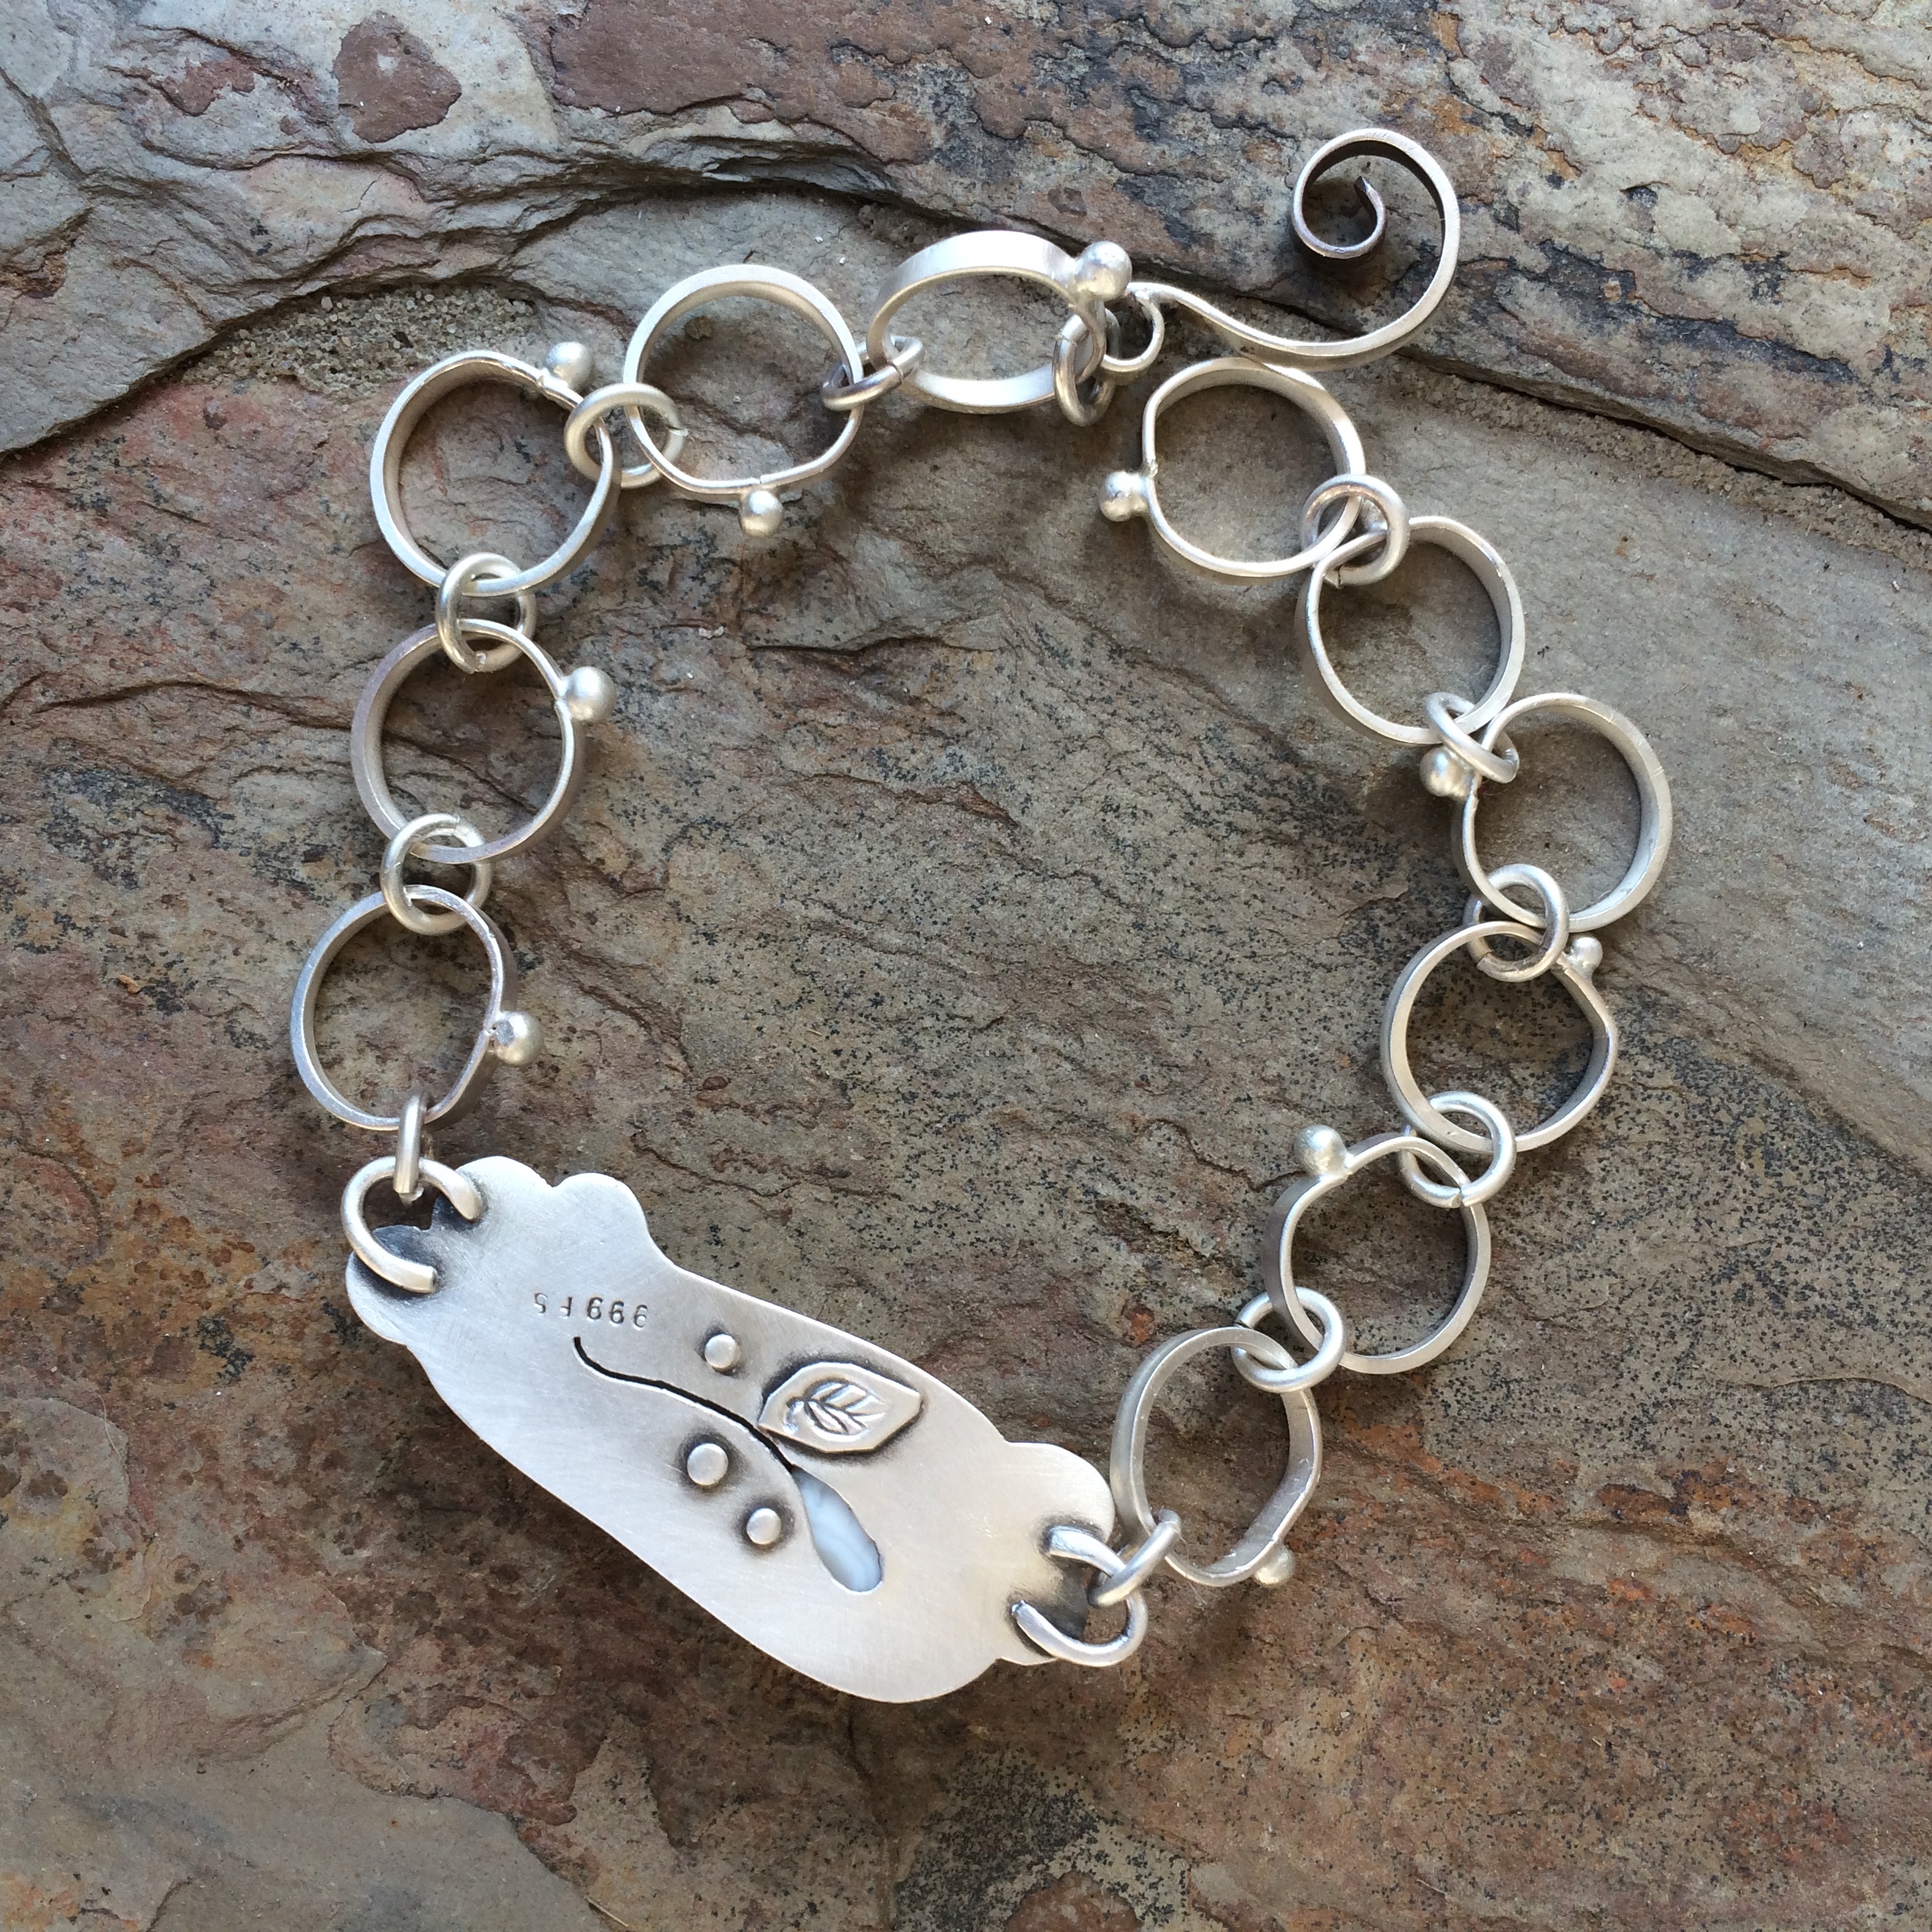
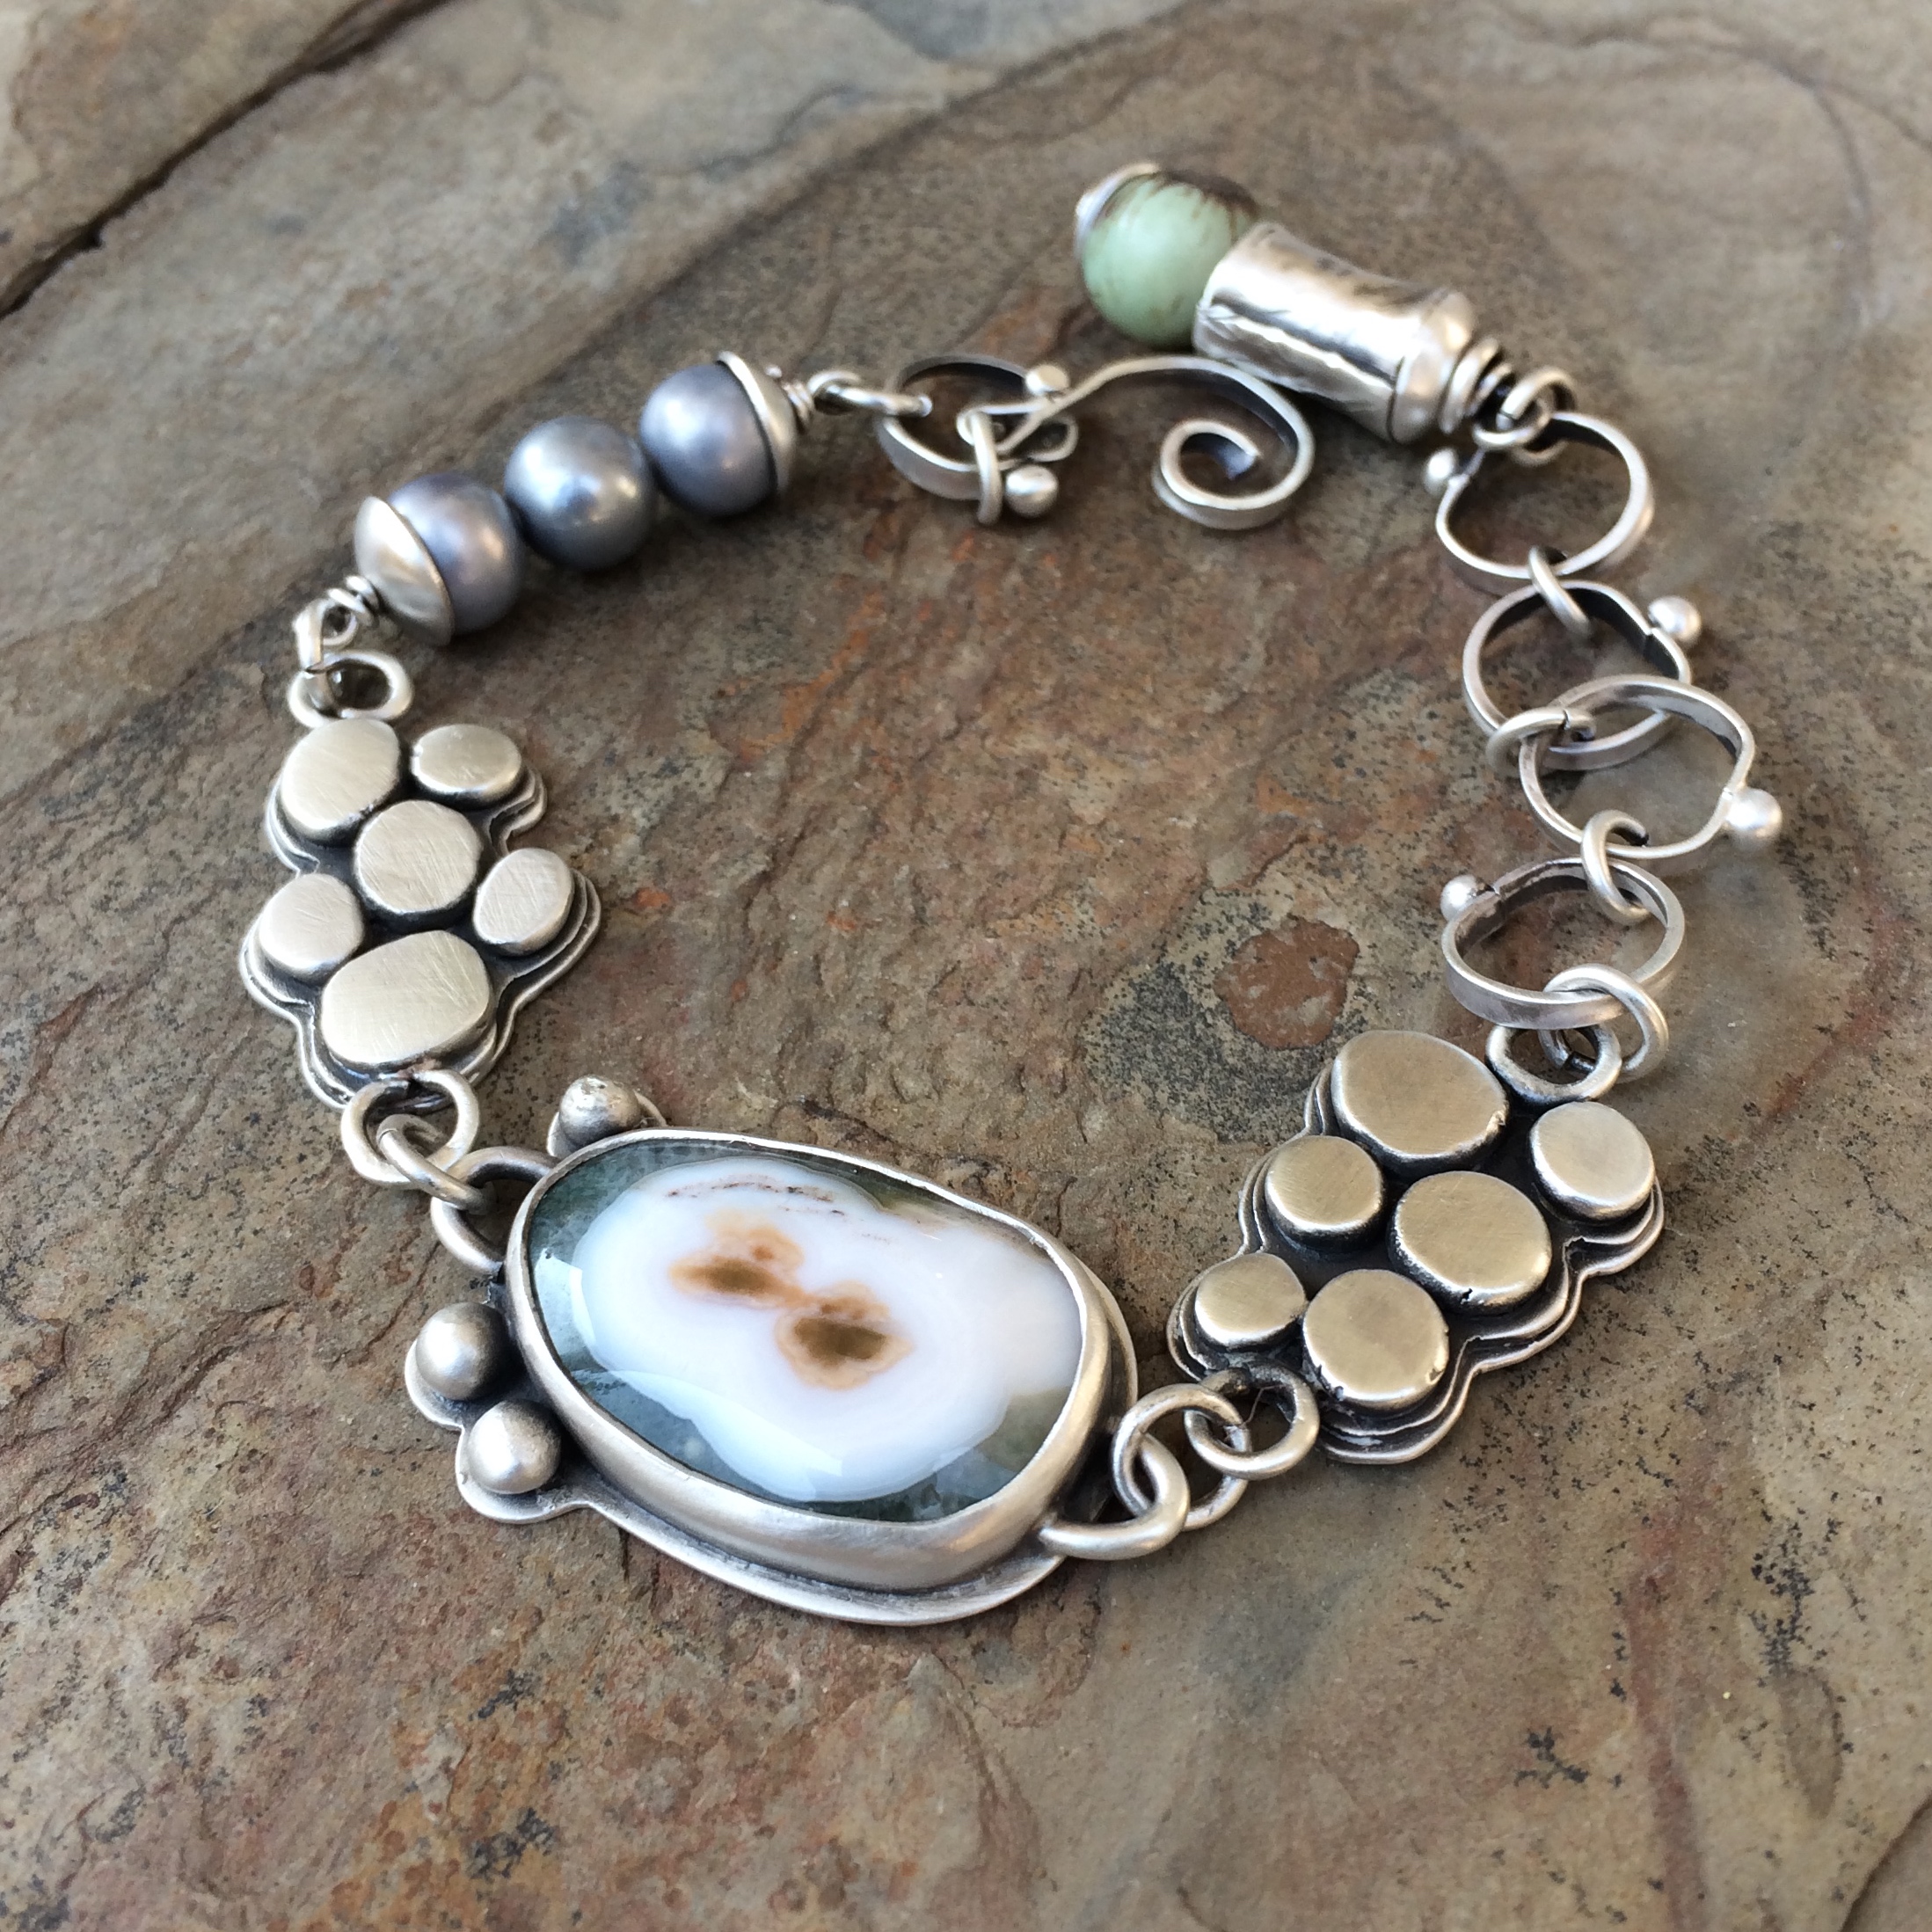
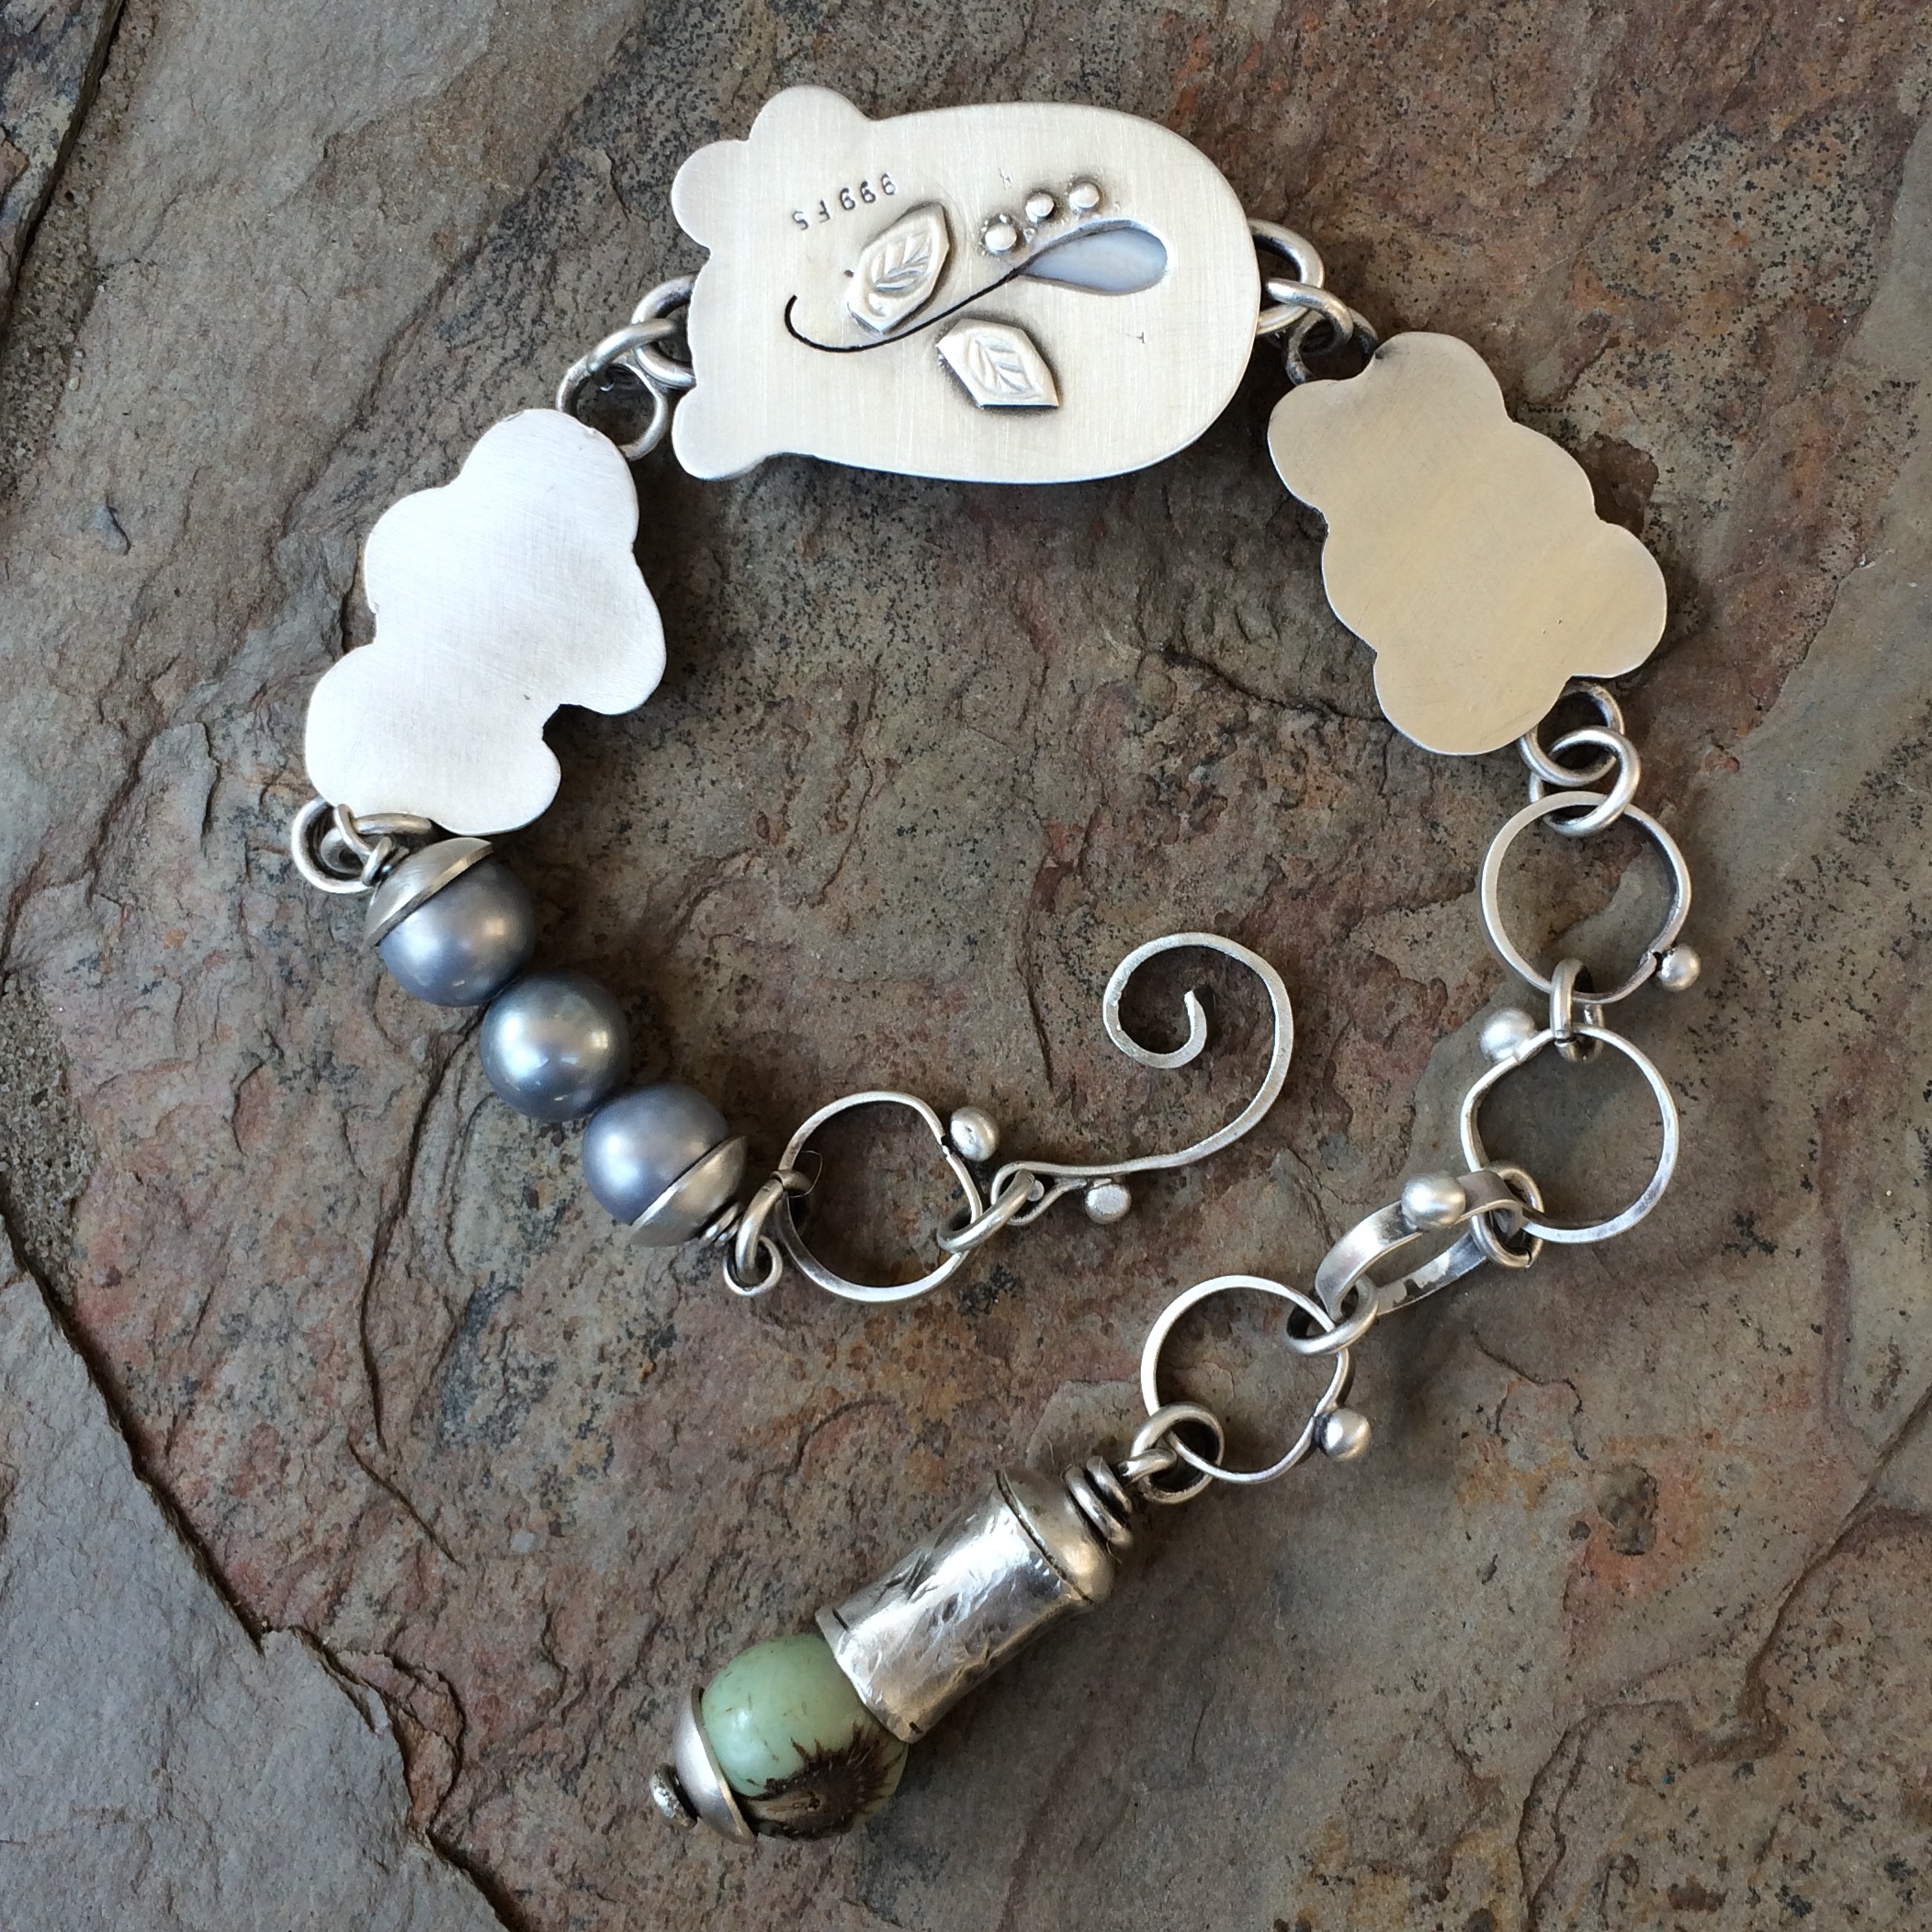
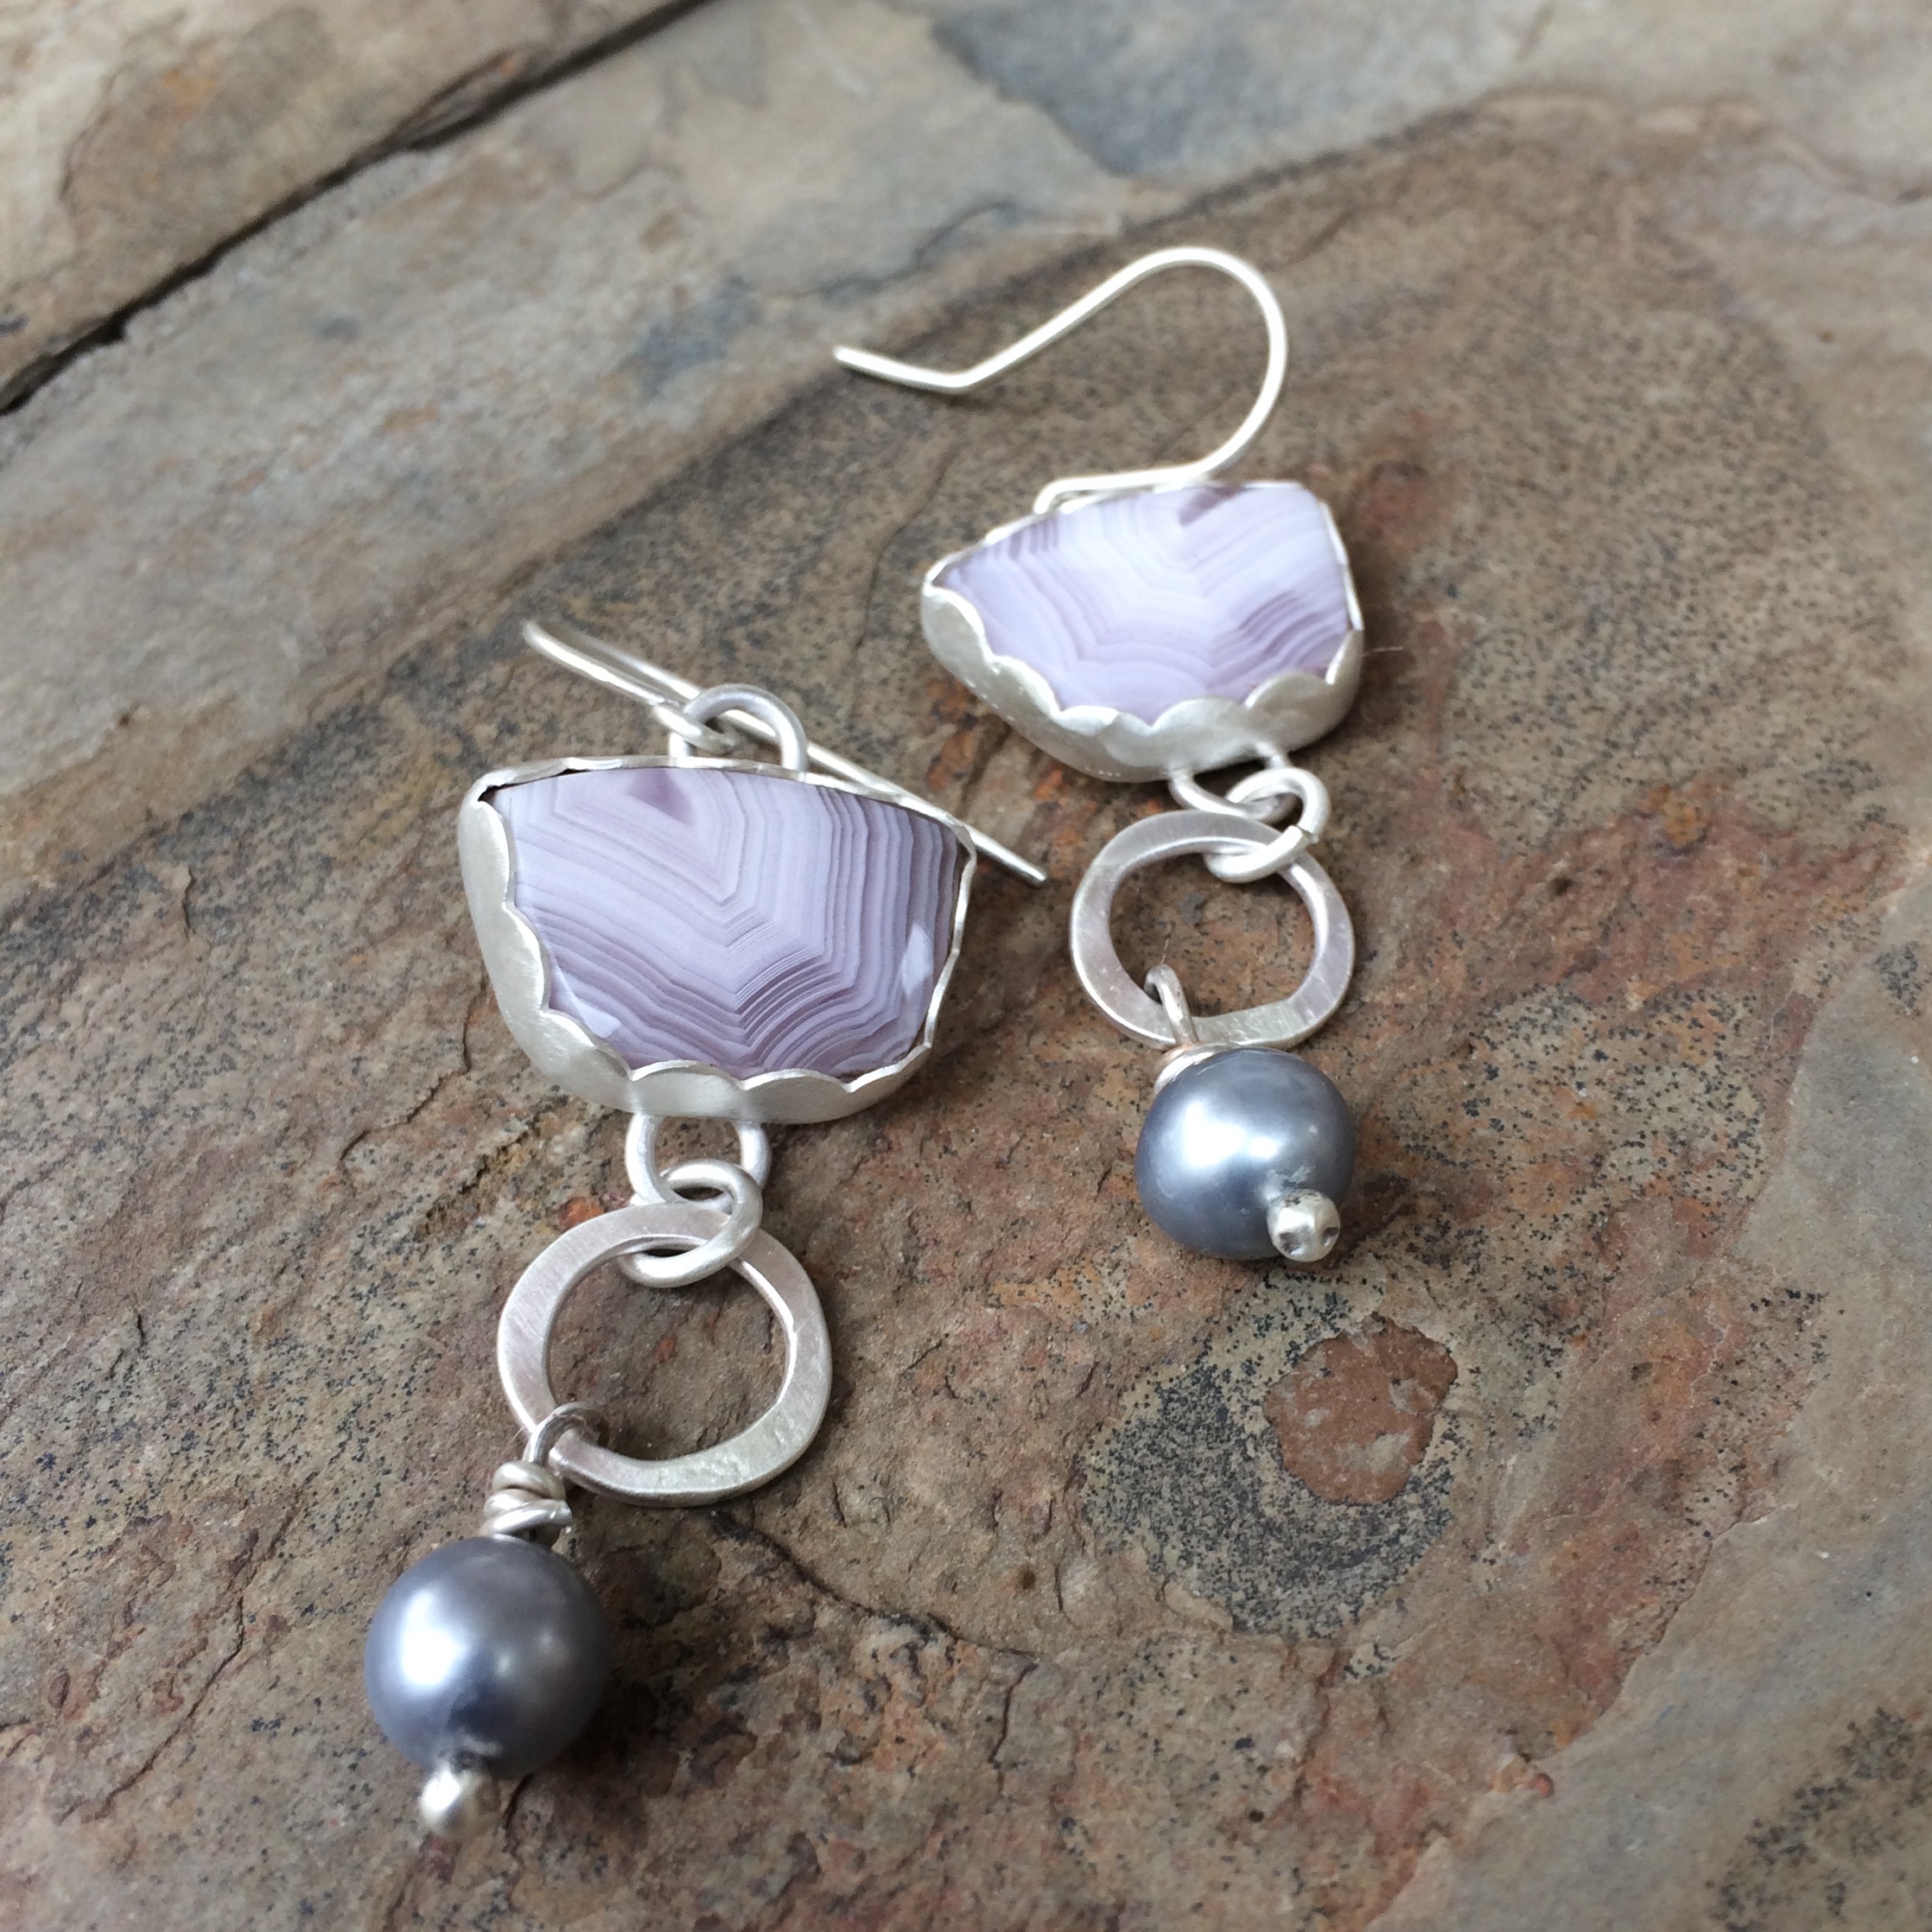

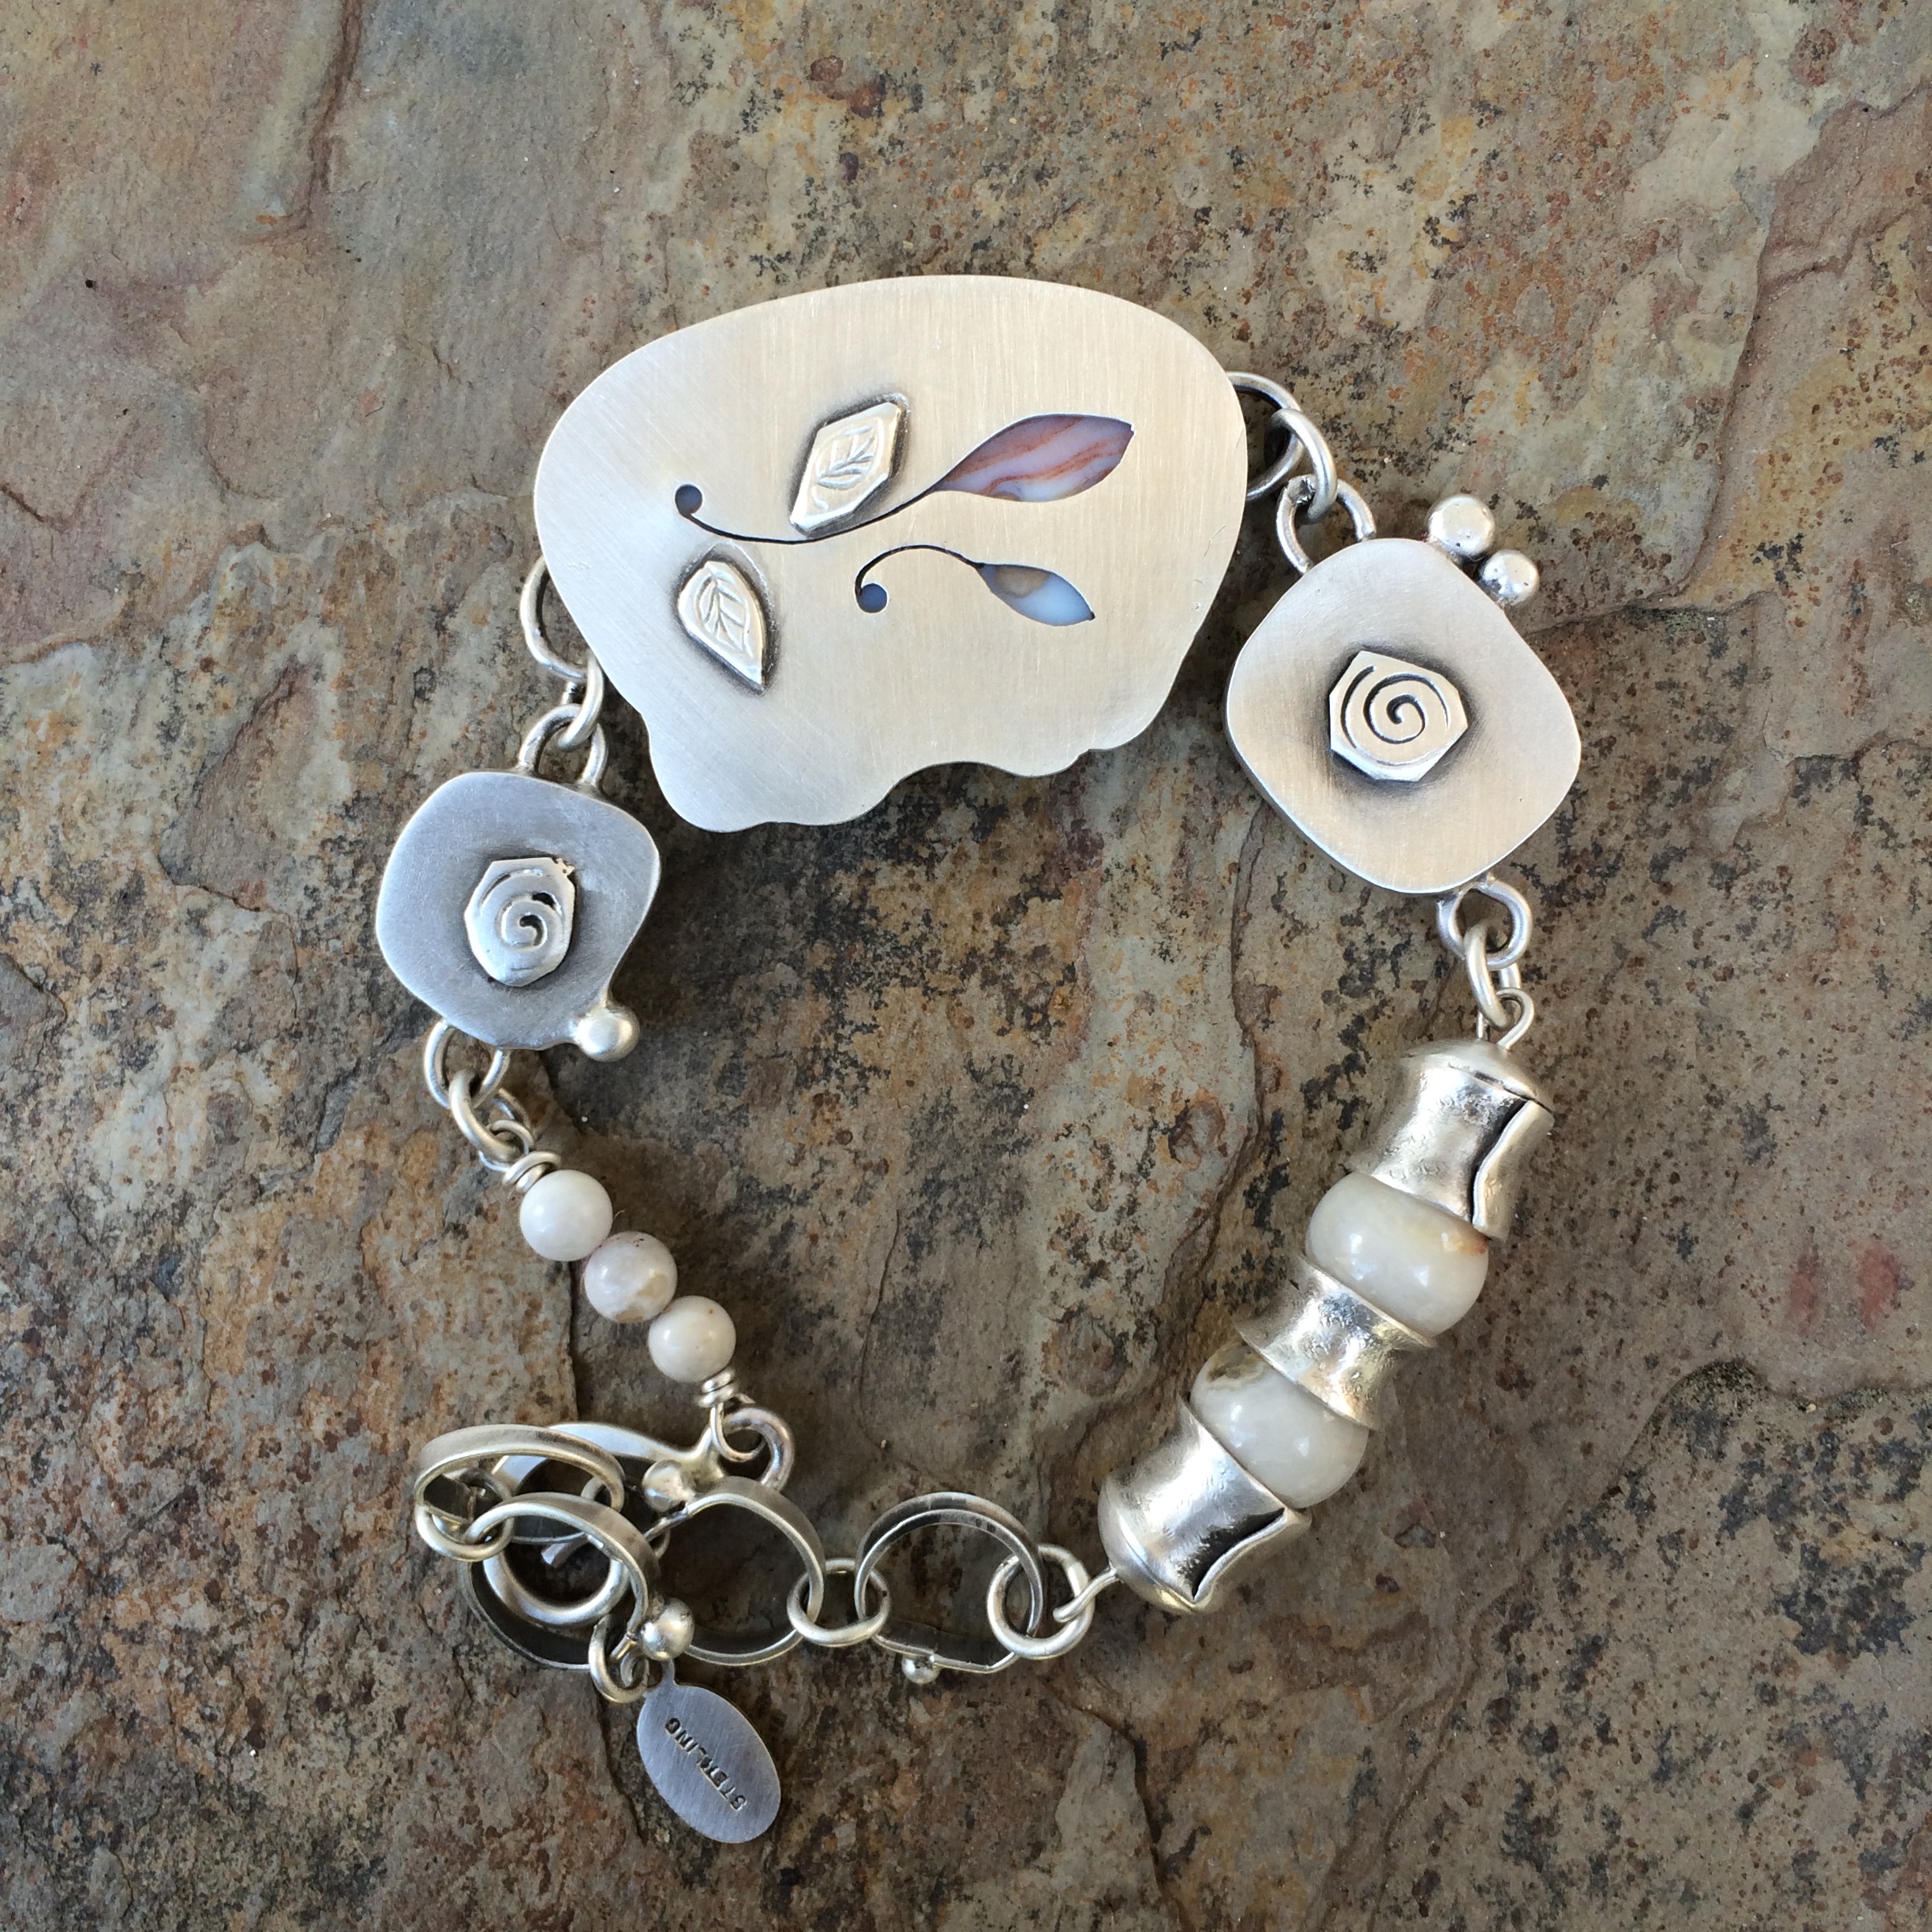
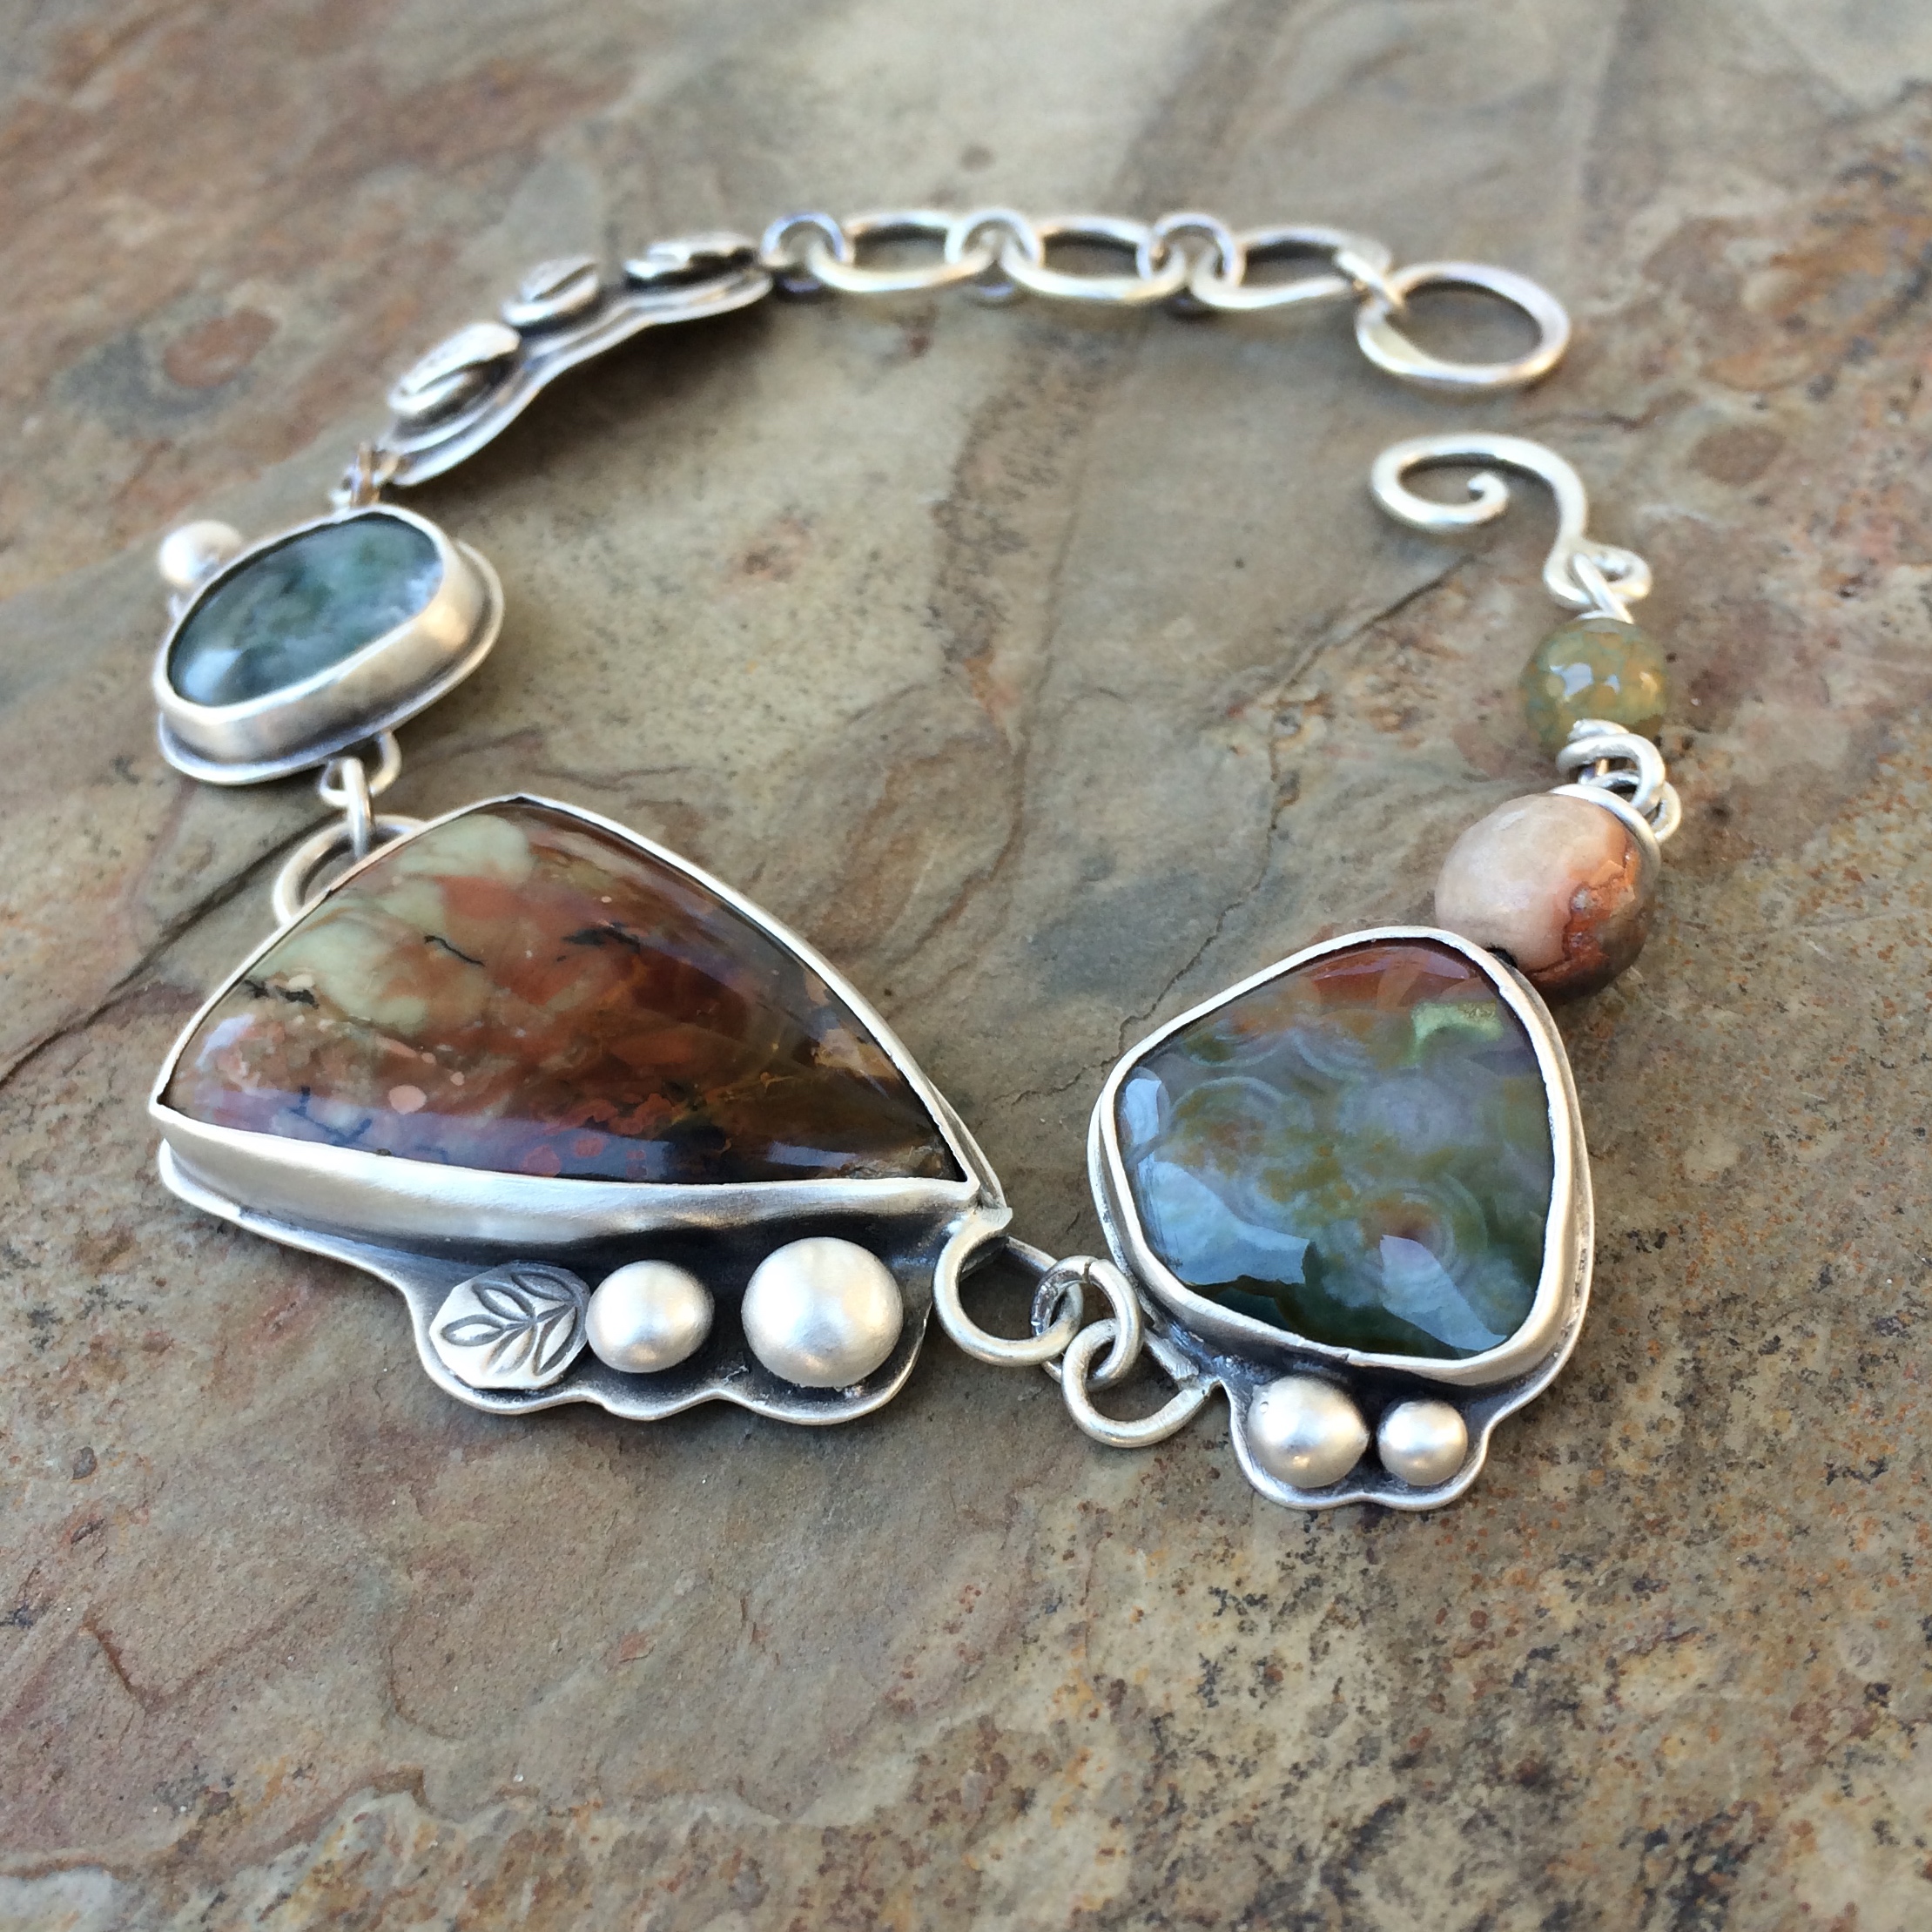
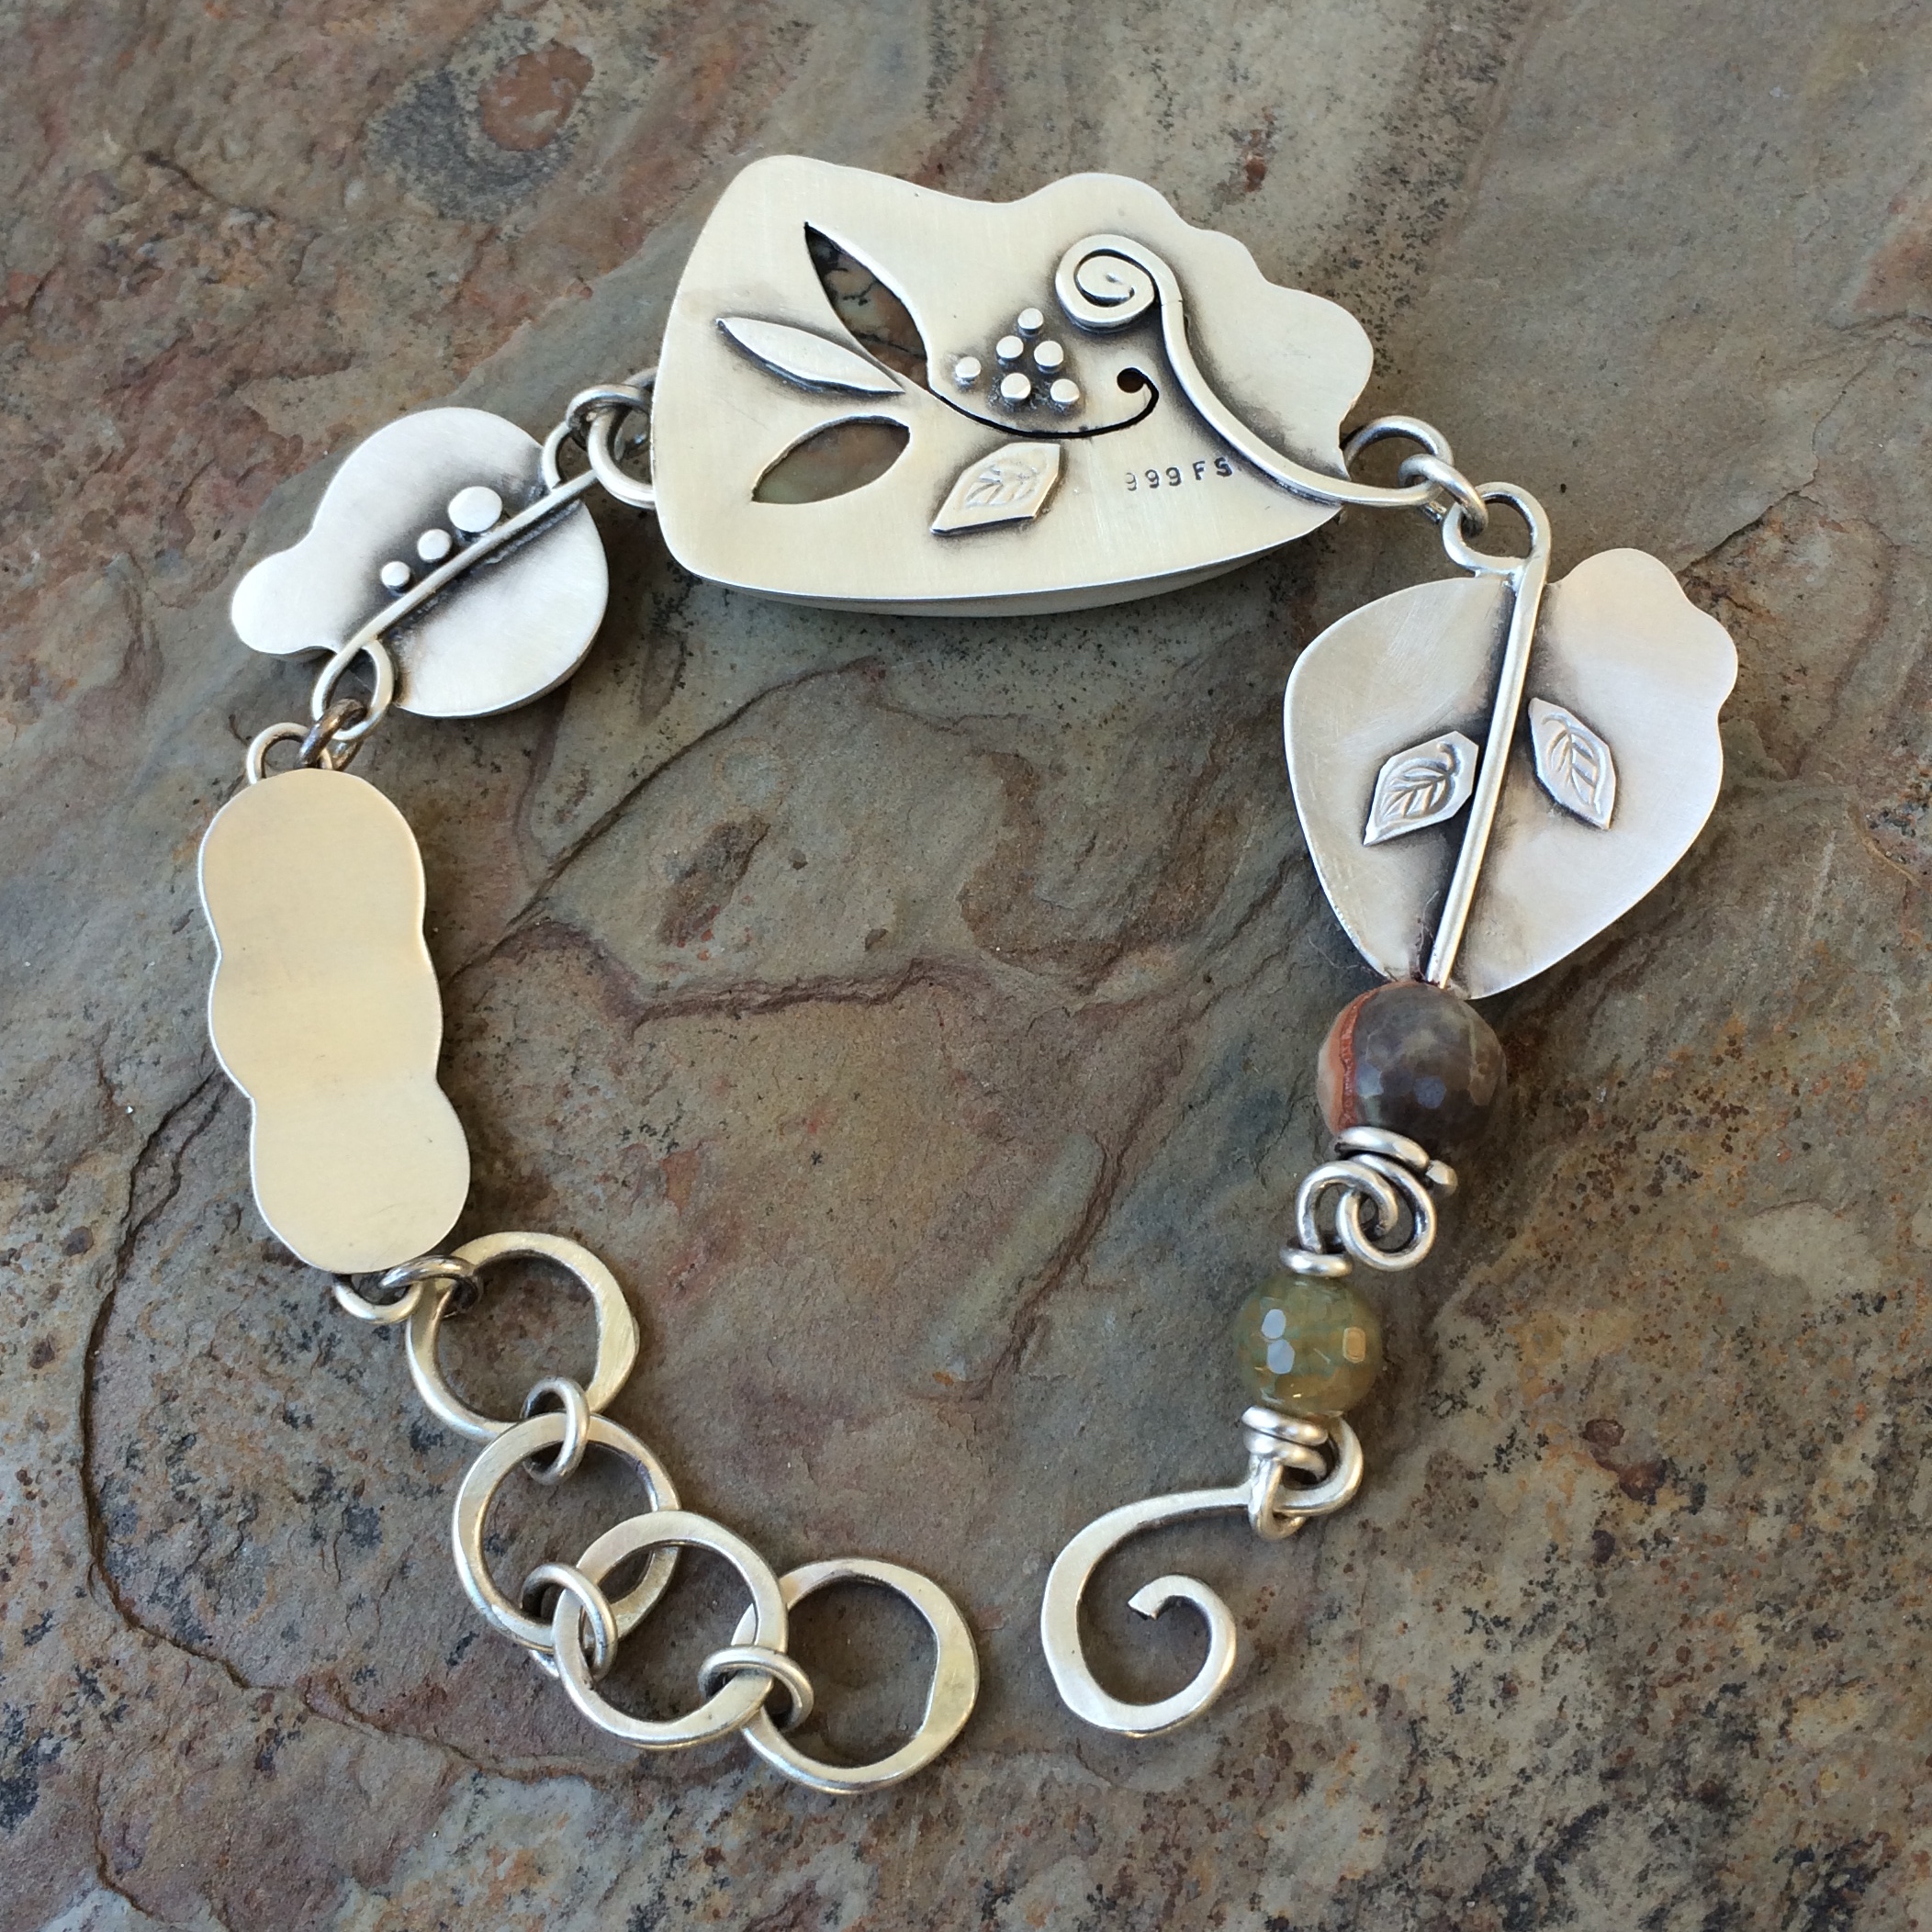
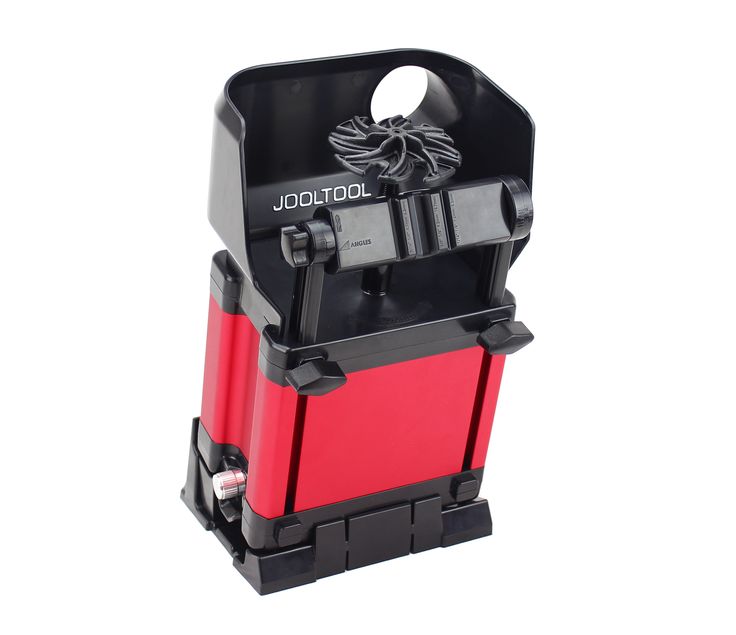

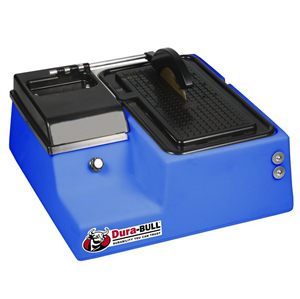
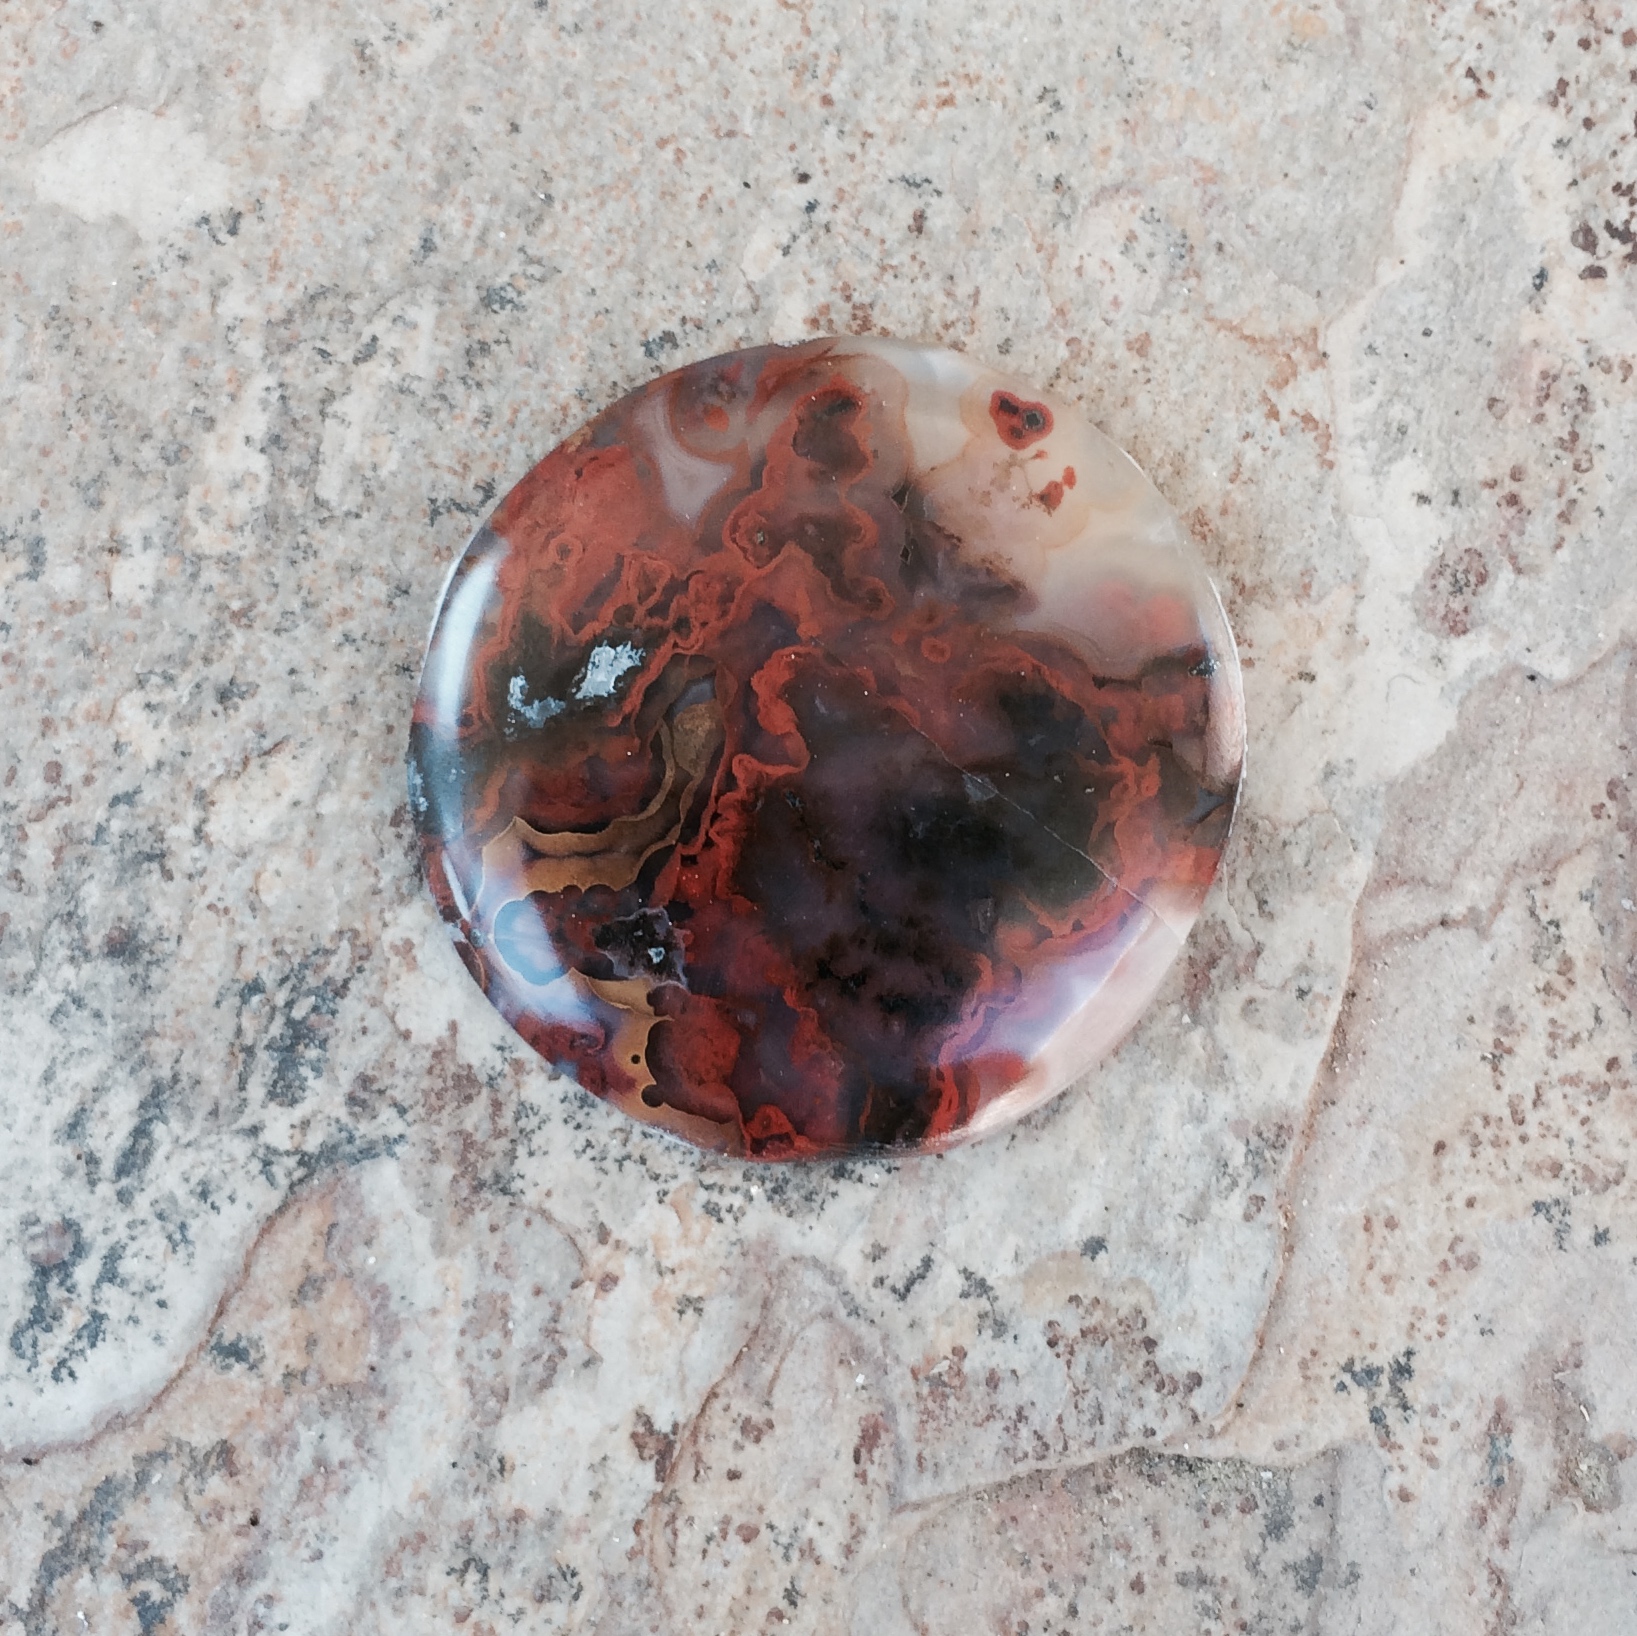


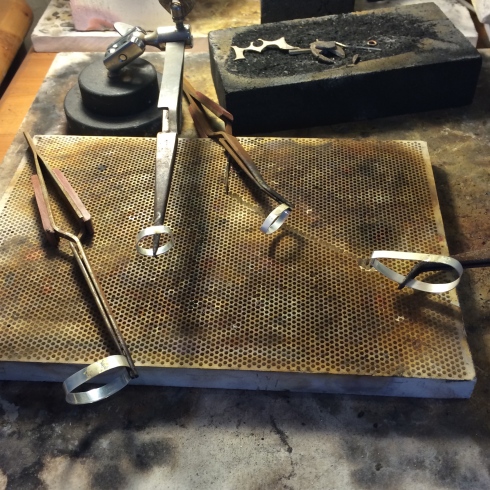


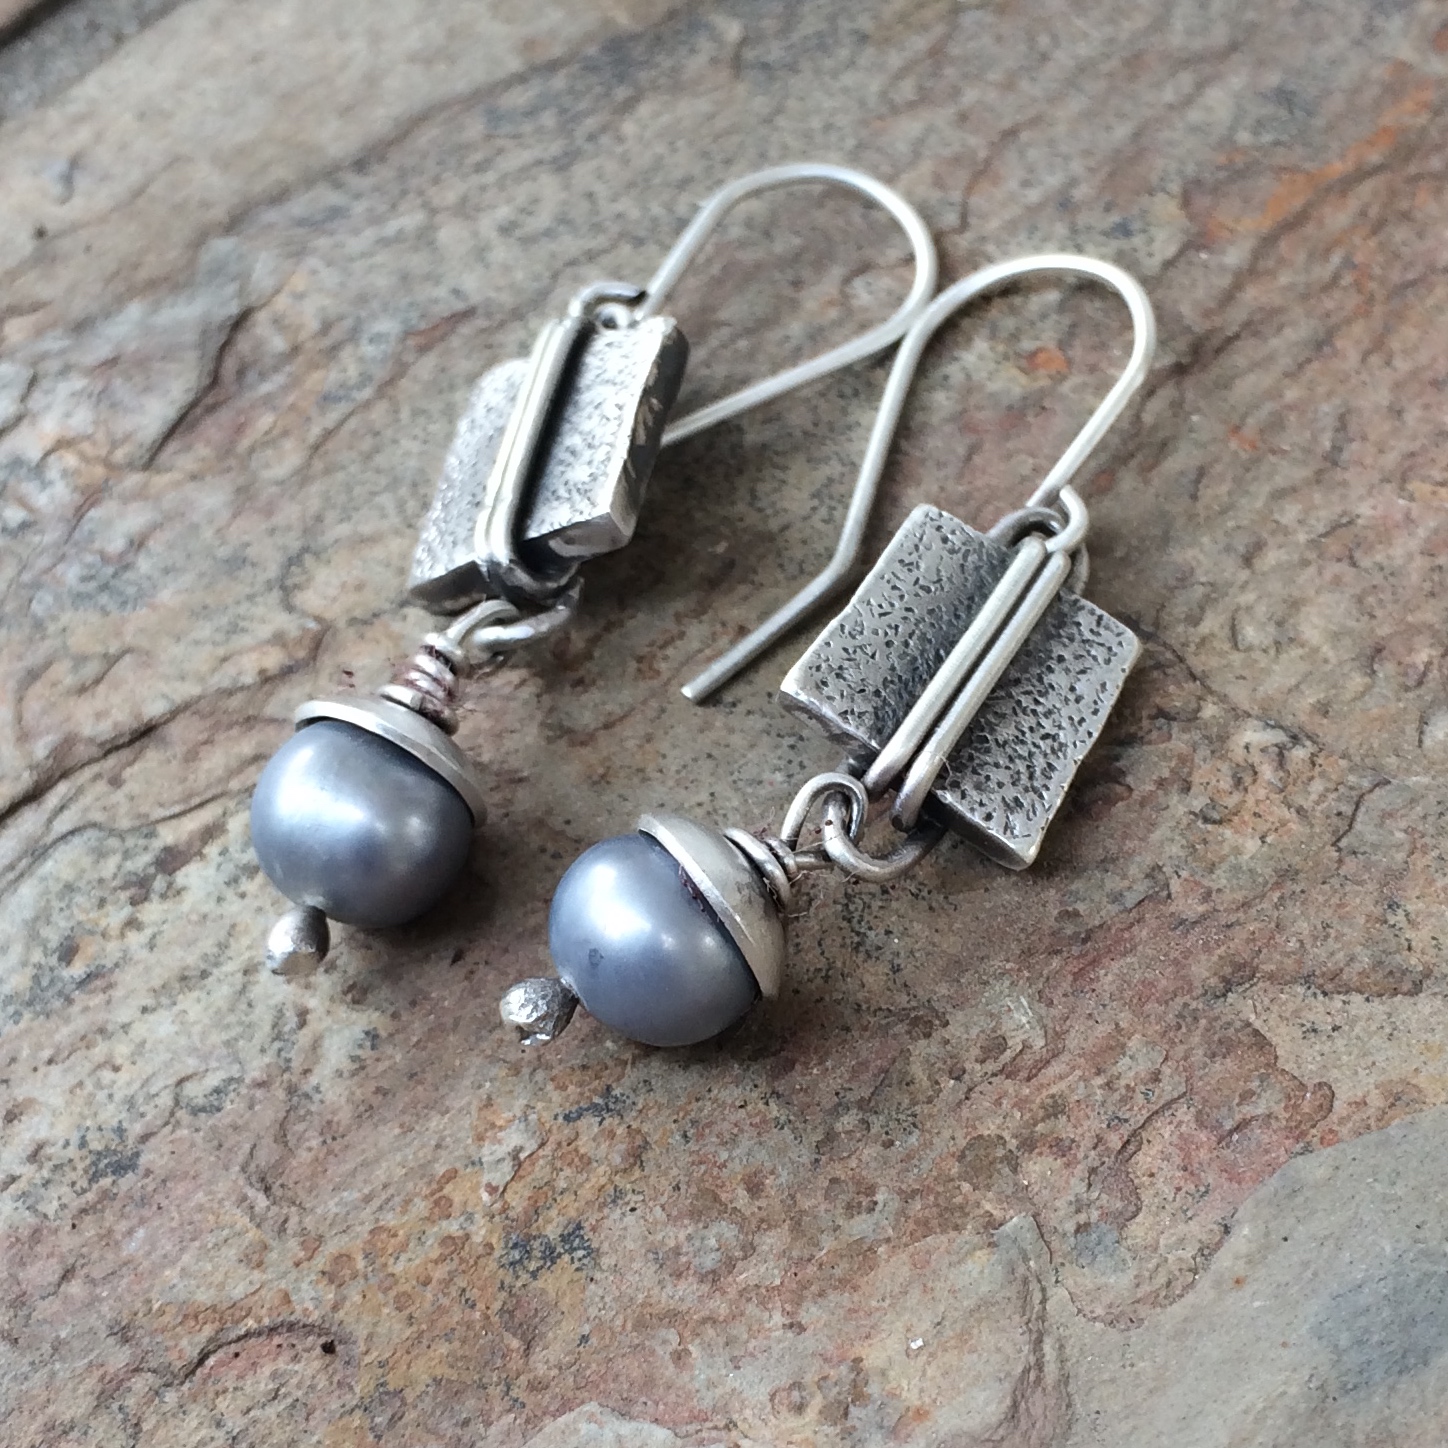

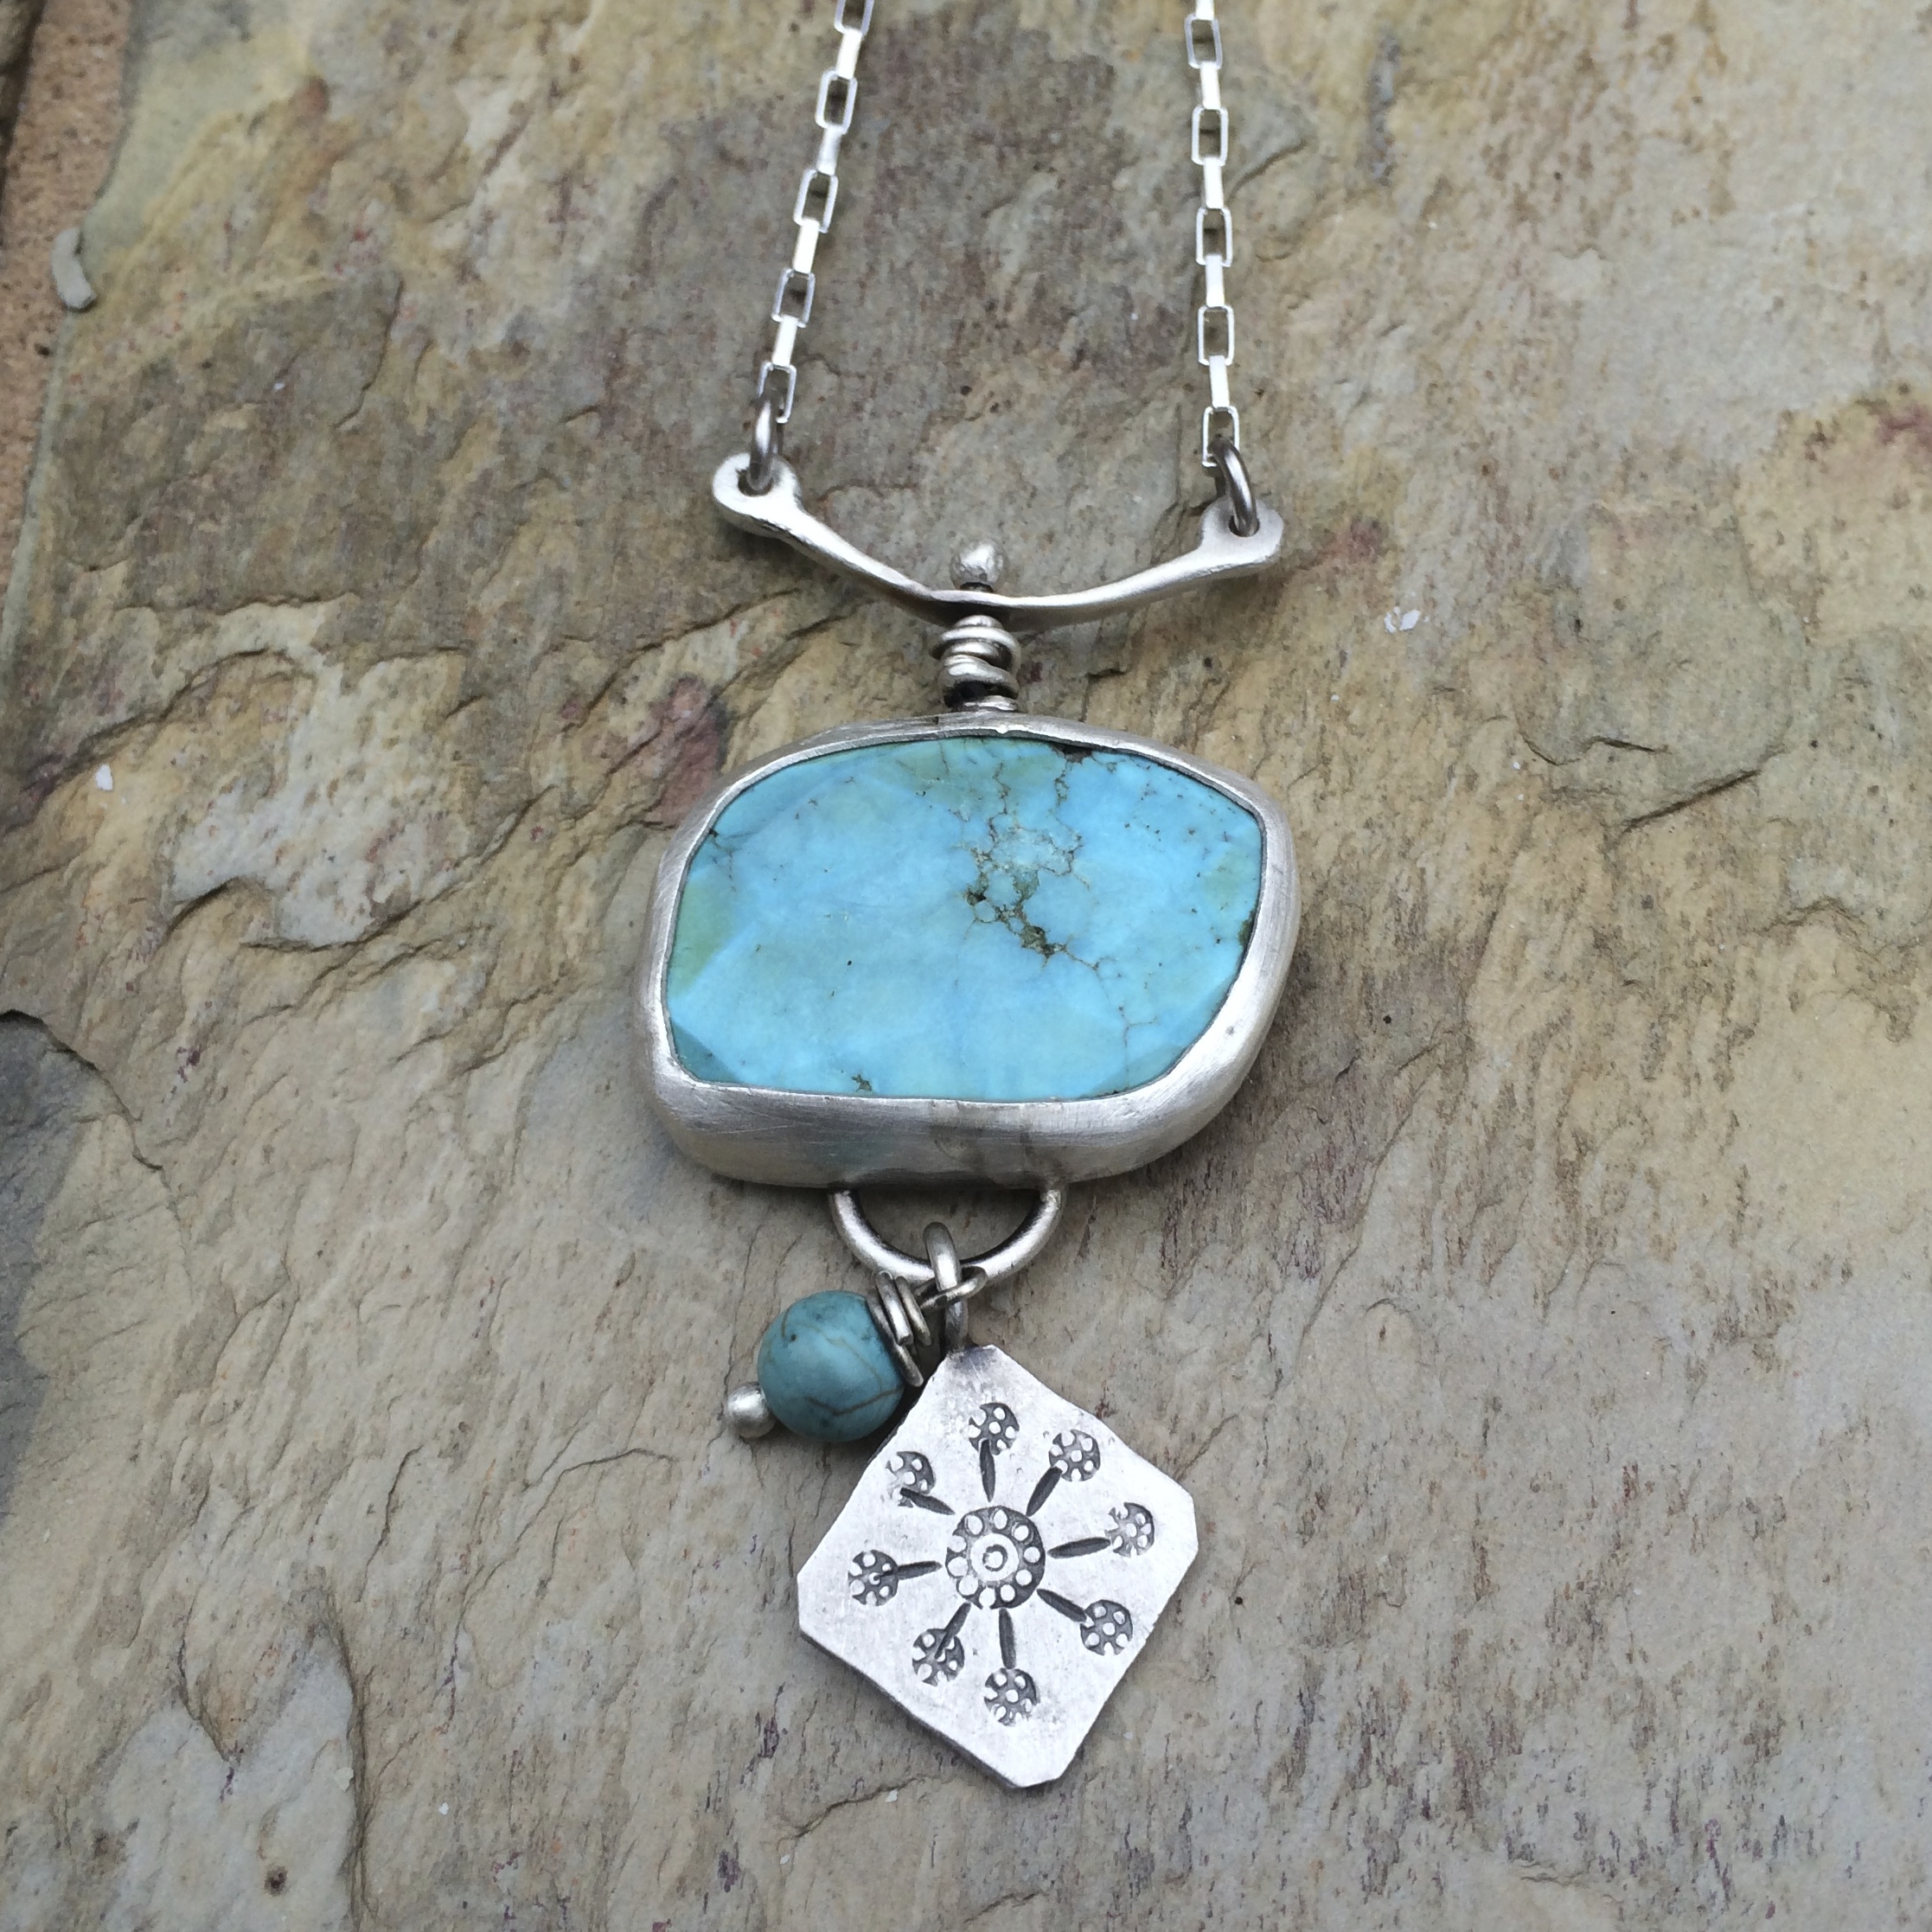

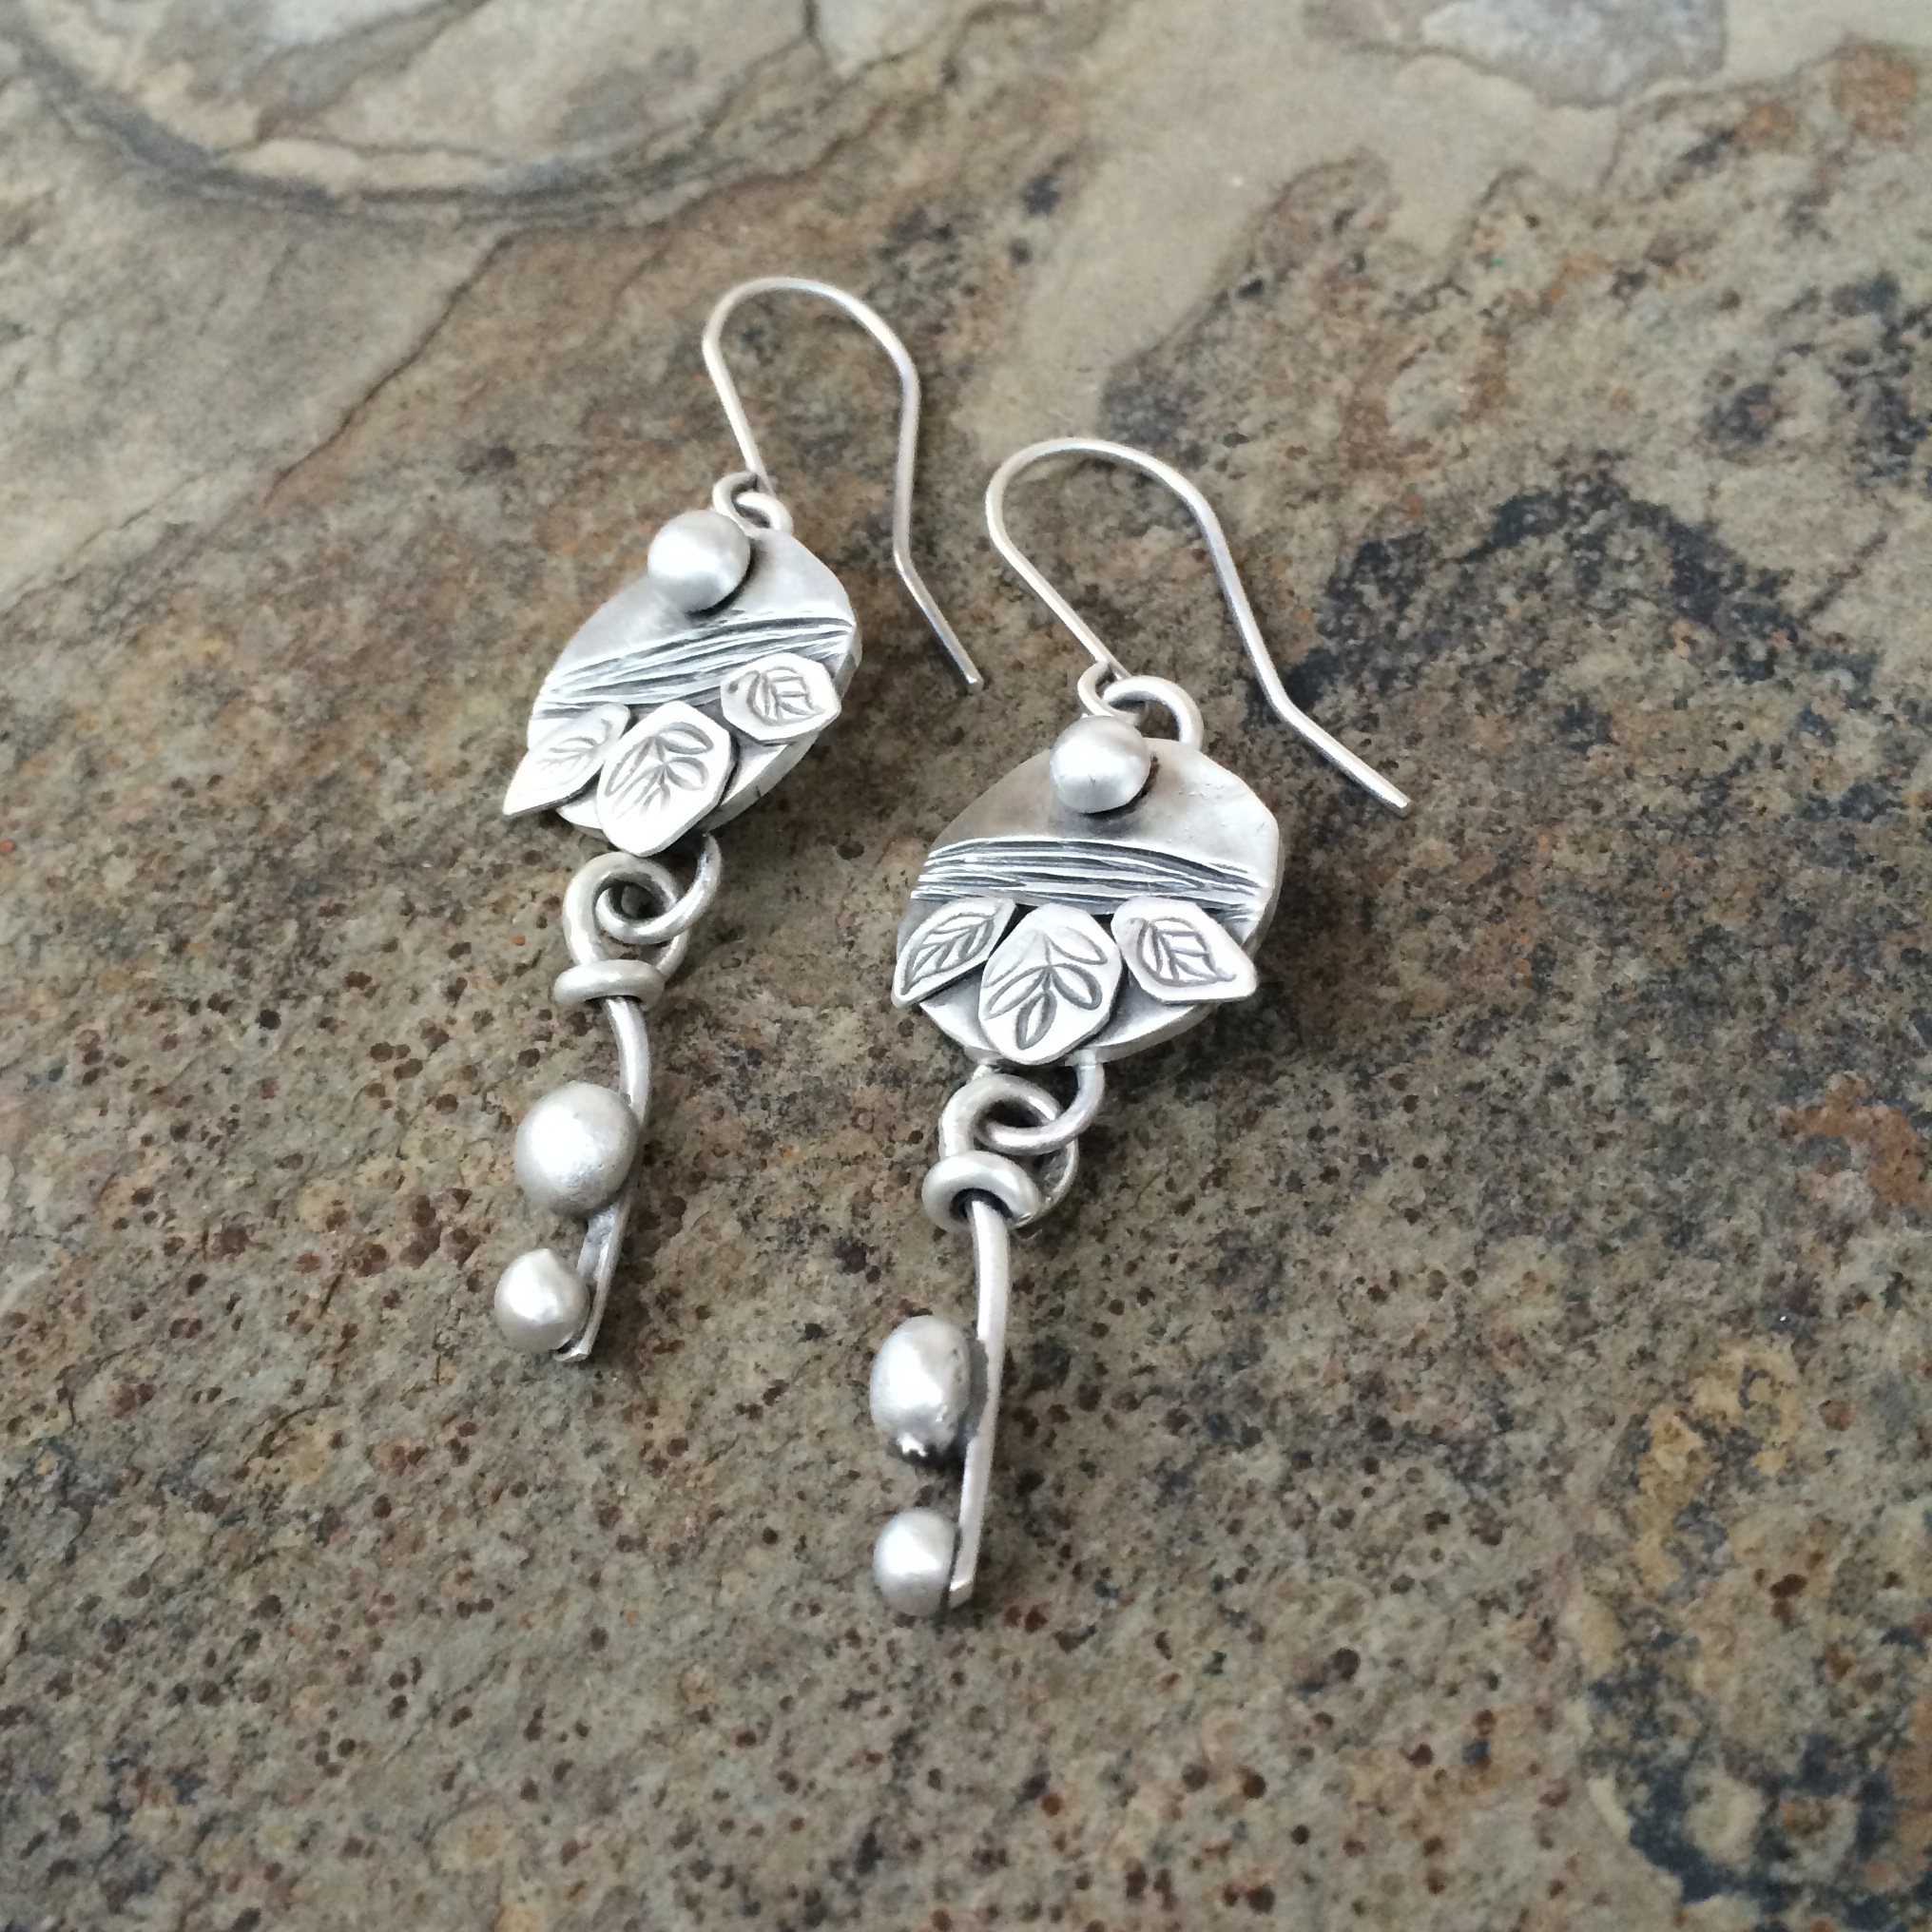


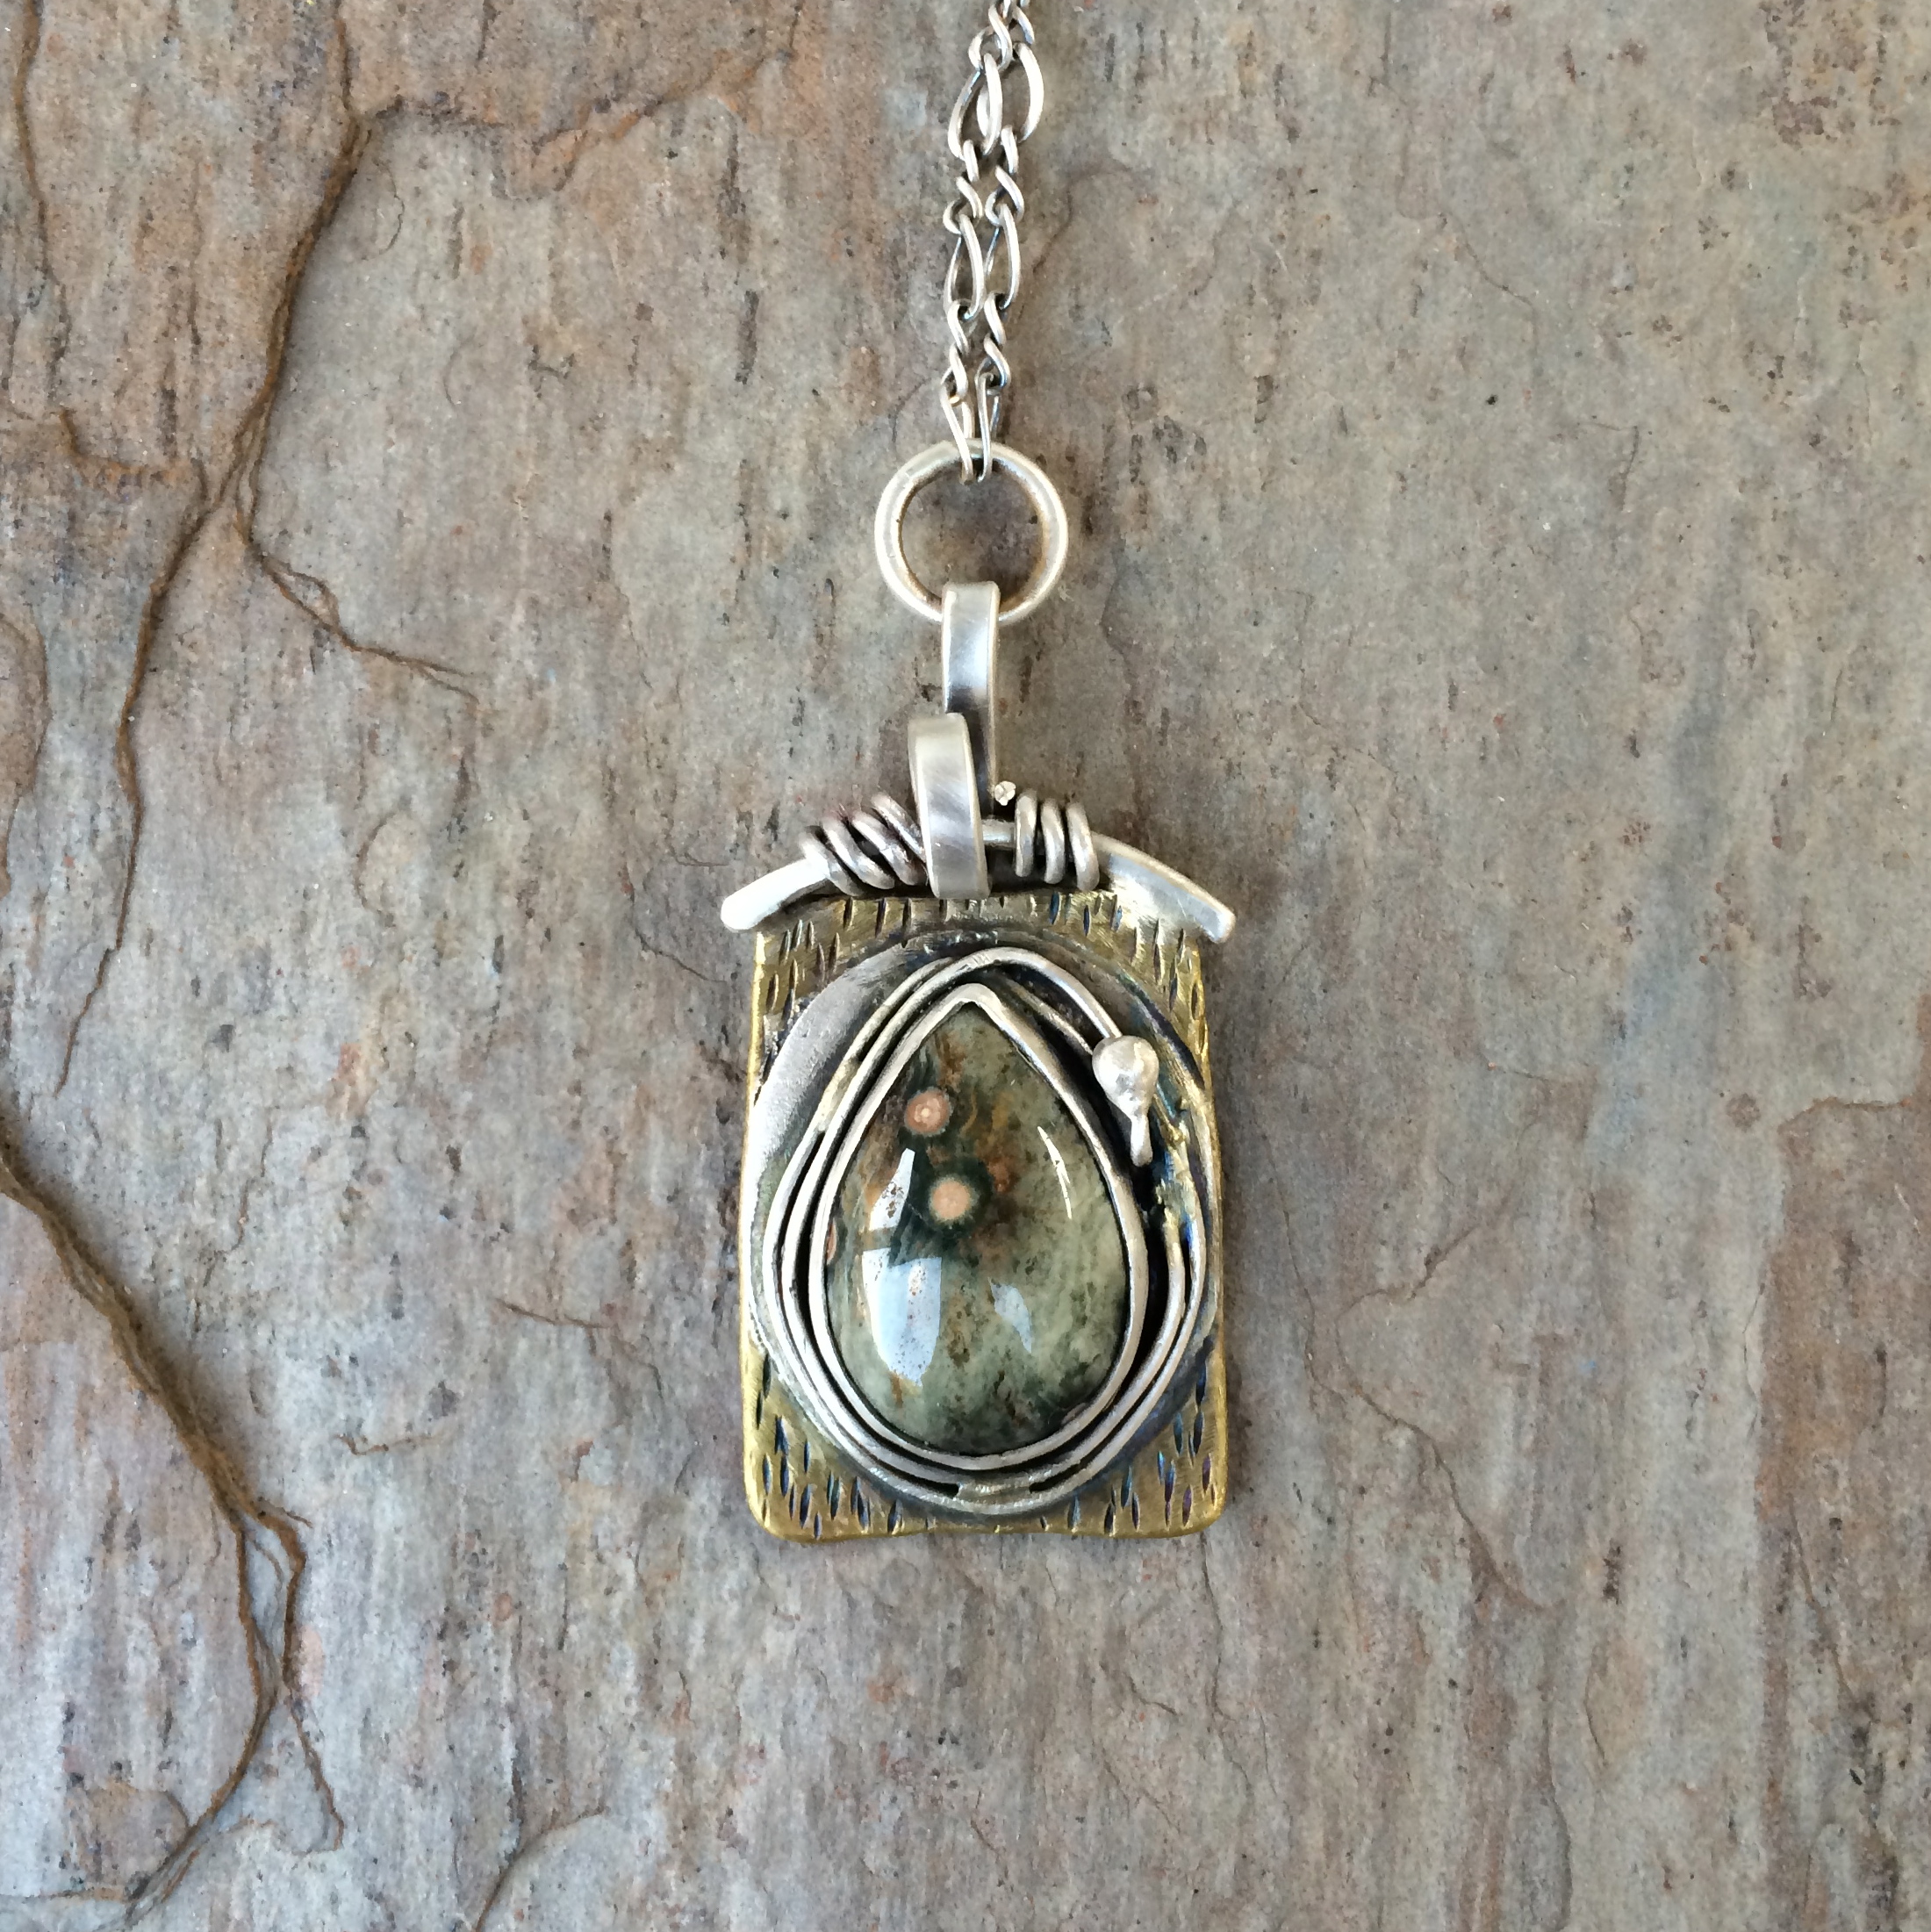


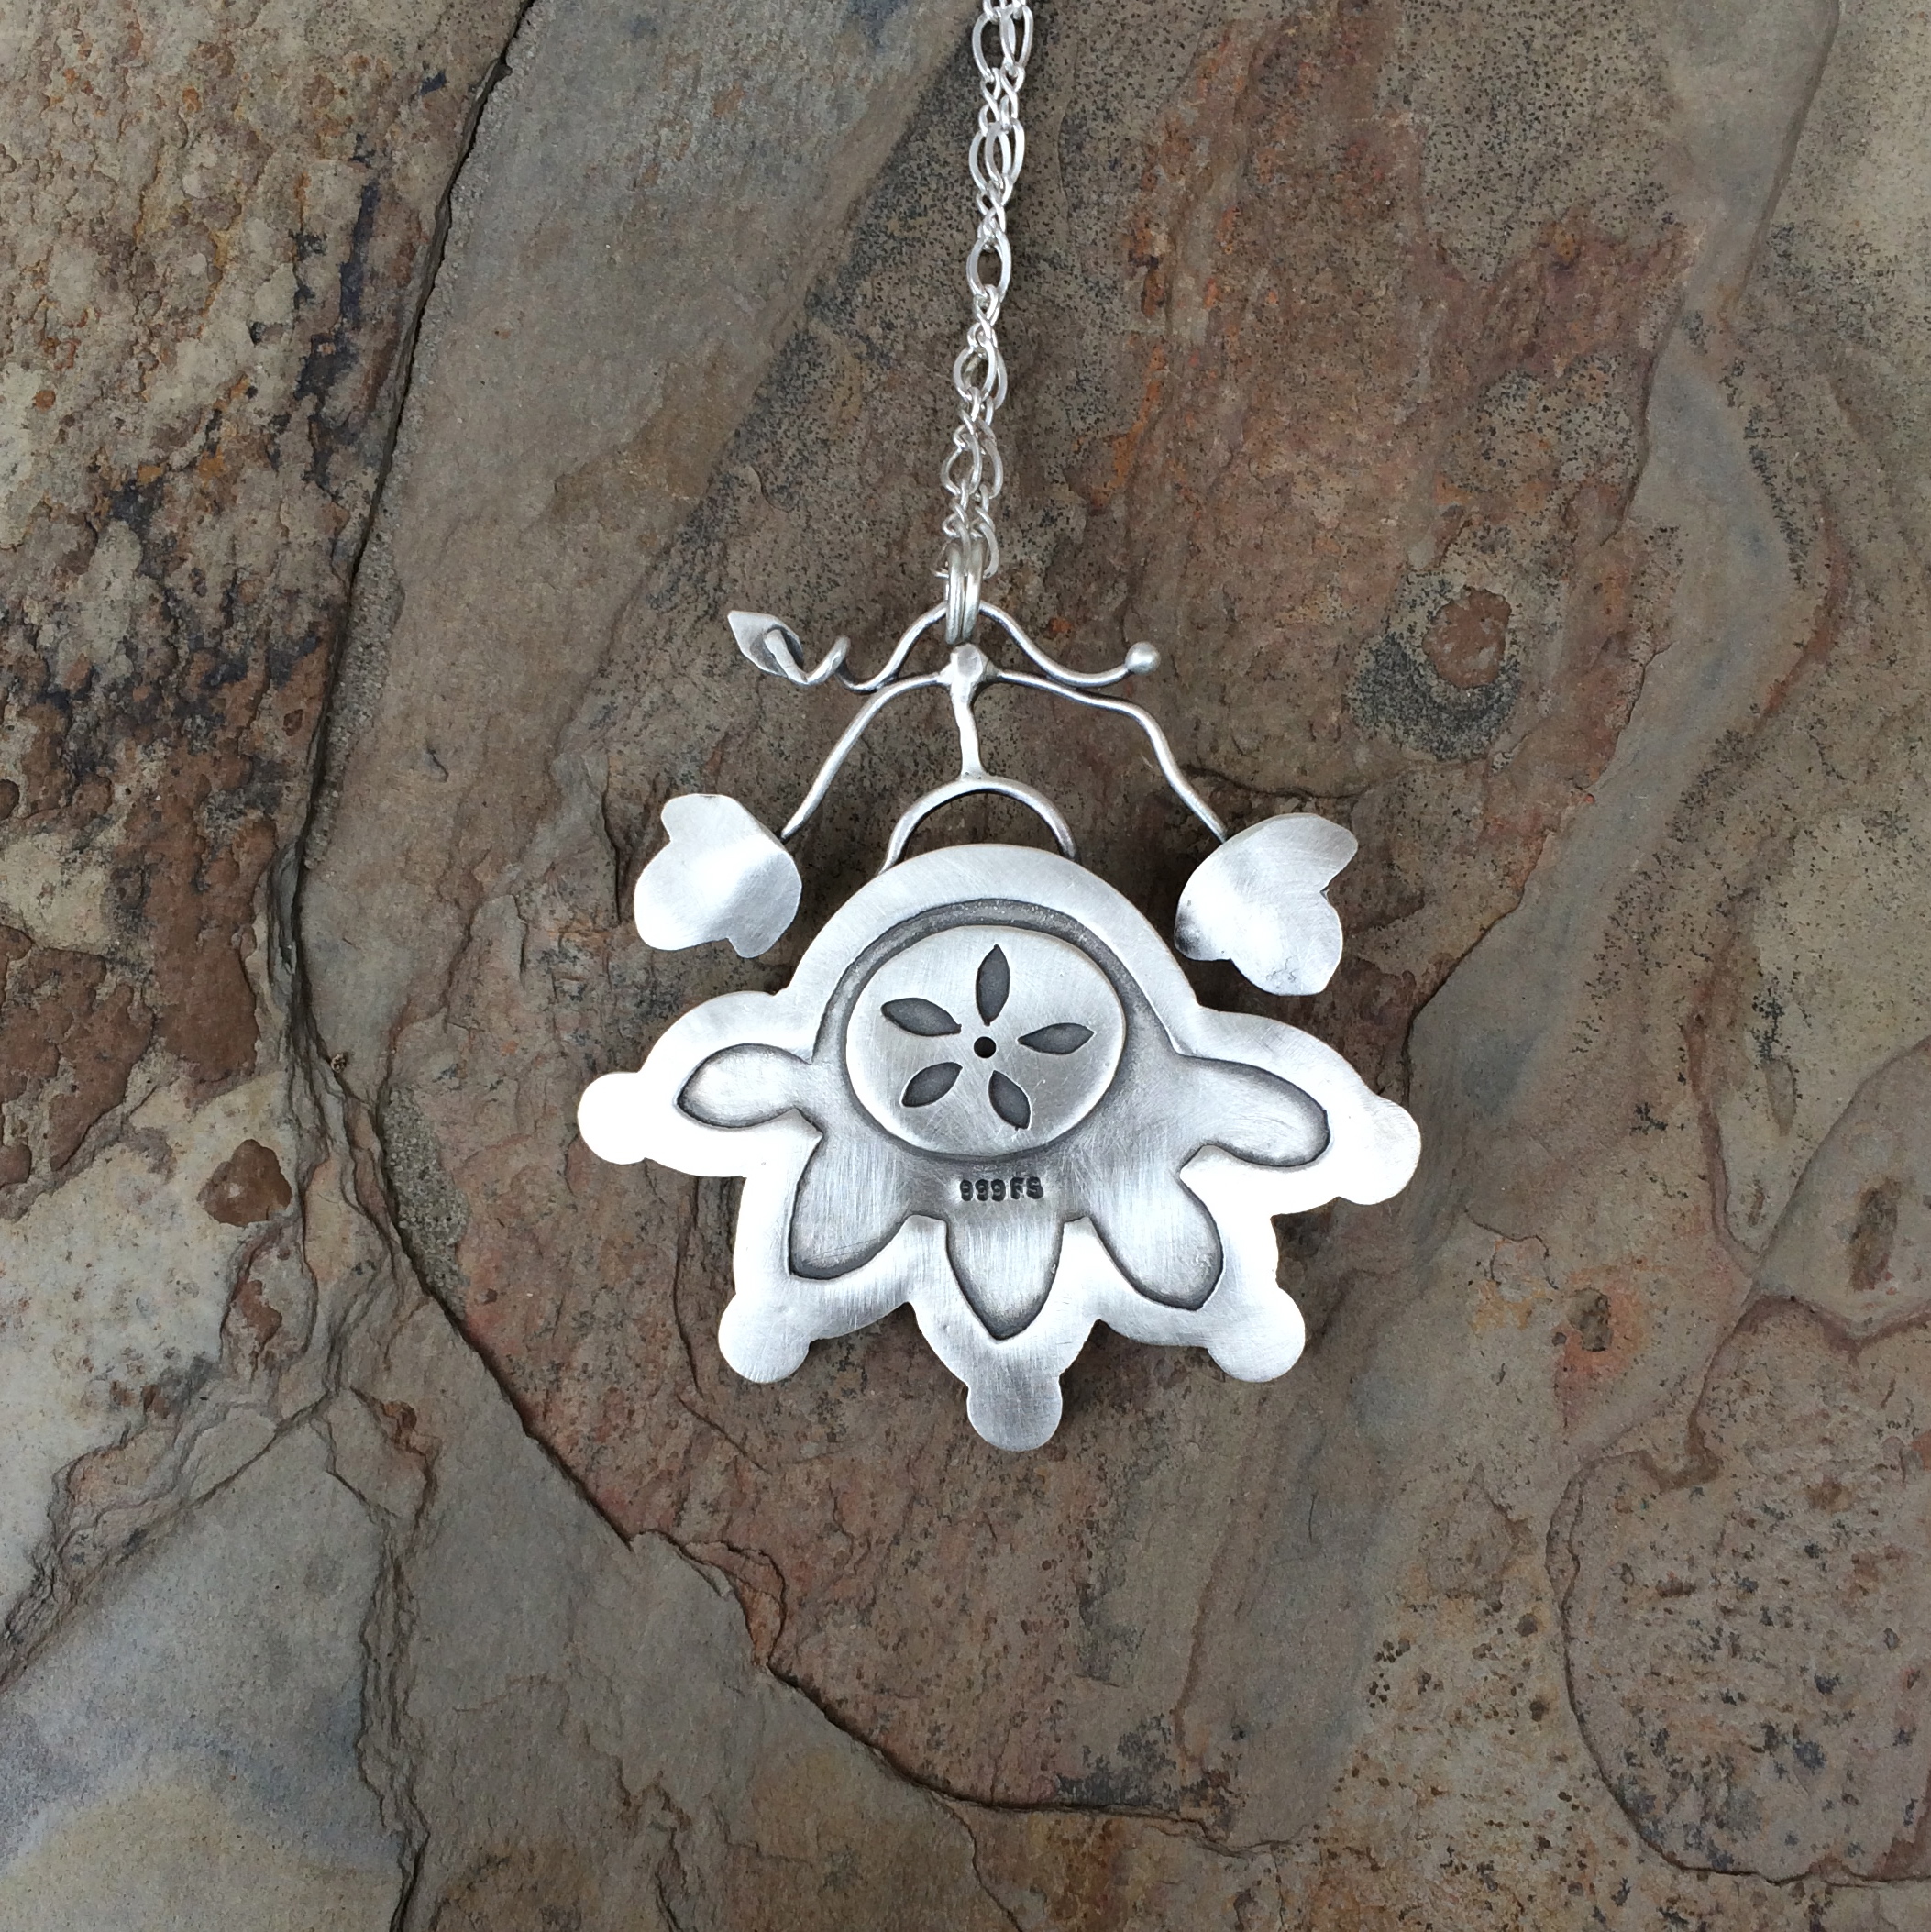
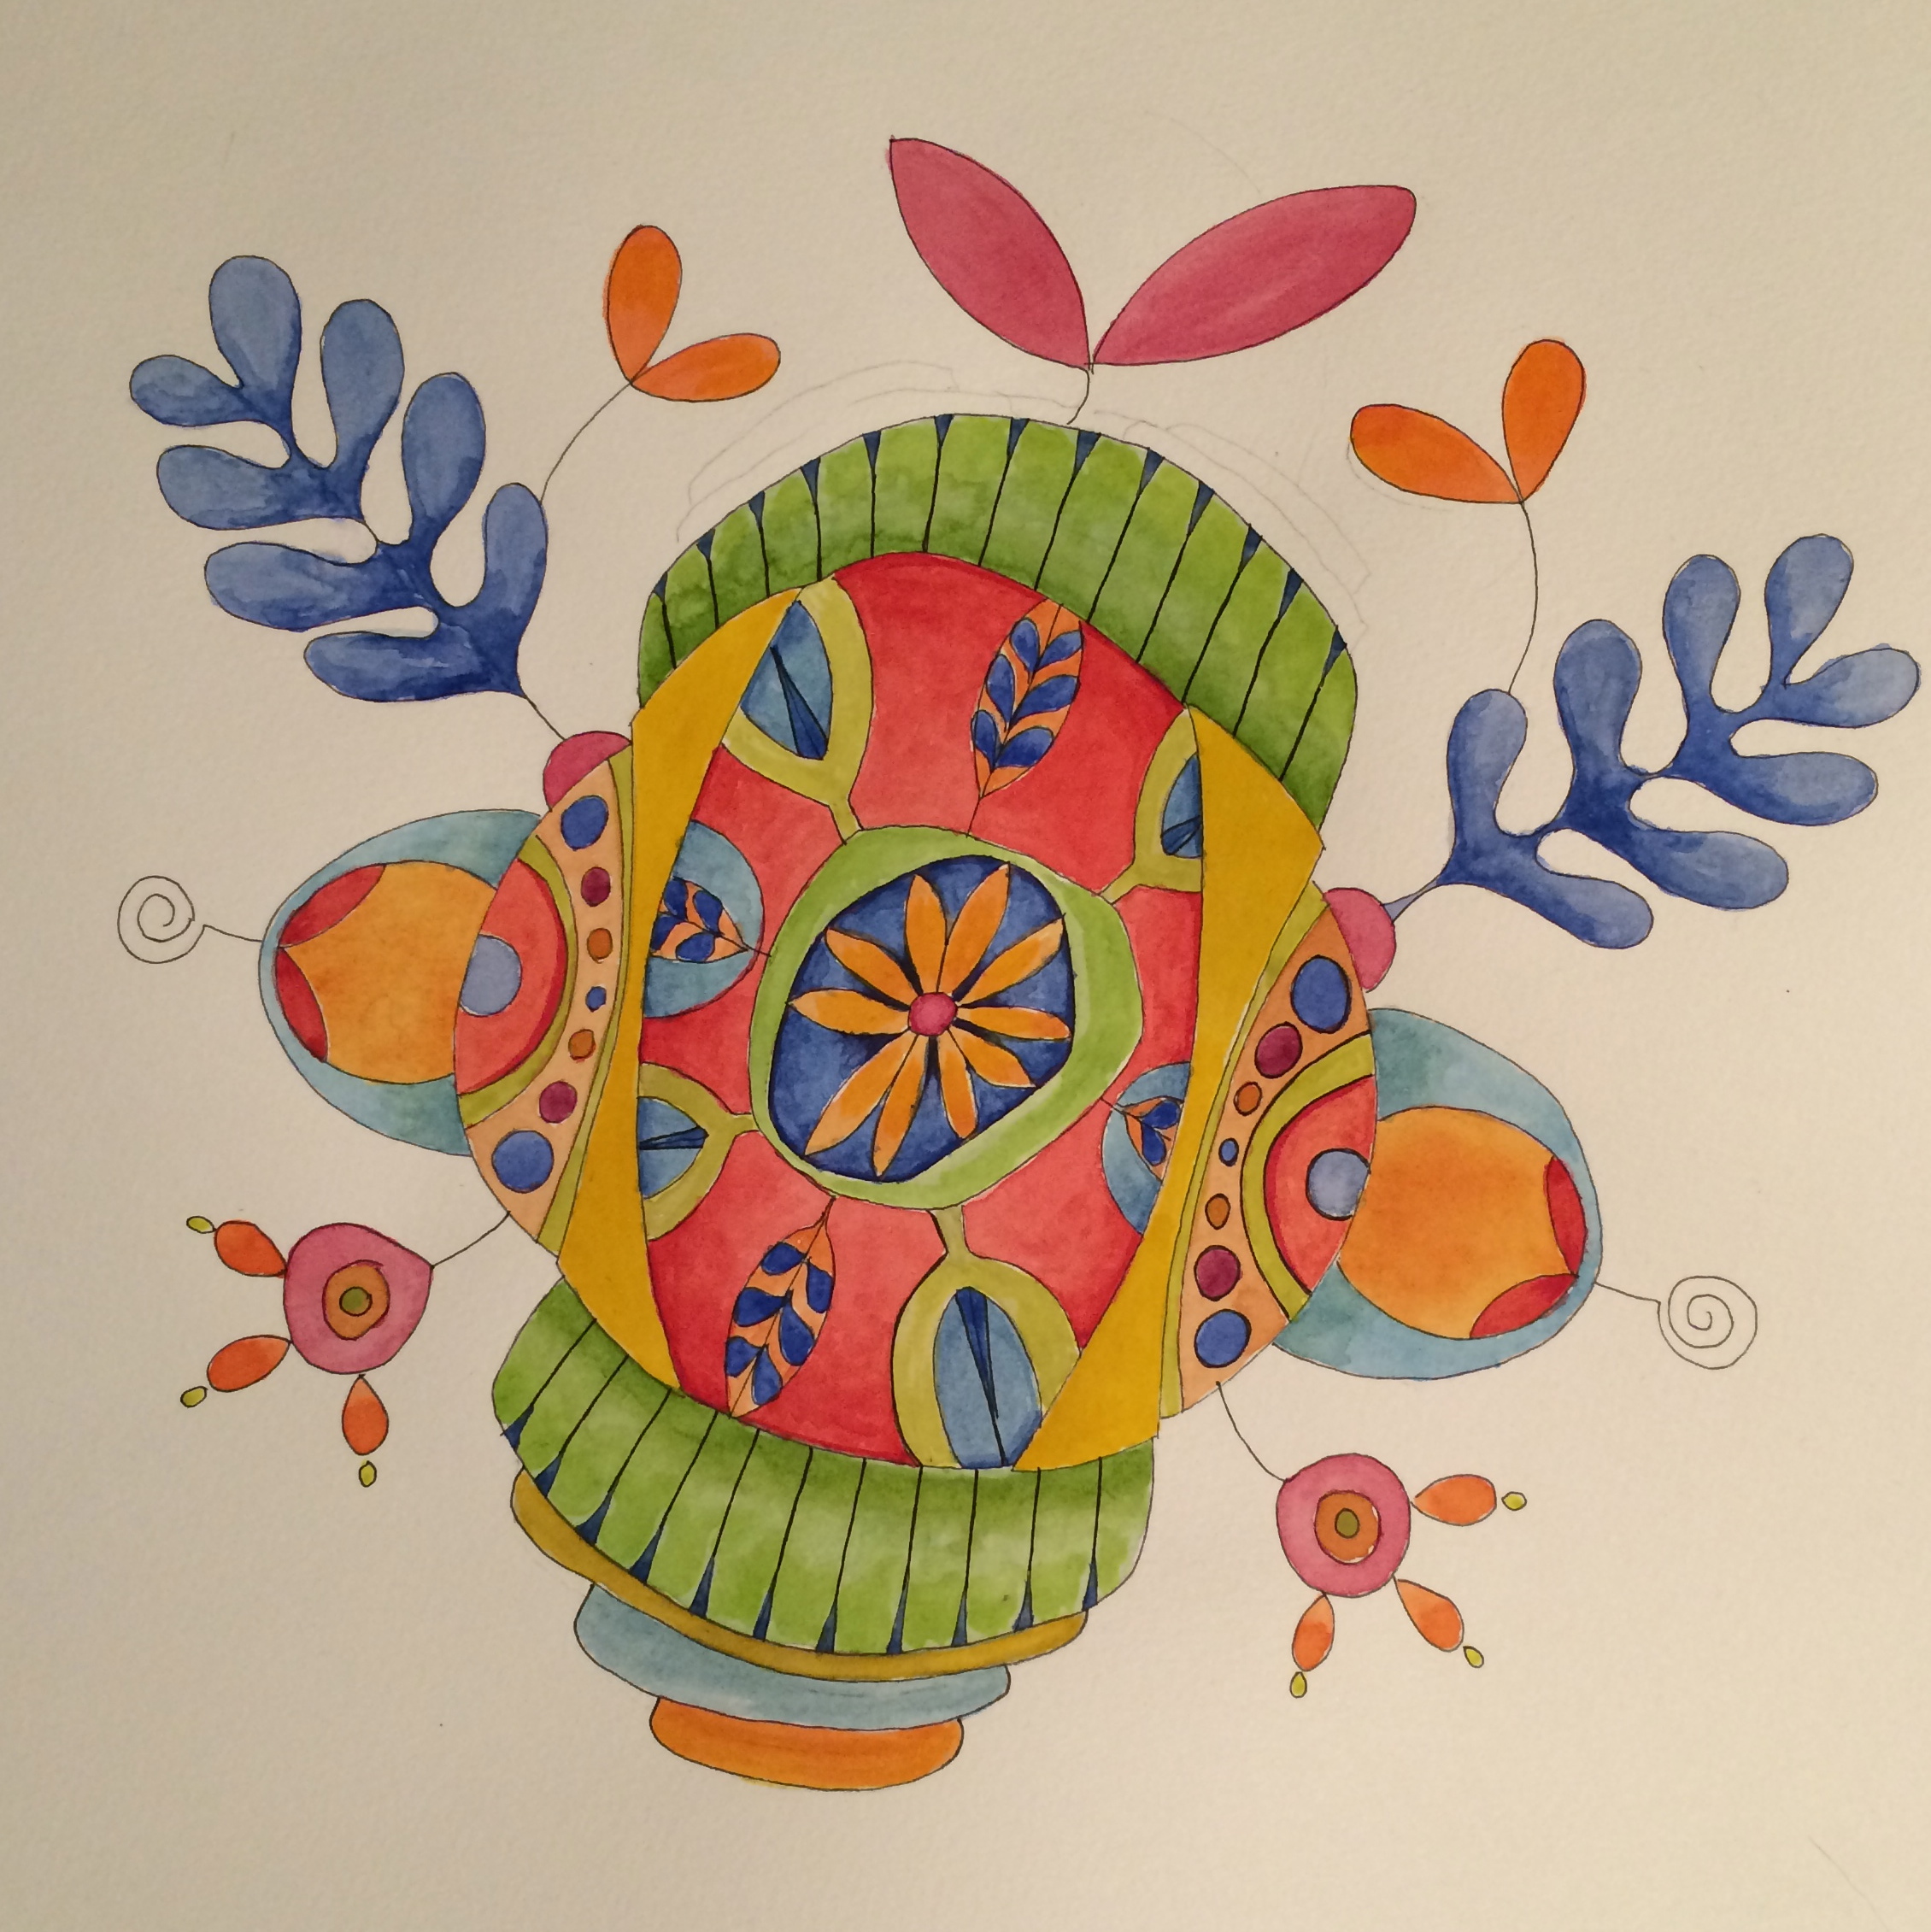


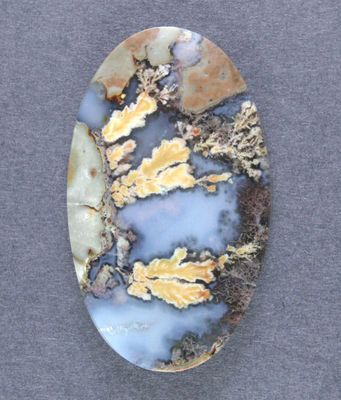


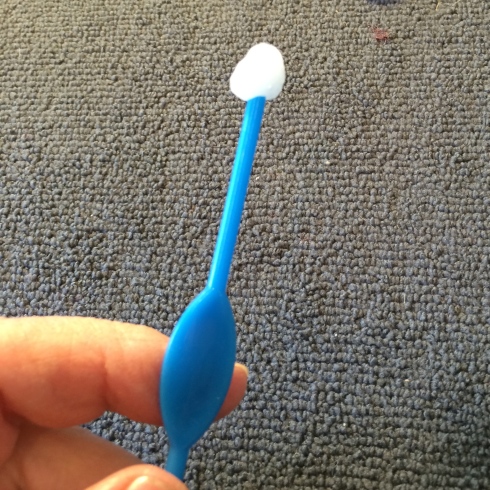


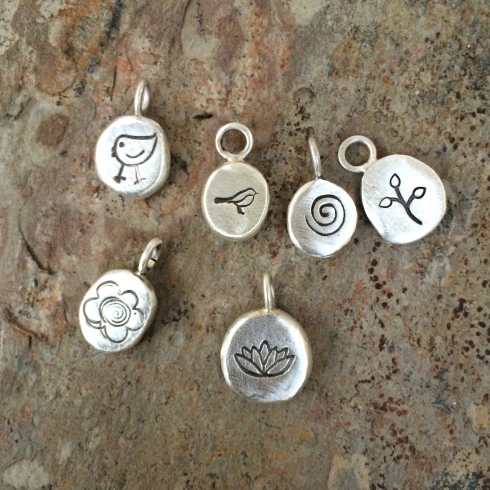

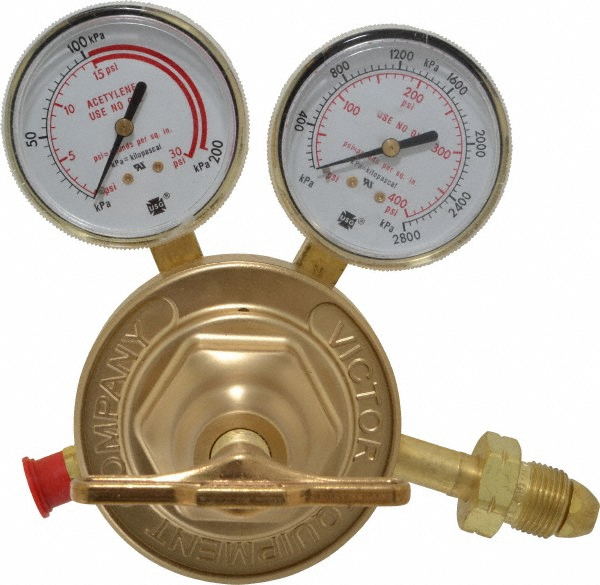

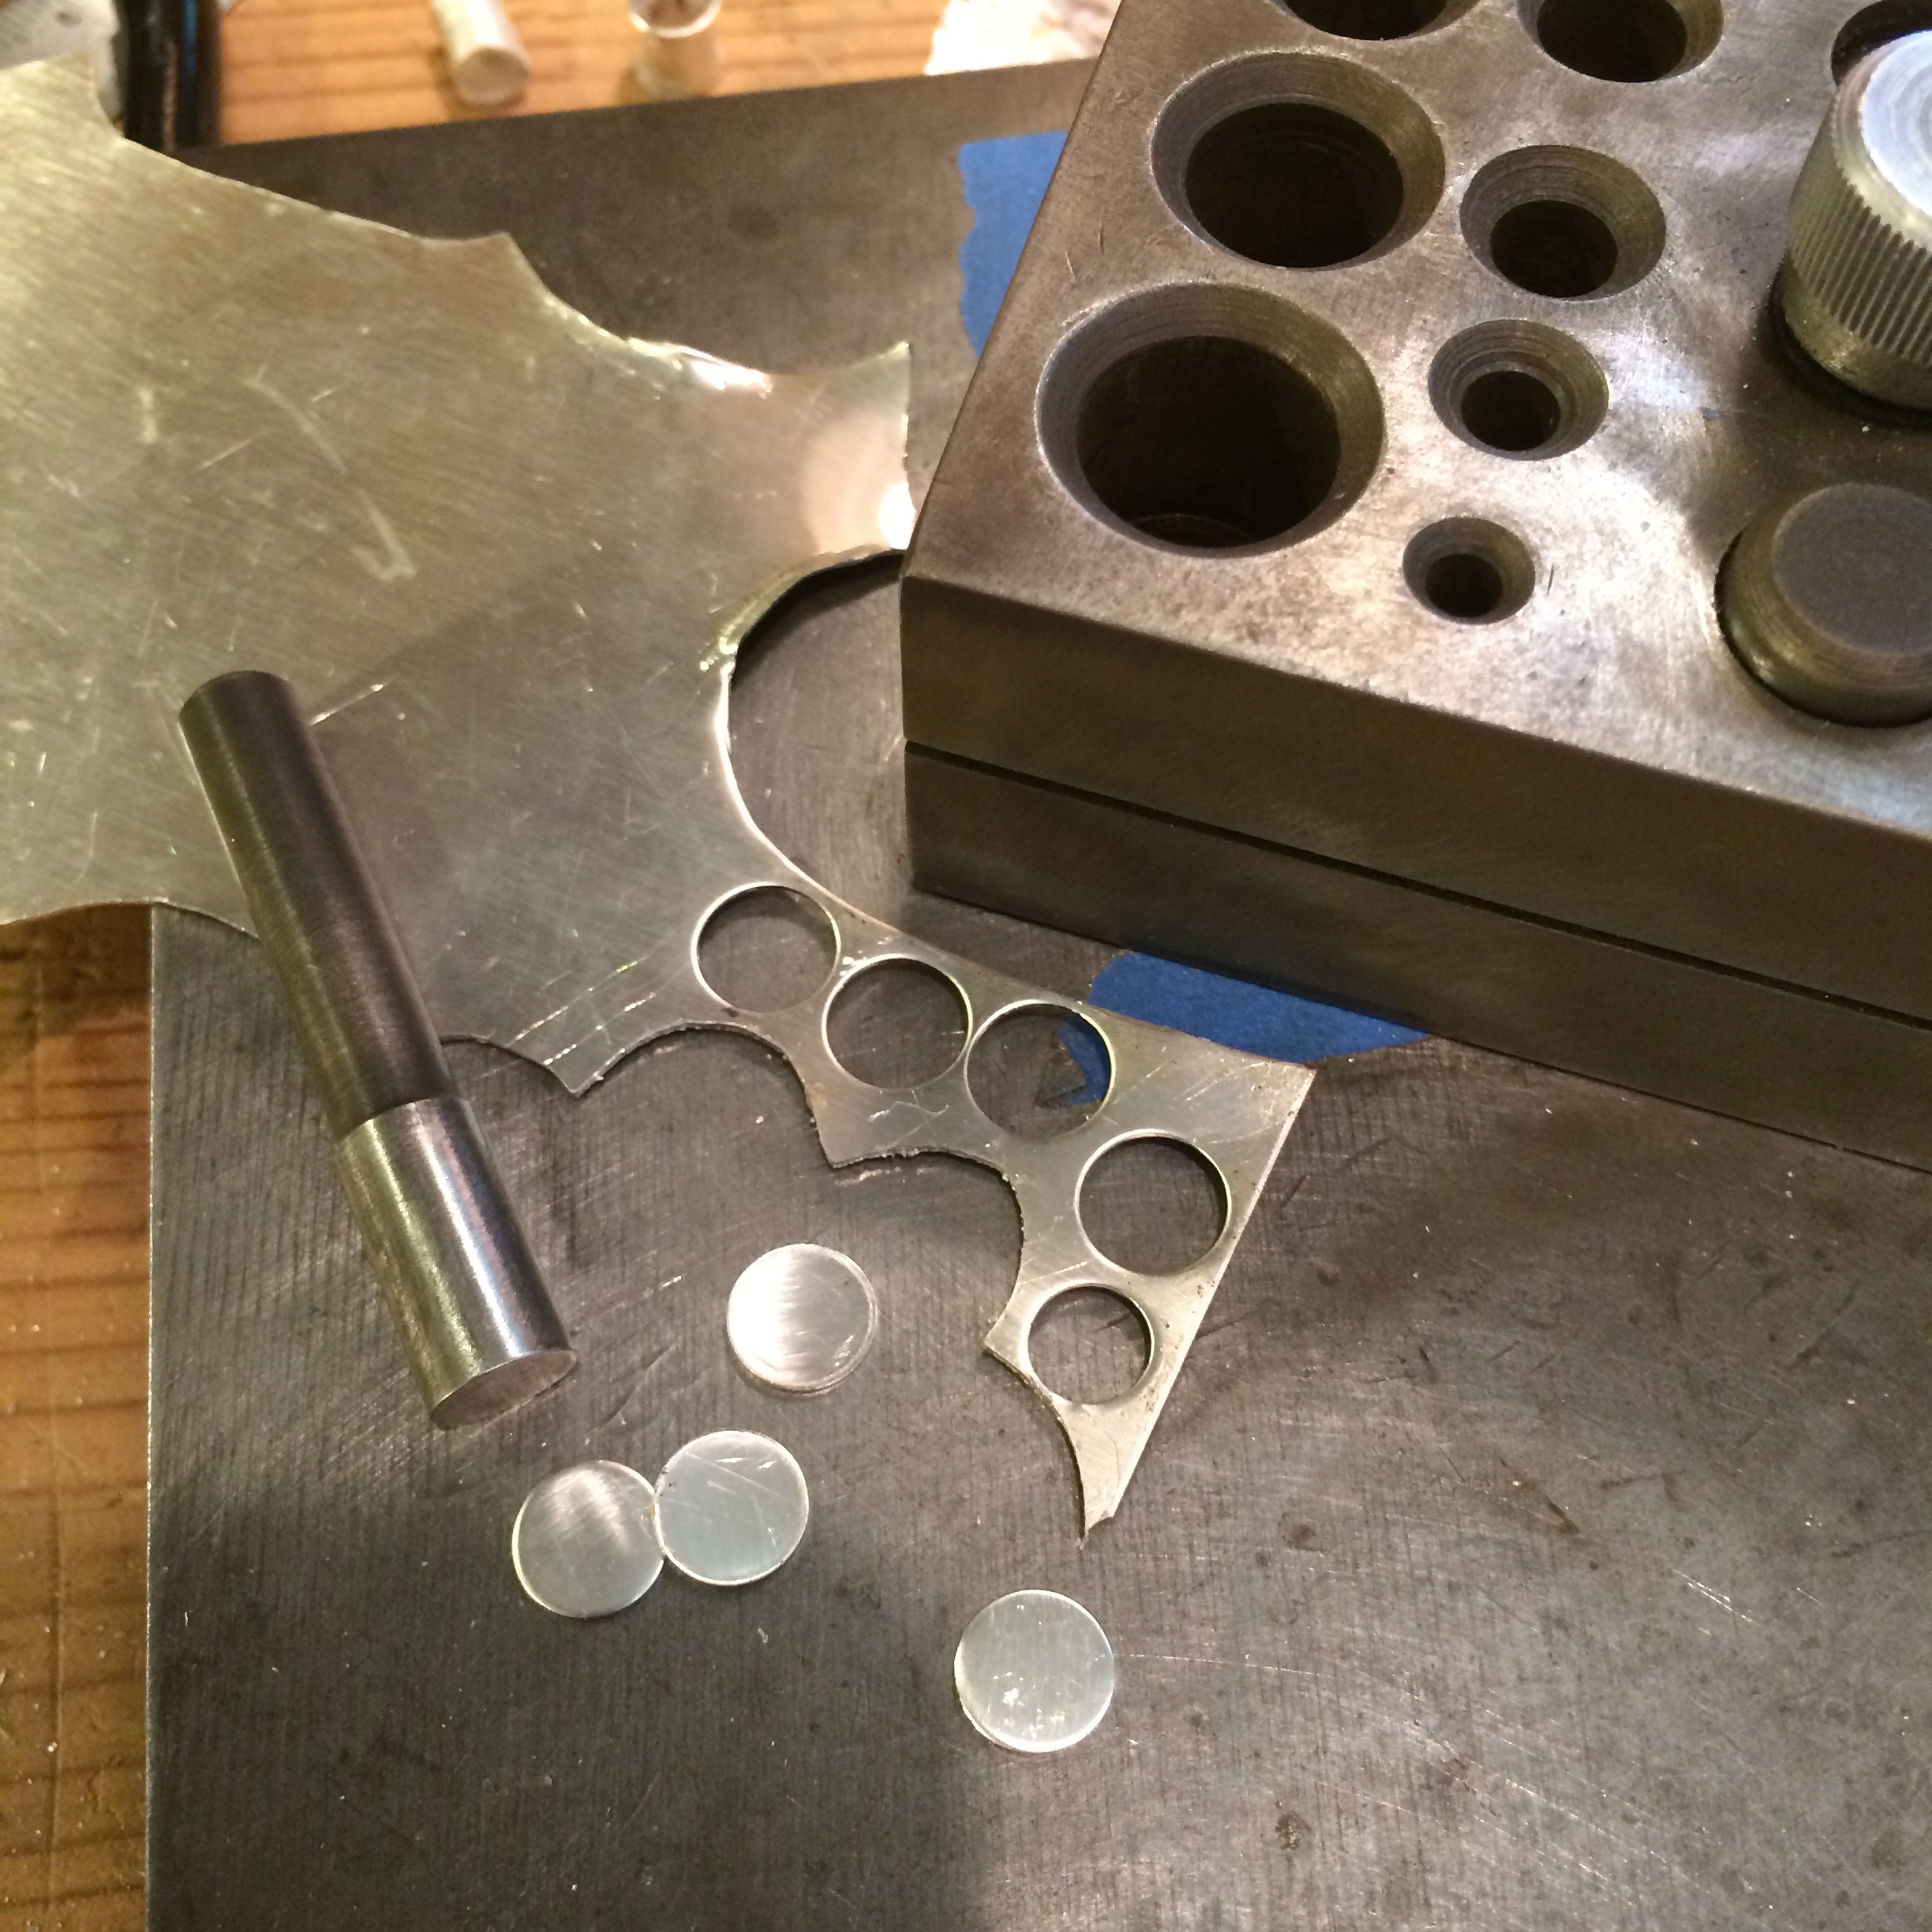