
O.K. Perhaps not that different.
Click on the image if you really need to know what’s going on here. Remember, you can never undo what you’ve seen once you’ve seen it. Otherwise scroll down to see what magic is going on in the studio this time.
–
O.K.
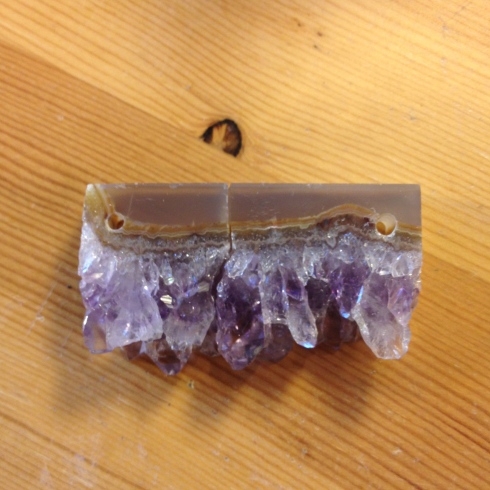
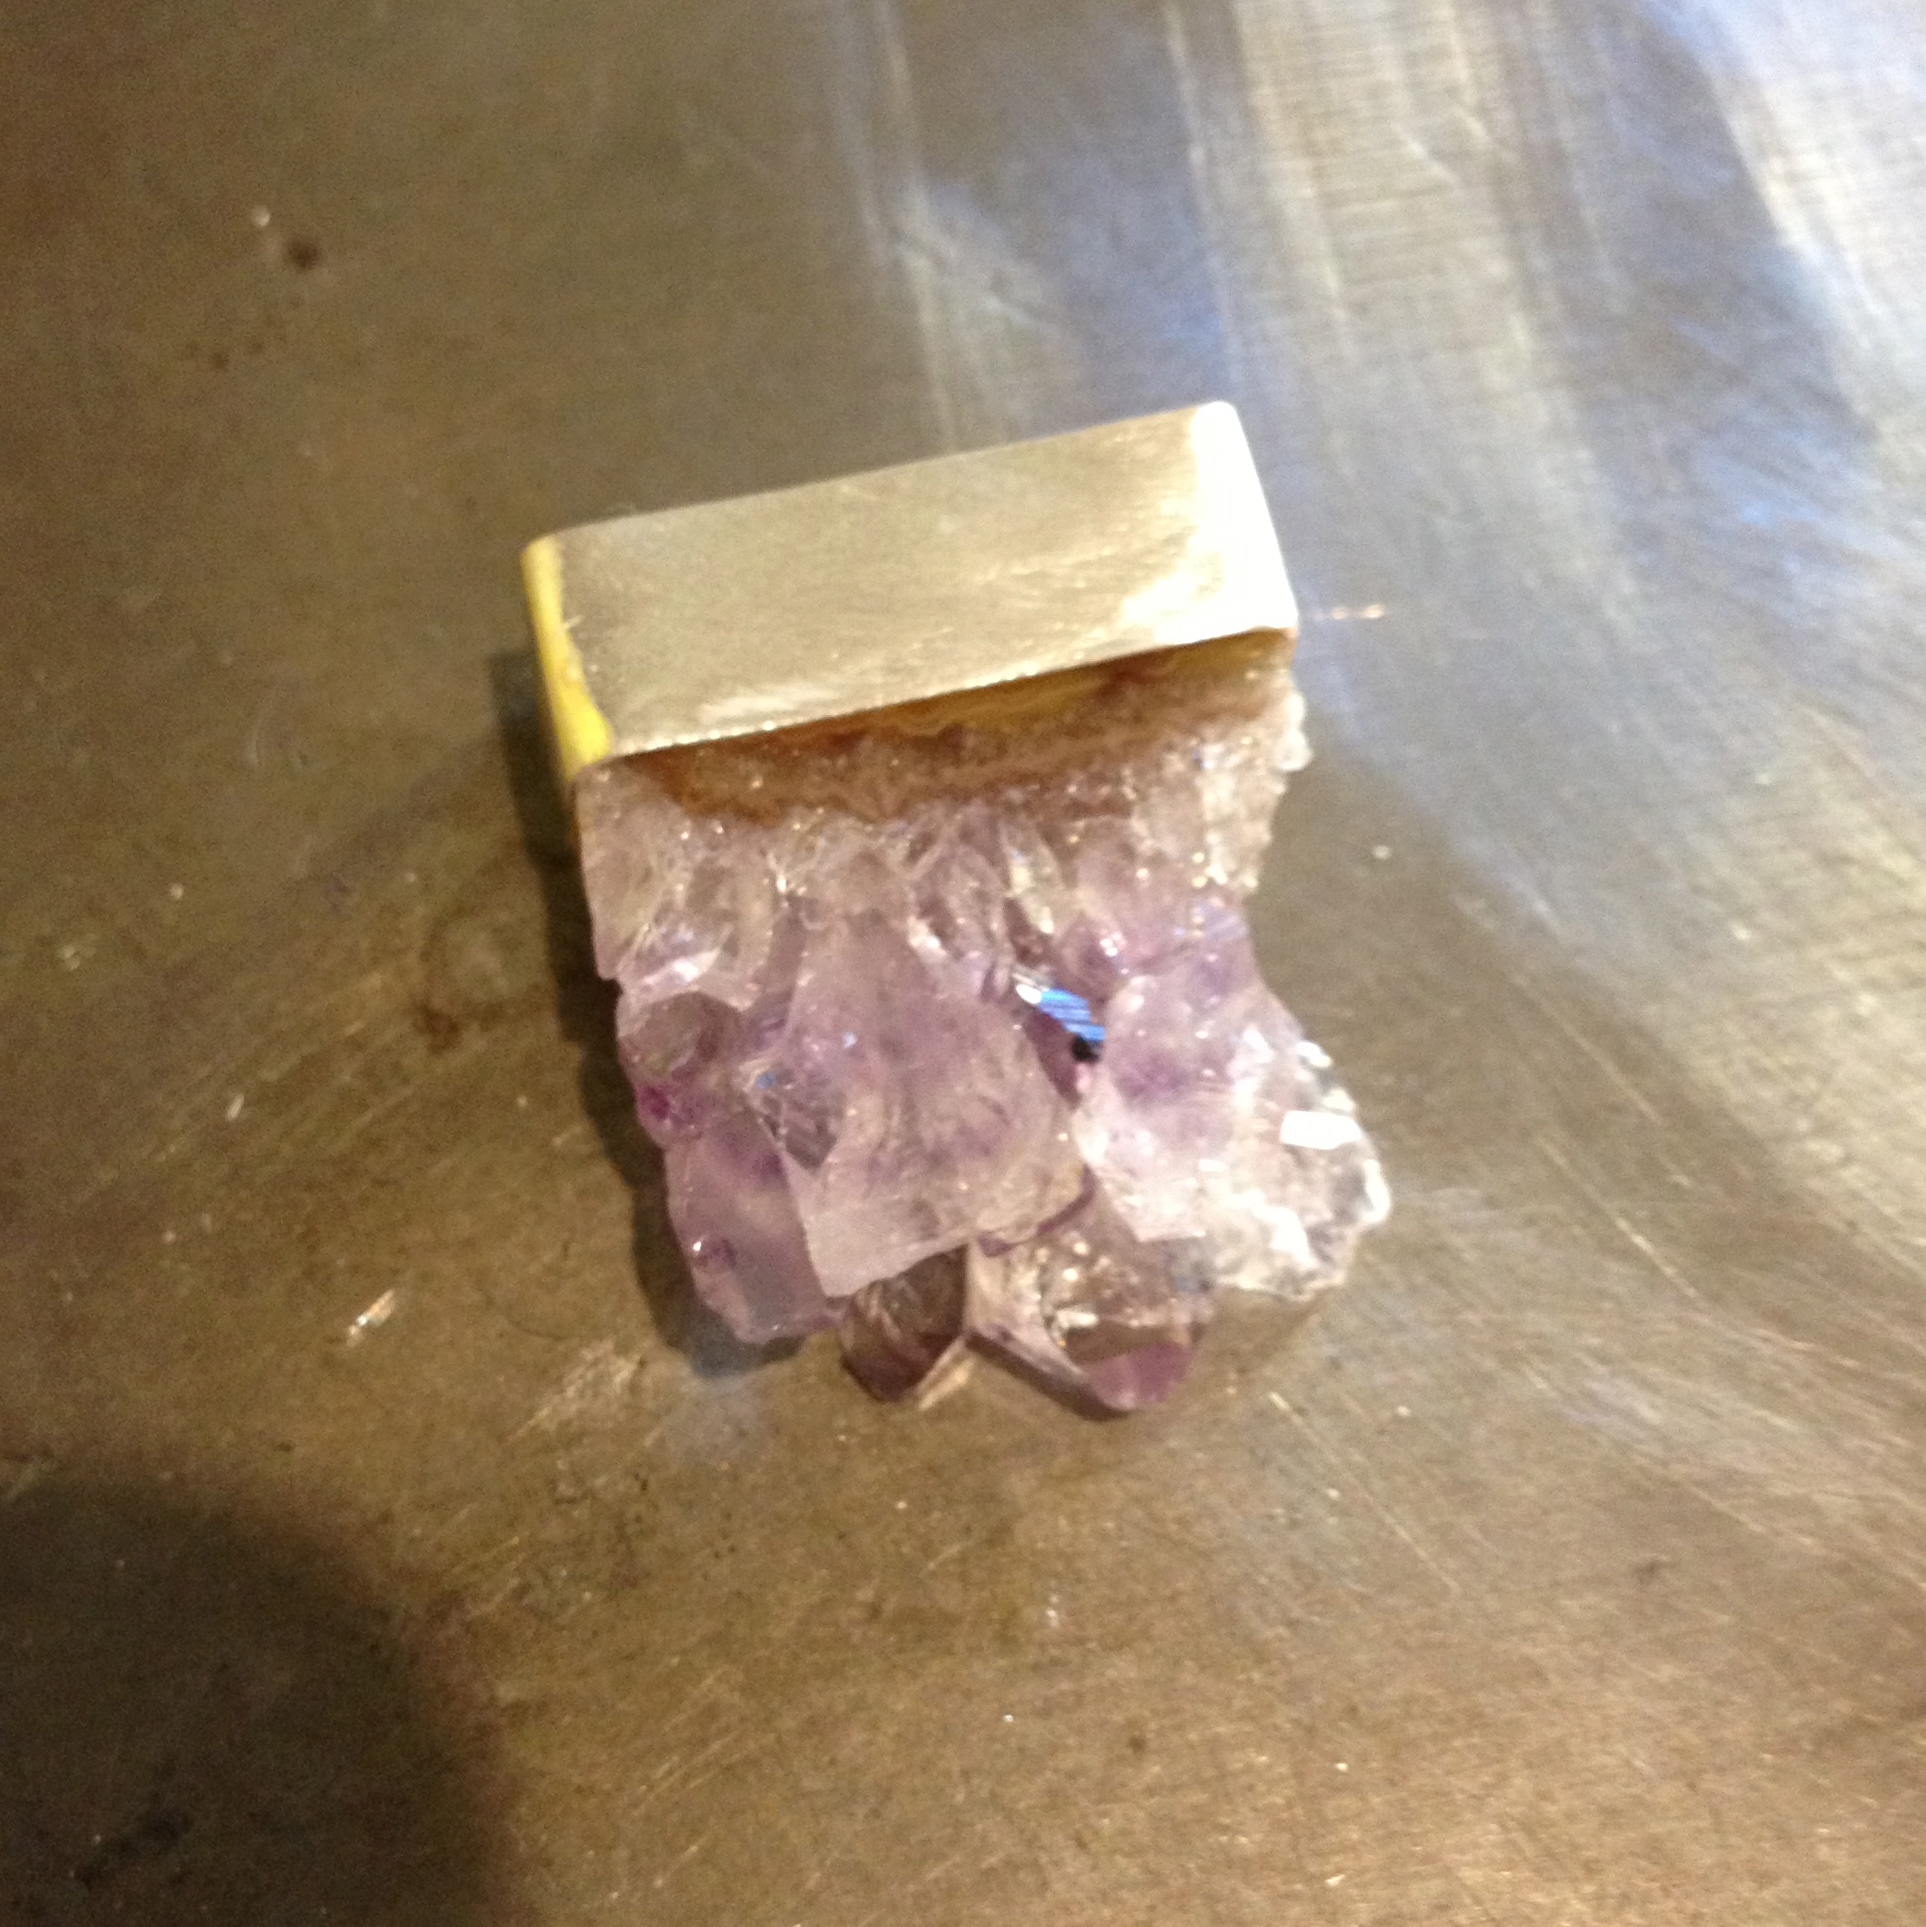
So you bought this piece of amethyst a long while back
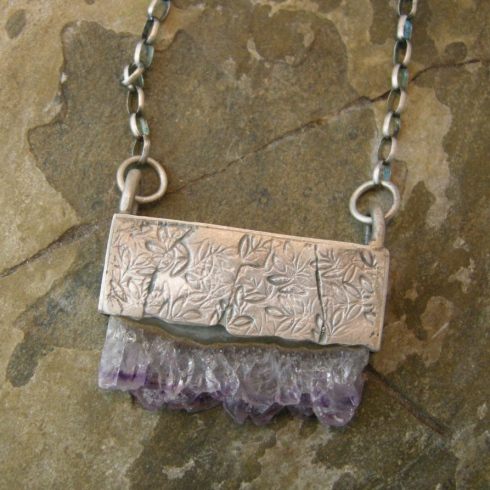
because you made this (below) about six (or, you can’t really remember) months ago and thought you’d have another go.
But the new piece of amethyst broke before you really had a chance to see what you could do with it.

You wasn’t too upset about it, however, as it was much thicker than you thought it would be, and kind of ugly – ish.
And then you remembered that time when you decided to banish amethyst from your studio completely.
But, when you were cleaning out and moving your studio around you found the piece again, and, as stubborn as you are, you decided that surely you could do something with it.
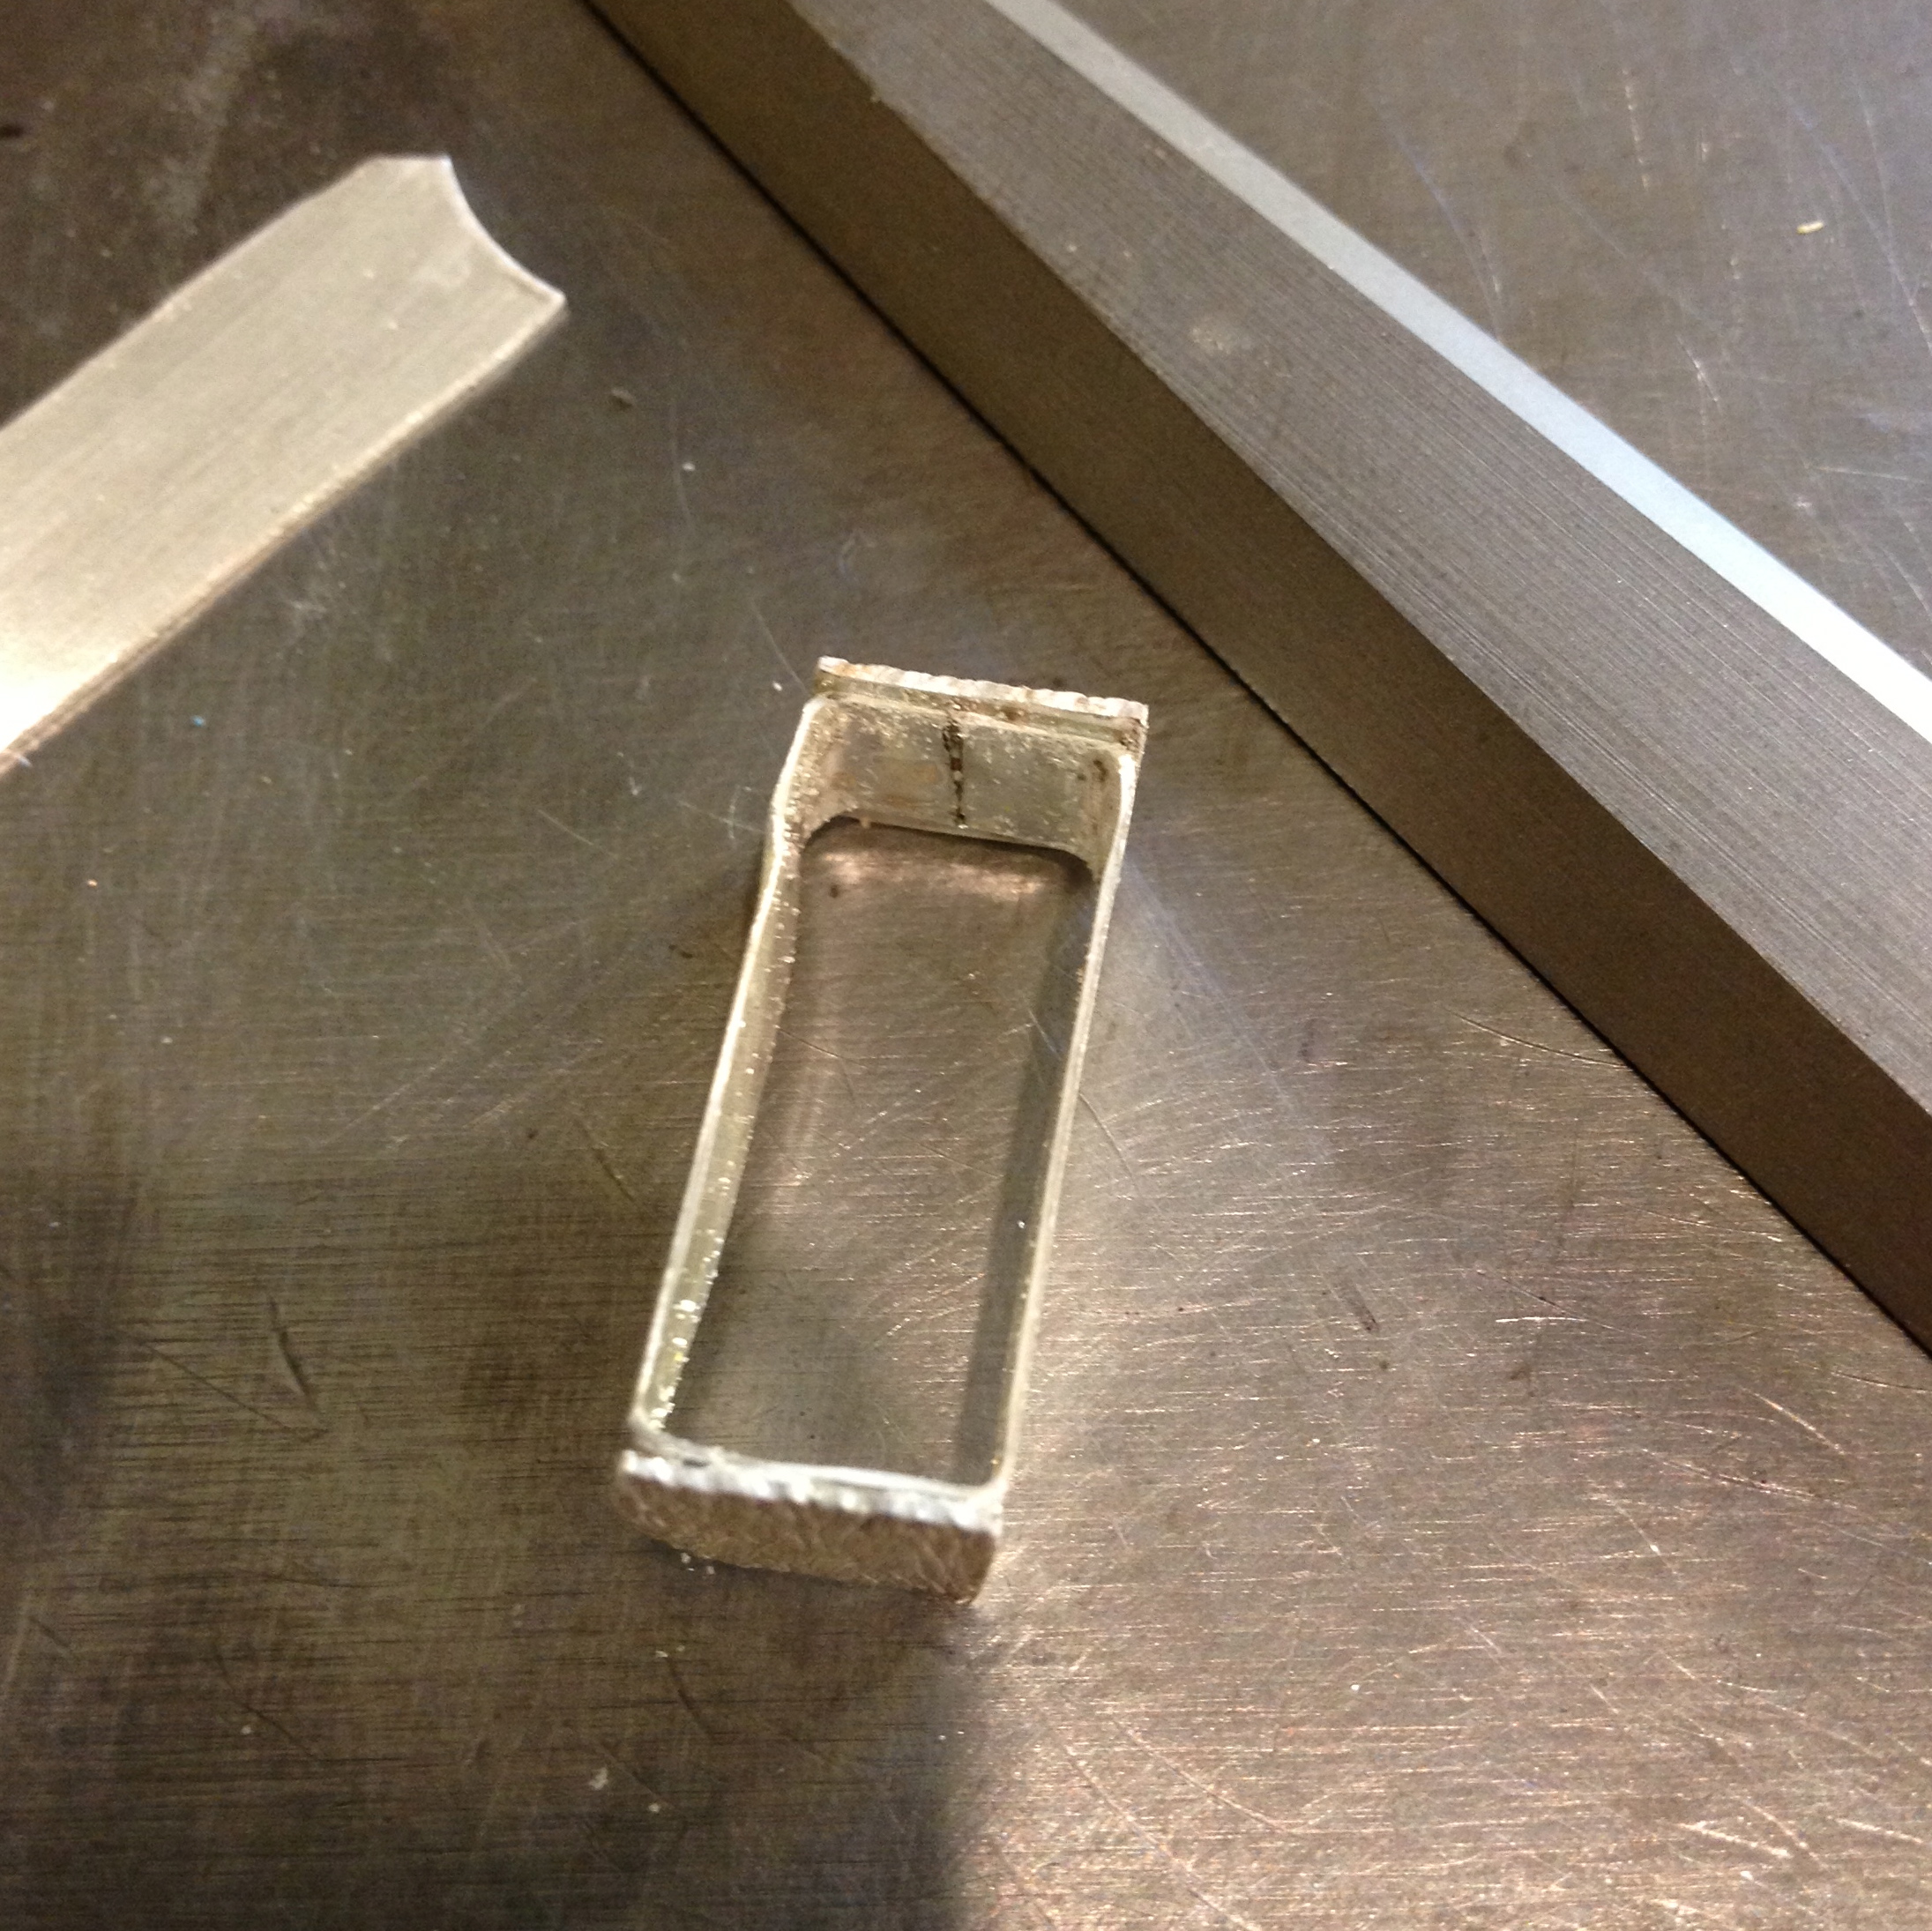
So not to be defeated you take the smaller half, because you don’t really want to waste that much silver on it if it’s not going to turn out well in the end.
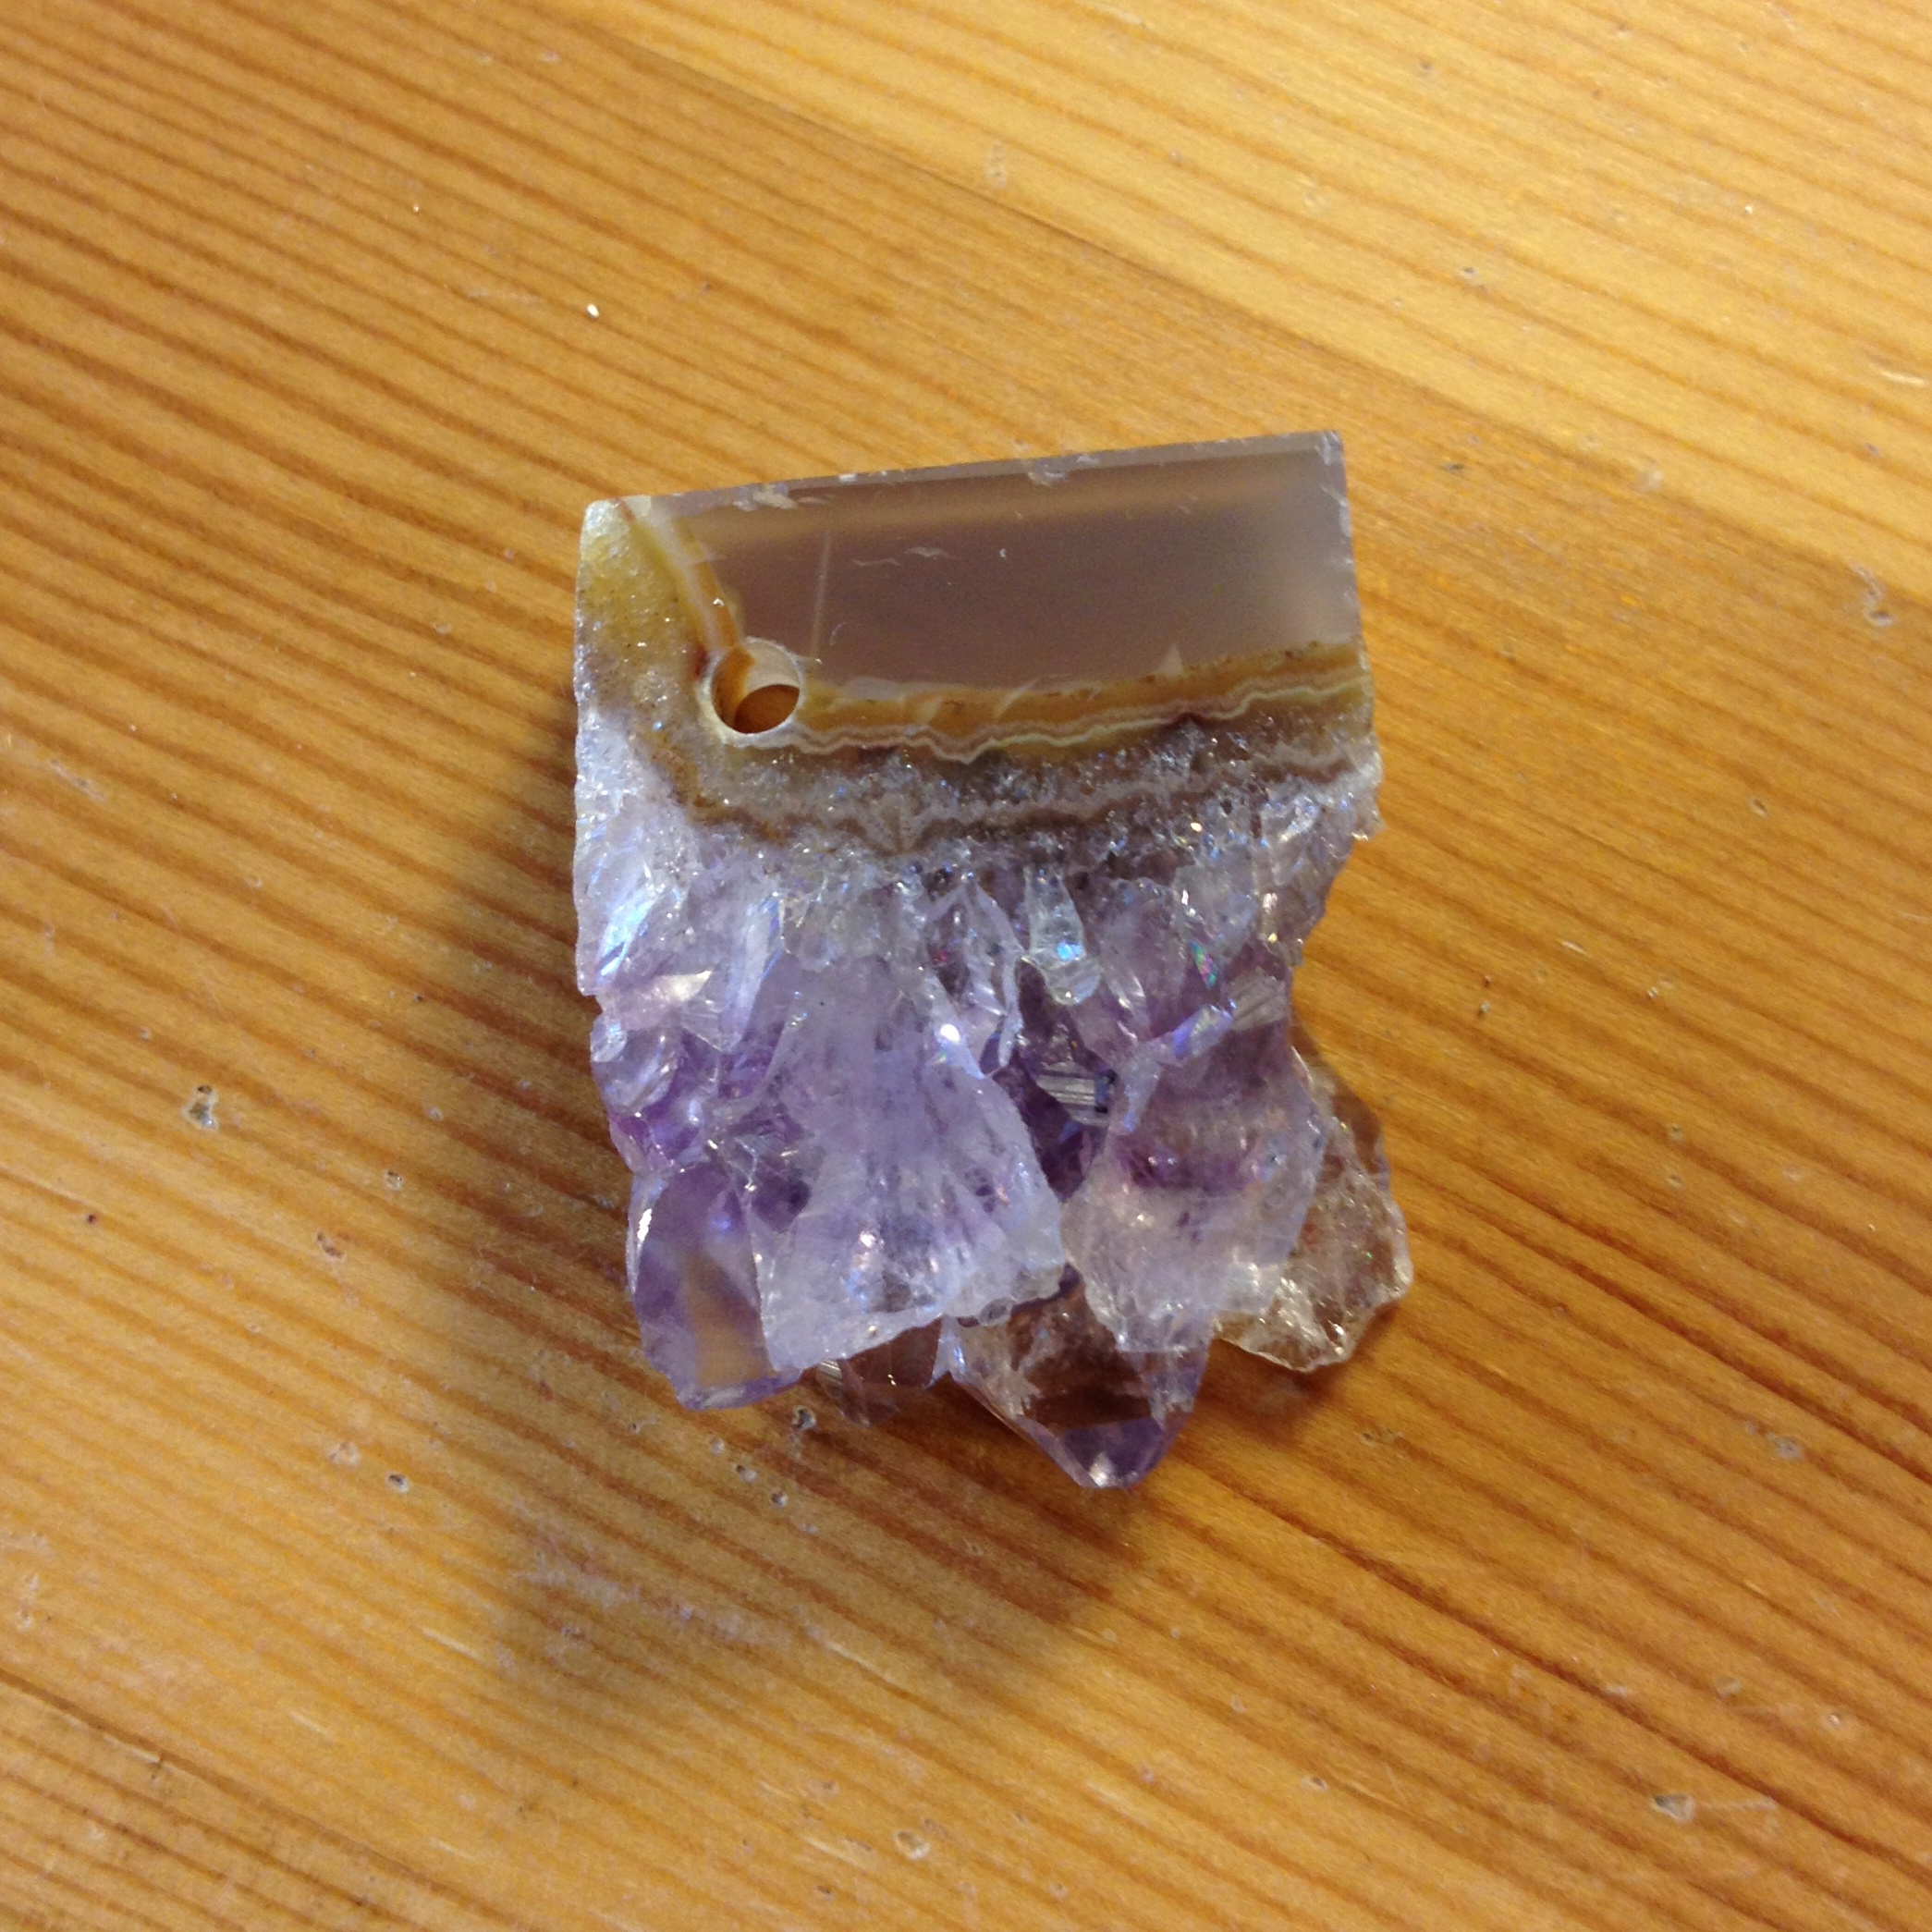
You decide that it is kind of nice after all, in that broken, lonely way that only a broken, lonely piece of amethyst can look. and you decide to make it a collar out of bezel wire.
Just to cheer it up.
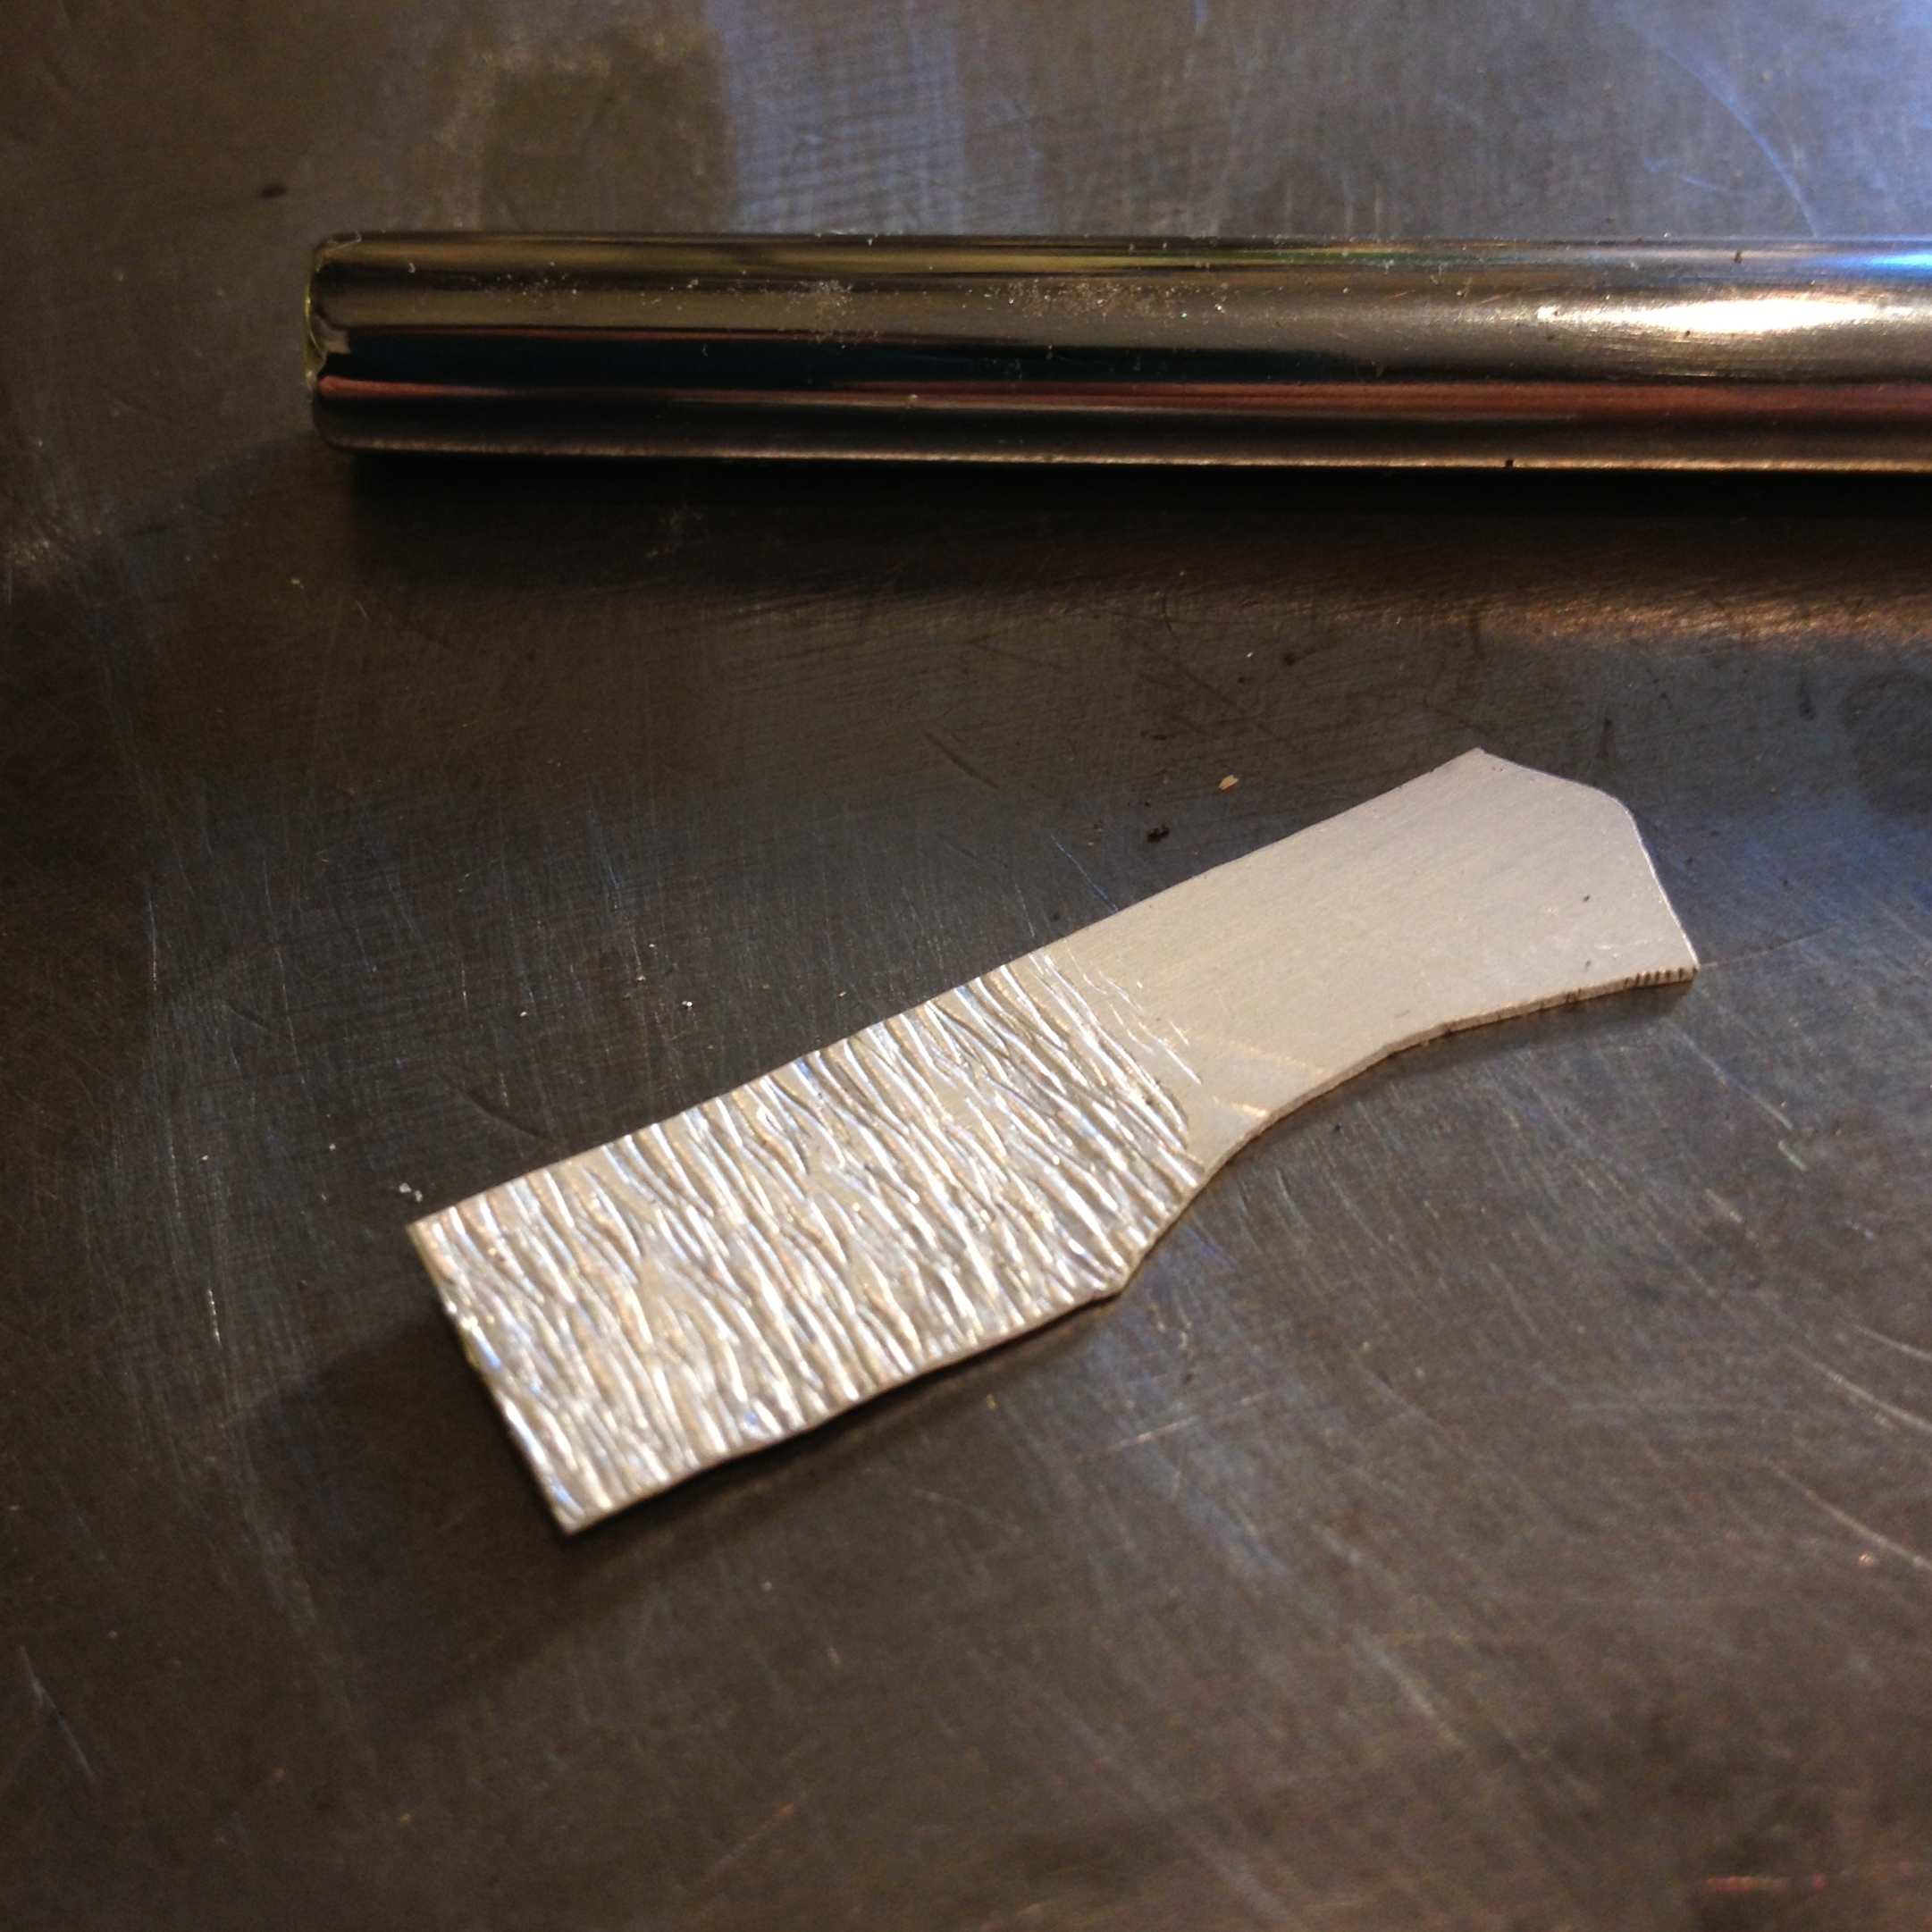
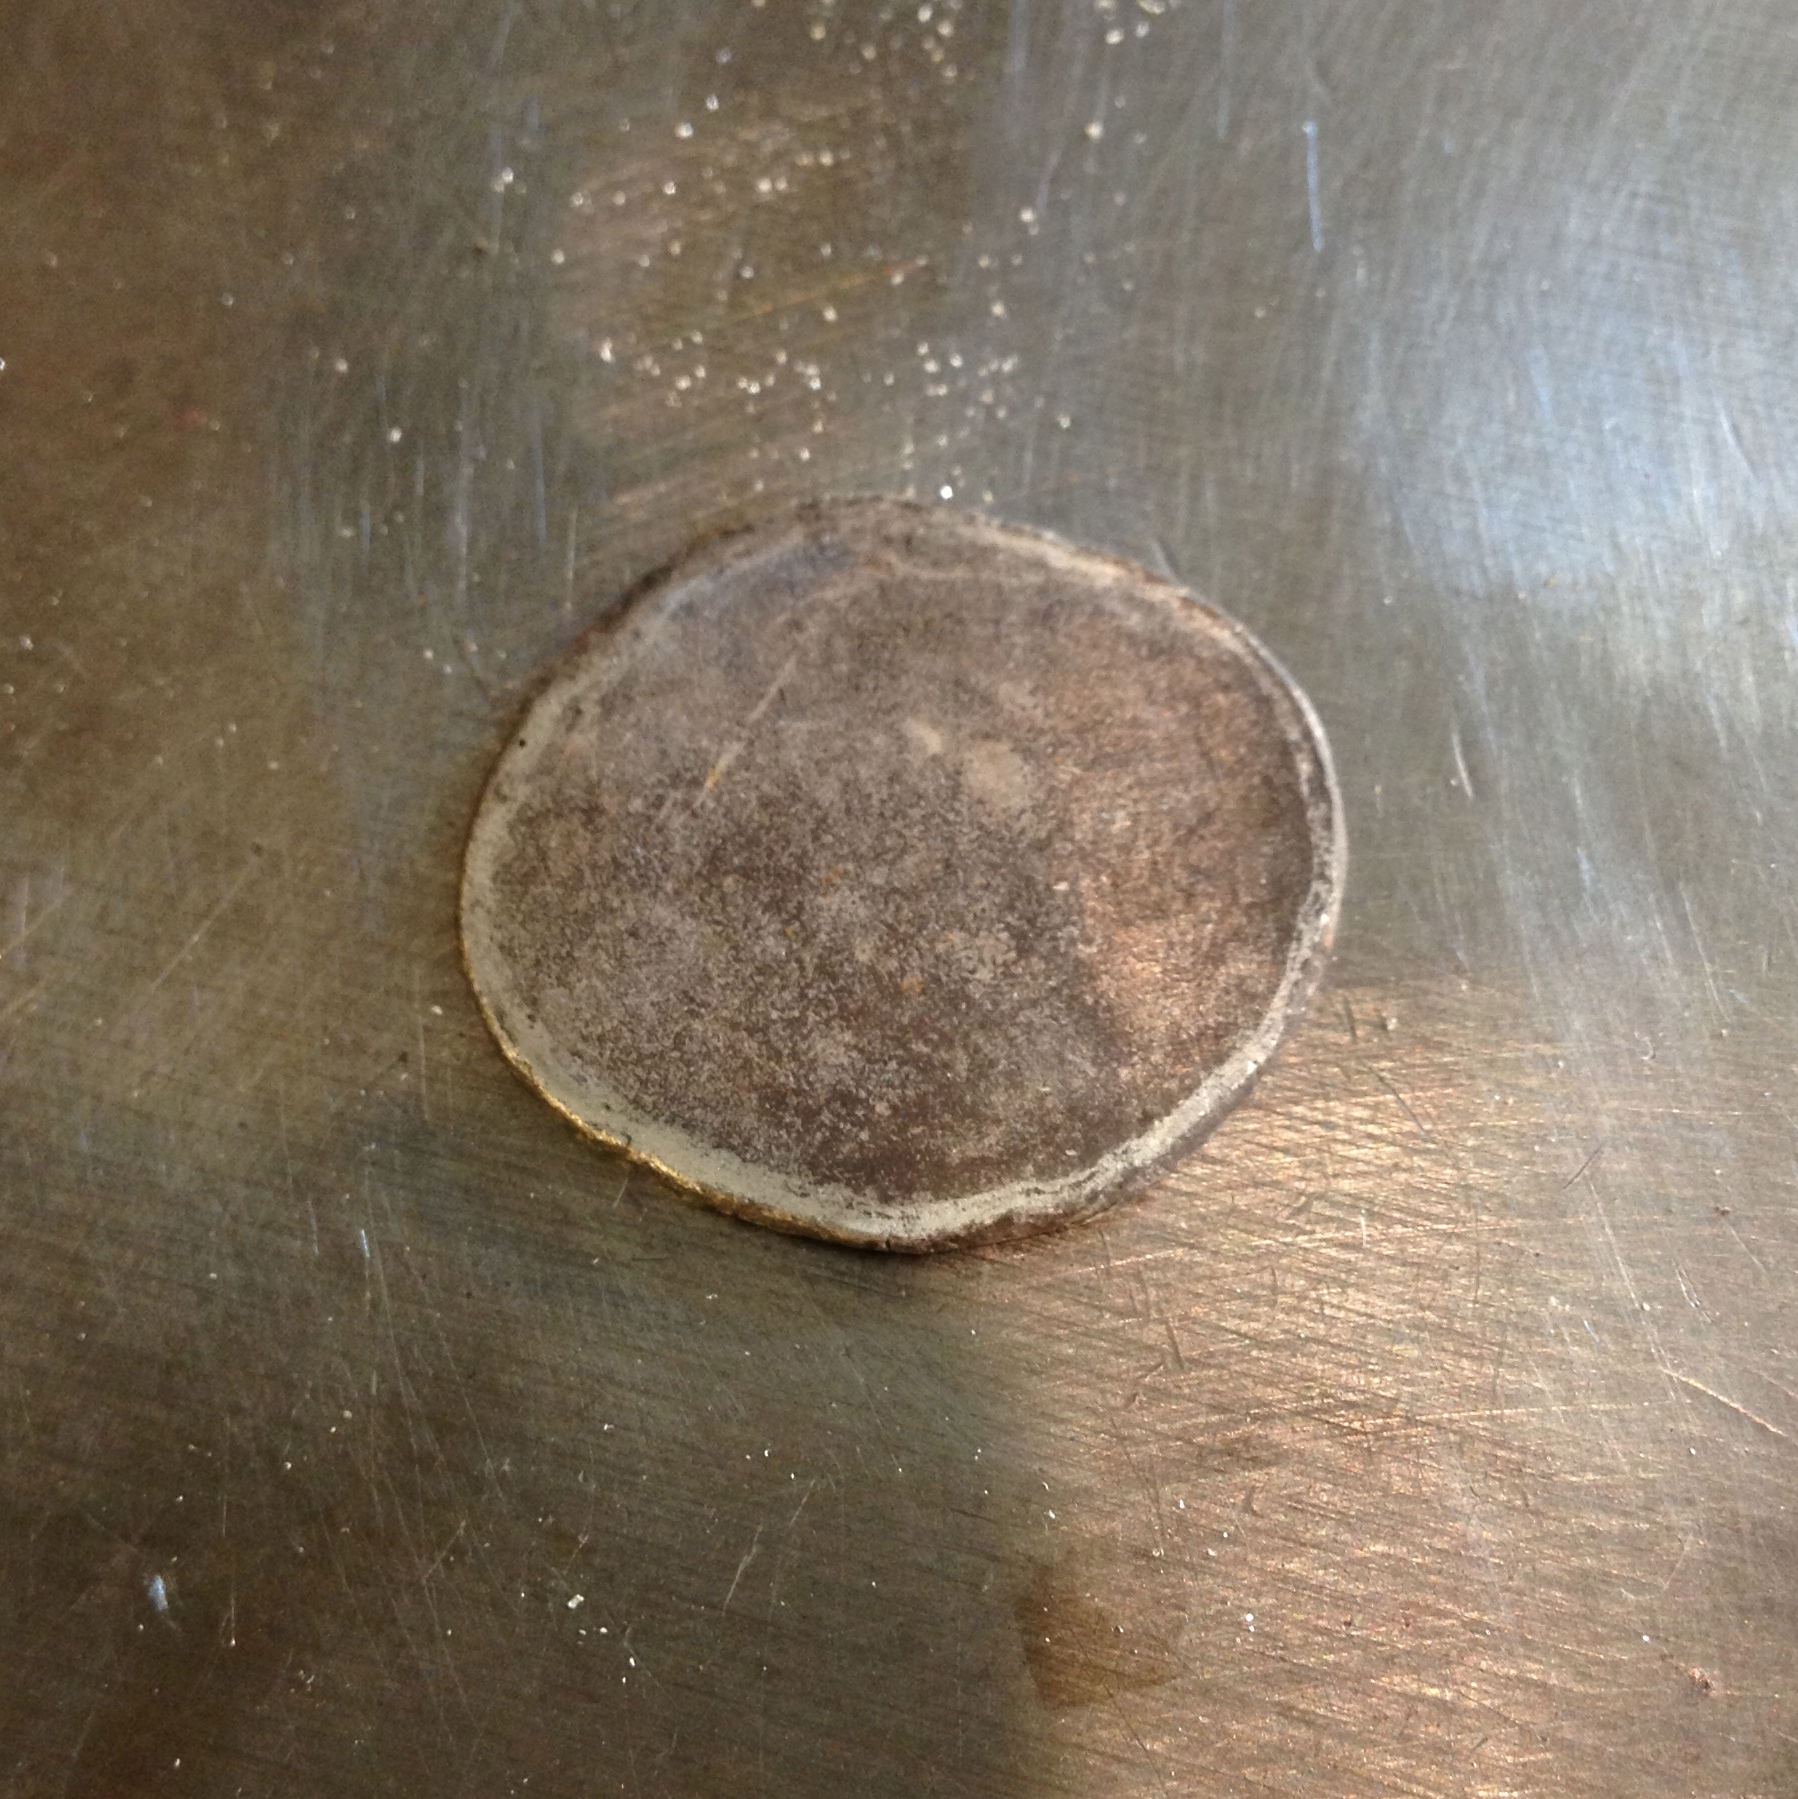
Then, you stamp a strip of silver with the new stamp you bought from Larry.
And solder it on to one end of the collar.
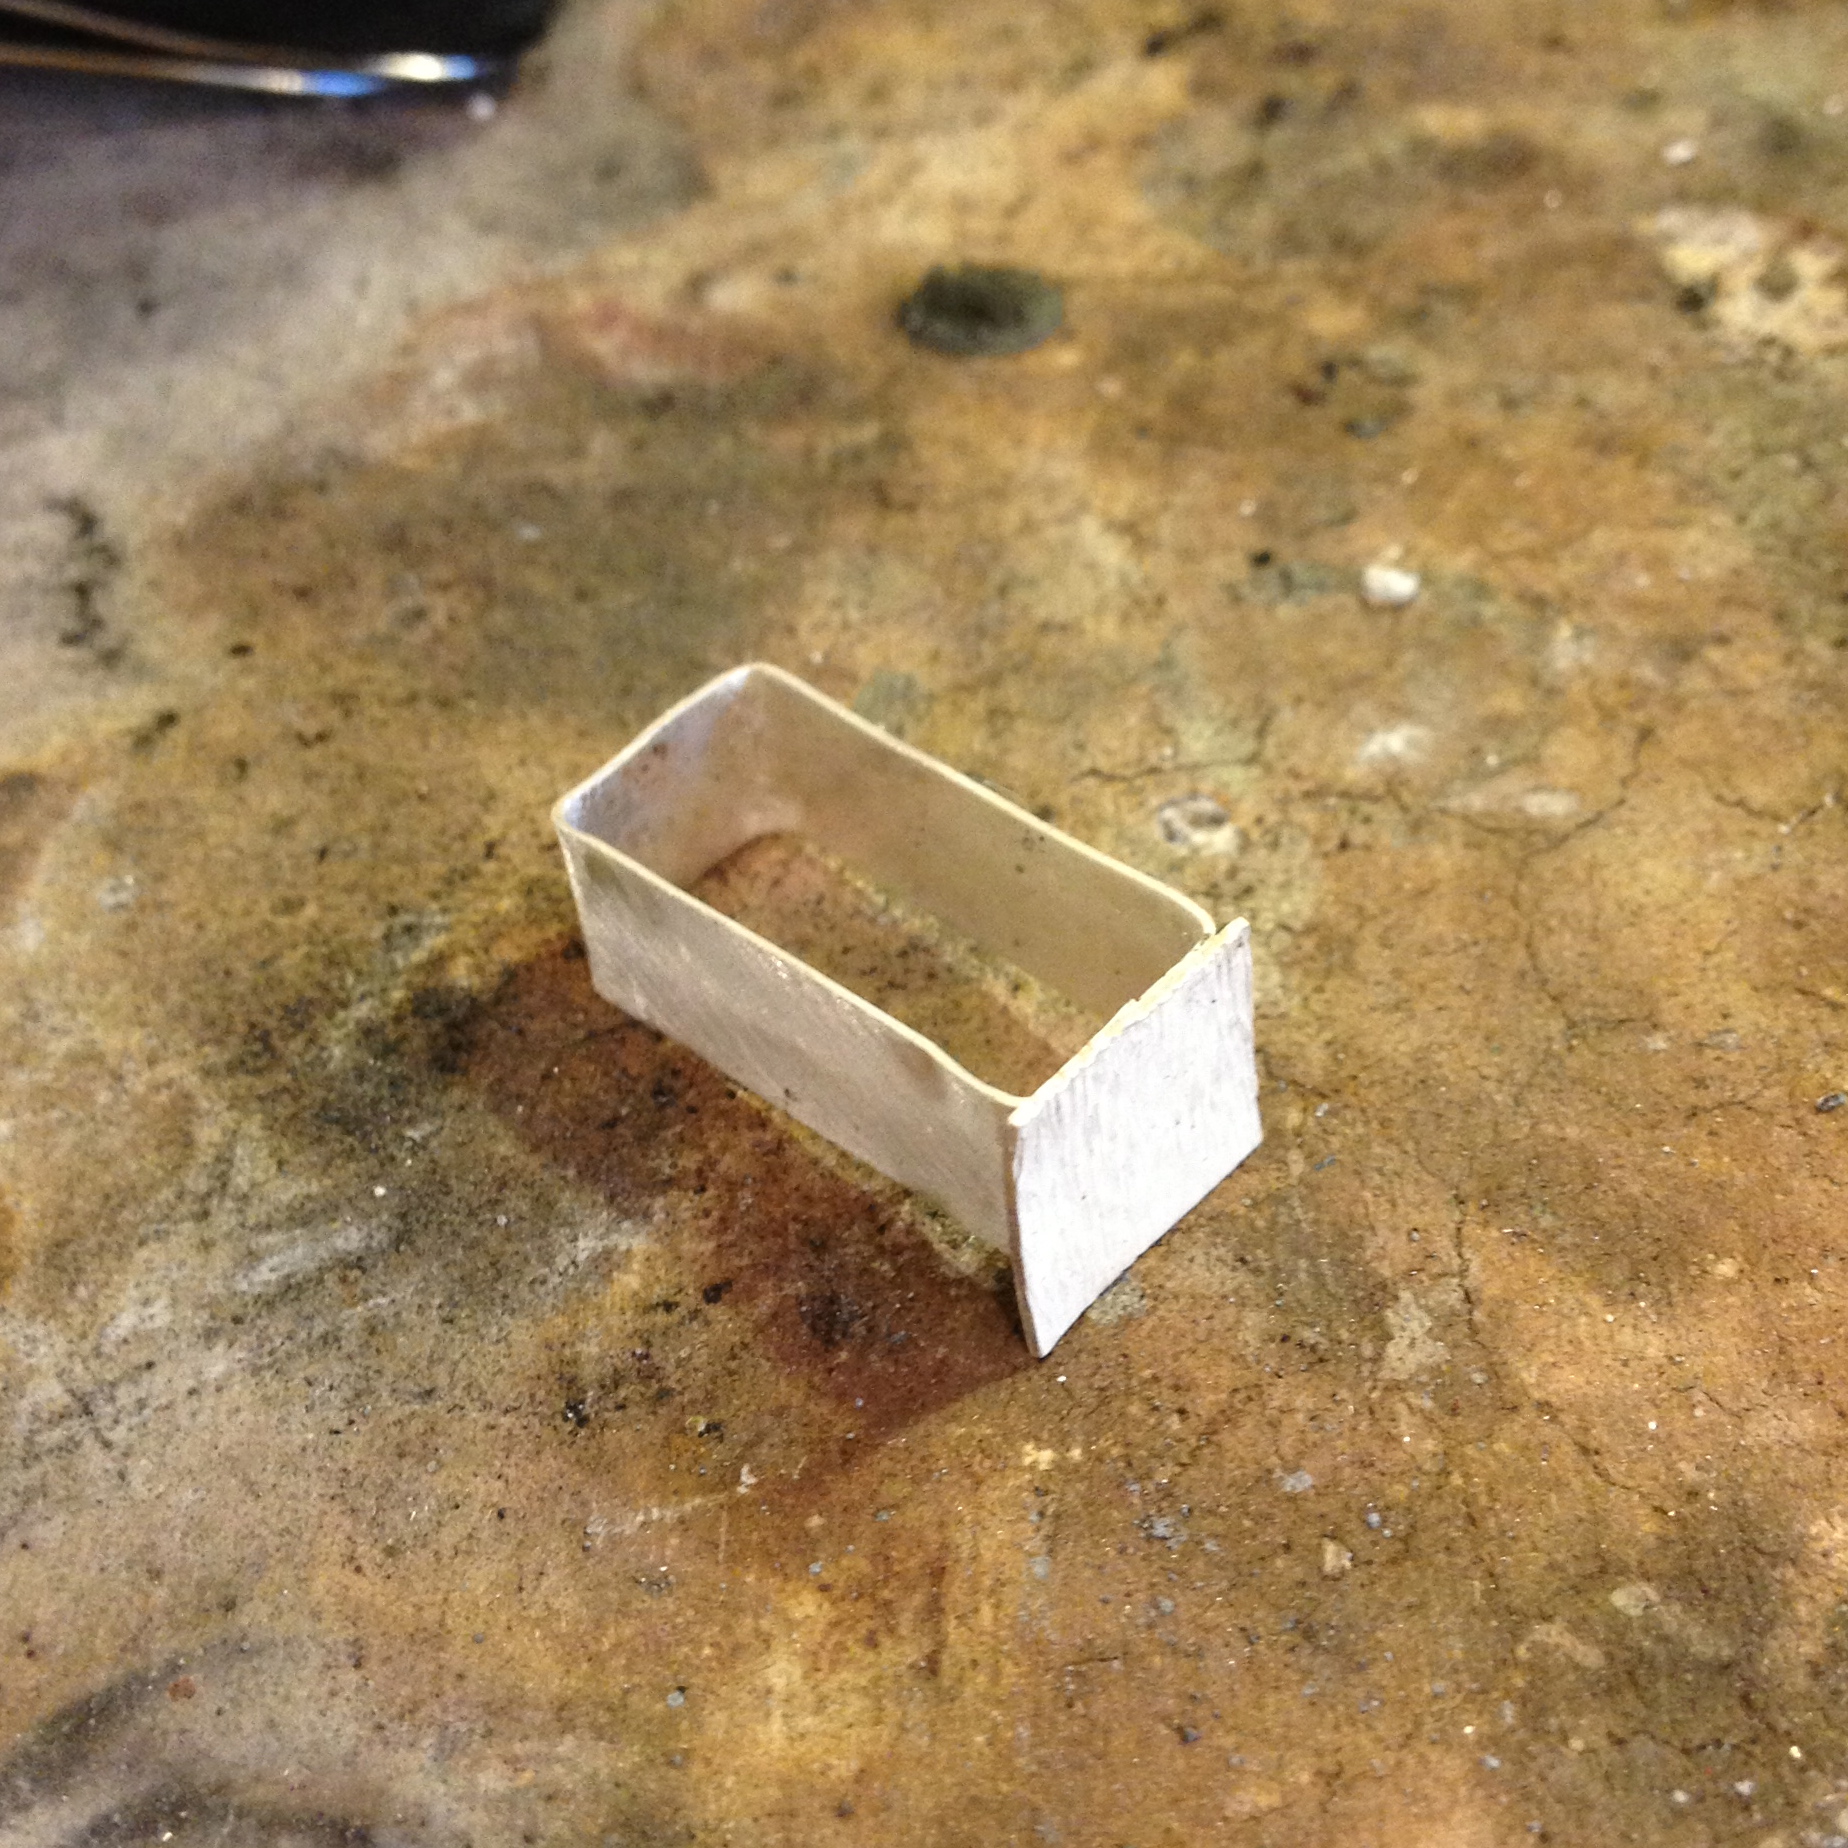
Then you do the same to the other end.
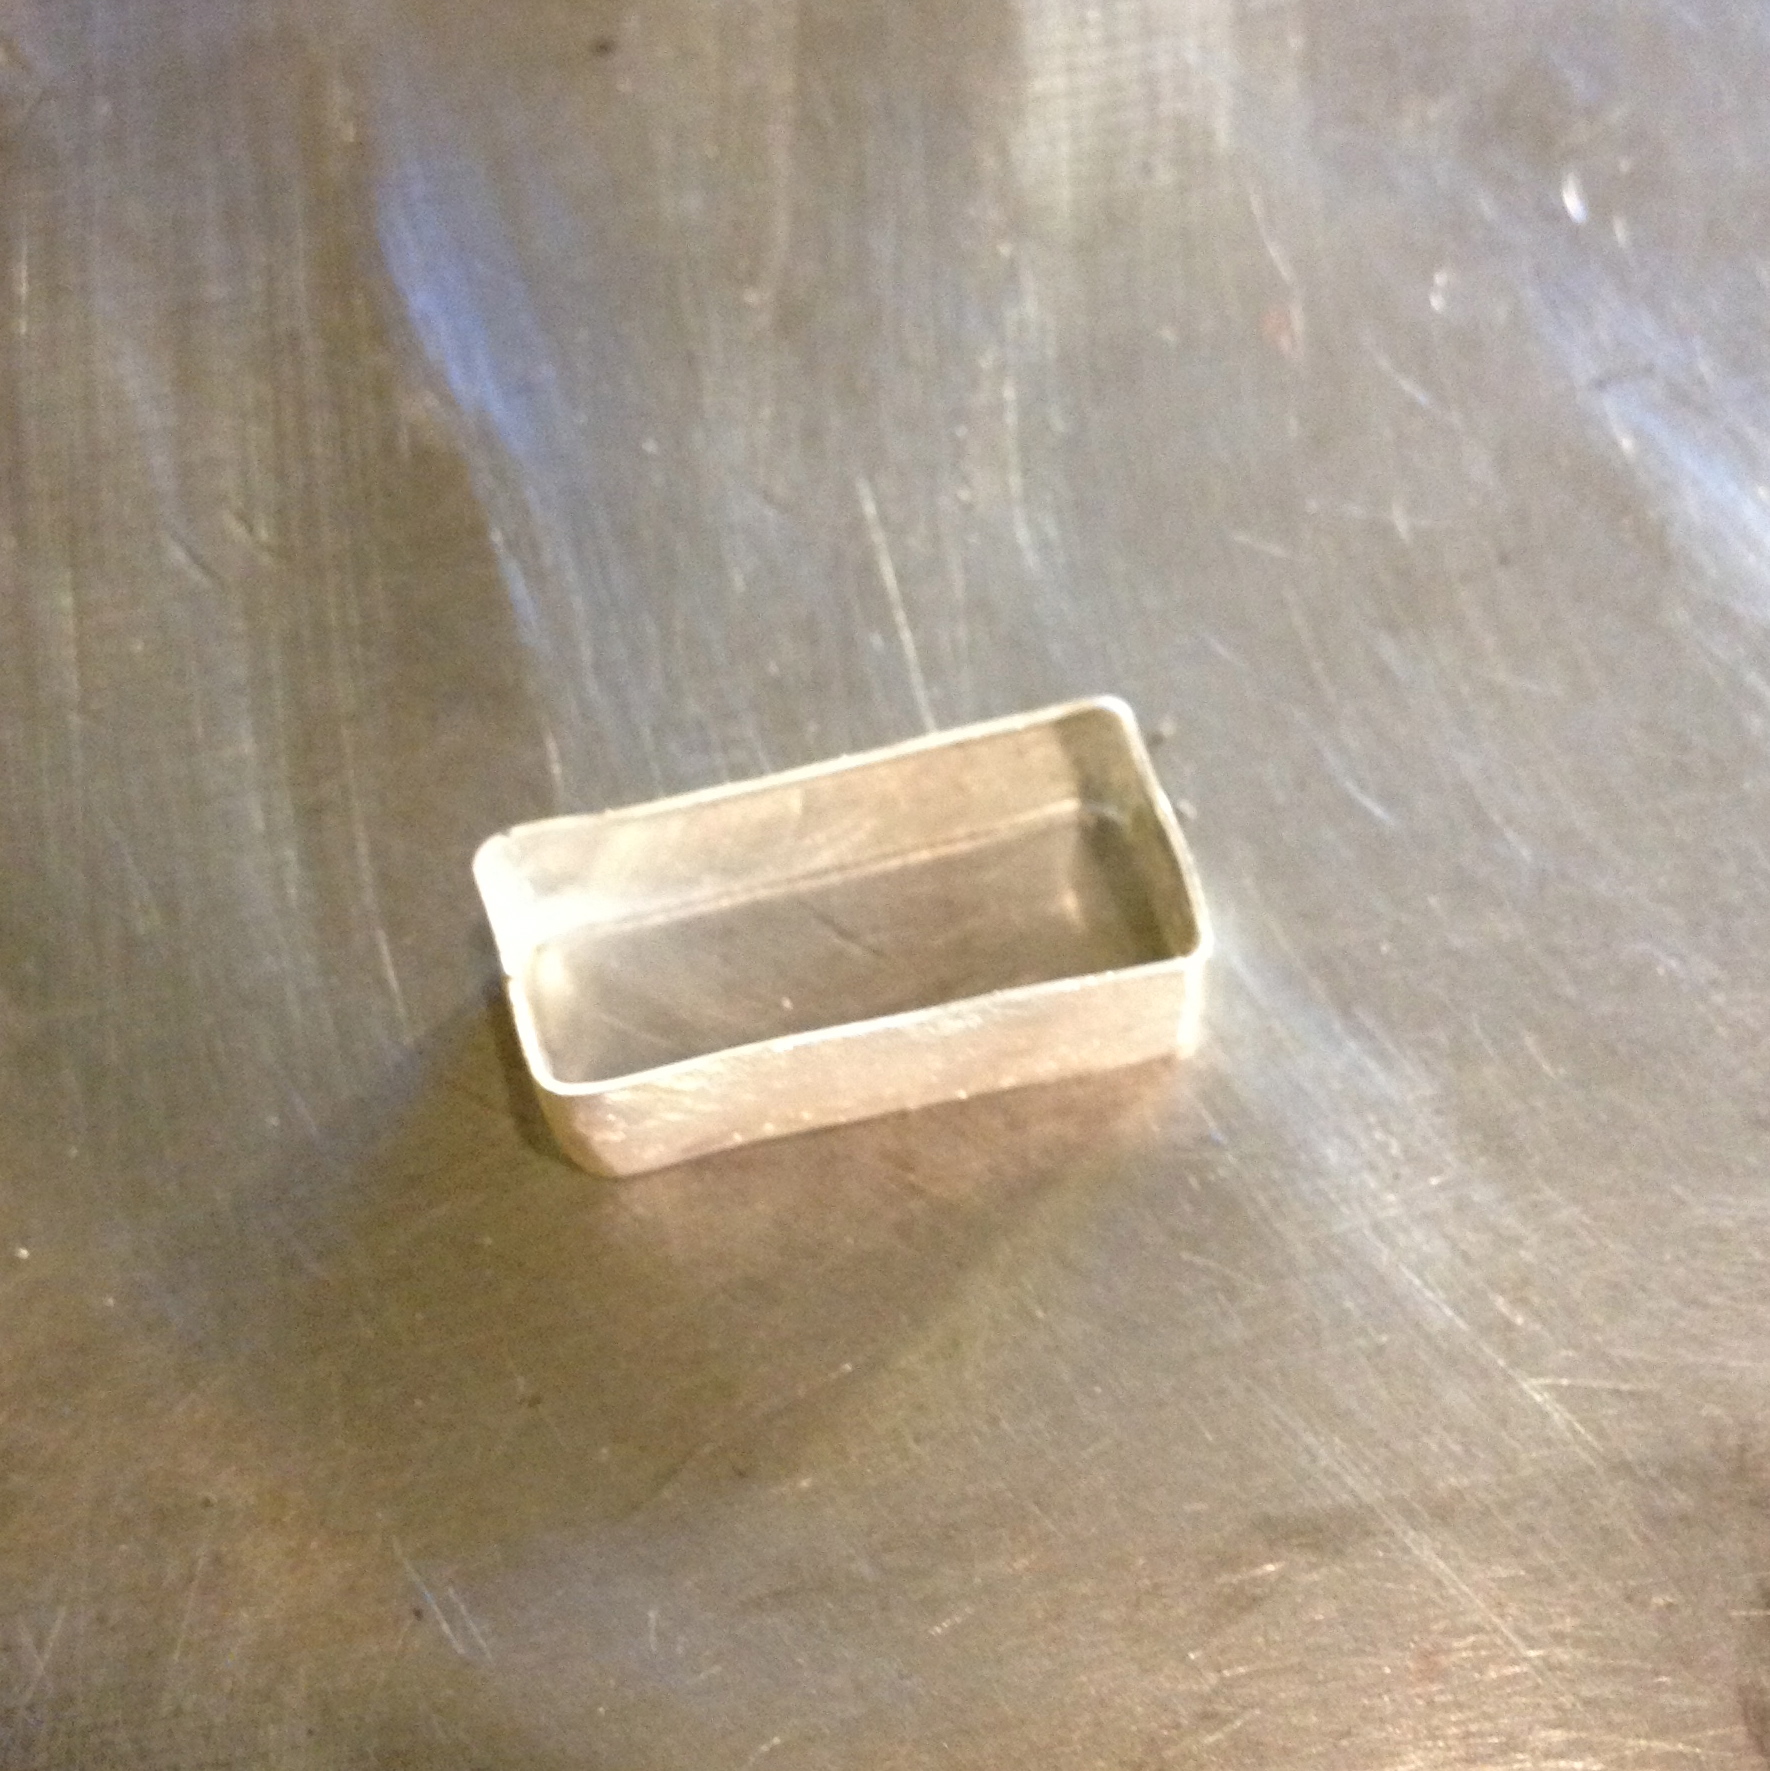
You file the ends flush with the longer sides of the collar.
And repeat the soldering process on both the longer ends.
Note: You had to cut the outer layers of silver longer than the bezel wire because the inner collar wasn’t long enough to cover up the ugly stub end of the amethyst which, for some unfortunate reason, also has a large grubby hole drilled into it.
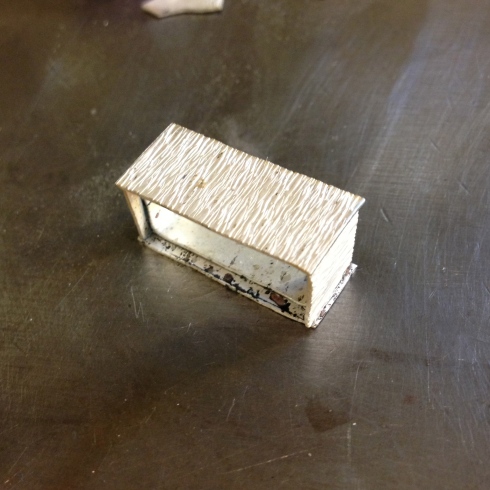
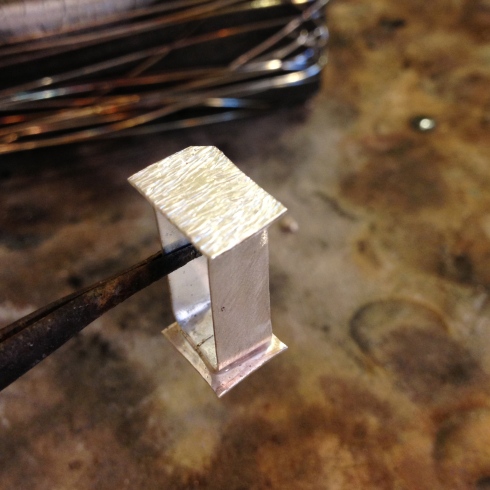
You file everything flush once more, and then solder a fifth strip to the top.
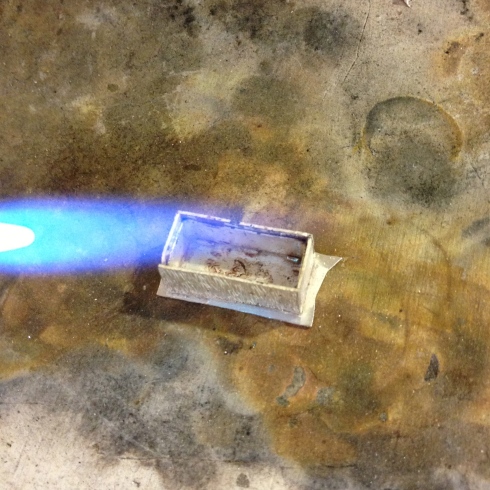
And sigh quietly to yourself when the thing fits back on top of the stone.
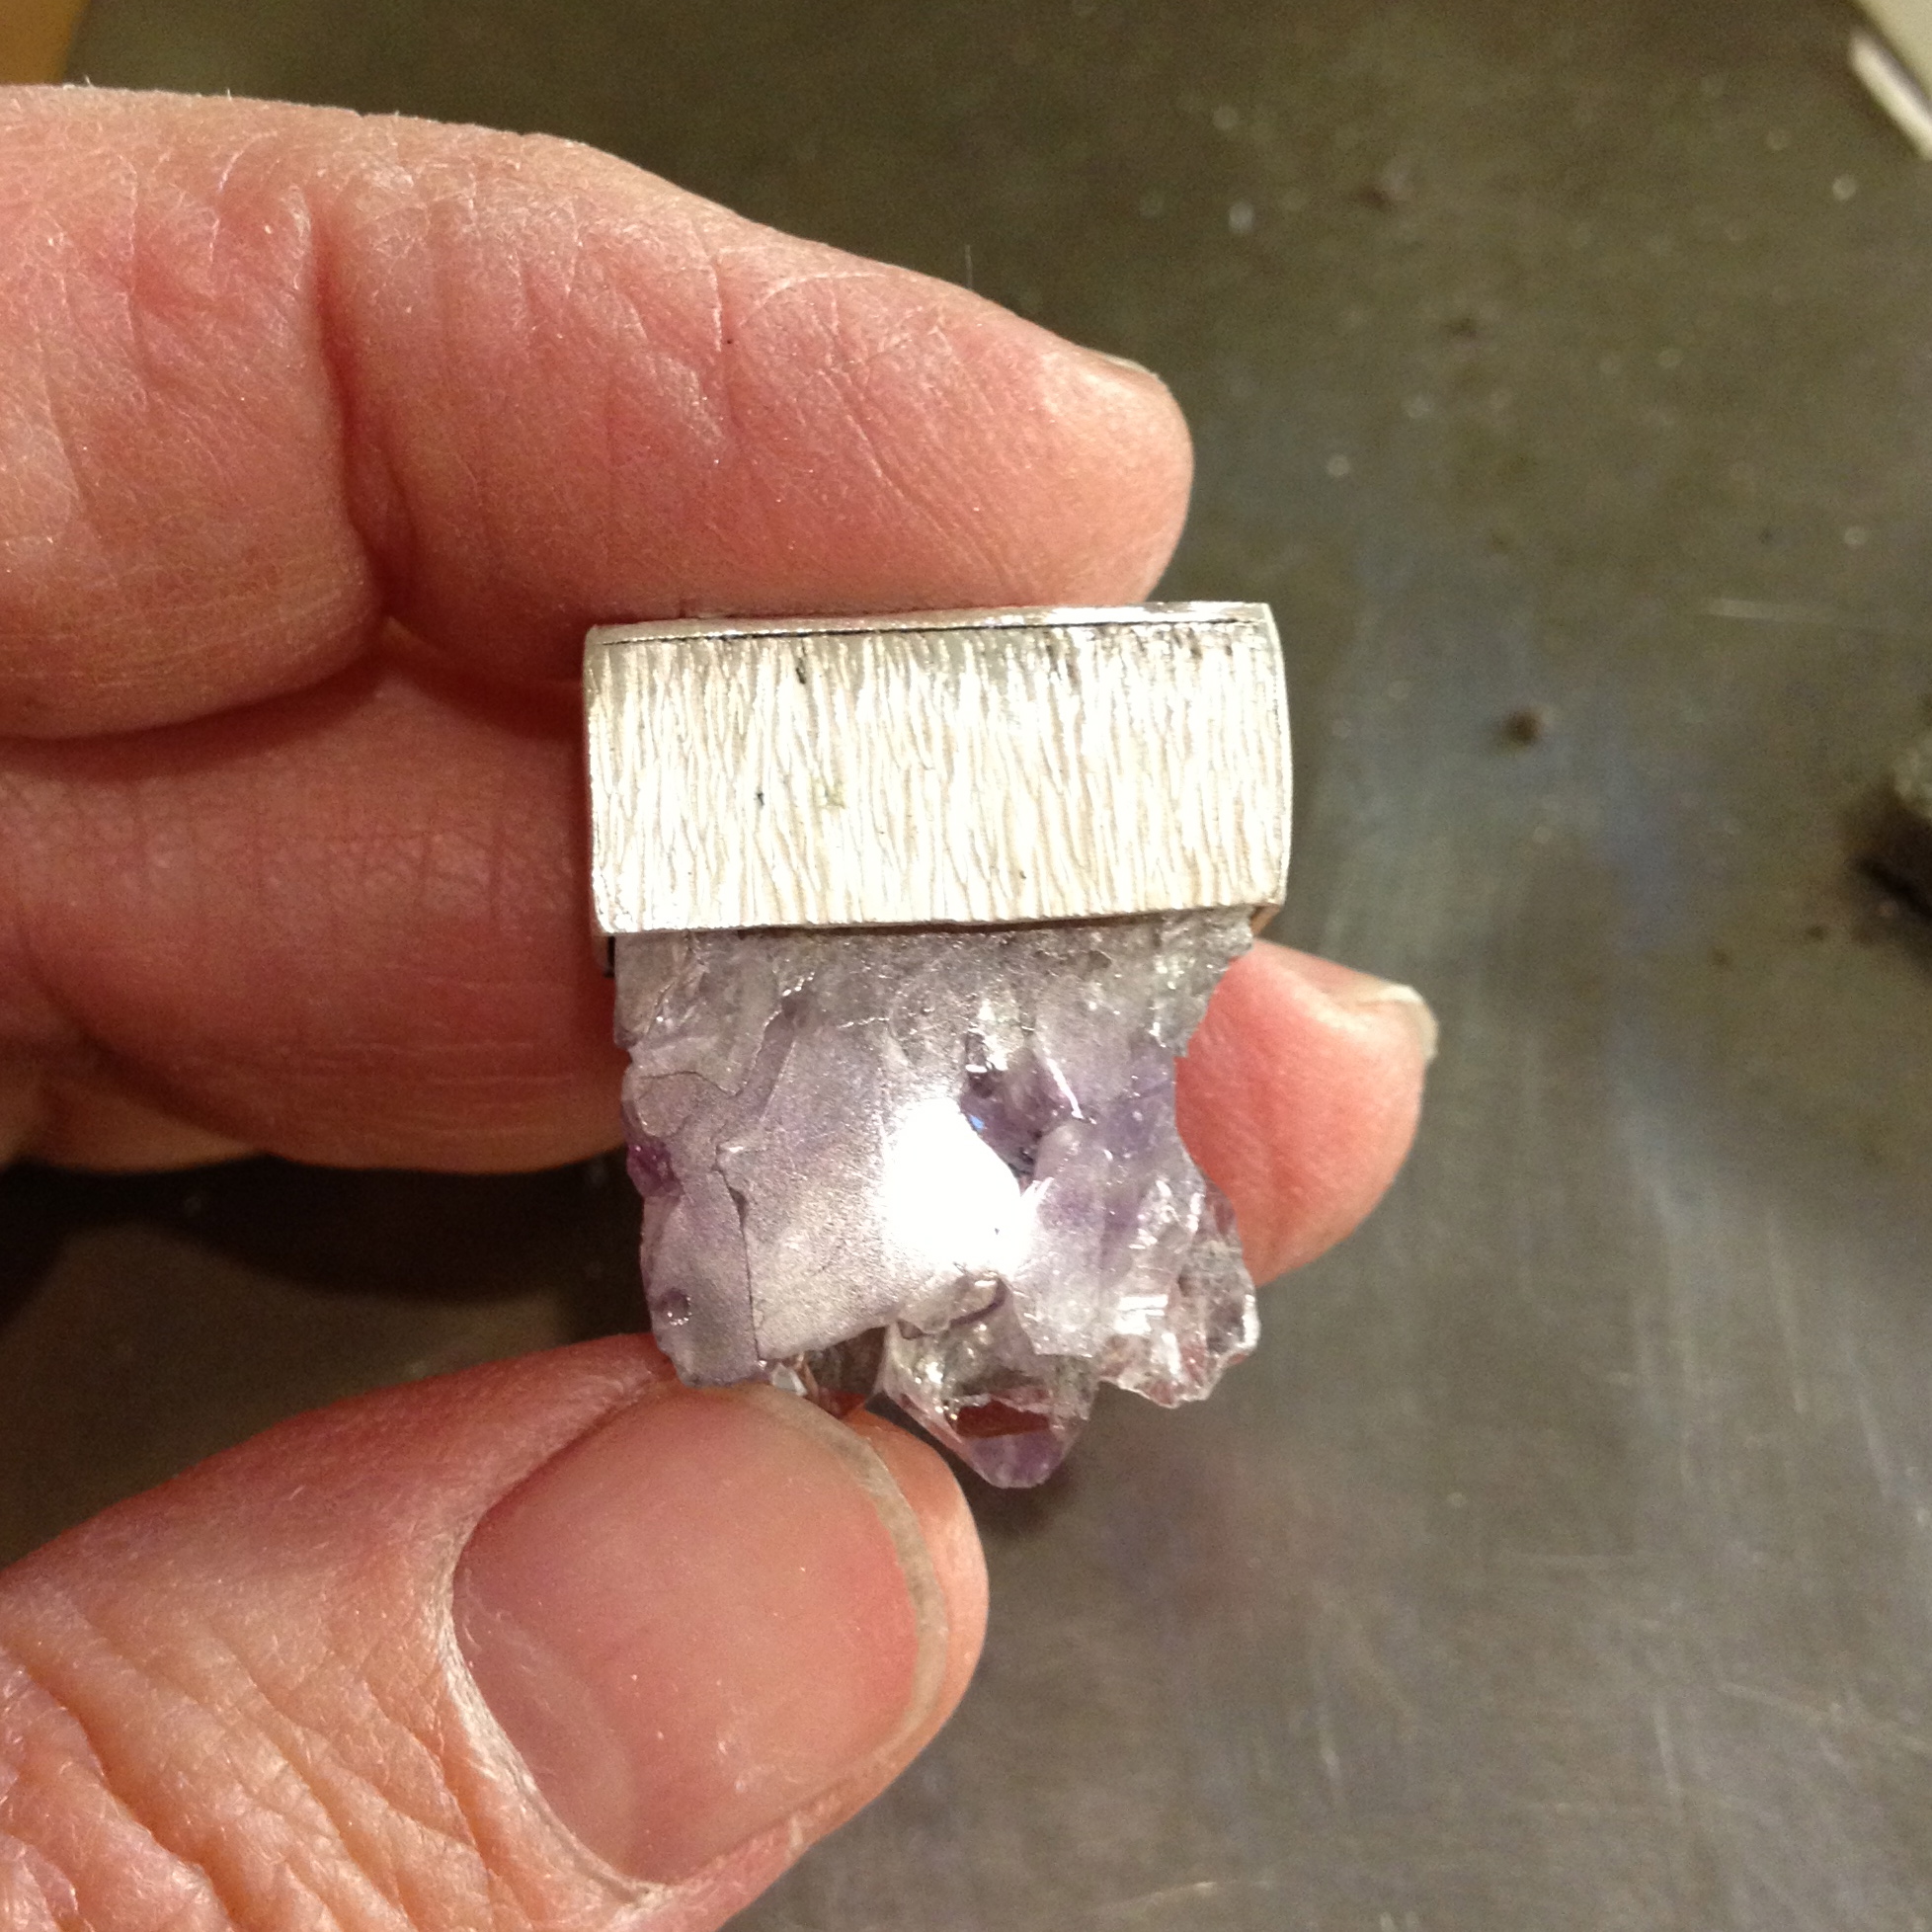
Because you really were wondering if it would.
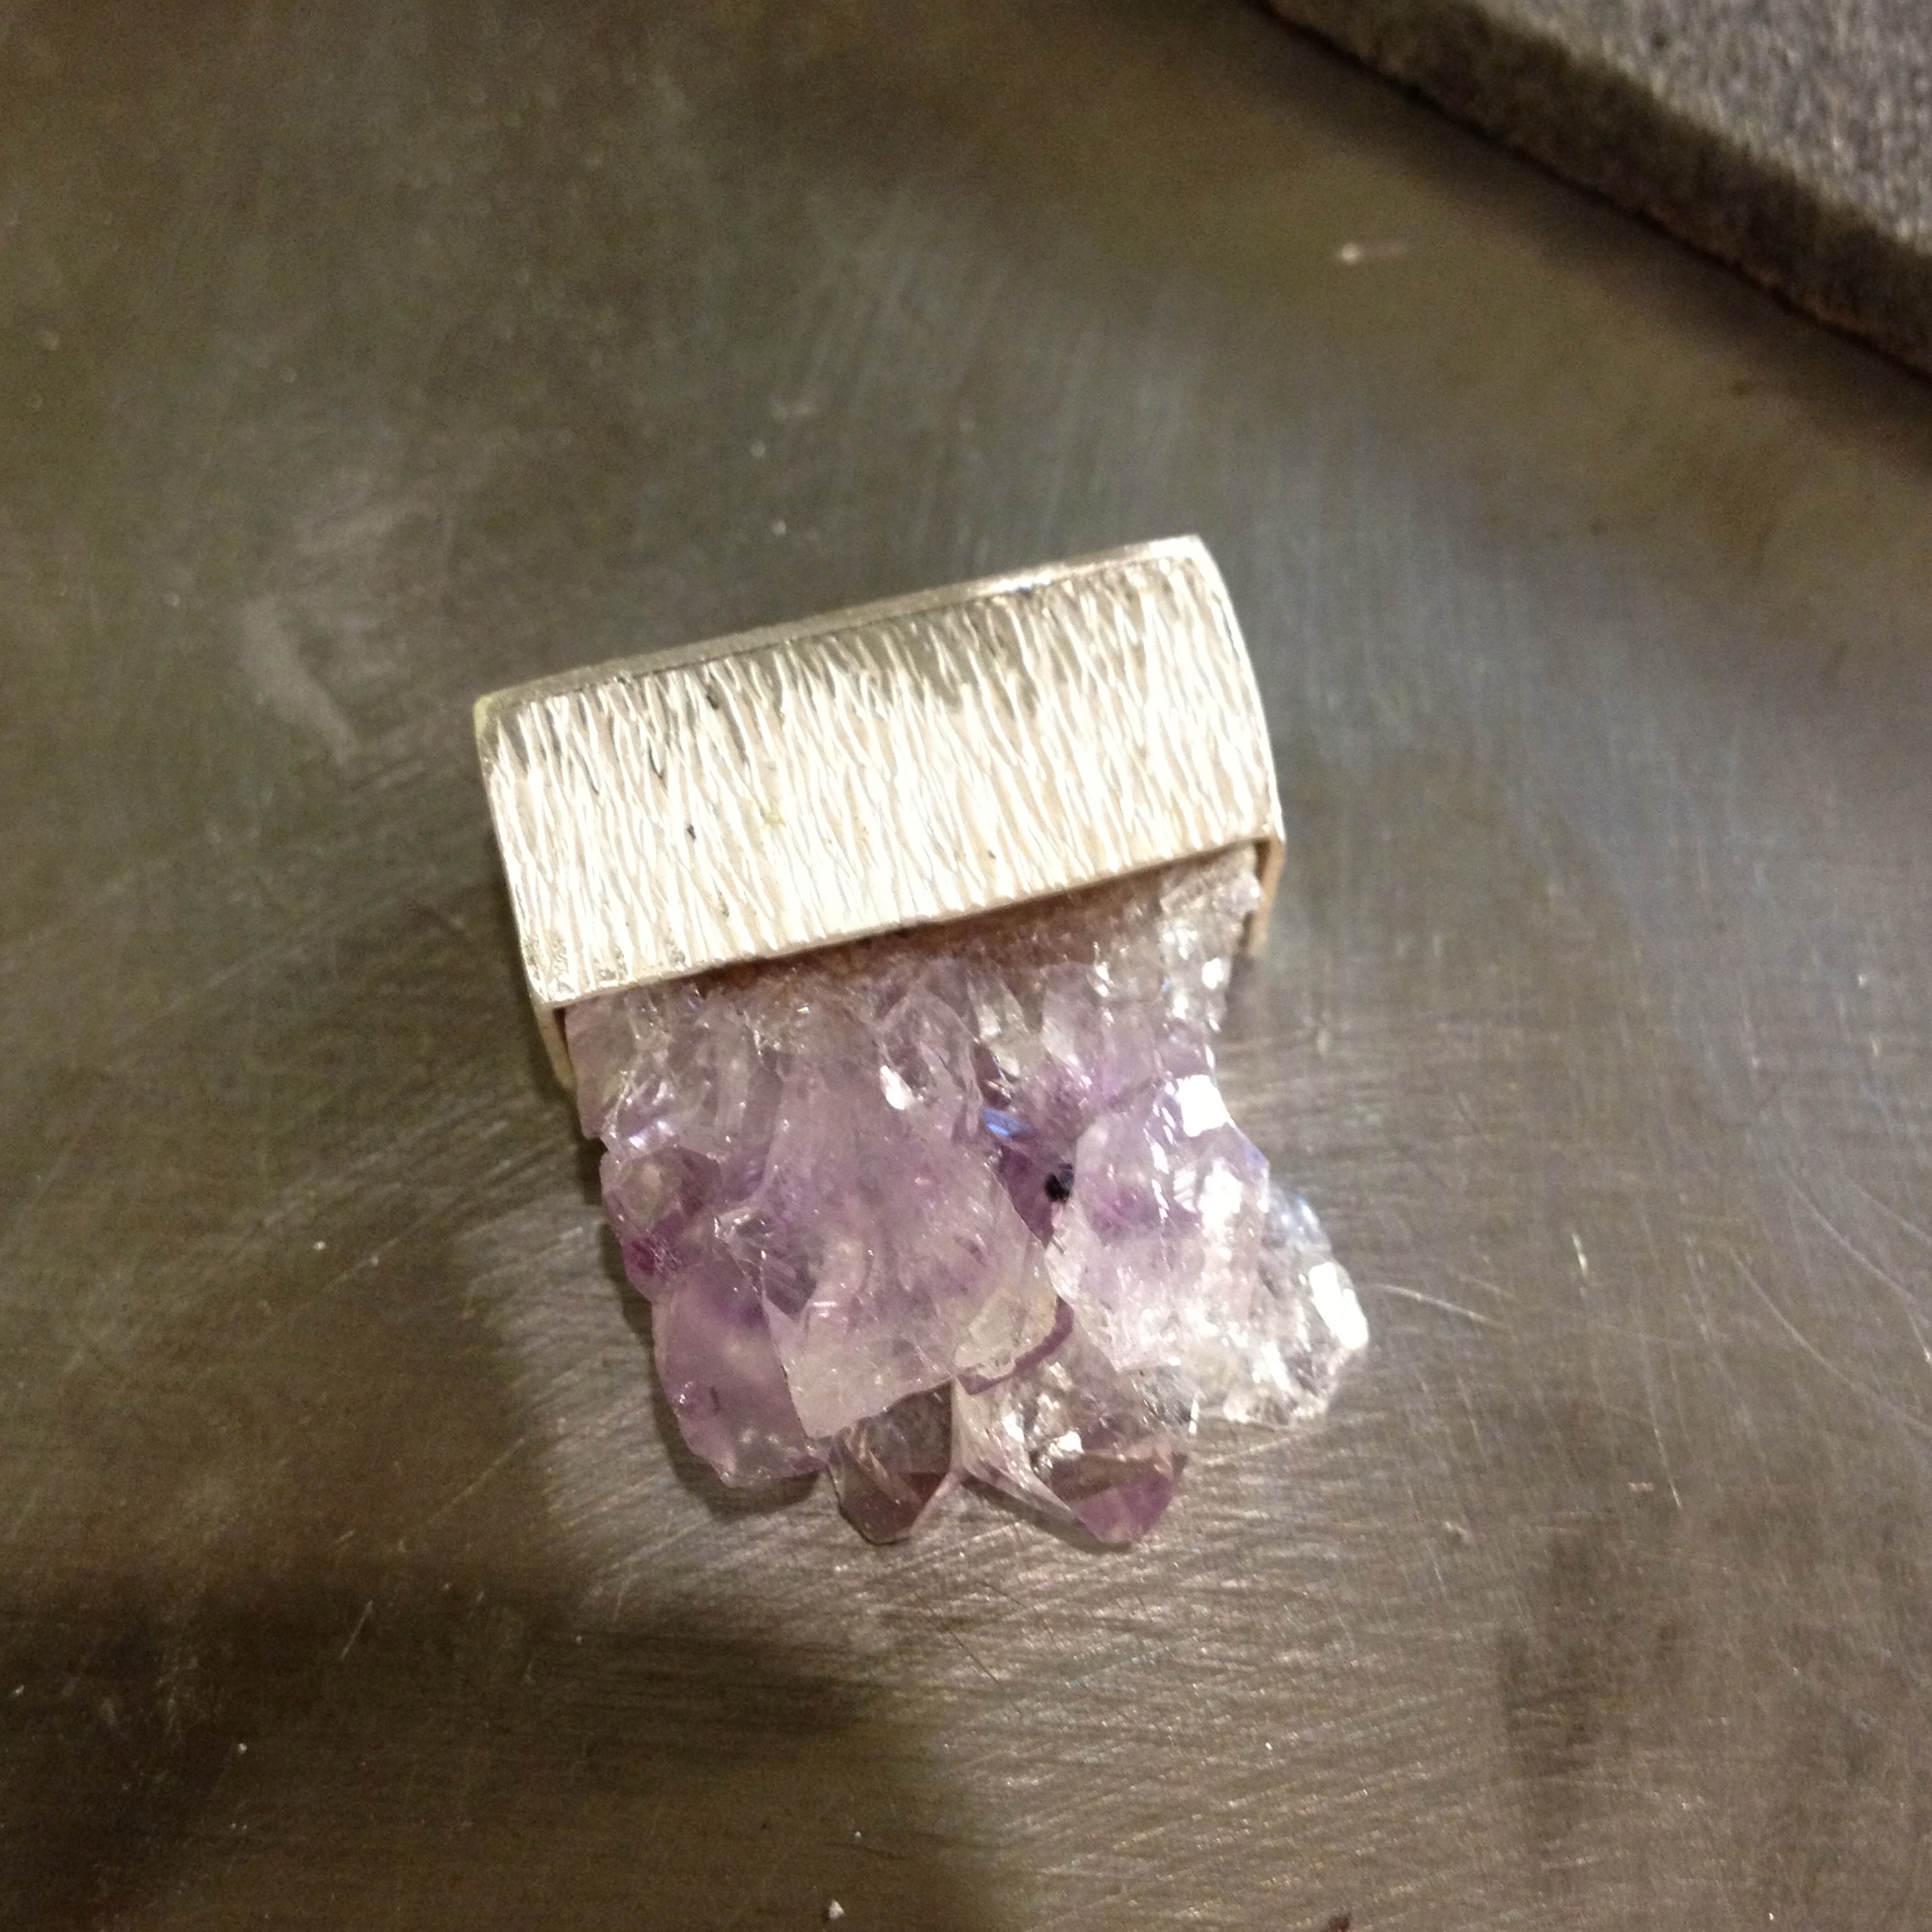
You’re not completely happy with the top edge being visible and wished you’d inserted the top sheet of silver inside the cap so you wouldn’t see it, but, on the whole, you decide it’s not too bad.
You start mulling around ideas of how to make a bale for it when,
Drats!
Those people that live in the house with you have come home from work, again, and now you have to go inside to cook for them 🙁
My life. I’m telling you!
So ….
It’s now tomorrow and you’re kind of thrown off your groove a bit and don’t really know what to do next with your small piece of dressed up amethyst.
So you play around with all sorts of beads and such.
You kind of like the funky look of this yellow lamp work bead that Kim made, but because you’re not absolutely sure you decide to move on from that somewhat strange idea.
You’re going to save that little beauty for another day.
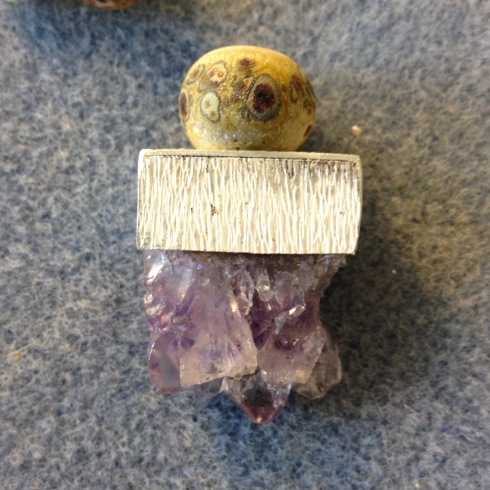
And then, you have an idea.
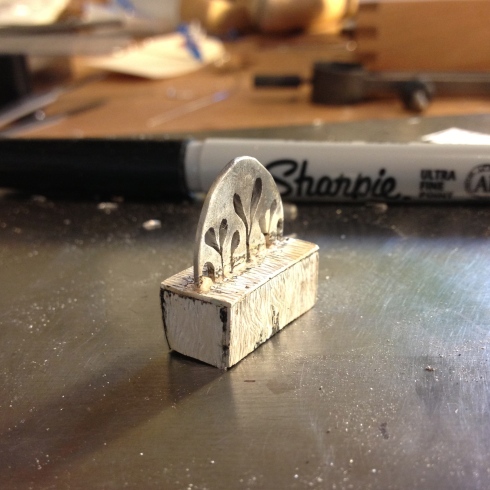
So you take a lump of silver that just happens to be hanging around on the table.
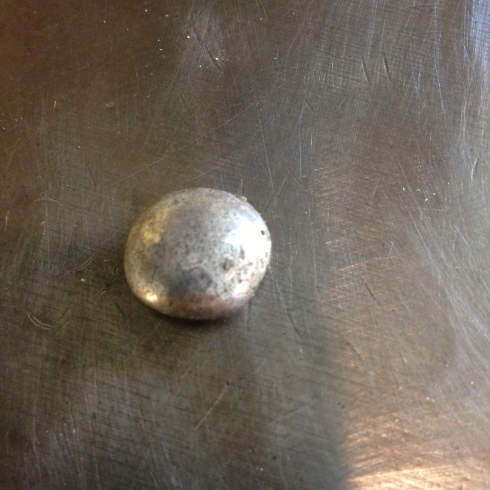
And hammer it into a disc.
You draw some leaves on it
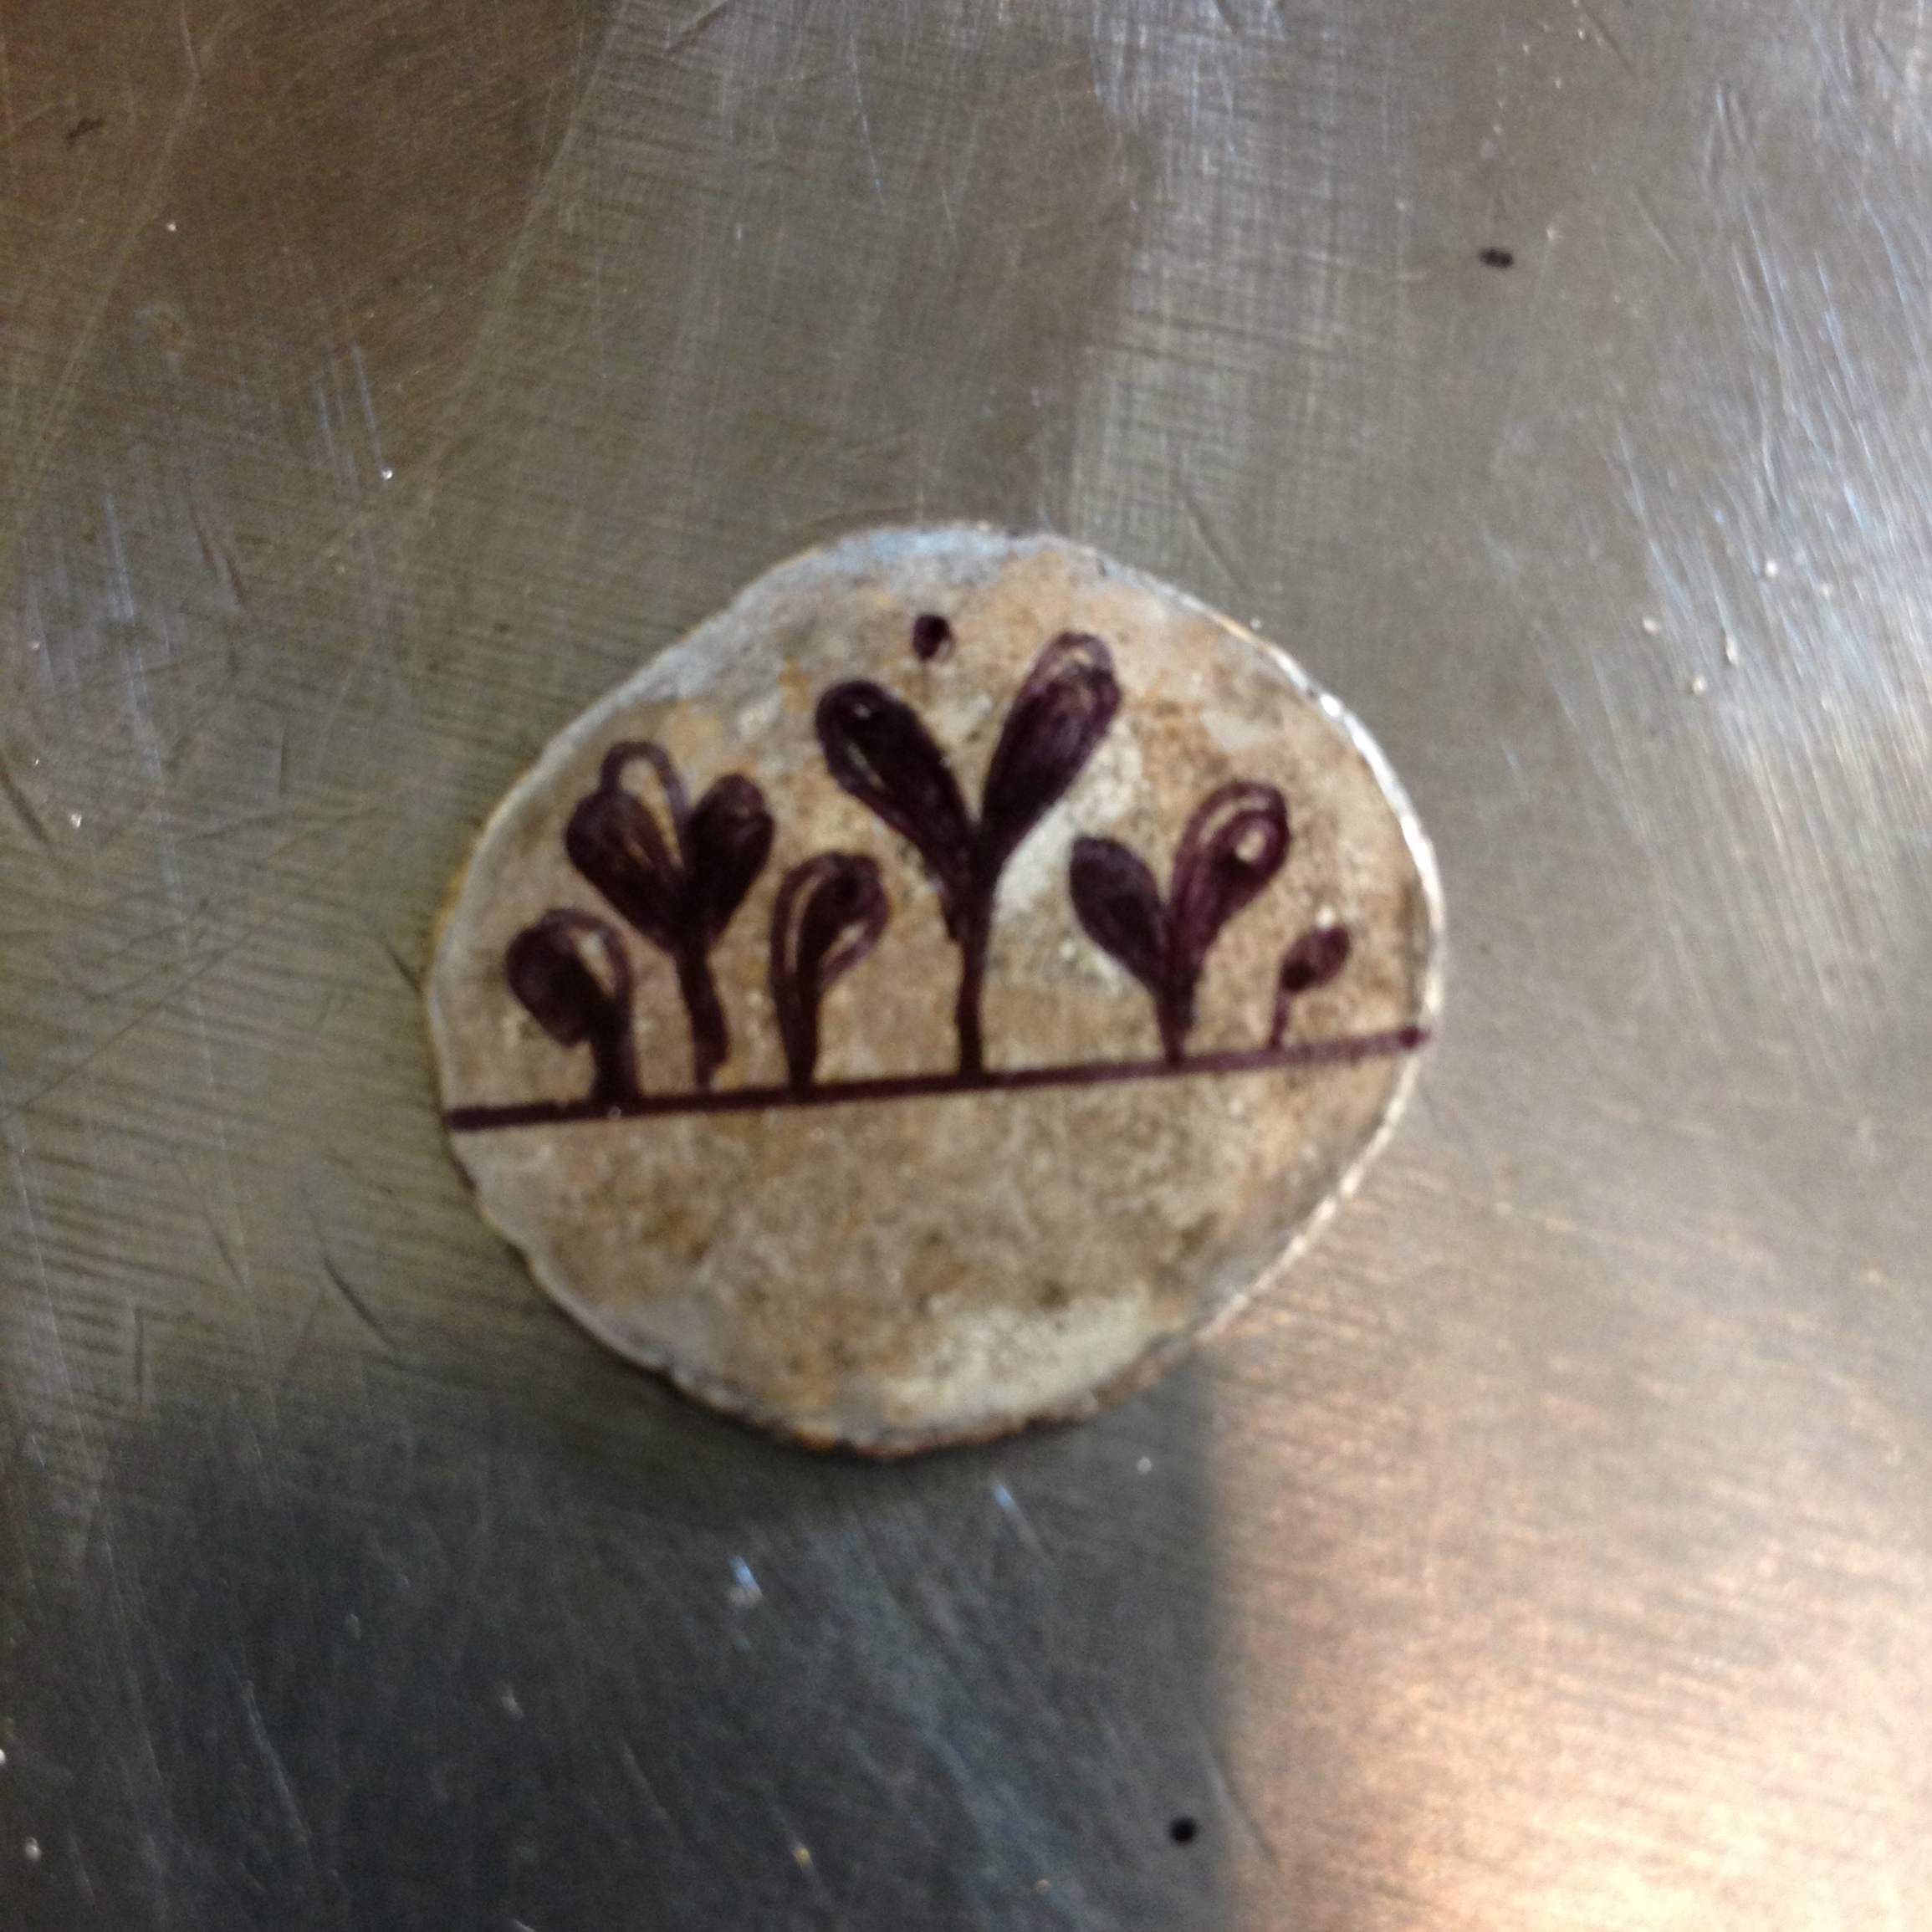
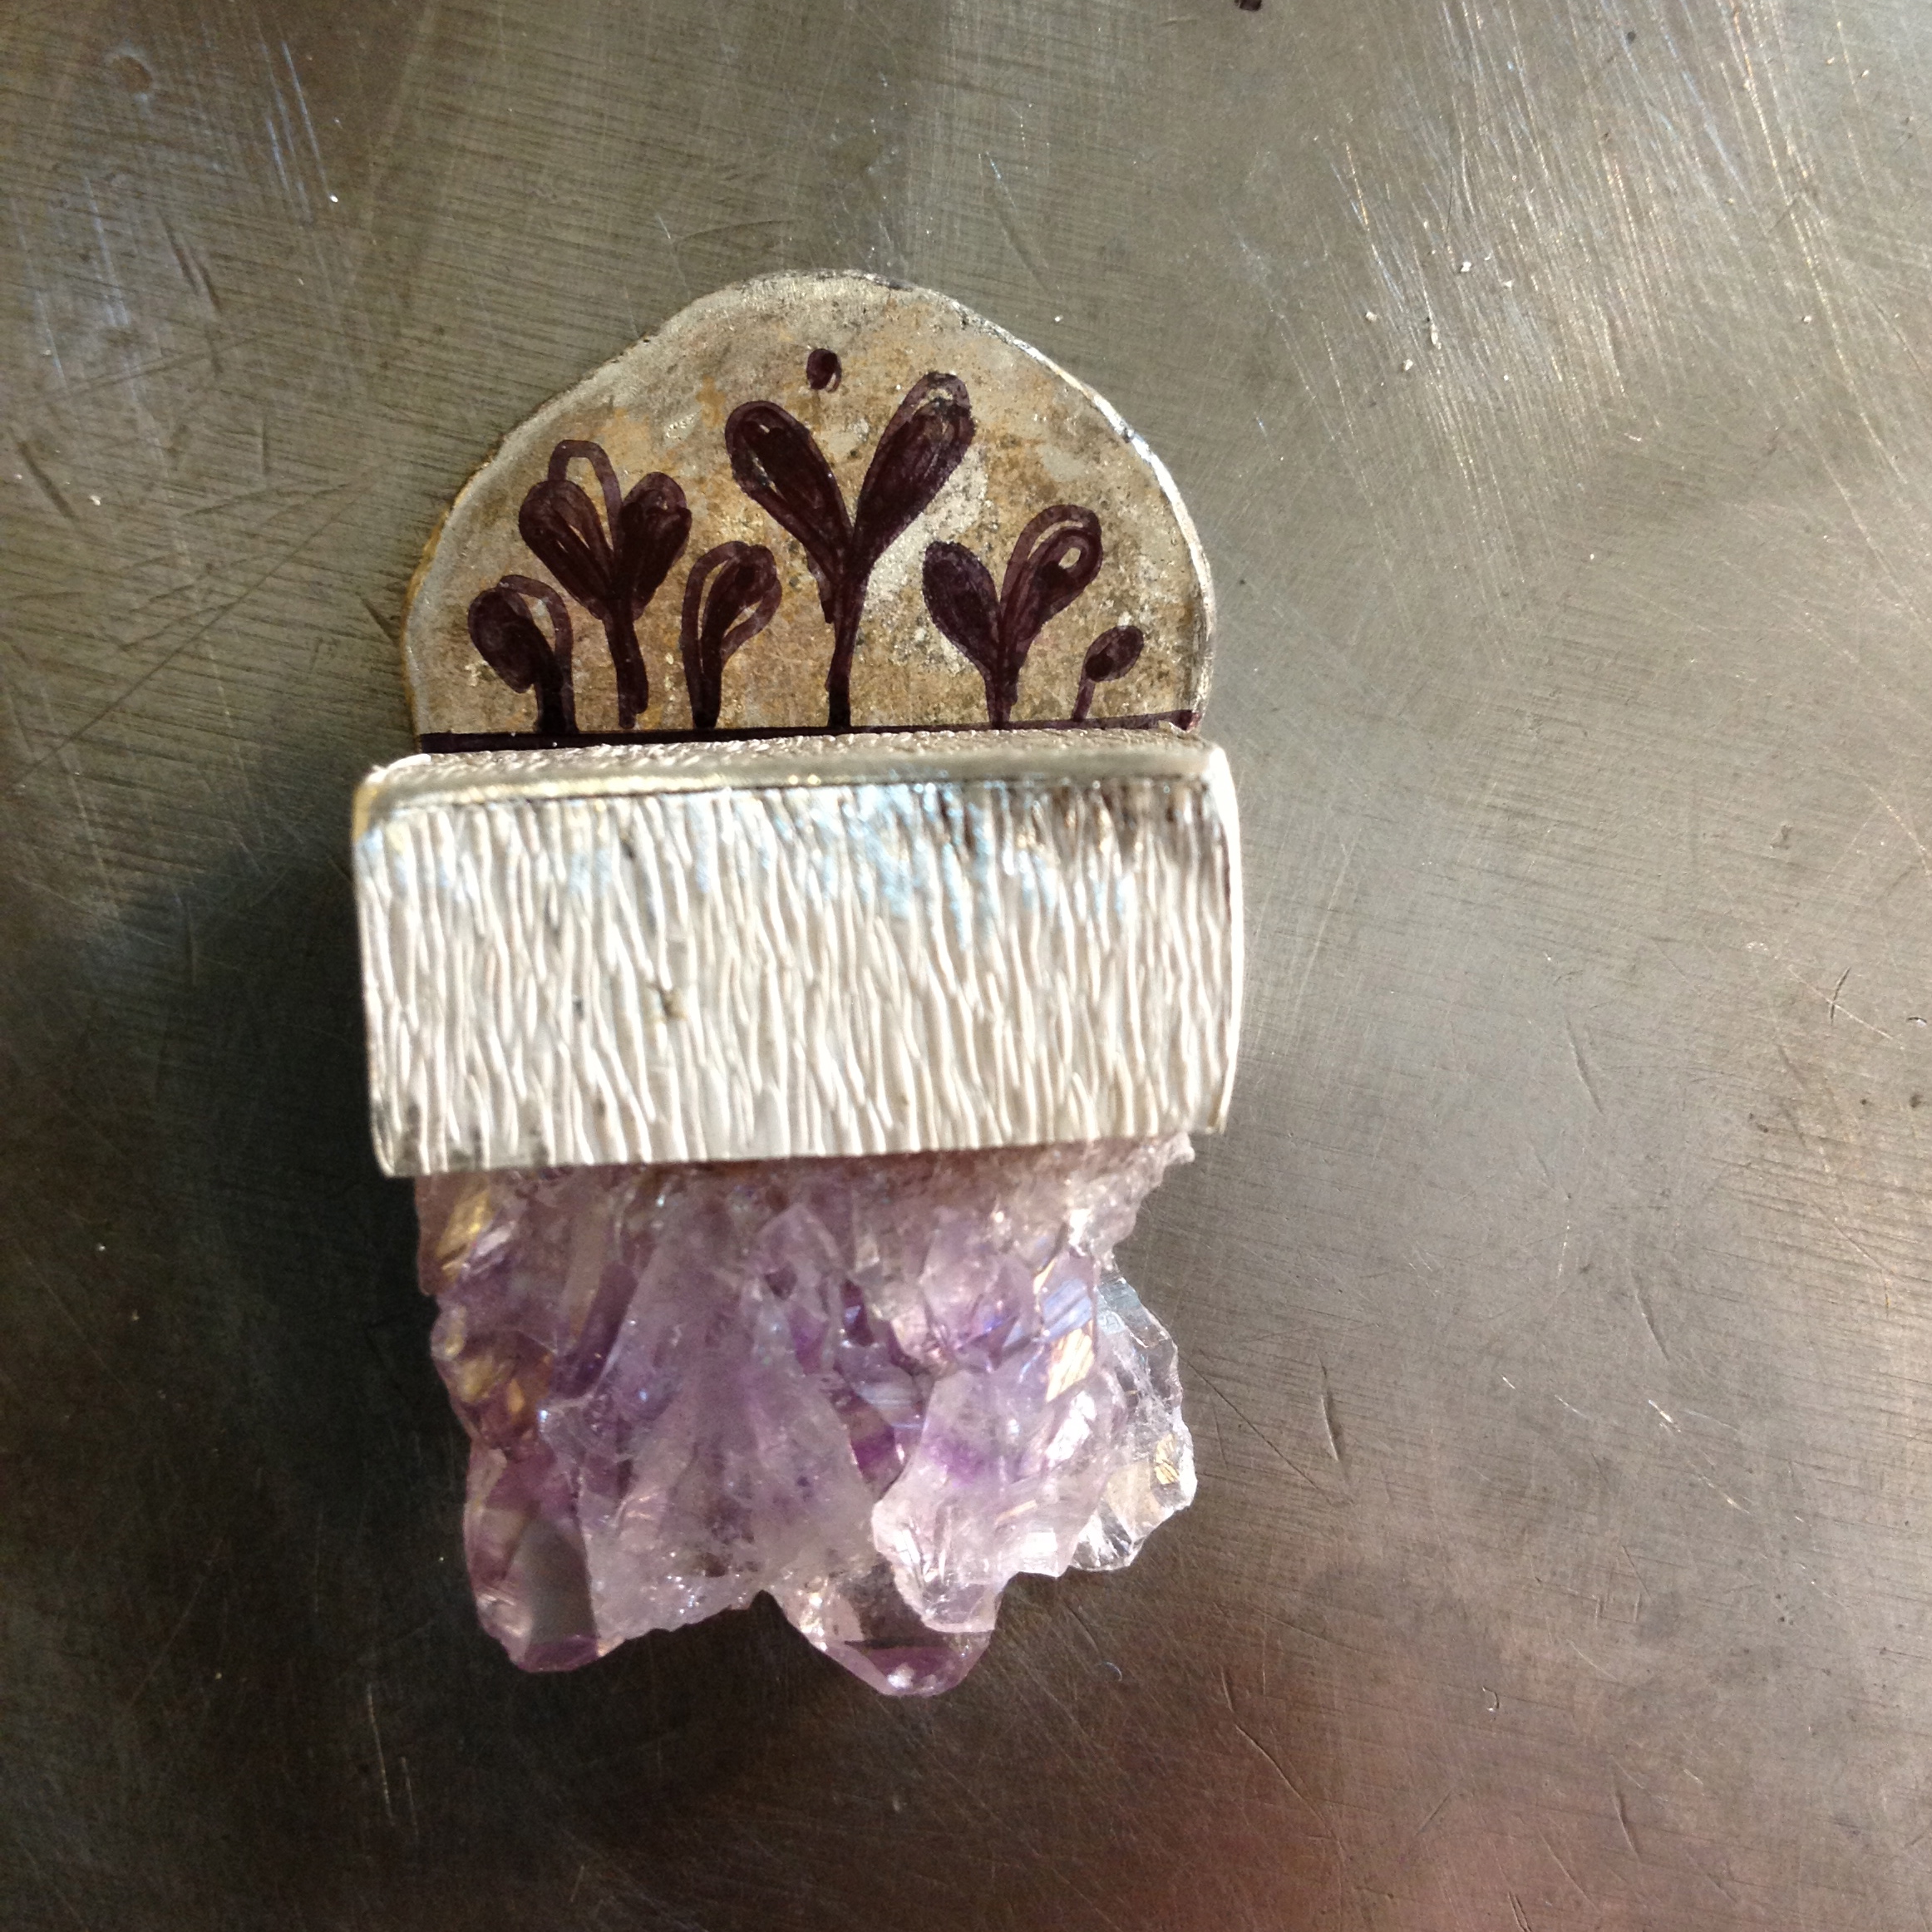
and place it next to the amethyst to see what you think.
You’re actually not convinced about it, but now you’re a bit fed up with all the indecision that’s been going on and decide to proceed anyway.
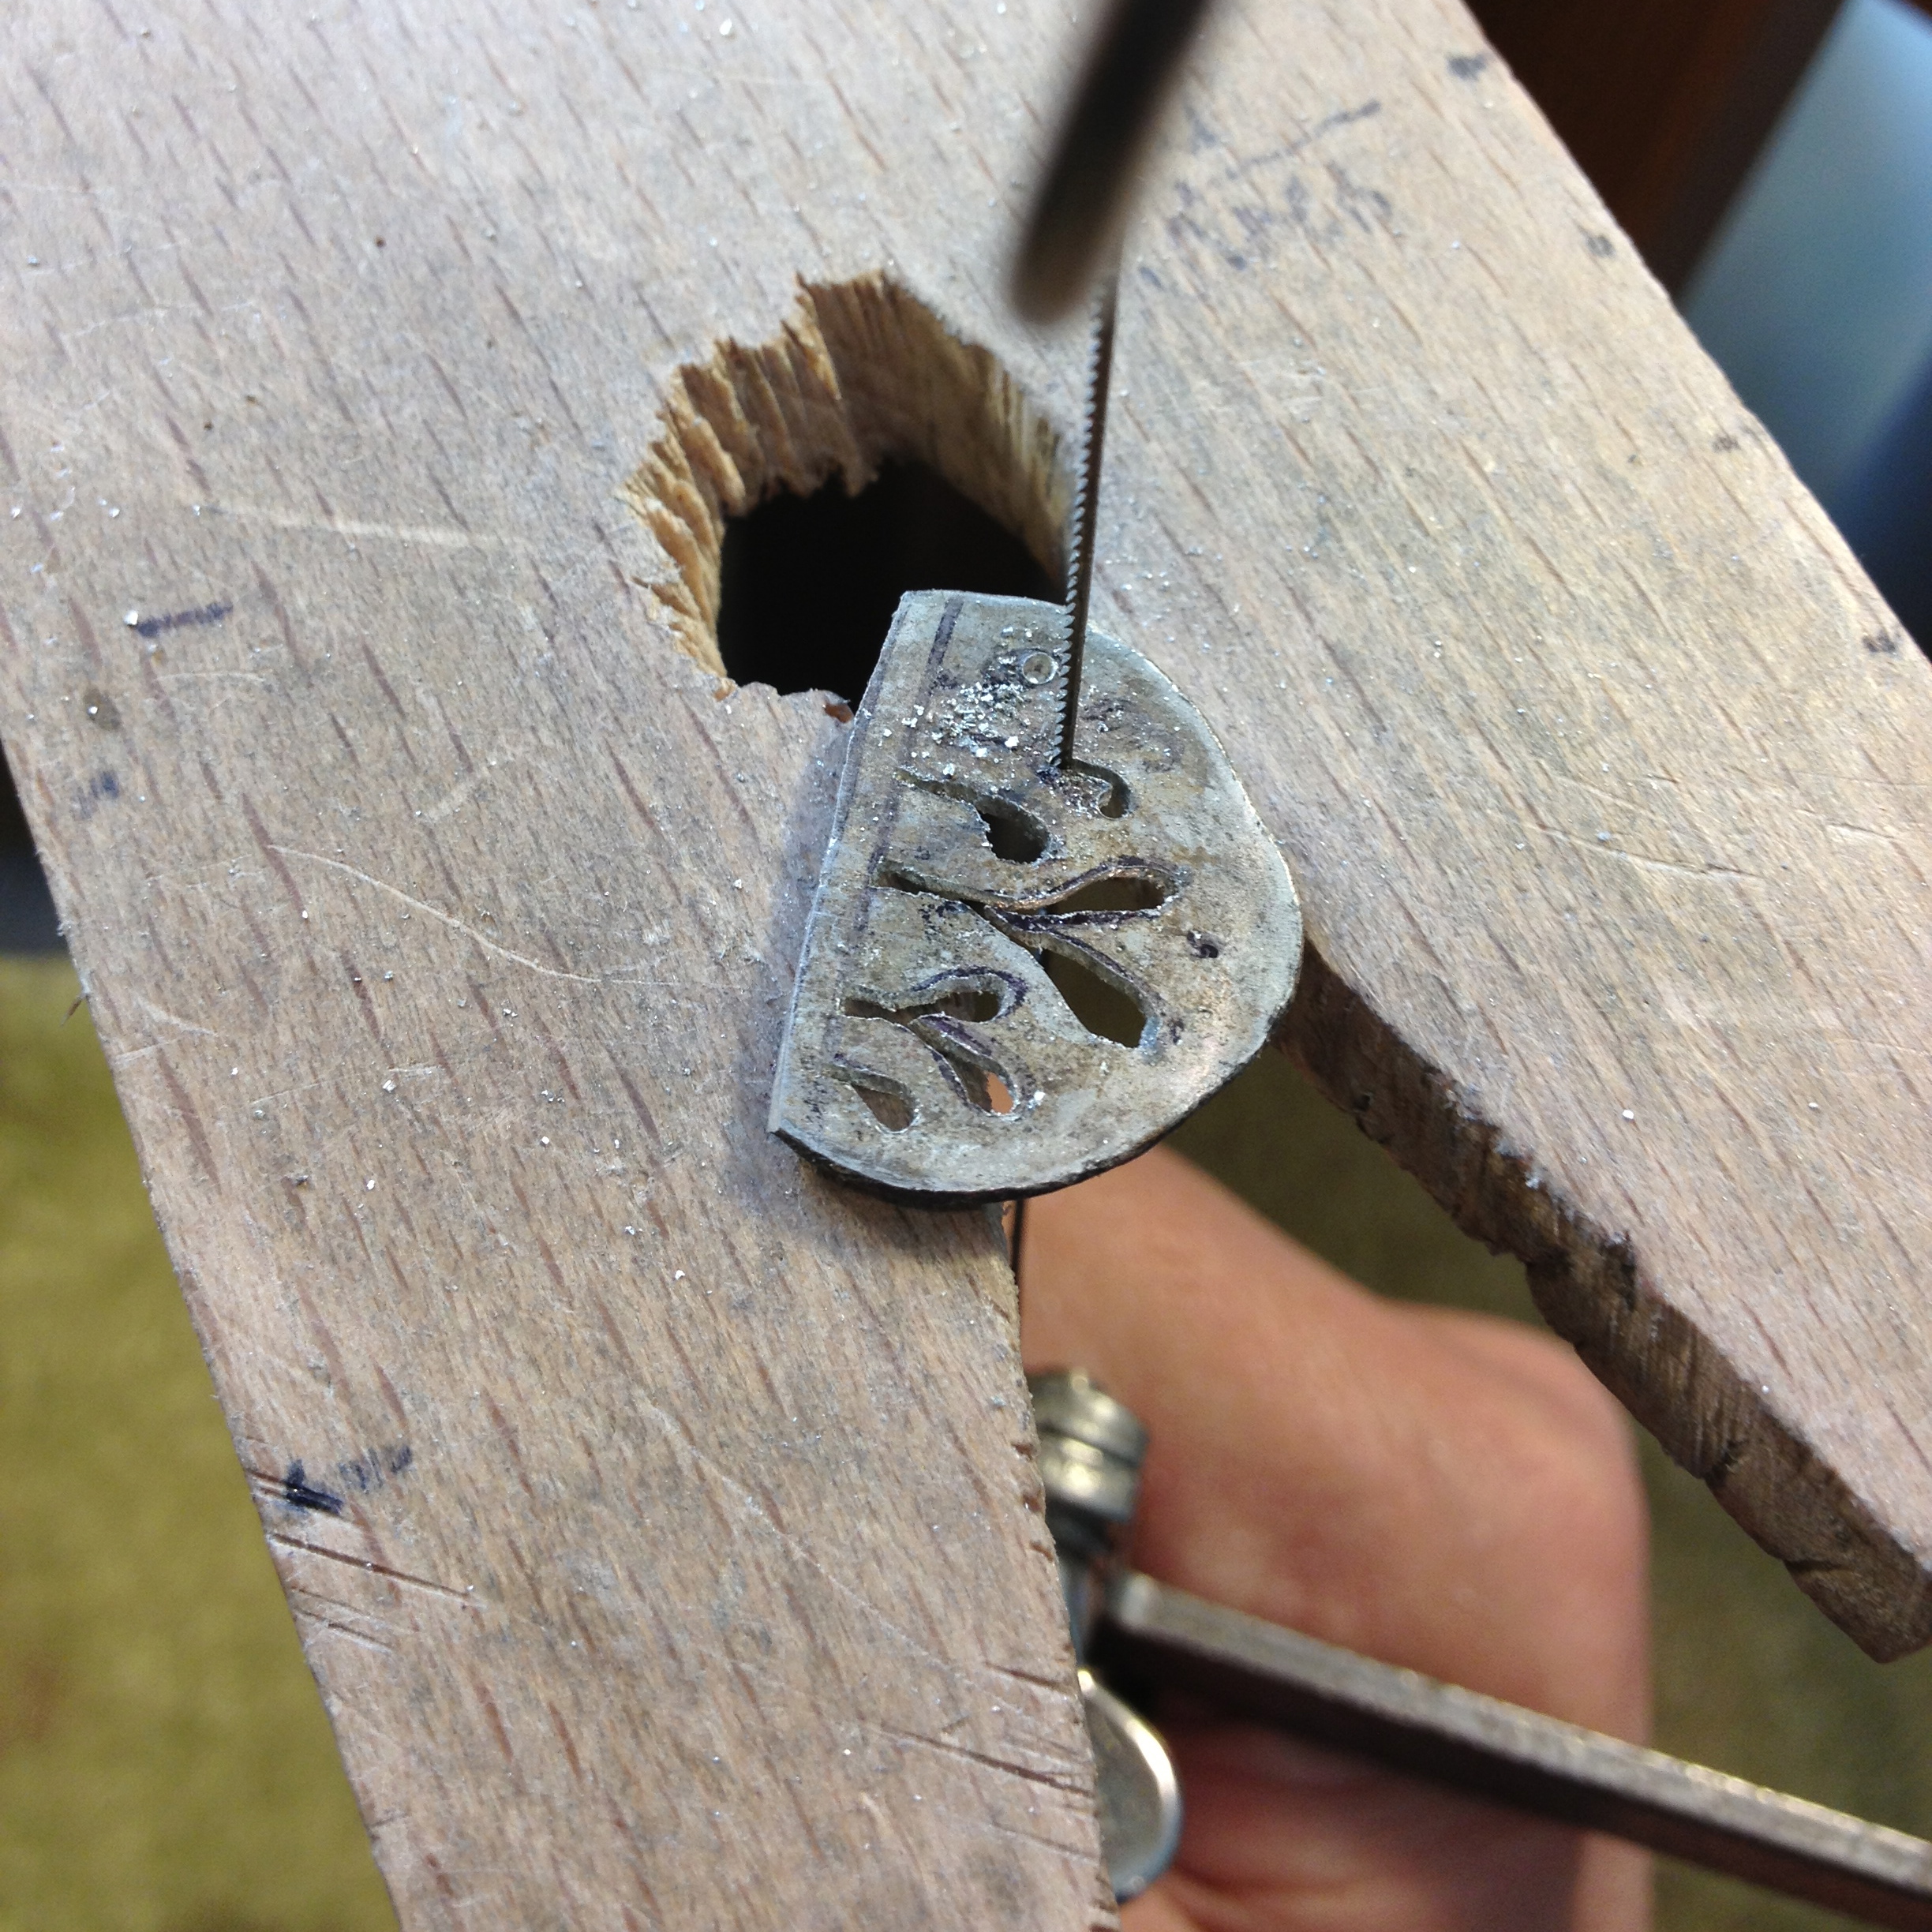
So you cut the leaves out.
And because you never know what your going to do before you do it, you now have to cut a slot out of the top of the box you’ve made for the amethyst.
This would have been easier had you planned out everything before hand, but then, that wouldn’t be as exciting.
Far better to live on the edge.
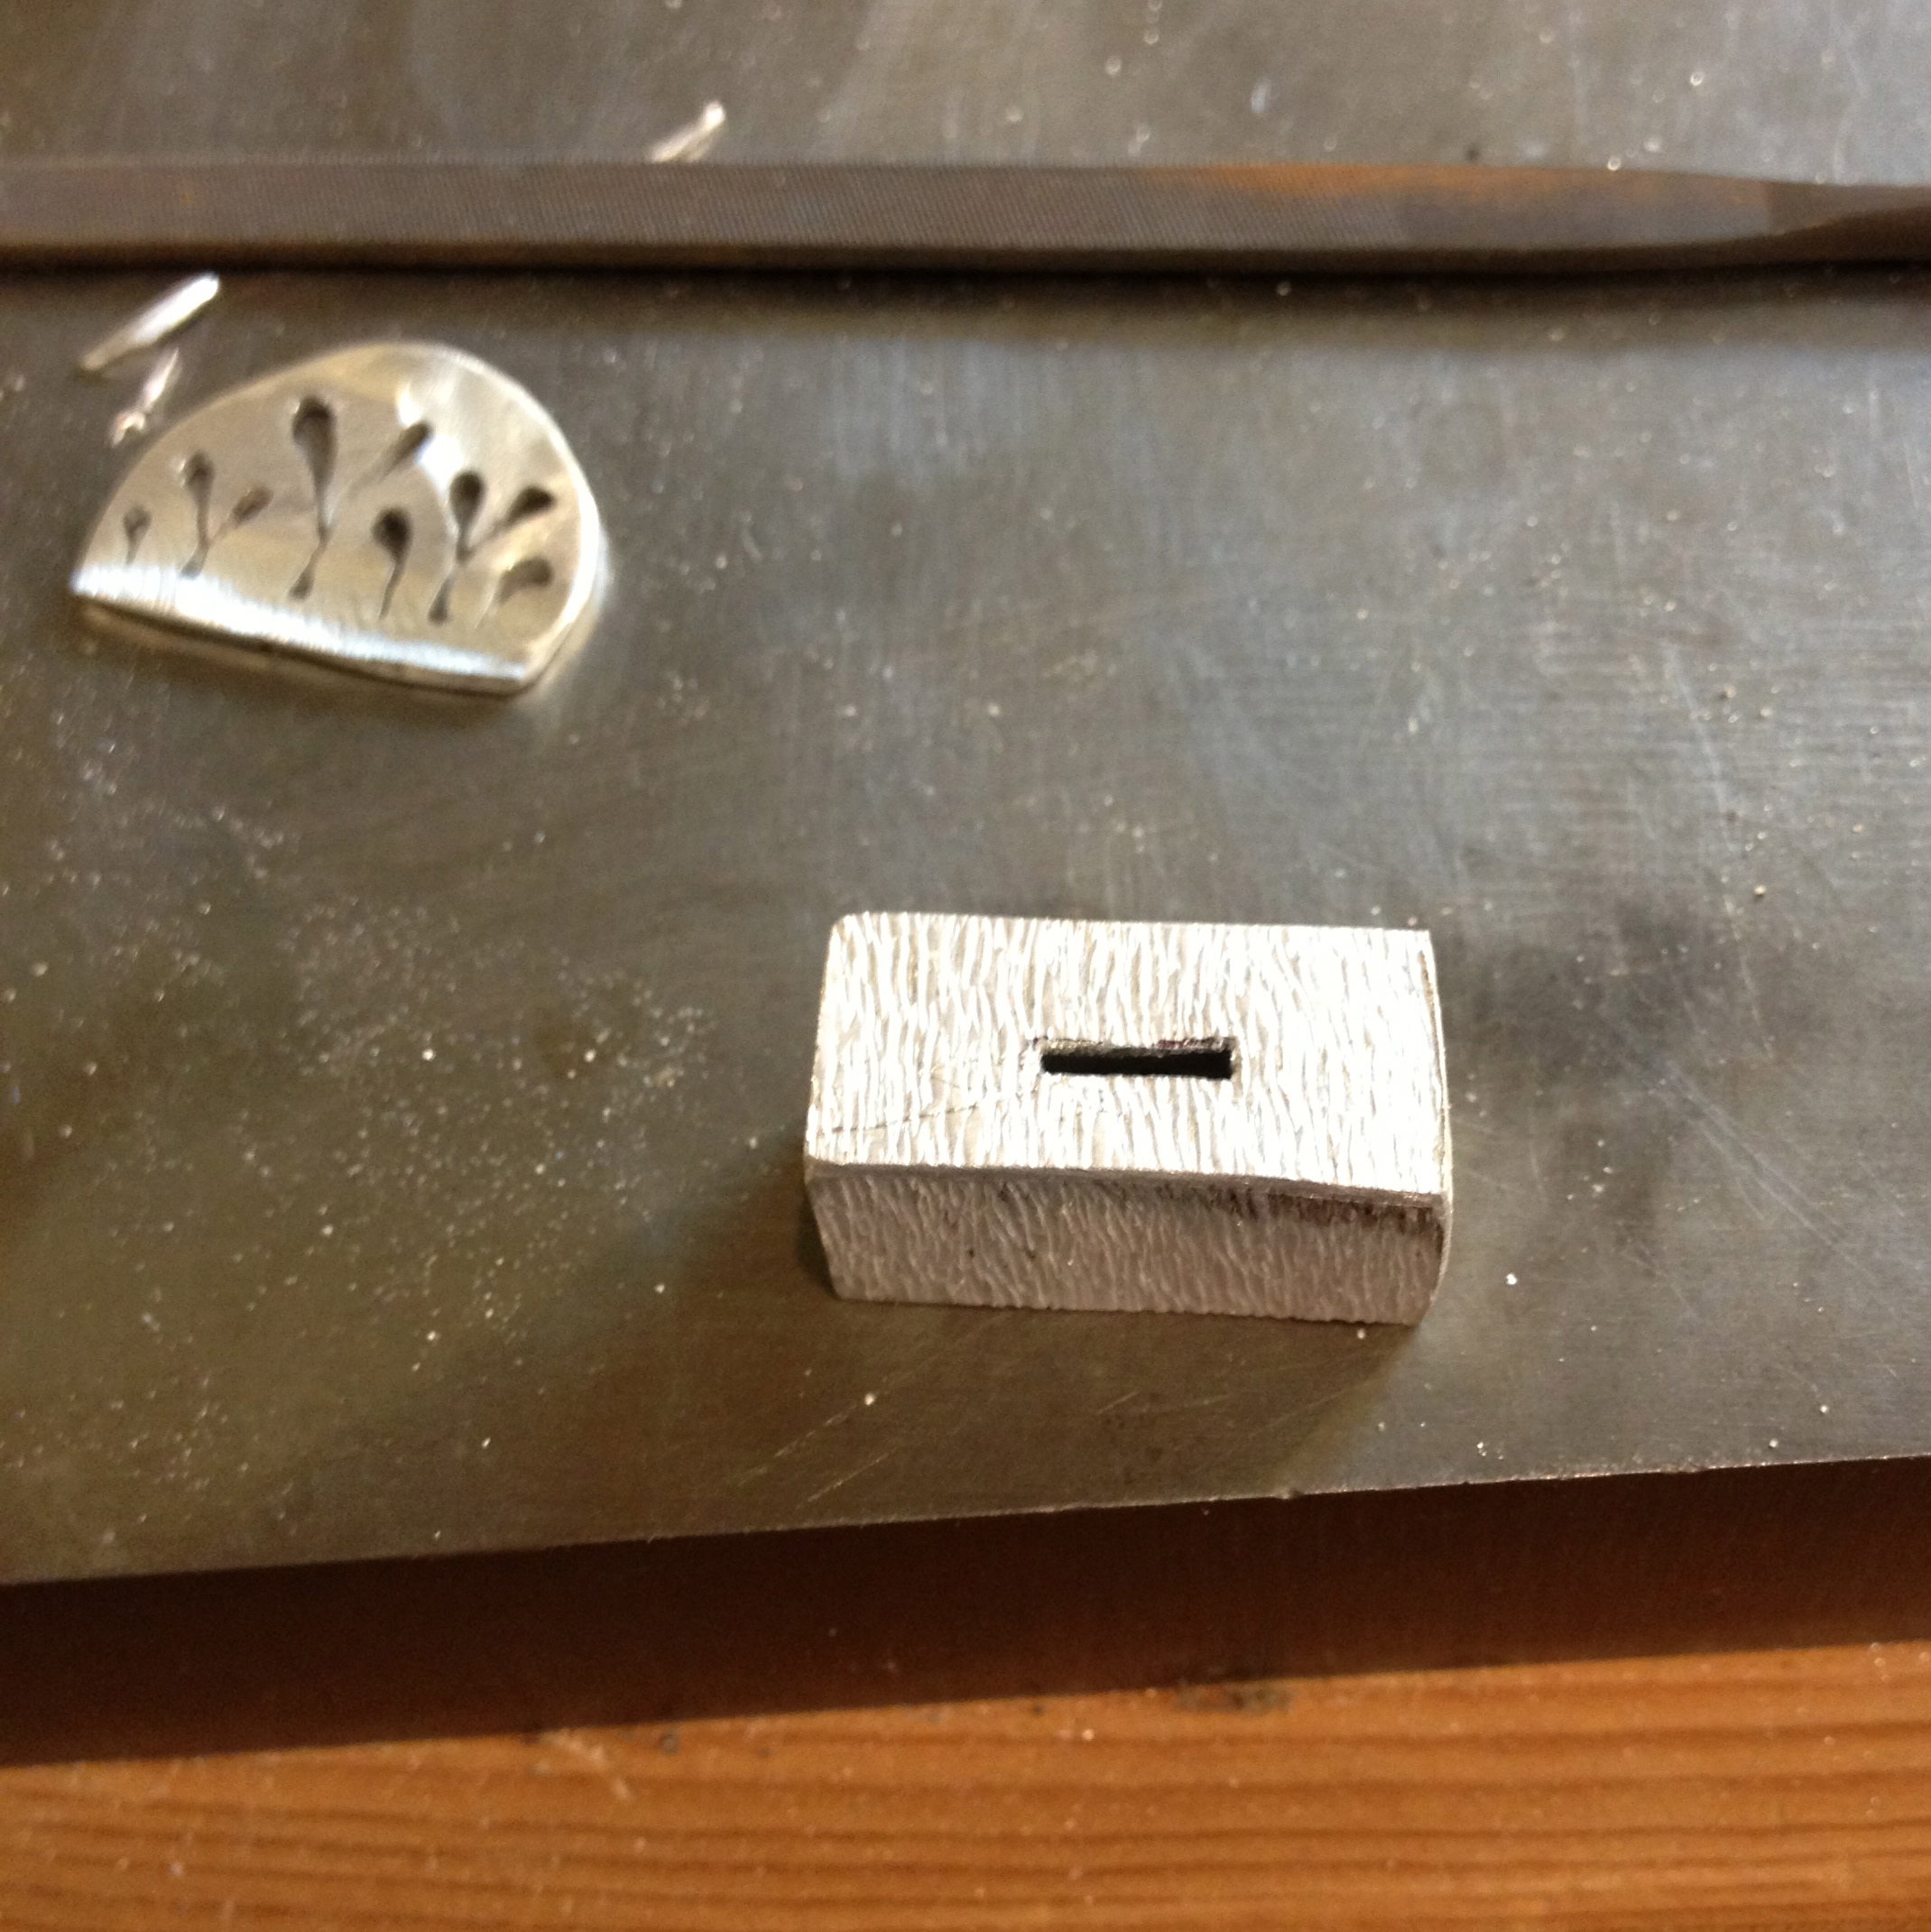
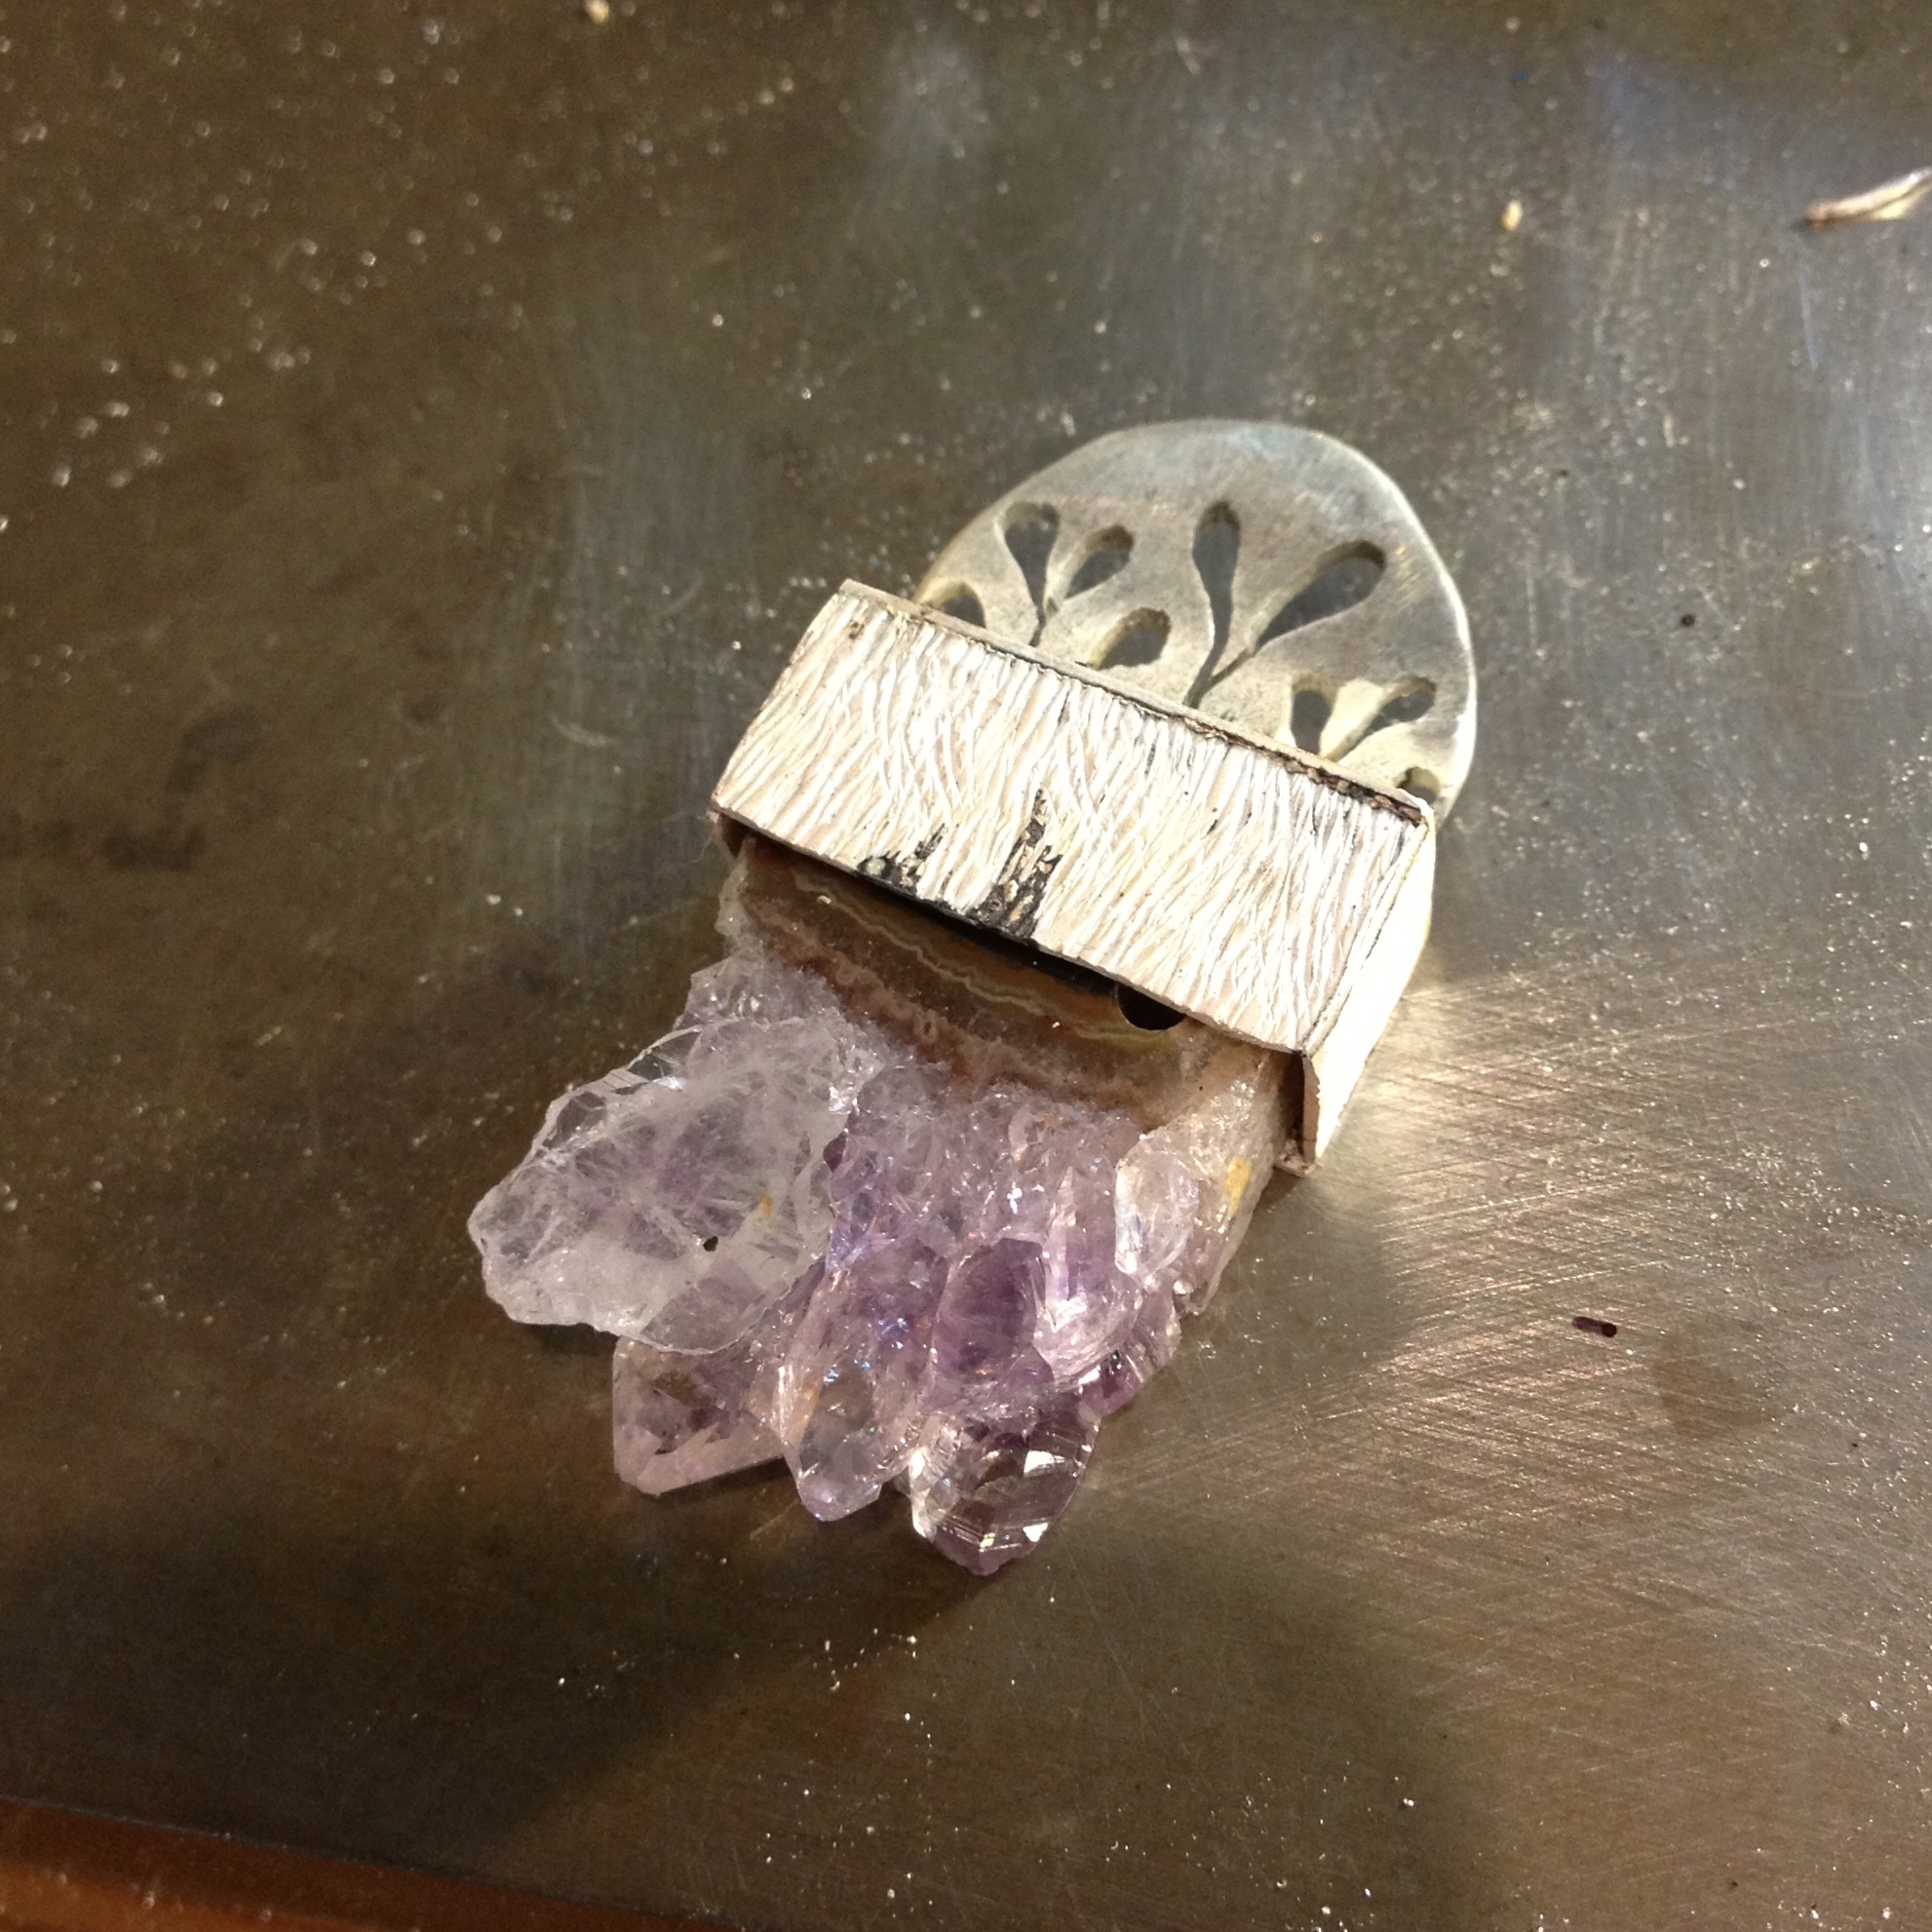
You cut a rough prong out of the disc and now have something to slot into the box.

And, remarkably, it seems to fit!
So you square up and file down the prong to fit flush to the inside and then solder it on to the box.
And slide the amethyst back into it.
But you’re still not sure if you like it.
Oh well, it’s too late now.
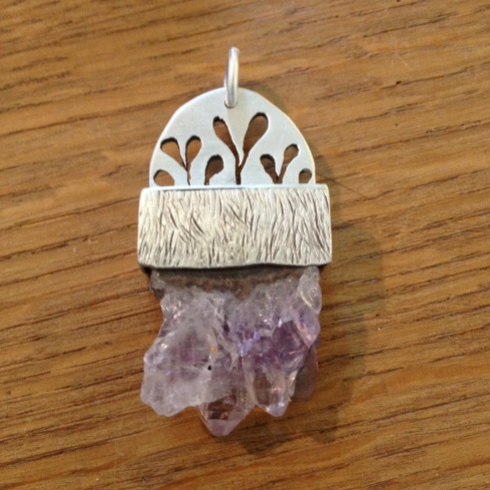
The End.
–
Thanks for showing me yours.
Now I’m going to make one 😉
–
Fun to watch this develop step-by-step. I’m much too uptight to just improvise like this!
Yes, I think perhaps I’m a little too compulsive.
Really enjoyed the article very interesting l am also a person who makes as though go often without a plan sometimes there is a plan and I still deviate from it. great really enjoyed it